| Author |
Message |
 |
|
|
|
|
Advert
|
Forum adverts like this one are shown to any user who is not logged in. Join us by filling out a tiny 3 field form and you will get your own, free, dakka user account which gives a good range of benefits to you:
- No adverts like this in the forums anymore.
- Times and dates in your local timezone.
- Full tracking of what you have read so you can skip to your first unread post, easily see what has changed since you last logged in, and easily see what is new at a glance.
- Email notifications for threads you want to watch closely.
- Being a part of the oldest wargaming community on the net.
If you are already a member then feel free to login now. |
|
 |
2016/11/01 18:34:25
Subject: How do you do it?!?
|
|

Regular Dakkanaut
|
How on earth do you convert all of those miniatures?
I tried to make simple conversion of new box of genestealers cult into Skitarii mining operation and I literally broke every piece there is apart from seismic cannon (and even that because I liked the gun to beginning with). How on earth do you get anything worth showing on P&M blog? All that I make is literal crap, how can I keep going?
Edit: Sorry, I guess I gave to my depression enhanced by wasted box of very expensive plastic.
|
|
This message was edited 1 time. Last update was at 2016/11/01 18:59:33
|
|
|
 |
|
2016/11/01 18:42:56
Subject: How do you do it?!?
|
|

Powerful Phoenix Lord
|
Practice and patience I suppose? I don't do many conversions personally.
|
|
|
|
|
2016/11/01 19:02:38
Subject: How do you do it?!?
|
|
Sneaky Kommando
|
I don't like to think of anything as "broken" when it comes to conversions. Your seismic cannon could easily be a power generator when viewed from a different perspective, feel me?
What exactly are you trying to achieve and what pitfalls are you experiencing in the execution? Are you planning out your model or just chopping bits hoping to find something that fits?
|
|
|
|
|
|
2016/11/01 19:16:44
Subject: Re:How do you do it?!?
|
|
Regular Dakkanaut
|
I tried to have army with those sick looking boomsticks, but with those nice gloves in the set, while most of them have some kind of claw things instead of hands. I screwed everything trying to get rid of them and now I'm left with some broken barrels. I thought about converting some Webber guns into triple barreled something but I can't for the love of god think about what to use as barrels.
|
|
|
|
|
2016/11/01 19:33:43
Subject: How do you do it?!?
|
|
Powerful Phoenix Lord
|
Having converted literally hundreds of models (not exaggerating, I really have converted almost 1000 minis over the last decade and painted almost 2000), I can tell you it takes practice and patience. But more importantly, it take the right tools.
|
|
|
|
|
|
2016/11/01 19:46:40
Subject: How do you do it?!?
|
|
Sneaky Kommando
|
Could you use green stuff to accentuate the hands to look like claws? If not, you could always try to use some tyranid bits.
For the barrels, it sounds like you could just various gauges of plastic rod.
|
|
|
|
|
|
2016/11/01 20:07:27
Subject: How do you do it?!?
|
|

Agile Revenant Titan
|
You should see some of my earliest creations! Truly awful!
Apart from patience and practice, there are a couple of tips and tricks.
Some good tools are a real bonus. A good craft knife is a must. Some good clippers (some electrical ones have a sort of wedge to their cutting edge that mangles the plastic slightly. Try and get ones with a cutting edge that's flush to one of the sides). Lastly, the most useful thing I've ever bought is a dremel with a little cutting burr. Really, really helpful to trim stuff to fit properly.
Also, you might have messed up one box of 'stealers, but that doesn't mean that the models now have no use.
Keep messing about with them to get a bit of practice in. Keep mucking about with them. You might end up with a model you like out of it 
|
|
|
|
|
|
2016/11/02 07:20:29
Subject: Re:How do you do it?!?
|
|
Regular Dakkanaut
|
Thanks guys for nice word. I really appreciate.
|
|
|
|
|
2016/11/02 07:50:16
Subject: How do you do it?!?
|
|
Norn Queen
|
Show us some pictures! its easier to give advice if we know what we are working with.
|
These are my opinions. This is how I feel. Others may feel differently. This needs to be stated for some reason.
|
|
|
|
|
2016/11/02 09:47:58
Subject: How do you do it?!?
|
|
Longtime Dakkanaut
|
 Lance845 wrote: Lance845 wrote:Show us some pictures! its easier to give advice if we know what we are working with.
Yeah, post some pictures. It's difficult at this end to understand what you were trying to do, and what went wrong. Something about claws and broomsticks? Also walk us through what tools you are using, and what glue you are using. As Novasetri said (sort of), there is no such thing as "broken". Unless something is melted into gloop, it's probably salvageable. A few snapped guns and hand swaps, should be no problem to sort out with a bit of patience and some help from Dakka. 
|
|
This message was edited 3 times. Last update was at 2016/11/02 11:50:07
|
|
|
|
|
2016/11/02 11:13:17
Subject: How do you do it?!?
|
|
[DCM]
Moustache-twirling Princeps
Gone-to-ground in the craters of Coventry
|
Boomsticks... 
Keep your early conversion, and even if you smash them up, use them as wrecks, objectives or for basing.
|
|
This message was edited 1 time. Last update was at 2016/11/02 11:14:02
|
|
|
|
|
2016/11/02 11:48:47
Subject: How do you do it?!?
|
|

Foxy Wildborne
|
10.000 hours of practice until mastery, same as everything else.
|
The old meta is dead and the new meta struggles to be born. Now is the time of munchkins. |
|
|
|
|
2016/11/02 12:30:58
Subject: Re:How do you do it?!?
|
|
Nasty Nob
|
Practice. Or play, depending on how you look at it.
I like the ideas of using Greenstuff to shape the hands. Styrene tubes work well for replacement or additional barrels.
Yes, please share some pictures with us!
|
|
|
|
|
|
2016/11/02 12:54:16
Subject: How do you do it?!?
|
|
Longtime Dakkanaut
|
That might be making sound a lot harder than it is. Sure, if you're talking advanced sculpting and painting, it can take a long time to master those skills. But it doesn't take 10,000 hours to kit bash a few weapons, and assemble things competently.
|
|
|
|
|
2016/11/02 13:36:57
Subject: Re:How do you do it?!?
|
|
Regular Dakkanaut
|
Actually I tried now converting some heads and they turned out really good in my opinion. Will post some pics later. Also I have some new idea for what to do with weapon problem I'm facing (did you know that you can buy a whole lot of meltaguns from tempestus scions boxes? I have something like 6-8 of them, I'll try to convert them, maybe I'll be opening P&M blog of my own)
I use citadel clippers (don't judge, I didn't knew there are better for lower price)
I have Olfa scalpel AK-4 - medium-end in Poland from what I heard
I use magic sulpt (cures into rock solid rather than flimsy as with greenstuff) and sculpt them with silicone clay shapers
Apart from that I sometime use power tool (kind like Dremel but from polish manufacturer) but i mostly just use file, less noisy and a bit more cleaner
As for glue I use either Revell plastic glue or just some modelling paste (great stuff, kind of what liquid greenstuff want to be when it grows up)
I'll post some pictures of what parts I want to do what later.
|
|
|
|
|
2016/11/02 14:11:26
Subject: Re:How do you do it?!?
|
|

Ancient Venerable Black Templar Dreadnought
|
 Kandela wrote: Kandela wrote:Actually I tried now converting some heads and they turned out really good in my opinion. Will post some pics later. Also I have some new idea for what to do with weapon problem I'm facing (did you know that you can buy a whole lot of meltaguns from tempestus scions boxes? I have something like 6-8 of them, I'll try to convert them, maybe I'll be opening P&M blog of my own)
I use citadel clippers (don't judge, I didn't knew there are better for lower price)
I have Olfa scalpel AK-4 - medium-end in Poland from what I heard
I use magic sulpt (cures into rock solid rather than flimsy as with greenstuff) and sculpt them with silicone clay shapers
Apart from that I sometime use power tool (kind like Dremel but from polish manufacturer) but i mostly just use file, less noisy and a bit more cleaner
As for glue I use either Revell plastic glue or just some modelling paste (great stuff, kind of what liquid greenstuff want to be when it grows up)
I'll post some pictures of what parts I want to do what later.
So, how do you convert models?
I guess first of all, you would have to see a "need" in your army for something (more variety, different looking weapons, how to "make" more weapons, a "better" model of an existing one.).
You would then need to have some idea of key features you would want and the core model bits you are going to hang everything off of.
Next, kit bashing is a good start, I found after a while you get good at "name that bit" as you get to see these various kits.
GW standardizes very well so it can be surprising how good some combinations can work out.
Always keep all the pieces, little sorting containers like people use for beading or fly fishing can help organize those to something useful.
ALWAYS keep an eye out for possible bits in day to day stuff or in other hobby lines.
Railroad stuff is great and the scrap booking area in the hobby shops like Michael's can have good finds.
Tiny stick-on eyes can be rivets, some of their punches are helpful, I got a bunch of cool looking gears to add to a manufactorum building I was working on.
Tearing apart a few junk electronics can yield some interesting heat sinks and fans.
Liberal amounts of sculpting with the some kind of epoxy is a great skill and is easier than it looks.
Many people "cheat" and make roll-molds for sculpts they want to make a lot of.
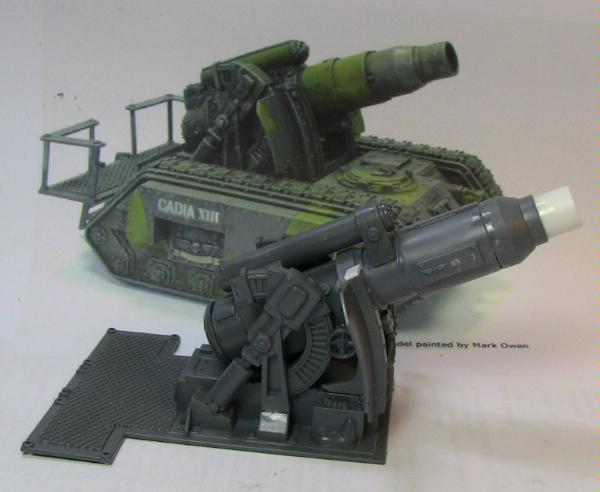
Some stuff I had done (emphasis on WIP not the completed version, see my gallery if interested): There are many who are better than me but I was able to get what I wanted and that is really what matters.
The tools are not terribly important as long as you find basic tools you are comfortable with.
|
A revolution is an idea which has found its bayonets.
Napoleon Bonaparte |
|
|
|
|
2016/11/02 14:37:59
Subject: How do you do it?!?
|
|

Dakka Veteran
|
An important tip I can give you:
have patient, don't start chopping right away, but slowly build your modellen and alter bits when you get to the point where you want to at the bit, so you can beter make the bit fitting.
Also its better to remove not enough then to much, because when you cut off not enough, you can cut off a bit more. But when you cut off to much, its much harder to add a bit more to it.
|
|
|
|
|
|
2016/11/02 16:27:41
Subject: Re:How do you do it?!?
|
|
Regular Dakkanaut
|
 Talizvar wrote: Talizvar wrote:So, how do you convert models?
I guess first of all, you would have to see a "need" in your army for something (more variety, different looking weapons, how to "make" more weapons, a "better" model of an existing one.).
You would then need to have some idea of key features you would want and the core model bits you are going to hang everything off of.
Next, kit bashing is a good start, I found after a while you get good at "name that bit" as you get to see these various kits.
GW standardizes very well so it can be surprising how good some combinations can work out.
Always keep all the pieces, little sorting containers like people use for beading or fly fishing can help organize those to something useful.
ALWAYS keep an eye out for possible bits in day to day stuff or in other hobby lines.
Railroad stuff is great and the scrap booking area in the hobby shops like Michael's can have good finds.
Tiny stick-on eyes can be rivets, some of their punches are helpful, I got a bunch of cool looking gears to add to a manufactorum building I was working on.
Tearing apart a few junk electronics can yield some interesting heat sinks and fans.
Liberal amounts of sculpting with the some kind of epoxy is a great skill and is easier than it looks.
Many people "cheat" and make roll-molds for sculpts they want to make a lot of.
Some stuff I had done (emphasis on WIP not the completed version, see my gallery if interested): There are many who are better than me but I was able to get what I wanted and that is really what matters.
The tools are not terribly important as long as you find basic tools you are comfortable with.
Those are really good guidelines, thank you.
I just sometimes have a "feeling" that if something was done differently it would look cool. I just see the bits and somewhere in my mind a image "pops" on how it "should" be done rather than how it is now.
What I'm trying to achieve is uniform army, I intended to make them look the same but with different poses and details like head or something like that.
To do so I need all of them to have hands from specific bits from the kits (something like plated work gloves - would give you pic but battery in my camera died), ceratin abdomen part hat the kit comes with (just got to make a simple mold of it and fill it with putty), then I wanted to add robe and hood to make them seem a bit more like Adeptus Mechanicus.
|
|
|
|
|
2016/11/03 07:08:44
Subject: Re:How do you do it?!?
|
|
Regular Dakkanaut
|
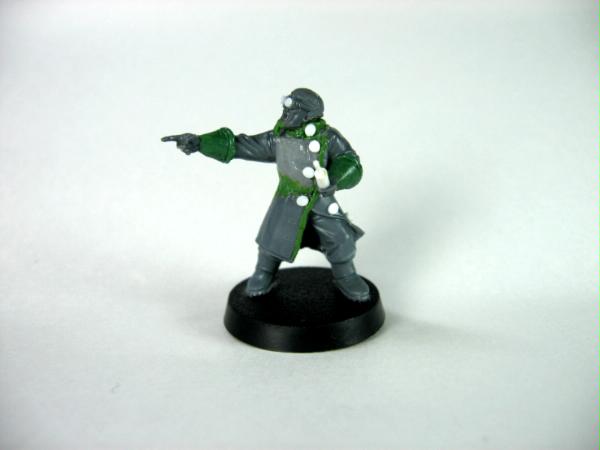
Now with images!
First off - my meltagun converted into air cooled smg. I used hands from neophyte hybrids box and melatgun from tempestus scions with some bits from infiltrators set. Adter cutting out the meltagun bits on top I replaced them with some heavy stubber barrel.

Unfortunately I call that a waste of time as it is too big to be actually held by my guys (it would require them to have much longer arms to properly hold it. Too cumbersome I think) 
Next ones are the heads.

Although I have only one image I think you can get the gist of it. I simply grabbed the lower jaw that was covered by some kind of armour/rag and added upper part from head that had some goggles. Now all that is left for me to do is to "trim" the head and add some kind of hood.
The third is the part I want to reproduce.

As you can see, those legs have some kind of work clothes. It would be very cool if I managed to cut off the legs, make simple push mold and fill it with putty. Then I thought about cutting legs from different poses and just pinning them to the bit with just work clothes. This way everybody in my army would have this rugged "straight from the mines" look.
Later I would add a robe made of magic sculpt to cover the legs down to the ankles to hide the obvious inconsistencies.
|
|
|
|
|
2016/11/03 09:55:00
Subject: How do you do it?!?
|
|
Agile Revenant Titan
|
Hmmm, not sure about the others but with the converted meltagun/SMG could you reposition the right hand slightly to bring the left one closer to the body? Might not even need to cut it, could just bend it slightly...
|
|
|
|
|
|
2016/11/03 14:12:48
Subject: Re:How do you do it?!?
|
|
Ancient Venerable Black Templar Dreadnought
|
Kandela wrote:Now with images!
First off - my meltagun converted into air cooled smg. I used hands from neophyte hybrids box and melatgun from tempestus scions with some bits from infiltrators set. Adter cutting out the meltagun bits on top I replaced them with some heavy stubber barrel.
Unfortunately I call that a waste of time as it is too big to be actually held by my guys (it would require them to have much longer arms to properly hold it. Too cumbersome I think)
I would suggest cutting the "grip" hand at the top and cut off the bottom part of the grip sticking out.
Pivot it inboard a bit swinging the arm in more, glue, then glue on bottom of grip in line with the gun.
That can bring the arms in closer and not look too goofy. Next ones are the heads.
Although I have only one image I think you can get the gist of it. I simply grabbed the lower jaw that was covered by some kind of armour/rag and added upper part from head that had some goggles. Now all that is left for me to do is to "trim" the head and add some kind of hood.
I know it would have been far easier for me to smear a blob of green stuff over the lower face and scribe those lines across and the outer border of the mask.
That is an excellent cutting and gluing job I must say though! The third is the part I want to reproduce.
As you can see, those legs have some kind of work clothes. It would be very cool if I managed to cut off the legs, make simple push mold and fill it with putty. Then I thought about cutting legs from different poses and just pinning them to the bit with just work clothes. This way everybody in my army would have this rugged "straight from the mines" look.
Later I would add a robe made of magic sculpt to cover the legs down to the ankles to hide the obvious inconsistencies.
Do you have a bunch of these kilt-like lower bodies?
I would start by cutting off legs right at the kilt flat and file flat.
It would be easy to cut the legs to a consistent length and play with the angles of cut a bit to get the pose right.
You are able to rotate the leg appropriately as well so it should turn out alright.
If you are planning on molding, do the lower body and some legs you have trimmed to your liking.
Looks cool enough.
|
A revolution is an idea which has found its bayonets.
Napoleon Bonaparte |
|
|
|
|
2016/11/03 14:33:57
Subject: How do you do it?!?
|
|
Legendary Dogfighter
|
Single biggest contributing factor is the right tools - you can be only borderline competent with ultra-precise tools and still get a worthwhile result, and conversely be extremely experienced with the wrong tools & materials and still come up short.
a *good* saw, a good scalpel/craft knife, and well prepared putty/green stuff/milliput and patience will take you to the 80% mark, the rest is practice and natural ability (such as a steady hand and good depth perception)
|
Some people find the idea that other people can be happy offensive, and will prefer causing harm to self improvement. |
|
|
|
|
2016/11/03 14:55:37
Subject: Re:How do you do it?!?
|
|
Longtime Dakkanaut
|
If you look at the genestealer hybrid models with autoguns, the hand is actually just as far down the barrel as your hands. The problem is you've changed the height (not the length) of the gun, so the hand has been moved further down, and consequently further away. The simplest fix would be to remove the trigger hand from the gun, and build up the back of the gun so it is no longer recessed. That would lower the trigger hand, and shorten the distance, which I believe would fix your problem, and would appear to be well within your capabilities.
|
|
This message was edited 2 times. Last update was at 2016/11/04 17:14:46
|
|
|
|
|
2016/11/03 14:56:47
Subject: How do you do it?!?
|
|
Ancient Venerable Black Templar Dreadnought
|
 malamis wrote: malamis wrote:Single biggest contributing factor is the right tools - you can be only borderline competent with ultra-precise tools and still get a worthwhile result, and conversely be extremely experienced with the wrong tools & materials and still come up short.
a *good* saw, a good scalpel/craft knife, and well prepared putty/green stuff/milliput and patience will take you to the 80% mark, the rest is practice and natural ability (such as a steady hand and good depth perception)
It seems reasonable at first blush, but I would disagree on a couple points.
Using an "inappropriate" tool usually leads to less than great results: an adjustable wrench can be used as a hammer but why do that?
I have found that getting a "reasonable" new tool while learning is the way to go.
So as you learn, you can better appreciate and maintain the better tools and not waste your money.
There are many ways to cut a part off a sprue or cut plastic or metal, you eventually gain experience with a specific tool and have greater competency with it.
I am good/comfortable with hairy brush. My "favorite" has the enamel worn from the handle and has a nice curve to the bristles I like/am used to.
I have been learning airbrush for a couple years now and can do things FAR better with it than brush and some things with brush the airbrush cannot match (yet) for me.
Places like this offer many lessons or tricks people pick up that can help immensely.
I used to paint religiously on the table, leaning forward over the work.
I have a bunch of swivel arm lamps and now I paint models leaning back with them almost on my chest: my back thanks me.
Resting your pinkie or other fingers to brace the painting hand can greatly increase the accuracy of your painting.
Airbrush: where possible turn on air first, start moving then apply paint just before the target model.
... there are TONS of good advice to be found from others.
The tools help but are not the main reason for success or failure of your efforts.
|
A revolution is an idea which has found its bayonets.
Napoleon Bonaparte |
|
|
|
|
2016/11/03 15:15:34
Subject: How do you do it?!?
|
|
Librarian with Freaky Familiar
|
Just sing your self a little song, to the tune of skeleton dance song
Ohhhhhh
The bolt guns connected to the, left hand,
The power axe's connected to the, right hand.
This symbol gets removed with a, file
That symbol gets modeled with, green stuff.
The armor chips get added with a, scalpel,
the big gaps get filled with, green stuff.
Dont worry to much about the, cut mark
Itll just be, battle damage.
And that how you do a conversion.
But really just do it over and over and over, and over time, you will get better at it, learn the tricks of the trade, and the how too's to make it look really good. Be creative with it as well. You are not limited to plastics, almost anything can be used for a conversion.
|
To many unpainted models to count. |
|
|
|
|
2016/11/03 15:29:28
Subject: How do you do it?!?
|
|
Legendary Dogfighter
|
Talizvar wrote: malamis wrote:Single biggest contributing factor is the right tools - you can be only borderline competent with ultra-precise tools and still get a worthwhile result, and conversely be extremely experienced with the wrong tools & materials and still come up short.
a *good* saw, a good scalpel/craft knife, and well prepared putty/green stuff/milliput and patience will take you to the 80% mark, the rest is practice and natural ability (such as a steady hand and good depth perception)
It seems reasonable at first blush, but I would disagree on a couple points.
Using an "inappropriate" tool usually leads to less than great results: an adjustable wrench can be used as a hammer but why do that?
I have found that getting a "reasonable" new tool while learning is the way to go.
So as you learn, you can better appreciate and maintain the better tools and not waste your money.
I'll cop to this one - my use of sub par files and scalpels in my first 5 years or so is why i'm pathologically patient with the good stuff ( and the fact some of it can slice my finger right off). Conversely however, inferior tools can and do introduce bad habits which take a methodical approach and a realisation that it's happened to resolve - as you've mentioned regarding the back strain which i'm wholly with you. I moved to painting on the top of my knee at eye level very early on.
Now tricks methods and familiartiy are important, of course, but if what you're using is simply not capable of operating to the level you're trying to attempt giving up in frustration or making less than ideal compromises creeps in.
|
Some people find the idea that other people can be happy offensive, and will prefer causing harm to self improvement. |
|
|
|
|
2016/11/03 16:12:31
Subject: How do you do it?!?
|
|
Regular Dakkanaut
|
 Backspacehacker wrote: Backspacehacker wrote:Just sing your self a little song, to the tune of skeleton dance song
Ohhhhhh
The bolt guns connected to the, left hand,
The power axe's connected to the, right hand.
This symbol gets removed with a, file
That symbol gets modeled with, green stuff.
The armor chips get added with a, scalpel,
the big gaps get filled with, green stuff.
Dont worry to much about the, cut mark
Itll just be, battle damage.
And that how you do a conversion.
But really just do it over and over and over, and over time, you will get better at it, learn the tricks of the trade, and the how too's to make it look really good. Be creative with it as well. You are not limited to plastics, almost anything can be used for a conversion.
Gotta try this. You made my day.
|
|
|
|
|
2016/11/03 16:21:16
Subject: How do you do it?!?
|
|
Longtime Dakkanaut
|
malamis wrote:Now tricks methods and familiartiy are important, of course, but if what you're using is simply not capable of operating to the level you're trying to attempt giving up in frustration or making less than ideal compromises creeps in.
I think there is certainly something to be said for that. I used to look at Evy Metal pictures as a teenager, and wonder how it was even possible to do the kind of painting they were doing. I had the finest detail brush I could find, and I've always been good at art, but there is no way I could get even close to what they were doing. I swore they were cheating somehow. Then the internet came along, and I found out about things like Microsol, flow aid and fluid retarder... suddenly, Evy Metal didn't seem so unattainable. Talizvar wrote:Resting your pinkie or other fingers to brace the painting hand can greatly increase the accuracy of your painting.
Connecting your hands can also help. I discovered that from sketching on the bus on my way home from college. Buses tend to bounce around and vibrate a lot, which makes drawing straight lines quite difficult. I found if I connected my drawing hand with the book in my other hand, then both would bounce together, which helps to cancel out the movement. It also works if you just have shaky hands.
|
|
This message was edited 1 time. Last update was at 2016/11/03 16:22:20
|
|
|
|
|
2016/11/03 18:34:02
Subject: How do you do it?!?
|
|
Legendary Dogfighter
|
 Smacks wrote: Smacks wrote: malamis wrote:Now tricks methods and familiartiy are important, of course, but if what you're using is simply not capable of operating to the level you're trying to attempt giving up in frustration or making less than ideal compromises creeps in.
I think there is certainly something to be said for that. I used to look at Evy Metal pictures as a teenager, and wonder how it was even possible to do the kind of painting they were doing. I had the finest detail brush I could find, and I've always been good at art, but there is no way I could get even close to what they were doing. I swore they were cheating somehow. Then the internet came along, and I found out about things like Microsol, flow aid and fluid retarder... suddenly, Evy Metal didn't seem so unattainable.
Plus it's well documented they used Vallejo
|
|
This message was edited 1 time. Last update was at 2016/11/03 18:34:18
Some people find the idea that other people can be happy offensive, and will prefer causing harm to self improvement. |
|
|
|
|
2016/11/04 02:49:02
Subject: How do you do it?!?
|
|
Hardened Veteran Guardsman
|
Start simple, maybe just a kitbash to make a unique pose. Space Marines are the best for this kind of thing. After that, maybe make something kinda simple. I took the bionic arm from the AM command sprue, for example, cut off the sword, and replaced it with a melta gun to make my third melta gun veteran. It was extremely simple (literally two slices and a dot of glue) for a nice result that has plenty of character and makes a nice conversation piece.
|
"We have lost the element of surprise, and they do not fear us. Perhaps they will appreciate our devotion to the Emperor and our ruthless efficiency." |
|
|
|
|
|
|


 6000 pts - Harlies: 1000 pts -
  4000 pts -
  1000 pts -
  1000 pts