Switch Theme:

WIP - Necron Flayed ones  [RSS] Share on facebook Share on Twitter Submit to Reddit
»
Author Message
Advert


Forum adverts like this one are shown to any user who is not logged in. Join us by filling out a tiny 3 field form and you will get your own, free, dakka user account which gives a good range of benefits to you:
  • No adverts like this in the forums anymore.
  • Times and dates in your local timezone.
  • Full tracking of what you have read so you can skip to your first unread post, easily see what has changed since you last logged in, and easily see what is new at a glance.
  • Email notifications for threads you want to watch closely.
  • Being a part of the oldest wargaming community on the net.
If you are already a member then feel free to login now.


Made in no
Grisly Ghost Ark Driver


Like other Flayed Ones converterers have said, the Flayed Ones resin sprues from GW aren't all that, and having more warriors on sprues than I would ever need, I set out to build flayed ones myself.

The projects is already well on the way, but I figured it would be no harm posting what I have done so far here.

There are several good projects on this already, and I have picked up a lot of good ideas.

My goals are:

*) Big knives and claws!
*) More clean-cut grisly human skin remains and skeleton parts tied around their bodies. (Smearing out greenstuff over them can make them a bit too messy)
*) Crazy poses! They are crazy after all. So the crazier the better.

Materials:

*) Necron warrior legs, bodies and heads.
*) Arms from wherever I have necron arms left over (everywhere!)
*) Hands from Immortal/Deathmark boxes, (there should be an extra 10 pairs of hands that can be cut from remaining weapon options when done with that build)
*) Greenstuff for human skin
*) polystyrene sheets for knives

I'm quite new to dakkadakka, so I'll probably have to edit posts etc to get things right and nice.
   
Made in no
Grisly Ghost Ark Driver


I generally found that I have to cut the legs at the hips to have more variation. Otherwise they'd all be that standard necron warrior pose.

Sometimes also cutting more joints.

I pin hands to make sure they can carry the weight of the knives and the extra wear that long pointy things get exposed to from everyday use.
[Thumb - IMG_20161008_220935.jpg]
Legs cut at the hips to have more variations of pose

[Thumb - IMG_2016-10-08_22-31-27.00.jpeg]
And pin them to make sure they stick

[Thumb - photo_2016-11-22_18-32-19.jpg]
Sometimes cuting all joints of the legs to get the pose right.

[Thumb - IMG_2016-10-09_22-45-19.87.jpeg]
Detail of arms, hands and claws/knives. Pinning hands to make sure they stick.

   
Made in no
Grisly Ghost Ark Driver


Each blade (3 on each hand), gets a supporting pins in the hand, one on each side if i could fit it.
[Thumb - IMG_2016-10-05_21-54-01.84.jpeg]
pins for blades

   
Made in no
Grisly Ghost Ark Driver


First model I used unmodified hips, and tried out a lying down sort of pose. As if having been struck but is getting back up (and is also flipping of whomever did it to him)
[Thumb - IMG_20161004_003509.jpg]

   
Made in us
Utilizing Careful Highlighting


at the keyboard

Nice! looking forward to seeing more

My son wants some of those but I couldn't get the silly original box anyway so I may end up converting some after all

   
Made in no
Grisly Ghost Ark Driver


Some more models:

[Thumb - IMG_20161031_004117.jpg]
Diving in

[Thumb - IMG_20161027_000638.jpg]
Your mother was a hamster...

[Thumb - IMG_20161005_212045.jpg]
if it quacks like a duck...

[Thumb - IMG_2016-10-21_00-44-25.19.jpeg]
Headless runner

   
Made in no
Grisly Ghost Ark Driver


Regular fighter poses are boring, here's Hamlet:
[Thumb - IMG_2016-10-17_20-26-15.49.jpeg]
Is there some soul left in here?

[Thumb - 2016-10-18-16-57-12.jpg]
Greenstuff cures aching joints

[Thumb - IMG_2016-10-17_22-18-06.76.jpeg]
I cut out a piece of the base and lowered it...

[Thumb - IMG_2016-10-17_22-17-55.94.jpeg]
... to create an open grave

[Thumb - IMG_2016-10-18_00-06-44.60.jpeg]
Complete with head stone and all

[Thumb - IMG_2016-10-17_23-36-39.11.jpeg]
Detail showing greenstuffed hips and the supporting pins drilled into the hand

   
Made in no
Grisly Ghost Ark Driver


Next they were clad in human skin straps, I used greenstuff for that (sprayed them first with black primer and grey metal to save time with painting later on..

(I'm not quite sure how to make the images togglable, when I find out I'll go back and edit so the thread becomes easier to navigate)

I used the inside of a milk carton (Norwegian one), as it is particularly unsticky, which is important when you work with thin slices of greenstuff. I also smeered it with vaseline, and smeered the roller with vaseline, see pict 5.


The sneaky/scary looking guy was motivated from this artwork: http://ning.deviantart.com/art/Necron-Flayed-Ones-157044186
[Thumb - DSC_7138s.JPG]

[Thumb - DSC_7137s.JPG]

[Thumb - DSC_7140s.JPG]

[Thumb - DSC_7139s.JPG]

[Thumb - DSC_7145s.JPG]
This was my setup, I cut small straps of rolled thin greenstuff and clad the flayed ones with it.

This message was edited 1 time. Last update was at 2016/11/26 18:33:12


Made in no
Grisly Ghost Ark Driver


For the runner guy I wanted to have skin straps flappnig horizontally in the wind, to really show that he's going fast.

That meant I had to work on him standing vertically and leave him like that for 24 hours till the greenstuff cured. Luckily I had just acquired a holder with a heavy base which was great for that purpose.


Automatically Appended Next Post:
Also that last guy is pinned in his front heel, otherwise the foot would never stick to the base.


Automatically Appended Next Post:
If anyone is actually reading these posts - currently I'm wondering if i should try to wash/clean the models some, to make the primer stick when I start painting. As you can see the models are shiny with vaseline on the greenstuff parts.

T.
[Thumb - DSC_7143s.JPG]
The first few straps are hanging loose in the wind

[Thumb - DSC_7148s.JPG]
Close up, more straps added

This message was edited 2 times. Last update was at 2016/11/26 18:35:39


Made in us
Utilizing Careful Highlighting


at the keyboard

Awesome!! I especially love Hamlet

lol

Now I want to make some!

   
Made in no
Grisly Ghost Ark Driver


Thanks! I'm trying to think of more historical scenes involving skulls or body parts to model, but don't have any yet. So it's just more athletic / fighter poses for now.

I clicked at your profile and saw you have done lots of modelling already so no need to explain in more detail what I have done here I reckon. It's quite simple really. Discovering I had all those hands from the immortal/deathmark package was a great relief. Otherwise there are guides/tutorials on how to model simple yet ok looking hands.
   
Made in no
Grisly Ghost Ark Driver


Some more updates (finally), I have started painting the flayed skin, color names listed are Vallejo game colors, easily googled for Citadel equivalents.

The greenstuff was first painted with white primer (the models were already black and lead belcher sprayed before applying greenstuff).

At first I tried 3 models with, in the listed order:

1: Heavy Skintone
2: Umber Wash dark brown wash for recesses
3: Parasite Brown + Glaze Medium in 1:1 ratio (giving a warmer brown wash)
4: Heavy Skintone again for some edge-highlighting
5: Bonewhite drybrush

Resulting in this, so far:


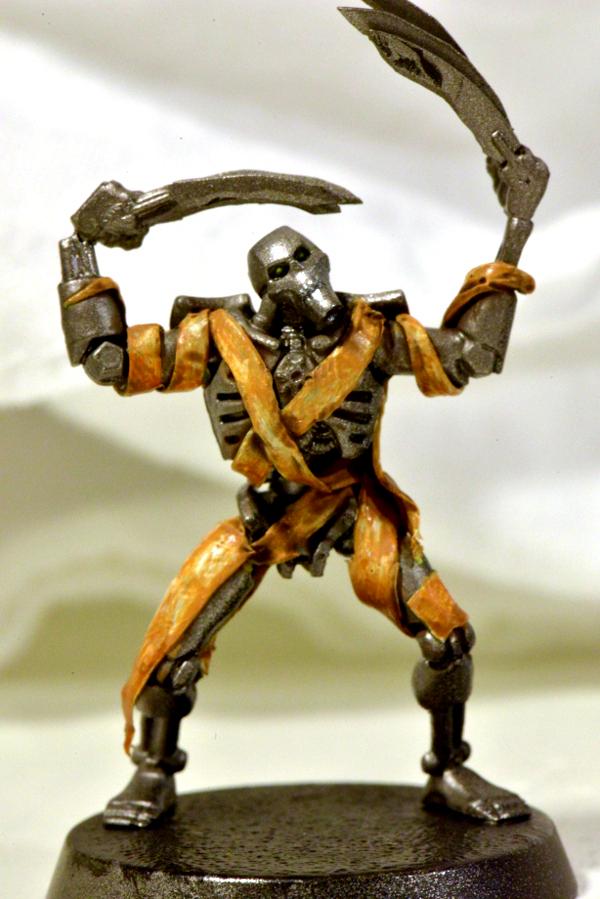
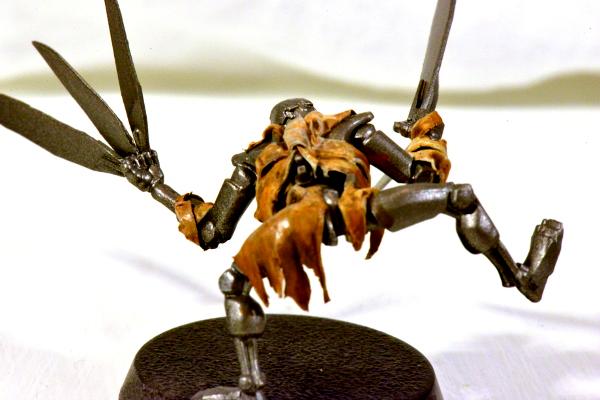
I am not entirely happy, the result looks a bit too leathery. I have not added blood effects to the models themselves, except for some on a set of knives, which may help, but leather just isn't that scary.


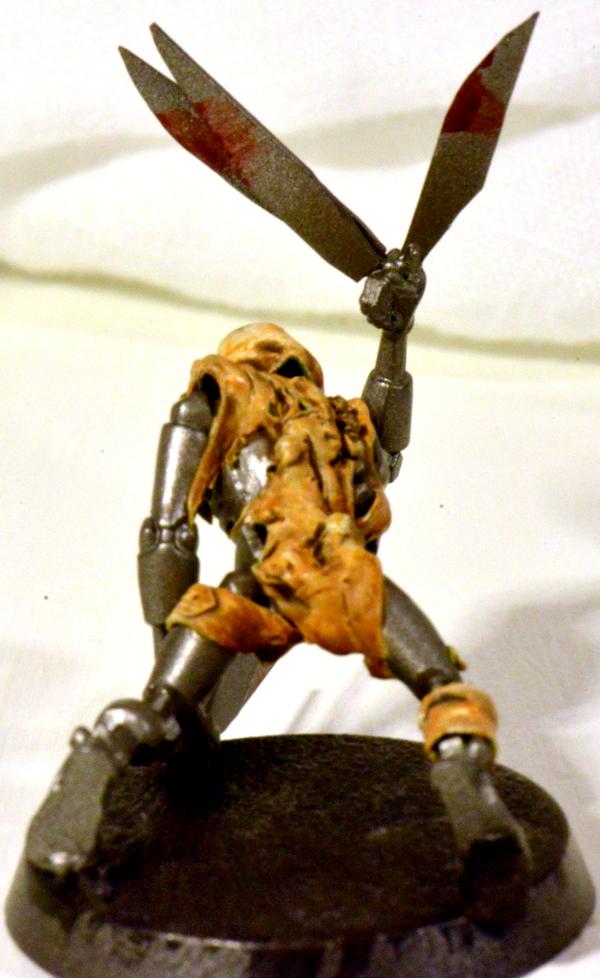
Automatically Appended Next Post:
To give something that looked more fresher from the slaughter house, I tried a pinker skin tone, Pale Flesh, it looks like this:


The idea then was to be a lot more careful with the washes, and add blood to most of the edges of the skin, as if it would be oozing after being cut, and went perhaps a little over board on the Hamlet model:


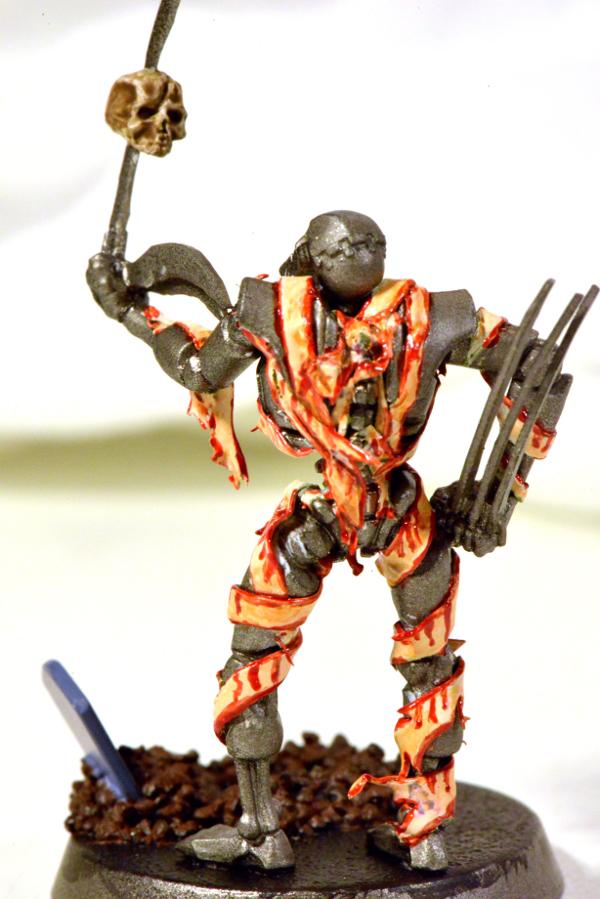
Also the grey color of the tomb stone is way to blue. Will need a do-over. I am not entirely sure what I feel about this. Perhaps some more carefully shaded areas to add some more contrast. It's a bit flat.


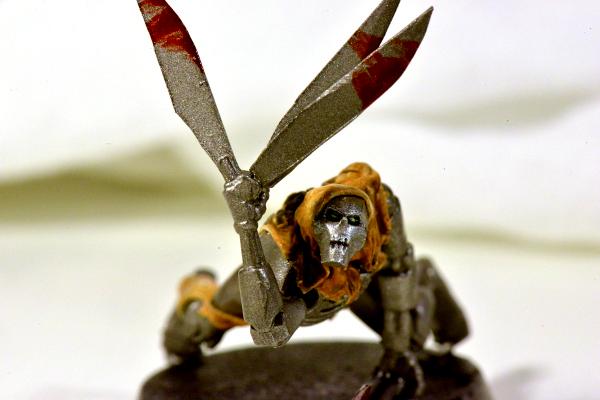
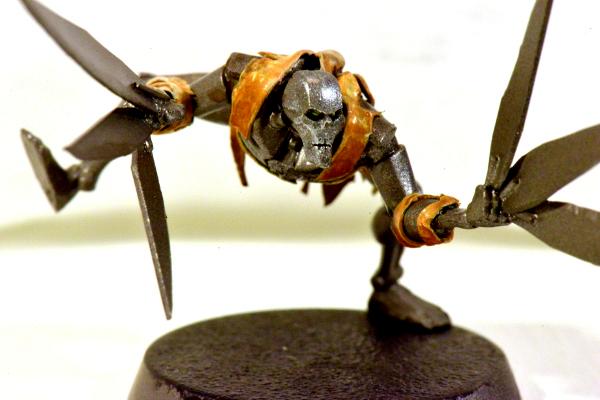
Automatically Appended Next Post:
For the next variation I'm mixing Pale Flesh and Heavy Skintone half and half, the first attempt looks like this:


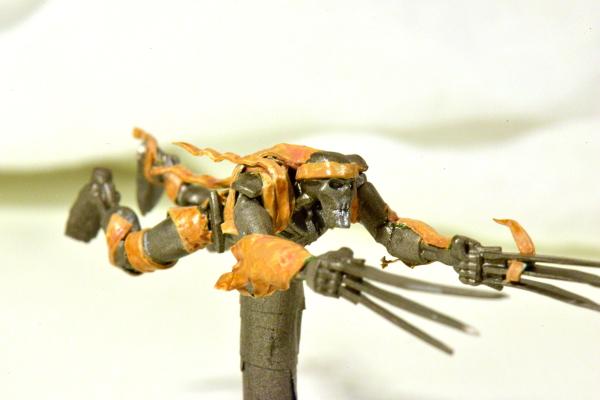
Some careful shading has been applied, using Glaze Medium and Parasite Brown, same as described i n the first paint post.

I'm a bit happier with this. (The grey post is just a skimmer stand that has been taped over to protect it during painting).

I plan to do bloodsplatter by toothbrush too, should be a lot more subtle but perhaps just as scary.

This message was edited 2 times. Last update was at 2017/01/22 21:56:57


Forum Index » Painting & Modeling
Go to: