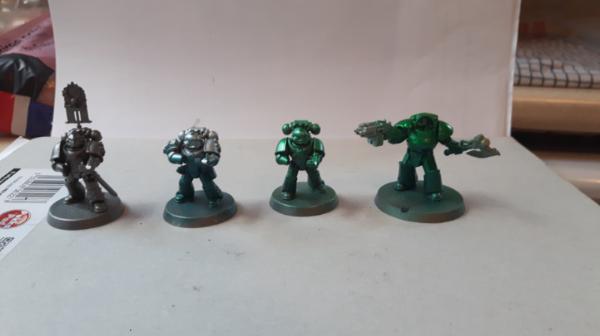
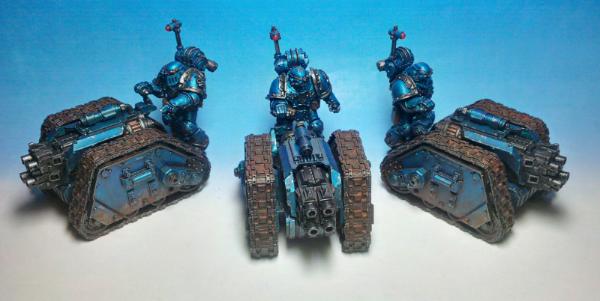
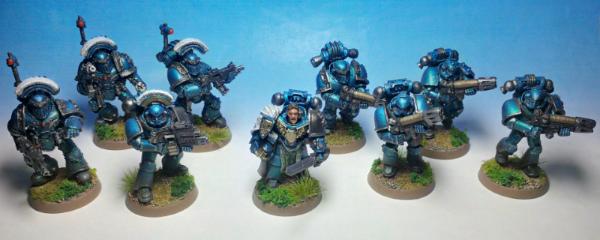
Yep, tamiya clears are the way to go. It produces a nice scheme. Here's my results and slightly adapted recipe:
- Prime with Halfords Matt Black Car Body primer (or any black primer that bonds to resin well)
- Brush on a 50/50 mix of Vallejo Game Air (VGA) Chainmail and Gun Metal
- Do a top down zenithal airbrush of VGA Silver
- Airbrush a thinned 25/75 mix of Tamiya Clear Green (25) and Clear Blue (75) on the whole model
- Airbrush the upper panels of the armour in thinned Tamiya clear green
- Airbrush the lower panels of the armour in thinned Tamiya clear blue
- Do a tricky top down zenithal airbrush of VGA silver mixed with a little VGA Electric Blue - this is tricky. Try to avoid speckling or a grainy finish, but you need to be pretty delicate and not drown the model in this colour
- Do a tricky top down zenithal airbrush of Tamiya Clear Blue over the silver zenithal coat. Make sure you cover the silver and blend it into the previous coats
- Do an Asurman Blue wash over the whole model to give the blue a tint, shade and to make it look more coherent
- Then paint the details - Metallic is basecoat VGA Gun Metal, Badab black wash then paint on chips using VGA Gun Metal and then Chainmail
- Hosing is Vallejo Model Colour basalt grey and then thinned black is washed over
- Eyes are red using the usual gem painting method
- Weapons are painted black with a little VGA gun metal mixed in to give them a slight metallic sheen
- Pouches are Burnt umber, griffon sepia wash and then burnt umber/bone mix to highlight
- Chip armour edges (knees, elbows, places where they will probably scrape and catch) with chainmail
- Varnish
- Dust on weathering powder
- Base
- Varnish to seal everything (delicately, depending on how you used the weathering powder)
- Job done!


 5000pts
  6000pts
  3000pts