| Author |
Message |
 |
|
|
|
|
Advert
|
Forum adverts like this one are shown to any user who is not logged in. Join us by filling out a tiny 3 field form and you will get your own, free, dakka user account which gives a good range of benefits to you:
- No adverts like this in the forums anymore.
- Times and dates in your local timezone.
- Full tracking of what you have read so you can skip to your first unread post, easily see what has changed since you last logged in, and easily see what is new at a glance.
- Email notifications for threads you want to watch closely.
- Being a part of the oldest wargaming community on the net.
If you are already a member then feel free to login now. |
|
 |
2017/08/17 19:35:05
Subject: Basing and painting before gluing?
|
|

Regular Dakkanaut
|
So I bought a tyranid army and have yet to do anything with it cause I want to make it a show piece army. I want to base all of them in a snowy type base and want to paint in high detail. Now all my other armies are unbased cause I primed glued and painted them.
what are peoples methods I'm thinking I make all the bases prime and paint them, then assemble the models and prime and paint them then glue at the end...is that the preferred method or is there a better way?
Automatically Appended Next Post:
now my other problem to add to that is, will the glue hold when you glue to the textured base and not straight to the plastic?
|
|
This message was edited 1 time. Last update was at 2017/08/17 19:36:54
|
|
|
 |
|
2017/08/17 22:25:30
Subject: Basing and painting before gluing?
|
|

Regular Dakkanaut
|
I tend to build my army by pinning one arm and blue tacking it to the base so its playable , i then paint all the models before basing being able to remove the pined arm means my painting isnt restdicted.
then i can do all bases in one batch and keep them looking the same and it makes posing specail models easier as you can test there pose with the blu tack , i just use super glue on to the basing material and it works fine but i do pin larger or metal minis
|
|
|
|
|
2017/08/17 22:28:38
Subject: Basing and painting before gluing?
|
|

Legendary Master of the Chapter
|
1) Pin the model to the base. (this also lets you mount on cork or some other holding device so you can paint which is nice)
2) mask or just paint around OR build up the area where the feet is going to go with a small disk of plastic so you can glue to a flat surface
or 3) if you are doing a snow base, id just glue the model onto the base with rocks and stuff, prime everything and paint everything separate than just glue the snow flock on top of it instead. any mistakes can be covered in snow.
|
 Unit1126PLL wrote: Unit1126PLL wrote: Scott-S6 wrote: Scott-S6 wrote:And yet another thread is hijacked for Unit to ask for the same advice, receive the same answers and make the same excuses.
Oh my god I'm becoming martel.
Send help!
|
|
|
|
|
2017/08/18 00:25:59
Subject: Basing and painting before gluing?
|
|

Three Color Minimum
|
If you glue on top of the GW textures for bases (eg Ag Badlands) I have found that they don't get a good grip on the base and have come off lifting some of the texture paint with them. Suggest test a base/model first and check?
|
|
|
|
|
2017/08/18 17:01:43
Subject: Basing and painting before gluing?
|
|
Lone Wolf Sentinel Pilot
|
For a whole army, you are better off assembling, gluing down any base material, then priming. This will help the texture hold to the base. Then paint and finish basing. If you need to do sub assemblies on the models, that's fine, but you will have issues if you try to paint the models and bases separately. You can always pin the models after the fact, but it will not be as strong a bond as plastic to plastic with plastic glue.
|
|
|
|
|
2017/08/18 18:31:45
Subject: Basing and painting before gluing?
|
|
Regular Dakkanaut
|
Thanks for all the info, so from what I gather these are the steps I'm going to take with my nids tell me if I got it correct.
1. Base my base (ha)
2. Assemble model and glue onto the based base
3. Prime the whole thing paint the base and model at the same time.
4. then since I'm doing snow add the snow effect after.
|
|
|
|
|
2017/08/20 12:33:12
Subject: Basing and painting before gluing?
|
|
Lone Wolf Sentinel Pilot
|
I would assemble first, then add basing material, then prime. Paint your model and finally snow and varnish.
|
|
|
|
|
2017/08/20 12:44:04
Subject: Basing and painting before gluing?
|
|
Utilizing Careful Highlighting
|
You've got it a little easier with your choice of basing. There's no real problem with applying snow effects after the model is completely done, as any effects that get a little sloppy and get on the model will just look more realistic then a monster bounding through the snow with nothing sticking to it.
|
|
|
|
|
2017/08/20 15:09:32
Subject: Basing and painting before gluing?
|
|
Powerful Phoenix Lord
|
Skip the first few steps here, but to give you an idea - the best is likely:
http://myminiaturemischief.blogspot.com/2016/06/step-by-step-spiders.html
1) Assemble
2) Base materials
3) Primer
4) Paint
5) Adorne w/ extraneous junk/grass/flowers/etc.
|
|
|
|
|
2017/08/21 06:22:53
Subject: Basing and painting before gluing?
|
|
Ancient Space Wolves Venerable Dreadnought
|
I spray paint while they're still on the sprue, then scrape or carve the paint off just before assembling.
|
I don't break the rules but I'll bend them as far as they'll go. |
|
|
|
|
2017/08/22 21:13:23
Subject: Basing and painting before gluing?
|
|
Regular Dakkanaut
|
That answer is it always depends. Lately I have been painting the model first, gluing it to the base, then painting and finishing the base. A little static grass will hide any crimes around the feet. If you have a model with a lot of underside to paint, it makes sense to paint that area first for easier access.
I also put little pieces of plasticard under the model's feet to elevate it above the gravel/talus so it doesn't look sunk into the terrain.
|
|
|
|
|
2017/08/22 22:50:50
Subject: Re:Basing and painting before gluing?
|
|
Blood-Drenched Death Company Marine
|
My suggestion is Blu-Tack. The stuff is amazing.
I suggest flocking/completely basing your base or bases completely, then before you spaypaint them, work out where the points of contact will be between the model and base. Place a small piece of Blu-Tack where the model will connect to the base, then spraypaint the base. After that's done, remove the Blu-Tack from the base once the paint has dried and paint the base completely, then move on to to paint the model. Once the model is finished, glue it down to the finished base, then clean up around the feet/connection point or points.
Here's an example of one of my bases, a molded resin base, painted with this method:
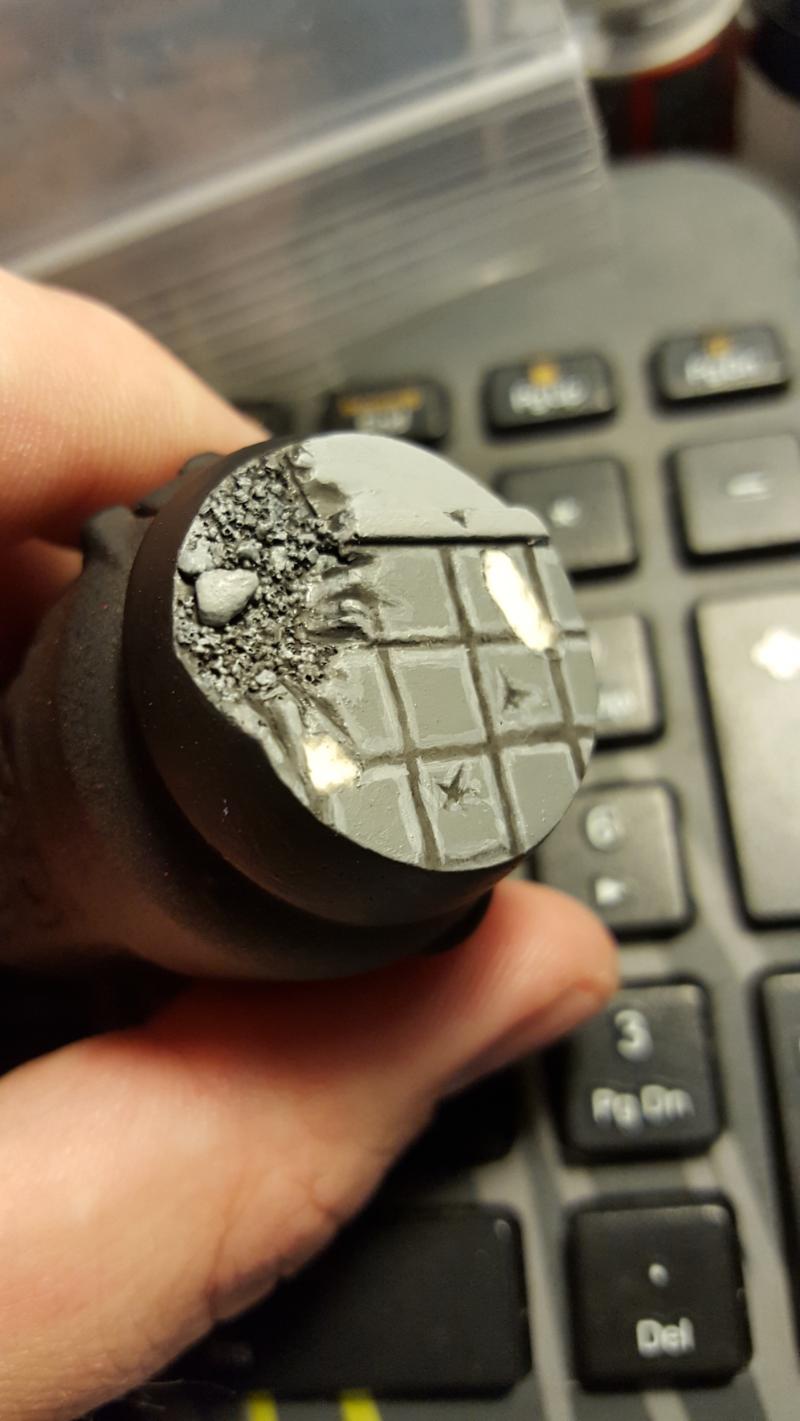
The two white spots are the base resin, where the marine's feet (which are bare plastic) will eventually attach to the base with super glue. This way I ensure the bare plastic is directly glued to the bare resin securely.
I hope this helps, and I do hope you'll start up a P&M blog for your bugs once you get started on them.  I'm doing a similar theme with my Blood Angels, painting them to as high a standard as I can and making them a display army I can be proud of.
Best of luck & take it easy.
-Red__Thirst-
|
You don't know me son, so I'll explain this to you once: If I ever kill you, you'll be awake, you'll be facing me, and you'll be armed. |
|
|
|
|
|
|