 - by Iain Wilson
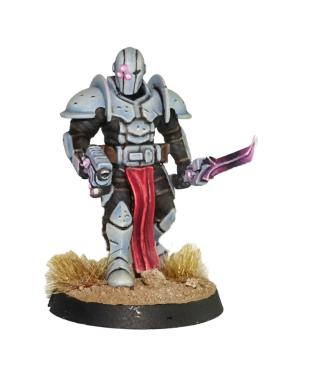
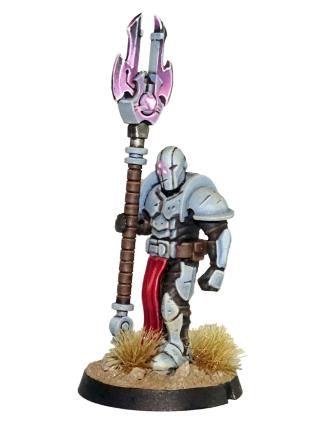
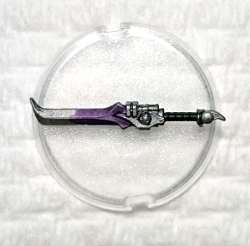
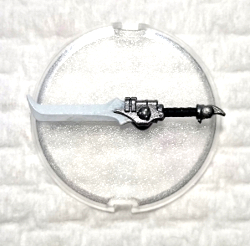
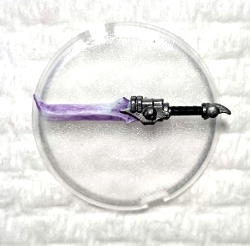
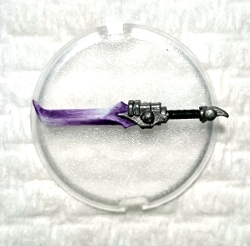
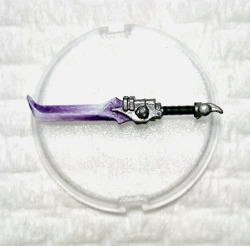
The Maelstrom's Edge Faction Expansion Sprue introduced a couple of cybel-powered edged weapons - the Cybel Blade and Cybel Glaive - to the Karist faction. These weapons give the Karist troops a wonderful, savage look and add even more nasty, close-quarters options to their units.
Painting these sorts of weapons is a great opportunity to add some eye-catching detail to your force, so I thought it might be useful to offer some suggestions on different ways to do so, to suit varying levels of painting prowess. There's no right or wrong way - you can feel free to use whatever technique suits your style, but the below ideas might give you a starting point if you're unsure of how to go about it.
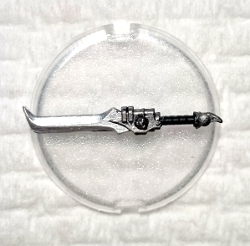
For each of the below methods, paint up the rest of the weapon however suits your force's colours, and then go to town on your blade!
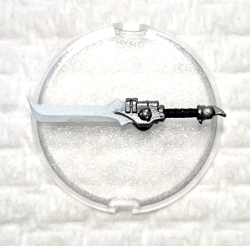
The Silver Wash Method
An easy one to kick things off. Start with a silver blade. Apply a wash of purple ink (I've used Army Painter Purple Tone). Let it dry, and you're done!
The White Wash Method
Similar to the above, except that you start with a white blade. Apply a wash of purple ink, and let it dry.
To lift it just a little, you can then use a fine detail brush and a little white paint to highlight the raised edges.
The Drybrush Method
Start with a silver or gunmetal blade. Apply purple ink to the back half of the blade, and let it dry.
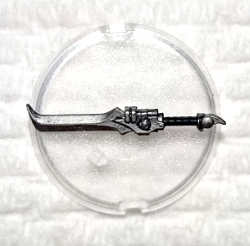
Blend the purple into the metal by lightly drybrushing with the same metal colour that you used on the blade. This will also pick out the raised edges.

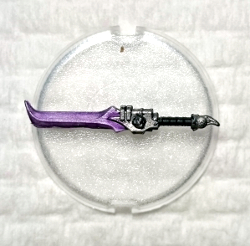
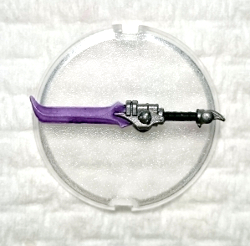
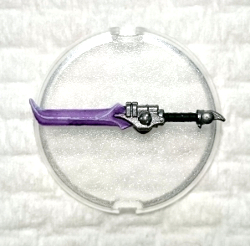
The Crystal Method
Start with a white blade. Using a fine detail brush, apply light coats of purple ink which each successive coat covering slightly less of the blade so that you build up a gradient of purple fading gradually to white . You don't want the ink to pool - the lighter you apply each coat, the better the end result will be.
Work with the shape of the blade - you want the brightest (whitest) part of the blade on the curved part of the edge, so the purple builds up from that point towards the tip and the back end of the blade. On the top half of the blade this is reversed, so the darkest purple is on the inside of the curve, fading out to white on the ends. Once you've built up your colour to the level you want it, highlight the raised edges with a little white.
And that's it - 4 different techniques for some very different results. You can vary these up some more by using different colours - I've gone with purple as that's the 'canon' colouring for cybel energy, but if you're using a different colour throughout your force (or looking to apply these techniques for a different miniature altogether) then you can easily substitute any colour ink.
If you're feeling inspired, you can pick up the Expansion Sprue from the Maelstrom's Edge online store
here, and make sure you share your efforts on the Comm Guild Facebook page (
https://www.facebook.com/groups/MaelstromsEdge)!
For other Maelstrom's Edge modeling articles, including tutorials and walkthroughs of a wide range of different building and miniature projects, check out the article roundup
here.


 Finished Forge World Elysian Army
  Finished Tau Sept Cadre
  Finished Ork Waaagh |
  Alaitoc Eldar Warhost
  Finished Order of Our Martyred Lady - Sisters of Battle
  Finished Necromundian Imperial Guard Regiment


