 - by Iain Wilson
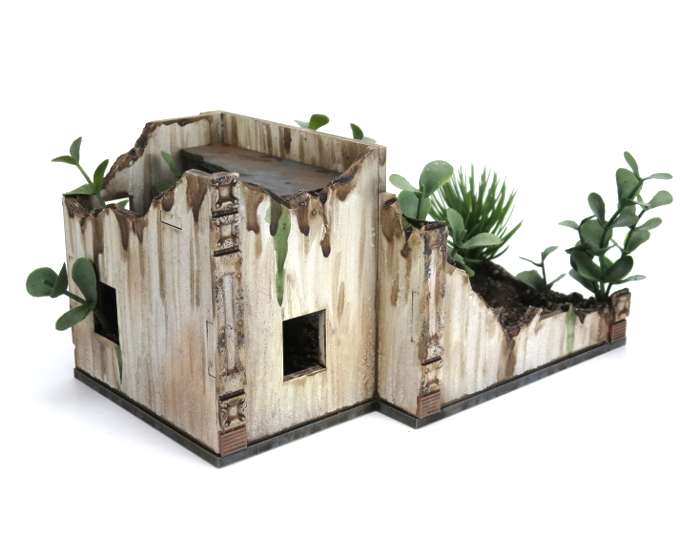
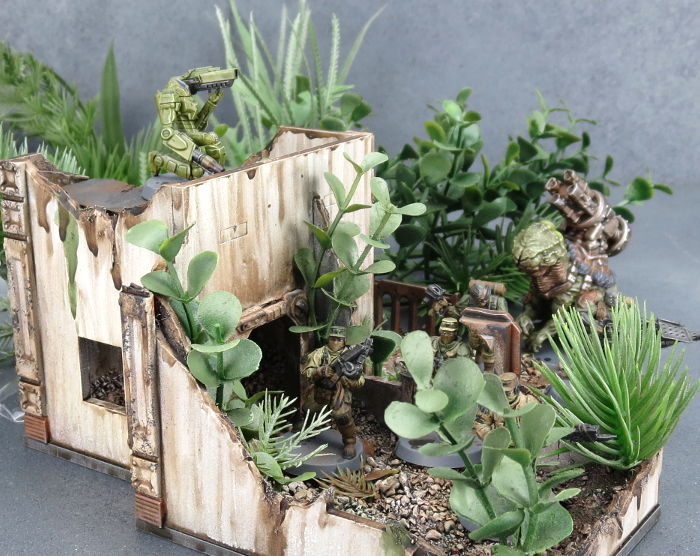
As anyone who has been following these modeling articles may have noticed, I have all sorts of trouble looking at store-bought kits and not immediately coming up with various ways to hack them up and glue them back together again, and this week's article is no exception. There are a plethora of outstanding MDF building kits out in the market these days, which can be great options for inexpensive, easy to build terrain. Thanks to how easy it is to cut and glue, they can also form a great base for modification. I recently put together a basic desert building from Knights of Dice's Tabula Rasa range, with some extra detailing courtesy of the Maelstrom's Edge terrain sprue (If you missed it, you can find the article here), and this week, I'm taking a stab at a second building from this range. Intact buildings are just so pre-galaxy-spanning-apocalypse, however, so I'm taking the knife to this one and creating a small abandoned outpost:
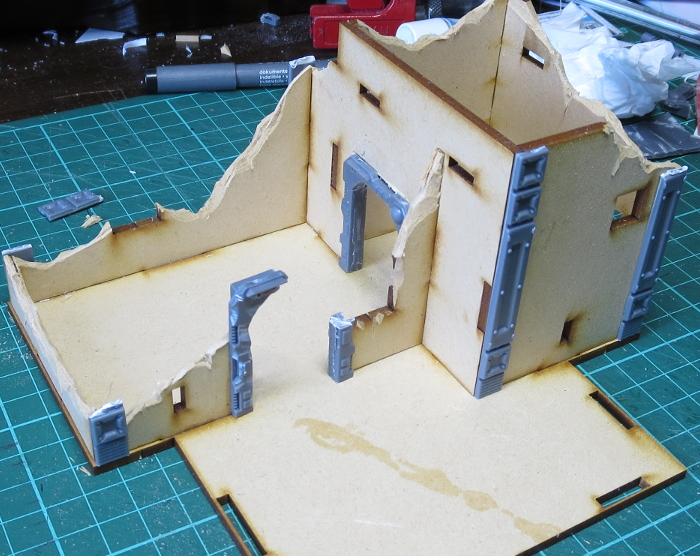
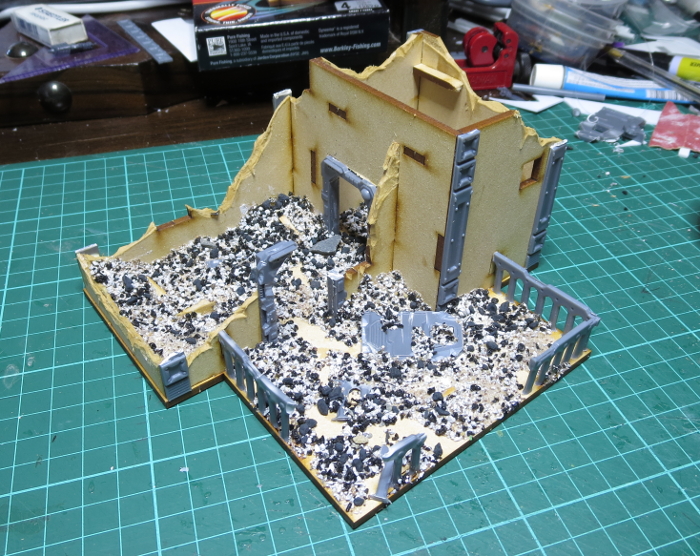
The first step was to plan out exactly how I was going to destroy the building, so I popped the parts off their sheets and fitted the basic structure together with no glue. Then I took a pencil and drew a rough line around the outside where I wanted the walls to be damaged.
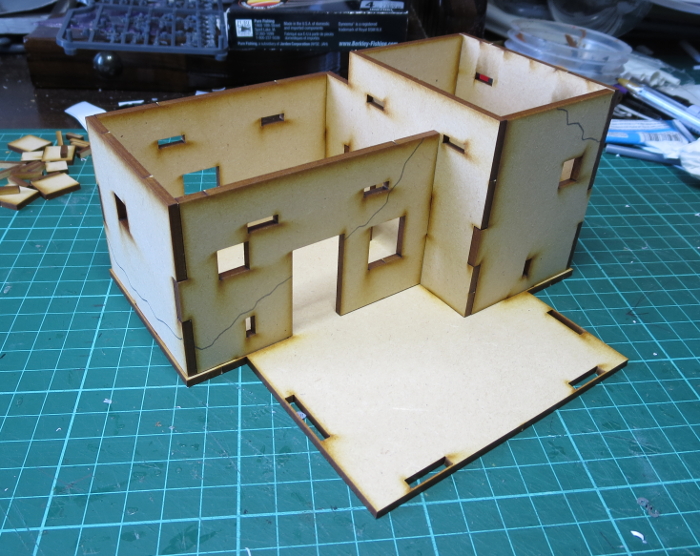
I cut the walls using a sharp exacto knife, by scoring through on the outside following the pencil line relatively closely, then scoring a roughly corresponding line on the inside of the wall piece (this wasn't an exact match, just eye-balled to be close enough) and then snapping the piece in two. The edge was then cleaned up using the knife to remove any fluffy or protruding parts.
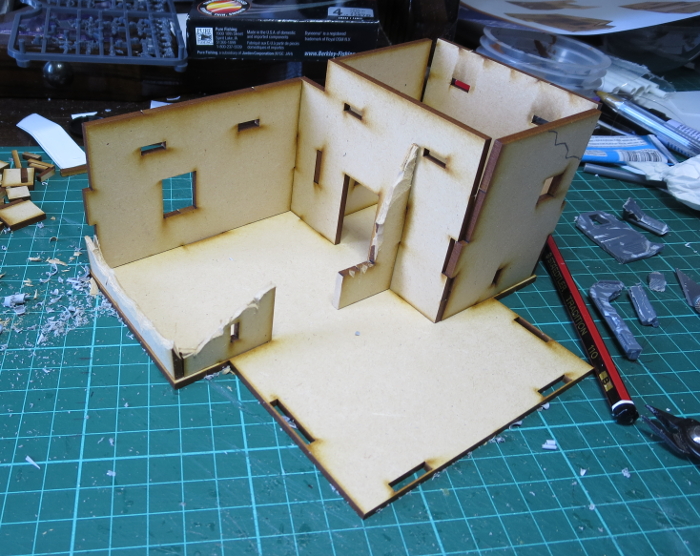
When all of the cuts were completed, it was time to add some detail. The Tabula Rasa kits are deliberately plain, both to keep the cost down and to provide a generic structure for detail pieces to be added, and so they're a perfect base for the Maelstrom's Edge terrain sprue!
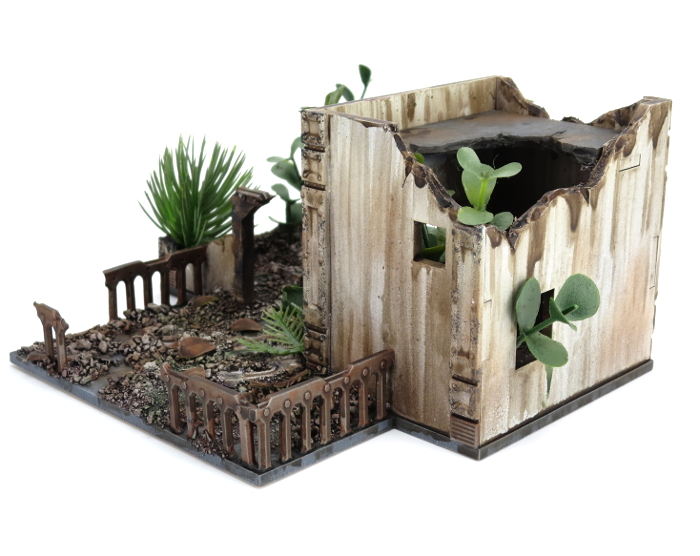
I took a door piece and used a razor saw to cut the door out of the frame, and broke the frame into several pieces. Some scarring was also added with the knife.
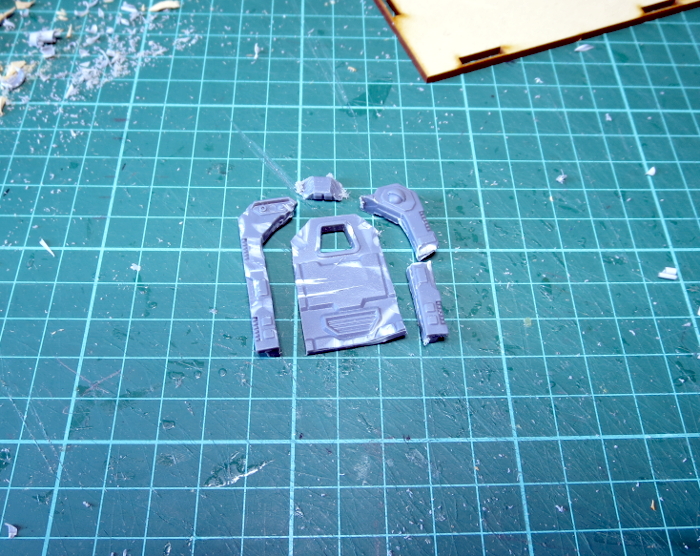
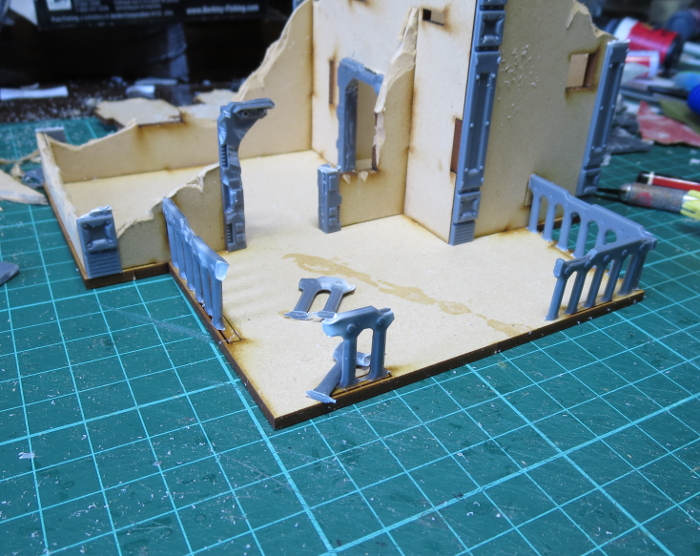
I widened both the exterior and interior doorways to match the terrain sprue door pieces. The door frame pieces were glued in place on the exterior doorway, and I added a second doorframe with the door also removed but the frame left intact into the inner doorway. Support struts cut to length were glued over the corner joints on the walls to hide them, and add a little more visual interest to the otherwise fairly plain, boxy building. On the first Tabula Rasa building I added detail over the window holes as well, but for this ruin it didn't seem necessary.
The courtyard has a low
MDF wall that runs around it, but I wanted something a little more flashy, so I took a couple of ladders from the terrain sprue and cut off one side with a razor saw.
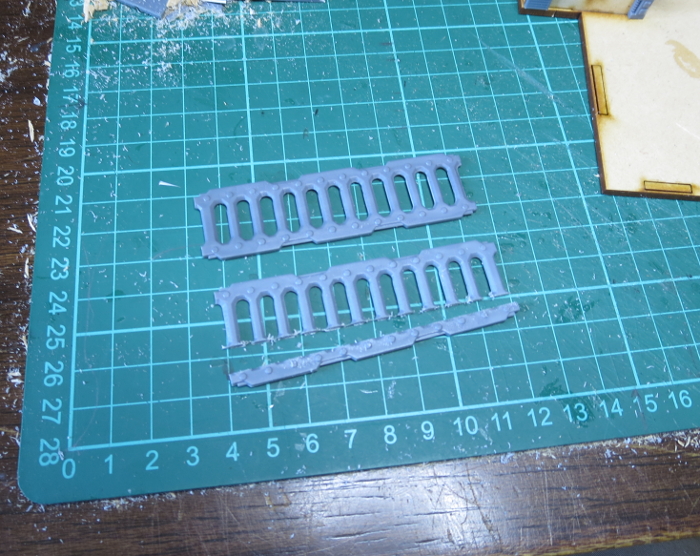
These were then cut to length and glue in place around the edges of the courtyard, after gluing the scrap pieces back into the locator holes for the original wall to fill them in.
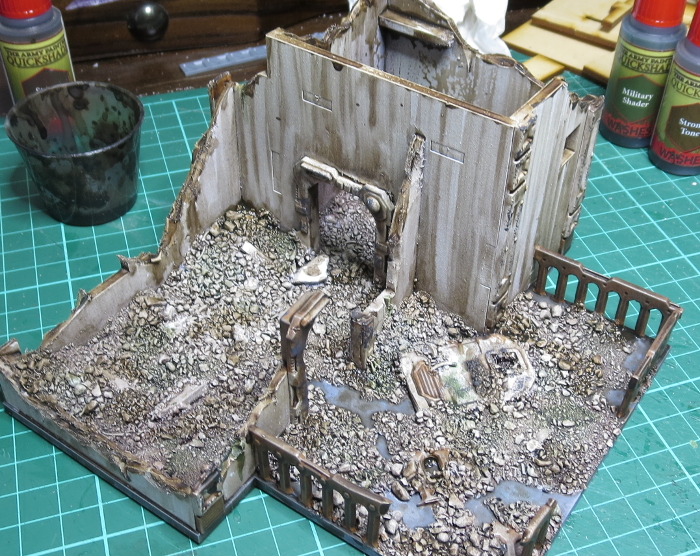
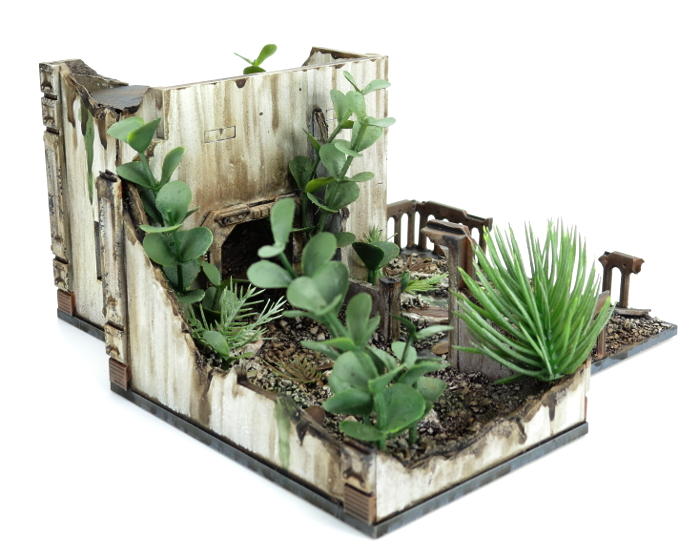
To help turn this into an old, long-abandoned ruin that the jungle had started to reclaim, I built up some patches on the floor with air-drying clay.
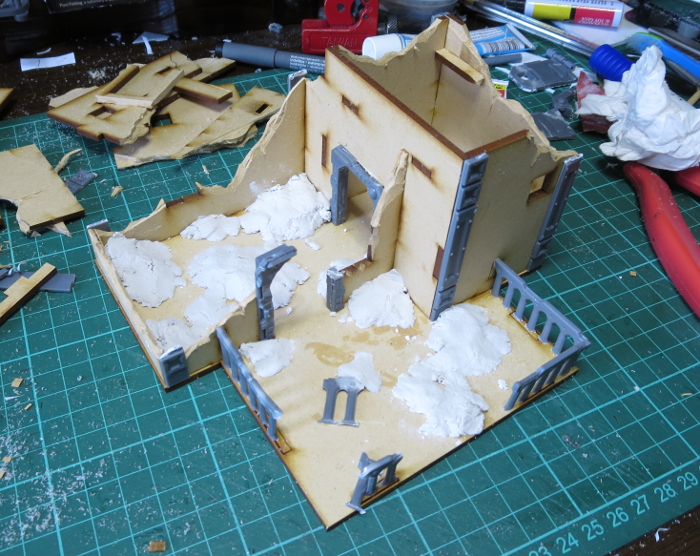
I pressed a few castoffs pieces of
MDF into the clay, and glued the distressed door down on the courtyard floor. Over this, I painted a thick layer of PVA glue and sprinkled on a generous layer of a gravel, sand and railway ballast mix that I like to use for building rubble as it has a lot of different textures in there.
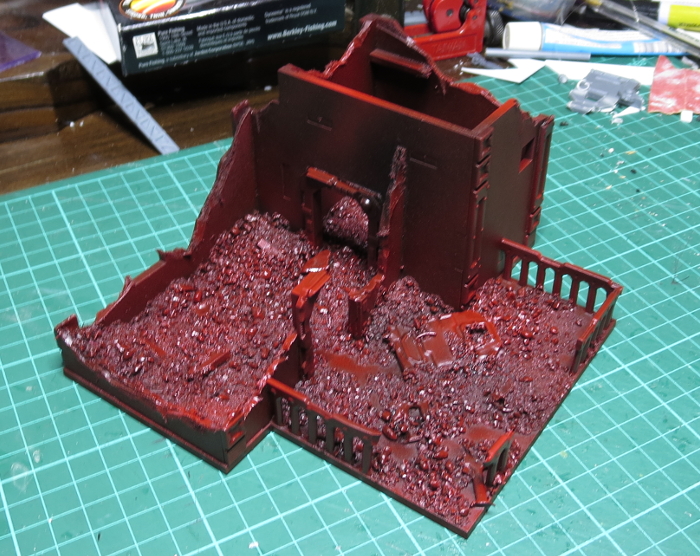
When the PVA glue had dried, I tipped off the excess gravel mix, and then it was time to paint. I didn't have a brown spray to hand, so I undercoated with some flat black and, while it was still wet, followed up with a light coat of Army Painter Dragon Red.
Over this went a coat of a light cream colour, and then a highlight spray of white from above.
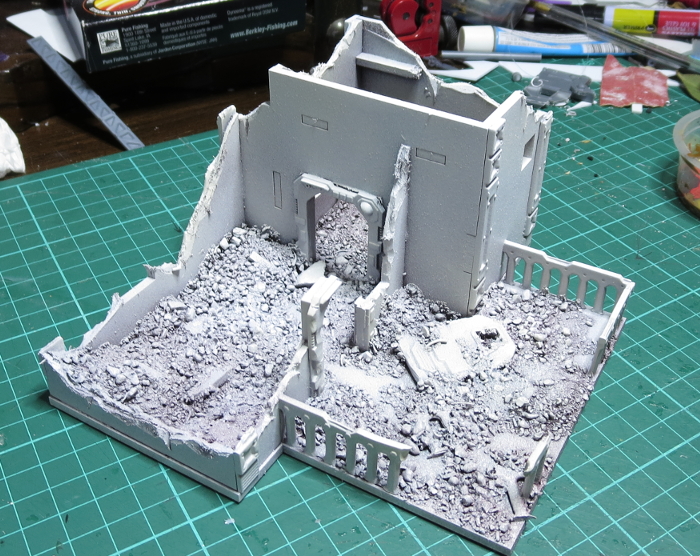
I went back over anything that I wanted to look like exposed metal and re-undercoated with Vallejo Beasty Brown, before drybrushing with P3 Pig Iron. The few bits of the original floor still peeking through the rubble were painted with Vallejo Basalt Grey and drybrushed with Vallejo Light Grey.
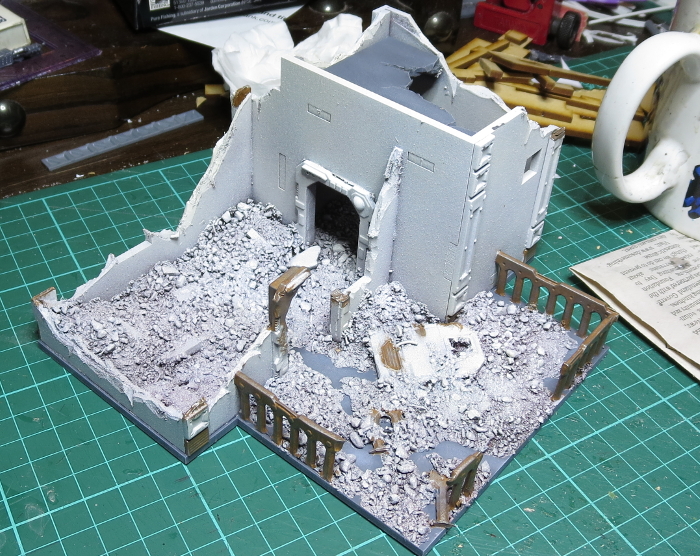
With that out of the way, I went to town with washes!
I gave the whole building a generous coat of Army Painter Strong Tone. The walls were painted with a medium-sized flat brush, using vertical strokes to create a streaky effect and allowing the wash to pool and run where it felt like it. When that first wash had dried, I went back over it, picking out small areas with extra dollops of Strong Tone and also adding some patches of Green Tone and Military Shader to give them a greenish, mossy tint.
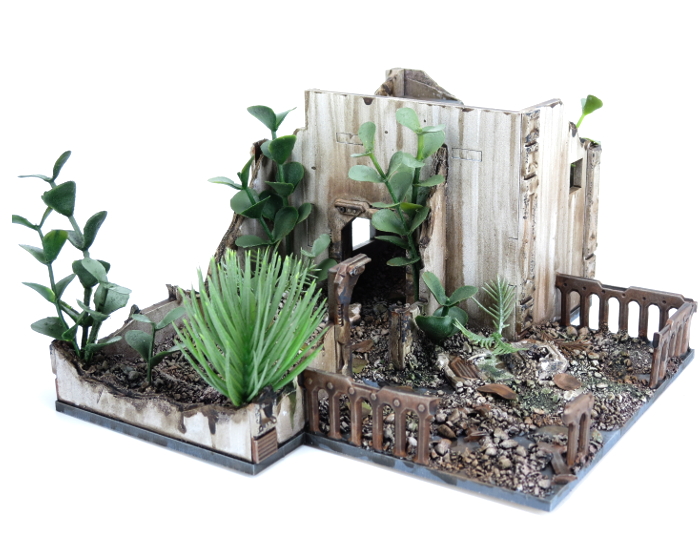
Time to add some shrubbery!
I took a bunch of assorted fake plants. Most of these are cheap aquarium plants, although I also used a bunch of plastic greenery taken from a mat I found at a local hardware store for creating fake vertical gardens. It looks rubbish as an actual plant feature, but is a perfect resource for my purposes here.

Fake plants, particularly the cheaper kind, tend to be rather brightly coloured and slightly glossy, which just wouldn't do. I got around this by giving the plants a light spray with Army Painter Army Green - not enough to completely cover over the original colour, but enough to dull down the colour and shine. To add some extra colour differentiation, I very lightly misted the tips of some of the plants with white. The painted plants were then glued in place wherever seemed appropriate, but poking a hole through the rubble and into the underlying clay, applying some superglue to the plant stem and pushing it into the hole. I also cut some leaves off a few plants and glued them around on the ground.
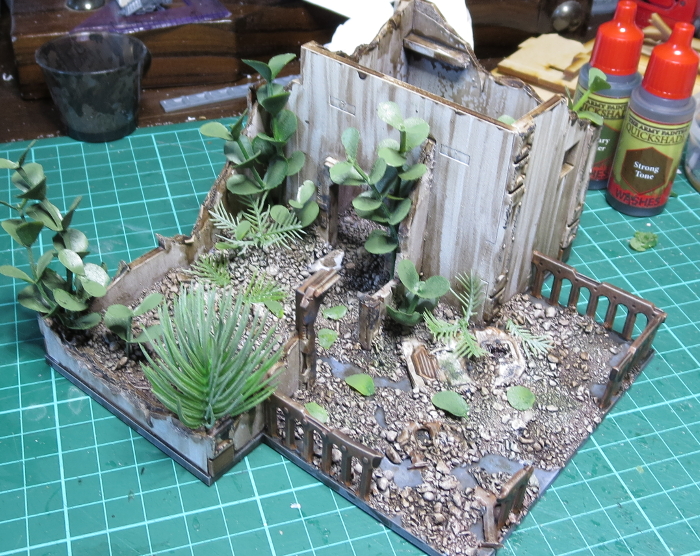
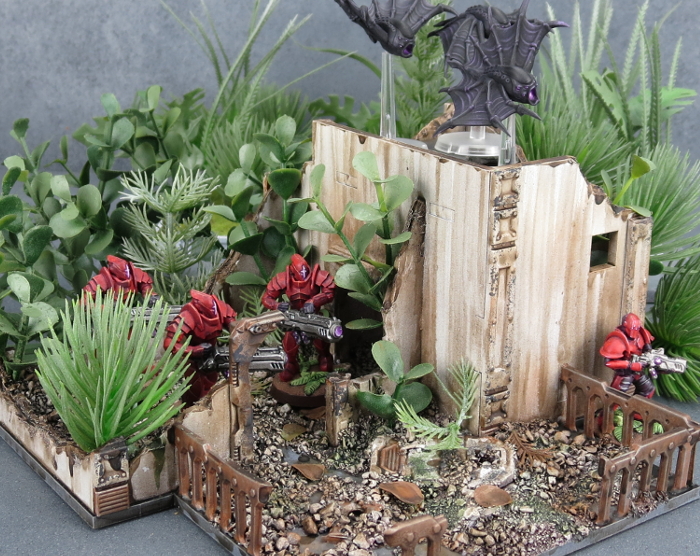
The final step was to paint the fallen leaves with varying amounts of brown, and then a quick wash of Strong Tone. At this point, the ruin looked something like this:
To get all apocalyptic on your own building creations, you can pick up the Maelstrom's Edge terrain sprue along with the rest of the Maelstrom's Edge model range from the webstore
here.
As always, feel free to pop along and share your work, or ask any Maelstrom's Edge- or hobby-related questions on the
Comm Guild Facebook page!
For other Maelstrom's Edge modeling articles, including tutorials and walkthroughs of a wide range of different building and miniature projects, check out the article roundup
here.


