Forum adverts like this one are shown to any user who is not logged in. Join us by filling out a tiny 3 field form and you will get your own, free, dakka user account which gives a good range of benefits to you:
No adverts like this in the forums anymore.
Times and dates in your local timezone.
Full tracking of what you have read so you can skip to your first unread post, easily see what has changed since you last logged in, and easily see what is new at a glance.
Email notifications for threads you want to watch closely.
Being a part of the oldest wargaming community on the net.
If you are already a member then feel free to login now.
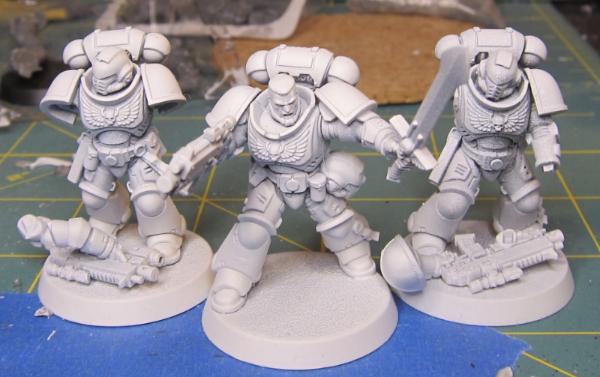
Hi all, I’m looking for advice on painting my marines in sub assembly form please
I’ve always glued my Marines together then painted but I have trouble getting into all the nooks and crannies so here goes
1. How do I know which parts are correct for the space marine pose?
2. I don’t want to drill and use a paper clip on the peices so is there another alternative?
3. Should I do each part separately or is it better to glue the legs, torso and head on and leave the arms, weapons and shoulder pads off?
Generally, for a bolter marine, I glue everything but the bolter arm and bolter together. I glue those together separately. This should make it fairly easy to get a brush everywhere, although sometimes around the backpack can get tricky.
Jump packs I do separately, as they tend to overshadow the head and shoulders.
One thing you can do to paint bits is to use a small dot of superglue to attach the little bits to spare sprue or something similar. Once you are done painting it, you can snap it off and finish assembling the model. For some things, I will also just use poster tack to attach it to something I can get a better grip on. If you just hold the bits in your hand while painting, you get oils on them and rub paint off. Not a good thing (but one I did for years)
1 - I would pre-paint the: Heads and Arms and Weapons. Sometimes the legs if they are too complicated.
I know what piece needs to be pre-painted by seeing what undercuts the brush wont reach if assembled.
For large enough pieces and vehicle parts:
A - Glue in a piece of sprue to an area that could be easily clean up afterwords to hold the piece for priming and painting.
B - Keep the sprue-glued pieces stuck in play-clay for drying
2 - For smaller pieces, like the arms legs and heads, what I do is use my set of small Hand-Held drill-bits to screw/twist into the joint and just paint the piece while it is on the bit. It takes 2-5 seconds to twist a tiny bit into the joint, and it has enough grip not to move during painting, if piece moves, just give the bit a slight twist until firm and continue. (You can see I did that for the crew heads)
https://www.harborfreight.com/20-pc-carbide-rotary-micro-bit-assorted-set-62379.html
C - After pieces are painted, Clean up any paint from the joints by scratching it with a knife to apply the glue.
3 - Some pieces are easy to paint separately like arms and heads, but some pieces are easy to paint when assembled like soulderpads. I would have torso and legs glued together and painted first. Then the arms painted separately. Then glue the painted arms to painted torso. Then glue in the UNpainted shoulder pad and paint the shoulders when all assembled.
Hope this helps.
This message was edited 1 time. Last update was at 2019/03/02 20:43:12
Nevelon wrote: Generally, for a bolter marine, I glue everything but the bolter arm and bolter together. I glue those together separately. This should make it fairly easy to get a brush everywhere, although sometimes around the backpack can get tricky.
Jump packs I do separately, as they tend to overshadow the head and shoulders.
One thing you can do to paint bits is to use a small dot of superglue to attach the little bits to spare sprue or something similar. Once you are done painting it, you can snap it off and finish assembling the model. For some things, I will also just use poster tack to attach it to something I can get a better grip on. If you just hold the bits in your hand while painting, you get oils on them and rub paint off. Not a good thing (but one I did for years)
This is all good advice.
I'd add that depending on your paint scheme. leaving other bits off can be advantageous. For example, Salamanders have black backpacks, so painting the backpacks separately makes life easier. Similarly, if your Sergeants have different color heads, doing them separately can make life easier.
Personally, I use paperclips and mask the joint with blu-tac, but I can see how people would rather avoid that. One option is to leave the part on the sprue, or at least leave one part connected - you'll have to clip it off and paint it afterwards, but it's a good option for things like head that are generally only joined on the bottom.
As to tracking which parts go where, well, I use labeled paper clips, but any armature can be labelled. OTOH, recent GW kits are fairly specific, so if you keep your instructions handy you can tell which part goes where just by looking for a lot of kits. If that's not the case, keep some small containers and group each mini with its parts through the process. Watchmaker's cases are good for this.
When I paint marines I usually glue the legs and torso together and I glue the pauldrons (shoulder guards) to the arms and then paint everything separately. However you're going to want to make sure that the areas that are going to be glued remain bare plastic, the primer and paint can lead to the parts not sticking together as they should. Blu-tac/poster putty over the areas you don't want paint to get on and then peel it off when you're done painting and you can get that plastic to plastic adhesion.
If you have to pin it I would suggest using toothpicks instead of paperclips. they may be more rigid in terms of placement but you can always break them off and the glue adheres better.
- legs/torso/head together.
- attach arms (minus the pauldrons) and paint them.
- back pack, pauldrons and weapon get painted separately and attached afterwards.
That’s all good advice, thankyou all but one more, how do you know which arms to use and how to position the torso to the legs? I mean I’ve always glued the entire models together to get the correct pose
When I’m building the marine, I cut the parts off the sprues and put them in old blister packs to keep matched parts together. They get cleaned and assembled individually to make sure I don’t mix up arms/etc.
I spray prime with a rattle can. When I do, I line up the boys and place any spare bits in front of them, to keep them all together. I use poster tack to keep them from flying around.
While waiting for paint, I generally tuck the bolter between the legs to keep things tidy. Minis in more parts are often stored in a blister to keep together.
I use plastic cups to keep parts together.
They stack if not very full and go well into cardboard boxes like the ones the kits come in, so everything can be out away neatly.
To temporarily mount parts that would be in the way otherwise there are several options, blue-tac, double-sided sticky tape or superglue. Use whatever works best for the part you need to stick on later to attach it to a pice of cork from a wine bottle or simliar object suitable as a handle. Later just take it off the cork, use an emery board or your hobby knife to clean any residue and stick it on the model.
Mind you, that is only for models with a closed positiion, i.e. their arms or other parts block access for your brush to parts you want to paint.


 Ultramarines, 3rd Co. and friends, 16k+
  4k
4k  4k Points
 Competition Index