 - by Iain Wilson
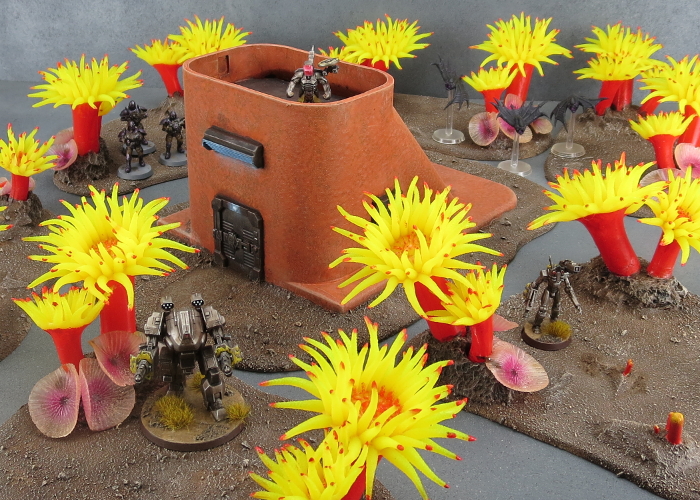
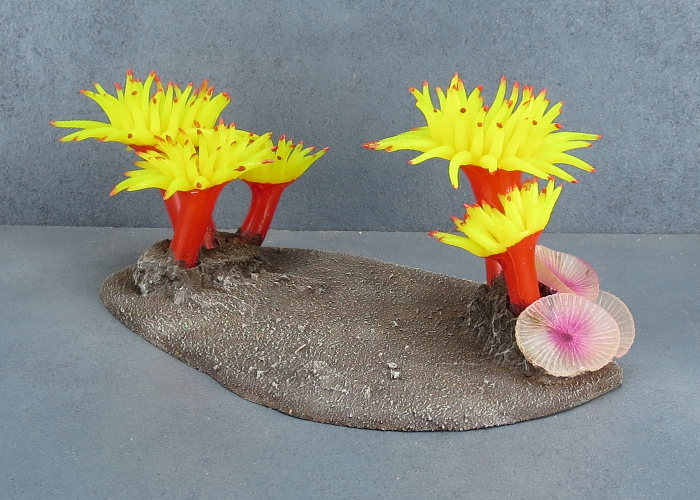
While there is a steadily growing range of awesome terrain on the market these days for sci fi wargames, one curious gap is the general lack of alien plantlife, which results in a vast majority of 'forest' type terrain being represented on the table by variations of the same, standard green trees. This week, I'm venturing outside the shady, green box, and creating an alien forest setup using silicon aquarium plants!
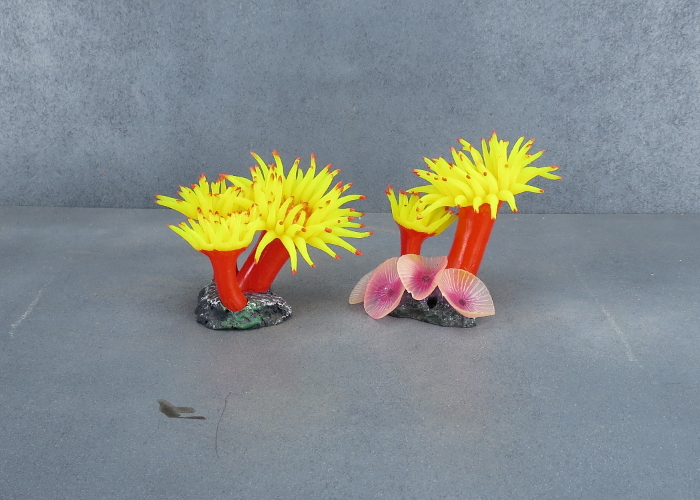
Aquarium plants come in a pretty vast range of different styles, sizes and colours, so can be an invaluable source of alien flora. The plants I'm using here are some sort of anemone-looking thing made from silicon and mounted in pairs or triplets on resin rocks. You could just as easily use whatever other plants you feel like (or can find in your local aquarium supply store!), but I really liked the look of these.
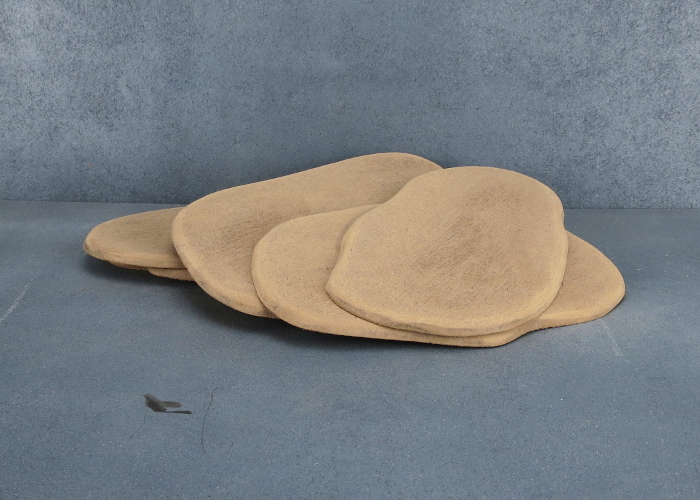
Forest bases need a base (obviously!), so I cut half a dozen out of 5mm masonite. I used a scroll saw with the blade set to a 30 degree angle for this, to get nice wobbly edges, and then sanded them down smooth. You could do the same with a jigsaw, or a coping saw if you prefer to avoid power tools.
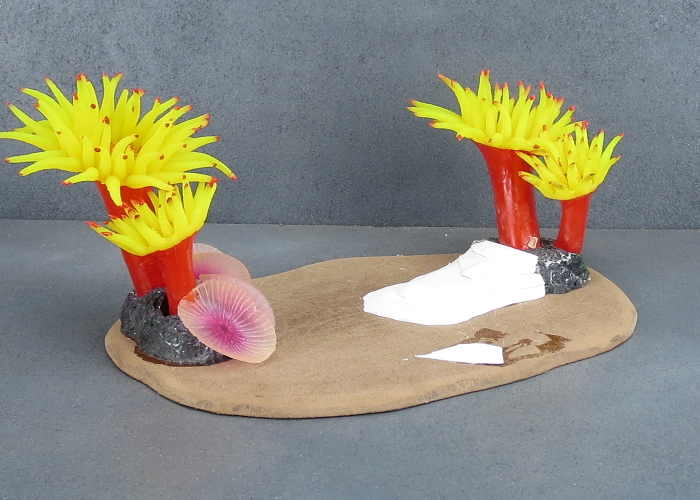
Onto each base, I glued two or three clumps of 'trees' with superglue, leaving them in the resin rocks so that I didn't have to make up some sort of alternative base for them. This also helps to give them a little more height, and adds a bit of extra texture to the forest bases.
To stretch out my collection of plants a bit, and also to help break up the identical clumps, I cut through some of the resin rocks with a razor saw to split up the tree clumps.
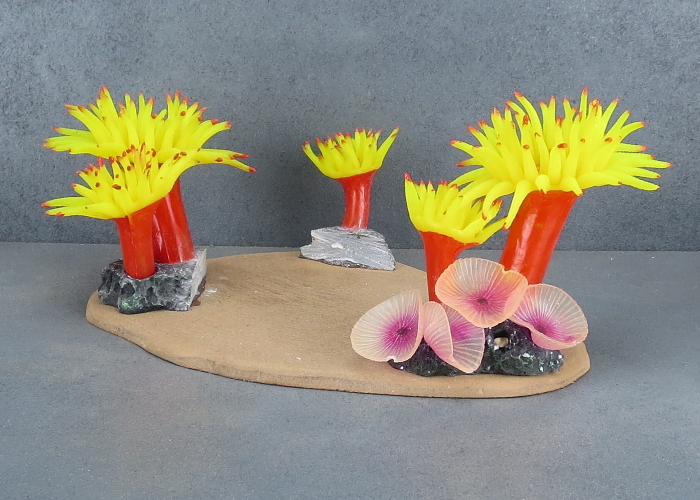
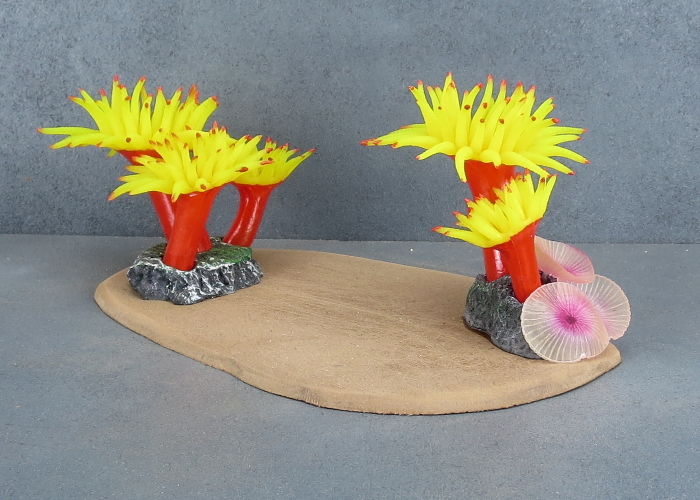
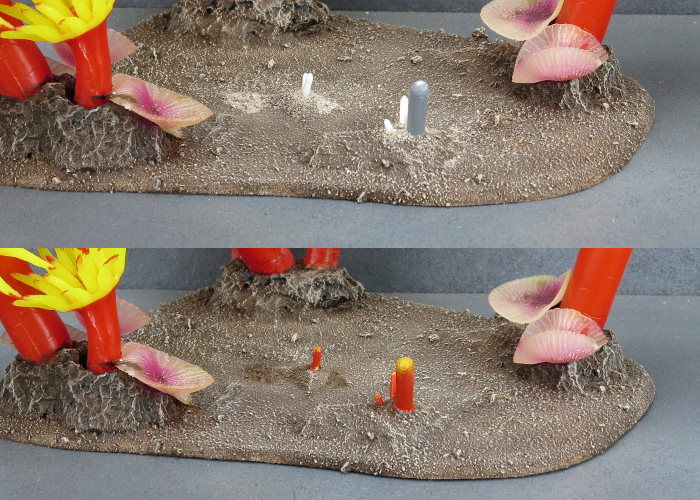
The cut edges of the rocks were then concealed behind stacks of foamed PVC, cut from scraps leftover from a previous project. You could also use foamcore or cardboard for this (although the PVC is a bit more durable and less likely to delaminate from use) or putty or filling plaster to sculpt up a replacement rockface.
From there, I slapped a generous coat of PVA glue on each base and sprinkled on a sand/gravel mix, leaving the glue to dry before tipping off any excess sand that hadn't stuck. I also applied a generous spray of matte sealer, both to help hold the sand down and to kill a little of the shine on the silicon plants.
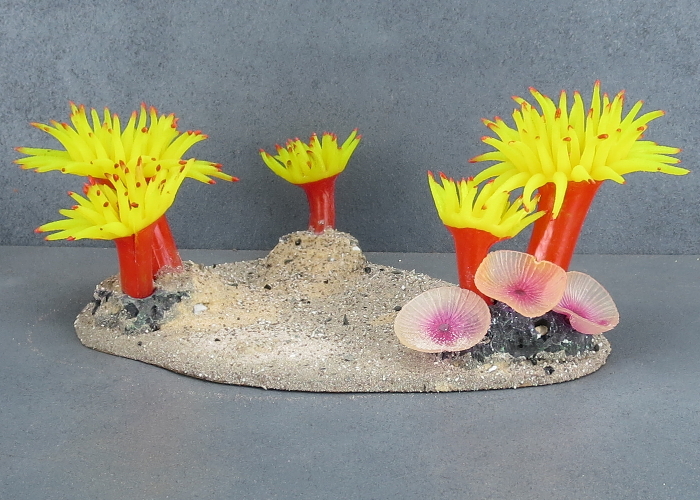
To paint, I glopped on a generous coat of a medium brown as a base coat - I used a Mont Marte Burnt Umber artist's acrylic for this, with the intention of matching these bases to the air conditioner fitting bunker that I made
last week.
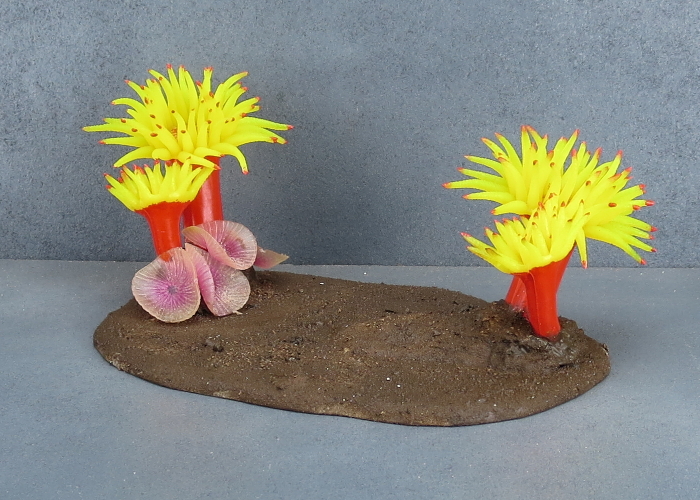
Over the brown, I drybrushed a taupe colour ('Fawn', another artist's acrylic).
The largest of the bases had some extra space left on it, so I added some young growth using some clipped pieces of plastic rod, painted up with red and yellow to match the plants.
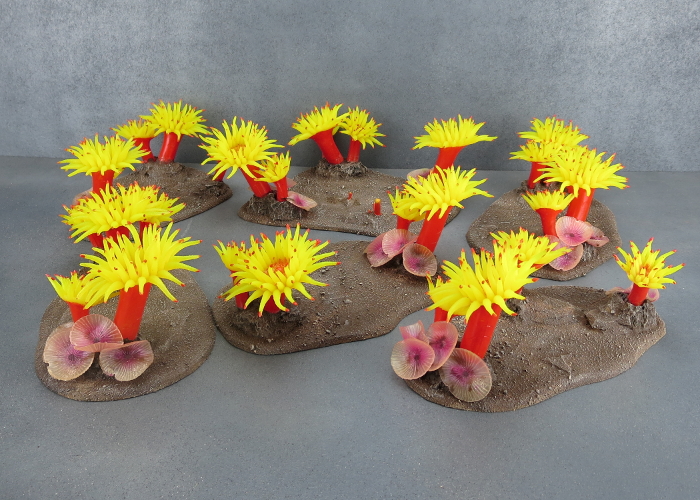
And that's pretty much it. If you want a more over-grown look to your forests, you could easily put the 'tree' clumps closer together, or add extra undergrowth using other, smaller plants. There's a bit of a balance to find with area terrain like this, though - You want it to look good, but you also need to be able to put models in it, so I prefer to keep things fairly simple to improve their function on the table. An alternative compromise is to mount the trees onto the base with magnets instead of gluing them in place. This lets you add some extra layers of detail, while being able to selectively pluck parts of the forest out of the way as necessary to place models in there. For now, though, this is my forest all together on the table:
Feeling like assembling your own tropical alien paradise? As always, feel free to pop along and share your work, or ask any Maelstrom's Edge- or hobby-related questions on the
Comm Guild Facebook page!
You can find the Maelstrom's Edge boxed game and model range in the Maelstrom's Edge webstore
here.
For other Maelstrom's Edge modeling articles, including tutorials and walkthroughs of a wide range of different building and miniature projects, check out the Hobby section of the Maelstrom's Edge website
here.


 Finished Forge World Elysian Army
  Finished Tau Sept Cadre
  Finished Ork Waaagh |
  Alaitoc Eldar Warhost
  Finished Order of Our Martyred Lady - Sisters of Battle
  Finished Necromundian Imperial Guard Regiment

