
- by Iain Wilson
There are two common ways to create buildings for use in wargames - making them solid and either treating them as impassable structures or using abstract rules to represent models being inside where appropriate, or using buildings with removable roofs so that models can actually be placed inside and positioned accurately when required. I generally prefer to go the former route, as it makes buildings a lot simpler to put together, and is less fiddly during a game than having to take a roof off - particularly if there are models on it!
Sometimes, though, it's handy to be able to go that extra distance, so I thought I would show a quick and easy way to create a building with a removable roof from a cardboard giftbox, with a little help from the
Maelstrom's Edge terrain sprue.
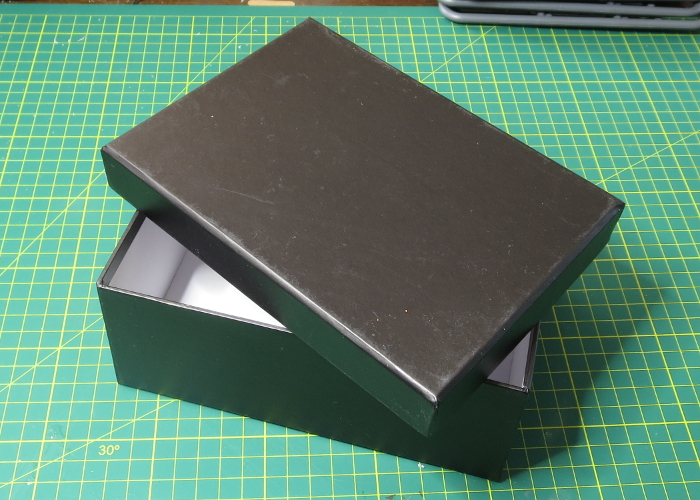
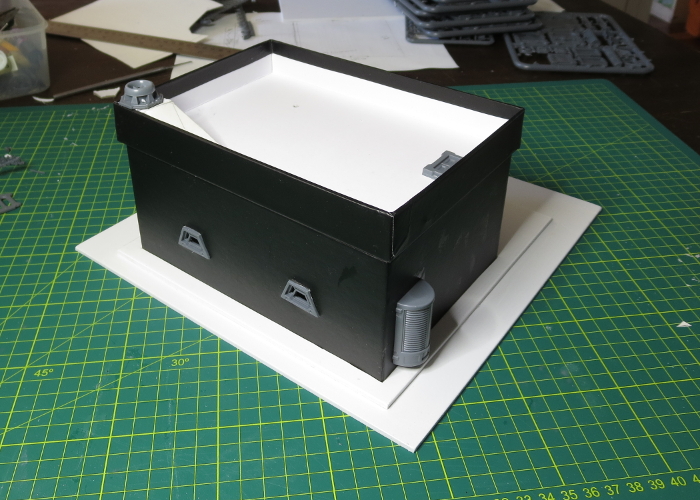
For the core of this building, I used a plain black cardboard giftbox, purchased from a local discount store.
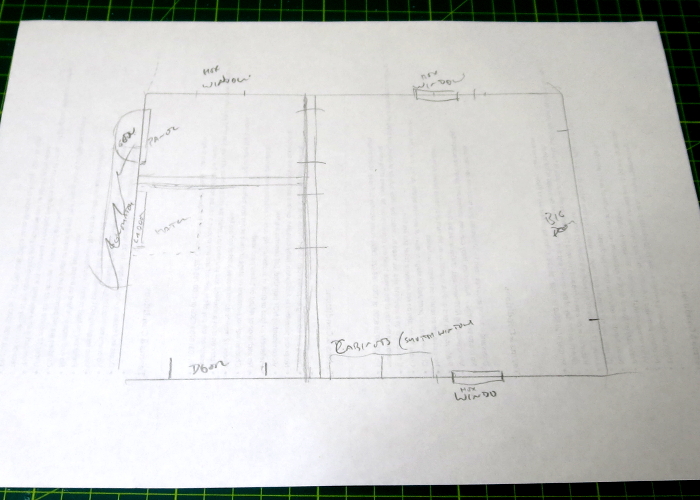
Usually when I'm building terrain, I just go from the idea in my head and hope for the best. In this case, though, I sketched out a quick plan to make sure that the interior all fit into place as intended. The plan changed slightly along the way, but it provided a handy reference as I was putting everything together.
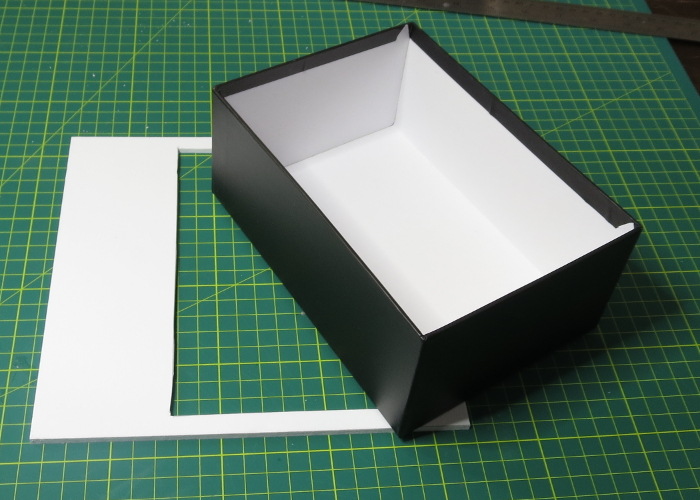
I started out by drawing around the base of the box on a piece of 2mm foamed PVC and cutting out a hole for the box to sit in. This serves to conceal the bottom edge of the box, which has a slightly rounded edge.
Next, I took a large door from the terrain sprue, sat it in place on one of the short edges of the box, traced around it with a pencil and then cut out the resultant rectangle to create a door cavity.
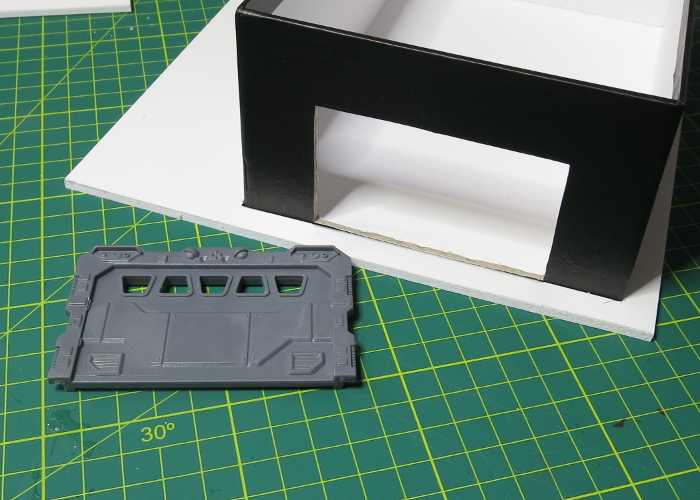
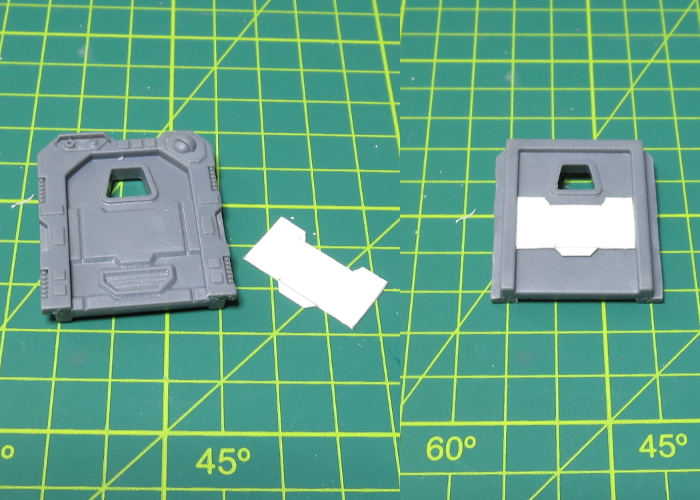
I did the same on one of the long edges of the box with a small door from the terrain sprue. This door is largely featureless on the back (as it wasn't really designed for use where you would see both sides of it), so I cut a piece of thin cardboard to duplicate the raised panelling from the front.
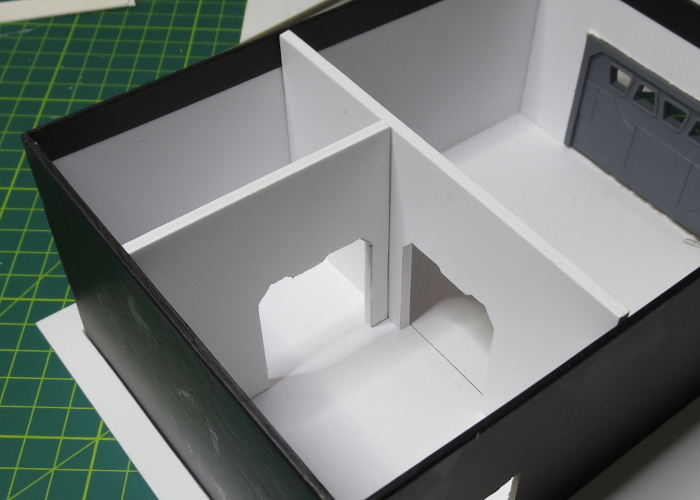
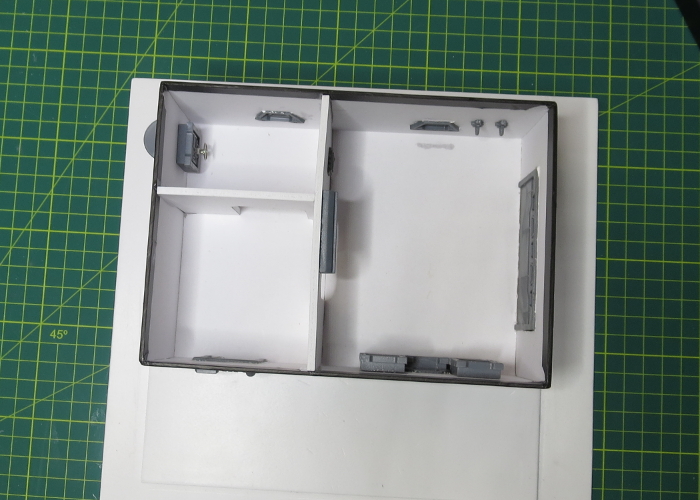
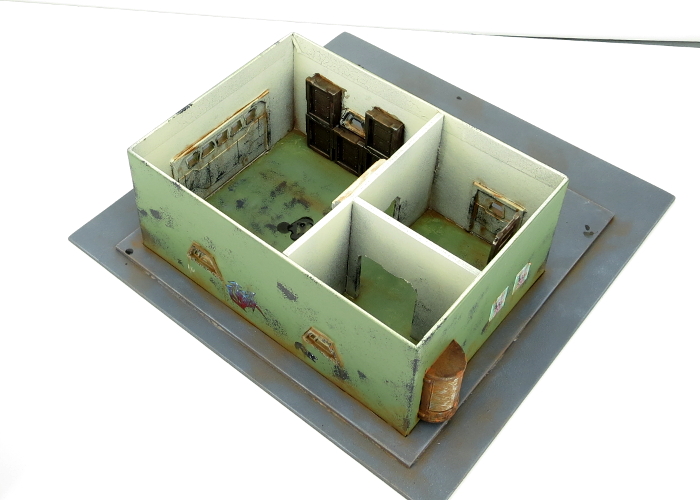
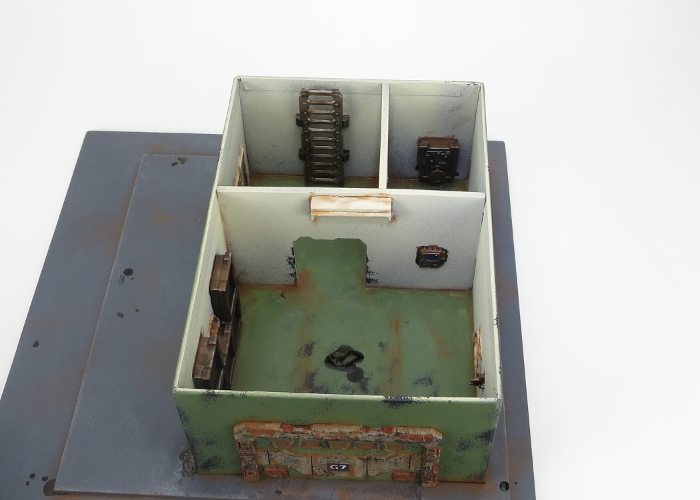
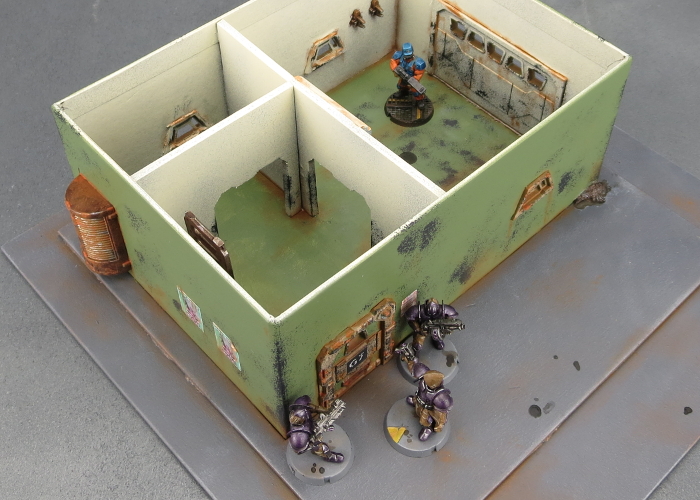
For the interior walls, I used more foamed PVC, with doorways cut in using the small door frame as a template. I checked that these walls fit where I wanted them, but didn't glue them in at this point so that I could get at the interior easier to add more detail.
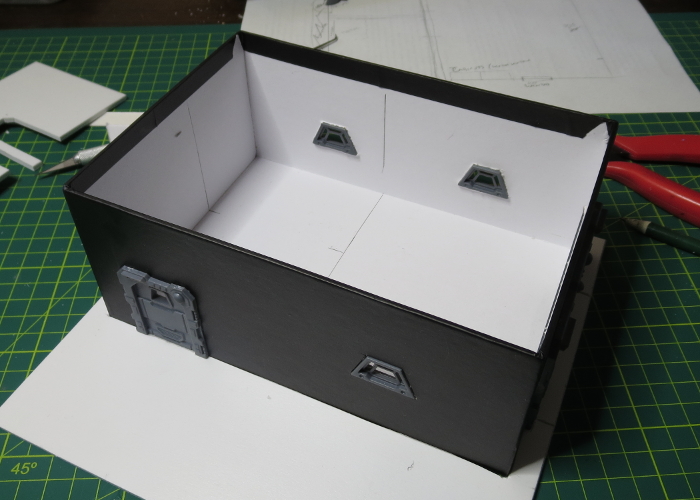
The building needed some windows. I tend to default to the shutter windows on my builds and use the trapezoid windows for more interesting things, but for this building I had another plan for the shutters. So I spaced out some of the trapezoid windows on the long sides, cut holes by tracing around them with an exacto knife and then glued them in place. Using the knife instead of a pencil to trace gives a tighter fit, which is useful since the trapezoid windows don't have a flange to conceal a loose fit like the doors do.
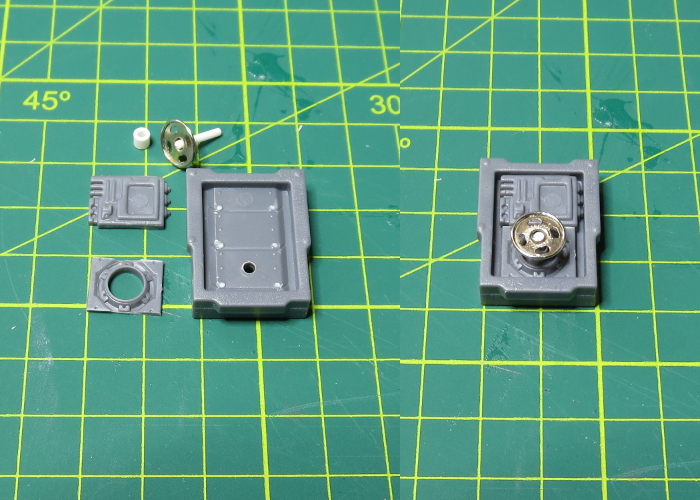
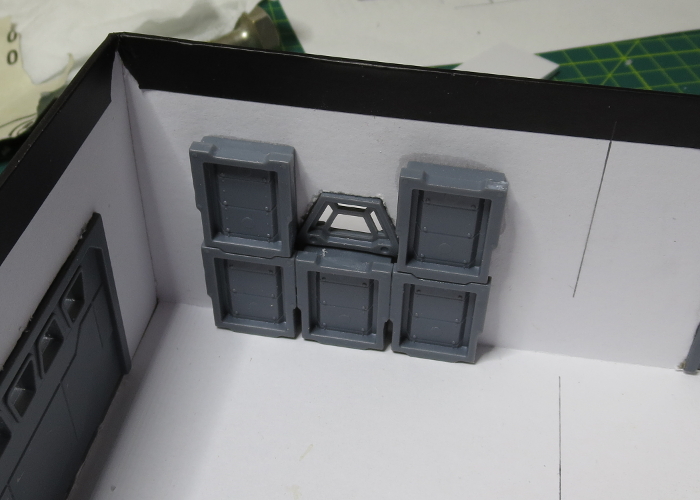
I kitted out the interior with some bits and pieces made from an assortment of terrain sprue parts. All of this was glued in place, except for the ladder. I left that separate to make it easier to paint behind it.


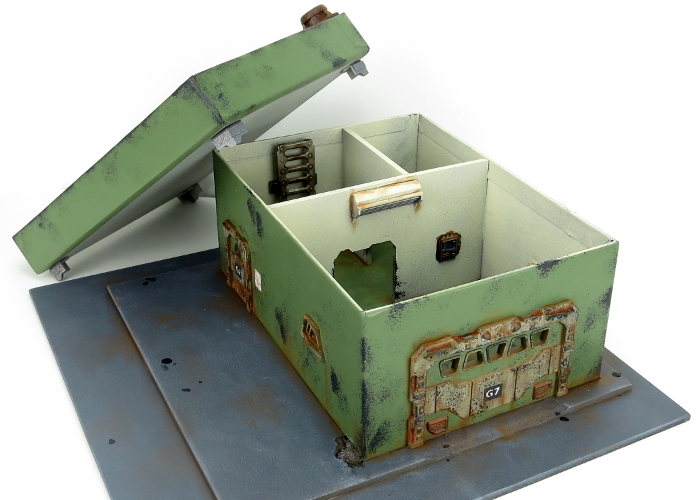
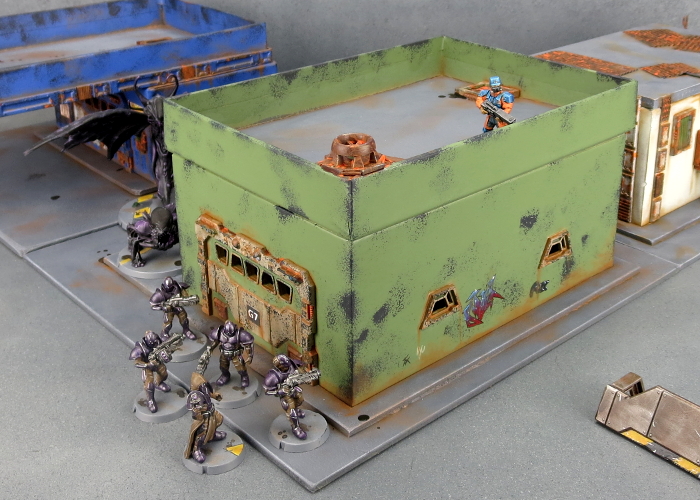
And now, the important part! I took the lid of the box and glued four corner braces from the terrain sprue upside down around the corners of the lid top. These were spaced to fit neatly inside the box, so that the lid could be sat in place upside-down to create a walled roof.
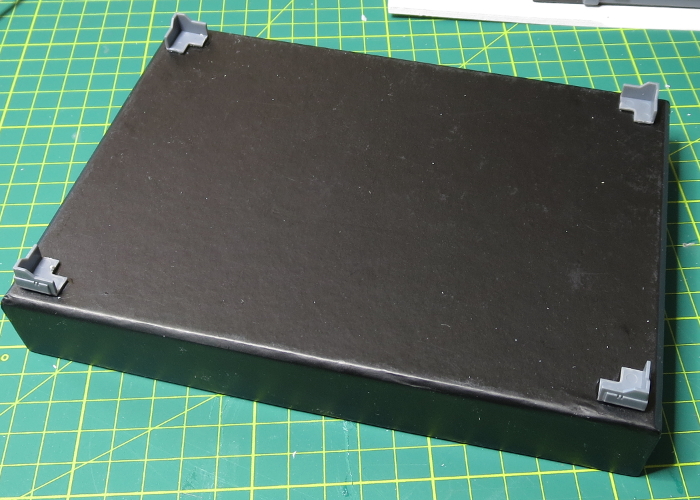
Of course, this could also be done much more easily by just sitting the lid on the way it normally goes, but I like having a lot of buildings with walled roofs to allow for models to have some cover up there.
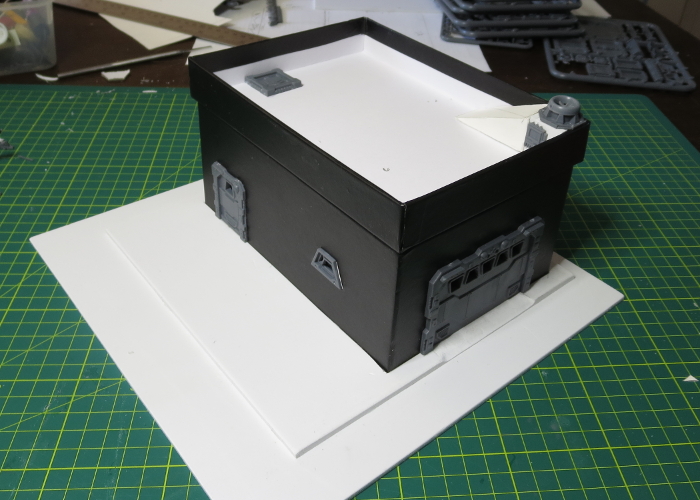
I finished up with a few extra detail pieces here and there, and another sheet of PVC on the bottom to form a base.
To paint, I gave the inside a spray with a Rustoleum dark brown primer, and then a light coat of Dulux chalky beige. The outside received a coat of Army Painter Army Green.
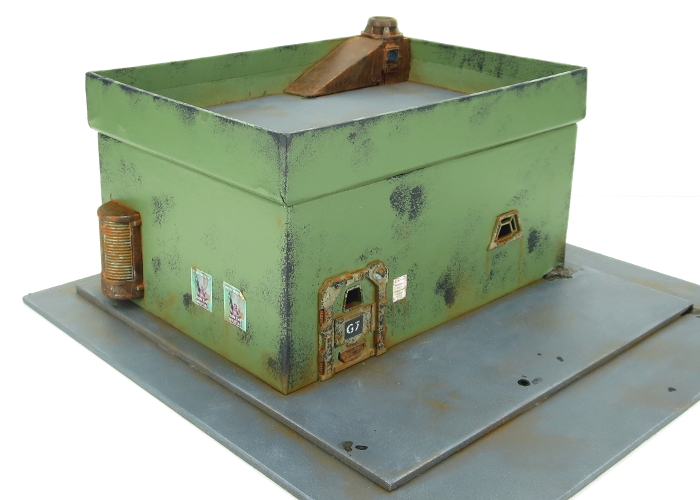
I gave the doorframes and windows a coat of Vallejo Heavy Brown, and then a layer of P3 Jack Bone. The base and roof are my usual urban mix of Vallejo Basalt Grey with a drybrush of Vallejo Light Grey.
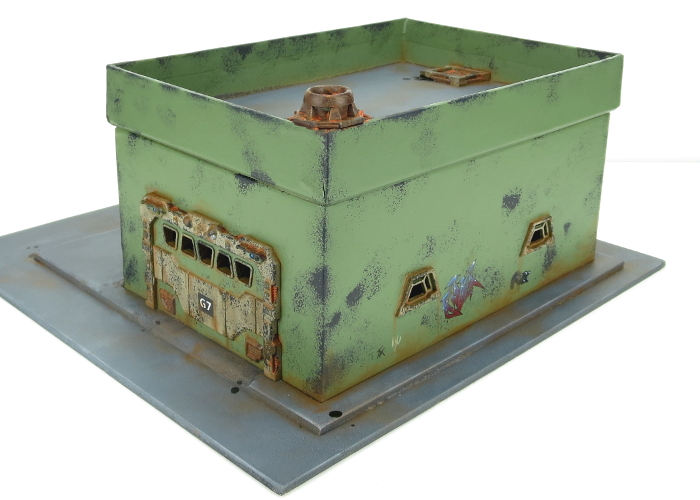
As I wanted the weathering to be heavier on the outside then in, I gave the exterior metal parts a base coat of Citadel Scorched Brown, a very light drybrush of P3 Pig Iron, and then a generous dabbing of Army Painter Dry Rust. The interior metal parts got the same base coat, a heavier layer of Pig Iron, and then a wash with Army Painter Strong Tone.
Everything was dirtied up with a sponge of Vallejo Heavy Charcoal and a drybrush of Vallejo Beasty Brown into all the crevasses and corners, again going heavier on the outside of the building.
With some final detailing and a few printed posters, the building was ready for the table!
To build your own rooftop of removable doom, you can pick up the Maelstrom's Edge terrain sprue, along with the rest of the Maelstrom's Edge model range in the webstore
here.
As always, feel free to pop along and share your creations, or ask any Maelstrom's Edge- or hobby-related questions on the
Comm Guild Facebook page!
For other Maelstrom's Edge modeling articles, including tutorials and walkthroughs of a wide range of different building and miniature projects, check out the Hobby section of the Maelstrom's Edge website
here.


