
- by Iain Wilson
Most of my terrain building focuses on buildings and other urban-styled features, because tinkering with plastic terrain sprues is just too much fun. Sometimes, though, I like to venture outside the urban sprawl and into the forest. Previously, I've dabbled with old-school,
polystyrene ball cacti and alien forest bases made from
silicon aquarium plants. This week, I'm working on some boab-inspired trees made from expanding foam!
There are various tutorials floating around for expanding foam trees, but all of those that I found were using twigs or plastic tree trunks with the foam used for filling in foliage. I wanted to turn that idea upside down, using plastic plants for foliage, and the foam used for the trunk. (For the uninitiated, expanding foam is sold in hardware stores for filling holes in walls and the like. It comes in an aerosol can, and when you spray it out it expands to around 300% of its original volume, setting into a lightweight, hard-shelled foam)
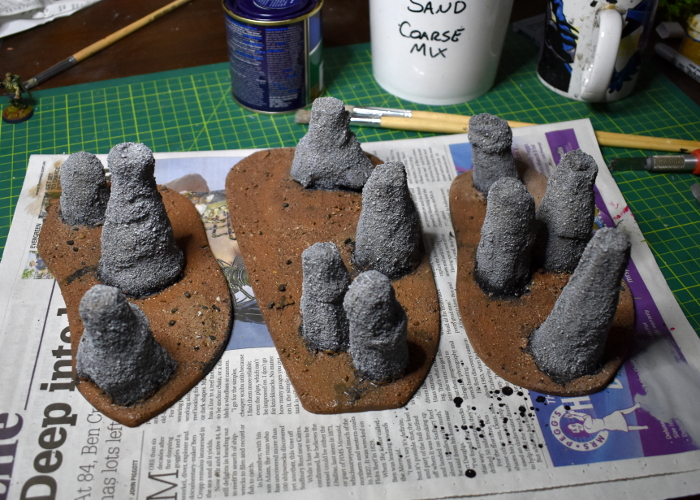
My first attempt used large bases with a piece of sprue stuck vertically on them as a support, with the foam sprayed around it, but this wasn't overly successful - they just settled into giant blobs of foam. So instead, I hit on the idea of using a mould for them. I took a screwdriver and used its handle to make a number of vaguely-conical holes in some damp playsand, and then sprayed the foam into these holes, leaving it to set.
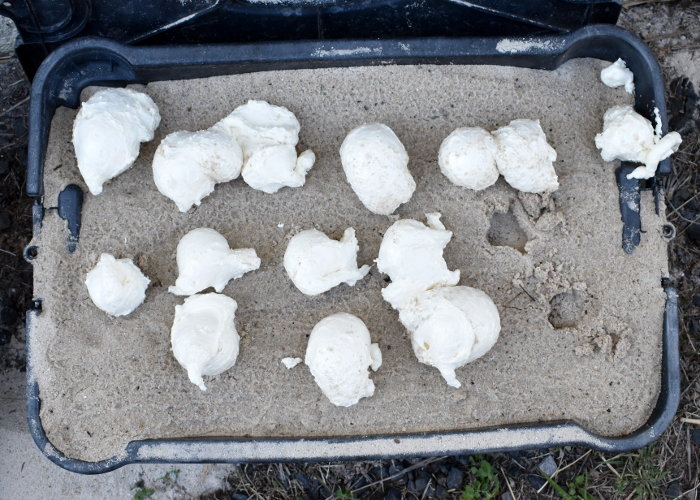
Once the foam was set, I pulled the pieces out of the holes, brushing off any loose sand. Because the foam is quite sticky when it is setting, they wound up with a layer of sand quite firmly glued to the outside, which made a nice texture on the trunks.
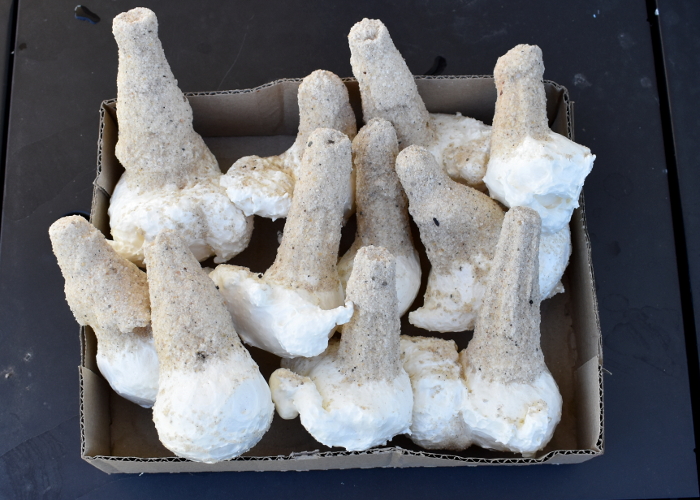
I used a mitre saw to cut the blobby excess bits off the bottom of the trunks, and then glued them down to some hardboard. A knife probably would have done this job, as the foam is quite easy to cut, but the deep-bladed saw made it easy to get a nice, flat cut.
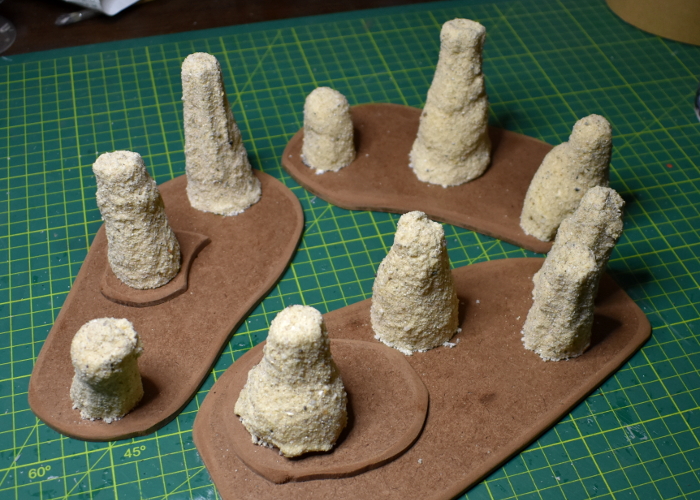
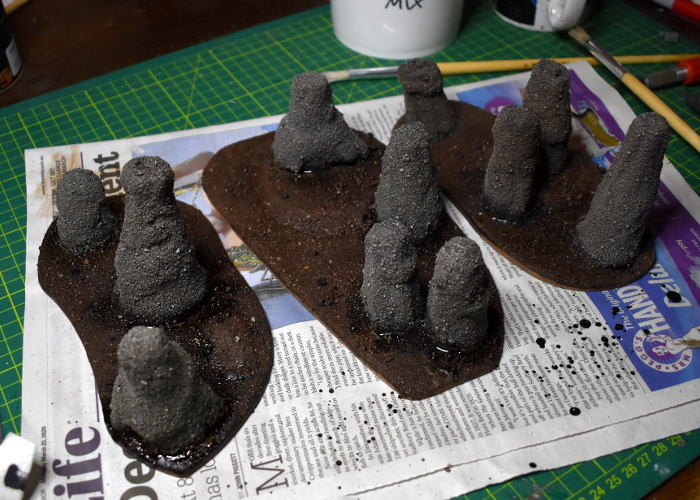
After texturing the bases with some light gravel and sand mix, I tried painting the trunks with a coat of the same charcoal wood stain that I used for last week's
wood stain painting tutorial. While it worked great on the models, here it just tinted the sand but left the lighter, yellowy foam peeking through, so I painted over the top with a coat of Army Painter Ash Grey, and also basecoated the base with some Army Painter Leather Brown.
I then went over the whole lot with a generous coat of Army Painter Strong Tone.
To finish up the painting, I gave the bases a light drybrush with some more Leather Brown, also painting the edges with the same colour. Then I glued on some patches of static grass, and a few bushes made from plastic indoor decorating plants - these come from large sheets of plants that are sold for making artificial garden walls.
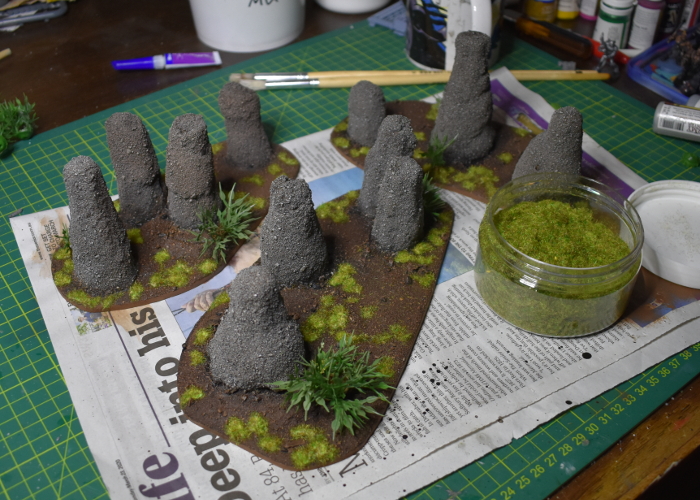
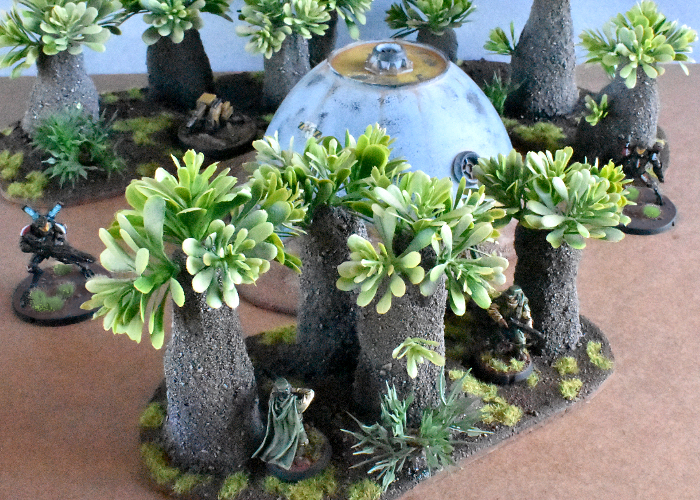
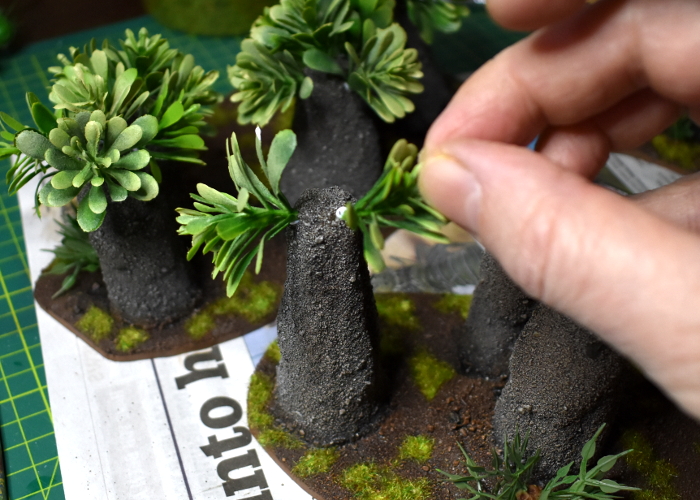
At this point, these terrain pieces could easily pass for rocky outcrops or some sort of giant insect mounds, but I decided to go the final step and foliage them up. Using some more decorative plastic sheet plants, I pierced around the top of the trunks with a spike, and then glued clumps of plants on to form a canopy.
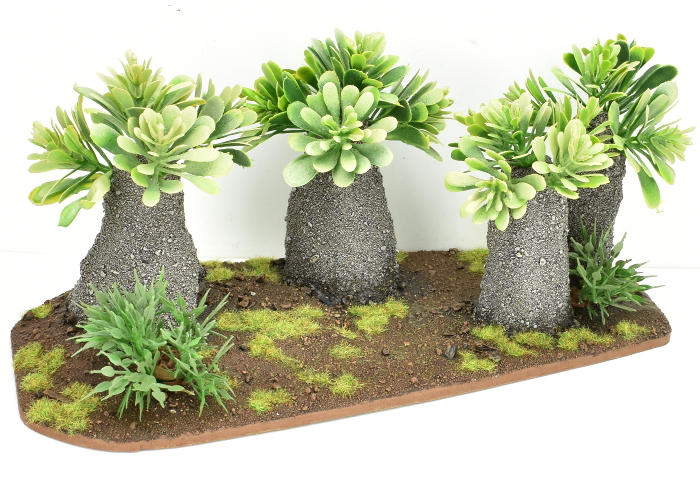
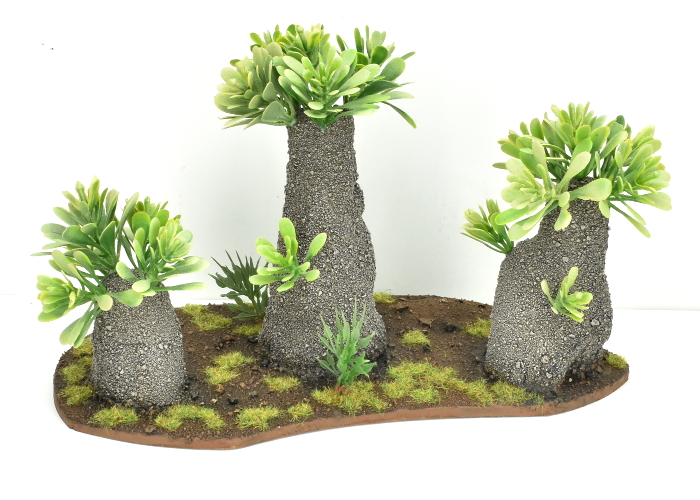
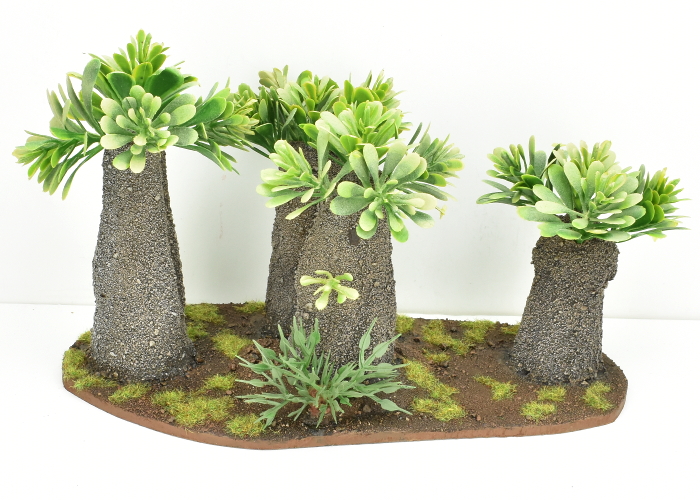
The end result:
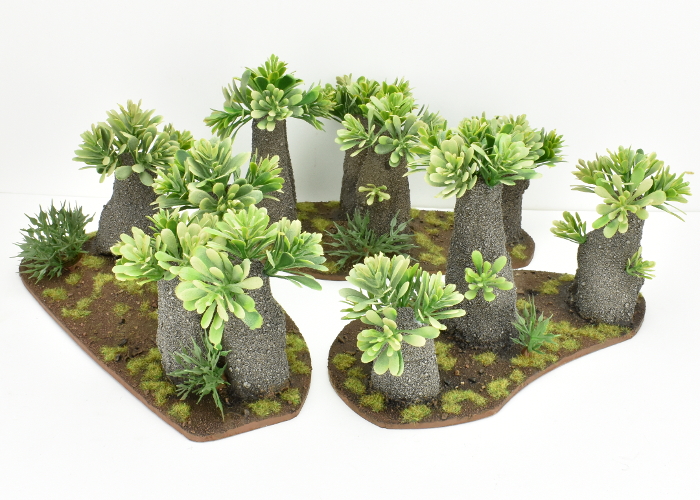
And the forest cluster, all together:
The texture on the trunks winds up a little unusual for bark, but given that they're intended for a sci-fi table it could easily be something other than wood as we know it - maybe some sort of calcium deposit, or a silicon-based extrusion on which the plants grow. It might also give an interesting bark effect to paint over the sand with some crackling, desert-earth texture paint.
If you feel like building your own alien forest of water-retaining doom, be sure to show your results in the
Comm Guild Facebook group!
Meanwhile, don't forget that you can pick up the entire Maelstrom's Edge model range from the webstore
here.
For other building ideas, modeling tutorials, army spotlights and conversion walkthroughs, check out the Hobby section of the Maelstrom's Edge website
here.


