| Author |
Message |
 |
|
|
|
|
Advert
|
Forum adverts like this one are shown to any user who is not logged in. Join us by filling out a tiny 3 field form and you will get your own, free, dakka user account which gives a good range of benefits to you:
- No adverts like this in the forums anymore.
- Times and dates in your local timezone.
- Full tracking of what you have read so you can skip to your first unread post, easily see what has changed since you last logged in, and easily see what is new at a glance.
- Email notifications for threads you want to watch closely.
- Being a part of the oldest wargaming community on the net.
If you are already a member then feel free to login now. |
|
 |
2020/09/23 22:41:35
Subject: Talk to me about print lines and painting
|
|

[DCM]
Dankhold Troggoth
|
I'm seeing some fantastic 28mm miniatures (and even smaller scale stuff) shown off in this forum, and it looks like many of us are using the same "level" of equipment for these prints - namely, a liquid resin desktop printer (Anycubic Photon, Elegoo Mars, Formlabs printer, etc).
But despite doing a lot of printing with this kind of printer, I've rarely felt they were up to printing miniatures for painting, and this is almost solely due to print lines.
I paint using a lot of washes, and these are just tailor-made for exposing print lines. What are you doing in either your print cleanup, or painting prep to mitigate this? I can carefully remove supports and slightly sand flat surfaces, but am not sure if there's something I'm missing which would make my prints more suitable for painting. Like... thick primer??? I'm not even joking  
Please share any tips you have for getting your prints ready to paint!
|
|
|
 |
|
2020/09/23 23:27:41
Subject: Re:Talk to me about print lines and painting
|
|

Inspiring SDF-1 Bridge Officer
|
|
|
This message was edited 1 time. Last update was at 2020/09/23 23:28:55
|
|
|
|
|
2020/09/24 05:49:45
Subject: Talk to me about print lines and painting
|
|
[DCM]
Dankhold Troggoth
|
Your results are so impressive!!! Especially on the smooth curved surfaces like shoulder pads, I can't believe you're not needing to do anything at all! I've printed some parts to be used as masters for casting and I definitely know the caster cleaned up some things like that. There was even a GW mini that was mass produced with some print lines visible.
I can't tell if you're a magical unicorn or just have your printer dialed in perfectly, but either way I'm considering kidnapping you to do all my printing for me 
|
|
This message was edited 3 times. Last update was at 2020/09/24 06:16:37
|
|
|
|
|
2020/09/24 06:23:32
Subject: Talk to me about print lines and painting
|
|
Inspiring SDF-1 Bridge Officer
|
^^
Before that I'd recommend you to start using Anti Aliasing (most of those are at x4) and Image Blur Pixel if your printer allows for it, as those will definitely help with the layering. Correctly poitioning the thing you're printing on the bed also works really well.
Furthermore, what I've found helps the most is making sure you're printing at the "juuust right" exposition time for your layer height and your resin. if you over expose the layers the stepping is much more evident.
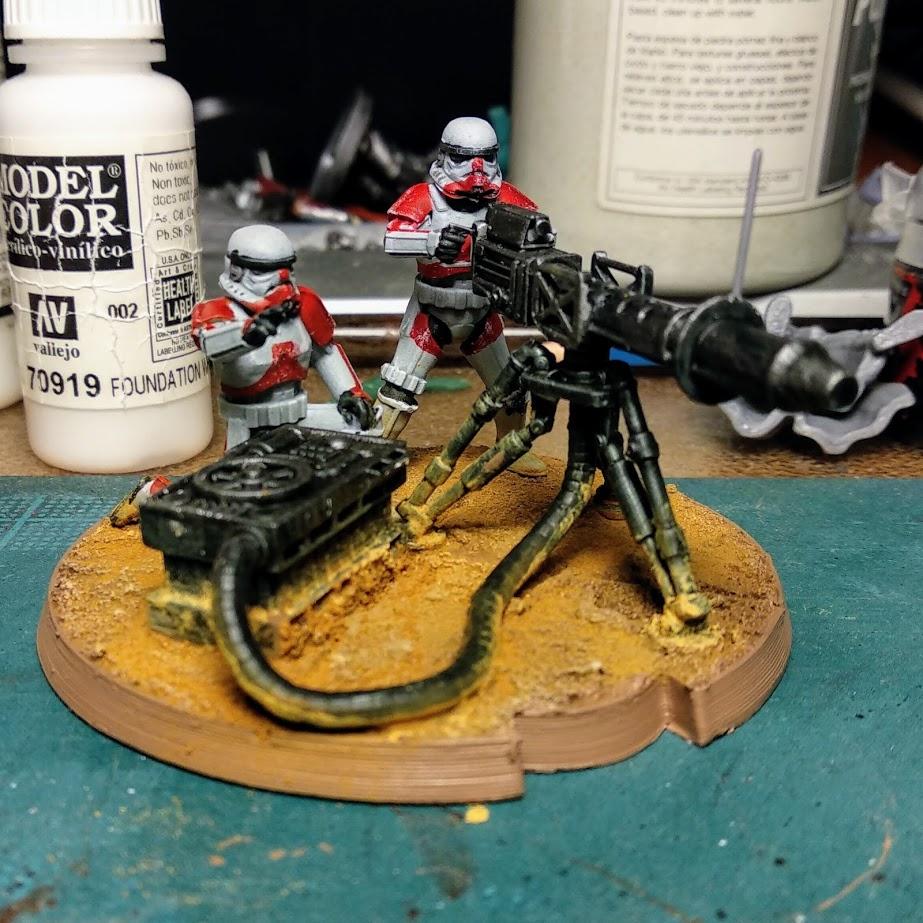
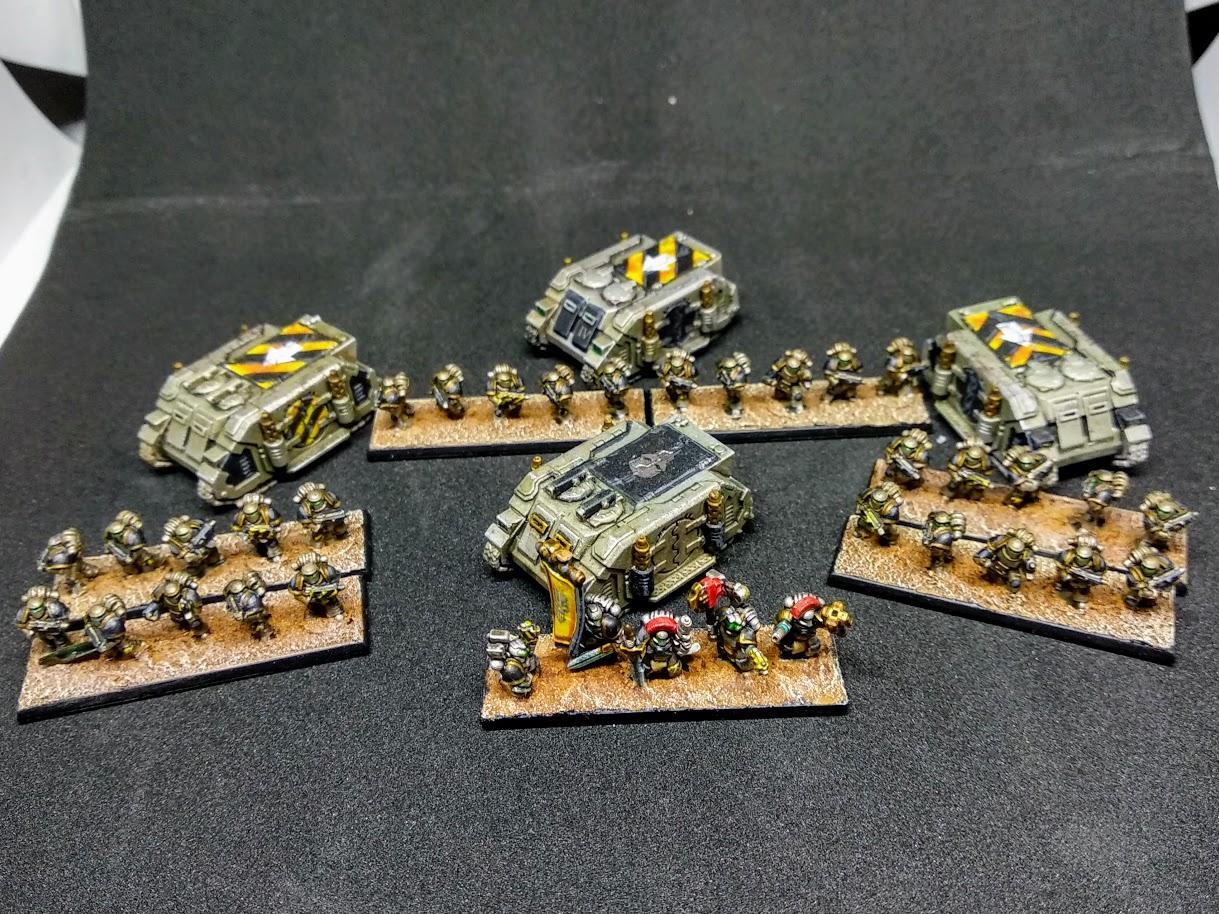
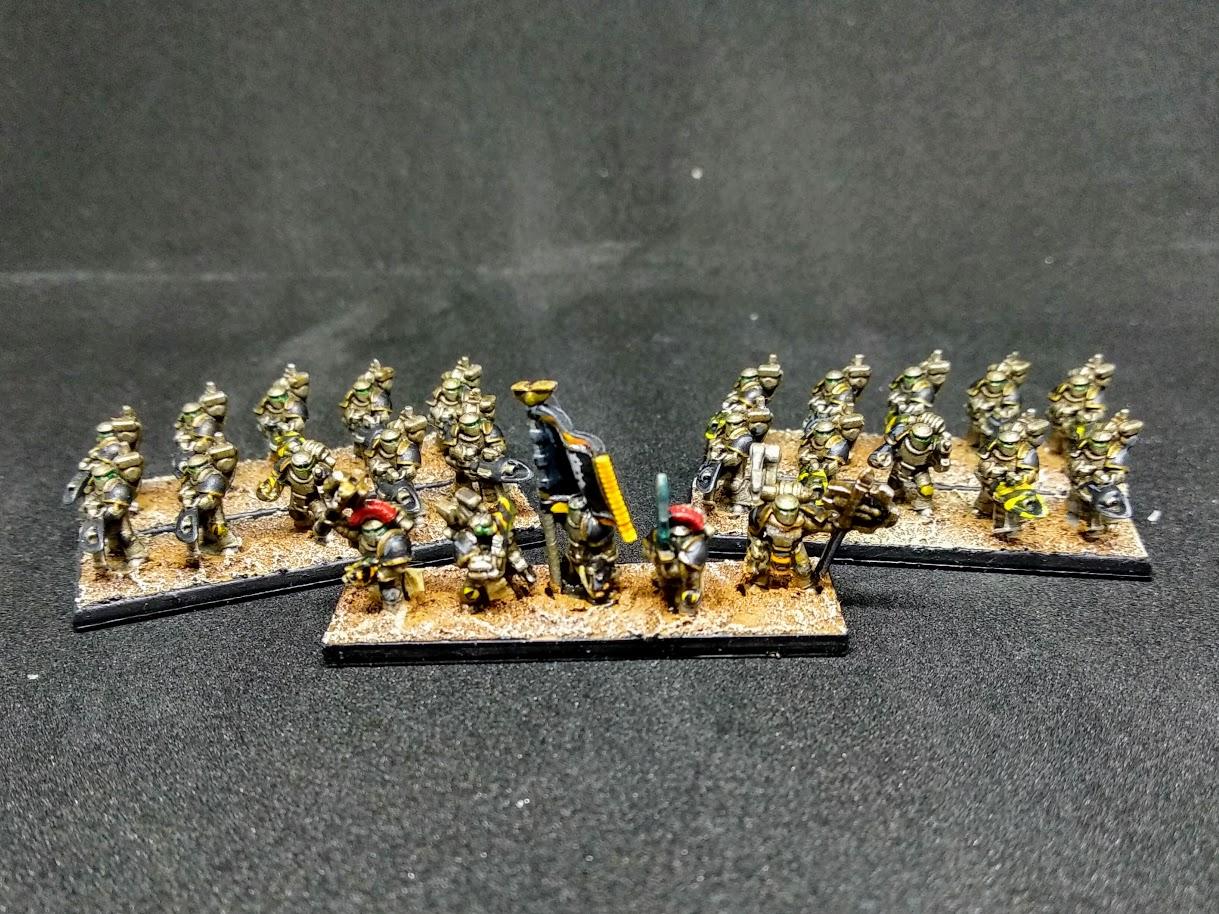
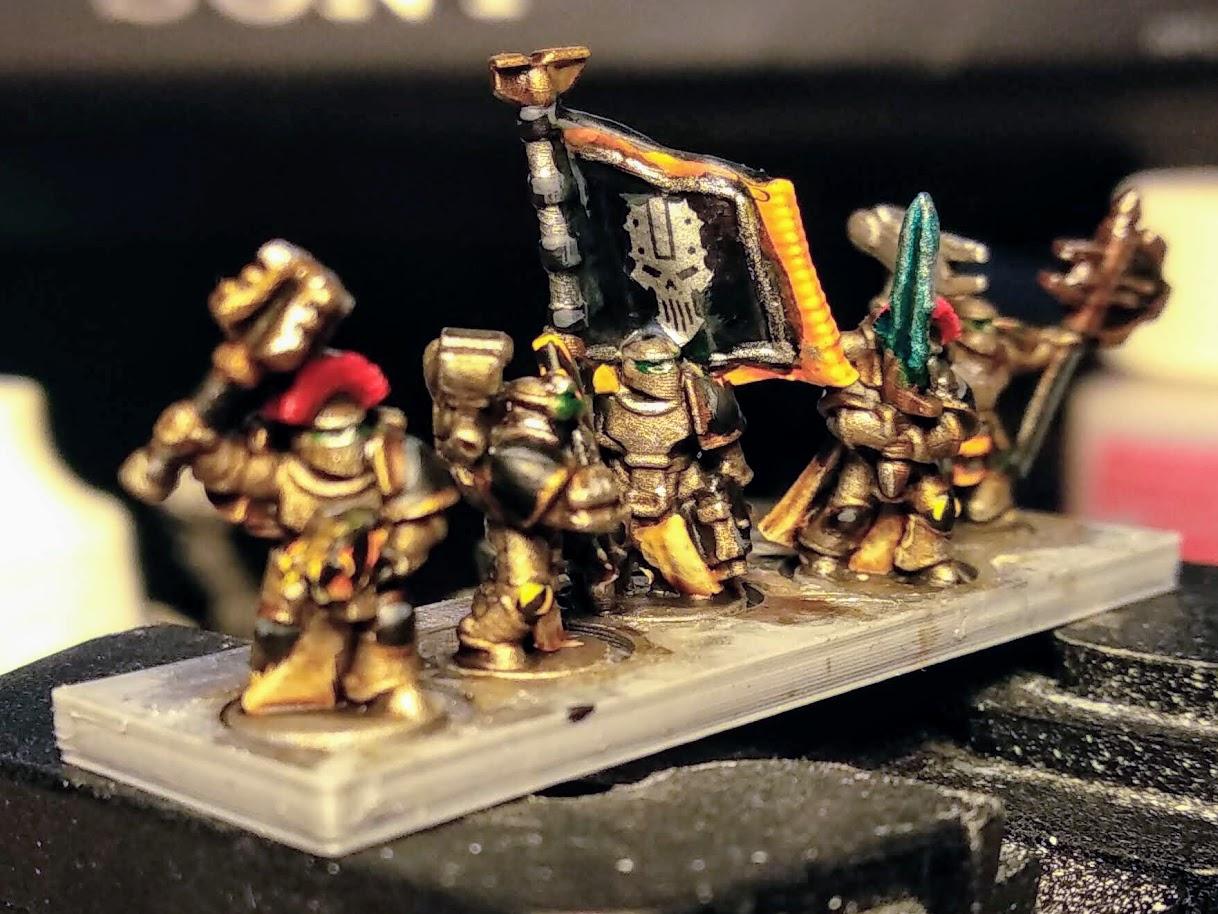
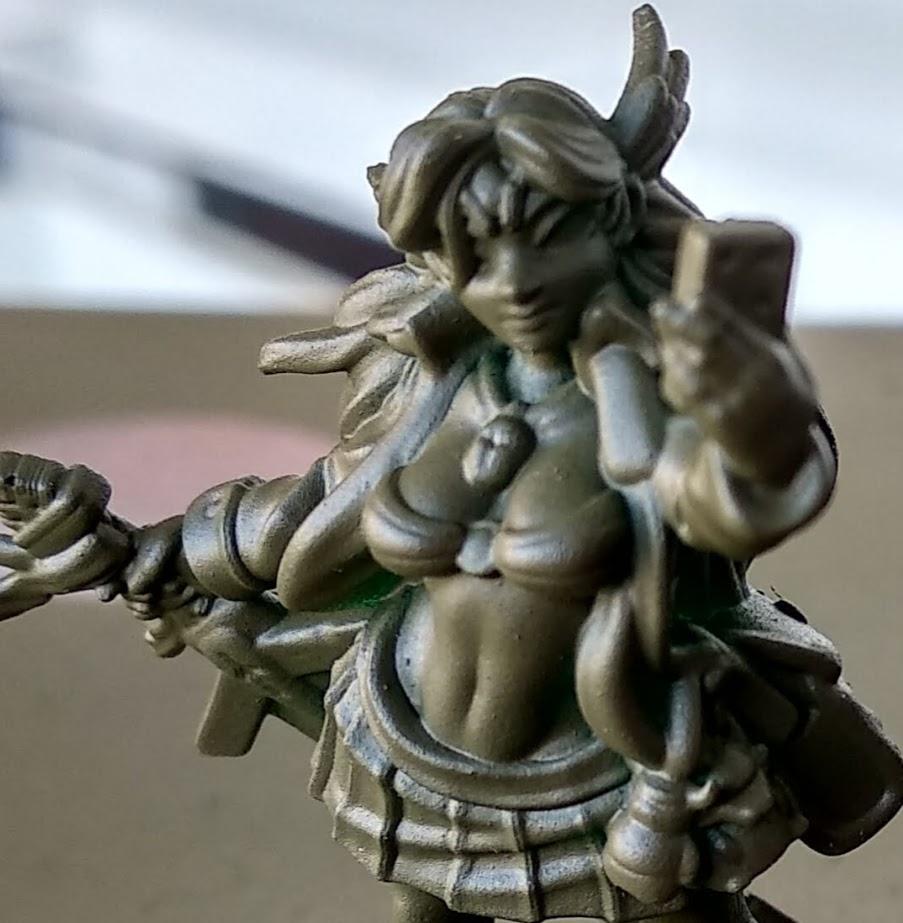
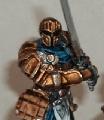
Thats said, were I to use prints as masters for moulding, I'd definitely print at 0.02mm per layer, the difference is important. For example, back in the day I printed the same mini, positioned exactly the same and with the same supports and everything (this was before AA and IBP, though, so today it would be a bit different). They both look perfectly OK, and TBH, once primed they paint almost as well... but if you close up the difference is stark:
0.05mm layers:

0.002 layers:
|
|
This message was edited 3 times. Last update was at 2020/09/24 06:29:29
|
|
|
|
|
2020/09/24 13:41:26
Subject: Talk to me about print lines and painting
|
|

Courageous Questing Knight
|
It certainly depends on your patience and level of expectation. When I print minis that are for photography or close scrutiny I will go with .02 on my Elegoo Mars and I see no layer lines at all. I might hit it with AA at 2-4. If I go to .05 I AA at 4 and under close look you can barely see lines, but it is still near perfect.
When I do big minis and punch it up to .07 or .08 I will AA at 4 or 8, depending on the sculpt. You can again barely see lines and the AA greatly helps. You definitely want to stay in the .02-.04 range if you want your minis to be stellar, but it just takes a bit longer to print than higher levels, of course.
Overall, layer lines should not be any problem.
Albertorius - your print and photography are superb!!
|
|
This message was edited 3 times. Last update was at 2020/09/24 13:43:21
|
|
|
|
|
2020/09/24 14:00:15
Subject: Talk to me about print lines and painting
|
|

Did Fulgrim Just Behead Ferrus?
|
Hardware Studios had some handy tutorials on that: https://hardwarestudios.co/tutorials/
|
|
|
|
|
|
2020/09/25 00:26:02
Subject: Re:Talk to me about print lines and painting
|
|
Last Remaining Whole C'Tan
|
Are you sure your build plate isn't shaking, and that you don't have z-wobble? If the guide screw is not perfectly straight, that would cause problems with visible lines even when the print is a perfect resolution, pose, and so on.
Also, are you sure your print layers are in tune with your hardware? On the Photon, for example, you can do any layer height you want - .025 for example. However, the stepping motors don't support micro-stepping very well, and forcing them to do it - instead of .02 or .03 - will severely hurt print quality.
|
|
This message was edited 1 time. Last update was at 2020/09/25 00:29:11
 lord_blackfang wrote: lord_blackfang wrote:Respect to the guy who subscribed just to post a massive ASCII dong in the chat and immediately get banned.
 Flinty wrote: Flinty wrote:The benefit of slate is that its.actually a.rock with rock like properties. The downside is that it's a rock
|
|
|
|
|
2020/09/28 02:30:12
Subject: Talk to me about print lines and painting
|
|
[DCM]
Dankhold Troggoth
|
You guys definitely have me thinking - thank you for the thoughts and advice!
As a FormLabs user, this feels a bit like PC or Android folks talking to an Apple user. I've never seen an anti-aliasing option in the software I use to print on my From2 (PreForm, by the same company, and of course printing using their resin too  ). Maybe this is an option, but I can't figure out how it would help with hiding layer lines when no matter what the part has to print in layers?
Can someone explain that to me, or link me to a resource that could?
|
|
|
|
|
2020/09/28 02:37:48
Subject: Talk to me about print lines and painting
|
|
Dakka Veteran
Seattle, WA USA
|
 RiTides wrote: RiTides wrote:You guys definitely have me thinking - thank you for the thoughts and advice!
As a FormLabs user, this feels a bit like PC or Android folks talking to an Apple user. I've never seen an anti-aliasing option in the software I use to print on my From2 (PreForm, by the same company, and of course printing using their resin too ). Maybe this is an option, but I can't figure out how it would help with hiding layer lines when no matter what the part has to print in layers?
Can someone explain that to me, or link me to a resource that could?
My understanding is that since the Form printers are laser SLA, anti-aliasing isn't even a thing. AA is essentially a slight blurring of pixels around edges of an image to soften the "boxy" edges on curves (i.e., pixellation). That applies only to SLP and MSLA technologies, you don't AA the laser beam on the SLA printers.
For MSLA/DLP, it helps reduce the appearance of layer lines by basically semi-curing the edges a bit, so they're "softer" looking, if that makes any sense. Kinda like the old movies did a slightly unfocused lens on leading ladies to give them a halo of "beauty".
Edit: Also, think of it this way. For DLP/MSLA, all the image is on a grid of pixels, so you can't avoid slightly more jagged edges. The higher the resolution of the screen, the smaller each pixel is so that helps visible smoothness. SLA you're "drawing" with a laser point, which is itself round, so you can get smoother curves in general (subject to the machining on the movement for the laser).
|
|
This message was edited 1 time. Last update was at 2020/09/28 02:40:02
|
|
|
|
|
2020/09/28 09:04:00
Subject: Talk to me about print lines and painting
|
|
Inspiring SDF-1 Bridge Officer
|
Ah, of course, AA it's only an issue for DLP printers, because we're using screens with pixels, so pixellation occurs.
|
|
|
|
|
2020/09/28 10:02:35
Subject: Talk to me about print lines and painting
|
|
[DCM]
Dankhold Troggoth
|
Ah, that makes sense. Thank you!! I'm going to give a few minis a shot and will report back with some pics and see how my layering looks 
(I generally have used the printer for "work" type projects, although it's my own, but really want to get better at printing and prepping miniatures)
|
|
|
|
|
2020/09/28 16:21:56
Subject: Talk to me about print lines and painting
|
|
Decrepit Dakkanaut
The Battle Barge Buffet Line
|
I can vouch for Albertorius' results as I frequently have pestered him over the years for pics. 
RiTides, can you post close up pics of your own figs that you don't think turned out well due to the layer lines and washes? If you do, please post the settings you used. As Albertorius' pics show, the layer height does matter. I've had decent results with 30 microns on the same printer he uses and think it's a good middle ground for time vs quality.
|
We Munch for Macragge! FOR THE EMPRUH! Cheesesticks and Humus! |
|
|
|
|
2020/09/28 21:41:44
Subject: Re:Talk to me about print lines and painting
|
|
Last Remaining Whole C'Tan
|
I also would like to see pictures - both of the mini, and how it looks in the slicer. Maybe they are peel lines, could be a large non-hollowed part, or a hollowed part with no drain causing suction?
|
lord_blackfang wrote:Respect to the guy who subscribed just to post a massive ASCII dong in the chat and immediately get banned.
Flinty wrote:The benefit of slate is that its.actually a.rock with rock like properties. The downside is that it's a rock
|
|
|
|
|
2020/09/28 22:00:31
Subject: Talk to me about print lines and painting
|
|
[DCM]
Dankhold Troggoth
|
Will do!! I've got a nice grey resin, which I can apply a black wash directly to which should show anything . I'd really like to do a side-by-side, one with light sanding prep and one without. Will have pics of this up by next week!
Unfortunately I don't have any existing poor prints as I moved and anything not worth keeping got thrown out! But my print settings are the same, so I should get similar results (for better or worse).
|
|
|
|
|
2020/09/29 06:19:22
Subject: Talk to me about print lines and painting
|
|
Inspiring SDF-1 Bridge Officer
|
I just got my first resin printer last week (Anycubic Photon), and I'm having a damnable time trying to get any sorts of results beyond sheer frustration.
Those of you getting great results, can you tell me a few things: -
1) how long did it take to start getting passable results?
2) How are you setting/leveling your build plate (I'm tryiing to use the so-called Flint Read leveling)?
3) What resin are you using?
4) What are your exposure settings and layer settings?
5) What slicer software are you using (I'm attempting to learn CHITUBOX - is that good?)
6) Any other tips/tricks for getting a good print for beginners?
|
It never ends well |
|
|
|
|
2020/09/29 07:42:50
Subject: Talk to me about print lines and painting
|
|
[DCM]
Longtime Dakkanaut
|
1) First try on both my printers.
2) empty vat with FEP installed. The paper trick doesn't work as well and is a dumb suggestion many manufacturers use.
3) Phrozen resin as it's cheap and made for the printers I have (Phrozen printers) with manufactures cure settings.
5) I do all my supports/hollowing in Prusaslicer. I have to then slice in Chitu as there's no other option. But chitu is very unstable and has unreliable support generation (didn't use to be this bad). Prusaslicer is very good at supports.
6) Check the build plate. Is to smooth(ish)? It should look like someone quickly ran some coarse sandpaper over it. If it doesn't get some coarse sandpaper and run it over a few times. The resin needs the small grooves to grip into.
|
|
|
|
|
2020/09/29 14:58:25
Subject: Talk to me about print lines and painting
|
|

Leader of the Sept
|
Ooh, interesting about the slicers. Am I right in thinking you use Prusa to generate all the gubbins, save it to a 3mf format or similar then import to chitubix for the final gcode, or whatever it is that the printer actually reads?
|
Please excuse any spelling errors. I use a tablet frequently and software keyboards are a pain!
 Terranwing - w3;d1;l1 Terranwing - w3;d1;l1
 51st Dunedinw2;d0;l0 51st Dunedinw2;d0;l0
 Cadre Coronal Afterglow w1;d0;l0 Cadre Coronal Afterglow w1;d0;l0 |
|
|
|
|
2020/09/29 14:59:36
Subject: Talk to me about print lines and painting
|
|
Decrepit Dakkanaut
The Battle Barge Buffet Line
|
 Stormonu wrote: Stormonu wrote:I just got my first resin printer last week (Anycubic Photon), and I'm having a damnable time trying to get any sorts of results beyond sheer frustration.
Those of you getting great results, can you tell me a few things: -
1) how long did it take to start getting passable results?
2) How are you setting/leveling your build plate (I'm tryiing to use the so-called Flint Read leveling)?
3) What resin are you using?
4) What are your exposure settings and layer settings?
5) What slicer software are you using (I'm attempting to learn CHITUBOX - is that good?)
6) Any other tips/tricks for getting a good print for beginners?
1) Second print. I used overaggressive support settings and less than optimal model orientation and got the first ever U.S.S. Cactus of the venerable Plucked Chicken class.
2) The paper method. I've never had a failure due to leveling and only relevel when I need to clean the vat.
3) Elegoo Grey. Even though I ordered the ABS-like, I didn't actually get that and instead got the older version.
4) Depends on the printer and layer settings. I typically print my figs at 30 microns and 6.5 seconds on the original Elegoo Mars.
5) Chitubox. I've experimented with prusaslicer autosupports and it worked well enough on 75% of the model (both my marines had a misprinted/missing foot and calf). You still need to double check and make sure parts are properly supported IMO but maybe I got unlucky in my only attempt with it. If I'm in a rush, I plan on autosupporting in prusa and then quickly manually tweaking in chitubox just because I'm familiar with the latter.
6) Don't get discouraged; 3d printing is more effort than I unrealistically expected but worth it for alot (but not all) situations. Learn to place custom supports and tweak the settings. I use the 3dprinting pro style very thin light supports that just basically peel off the model after a hot water rinse in high detail areas. I still manually clip off the medium and heavy supports.
|
|
This message was edited 1 time. Last update was at 2020/09/29 15:01:20
We Munch for Macragge! FOR THE EMPRUH! Cheesesticks and Humus! |
|
|
|
|
2020/09/29 15:20:14
Subject: Talk to me about print lines and painting
|
|
Courageous Questing Knight
|
I use all types of resins, but generally find them all using about the same exposure. I will print from .03 to .06 layers for minis and use a 60 second first layers and then 6-8 seconds, depending on the layer thickness - the thicker the layer, I will add a second or 2.
I always use the paper to level and never have a problem. I did try to do it with the vat and FEP installed, but found the build plate twists slightly and it was difficult to see it and get it aligned (squared up) before tightening - also, I was afraid the build plate getting flattened and shifted might scratch the film. The paper works and allows me to re-level without having to clean out the vat (just remove it), so I will stick with paper.
ChiTuBox? I do love it, but have found all versions after 1.5 have been unstable when it comes to supports - sometimes it will crash. So, if when using the latest (1.6.4, I think) and I get a crash, I will re-open in 1.5 and finish. Sure, means a bit more saving before going to the support UI, but not so bad and does not happen very often. Once you get your supports dialed in as far as percentage of coverage, top and bottom points, I think they work perfectly - just need to make sure all islands and low spots are covered. For most minis I will always auto-support all with thin and then manually add some medium supports at stress/critical points. On large minis I have used all medium, but find they leave a more noticeable blemish, so I have learned to use them sparingly or just on bottom areas you will not readily see.
A few things I have found regarding using the AA:
- it greatly increases the file size
- If using a thin layer setting, do not use AA at all, as it will soften some of the crisp details
- I will never go above 4 for even really large minis, as i do not want to blur any details - really depends on the layer you use. If you are in such a hurry to have your prints done and you set a thicker layer and need to use high AA to smooth the lines, then you are not really expecting to get the best quality your printer can produce, so if you are satisfied with the result, that is all that matters.
- I did a test when I first got my Mars and printed one mini at .03 layers w/ no AA, one at .05 w/ 2 AA and one at .05 w/ 8 AA. The .03 obviously came out the best, but the difference between the two .05 were pretty significant. The 8 AA made the mini a bit mushy.
- I will use 8 AA on pieces I print that are not very detailed or large so I can push the layers up to .08 or .1 - It does work, but just be aware when using for smaller detailed minis.
|
|
This message was edited 1 time. Last update was at 2020/09/29 15:29:26
|
|
|
|
|
2020/09/29 23:10:02
Subject: Talk to me about print lines and painting
|
|
[DCM]
Longtime Dakkanaut
|
Flinty wrote:Ooh, interesting about the slicers. Am I right in thinking you use Prusa to generate all the gubbins, save it to a 3mf format or similar then import to chitubix for the final gcode, or whatever it is that the printer actually reads?
I added prusa's SLA printer. It's a tad larger then my two printers plates but not by much. When you switch to the sla printer the options of the slicer change so this is needed. I add the supports/hollow etc. Then up in the file menu is export->As STL with Supports. The I drop the exported STL into chitu and slice.
|
|
This message was edited 1 time. Last update was at 2020/09/29 23:10:28
|
|
|
|
|
2020/10/07 16:24:13
Subject: Talk to me about print lines and painting
|
|
Courageous Questing Knight
|
 warboss wrote: warboss wrote:
1) Second print. I used overaggressive support settings and less than optimal model orientation and got the first ever U.S.S. Cactus of the venerable Plucked Chicken class.
LOL ...that really is funny - I missed this the first time I read it!!!!
|
|
This message was edited 1 time. Last update was at 2020/10/07 16:24:33
|
|
|
|
|
2020/10/07 20:23:40
Subject: Talk to me about print lines and painting
|
|
Decrepit Dakkanaut
The Battle Barge Buffet Line
|
 MDSW wrote: MDSW wrote: warboss wrote:
1) Second print. I used overaggressive support settings and less than optimal model orientation and got the first ever U.S.S. Cactus of the venerable Plucked Chicken class.
LOL ...that really is funny - I missed this the first time I read it!!!!
Yeah, it's an interesting first print run result and one I don't mind sharing if it helps others feel better about their own results. I figured I had absorbed alot of useful info from watching dozens of hours of youtube content teaching about it before getting my printer but nothing beats actual practice.
|
We Munch for Macragge! FOR THE EMPRUH! Cheesesticks and Humus! |
|
|
|
|
2020/10/09 18:48:38
Subject: Talk to me about print lines and painting
|
|
Courageous Questing Knight
|
That happens to all of us. The best advice on the support settings is the depth and format of the top to minimize the attachment to your mini, but still provide structure so it all prints properly. I have them set now to where I have them practically fall off with minimal blemishes. I use heavy light and a few medium, just to add some strength.
|
|
|
|
|
|
|
|