| Author |
Message |
 |
|
|
|
|
Advert
|
Forum adverts like this one are shown to any user who is not logged in. Join us by filling out a tiny 3 field form and you will get your own, free, dakka user account which gives a good range of benefits to you:
- No adverts like this in the forums anymore.
- Times and dates in your local timezone.
- Full tracking of what you have read so you can skip to your first unread post, easily see what has changed since you last logged in, and easily see what is new at a glance.
- Email notifications for threads you want to watch closely.
- Being a part of the oldest wargaming community on the net.
If you are already a member then feel free to login now. |
|
 |
2017/09/07 00:15:46
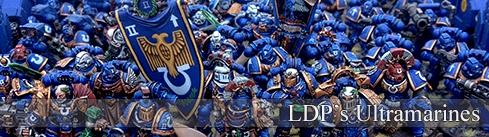
Subject: Blood Angels Army Project (pic carpet bombing)
|
|

Unstoppable Bloodthirster of Khorne
|
Gorgeous weathering on these vehicles.
|
|
|
|
 |
|
2017/09/18 17:30:20
Subject: Blood Angels Army Project (pic carpet bombing)
|
|

Homicidal Veteran Blood Angel Assault Marine
|
Thanks, mate!
It's been a while and didn't manage to get much painting time in the past few weeks. but over the past two weekends I managed to finish up the two Deimoses, and the Xiphon is 99% done, needing just some lenses painted in.
In the end I didn't go full-out with the weathering powders on the deimoses as i wanted them to be playable without leaving powder marks every time you set it down. So they received a big coat of varnish to seal in the powders, but that turned them really a lot darker than intended. I guess I should have gone with a very, very light mix of powder to keep the medium brown mud look after the varnish. On the other hand, while it is a tad dark right now, it doesn't look too bad, looks sufficently muddy, and it doesn't rub of when you pick up the model.
On the Xiphon, I saw I'll need to go back on some decals and stab them profusely with a needs and try to rub in some gloss varnish to get rid of the film shine that is present in some lighting angles. Mainly the pilot's name on the front section, and the signs on the left hand side just behind the cockpit.
Whadayathink, guys?


More photos in high-res:
https://imgur.com/a/L0ACo
https://imgur.com/a/RwlwZ
Enjoy!
|
|
|
|
|
|
2017/09/18 17:31:02
Subject: Blood Angels Army Project (pic carpet bombing)
|
|

Legendary Master of the Chapter
|
Slick work man.
love the interceptors green grey missiles.
|
 Unit1126PLL wrote: Unit1126PLL wrote: Scott-S6 wrote: Scott-S6 wrote:And yet another thread is hijacked for Unit to ask for the same advice, receive the same answers and make the same excuses.
Oh my god I'm becoming martel.
Send help!
|
|
|
|
|
2017/09/21 17:44:51
Subject: Blood Angels Army Project (pic carpet bombing)
|
|
Homicidal Veteran Blood Angel Assault Marine
|
Thanks! Yeah, for a while I was doubting what colour to do that rotary launcher, but in the end I decided to do it in that green I've been using as a tertiary colour on a lot of models. It came out better than expected.
|
|
|
|
|
|
2017/09/22 13:31:57
Subject: Re:Blood Angels Army Project (pic carpet bombing)
|
|

Stalwart Space Marine
|
Some beautifully converted and painted minis on here mate! How did I miss this blog for so long? Subbed for more, inspirational stuff you've got on here 
|
I'm doing my own thing because it's fun. And it takes longer, which means more entertainment value for my cash. So there  |
|
|
|
|
2017/09/24 13:41:55
Subject: Blood Angels Army Project (pic carpet bombing)
|
|
Homicidal Veteran Blood Angel Assault Marine
|
Aaaalrighty then. And with the blink of an eye, more than a month has passed. I haven't completely been sitting still, well, almost. I've been staring at minis a lot.
The Derereredeo has vexed me as on how to magnetize the arms with a decent transportability in mind, and still have a good-looking pose. The whole arm setup is rather complex, yet easy to set up, but it's the ammo feeds that further complicate matters. In the end I went with a standard pose setup as it still is a cool pose, but it won't compromise structural stability. As for now the 'armpit/shoulder' part is still separate as it will be easier to paint, but once done, I'll glue the gun assembly into the armpit, and the whole gun arm(s) will be easy to remove and swap.

The tempest is stuck together. And whilst it does come equipped with a fully detailed cockpit and pilot, I decided to leave those out. I didn't feel like scratch-building a hinge mechanism for that small canopy, so I just glued it it on and called it done.
the gun and bumper will be painted separately, and I swapped out the standard wing-tip antenna with some copper detailing as I think it looks neater. The resin Forgeworld antennae were a bit to thick, and not 100% straight, and on antenna like that I though it crucial to have a clean look. Even when straightened out manually, the resin bits would never be 100% straight, and very prone to breaking off.
I also lost a lot of time coming up with a paint scheme for the tempest, but I'm not quite done with pondering... I thought to perhaps add a straight black bar length-wise, as wide as the cockpit, and smaller length-wise stripes on the wings. Or perhaps a broad, diagonal stripe across the whole of the model, much like this:
http://www.aerospaceweb.org/aircraft/fighter/draken/draken_02.jpg
What do you think? Any alternative ideas?

And then... I decided it was time. After a lot of thinking and brainstorming I couldn't come up with a definitive plan of approach, or even design, for the reworked Storm Talon, so I decided the best way would be to glue one together, and then attack it with a saw and a bitz box. And then the whole road ahead became clear.
Larger wings, canards, a smaller gun turret, less building-sized weapon sponsons, and an overall stretched look. I didn't feel like meticulously planning the conversion, and I wanted to use as many plastic components as possible, as they are very easy to adapt and glue. I felt that to have as much structural strength as possible, that the melted bond of plastic cement would be the way to go. So the main conversion will be done by hacking, cutting, and sanding various plastic bits, and I'll use plasticard and greenstuff to fill in any structural short-comings.
What do you think so far? Any thoughts or suggestions?

|
|
This message was edited 2 times. Last update was at 2017/11/05 17:37:56
|
|
|
|
|
2017/11/05 16:01:22
Subject: Blood Angels Army Project (pic carpet bombing)
|
|
Homicidal Veteran Blood Angel Assault Marine
|
Aaaalrighty then. And with the blink of an eye, more than a month has passed. I haven't completely been sitting still, well, almost. I've been staring at minis a lot.
The Derereredeo has vexed me as on how to magnetize the arms with a decent transportability in mind, and still have a good-looking pose. The whole arm setup rather complex, yet easy to set up, but it's the ammo feeds that further complicate matters. In the end I went with a standard pose setup as it still is a cool pose, but it won't compromise structural stability. As for the now the 'armpit/shoulder' part is still separate as it will be easier to paint, but once done, I'll glue the gun assembly into the armpit, and the whole gun arm(s) will be easy to remove and swap.
The tempest is stuck together. And whilst it does come equipped with a fully detailed cockpit and pilot, I decided to leave those out. I didn't feel like scratch-building a hinge mechanism for that small canopy, so I just glued it it on and called it done.
the gun and bumper will be painted separately, and I swapped out the standard wing-tip antenna with some copper detailing as I think it looks neater. The resin Forgeworld antennae were a bit to thick, and not 100% straight, and on antenna like that I though it crucial to have a clean look. Even when straightened out manually, the resin bits would never be 100% straight, and very prone to breaking off.
I also lost a lot of time coming up with a paint scheme for the tempest, but I'm not quite done with pondering... I thought to perhaps add a straight black bar length-wise, as wide as the cockpit, and smaller length-wise stripes on the wings. Or perhaps a broad, diagonal stripe across the whole of the model, much like this: [ATTACH=CONFIG]61506[/ATTACH]
What do you think? Any alternative ideas?
And then... I decided it was time. After a lot of thinking and brainstorming I couldn't come up with a definitive plan of approach, or even design, for the reworked Storm Talon, so I deiced the best way would be to glue one together, and then attack it with a saw and a bitz box. And then the whole road ahead became clear.
Larger wings, canards, a smaller gun turret, less building-sized weapon sponsons, and an overall stretched look. I didn't feel like meticulously planning the conversion, and I wanted to use as many plastic components as possible, as they are very easy to adapt and glue. I felt that to have as much structural strength as possible, that the melted bond of plastic cement would be the way to go. So the main conversion will be done by hacking, cutting, and sanding various plastic bits, and I'll use plasticard and greenstuff to fill in any structural short-comings.
What do you think so far? Any thoughts or suggestions?
|
|
This message was edited 1 time. Last update was at 2017/11/05 17:10:00
|
|
|
|
|
2017/11/05 16:29:11
Subject: Blood Angels Army Project (pic carpet bombing)
|
|
Decrepit Dakkanaut
|
Very cool stuff!
|
|
|
|
|
|
2017/11/05 17:12:14
Subject: Blood Angels Army Project (pic carpet bombing)
|
|
Homicidal Veteran Blood Angel Assault Marine
|
Woops, double post...
Cheers, Gitsplitta!
|
|
This message was edited 1 time. Last update was at 2017/11/05 17:37:10
|
|
|
|
|
2017/11/06 04:01:51
Subject: Blood Angels Army Project (pic carpet bombing)
|
|
Gargantuan Great Squiggoth
|
Fantastic work sir. The paint on the flyer and rhino are exceptional. Love the latest jobs, nice work. Worth looking at twice.
|
|
|
|
|
|
2017/11/07 04:00:35
Subject: Blood Angels Army Project (pic carpet bombing)
|
|
Ragin' Ork Dreadnought
|
I really like the sleek, rounded shape that Stormtalon is taking on. The chin gun is already an improvement. Interested in where you go from here.
|
|
|
|
|
|
2017/11/08 20:31:11
Subject: Blood Angels Army Project (pic carpet bombing)
|
|
Homicidal Veteran Blood Angel Assault Marine
|
Cheers, guys! I'm hoping to get some work done over the weekend.
The chin turret is the assault cannon + brace from a land speeder, with an extra Land Speeder auto cannon. I might need to find a way to add pitch to the assembly, as the standard mount of the Storm Talon only has jaw.
And I also think I need to come up with a tail thruster, at least one that points down.
|
|
|
|
|
|
2017/11/12 15:39:31
Subject: Blood Angels Army Project (pic carpet bombing)
|
|
Homicidal Veteran Blood Angel Assault Marine
|
Under construction!
Progress from the weekend. Took my time to undercoat the speeder and the dread. Lots of nooks & crannies, so lots of little sessions with drying time in between. Also, an airbrush booth cannot get rid of the stench of a spray can thàt easily so I preferred to spend the drying time elsewhere. 
But the better part of hobby time was spent on the Storm Talon MKII. As foreseen, going into the build without a plan means I'll have to McGyver my way through every unforeseen issue that pops up.
I glued in some extra little bits in the back hole in order to have some extra support for the tail, but I probably should have waited with gluing the tail on until the nose section was finished.
Not that it's a dramatic issue, but I'm thinking that that nose would be a bit easier to shape without the tail attached, in terms of holding the model my hand for sanding and cutting. I also wondered if it would be best to blend the nose to the fuselage using plasticard for a cleaner look, but I know myself. Accurate measurements of such a complex shape would be subject to complex quantum physics between measuring, cutting, and fitting. So greenstuff it is! Came out better than I feared though. needs some sanding when dry but I feel it will look OK.
I also glued in some extra support struts in the tail section using bits of sprue, and I subsequently found out that the wings needed to be mounted just a tad higher in order to properly be clear of the engine nozzles. So more sprue was cut up and glued into place. This also means that I'll have to do more work than expected to the dorsal area.
But I feel the McGyver is strong with this build, so full steam ahead! (Although I doubt I'll get much done during the week...)


|
|
|
|
|
|
2017/12/26 14:33:45
Subject: Blood Angels Army Project (pic carpet bombing)
|
|
Homicidal Veteran Blood Angel Assault Marine
|
Alrighty, a month and a half onwards and not that much has been done. Personal life and work life have been rather busy and exhausting but I did squeeze in the odd hobby hour here and there.
Also bought myself a Nikob D3400 and a tripod on Black Friday at a rather ridiculous discount. It's been well over a decade since I worked with RAW (.nef actually) image formats so that needs some tweaking here and there, especially with presentation photos.
As you can see below, lots of skill to (re-)learn.

And here's the main progress of the past weeks, the Storm Talon reborn. A lot of time was spent pondering and contemplating, seeing as this whole build is without plan. But bit by bit it's taking shape.
I like how the nose turned out, looking much better than I feared and the knight bit blended in nicely with the body. I also have the gun assembly figured out, as well as a separate sighting system that will be installed just below the beak/nose, with the gun system sitting below it on it's 'standard' connecting point.
I though long and hard on how to install the canards but in the end I just took a saw to those side bits so I can slide them in neatly. I'm wondering whether to blend them in nicely to the body (extend it to the hull using plasticard, or leave them somewhat separated as-is. What do you guys think?
The wings, I'm honestly not too sure about those. If I had all the time and skill in the world, I would completely reconstruct the sucker with the wings more in the middle, and a complex engine-rotating system a little more aft, but since I decided this would be a minimum-effort project, I'm going to row with the oars that I have. And actually I consider this project to be a warm-up session for the Stormhawk rebuild I've got lined up as well, so I don't mind the more wild exploratory kitbashing. With the delta wing this far aft, and the rotating engines in their default location, the whole thing does give off a kind of ornithopter vibe, which suits the Storm Talon I think.
At the very least, this rebuild has a more plausible wing surface area where air could actually flow over and under instead of that utter brick-like design of the regular storm talon (especially that silly turret and those ridiculously oversized weapon pods).
I reconstructed the wings of a Stormraven to have it's missile pods on the wing tips, and had to improvise the missiles-, and exhausts themselves, kitbashed from another kit as I didn't have the Stormraven's original missiles anymore. Tempting as it was, I decided not to go for a complicated, modular, and magnetized setup, so the build will be missiles only, no Heavy bolters or lascannons.
Thoughts?

|
|
|
|
|
|
2017/12/29 13:56:11
Subject: Blood Angels Army Project (pic carpet bombing)
|
|
Homicidal Veteran Blood Angel Assault Marine
|
Hmmm, looking at the model right now makes me think I can probably move the main wings up and forward a bit, seeing as those canards will be pumping furiously all the time. I can relocate the wings until they're touching that little backwards scoop on the top. That could balance out the craft quite a lot I think.
Green stuff needs drying now.
Built up the back/shoulder a bit using two parts of a sprue, and blended in with some green stuff. The wing is just a tad too low now. Although the wing is not blocking the engine nozzle, I would like to have just a tad more clearance to allow for a better air flow over and under the wings. I'll use the tabs I cut off of the large Stormraven wings. Perfect thickness, and I can continue to build up the wing using plastics only so that the meld bond of the plastic cement will ensure a solid structure.
Oh, and as you can see I gave the chevron masking an attempt on the Land Speeder Tempest. Not 100% tight but not too shabby nonetheless. I think it's reasonably accurate for painting.

|
|
|
|
|
|
2018/01/02 01:17:30
Subject: Blood Angels Army Project (pic carpet bombing)
|
|
Homicidal Veteran Blood Angel Assault Marine
|
Happy New Year, all!
A preview of the Storm Talon, and the Derededededeo also received his masking. 

|
|
|
|
|
|
2018/01/02 14:04:29
Subject: Blood Angels Army Project (pic carpet bombing)
|
|
Decrepit Dakkanaut
|
Very promising projects Meph. Looking forward to seeing them come to fruition.
|
|
|
|
|
|
2018/01/02 17:58:23
Subject: Blood Angels Army Project (pic carpet bombing)
|
|
Homicidal Veteran Blood Angel Assault Marine
|
Cheers! Same here actually The stormtalon design is growing on me. Placing the wings a bit more forward and up really helps to balance the look. I still have to build up the 'spine' between the wings, and I think that will balance out the look even better.
|
|
|
|
|
|
2018/01/02 18:21:34
Subject: Blood Angels Army Project (pic carpet bombing)
|
|
Blood Angel Neophyte Undergoing Surgeries
|
Just found this thread and I got to say as a pretty new player/painter (I've been play for about 3 years on and off) but am a amazed by the level of effort and dedication put into your Army. The first army I played was tau but I shared them with my brother sooo I could not really decide what paint jobs we did. I loved the fasight enclaves but my brother loved the classic tau paint scheme. So we ended up with a squad of farsight enclaves fire Warriors and the rest of the army was the yellow orange ochre of the tau. I then realized that I would find the exact opposite army to the tau that would work with the red paint scheme. So I picked blood angels and form then on I was hooked. I'm ranting now but I just want to say that your army is (well I can't think of a better word so..) beautiful. Sorry for ranting bu I love blood angles
|
|
This message was edited 1 time. Last update was at 2018/01/02 18:22:32
Praise the holy emperor. Burn the heretics.
~2500 
~ 2000 
[CENTER] [/CENTER [/CENTER
 |
|
|
|
|
2018/01/02 18:59:25
Subject: Blood Angels Army Project (pic carpet bombing)
|
|
Homicidal Veteran Blood Angel Assault Marine
|
Red wunz are the bestest! Welcome to the thread and thanks for the kind words. Don't hesitate to ask if you're wondering about a particular model or technique. I'd be more than happy to oblige.
Oh, and if you put the # of posts per page on max, the thread is only 34 pages.
|
|
|
|
|
|
2018/01/02 20:52:05
Subject: Blood Angels Army Project (pic carpet bombing)
|
|
Blood Angel Neophyte Undergoing Surgeries
|
Just wondering how you got the crisp red? I think you said you used an airbrush but I don't have one. Should I buy one? Beacuse currently no matter how much I thin my paints my base coat looks chalky. If you could help that would be amazing.
Thanks
|
|
This message was edited 1 time. Last update was at 2018/01/02 21:59:00
Praise the holy emperor. Burn the heretics.
~2500
~ 2000
[CENTER][/CENTER
|
|
|
|
|
2018/01/02 21:24:20
Subject: Blood Angels Army Project (pic carpet bombing)
|
|
Homicidal Veteran Blood Angel Assault Marine
|
Well, should you? Hmmm, if you can spare the modest funds, definitely go for it. It's a good investment, will save you a lot of time, and give you a bosst in quality as the airbrushed base coats just look better than hand-brushed ones. I highly recommend a starting kit like this: https://www.ebay.com/itm/2-3-5-Gravity-Dual-Action-AIRBRUSH-KIT-Tank-Air-Compressor-Hobby-Cake-Tattoo/391333201894?epid=1834367119&hash=item5b1d46c7e6:g:AD4AAOSwoydWryb3
I got a similar kit from Germany almost 10 years ago with the exact same compressor, and I'm still using it. A few years ago I upgraded to a better airbrush, but s starter kit like this is a great start. Especially if it's mainly for basecoating and applying washes.
(Oh, and buy some empty airbrush paint jars, and a big bottle of thinner and cleaner. Do not buy the mini bottles for those two as you use them a lot.)
As for the red, the exact names elude me atm, I use a +- 1:1 mix of the darker, almost terracotta GW red and a light red as base coat, and I enrich the colour with some thinned dark red wash.
Then, I drybrush highlights with the lighter red, red+ a flat orange, the same flat orange and then Vallejo's Ice Yellow, a very light and flat yellow that GW doesn't hvae. Absolutely brilliant for the last highlights on reds and greens.
But the main trick is that those highlights will have your red look a bit pale, so I give the model another spray wash of the dark red, followed by a coat of thinned red wash as a glaze to deepen the reds again, and it blends the drybrushed highlights together. As a final touch, I gently drybrush the edges with the Ice Yellow again.
Red is notoriously difficult to highlight as it tends to pink up or become chalky very easily, as you have noticed. Using washes and glazes help bring back the full red colour again.
Somewhere in the thread are a more lengthy and detailed 'step-by-step's on how I paint my models, but building up your colour in layers of highlights-glazes-highlights is the underlying technique I use.
The whole concept of building up layers is what makes the whole difference. Sure, two edge highlights look nice but the pro competition painter apply anywhere between 50-100 incredibly thinned layers to build up highlights, and the effect just shows. Just think of it as building up an illustration in photoshop, or special effects passes in movies, i.e.:base colour, highlights, scratches, grime and rust, lighting passes, etc, etc..
I am a bit too lazy to paint 50+ layers on army models so I applied/developed a technique with very dry drybrushed highlights with washes and glazes in between. I apply anywhere between 4-8 highlights and depending on the desired effect, apply anywhere between 3-6 washes and glazes in between the highlights.
|
|
|
|
|
|
2018/01/02 21:54:28
Subject: Blood Angels Army Project (pic carpet bombing)
|
|
Blood Angel Neophyte Undergoing Surgeries
|
Thanks
Just a question are airbrush compressors loud?
|
|
This message was edited 1 time. Last update was at 2018/01/02 21:56:49
Praise the holy emperor. Burn the heretics.
~2500
~ 2000
[CENTER][/CENTER
|
|
|
|
|
2018/01/03 12:04:13
Subject: Blood Angels Army Project (pic carpet bombing)
|
|
Homicidal Veteran Blood Angel Assault Marine
|
Hmmm, yes.and no. The one from the link (same as I have) is a good deal quieter than a vacuum cleaner or a hair dryer, but I wouldn't classify it as quiet.
Let's say that during the day, with some background noise or general activity in the house it won't bother anyone, and you can easily listen to music or the TV at a normal volume. But at night when everything's quiet, you will hear it outside of a room.
No doubt there are some real quiet compressors out there, but they will be more expensive.
|
|
This message was edited 1 time. Last update was at 2018/01/03 12:04:44
|
|
|
|
|
2018/01/21 14:41:08
Subject: Blood Angels Army Project (pic carpet bombing)
|
|
Homicidal Veteran Blood Angel Assault Marine
|
Some progress from over the past few weeks. Din't have much hobby-time, sadly. But still, I got some stuff done. I've done some more stuff today, but didn't take any pictures yet.
But the progress to far:
-Found sweet and easy way to build up the back spine. I clipped a part from a Valkyrie, and some spure.
-Finally got my head wrapped around the sighting mechanism. It's the lens bit with the two hoops, with the gimbal on the bottom right. Plus greenstuff, plenty of green stuff.
-Also concocted a neat gun assembly.
-Gave the tail a rounded leading edge with some suitably shaped plasticard.
-Built up the 'shoulder' of the wing with greenstuff.
oh, and some gak got red, yo.
 Automatically Appended Next Post:
And the progress of today:
I added a thruster assembly to the tail. It made sense, giving it better maneuverability, both in hover as well as level flight.

|
|
This message was edited 2 times. Last update was at 2018/01/21 17:36:22
|
|
|
|
|
2018/02/10 17:00:17
Subject: Blood Angels Army Project (pic carpet bombing)
|
|
Homicidal Veteran Blood Angel Assault Marine
|
Things are moving along nicely. Despite not having much free time to paint, I did manage to get some stuff done.
The Storm Talon is complete, which came as a small surprise actually. After so much time fiddling with bits, cutting, sanding, etc., it suddenly popped into ready-for-paint status.
I'm currently assembling the pilot to see see if I have to glue in the main cockpit console bore painting or not.
Actually, since the last set of photos I just had to add the canards and my original plan was to extend/blend the canards into the fuselage. But after much staring and contemplating I figured they would look better without the extensions so I just had to slot-, and glue them into place and close the little gaps with some greenstuff. I'm getting eager to give the model its black under coat so it will be easier to see the actual state of the kit-bashing and sculpting.

And the other models have gotten most of their red coats on. I gave them my usual layering of drybrushed highlights, washes, and glazes. I just need to add the lightest highlights with Ice Yellow (VJ), and maybe another glaze. And then it's peelin' time!
I hope there's not too much bleed-in of the red onto the black as I've noticed that some bits of masking tape are not as tight as they used to be. Fingers crossed!

What say you?
|
|
|
|
|
|
2018/02/17 16:54:52
Subject: Blood Angels Army Project (pic carpet bombing)
|
|
Homicidal Veteran Blood Angel Assault Marine
|
Ok, the red's on, and the tape's come off.
It's better than expected as I feared much more leakage under the masking tape. Guess I didn't do such a shoddy job after all. Just some lines need to be cleaned up here and there.
Whaddaythink?

|
|
|
|
|
|
2018/02/17 21:52:56
Subject: Blood Angels Army Project (pic carpet bombing)
|
|
Gargantuan Great Squiggoth
|
Wonderful 10 minutes catching up. Really great work . Love the kitbashing.
|
|
|
|
|
|
2018/02/18 00:45:08
Subject: Blood Angels Army Project (pic carpet bombing)
|
|

Scarred Ultramarine Tyrannic War Veteran
|
Looking great, Meph! Stripes are clean and well applied, and considering that the dread has guns for arms, he's surprisingly dynamic! Eager to see in which direction you face his helm. keep up the characteristically great work.
|
|
|
|
|
|
2018/02/18 11:50:16
Subject: Blood Angels Army Project (pic carpet bombing)
|
|
Homicidal Veteran Blood Angel Assault Marine
|
Cheers, guys!
Yeah, his helm... that will be one of the last pieces that'll be glued into place. It doesn't have thàt much wiggle room in that socket/cowl but I'm curious to see what look it will get as well.
Today I'll clean up the lines and start blacking out the details. Although I do think I first might paint up the missile pods. There's a golden lines masked on the front cowlings and I'm dying to find out how it will look on that black. Automatically Appended Next Post: Some more shots just to show off the masking. ^_^
Also, I did enough work on the missile pods so I could remove the masking tape. Those lines are tight! EvenifIdosaysomyself...


|
|
This message was edited 1 time. Last update was at 2018/02/18 15:05:26
|
|
|
|
|
|
|


 ___________________