| Author |
Message |
 |
|
|
|
|
Advert
|
Forum adverts like this one are shown to any user who is not logged in. Join us by filling out a tiny 3 field form and you will get your own, free, dakka user account which gives a good range of benefits to you:
- No adverts like this in the forums anymore.
- Times and dates in your local timezone.
- Full tracking of what you have read so you can skip to your first unread post, easily see what has changed since you last logged in, and easily see what is new at a glance.
- Email notifications for threads you want to watch closely.
- Being a part of the oldest wargaming community on the net.
If you are already a member then feel free to login now. |
|
 |
2015/08/16 16:24:45
Subject: Re:Homemade multi-level city terrain boards/buildings (8/16 - sign work, marble pillars)
|
|

Dakka Veteran
|
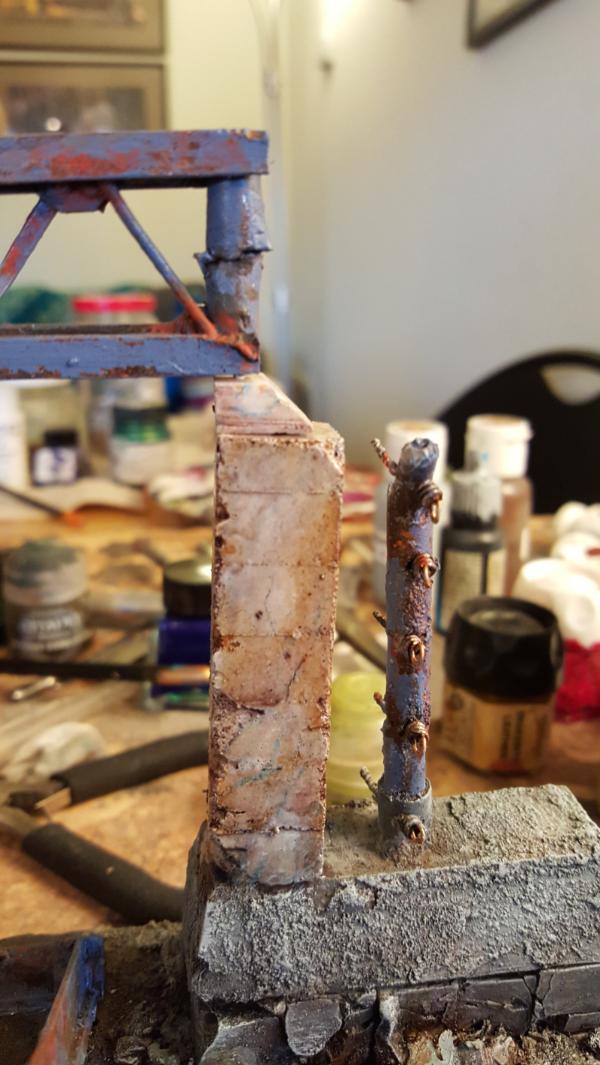
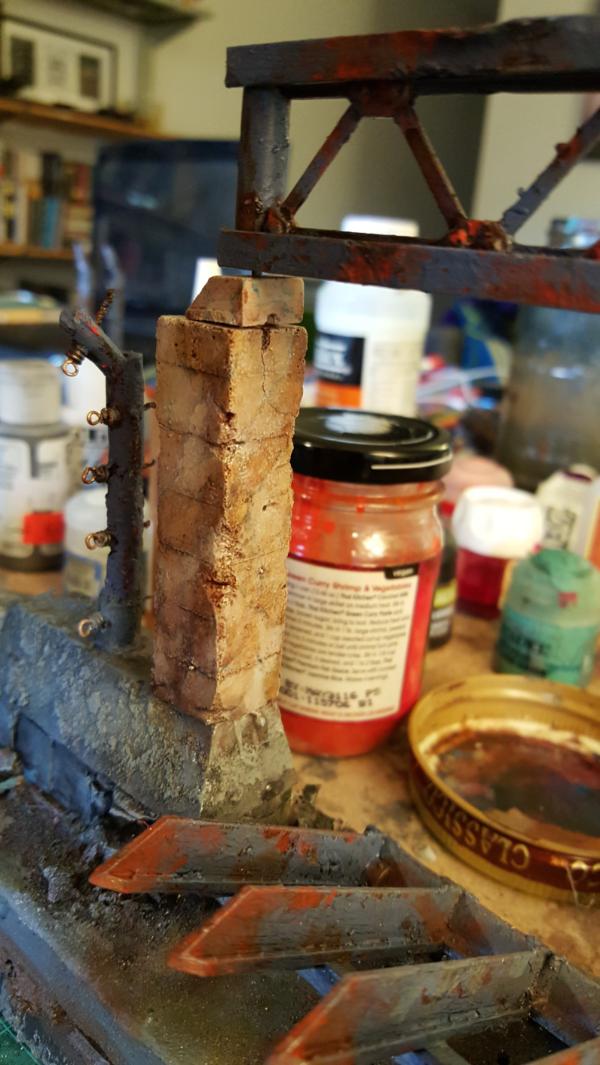
Working on the front sign/marble pillars.
I have to say i dont know what it is but th emarble turned out jus about perfectly, including the vein lines! I'm excited now to paint up more of the marble on the main board again (*and hell maybe even redo some patches)
I think a bit part of it was getting a blue ink that naturally wasnt too deep/opaque. I remember alot of my problems ended up being that I would paint a line that was way too opaque and have to wipe it off, which got the surface damp and thus made subsequent lines spread out and get sadder.

|
|
This message was edited 2 times. Last update was at 2015/08/16 16:27:11
|
|
|
 |
|
2015/08/17 15:56:40
Subject: Homemade multi-level city terrain boards/buildings (8/16 - sign work, marble pillars)
|
|

Avatar of the Bloody-Handed God
Inside your mind, corrupting the pathways
|
That marble looks excellent. With the damage it also looks kind of like a marble facing adhered to a cheaper stone as well which is a great look 
|
|
|
|
|
|
2015/08/17 19:01:41
Subject: Re:Homemade multi-level city terrain boards/buildings (8/16 - sign work, marble pillars)
|
|
Dakka Veteran
|
|
|
This message was edited 1 time. Last update was at 2015/08/17 19:01:56
|
|
|
|
|
2015/08/17 19:38:52
Subject: Homemade multi-level city terrain boards/buildings (8/17 - 2 tone beetle genestealer)
|
|
Speed Drybrushing
|
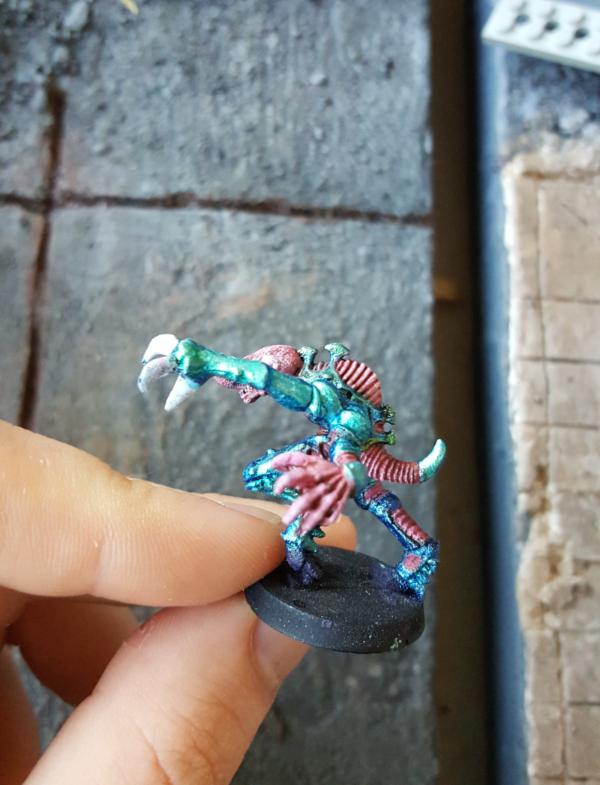
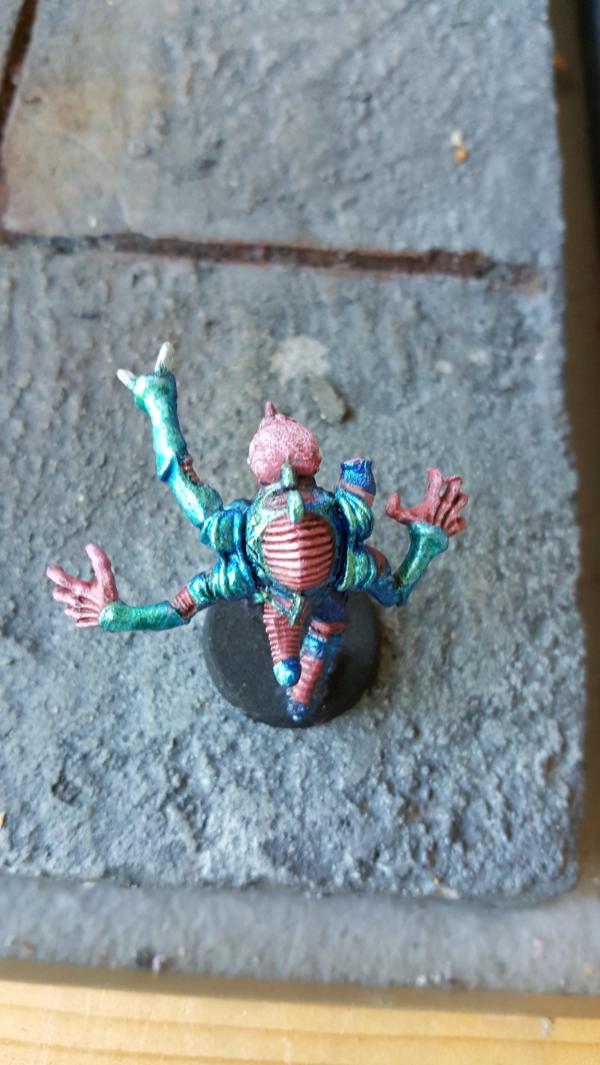
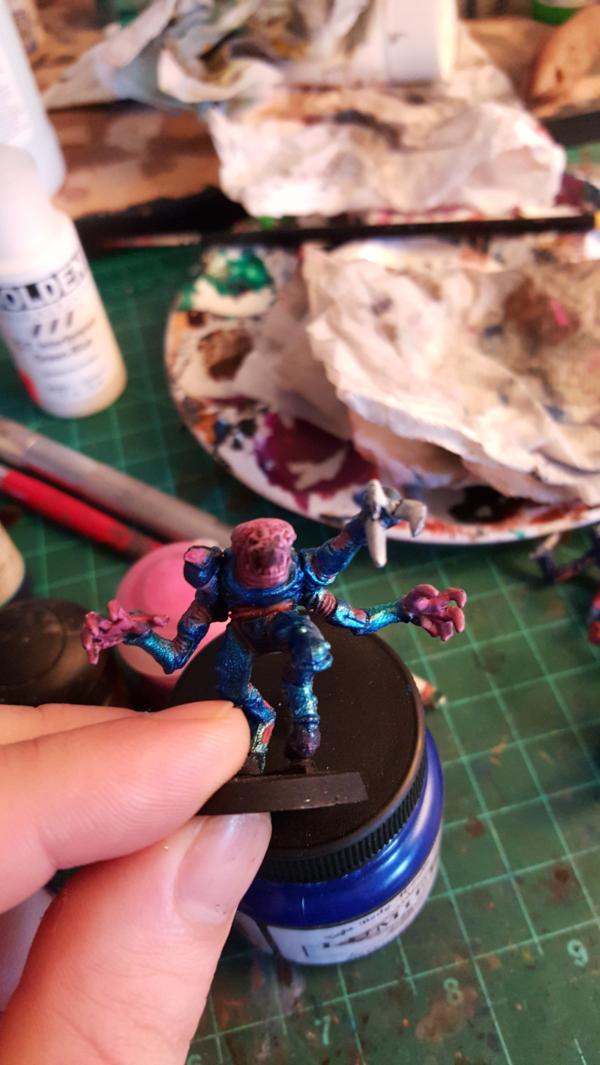
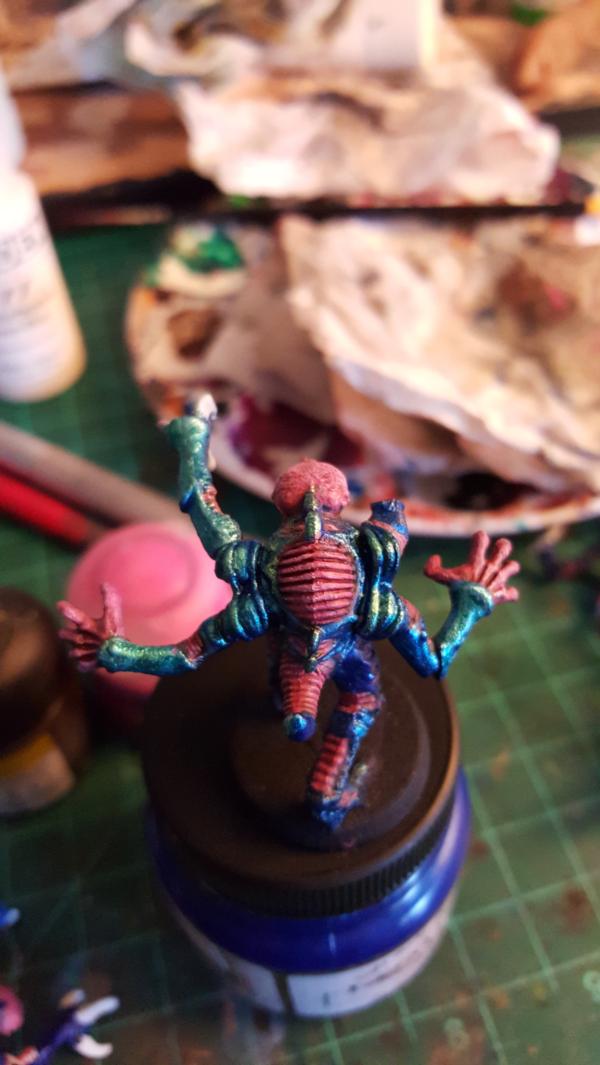
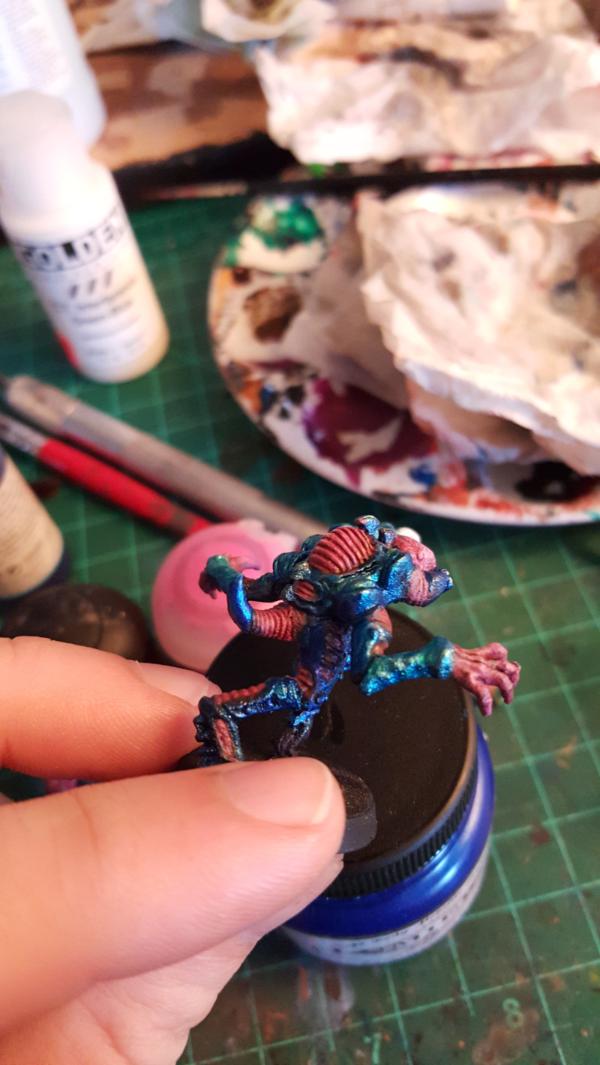
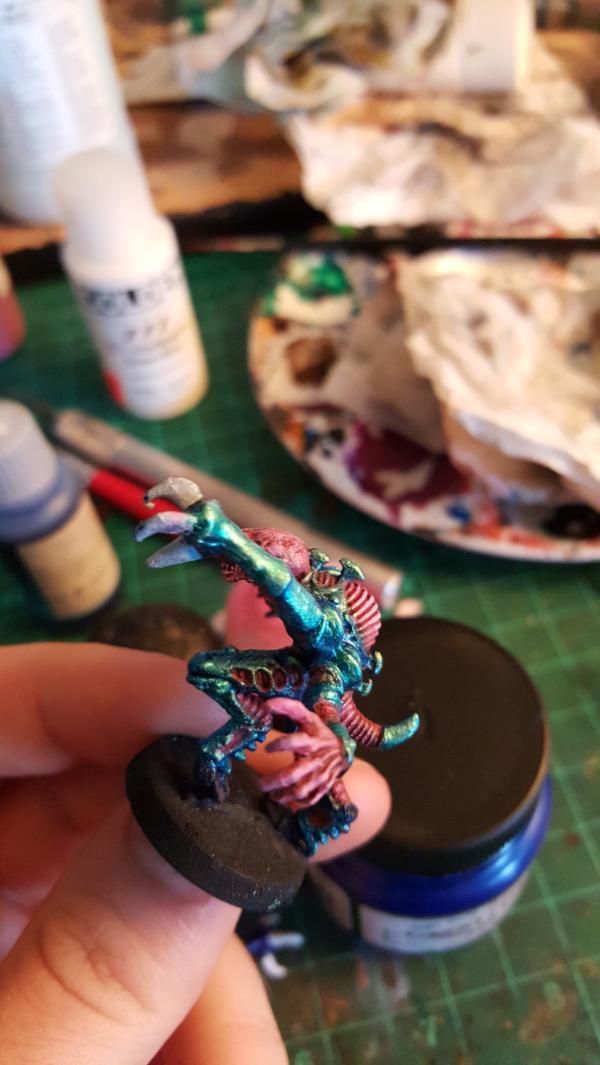
I'm pretty sure I said it before but I will say it again, I really like the iridescent 'nids.
|
|
|
|
|
|
2015/08/18 16:49:44
Subject: Re:Homemade multi-level city terrain boards/buildings (8/17 - 2 tone beetle genestealer)
|
|
Dakka Veteran
|
Thanks!
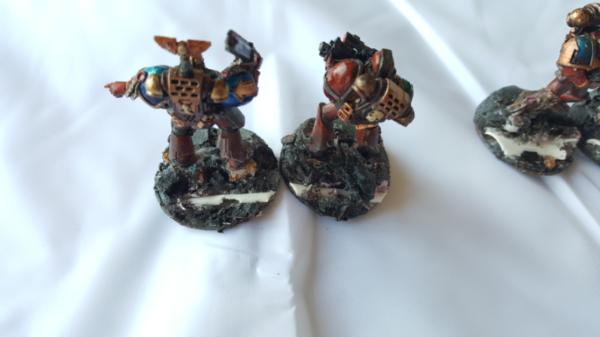
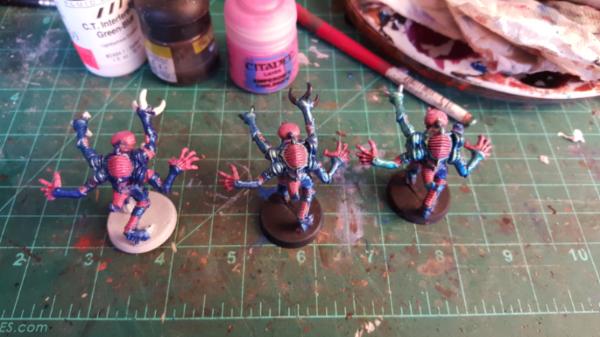
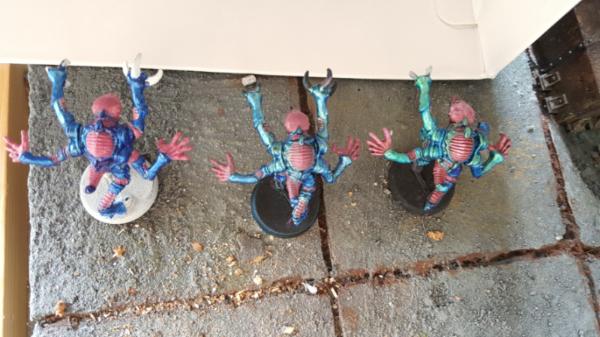
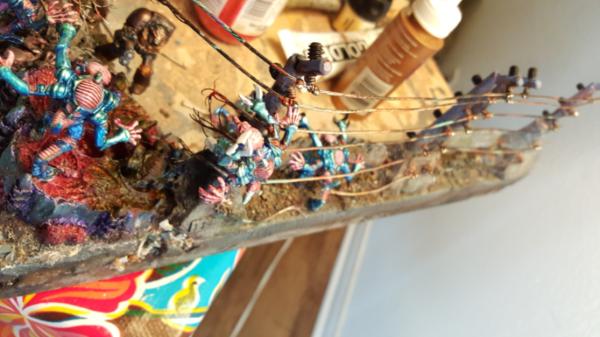
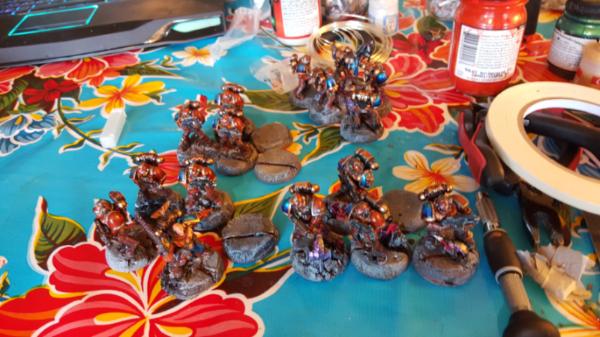
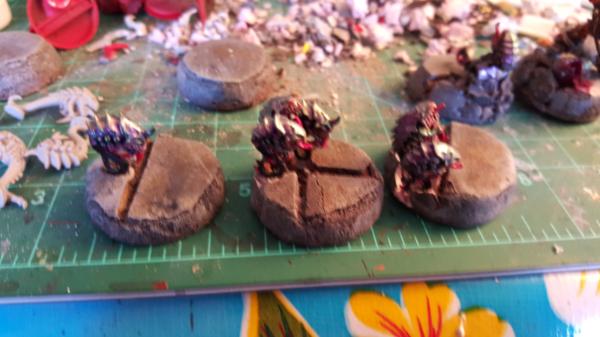
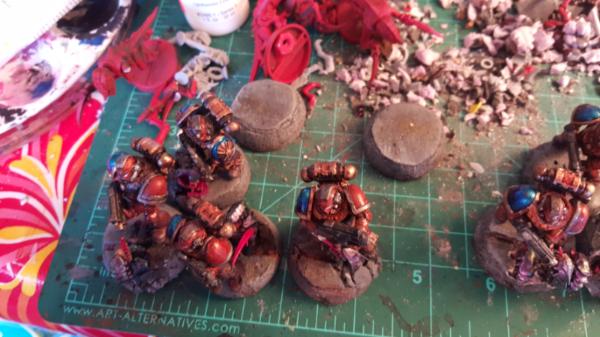
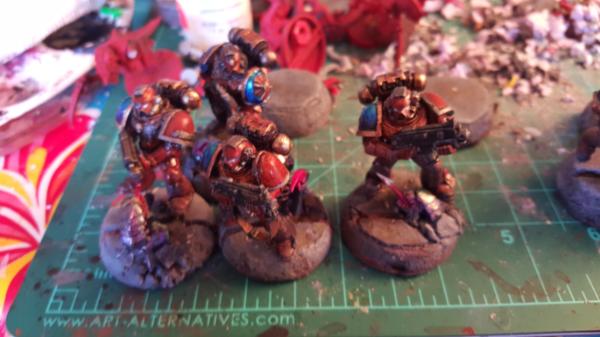
Here is just more stealers. Im making about 6ish to flood that corner, hopefully it's enough. There are a couple i might need to go back and pose to mroe properly fit on the board but it should be tooo bad.
So on the left you can see just the straight blue, middle is blue + the blue-green transition, and then the one on the right is the one you've already seen, with the extra green highlights.
|
|
|
|
|
|
2015/08/19 18:22:37
Subject: Re:Homemade multi-level city terrain boards/buildings (8/19 - putting up the electric fence)
|
|
Dakka Veteran
|
So the set of 6 stealers is almost done, but you guys dont really need those pics.
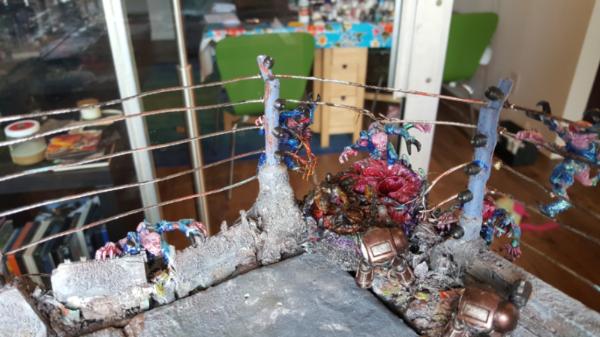
Instead how about some work on the fence!
A few notes:
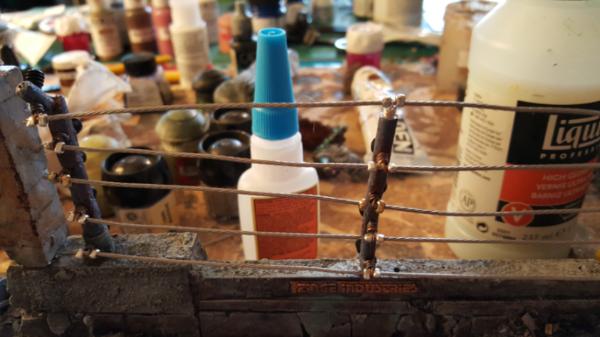
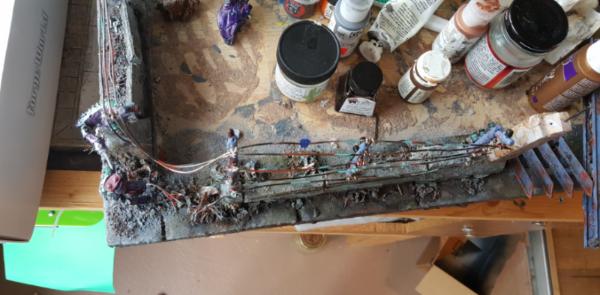
Basically the idea was to get some crimping beads from michaels to set this up. Now I always intended to crimp it down at each post, to maintain some tension even when i start cutting/bending the lins at the corners.
Unfortunately as you can see the first row of tubes did.. not hold well (it ALREADY had slipped just by putting on the second row of line wieth alternate beads). The second row holds much better but they are a touch big which is sad. I'm going to try again at michaels to see if i can get slightly smaller beads that work, but if not i'll stick with the second set. At this point keeping tension is way better than beads that are a bit too big. I can always paint them black and they wont be as notivable.
The good news is that even with just 2 lines on the fence is.. very strong. Very realistic so far. The bad news is that bending it at ALL could prove to be very difficult, at least in ways such that it breaks normally. Thankfaully I only really expect to bend the fence on the carnifex side (the stealer side will be more cut wirse, not bend poles), but yeah, very interesting.
This picture really highlights the diffierence in holding power:
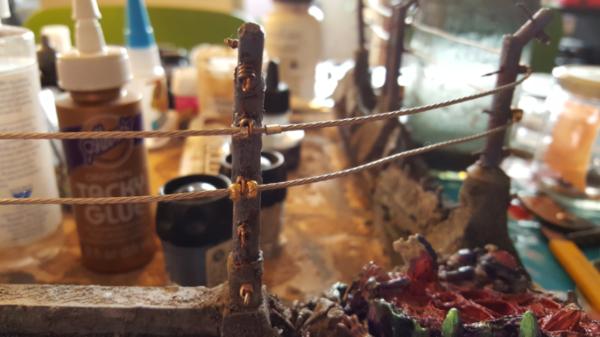
Maintaining tension across the corner is tricky. the first row of bead types really just did not hold well at all, very dissapointing.
|
|
This message was edited 1 time. Last update was at 2015/08/19 18:23:51
|
|
|
|
|
2015/08/20 17:23:36
Subject: Re:Homemade multi-level city terrain boards/buildings (8/20 - first side of fence in)
|
|
Dakka Veteran
|
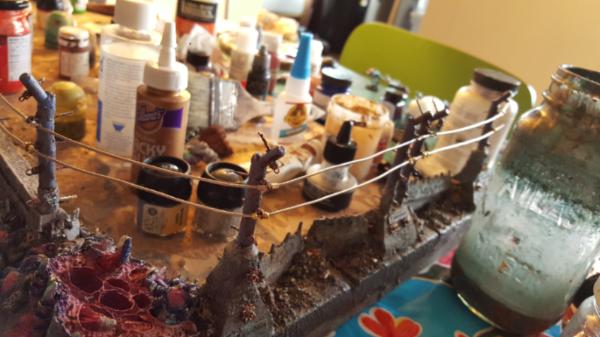
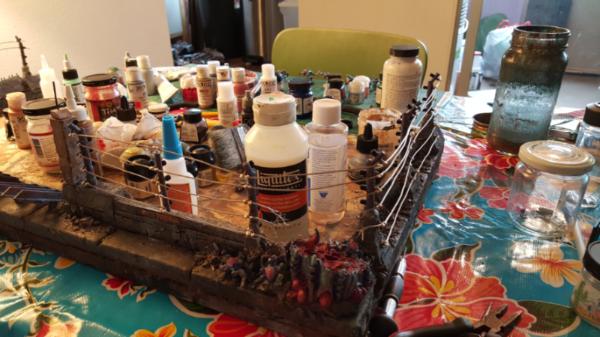
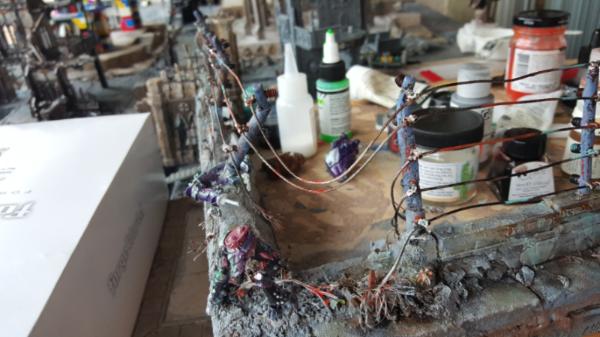
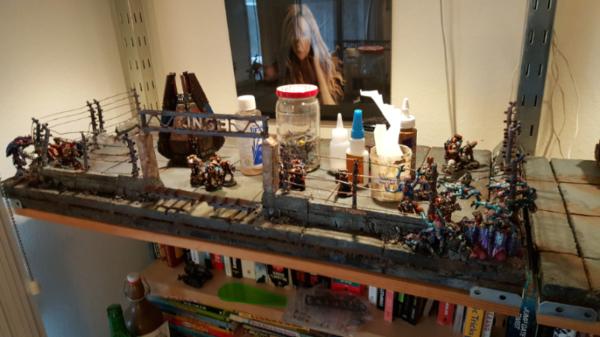
So a second trip to michaels and we got different beads and.. wow what a difference. Not only were these beads a better size than either of what I had before, but they are much, much stronger (and much tougher to crimp to boot). Somehow I stumbled onto higher quality beads without realizing it (the only thing on the packaging was that they were silver plated?)
Either way it's made a big difference on keeping some amount of tension on these lines, and as such we have the first side! I've also put in the rear backplugs which also look great too.
|
|
|
|
|
|
2015/08/21 18:12:51
Subject: Re:Homemade multi-level city terrain boards/buildings (8/21 - carnifex side fence in and destroyed)
|
|
Dakka Veteran
|
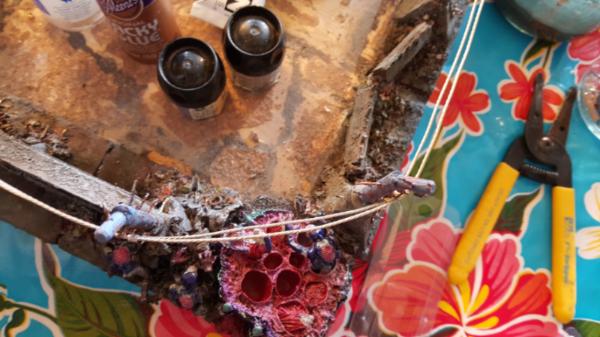
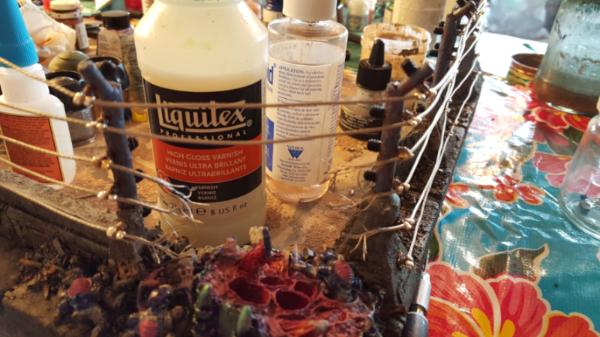
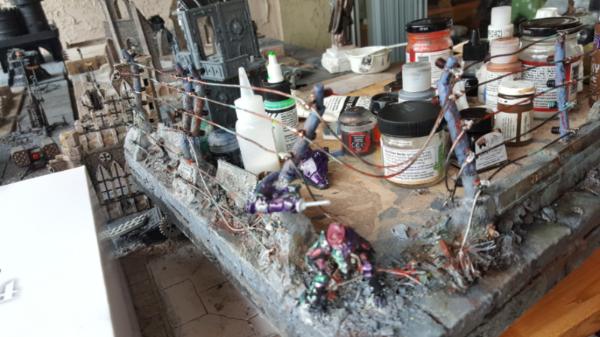
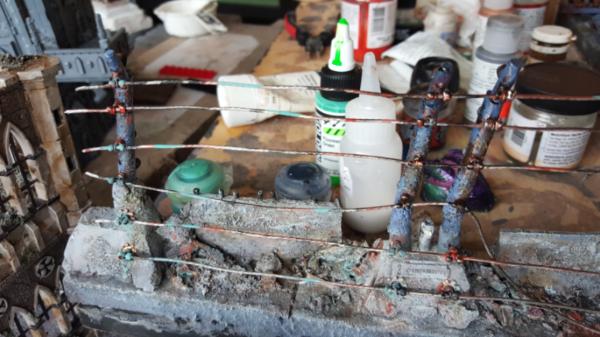
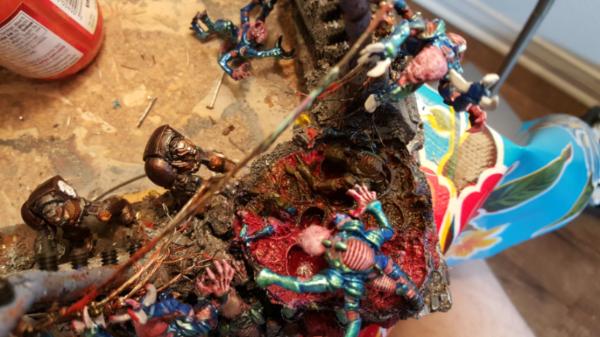
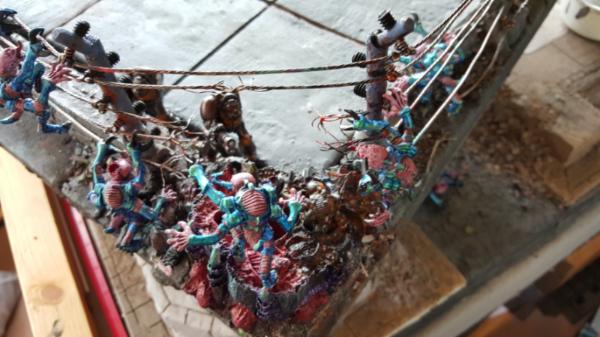
And now fo rthe carnifex side of the fence! Unlike the stealer side the fex.. pretty much broke everything when he came charging in.
We also have some preliminary aging and coloring of the wires to boot.
|
|
|
|
|
|
2015/08/23 06:16:48
Subject: Homemade multi-level city terrain boards/buildings (8/21 - carnifex side fence in and destroyed)
|
|
Avatar of the Bloody-Handed God
Inside your mind, corrupting the pathways
|
Wow, looks fantastic. Don't suppose you can show the packet for the beads?
|
|
|
|
|
|
2015/08/23 21:41:22
Subject: Re:Homemade multi-level city terrain boards/buildings (8/21 - carnifex side fence in and destroyed)
|
|
Dakka Veteran
|
Yep! the beads I ended up using were these:
http://www.michaels.com/10443509.html#srule=best-seller&sz=12&start=2
More specifically size #3. For the twisted wire i basically just used cable for hanging pictures, i'll post that up later. Either way you basically want picture frame cable that's not sleeved (so there isnt a plastic coating around it, you get a nicer texture that way)
all the other cheaper beads/tubes they have michaels are.. exactly that. terrible. they didnt hold at all. These beads at least mostly held up when i was pulling and pushing on the carnifex side. Ther ewere some slippages here and there but it was easy enough to fix.
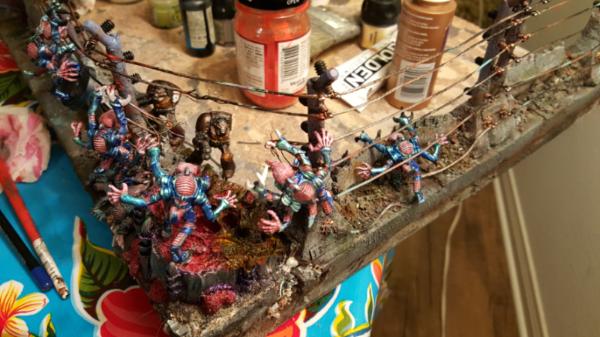
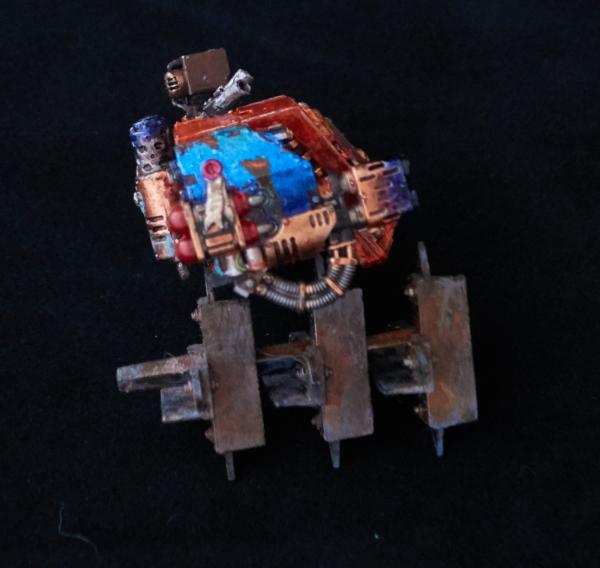
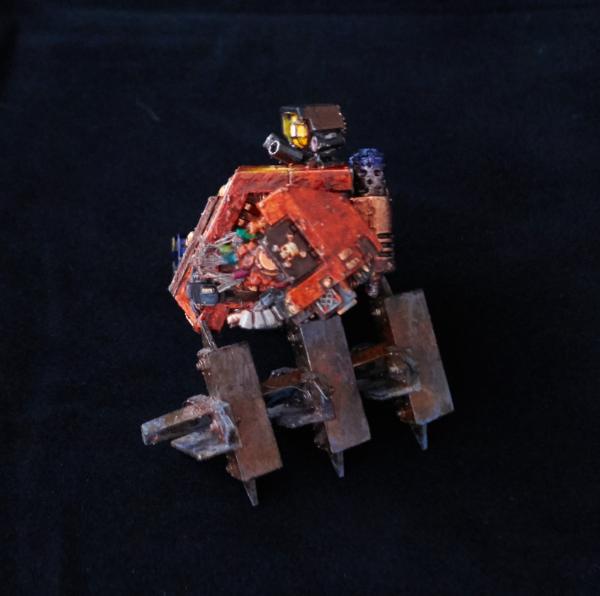
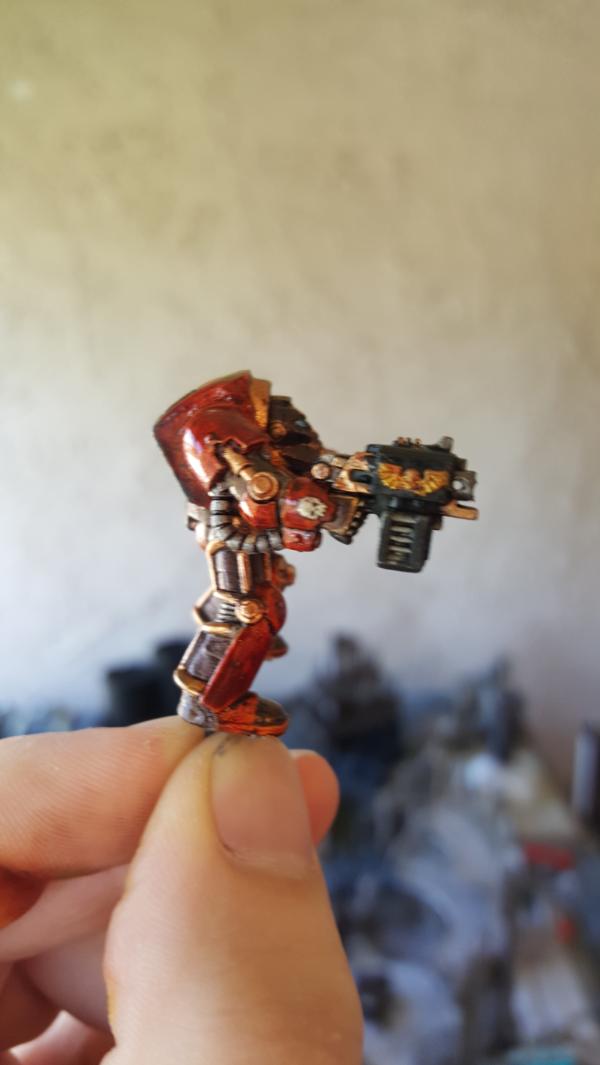
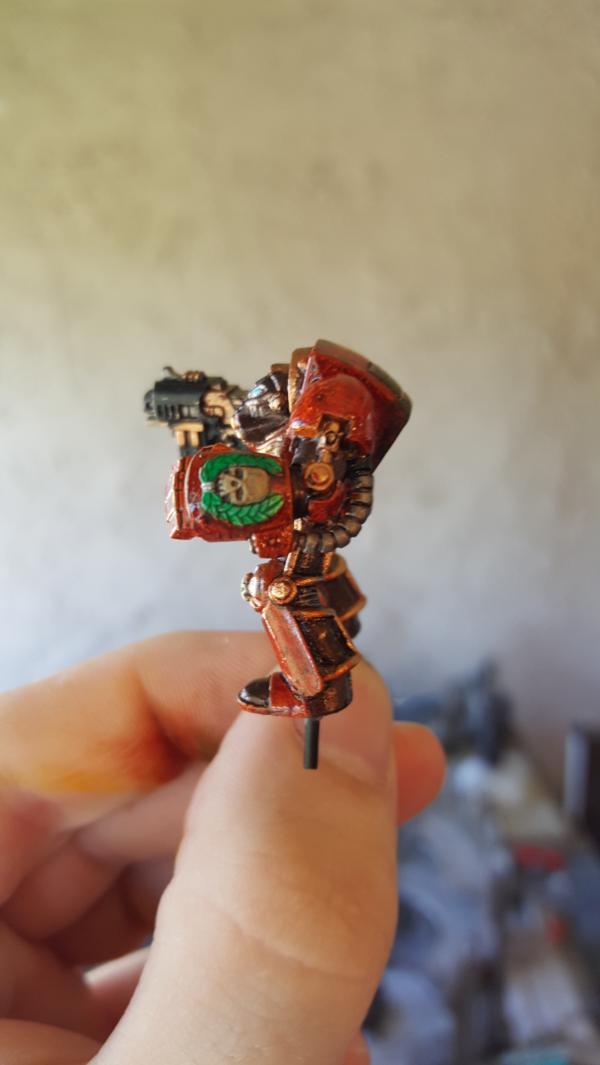
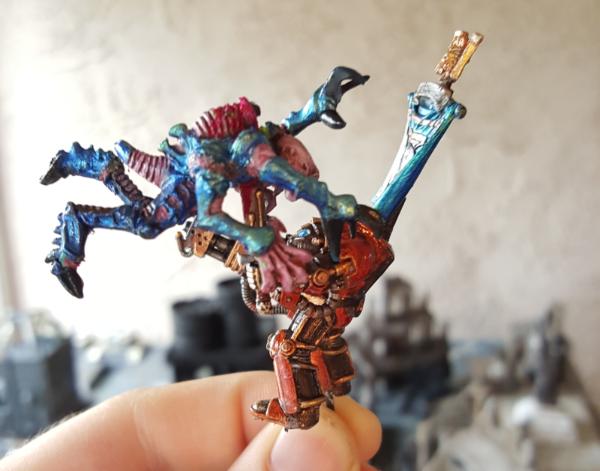
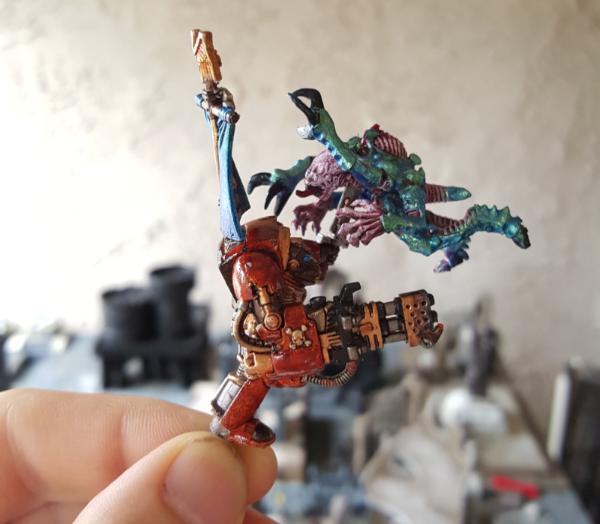
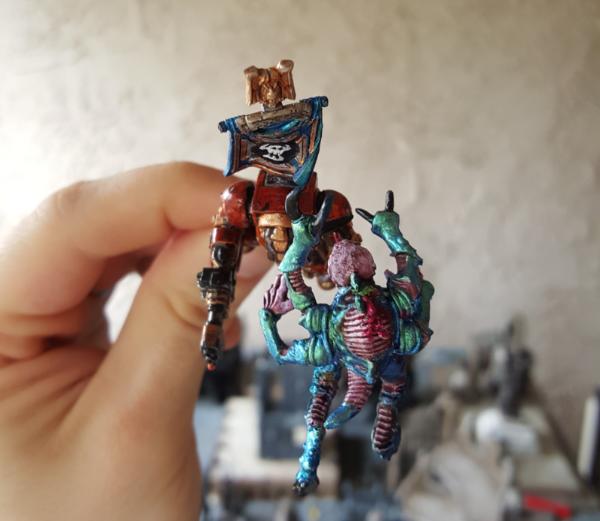
ANyways unfortunately these pictures are a day and a half old but there has been so much progress this weekend. Unfortunately I probably wont meet my original goal of being done by the weekend, but that's mostly due to the fact that I decided I want to amp up the detail in the terminators a bit and give them more heroic arms and such.
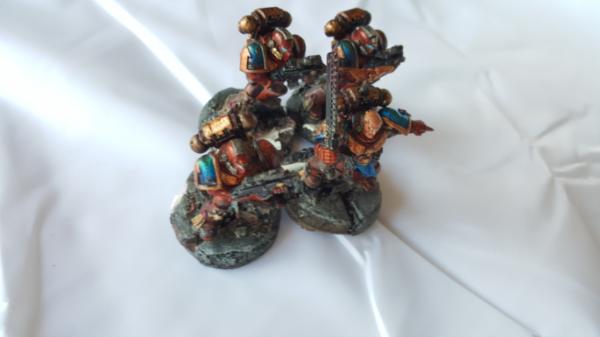
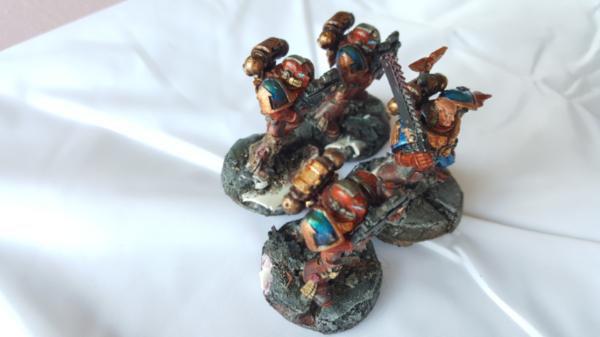
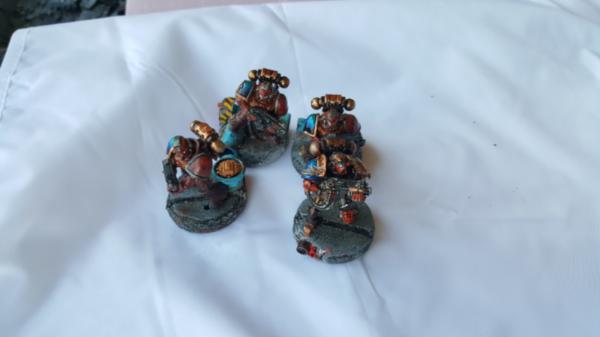
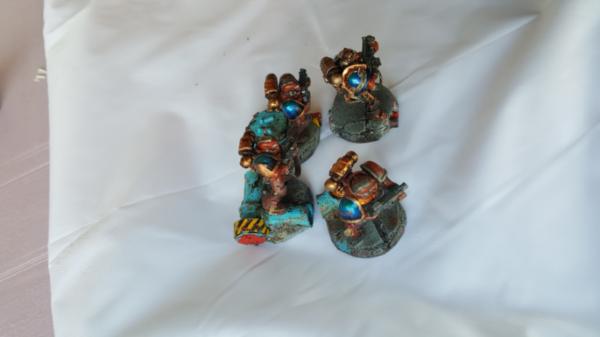
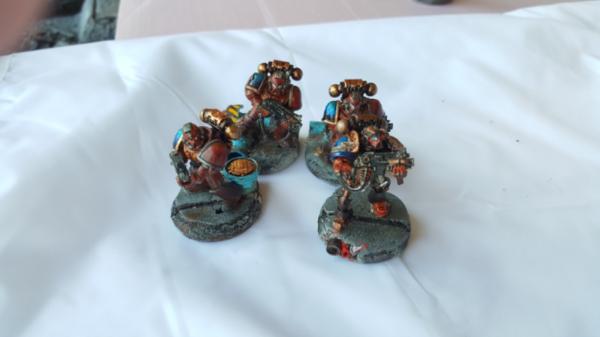
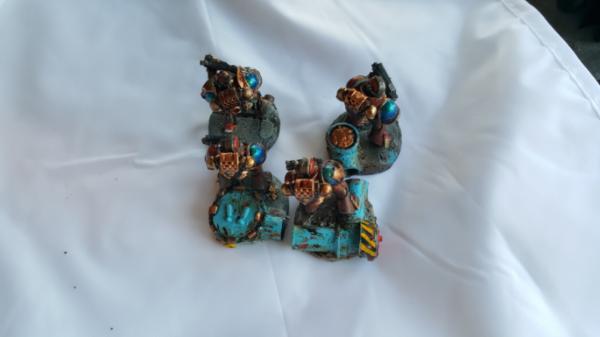
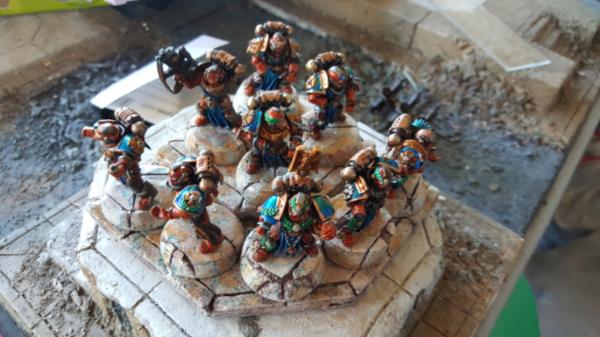
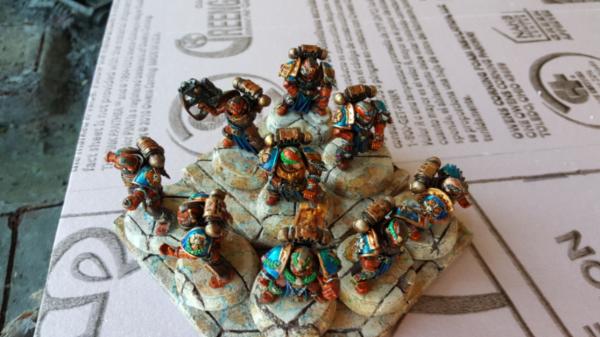
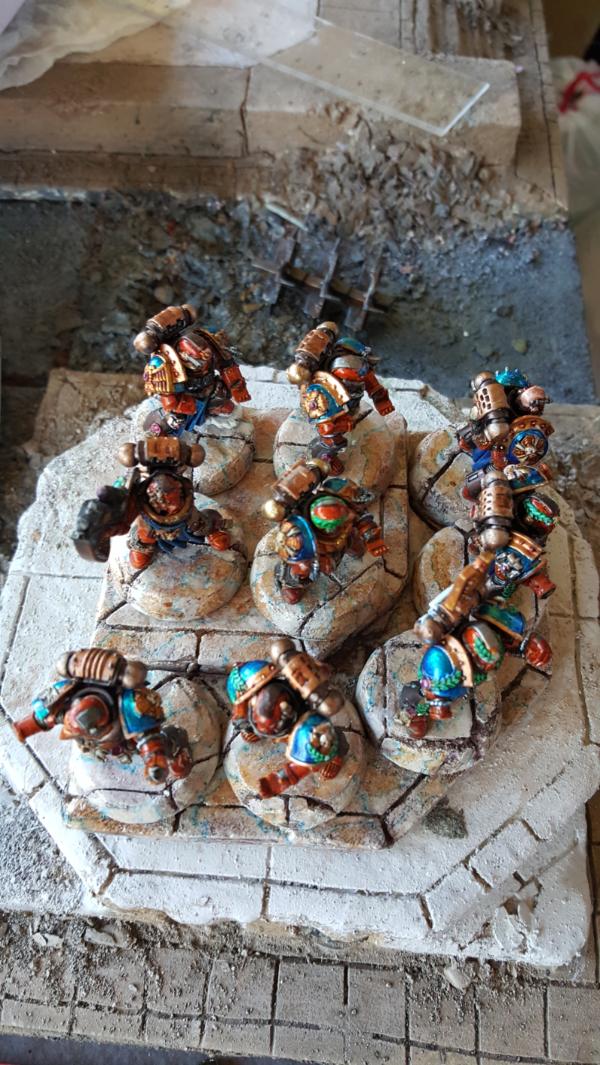
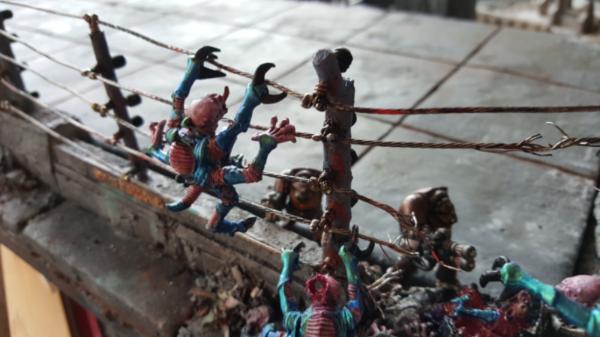
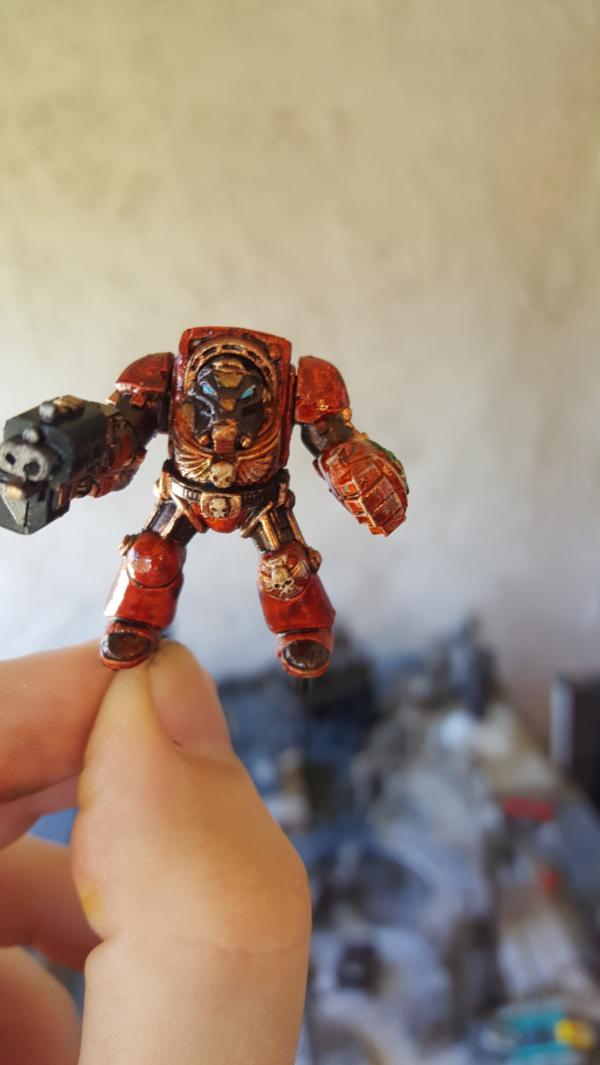
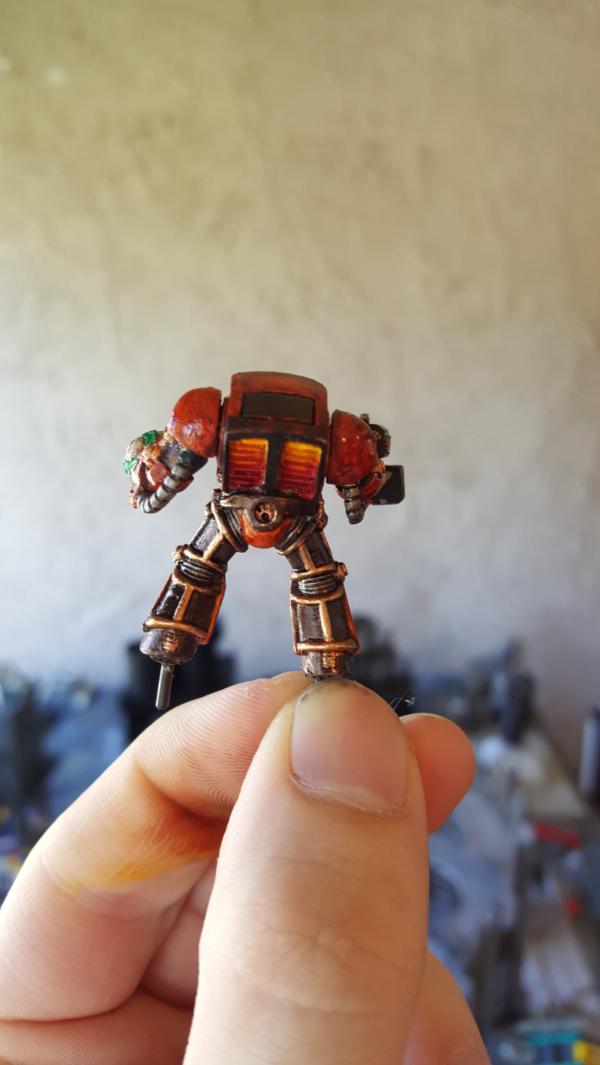
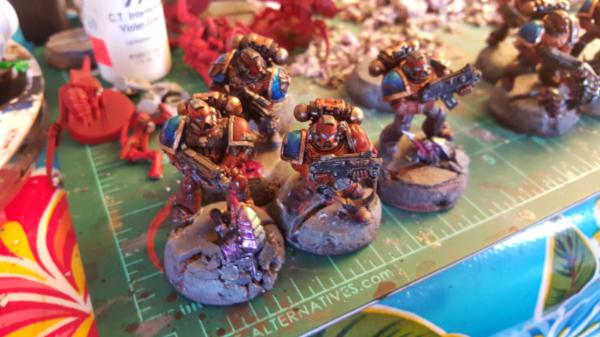
The pictures below are the PLANNED position for the stealers, not their final pose. The final set of poictures will come about soon im just so busy trying to finsih it all. It required some pretty serious chopping and reposing of their arms but fortuantely that's not *too* bad to do for the stealers, and the result I think is really dynamic and gives a good "those terminators are screwed" vibe.
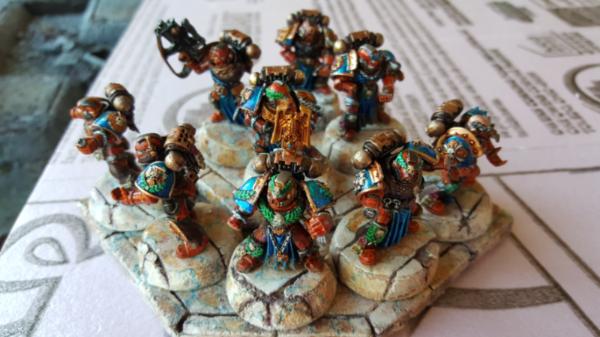
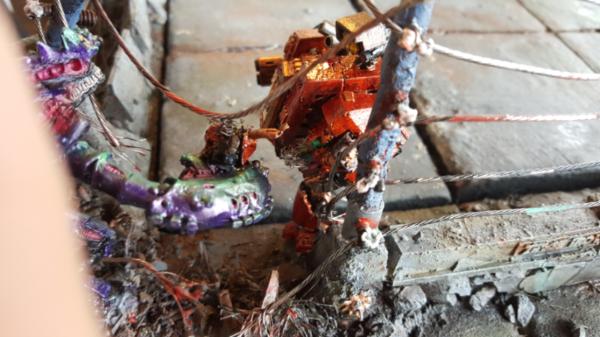
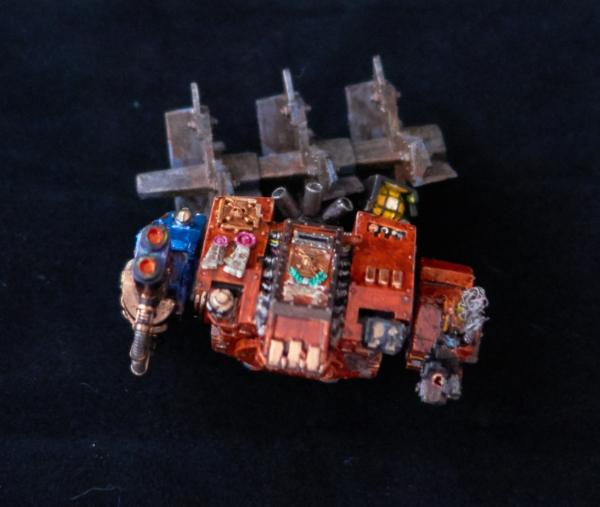
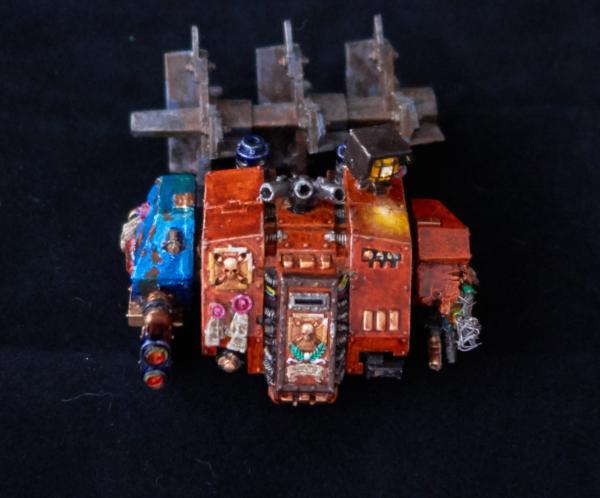
The flamerthrower effect also turned out really well, and (as you'll see soon) I even maanged to get a reasonable "after flamer ember" look to all the nooks not covered in black. The basic technique I did was (let each step dry before you go onto the next step. Very very dry or very sad mixing of the black/color into mud)
1. paint the model as normal. It sucks, but you get better movments of color peeking out from areas not hit with flamer. Its hard to plan that in advance.
2. Using the fctual flamer template drybrush the appropriate area black heavily.
3. In allt he little nooks/crannys not hit with black, flood them with a red wash and then yellow wash.
4. Using a small brush add dabs of specific color to the nooks. Oranges, reds, finally bright golden yellows (i suggest normal size GW brush cause they are cheaper to rebuy. Generally you need a decently small brush for this work, but because you end up dabbing a lot it will start to look more like a drybrush at the end, so dont use ur fine detail here. Normal is good neough, or better yet something from a paint store thats not hella expensive)
5. Orange wash
6. finally re-dry brush black over the whole area.
Remember, the black really wont reach around the entire surface. So if you are shooting flame onto a pillar, the back side wont be nearly as charred. This is here I tried to put more ember colors, as it would still get super hot.. just not dead black.
It might be worth it for me to go back later with an ash pass right in the beginning of the flame, just to really show how hot it got.

|
|
This message was edited 1 time. Last update was at 2015/08/23 21:43:45
|
|
|
|
|
2015/08/25 18:48:04
Subject: Re:Homemade multi-level city terrain boards/buildings (8/25 - dreadnought battle almost done)
|
|
Dakka Veteran
|
|
|
|
|
|
|
2015/08/25 21:53:06
Subject: Homemade multi-level city terrain boards/buildings (8/25 - dreadnought battle almost done)
|
|

Arch Magos w/ 4 Meg of RAM
|
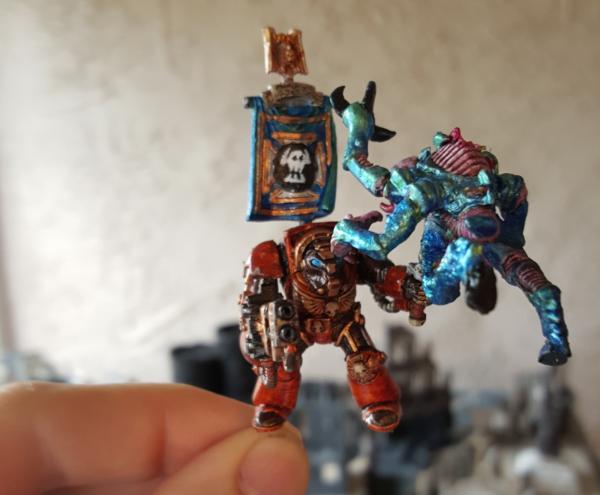
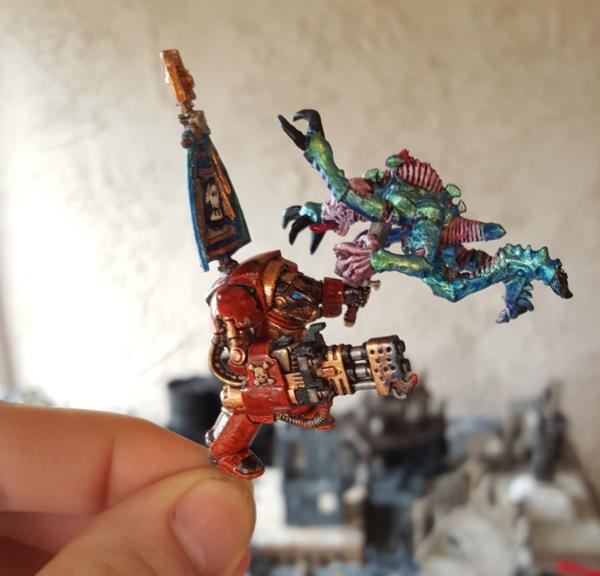
I am loving this!!! Dios for the win!! Really lovely work.
|
|
|
|
|
|
2015/08/26 07:54:17
Subject: Re:Homemade multi-level city terrain boards/buildings (8/25 - dreadnought battle almost done)
|
|
Dakka Veteran
|
Thanks! tonight I'm finishing up the dreadnought body, and I pulled out my lighting tent I havent experimented with yet.
Im hoping to take some pics of the body tomm morning to see if I can get some better pic quality overall.
|
|
|
|
|
|
2015/08/27 06:26:18
Subject: Re:Homemade multi-level city terrain boards/buildings (8/25 - dreadnought battle almost done)
|
|
Dakka Veteran
|
|
|
|
|
|
|
2015/08/31 07:22:08
Subject: Re:Homemade multi-level city terrain boards/buildings (8/25 - dreadnought battle almost done)
|
|
Dakka Veteran
|
|
|
This message was edited 1 time. Last update was at 2015/08/31 17:47:16
|
|
|
|
|
2015/09/03 20:10:13
Subject: Re:Custom multi-level city terrain (9/3: custom 32mm bases, senic board #2 design, rhino detailing)
|
|
Dakka Veteran
|
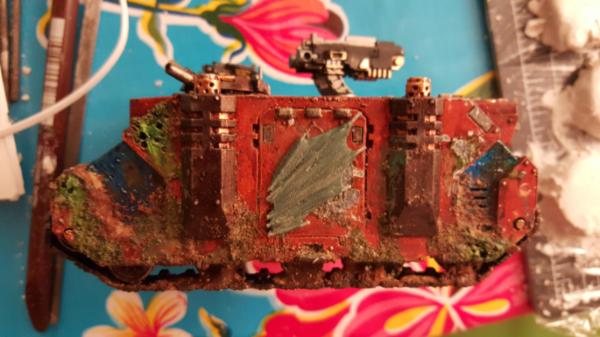
So updates!
With the first board basically 95% done I needed a break to work on the rest of my army.
Basically my goal is to get my army finish painted and super pretty for LVO. The goal being going for renaissance man or at least getting a respectable paint score. The orange/blue looks super good now but i just gotta finish all the ltitle fiddly bits I've been leaving off (tank hatches, etc).
My army is a straight up battle company. Straightforward, very TAC.
That means I have to do this:
1. Chapter detailing, some sort of symbol to use across my whole army
a. CHoose a symbol (done! explain in a bit)
b. Make a custom transfer sheet for the troops
c. Sculpt out of green stuff some bigger symbols for tanks.
2. Finish all the other little fiddly bits for my army
a. some missing heads (done!)
b. missing guns
c. hatches
d. 2 more legion rhinos
e. razorback turrets.
i: 2 assault cannon turrets
ii: 2 undecided turrets
iii: 1 bolter turret (done!0
iv: i flamer turret
3. Custom 32 mm bases for everyone.
a. Marble bases for my command squad guys
b. Potentially some "walkway style" bases for my devastator squads
c. normal bases for my tactical marines.
4. Custom diorama style display board.
a. as backup, make a more normal board with electirc fence/tyranid incursion, etc (done!)
b. build the main board.
So now to detail the plans for those steps:
1a: symbols.
FInally found one.. As it turns out I happen to have worked on how to train your dragon 2 so the tail symbol is a perfect fit for my army!
It's also a double reference since that would make my army Dragon Army which ties to enders game (which also happens to have orange coloring! woot)
https://s-media-cache-ak0.pinimg.com/736x/b3/12/35/b312359cf46f2a498eff6d9e72232117.jpg
So i just have to make and print the transfer sheet, and for the larger detail block i plan on sculpting out the wing + symbol on the side doors of my rhinos (similar to those amazing forgeworld lregion door details)

3. Bases
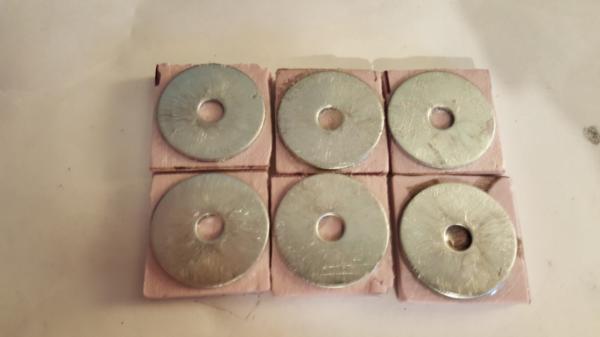
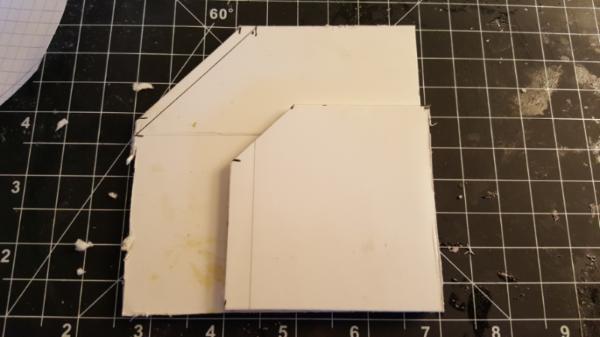
Now that my display boards are city themed its' time to finally base my army. Since we've just swithed to 32mm and thickness is a concern, i figure it's easier to just make bases from scratch starting from a properly sized metal disc. This will give me weight and lets me maximize the amount of foam I can use to give these bases depth/craters/etc. The total height I'm aiming for is about 1/4th thick for the base. thicker than a normal base but about the right size for something senic.
I was originally worried about the foam sticking to the metal but using a 2 part epoxy and wow they are held on there. No longer worried. For good measure I scratched up the discs first for an even stronger bond.
4. 2nd board design:
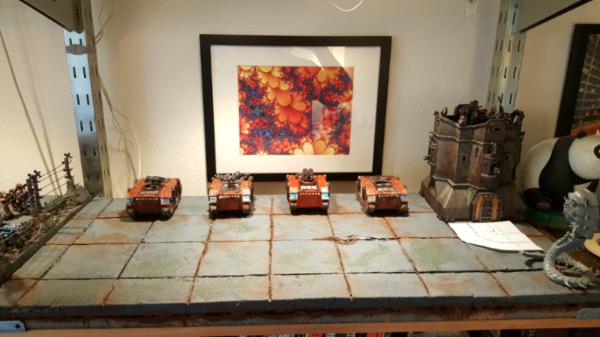
as mentioned, since I am a battel company the basic idea for this board is a walled fortress with a large area dedicated to the repair of rhinos, which is under heavy tyranid attack.
So the row of rhinos you will see will basically be carports, with tools/fuelcans/engine blocks/etc scattered around. They will be on stands and suh to raise them up a bit and I indend to have some workers working on them (likely orks cause its super fun). Above them will be a walkway where some of my SM will be standing ready to get in the rhinos in an emergency.
Then bastion will probably be raised up a bit and widened at the top to add room for a bigger turret, but it stands as the main barracks.
The while square is my formal "marble" entrance to the bastion, where the command squads sits.
The rest of the space is just empty for bodies/tanks and the other wall is on the edge and under attack from a swarm. The mawloc just having breached one orner of it.
Basically this board is meant to be the big brother of the other board in every way. Instead of a carni attacking its a mawloc, and in addition to stealers we have lictors and things climbing the walls. I'll have more pictures and drawings of the concept as i make them.
|
|
|
|
|
|
2015/09/03 22:01:53
Subject: Custom multi-level city terrain (9/3: custom 32mm bases, senic board #2 design, rhino detailing)
|
|
Arch Magos w/ 4 Meg of RAM
|
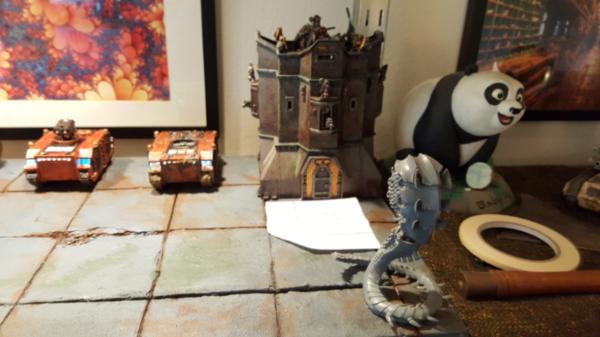
this is really coming together beautifully! Love the happy panda looking in on the progress!!!
|
|
|
|
|
|
2015/09/06 18:53:21
Subject: Re:Custom multi-level city terrain (9/3: custom 32mm bases, senic board #2 design, rhino detailing)
|
|
Dakka Veteran
|
Work continues on all fronts!
First we have the wings. To clarify, I am a total green stuff novice. Im vaguely aware of sculpting and did some stuff with clay way back when but nothing ever this small or detailed. Futhermore the properites of green stuff are unique so im basically at square 0.
A few things ive learned (BIG HUGE NOTE: this is all using a 50/50 ratio of green stuff. After some research it seems that had I used more hardener: the blue part, i might have had more luck)
1. green stuff is sticky.
2. Very, very sticky.
3. takes about 3 hours to really dry, during that time it's always sticky and at no point can you really easily "cookie cutter" it into shape. IE: take an existing template and cut excess green stuff into that hsape. More often than not after about 30 seconds it stuck to my outline and i had to wreck the peice to get it out again.
4. It holds detail forever.
5. can be sifficult to sand off details.
6. your eally need the right tools before you start working.
So if you recall this is my reference:
https://www.google.com/search?q=how+to+train+your+dragon+tail&rlz=1C1CHFX_enUS429US429&espv=2&biw=1600&bih=837&source=lnms&tbm=isch&sa=X&ved=0CAYQ_AUoAWoVChMI0Katl4fjxwIVCo0NCh2evgPz
(i found image of a it flat and move it to PS to get it the right size)
We first got this:
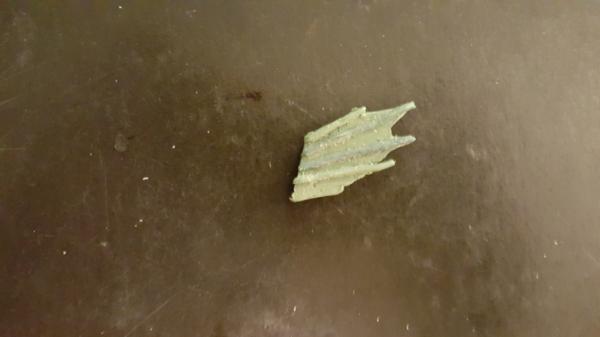
Not particulrly successful. Getting the precision was just impossible for me and while i could eventually carve it down into a better piece (which ims ure is the more standard way they do things), that would take me forever.
Instead I thought of a plan B: make it how Hiccup would have made it. So I got a sheet of the thinnest clear plastic i could find at my local art store (which, if you arnt as lucky as me to have a swains, you could isntead simple get one of those clear plsatic cups touse instead. Just cut it up and flatten it out. The idea being I cut out the shape to a stencil, and then lay down wires for the spines. I then drape over the green stuff on top to get a much more natural look at the crispness I want.
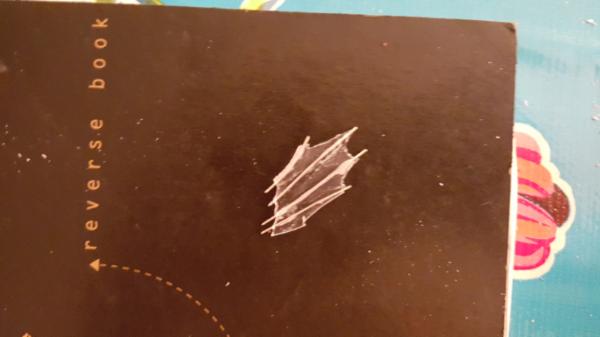
The result:
Works super well, and all my pointy bits are now strong and not made out of green stuff/wont snap at the first opportunity. But there are still some problems. You can see that I used a small round file to try and push down the green stuff between the main skeleton to give it that webbed look.. and the green stuff also kept the impression of the file. Whoops! Definitely an instance where I needed actual carving tools which have smooth things that serve such a purpose. I tried filing off that detail but they are still around, albeit faintly.
Now i just gotta figure out a good red to match the tail but still stand out.
Next we have mass base construction. Now that I've determine the general base idea will work it's time to mass produce. Im generally not worried about embedding surface detail because unlike a normal dirt/rock base where you'd expect such a thing, for me it's a hard concerete like surface. So all my debris/bits of tyranid/etc will be, liek with the borad, laying on top of my foamcoat layer. Furthermore I can also ad cracks and post effects like craters more easily then too.
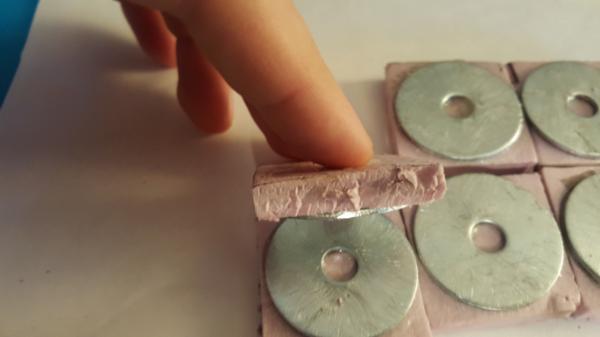
To glue the metal to the foam I am using a 2 part epoxy from locitite, though gorilla glue would also work. Im making sure to rough up the metal first though before gluing to ensure maximum results. Let me tell you it holds like a champ.
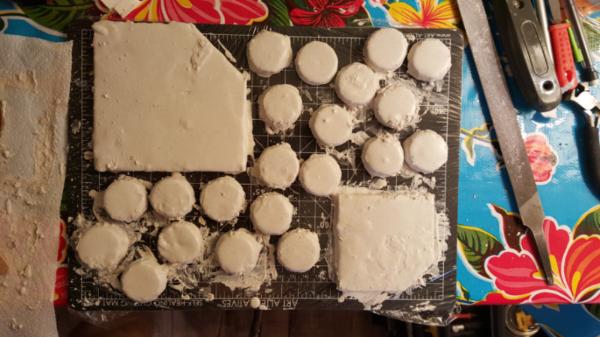
Once cut and glued you gotta make sure to clamp them down and wait a few hours:
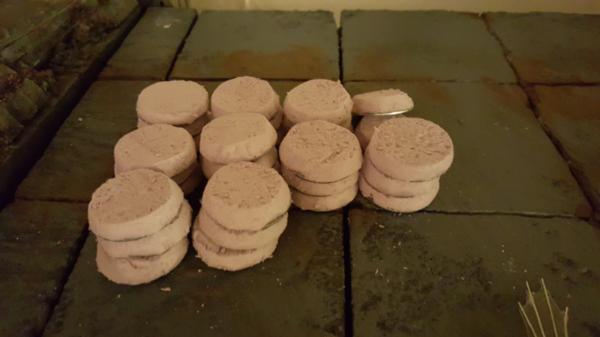
Horray a whole bunch of bases:
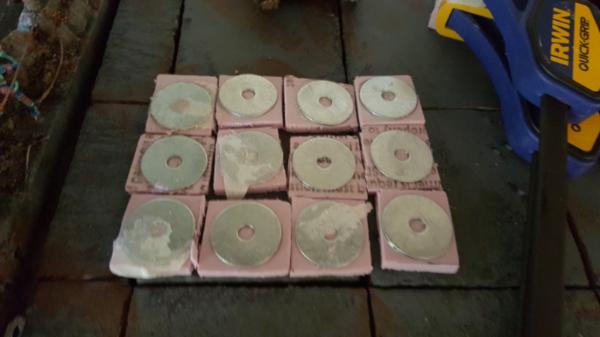
Now cut off the excess and sand it down. I tapered it a bit to make the basis feel a bit smaller and tigher to the underlying model, just like GW does (just with a thinner base)
Simultaneously I also worked on the marble section of my 2nd board. The reason being is that I have to line up about 15 of these bases to the marble for my commnd squads. So even though I am no where started on the 2nd board detail wise I had to at the very least cut out and make the marble section.
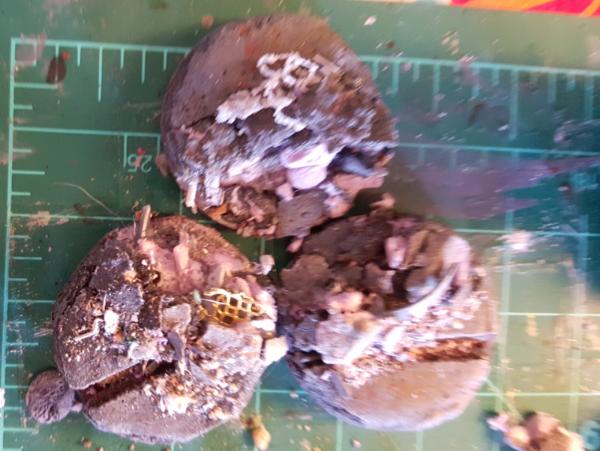
Finally the foam coat step! bring on the messy!
Next ill show the more polish reslts and begin painting upt he marble!
|
|
|
|
|
|
2015/09/08 17:25:12
Subject: Re:Custom multi-level city terrain (9/8: marble bases, mass city bases work)
|
|
Dakka Veteran
|
Now onto the marble stuff.
First step. carve out the pattern in both the bases and the underlying marble!
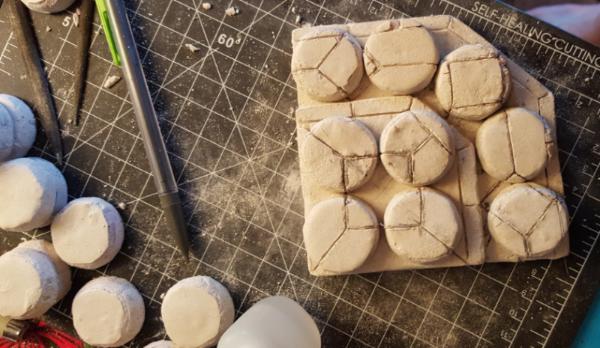
Blotching and the beginning of the blue lins:
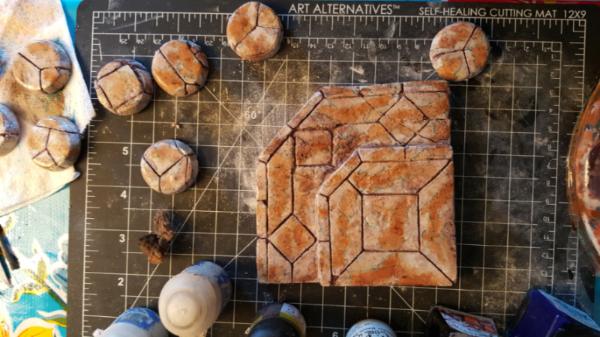
And then the final results. Im super happy with them but there is still some blue lines that ended up being a bit too thick and dark. For this set of marble at least waiting 30 minutes for the blue layer to dry wasnt quite long enough: as soon as I would add the gloss coat layer the blue lines would start to spread out. A bit frustrating but pretty fixable, just needs some touchup here and there with the cream/dark spot colors.
|
|
|
|
|
|
2015/09/09 23:07:08
Subject: Re:Custom multi-level city terrain (9/8: marble bases, mass city bases work)
|
|
Dakka Veteran
|
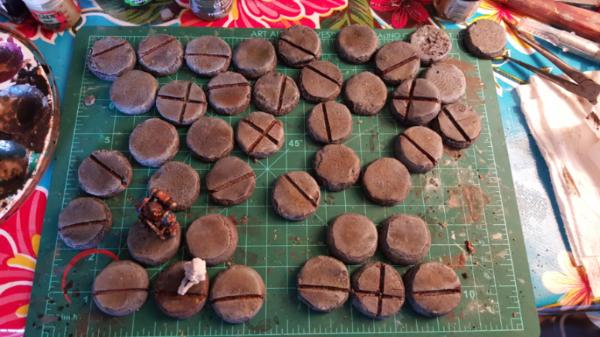
Starting work on the other bases. Just getting the brown in the grooves before i lay on my grey basecoat.
|
|
|
|
|
|
2015/09/10 18:26:50
Subject: Re:Custom multi-level city terrain (9/8: city base basecoat done, wip on details)
|
|
Dakka Veteran
|
the base base coat is done (say that 10 times fast):
Now to get started on the detail work! Here is the general plan on detailing:
I have 6x5 man squads to detail up. FOr any given squad they will have a seargent (might change, but will be rare for all but 1-2 squads) and 0-1 speacial weapons (definitely will swap out more often)
That leaves 3 core bolter bodies that will never change, and that's the basis for any sort of posed base sets I have. So it becomes:
2x3 squads of hero detailing
4x4 squads of hero detailing (ie: 3 man bolter + seargent that wont change)
4x1 special weapons with generic detailing
2x1 seargents with generic detailing
2x1 bolter bodies with generic detailing
Now it gets even more complicated when you consider the possibility of moving to 10 man squads in the future. As such it makes sense for some of the hero detailing to broadly be similar. Fortunately as there are 2 3 man squads and 4 4 man squads i can do this relatively easily.
So my hero detailing now comes down to this:
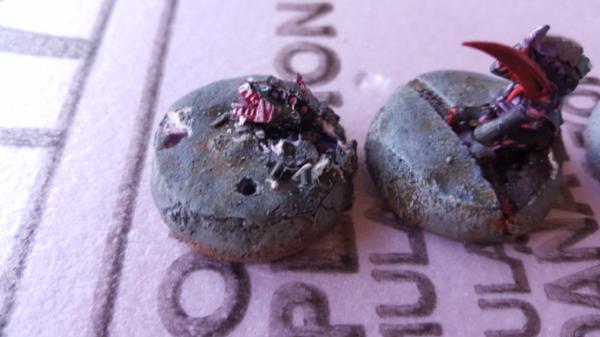
2 sets of impact craters.
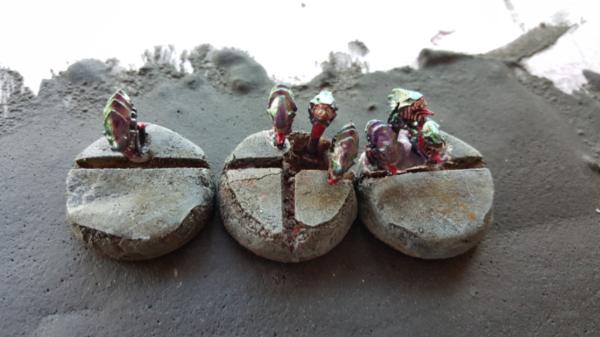
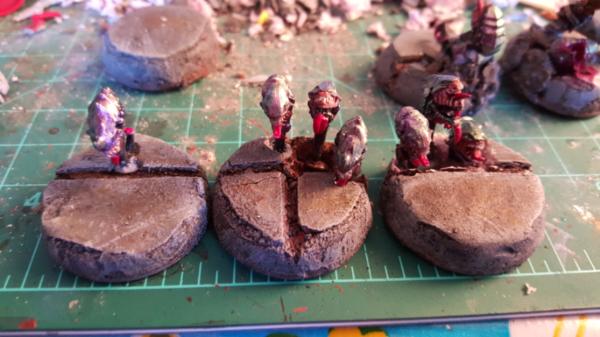
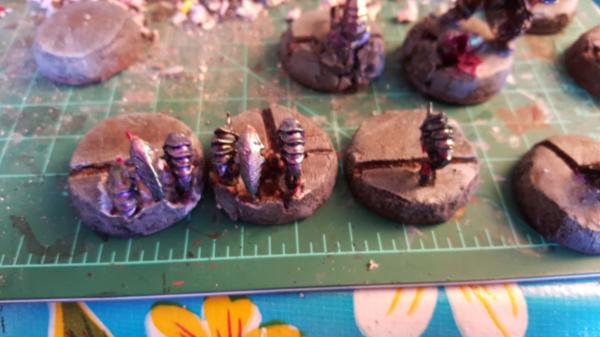
2 sets of the "hormagaunt attack": ie hormagaunts popping up out of the ground
1 set of mawloc attack specific detailing (ie: bits from the broken flying defense wall)
generic detailing (normal rubble, debris, etc)
I figured id start with the hardest of the lot which is the hormagaunt attack. This is mostly because Im a crazy person but also because it will have the most restrictions on pose.
So here we get started!
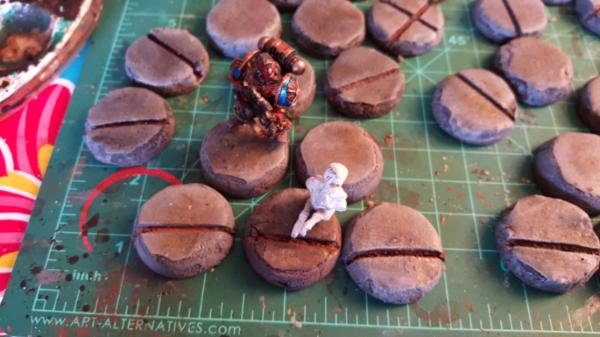
you can see the general idea. Gaunt popping up out of the ground and either the marine or his buddy shooting at him. In this instance the base where the gaunt is actually coming out of would be oblivious to his impending doom. The guy shooting would have already dealt with his gaunt. I also figure to have a seargent with sword in another 5 man squad in CC with a gaunt directly.
|
|
This message was edited 1 time. Last update was at 2015/09/10 18:27:12
|
|
|
|
|
2015/09/11 17:25:27
Subject: Re:Custom multi-level city terrain (9/11: craters, pipes detailing for bases)
|
|
Dakka Veteran
|
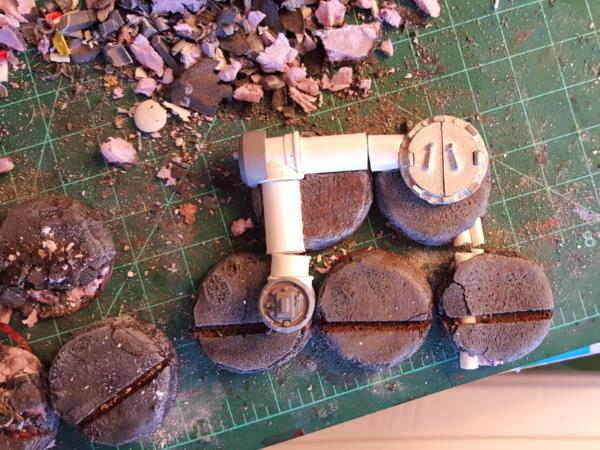
Turns out i dont have hormagaunts, so that priority has to wait a bit. Instead I worked on some craters and random piping/sewery detailing. Turned out fun, cant explain it or what it does, but its fun! Still need to surround it with dirt and such but hey. The craters are tough since the bases are so shallow but im still pretty happ with the result. There is another crater set ill show tomm, my pic just didnt turn out sadly.
Crater:
Piping detail:
|
|
|
|
|
|
2015/09/16 21:06:22
Subject: Re:Custom multi-level city terrain (9/11: craters, pipes detailing for bases)
|
|
Dakka Veteran
|
|
|
|
|
|
|
2015/09/17 18:50:18
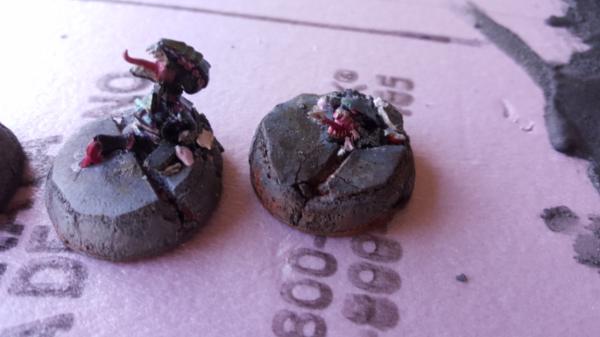
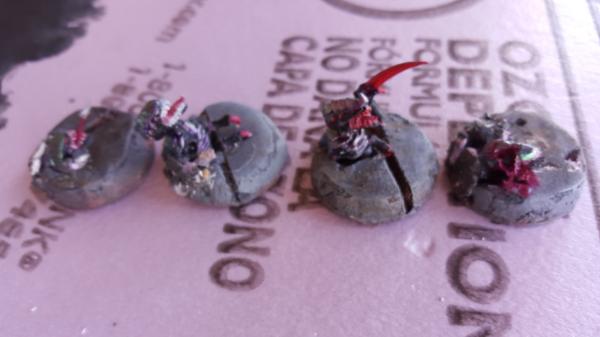
Subject: Re:Custom multi-level city terrain (9/17: ripper swarm bases!)
|
|
Dakka Veteran
|
|
|
|
|
|
|
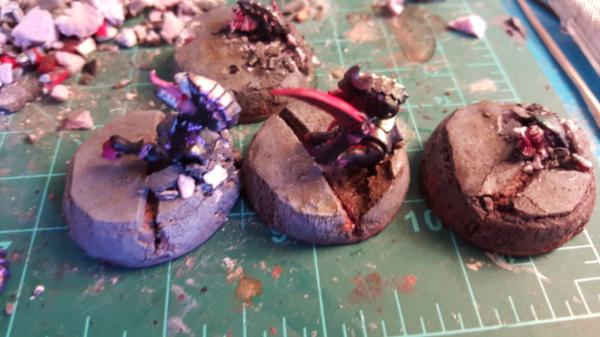
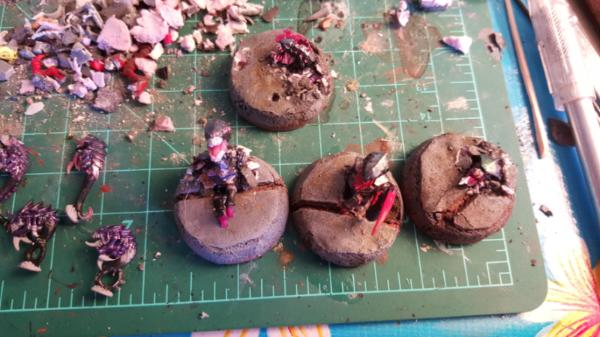
2015/09/18 17:21:46
Subject: Re:Custom multi-level city terrain (9/18: posing marines onto their nid bases.
|
|
Dakka Veteran
|
|
|
|
|
|
|
2015/09/18 17:35:28
Subject: Re:Custom multi-level city terrain (9/18: posing marines onto their nid bases.
|
|
Focused Fire Warrior
|
Largo39 wrote:So after a night of many broken backs and other limbs (first had to take the marins off their old bases which they were pinnd into. Sigh. ) We have marines that work on the new bases! yay!

Sick Bro!

Other bases look preety sweet as well!
|
|
This message was edited 2 times. Last update was at 2015/09/18 17:39:22
|
|
|
|
|
2015/09/18 23:51:43
Subject: Custom multi-level city terrain (9/18: posing marines onto their nid bases.
|
|
1st Lieutenant
Because we’re here,lad...
|
Amazing work. Consider me subscribed!
Bash
|
I love those little moments between the first kiss and the pepper spray... |
|
|
|
|
2015/09/21 18:55:59
Subject: Re:Custom multi-level city terrain (9/18: posing marines onto their nid bases.
|
|
Dakka Veteran
|
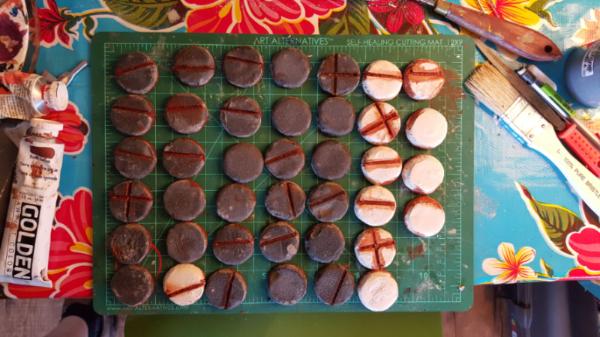
Thanks guys! Sto this weekend was all about bases:
yay! lots done. ALl the blank ones are the generics I have to do (ie: rubble but no heroing that has to line up with something).
I'll have more closeups tomorrow but we'f finished out the gaunt attacks and the ripper attackas bases, and the ripper attacks is a full 5 guys, with the seargent squishing one! it's super fun.
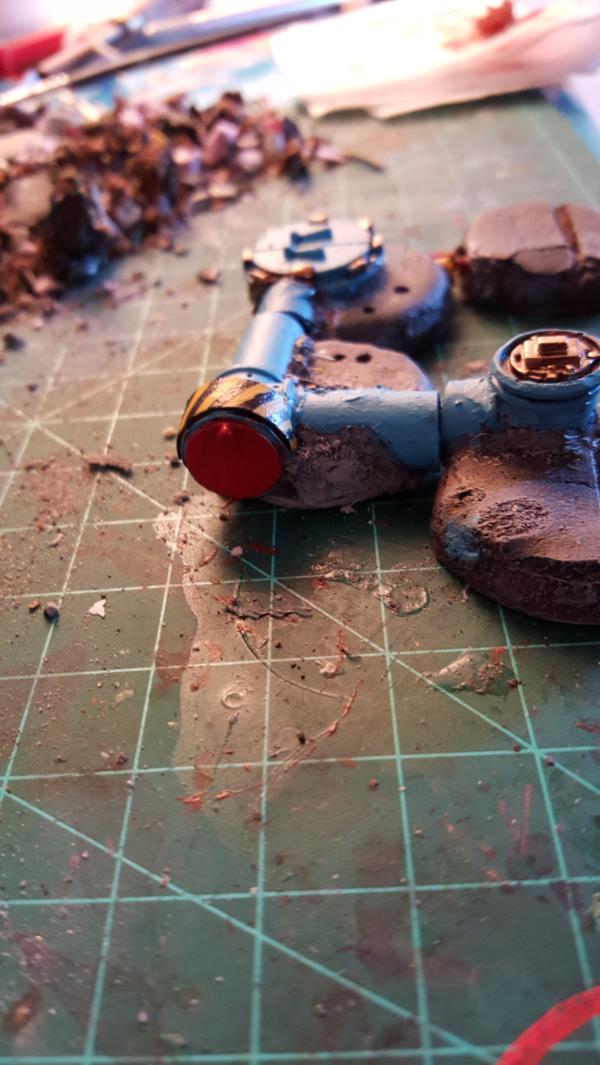
ANyways here is some paint on the piping, pre chipped!
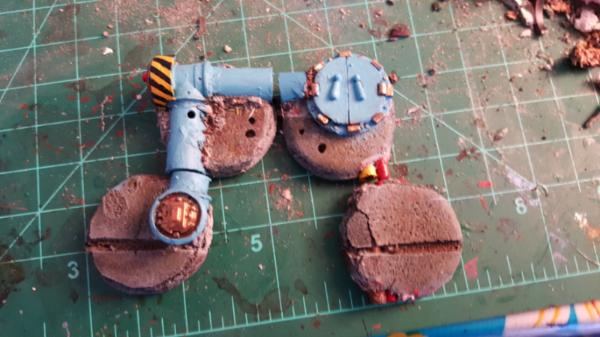
dont open the red door...
|
|
|
|
|
|
2015/09/22 17:08:28
Subject: Custom multi-level city terrain (9/21: Pipe bases.
|
|
Avatar of the Bloody-Handed God
Inside your mind, corrupting the pathways
|
Looking good!
My only comment is the bases look quite chunky.
|
|
|
|
|
|
2015/09/22 18:27:50
Subject: Re:Custom multi-level city terrain (9/21: Pipe bases.
|
|
Dakka Veteran
|
|
|
This message was edited 1 time. Last update was at 2015/09/22 18:28:24
|
|
|
|
|
|
|


 6th Skylight Patrol Contingent
 = 131
= 131