Mission – Crusade/Relic
Army Lists
CSM/Daemons
HQ
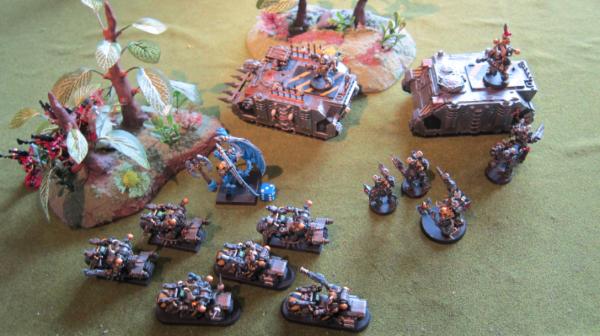
Lord - khorne, bike, axe blind rage, sigil corruption (Warlord – re-roll boon, Gift – shred)
Sorcerer -
lvl 3, terminator, familiar
(terrify, puppet master, shriek)
Troops
10
CSM 2x melta, rhino, dirge caster
8
CSM melta, combi melta, rhino, dirge caster
Heavy
2 Obliterators, Nurgle
2 Obliterators, Nurgle
5 Havocs, 4x lascannon, vets
Fast Attack
Heldrake
Allies
Bloodthirster –
(4+ FNP, portaglyph)
10 Plague Bearers
Army Lists
Eldar
HQ
Exarch – mantle of laughing god, power lance, power axe
Karandras[/color]
Troops
5 dire avengers
Wave serpent – scatter laser, shuricannon
3 jetbikes
3 jetbikes
Elites
5 wraith blades
Heavy
Wraithknight
3x warwalkers – scatter laser, star cannon
Fast Attack
Crimson Hunter
6 warp spiders
4 shining spears
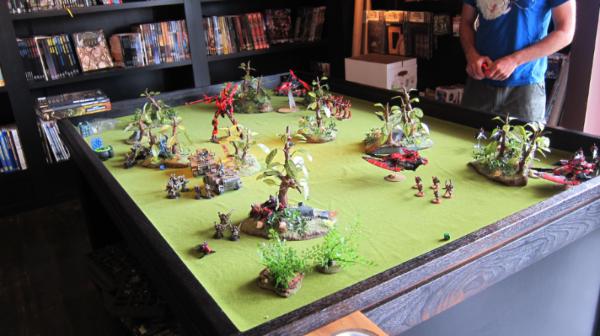
Deployment: Dawn of War
Night Fighting: Yes
Objectives: CSM 2 ; Eldar 1
First Turn: Eldar
Pregame Analysis: My opponent, seaphoenix, and I came in with different goals for the game. Seaphoenix continues to explore the latest Eldar codex to look for units and combos that are not obviously powerful. He enjoys finding a use for units that have fallen through the cracks. He’s a true Eldar player in that regard. He’s been playing since 2nd edition and has a bunch of tricks up his sleeve. Even in the games when I am blowing him off the board, come turn 5 he’s pulling out some moves that keep him in contention. He’ll try to present difficult choices to me and grind my units down until his jetbikes can swoop in and take the objectives in the end.
I on the other hand am looking to fine tune my Chaos tournament list. I don’t have much guile and frequently forget the order of operations. I get excited about the shooting phase or the assault phase that’s to come and forget to move. This is why my army is based upon running forward and trying to chop things. For this game I decided to swap a heldrake for some lascannon havocs. If I get first turn, I can potentially grab first blood with all those lascannons. My plan for the game is to stick together in the center. Use the plague bearers to grab a forgotten objective and hopefully chop off the wraith knights head.
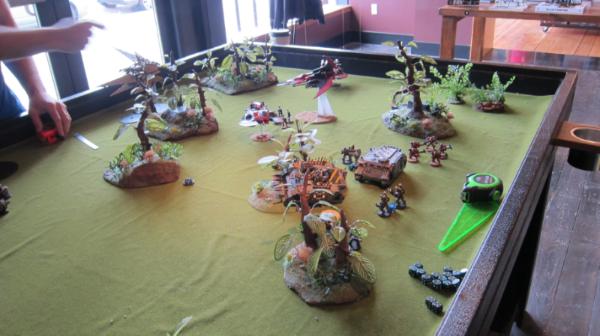
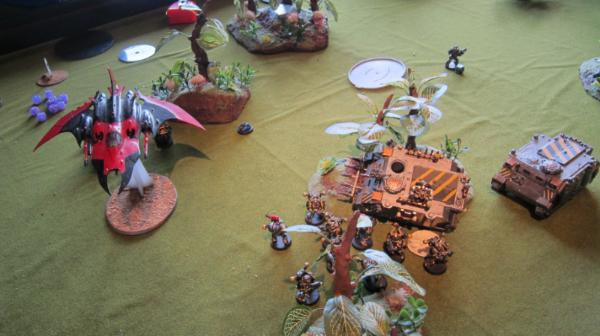
Setup

The Eldar deploy the war walkers and the wraith knight in a central location. The wave serpent, fire prism, autarch and shining spears are all in the right corner behind some terrain. Karandras ends up infiltrating on my side of the board with the wraith blades in the center of my deployment zone.
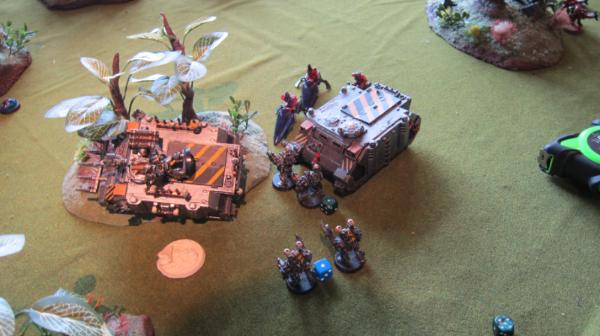
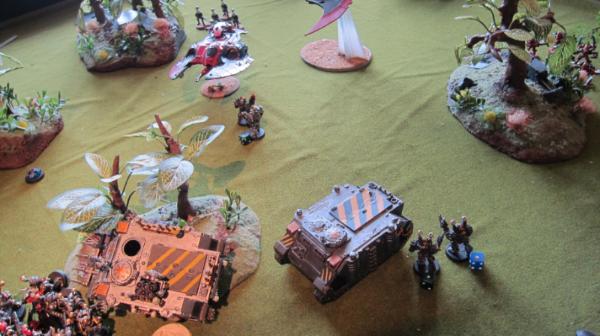
I deploy everything close to the center with the ability to threaten all his units. The obliterators are behind the rhinos and the havocs are hiding in terrain. The sorcerer joins a unit of obliterators on the board. The plague bearers are in reserve along with a heldrake.
Turn 1
Karandras hoofs into some trees. All the wraith blades except one get into terrain. The wave serpent and fire prism try to grab firing positions by moving out from behind the terrain. The wraith knight sticks a foot into terrain. The shinning spears and autarch move into the middle of the board. The warp spiders try to jump forward, but roll snake eyes. One of them stays in the warp and the rest decide not to venture forward.
In the shooting phase, the fire prism blasts my havocs. After cover saves, 2 are dead and despite their veteran status, the survivors run. Luckily they do not flee off the board. The rest of the shooting sees everything unload into the blood thirster. Despite not getting one
FNP roll, the blood thirster only loses two wounds. The shinning spears and autarch turbo boost to the right corner.
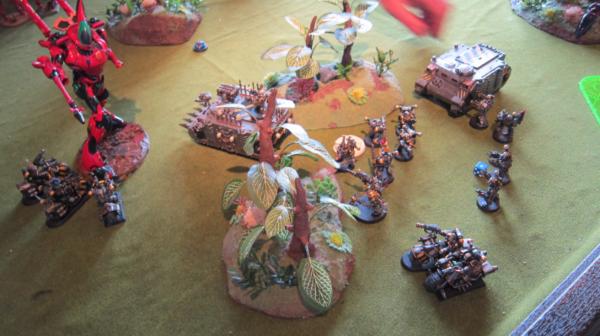
In the bottom of the turn, the havocs regroup and hope to land at least one snap shot before receiving laser lances to the face next turn. The sorcerer casts fear on Karandras and is denied. Knowing that my rolls are rarely hot and elegant plans fall apart easily, I move everything at Karandras. This being the first game that I’m supposed to try the portaglyph, I bone-headedly forget to chuck it.
I unload everything but two obliterators into Karandras and the end result is 1 dead blade and one wound on Karandras. Lascannon shots from the oblits do nothing to the fire prism while snap shooting from the havocs puts a glance on a war walker. Assaulting sees the thirster and the bikers make into combat. The thirster would take a wound from the mandible attack, but in the end roll just enough to end Karandras. The Khorne lord got a 5 for his daemon weapon roll and dispatched all the blades before they got a swing.
First Blood goes to the servants of the Blood God. With Karandaras dead I also get
Slay the Warlord.
Turn 2
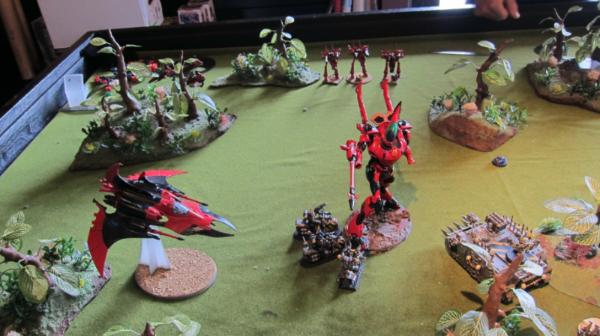
All the Eldar reserves show up. The wraith knight jumps forward. The warp spiders get a good roll and move forward. The autarch and spears move forward to deal with the havocs.
The crimson hunter manages to kill the thirster all by himself. That kills the thirster and his portaglyph that I forgot to use. D’oh. I was hoping
FNP would allow my rampage to go longer than 1 turn. The wave serpent and shinning spears wreck one rhino while the fire prism kills 3 of the survivors and puts one wound on an obliterator with a fortuitous scatter as it could not see anyone it killed before shooting. The knight hits the bikers once, but does not wound. To top it off, it fails the charge on the bikers. The autarch does not fail his charge on the havocs and ends them with his laser lance. A jetbike unit turbo boosts into the right corner.
Bottom of 2 I get the heldrake from reserve, the plague bearers are nice enough to stay away. The drake vector strikes the jet bike unit in the right corner and kills all 3. It would later only kill 2 out of 4 spears and whiff on wounding the autarch. In the psychic phase, the sorcerer takes control of the wraith knight. The jerk continues his parade of fail and rolls snake eyes with his shots at the war walkers. I have now taken control of knight 3 times including once this game. 5 out of 6 shots have been 1s to hit. The other was a 2.
Everyone jogs closer to the knight. I imagine that 6 melta guns, 2 multi meltas and 2 lascannons can soften him up enough for the bikers and lord to end him. All my shooting results in 2 unsaved wounds. Yikes. I’m not sure if the lord can take him now. In the end I decide that without the need to fight 1v1 due to the knight not being an independent character and the lord having shred, I might be able to take the jerk. Plus, if I don’t attack him he’ll just shoot me and then charge me next turn. I make the charge and the lord rolls well for the daemon weapon. In the end the knight pulps two chumps while the lord takes 2 wounds from him.
Turn 3
The shining spears move up behind a rhino with the autarch chuckling it up behind them. The warp spiders continue to move forward. The crimson hunter moves right to knock out the turkey. The turn does not go well for my opponent though. The crimson hunter only got a shaken result on the drake while the fire prism missed badly. The warp spiders inflict only 1 wound on an obliterator unit. My last rhino loses 2 hull points and its bolter. In the assault phase the spears and autarch both miss their charge.
The other highlight of the assault phase is the show down between the knight and my lord’s unit. The knight, perhaps too busy scratching his axe hole from the last round, missed all his attacks. In response the lord finished him off thanks to shred.
In the bottom of the turn I try to take control of the crimson hunter to initiate some friendly fire, but am denied once again. My bikers go off after the war walkers. One oblit unit goes after the autarch and spears while the other gets ready to shoot the fire prism. The turkey vector struck the serpent, but got no damage.
In the shooting phase I use the drake and the bikers to kill 2 war walkers and twin linked flamers from oblits killed the spears and put a wound on the autarch. A rending hit from the obliterators on the fire prism is denied with 4+ cover save. The assault phase saw the Khorne lord eat the last war walker while the obliterators made it into combat with the autarch and then watched 4 power fist killing blows be denied with 4+ invulnerable saves. The autarch then hit and ran.
Turn 4
The crimson hunter lined up a killing shot on my drakes butt while the serpent disembarked its avengers. The warp spiders continued their cat and mouse game. One unit of jetbikes continued its trip around the edge of the board to the left most objective.
The end result of shooting is a disappeared turkey and another wound on the lower unit of obliterators.
The charge phase does present a unique situation for me. The autarch got nailed with a melta gun hit. It wounded him and thus would instantly kill him. Seaphoenix suggested that the autarch should have his cover save as nothing specifies that you cannot get a cover save while charging. I disagreed, mostly because the other interpretation would work a lot better for me. I could not find anything to support my view, so he got his re-rollable 2+ cover save which he made. Then the autarch proceeded to make it into combat and claim another sergeant. Luckily the rest of the units held.
My plague bearers finally arrive and they land where they are supposed to, close to the left most objective. My Khorne Lord doubles back to help the
CSM unit fighting the autarch. One unit of oblits makes a move on the wave serpent.
The result of the turn is the disappearance of the wave serpent due to a combination of melta guns and power fists and box cars from my Lord to get to the autarch. He needed a 9 to get there. My fantastic luck does not last and despite 7 wounds being inflicted on the autarch, he saves 6 and deals a wound back to the lord. Tied combat. The autarch tries to hit and run, but sees his good luck end as he ends up stuck.
Turn 5
The crimson hunter goes after my second unit of
CSM who have been hanging out in the center of the board. The avengers scoot back toward their objective while the warp spiders try to get in range of shooting the second unit of oblits. The spiders kill off their target obliterators. The crimson hunter kills off all the
CSM in the sorcerer/
CSM unit. A jetbike unit claims the far left objective next to the plague bearers.
In the assault phase the daemon weapon finally turns on my lord. Despite his adoring fans yelling “Blood for the Blood God”, the self-inflicted hit deals a wound. However, he does manage to land two blows on the autarch and the invulnerable save finally gives out. The first boon roll turns the lord into a spawn. Thankfully the warlord trait allows for re-rolls on the table and I happily take it. I end up with shred again. Not knowing if that gives me a further re-roll, I decide to quit while I am ahead and just stop rolling on the damn chart.
At the bottom of turn 5 I take control of the crimson hunter and knock off one jet bike. They book it, but run only 4 inches away. I then stupidly decide that I need rear armor shots on the crimson hunter, despite it having the same armor all around, and move the bikers away from the
CSM unit holding the center objective. The plague bearers take up the left most objective. The end result of shooting is yet another cover save by the fire prism from a multi-melta pen from the surviving obliterator and that’s it.
If the game ends now, I take it two objectives to none….of course the game continues for the last chance for the eldar to pull out a victory.
Turn 6

The jet bikes regroup and take up contesting position on the leftmost objective. The avengers move up in terrain to shoot at the lone obliterator. The warp spiders move forward towards the center objective and
CSM unit there. The crimson hunter goes after the same
CSM squad.
In shooting the avengers finally end the obliterator threat and focus away to the objective. The fire prism, warp spiders and crimson hunter shoot the
CSM who go to ground. There are 3 survivors who decide to not run away.
At this point the Eldar have their objective and are contesting the other two objectives. If I flub this turn, I lose.

At this point I’ve finished my giant coffee and the caffeine insanity is making my incompetence worse. I realize that I’m in a bad position. The bikers are far away from the spiders and need to go around the
CSM unit to get a charge. This is because the
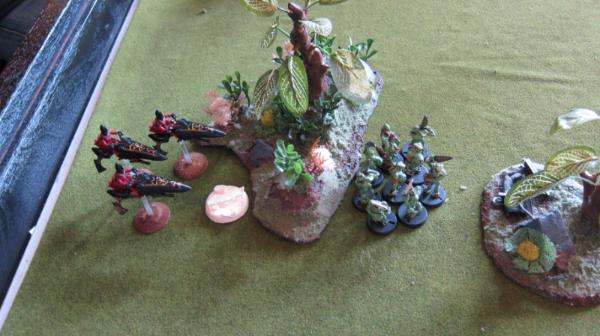
CSM went to ground and can’t move out of the way as they are using the turn to get back up. The sorcerer can hopefully save the day. He’s 6 inches away from the spiders. He casts terrify, but the spiders hold their ground and don’t run away. Plague bearers snuggle up to the jet bikes.
In the shooting phase I totally forget about the availability of psychic shriek and shoot the combi bolter at the spiders. This somehow actually kills 2 of them. Who needs loud crying when you have a bolt gun. The
CSM miss all their snap shots while the bikers are worried about killing only 1 spider and the survivors being out of charge range. The spiders do not run away despite the loses. Damn.
In the assault phase the plague bearers drown the jet bikes in poison wounds and are in sole possession of the left objective. Now the moment of truth in the center. The bikers attempt to charge…but thanks to a rending wound in overwatch, they fail it. One in a million shot. Actually 1/36, but feels a lot luckier than that. Perhaps the sorcerer can solve my problem. He needs 6 inches to get in. He gets 4. I roll to see if the game will continue and it does not. We each have an objective for primary and the relic lays untouched in the center.
We count up the points and I realize that I actually still won. We tied on the primary mission, didn’t touch the secondary mission. However I have first blood and slay the warlord. Seaphoenix only has line breaker.
Minor victory for chaos
Conclusions: I am lucky to have walked away with a win. I forgot to use the portaglyph and then made some dumb mistakes in movement toward the end of the game. With how I actually ended up playing the game, I probably should have deployed farther back out of range of the war walkers. Perhaps I should have used the rhinos as better cover for the havocs as well. Those jerks were one inch away from giving up first blood. Although if I did that, seaphoenix might have just blown up my rhinos for first blood making the havocs useless behind them. Overall I think I’m way better off with a second turkey than the havocs though. Also, the gift of mutation really paid off on the lord. Gaining shred with a daemon weapon allowed him to take on the wraith knight and actually win. It was a good back and forth game overall. Some big swings in momentum happened and I got a reminder that although a
40k game takes a long time, small loses in focus can take victory away very quickly.


