| Author |
Message |
 |
|
|
|
|
Advert
|
Forum adverts like this one are shown to any user who is not logged in. Join us by filling out a tiny 3 field form and you will get your own, free, dakka user account which gives a good range of benefits to you:
- No adverts like this in the forums anymore.
- Times and dates in your local timezone.
- Full tracking of what you have read so you can skip to your first unread post, easily see what has changed since you last logged in, and easily see what is new at a glance.
- Email notifications for threads you want to watch closely.
- Being a part of the oldest wargaming community on the net.
If you are already a member then feel free to login now. |
|
 |
2013/12/30 20:06:54
Subject: My first miniatures - 40k starter set
|
|

Fresh-Faced New User
|
Hi everybody
I got the 40k starter set as a try out to see how I like painting minis...I loved it! Want to get into painting and get an army together, then maybe play a game or two and see how I enjoy that side of it too. The idea is to keep me busy and as an alternative to going out drinking all the time which is both expensive and bad for my health...
The purpose od this thread is to share my results for any feedback you can offer and also to ask a few questions.
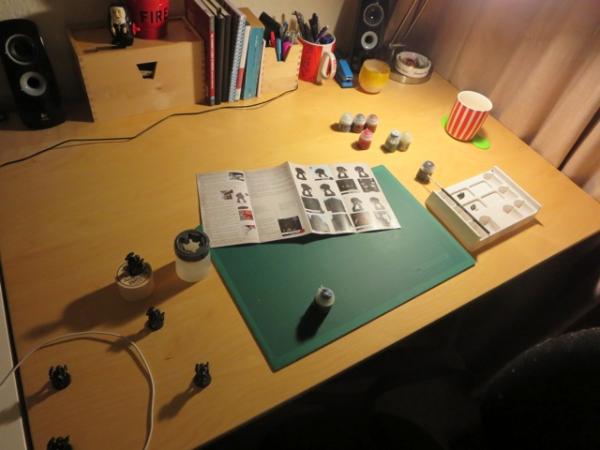
Here is my work space, as you can see...I don't have much right now!
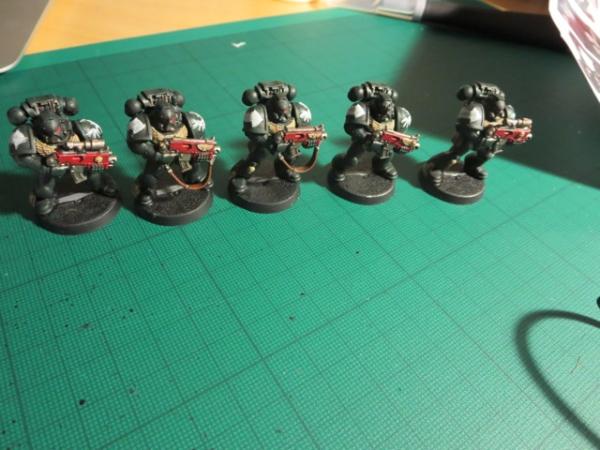
The finished result - I did these guys over a couple of days, having primed by hand (using the GW imperial primer that comes in the set). Total time taken is probably 5 or 6 hours at a guess, around an hour each mini, possibly slightly more. As I say, I'm completely new to painting in general so please excuse the quality of work here:
My thoughts:
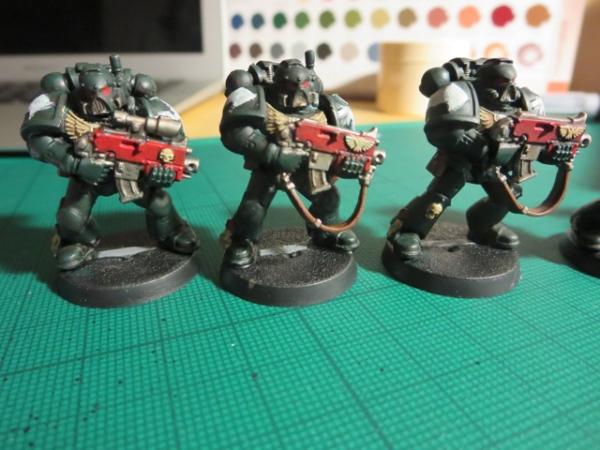
The primer - I did two layers as the first one went on a little patchy. I ended up putting on 2 layers straight from the pot, after deciding that a thinned out primer wasn't going to work very well. As a result, it was noticable that after priming some details (notably, the eyes/mouth area and the shoulder pad decorations) were less sharp and obscured.
In future I will be using a spray primer (already bought a can of Chaos Black spray, but wanted to start simple)
The base layers - particularly Caliban Green - I didn't thin it out enough again, and over loaded my brush so that it went on too thick and and spilled over where I was meant to be putting it.
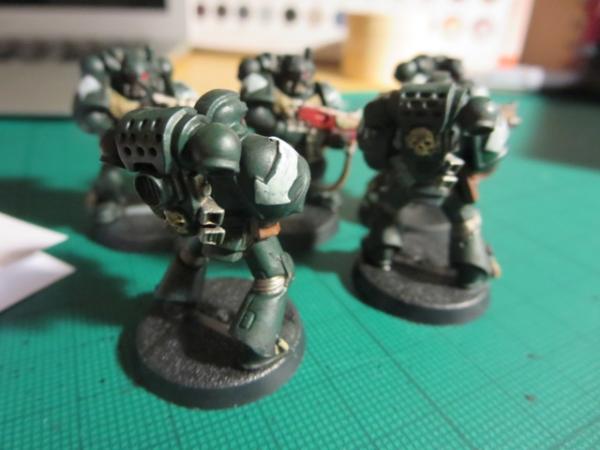
The markings on shoulder pads - these were the most difficult part without question, and they came right at the end. I had major trouble partly due to the brush acting up and partly because the markings weren't as raised as they should have been (due to base layers too thick).
Talking of the brush, I understand that the "Citadel Starter Brush" might not be the best quality and I wondered what you guys thought of this:
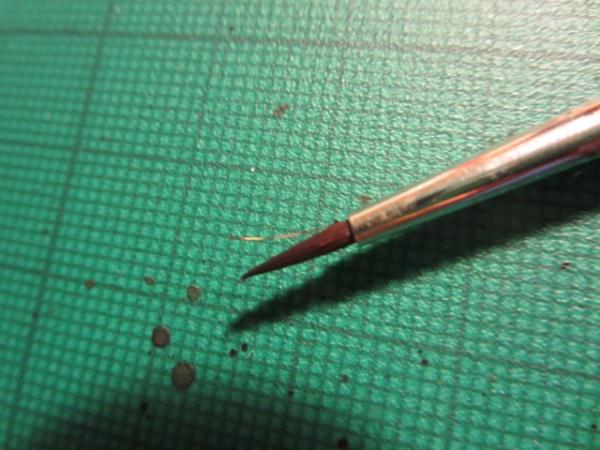
See how one thread of it has come away and looks discoloured - why did that happen?
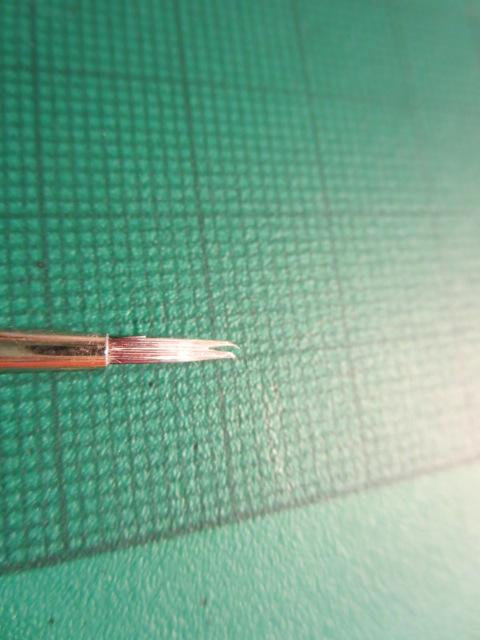
Also as I mentioned it was difficult to paint on the markings because my brush kind of "split" and wouldn't behave and make a nice neat point at the end. What causes this? IS it me or the brush, or both?!
Any feedback you have is gratefully received! 
|
|
|
 |
|
2013/12/30 20:13:57
Subject: My first miniatures - 40k starter set
|
|

Basecoated Black
|
Solid painting you got there. Regarding the brush, overloading the brush can get paint into the ferrule which will cause the hairs to split when the paint dries, also I would recommend that you clean your brush often, not just when switching colours.
|
|
|
|
|
2013/12/30 20:28:46
Subject: My first miniatures - 40k starter set
|
|

Pulsating Possessed Space Marine of Slaanesh
|
Welcome to the hobby! Though I have to admit...I did have a bit of a chuckle when you mentioned it as an alternative to something which is expensive and not good for your health
nice work so far! Feel free to branch out and try different painting techniques. Don't be afraid to make mistakes. And remember that 90% of the time, a paint job looks completely wrong...right up until the end, when it all comes together and it turns out you knew what you were doing the whole time.
|
----Warhammer 40,000----
  10,000 10,000  |
|
|
|
|
2013/12/30 20:29:41
Subject: My first miniatures - 40k starter set
|
|
Drakhun
|
Great start to painting. It even looks like your paint is about the right thickness.
When you start out you are going to go through brushes pretty quickly. It takes some time to learn how not to destroy them.
Easy things to do that will keep your brushes around longer....
1. Use cold water in your cup
2. Easy on the paint. Don't pull it in up to the ferrule.
3. Wash early, wash often.
4. Get some Masters Brush Soap. Go do it right now. Seriously why are you even still reading this?
5. Under NO circumstances dip your brush into a pot of paint! I don't care what you think you can see its too easy to get it in past the ferrule.
I hope that helps.
|
|
|
|
|
|
2013/12/30 21:49:52
Subject: My first miniatures - 40k starter set
|
|

Longtime Dakkanaut
|
I've got incredibly crummy brushes because I abuse them, but I find that twisting as you load the brush and as you paint can keep a point for longer. If the brush is frayed.... nothing will save that. If it's split like that, usually I can keep a sharp line or a sharp point.
GW Brushes are trash. Never ever again buy any brush from GW. Or any tools or any glue. The paint? That's up to you, but there will be people yelling and shouting from both sides of the fence. Tools, utensils, brushes, glue etc: you get better (or the same product in generic non-gw packaging) quality for less by just buying from your FLGS
you need more work on the white. I wouldn't repaint the entire arrows, just the rims/edges to make it look lit up, and it should do the trick.
|
|
This message was edited 1 time. Last update was at 2013/12/30 21:50:59
15 successful trades as a buyer;
16 successful trades as a seller;
To glimpse the future, you must look to the past and understand it. Names may change, but human behavior repeats itself. Prophetic insight is nothing more than profound hindsight.
It doesn't matter how bloody far the apple falls from the tree. If the apple fell off of a Granny Smith, that apple is going to grow into a Granny bloody Smith. The only difference is whether that apple grows in the shade of the tree it fell from. |
|
|
|
|
2013/12/31 08:32:13
Subject: Re:My first miniatures - 40k starter set
|
|
Defending Guardian Defender
Finland
|
Your painting is simple and good looking. I myself paint my miniatyres way they look good to me. (I only rarely paint those metallic joints to my space marines but lately i repaint them and give them more detailed look. Back to your Dangels they look good so keep up.
|
 Eldar 2000 Eldar 2000
 Blood Ravens 2200 Blood Ravens 2200
Red Corsairs 2100
 Dark Eldar 1200 Dark Eldar 1200
 Imperial Guard 800 Imperial Guard 800 |
|
|
|
|
2013/12/31 09:02:15
Subject: My first miniatures - 40k starter set
|
|
Neophyte Undergoing Surgeries
|
Looking good dude, very similar to my first starter set I painted a couple of years ago.
There's been lots of good advice on the brush issues above so I won't repeat that. As for you're painting I would suggest some edge highlighting as the next step...
Keep up the good work and welcome to the hobby
|
 2000pts Dark Angels 2000pts Dark Angels
 Just starting Ravenguard Just starting Ravenguard |
|
|
|
|
2013/12/31 10:00:12
Subject: My first miniatures - 40k starter set
|
|
Boosting Ultramarine Biker
|
Would recommend basing them, it doesn't have to be anything too complicated just some gravel glued to the base with pva would make all the difference
|
|
|
|
|
2013/12/31 12:11:51
Subject: My first miniatures - 40k starter set
|
|
Fresh-Faced New User
|
Thanks everyone for the kind words! Really appreciate it.
I think I made a major error, which led to the brush problems - to get paint from the pot to the pallete, I was dipping the brush right into the pot and mixing from there. It seemed natural to do so...now I'm thinking I should just be tipping the paint from the pot onto the pallete? Or do people use a dropper or similar?
These kind of questions are so basic you rarely see them covered on YouTube 
Anyway I think that paint got right into the ferrule causing the split in the point? Hmm...
 darefsky wrote: darefsky wrote:
5. Under NO circumstances dip your brush into a pot of paint! I don't care what you think you can see its too easy to get it in past the ferrule.
I hope that helps.
I've already got some Winsor & Newton Series 7 brushes but intentionally used the GW Starter Brush because I expected I'd probably do something wrong to damage my first brush, hahaha.
|
|
|
|
|
2013/12/31 12:15:00
Subject: Re:My first miniatures - 40k starter set
|
|
Brigadier General
The new Sick Man of Europe
|
IIRC the starter brush is just a some rubbish for painters to use when they first start. Just use the W&N.
|
DC:90+S+G++MB++I--Pww211+D++A++/fWD390R++T(F)DM+
|
|
|
|
|
2013/12/31 12:21:05
Subject: Re:My first miniatures - 40k starter set
|
|
Basecoated Black
|
If you want a recommendation for a brush (other than the already mentioned W&N series 7) I heartily recommend Rosemary's series 33 (or series 323 for dotting). I myself mostly use a size 0 or 1 for nearly everything as the brushes keep such a fine point with some proper care.
http://www.rosemaryandco.com/watercolour-brushes/pure-kolinsky-sable/pure-kolinsky-pointed
As for moving paint to the palette use a old brush or a dropper (or even better, get some dropper bottles to keep your paint in).
|
|
This message was edited 1 time. Last update was at 2013/12/31 12:23:09
|
|
|
|
|
2013/12/31 12:47:51
Subject: My first miniatures - 40k starter set
|
|
Sinewy Scourge
|
I use w and n brushes and they are great.
Spray primer is you best friend. 2 very thin layers is better than a thick brush layer.
|
|
|
|
|
|
2013/12/31 14:19:36
Subject: My first miniatures - 40k starter set
|
|
Drakhun
|
woolpack wrote:Thanks everyone for the kind words! Really appreciate it.
I think I made a major error, which led to the brush problems - to get paint from the pot to the pallete, I was dipping the brush right into the pot and mixing from there. It seemed natural to do so...now I'm thinking I should just be tipping the paint from the pot onto the pallete? Or do people use a dropper or similar?
These kind of questions are so basic you rarely see them covered on YouTube
Anyway I think that paint got right into the ferrule causing the split in the point? Hmm...
darefsky wrote:
5. Under NO circumstances dip your brush into a pot of paint! I don't care what you think you can see its too easy to get it in past the ferrule.
I hope that helps.
I've already got some Winsor & Newton Series 7 brushes but intentionally used the GW Starter Brush because I expected I'd probably do something wrong to damage my first brush, hahaha.
I don't want to get too in depth but things like stroke pressure can effect the longevity of your brushes. I have never bought a W&N simply because I use the Raphael 8404 series which is about the same but a bit more of well in the hairs. Pricing wise they are about the same, its just a personal choice.
Here is a great write up on brushes. It's from Meg Maples who just left PP she was one of their studio painters and knows her stuff.
http://arcanepaintworks.blogspot.com/2013/12/all-about-brushes.html
|
|
|
|
|
|
2013/12/31 15:08:28
Subject: Re:My first miniatures - 40k starter set
|
|
Yu Jing Martial Arts Ninja
|
Great start 
Regards brushes, I've recently switched from GW brushes to Army Painter, which are (I think) a little cheaper and I am finding keep their point much longer. Regiment brush for large areas, Insane Detail brush for fiddly bits, with regular rinsing the 2 brushes I just used to paint 28 gaunts are still as new (pretty much).
|
|
|
|
|
2013/12/31 16:06:25
Subject: My first miniatures - 40k starter set
|
|
Fresh-Faced New User
|
Brilliant start! The GW brushes are not that great to be honest. I struggle to do detail even with the smallest one. The advice above is all good though so no point in me repeating it. Welcome to the Hobby!
|
|
|
|
|
|
|
|
 Craftworld Eldar 27,500pts
