 - by Iain Wilson
The Maelstrom's Edge Terrain Sprue contains a slew of assorted plastic bits and pieces that can be used to pretty up your home-made scifi terrain, including a bunch of essential elements like doors, windows and pipe fittings. This week, I'd like to share a few tips and tricks for squeezing a little extra versatility out of the terrain sprue and adding some extra touches of detail to your buildings.
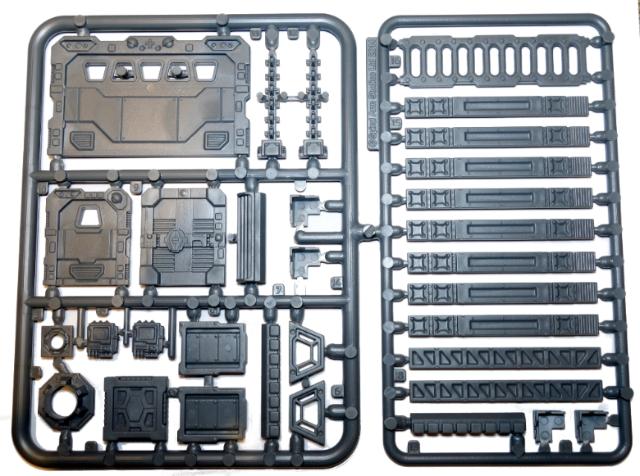
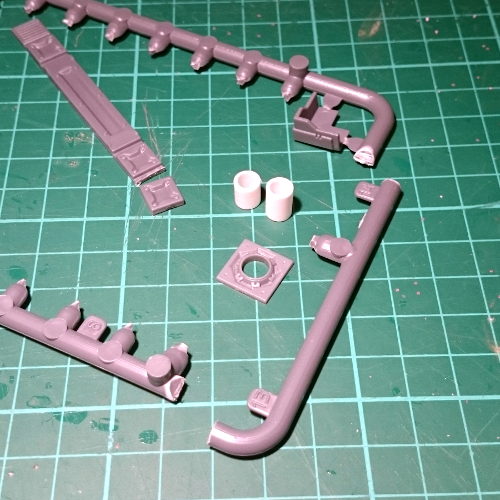
The terrain sprue in all its glory! While it's loaded with all sorts of interesting bits that can be clipped off and glued on to your buildings as-is, a little careful cutting and some extra materials will go a long way towards adding that extra detailing that helps to finish things off just right.
Handrails
An easy one to start with! The ladder from the sprue can be used for making railings for balconies or walkways, by cutting off one side along the red line shown below, with a razor saw or exacto knife. The lintel piece, cut down to length, is perfect for filling in the corners:
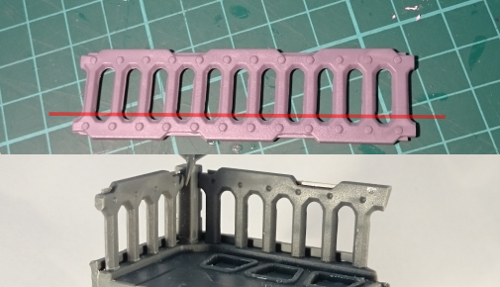
Alternatively, you can just glue the intact ladder sideways onto the outer edge of your walkway or platform, like this:
Ventilation Ducts
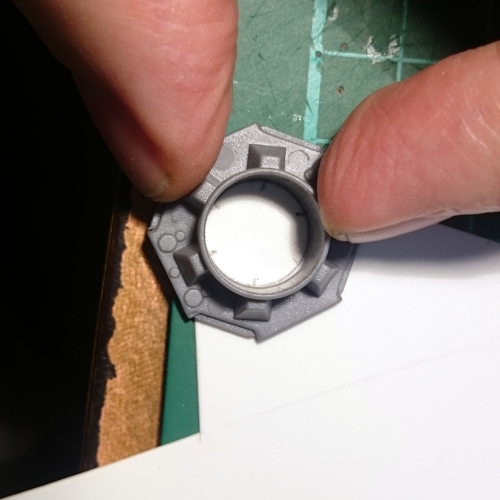
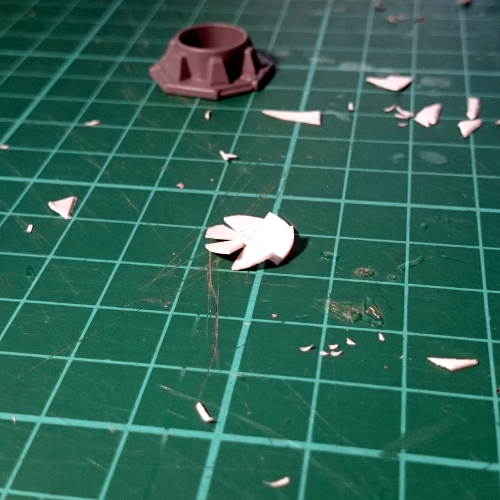
The large pipe fitting can be used for creating ventilation ducts with the addition of a fan blade made from plasticard or thin cardboard. Use the fitting itself as a template for the fan, by holding it upside-down against your plasticard or cardboard and drawing around the inside with a sharp pencil:
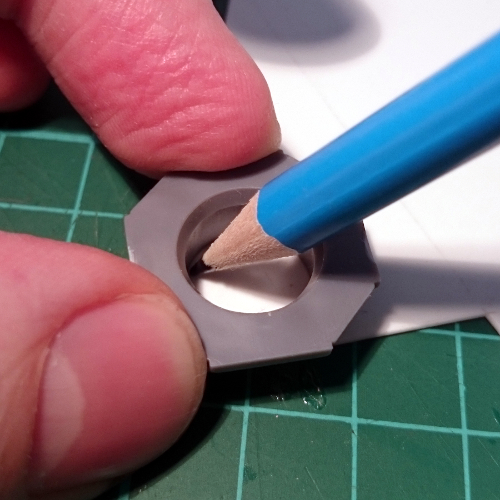
(In case you're wondering, you use the fitting upside-down for this because it flares out at the bottom. So if you draw around with the fitting right-way-up, your fan is going to wind up too wide to fit in)
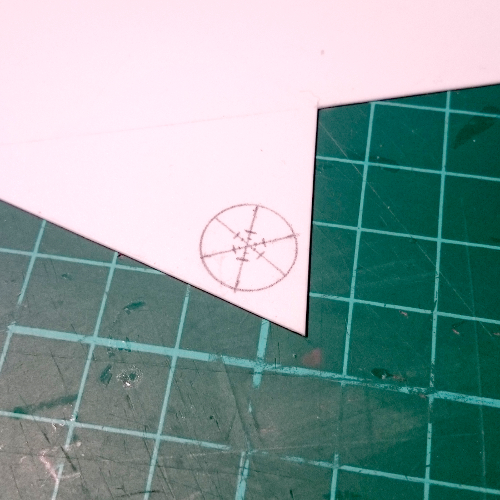
Next, you can flip the fitting up the right way, and use the buttresses as a guide to make six marks around the circle:
The join the marks across the circle, and along each of the resultant radial lines make another mark 2mm out from the centre.
Then cut out the circle, and cut inwards along each radial line up to the inner marks. Dry-fit it inside the pipe fitting to make sure it goes in, and sand around the edge if necessary so that it goes in easily - you don't want a tight fit, as it will deform slightly in the next step.
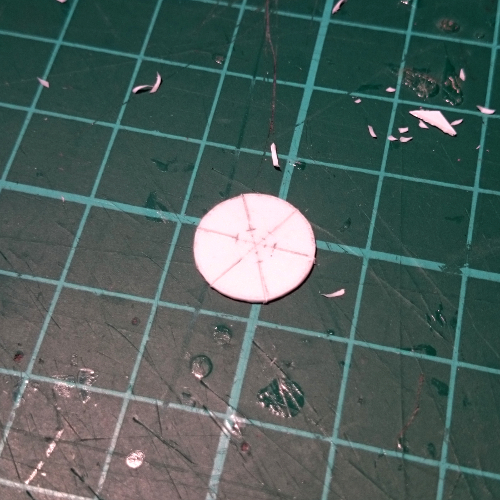
Now gently twist each of the segments around the circle to create a fan shape. If you're using plasticard, go gently here to avoid snapping it - cardboard is a little more forgiving at this step. Obviously, you also need to make sure that you twist each segment the same way, otherwise your fan is going to run into some operational issues.
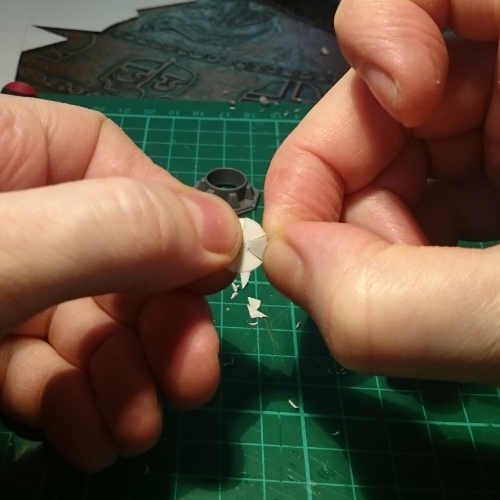
Your fan blade can now be glued in place inside the pipe fitting by applying a small amount of superglue around the edge and pushing it into place.
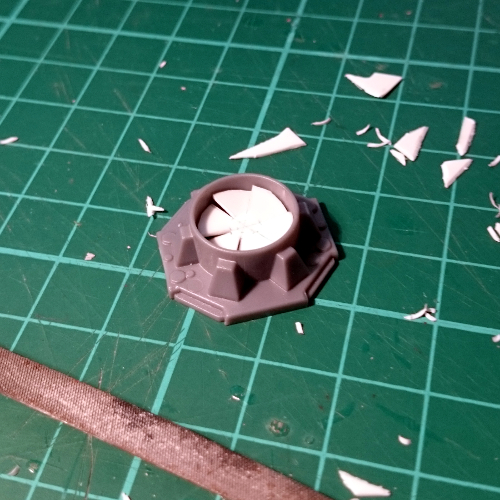
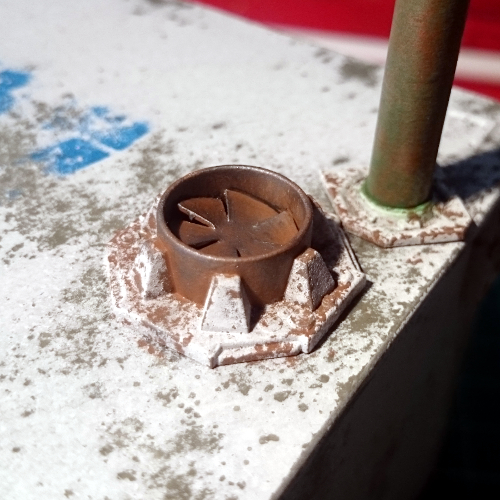
Once it's been glued into place on your building and painted, you ventilation duct can look something like this:
You can also create a more compact version using the smaller pipe fitting and a rotor assembly from an Epirian Firefly Drone. Simply trim off the mounting strut and fin from the rotor piece to make it circular, and glue it to the back of the pipe fitting, as below:
You'll need to cut a small hole in whatever surface you're mounting this on for the rotor assembly to sit in, so that the pipe fitting can sit flush.
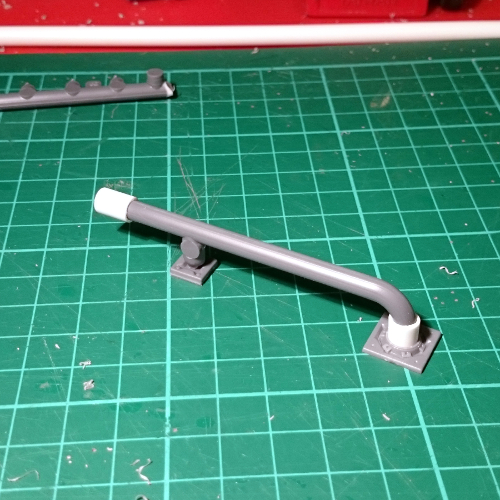
Chimney Pipes
I always try to look out for ways to make use of all of the leftover sprue that builds up from all of those plastic projects. The round sprue used on this terrain set is particularly useful with just a little help from some plastic tubing. Take the small pipe fitting, an 'L'-shaped piece of the thinner side of the terrain sprue, a square cut from the bottom of one of the support struts, and a couple of short pieces of 7mm (1/4") plastic tubing (Plastruct, Woodland Scenics or the like).
The 7mm tubing fits nice and snugly into the small pipe fitting. In a happy coincidence, the thinner section of the terrain sprue fits just as neatly into the 7mm tubing. If you remove any extraneous casting gates and mouldlines from the sprue piece and fit it all together, you can do this:
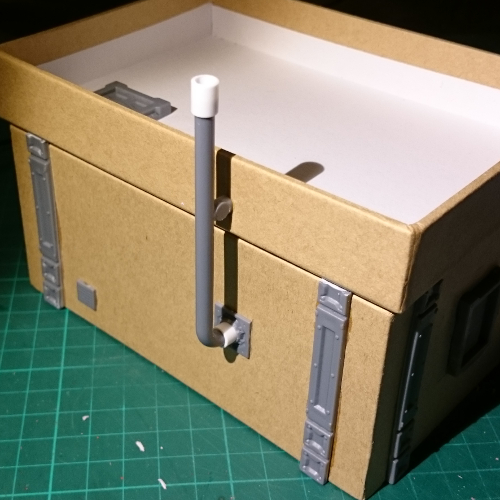
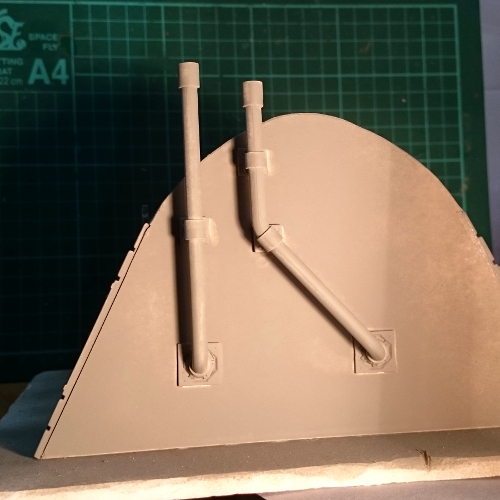
This can be then glued in place wherever seems appropriate, and can be easily reconfigured to match your terrain using different combinations of sprue sections and/or extra bits of tubing or support strut sections.
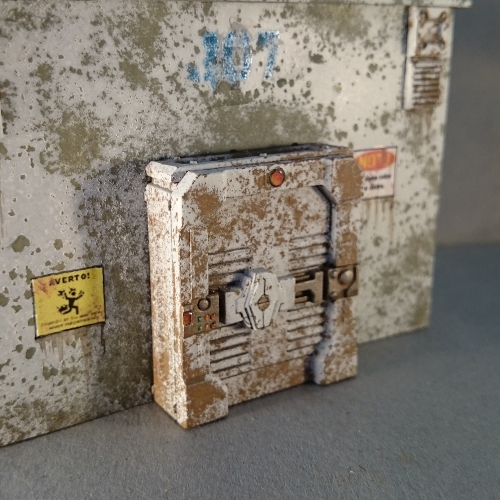
Trouble-free Doors
Some people have been using various plastic containers, storage trays or home guttering sections in conjunction with the terrain sprue to create some interesting buildings for their
MEdge tables. One of the big problems with some of these options, though, is that the doors need to be inset into the walls, and cutting some plastics easily and cleanly in order to do so can be problematic. So I came up with this solution:
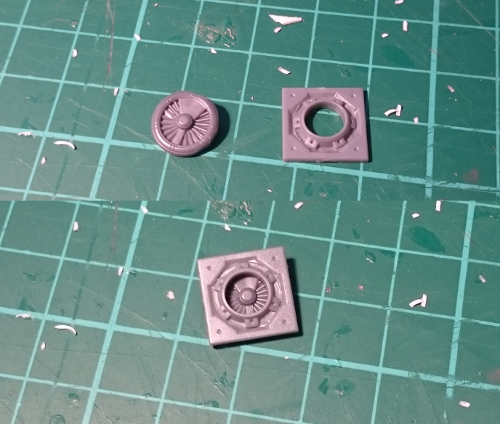
Take a door, and three support struts.
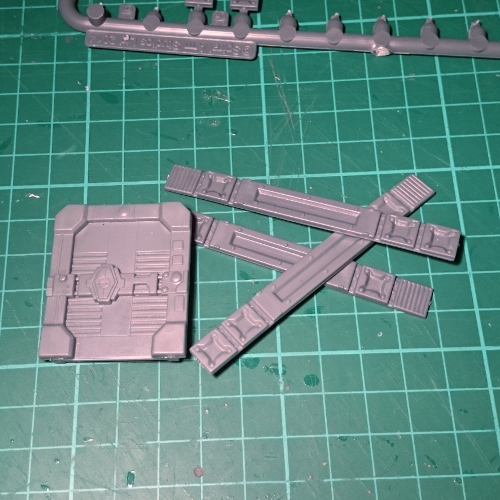
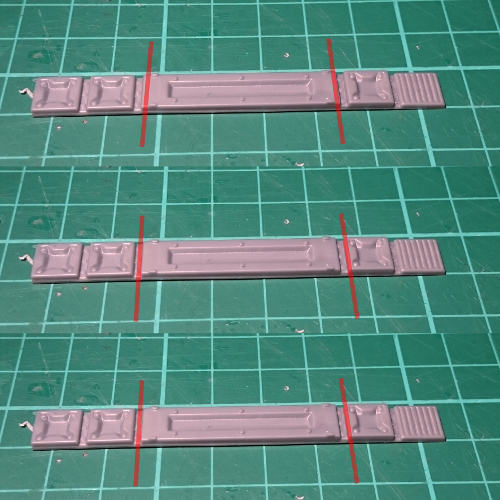
Trim off the support struts along the red lines in the below diagram, keeping just the middle pieces. Note that the top piece in the below picture is slightly different to the other two, which have a rivet strip left on one end:
The glue them in place around the back of the door frame. The strut piece from the top of the diagram goes along the top, and the other two (which, unless something's gone horribly wrong, will be identical) go down either side with the rivet strip at the top.
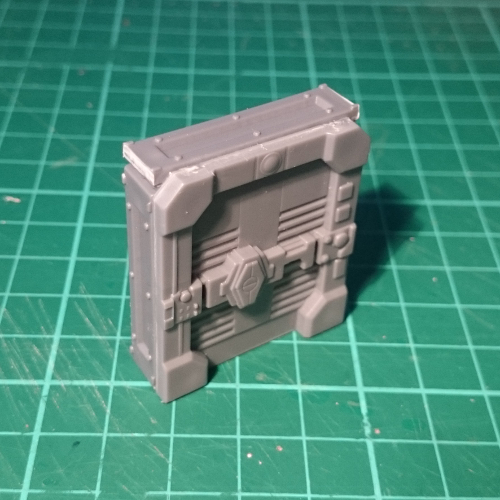
This can then be glued in place on the wall of whatever you're using to make your building, with no cutting of the wall required.
These are just a few ideas that I've found useful when constructing terrain. One of the great things about a product like this is the more-or-less limitless possibilities opened up through the ease of working with plastic components and the open-ended nature of the construction allowed by it. It's always great to see people take the sprue and find new and unexpected ways to use the components on it. So why not give it a go? You can pick up the Maelstrom's Edge terrain sprue along with the rest of the Maelstrom's Edge model range from the webstore
here.
As always, feel free to pop along and share your work, or ask any Maelstrom's Edge- or hobby-related questions on the
Comm Guild Facebook page!
For other Maelstrom's Edge modeling articles, including tutorials and walkthroughs of a wide range of different building and miniature projects, check out the article roundup
here.


