Switch Theme:

Arctik_Firangi's Grav-Tanks (quite pic-heavy)  [RSS] Share on facebook Share on Twitter Submit to Reddit
»
Author Message
Advert


Forum adverts like this one are shown to any user who is not logged in. Join us by filling out a tiny 3 field form and you will get your own, free, dakka user account which gives a good range of benefits to you:
  • No adverts like this in the forums anymore.
  • Times and dates in your local timezone.
  • Full tracking of what you have read so you can skip to your first unread post, easily see what has changed since you last logged in, and easily see what is new at a glance.
  • Email notifications for threads you want to watch closely.
  • Being a part of the oldest wargaming community on the net.
If you are already a member then feel free to login now.


Made in au
Stormin' Stompa


YO DAKKA DAKKA!

This blog is a continuation of my Wood Eldar Project. Now that I've finished my Dire Avengers I can get into my six Grav-Tanks. I've got a Fire Prism, three Wave Serpents and a pair of Falcons to knock over, and I'll be posting WIP here.

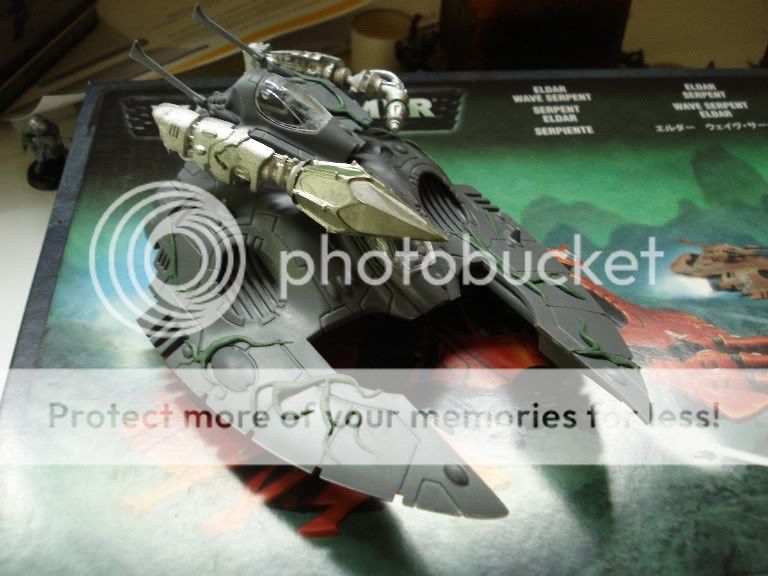
First I'm going to test a colour scheme with my Fire Prism. I'm sure everyone has seen THIS Fire Prism - it was on the Dakka Gallery hompage for a while. I'm going with a brown-green scheme, so I'm going to reference some blending from this model. The freehand is a little beyond me... but mine will be overall darker and getting the green-ink treatment.

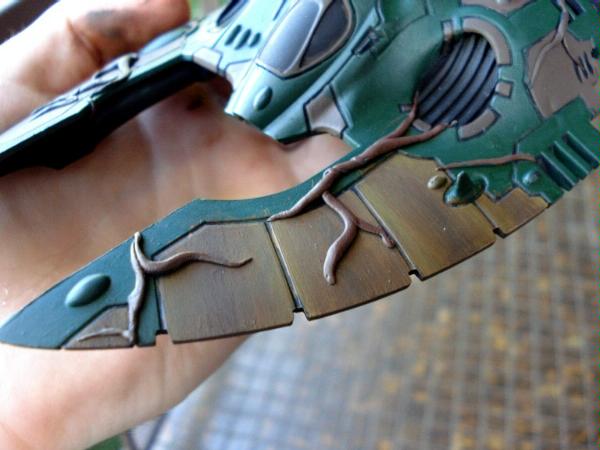
But rather than the freehand vines, I've made some out of greenstuff. It'll be interesting to see how they paint up. The components under the front of the hull have been seperated for priming, as will be the turret.


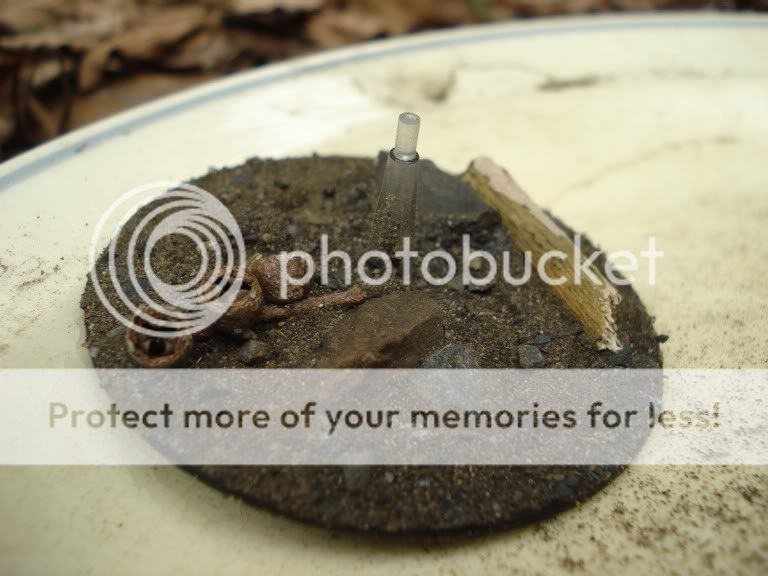
Since I forked out for nice bases on my Dire Avengers, I can do no less for my flying stands. I got some of THESE bases from Back2Basix a while back, but only have 5 obviously. and most of the detail is in the centre... not much point drilling those out. I think I'm just going to work with the regular flying stands.

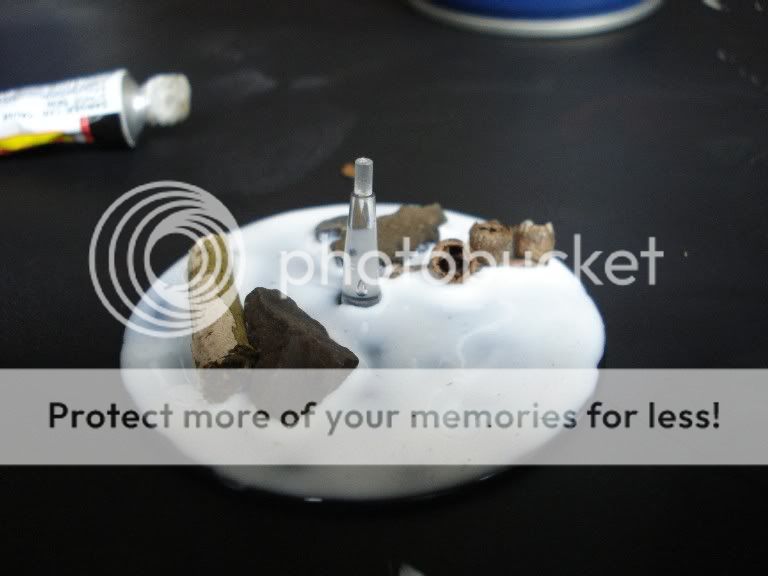
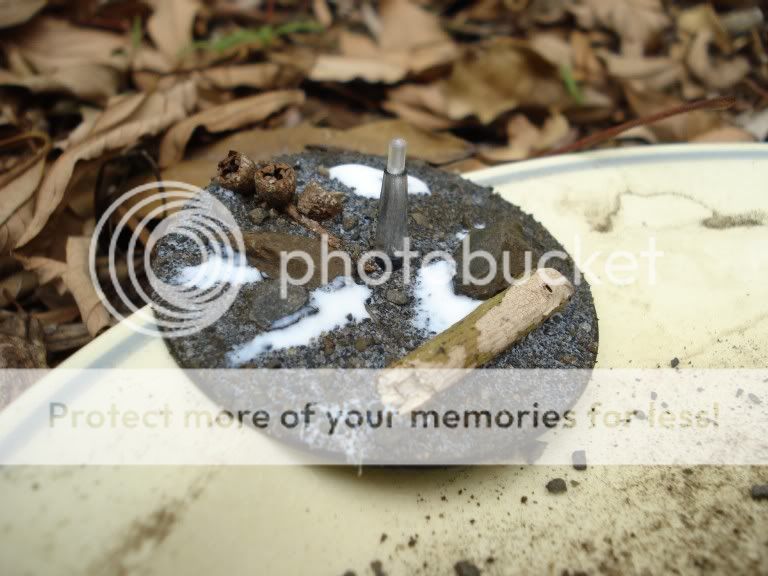
First I primed the flat part black, then put the stand into its socket as normal. The primer helps with PVA glue behaviour. I superglued a few larger rocks, sticks and plant matrial onto the base, then covered it with 70% PVA / 30% Water (I use a plastic goblin spear to place and spread my glue, works great!)


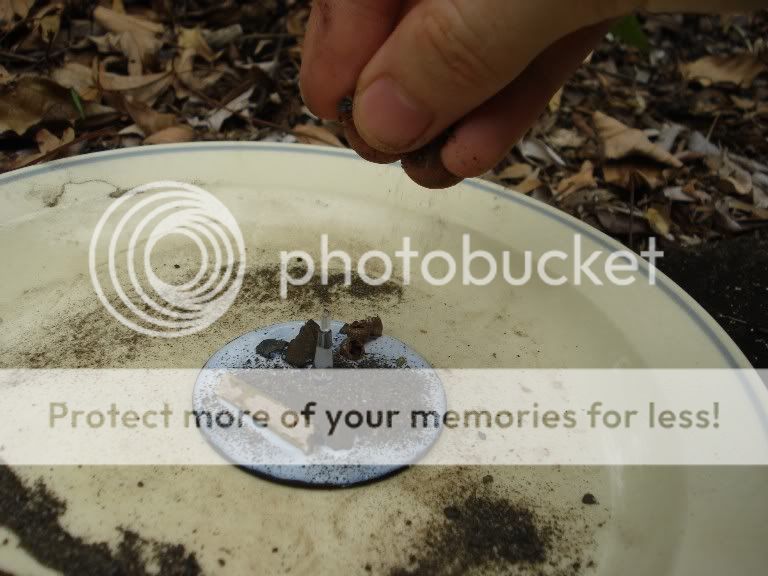
Obviously next I sprikle it with my intended basing medium. I live on an unguttered corner that people drive pretty quickly around, and there's plenty of road debris around. I grade it by putting it in a circular dish and shaking - this seperates the larger stone to one side, and I can easily get four different sizes of material.


It's still pretty thin, at this point, so I blow/shake away excess, goop on some sore glue (especially around raised details) and repeat twice:


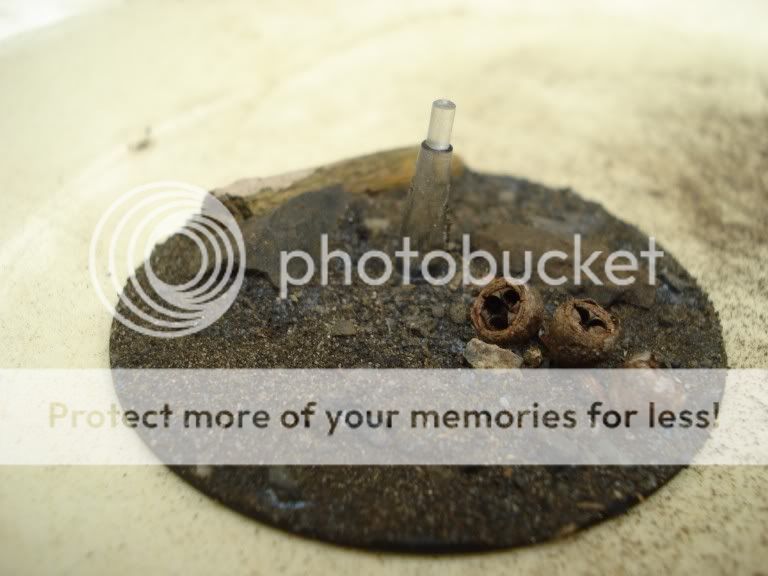
This has to dry overnight at least, and then it'll be primed to help hold it together... and obviously because I'm repainting it.


Then it occured to me that it wouldn't be all that noticeable under a grav-tank on a low stand... but hey, detail makes the piece.

This message was edited 3 times. Last update was at 2009/02/02 13:34:24


Made in us
[MOD]
Madrak Ironhide


Yeah, I like to base then prime, too. If I ever do Grav Tanks again, though,
I'm going to just brass rod the darn things. I could never get flight stands to
ever stay unbroken.

DR:70+S+G-MB-I+Pwmhd05#+D++A+++/aWD100R++T(S)DM+++
Get your own Dakka Code!

"...he could never understand the sense of a contest in which the two adversaries agreed upon the rules." Gabriel Garcia Marquez, One Hundred Years of Solitude 
   
Made in au
Stormin' Stompa


YO DAKKA DAKKA!

I intend to widen the hole in my Fire Prism, since that seems to be the only way to stop it lurching at weird angles. Ought to make it a bit less prone to breakage too.

By the way, I've just accessed Dakka on my phone for the first time. Comes out pretty neatly too. I recommend it for.. well, for browsing at least. I don't have a touchpad or keyboard layout. I would kill for a keyboard that fits into the USB/headphone socket on my phone.
   
Made in au
Stormin' Stompa


YO DAKKA DAKKA!

Orkhide Shade and Scorched Brown basecoats. I'm pretty intimidated already by the number of edges on these things... my desire for quality has never matched my ability to paint, and the prospect of getting just this one up to scratch is enough. The five that are to follow it will be maddening.


Here's to!
   
Made in au
Stormin' Stompa


YO DAKKA DAKKA!

Constructive help, please. I've never tried any sort of blending proper... but since this is supposed to look sort of like wood, the streakiness doesn't go down too badly.
The green would require a much smoother blend, and I'm not sure how to achieve it.

I can get retardant and try that... either way I guess it will take practice. I basically put down a scorched brown strip in the centre, two bestial brown strips beside it, and snakebite leather strips outside those. They were moderately watery, and I just kind of painted them together. I haven't looked at any techniques.. so what about putting down a watery coat of the darker layer and blending in from the outside with the lighter tone? Or the opposite?

I have no idea.

I intend to polish it up a bit with a light flesh wash, especially to contrast the matt brown vine parts.

This message was edited 1 time. Last update was at 2009/02/06 07:50:13


Made in gb
[ADMIN]
Decrepit Dakkanaut


London, UK

I dont think I would bother trying to wet blend on that. Instead I'd do simpler layered blending, depending on what you want the lightest colour to be. Id go for about 5 steps to start with at least (ratios depending on the actual colours used)
eg:
green1 : green2 = 35:75
green1 : green2 = 50:50
green1 : green2 = 75:25
green2
green2 : green3 = 25:75

Check out our new, fully plastic tabletop wargame - Maelstrom's Edge, made by Dakka!


Forum Index » Dakka P&M Blogs
Go to: