Adept Apologist's true-scale tutorial
(With gratitude to Elusive71, Synapse, Doghouse et al.)
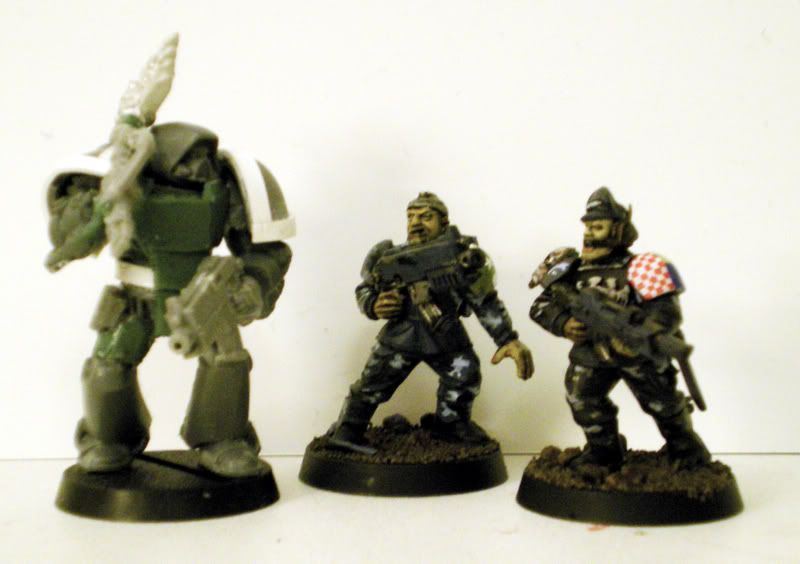
Whether you call them true-scale, art-true, heroic, actual-scale or just plain 'embiggened', larger Astartes are a great project and modelling opportunity.
This tutorial covers the intimidating chest and legs. The model can be finished with any terminator arms and shoulderpads, a standard marine head and backpack.
You will need:
Modelling putty
Sculpting tool
One or more sets of terminator legs
One or more standard marine torsoes and backs
Some lubricant (You can get little pot of vaseline lip balm, which is ideal)
Patience (If you don't have much, have a cup of camomile tea and relax – or apply to your local techpriest for the Rite of Pure Thought)
Legs:
1. Clean and prep a pair of terminator legs. I trim the 'bolts' from the side of the knee to slim the legs down subtly, but you can ignore this step if you prefer. I like to work on four or five sets at once (it gives uniformity, and stops you wasting greenstuff).
2. Next, mix your putty and let it cure for ten minutes or so, so it's still fairly sticky. Using the greased blade (vaseline is good) of your sculpting tool, cut a small block (approx 2 x 2mm) and press it into the recess of the inner thigh.
+++
Tip+++
For modelling putty, I recommend ProCreate, available from
Heresy miniatures. If you're using the
GW greenstuff, cut away the join between the yellow and blue parts before mixing. This part will have partially cured, and give you lumps in your work – not nice!
3. Press the putty into place with the rounded end of your sculpting tool, then grease the flat side and smooth it into place until the putty is flush with the support struts of the inner thigh.
4. Fill in the other areas on the legs in the same way. Work the inner thighs, then the outer thighs, and leave the backs of the calves (these will need a larger piece of putty – 3 x 4mm or so) until last. This approach means you can handle the piece as much as you need without smearing your work.
+++
Tip+++
I use a
GW modelling tool; but you can get by with a sharp knife and a tool with a smooth and a flat end. I'd also recommend clay shapers, which look a little like a paintbrush with a silicon end. These make smoothing and shaping putty a breeze, and won't stick.
5. This should have filled in the recesses without overflowing. If there are gaps, gently press in tiny pieces of putty until they are full. As an aside, I prefer the lower legs to look like there is a heavier plate at the front, and so I do not smooth the calf area round to the front, but simply fill in the recesses (see the picture below).
6. Grease the flat end of your sculpting tool, and with a gentle pressure, draw it down over the first area of putty, from top to bottom, to smooth it. Start at one of the hidden support struts, and work gradually round the area until you reach the other side.
This part is not difficult, but can be frustrating – so work patiently! If you've put a little too much greenstuff in the recess, this may cause the excess greenstuff to spill over the edge of the area. Carefully trim it away with the blade of your sculpting tool.
+++
Tip+++
If the greenstuff starts to lift away, you're using a little too much pressure. Press the greenstuff back into place, and work on another area while it hardens a little.
7. Being careful not to smudge or smear your work, smooth out the other areas in the same way. If you find the support struts start to show through the greenstuff, or the curve is not perfect, try adding a little more greenstuff and smoothing it in.
8. You may find that the upper legs are quite frustrating to smooth. You can cheat a little by using the flat of the tool to 'lift' a little of the greenstuff at the edges of the plates (i.e. at the groin and above the kneejoint). This creates the illusion of a hard edge.
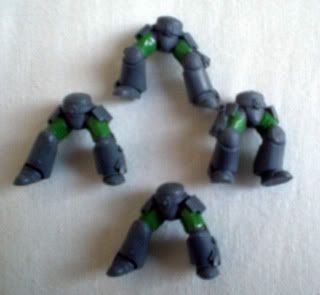
9. At this point, you should have a set of legs that look like giant power armour. Nice one! Wait for ten minutes or so, and add any details that you like now – I use the blade to make a little recessed box on the front of the thigh and use the point of the tool to make two little dots. Little techy details like this really help give the impression of scale.
10. Bask in the glory of making your own pair of legs for true-scale marines. They should look a little like this:
...and the back:
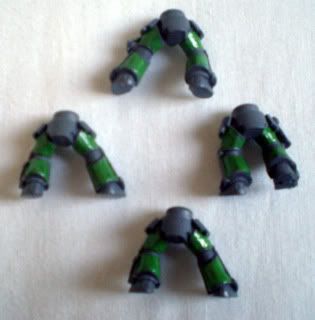
(Only hopefully not so blurry!).
11. Leave for a day, and you can file down, smooth off and generally tidy up the greenstuff.
Torso
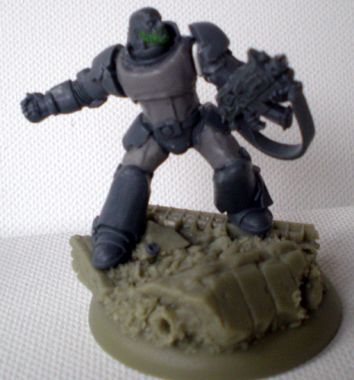
Following these instructions will result in a simple but effective torso, like this one:
+++
Abdomen+++
1. Clean and prep a normal marine torso and back. Carefully trim away any of the circular vents or other details you find interesting and put them to one side. Trim the belt buckle away carefully – you'll need it later. Like the legs, I like to work on four or five sets at once.
2. Glue the torso to the prepared legs.
3. Next, mix your putty and let it cure for five minutes or so, so it's still sticky. Place the putty on a tile or other non-absorbent surface (blister pack plastic is good), then spread it out to make a thin sheet. Check you can lift it off the surface without it distorting. If you can't, rub a tiny touch of vaseline on the tile and start again.
4. Cut a thin block of putty (8 x 2mm) and use the rounded end of the sculpting tool to press it gently into place round the waist. It should wrap the whole way round the marine, and thicken the whole waist to the width of the plastic upper chest.
5. Grease the round side of the sculpting tool and smooth the putty into place until the greenstuff is flush with the belt. This should cover the awkward join of the terminator legs and the marine torso, creating a smooth vertical column from the top of the terminator belt to the base of the marine chest.
6. Allow to dry overnight.
+++
Chest+++
7. Prepare the putty as above, letting it cure for 10 minutes this time. Place the putty on a tile, then place baking parchment over the top and use a pen or dowel as a rolling pin to ensure the putty is nice and thin. A depth of 1mm is great.
8. Remove the baking parchment and use the greased blade of your sculpting tool to cut a small block of putty (approx. 2 x 3mm). Place this over the cabled stomach area, and gently press it into place with the rounded end of the sculpting tool. If it distorts, gently nudge the edges back in from the side to sharpen them up.
9. Cut a rectangle of putty approx. 8 x 3mm, and place it over the chest of the marine. Press it into place slowly and gently, making sure that the edges of the rectangle reach from armpit to armpit.
+++
Tip+++
Stage 8 allows for many different options – the rectangle described will create a traditional marine chestplate, but you can make a Mk IV plate by making a T-shaped piece and covering the abdomen; or make a n-shaped piece to cover the laterals and flanks of the marine. Experiment and have fun, and use the artwork as reference.
10. Use the rounded end of the sculpting tool to smooth the top of the rectangle of putty down onto the top of the chest piece. Do not allow it to touch the neck of the plastic torso, or you'll lose all the lovely detail. Smooth the top corners into place, so that they blend with the curve of the plastic piece. This stage can be frustrating, but be patient and you'll get it.
+++
Tip+++
Like the legs, you can cheat a little by using the flat of the tool to 'lift' a little of the putty at the edges of the plates (i.e. at the bottom of the chestplate and at the sides of the stomachplate). This creates the illusion of a hard edge.
11. Allow to cure overnight.
12. Glue the belt buckle in place, and add small squares of 0.5mm plasticard as spacers to the shoulder joints to finish.
Success!
If you'd like a more complex one, feel free to experiment!
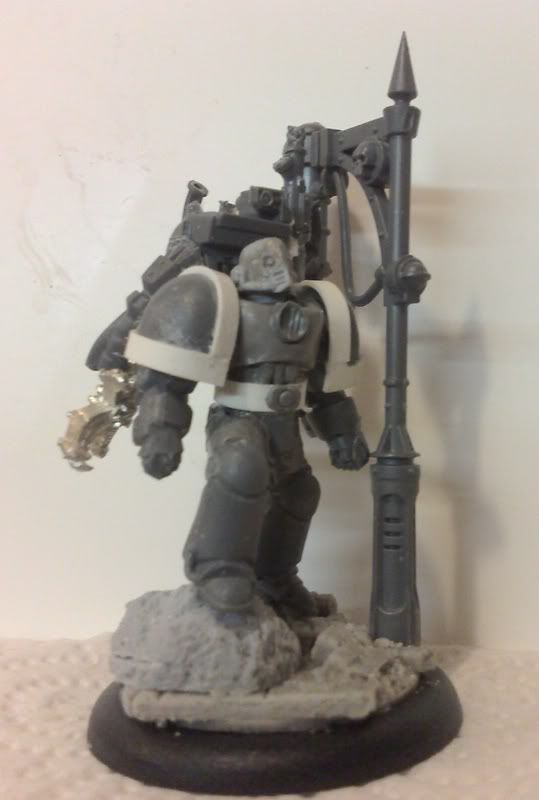 I used the rounded end of the sculpting tool to press into the centre of the chest piece, creating a small depression. The detail I carved from the original torso was then glued in place once the putty had cured. The stomach plate was replaced with piping made by scraping lines into the plate while it was uncured. A plasticard belt was also added, and the belt buckle glued onto this.
 This example is slightly more complex, but much more effective. As well as piping in place of the stomach plate, small vents were pressed into the corners of the torso plate while uncured; and a textured central reinforcement was added by rolling the grip of a drill over the putty on the tile, then cutting a block of the textured putty and gluing it in place once cured.
 This torso involved adding a plasticard belt, securing various additional plates made separately, mounting carved details and also cutting into an over-extended chest piece to make a recessed protective collar. A mark III/IV hybrid appearance was added by extending the chest piece over the stomach area.
Although considerably more complex, the methods used are the same.
Experiment, give it a go, and don't be put off by failure. Success will come with practice, patience and a steady hand.
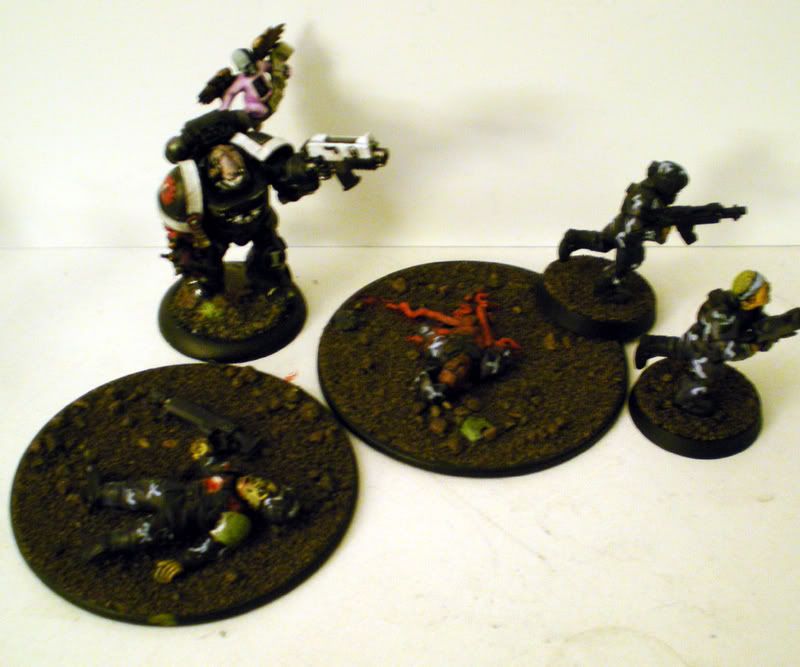
I hope that the tutorial's helpful, and good luck! With a little paint, you'll soon be well on your way to making a whole army of these fellas.


 The oonivers vill burn!


 Red Templars
 Radical Inquisitor


 3rd 40k Army

 -Da Drillboss


 Now, if can only roll a six...