Switch Theme:

Czech out my hedgehogs (a guide to making czech hedgehogs)  [RSS] Share on facebook Share on Twitter Submit to Reddit
»
Author Message
Advert


Forum adverts like this one are shown to any user who is not logged in. Join us by filling out a tiny 3 field form and you will get your own, free, dakka user account which gives a good range of benefits to you:
  • No adverts like this in the forums anymore.
  • Times and dates in your local timezone.
  • Full tracking of what you have read so you can skip to your first unread post, easily see what has changed since you last logged in, and easily see what is new at a glance.
  • Email notifications for threads you want to watch closely.
  • Being a part of the oldest wargaming community on the net.
If you are already a member then feel free to login now.


Made in se
Dakka Veteran


Stockholm, Sweden

I posted this on my blog as a three part tutorial, and thought that I should post it here as well. Slightly edited.

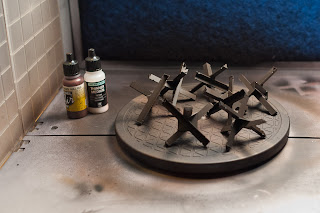
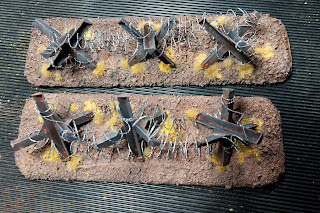
Czech out my hedgehogs!

Czech hedgehogs are anti-tank obstacles made of L or H shaped beams, and were used in huge numbers during WWII.
Even when tipped over they still function, and if you're dumb enough to try and tip them over with your AFV, you're essentially stuck.


German illustration of tank traps.
Image from missinglynx.com


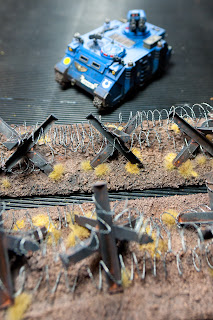
With todays tactics of layered / staggered defence I guess they're more or less out of fashion. But they do look awesome on the 40K-battlefield.

My suggestion is to count these as impassable for vehicles, difficult terrain (dangerous if you add barbed wire) for infantry with a 6+ save.
The L-beams don't give much cover, just look at Saving Private Ryan (@4:40 in that video) if you doubt that.

A note on the hedgehogs you see in SPR. They don't have the end-pieces on because they were on concrete "feet" in order to keep them from sinking in the sand.
If you plan to place hedgehogs on fairly solid ground you weld endpieces to them.

Now, Games Workshop makes a bunch of these, in the urban accessories set or something.
The problem is that they're completely worthless. You do not want spiked ends on these since that would mean that your one tonne beam-construction slowly would sink into the ground.
And from what I've heard, the molds are kinda crap.

So, onto building realistic hedgehogs for our realistic games with melta-/plasma-guns!


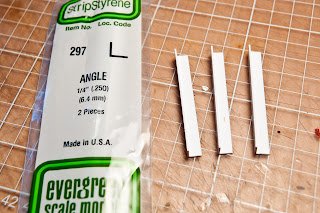
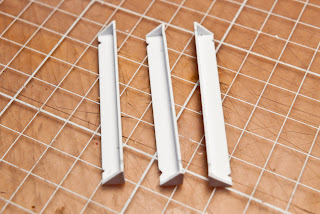
First cut three 60mm lengths of L-beam. 60mm is kinda the middle ground. Not too big and not too small.
If you want bigger obstacles to stop Baneblades or something, make them 80-90mm long and go up in thickness on the L-beams.


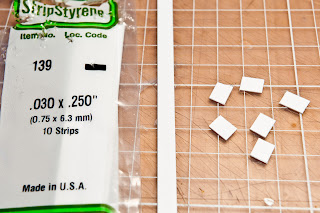
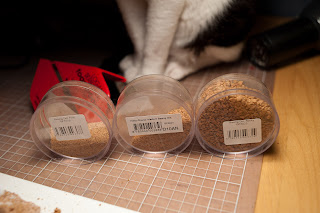
Next cut six square-ish pieces for the ends of your L-beams. They dont have to be perfectly rectangular and you can save some money by using a 0.75mm thick sheet instead.
Since we'll be using one of these to make the brackets for the L-beams. I opted to buy strips since it saves some time and can be used for other stuff.


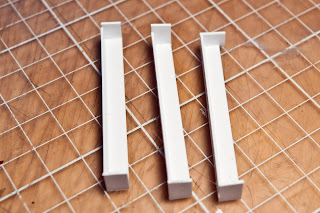
Glue them onto the ends of your L-beams. You will be cutting and trimming these later.
So in order to do that without too much hassle, glue them now so the bond will be strong enough for some manhandling later on.


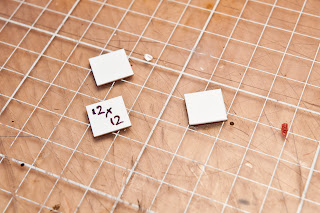
Now take your sheet of 0.75mm plasticard and cut two 12 by 12 mm squares.
If you want bigger "Saving Private Ryan brackets" go a little bigger. 16x16mm or even 20x20mm.
Score them from corner to corner, then remove one quarter...


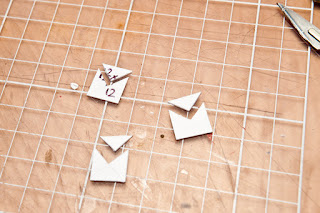
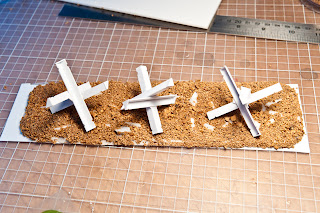
...like this. These will serve as the middle bracket for your hedgehog. You only need two of these.
Since I was making more than one hedgehog there are three in the picture (and a bunch more off frame).


By now the glue on the ends of your hedgehogs should've dried and you can carefully trim off the excess from the end pieces.
Keep the scrap if you plan to do more hedgehogs. Also cut notches 5mm in. These are for securing barbed wire to the hedgehogs and the hedgehogs to each other.


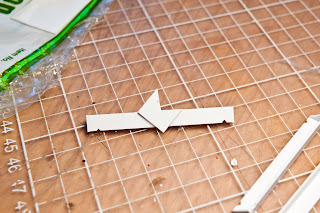
Glue one of the bracket-pieces on one of the L-beams. Be careful with positioning. You want it in the middle.


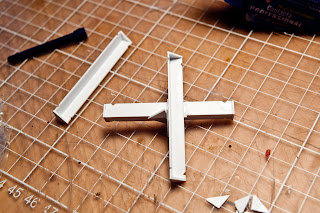
Do the same with the second L-beam and glue them together. This will make a cradle for the third and last L-beam. Wait a little for the glue to set.


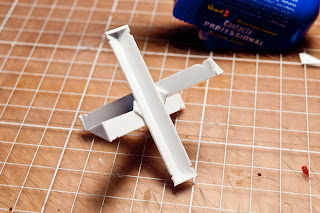
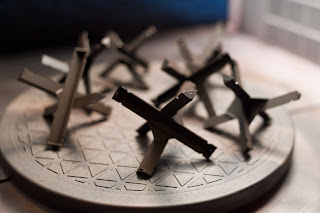
And then glue the third piece on there! Now you have yourself a czech hedgehog! If you really want to go all out, this is the time to add rivets to the bracket.
That's way too fiddly for me, but if you have the time to do it. By all means do it. I'd recommend using 0.5mm rod and making the brackets a little bit bigger.
Here's a good reference picture.


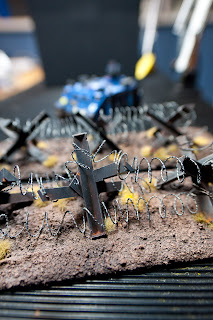
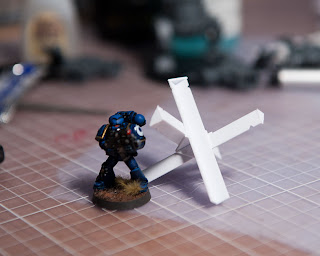
Comparison with an Ultramarine.

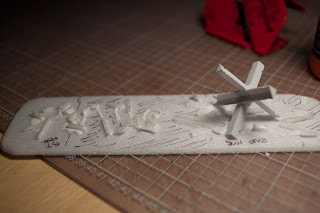
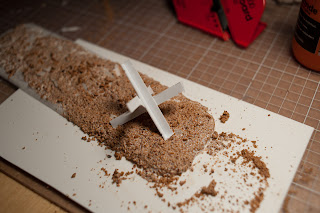
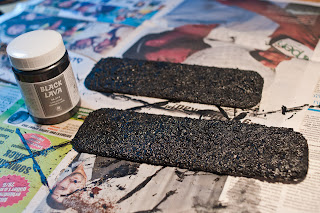
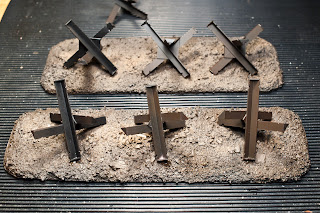
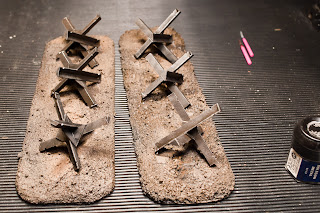
Now while you make two more hedgehogs I'll prepare part two of the tutorial in which I'll talk about basing the hedgehogs.

This message was edited 3 times. Last update was at 2010/08/11 16:39:47


Made in us
Napoleonics Obsesser


Good tutorial. The title caught me off guard though

"Tank Traps" would have sufficed.

This message was edited 1 time. Last update was at 2010/08/11 16:17:30


If only ZUN!bar were here... 
   
Made in se
Dakka Veteran


Stockholm, Sweden

For the bases I used 5mm thick foamboard. Cut it at a preferrable length and width.
I used 70mm 330mm for mine. The angled cutting tool leaves some scrap material. Use that and glue it on in random places on the foundation.
This is to make the ground a bit uneven and more realistic. The foamboard will be pretty elastic, so you might want to add some plasticard underneath to give it more rigidity. YMMV.


Foamboard with extras glued on for variety in height.


Marking out where the hedgehogs should stand.

Mark out where you want your hedhehogs and start covering the area with white glue and grit. The less uniform it gets the better.
This will later on be covered in Vallejo Black Lava in order to give it even more structure.
So if you're planning to add big stones or something, wait with that.


Adding gravel and building up irregular levels of dirt.


Gravel used. GF9 Fine, Medium & Coarse Basing Grit.


And there you have it. A base! Amazing isn't it? : )
As you can see from the two following pictures I've glued it onto a piece of plasticard to get some more rigidity.
And also added a third hedgehog. The plan is to cover these in barbed wire.
You can of course make single hedgehogs if you want more variety in the placing on your battlefield.

   
Made in se
Dakka Veteran


Stockholm, Sweden


Playing with lava!

I started painting the bases with Vallejos Black Lava. This is a favorite of mine nowadays.
It really adds subtle texture to the (already textured) base. It also acts as a sealant and primer in one.


VMA Camo Black Green, Burnt Umber & Mud Brown.

The next step is to add some colour to the bases. This will of course vary depending on how your game table looks.
The important thing to have in mind when colouring bases is to use one or two muted colors and then add a much lighter one to break up the surface.
For these I used two dark brown VMA colors and the light Mud Brown in splotches here and there. Kinda like an area highlight.
These will be drybrushed later on when we've mounted the hogs in place. So onto painting the hedgehogs.


Basecoat them black and then add some thinned Hull Red (1:1 ratio colour to thinner) to give the appearance of rust preventing primer or something like that.
The reddish tint almost looks like rust already. Something we'll add a plenty once they're on the base.


A closer look at the hull red tint.


Time to add the hedgehogs to the bases (finally!). I prefer to use a thick cyanoacrylate glue for this. Glue them on and wait for the glue to set!
This is important since we'll be drybrushing these next and it sucks to pick up superglue with your drybrush.
Why I don't drybrush these before adding them to the base is also to add some lightning to the hogs.
The underside won't reflect light, so there's no need to drybrush those parts. Right?


Now drybrush the hedgehogs. I used Citadel Boltgun Metal + Black — in a 1:1 ratio — all over the hogs and then a light drybrush of pure Boltgun Metal on the upper parts and edges.


Decision time! If you want static grass on your bases, you can hide the feet of the hedgehogs with that.
If you don't. Say if your game table is a barren wasteland. You will want to build up some gravel at the feet of the hogs and paint that in your mud & earth colors.
I'll be using static grass and Silflor tufts so there will be no more building.

Drybrush your bases. I started with a middle between the lightest and darkest color. And then a lighter shade of the light color on the lighter colored parts.
Just make it look good, ok? This is where you hide the glossy cyano-glue as well. Don't forget that!

At this stage you could consider yourself done with the hedgehogs.
But we'll take it a step further and add some barbed wire, static grass and pigmenting to make them more alive.


Static grass added. GF9 "dead grass" and Silflor 4mm autumn tufts.


Barbed wire from Games Workshop. It's not the most realistic one out there but I had two rolls of it that needed to be used for something.

Now some pigmenting. Some Aged Rust and Light Rust to the hedgehogs and the barbed wire. Mud and earth pigments here and there on the bases.
I also added some black soot to the hedgehogs to represent bullets or shrapnel hitting them.
In this stage I drybrushed the static grass a little as well.

Put on some sealant. And... WE'RE DONE!!!


I hope you liked this short tutorial, I sured liked writing it!

Most, if not all, of the material used in this tutorial can be found at Antenocitis Workshop.
The airbrush used is a Harder & Steenbeck Evolution together with a spray booth from Model Expo Online.

   
Made in us
Boosting Ultramarine Biker


Saco, ME

Nice work. Very detailed hedgehogs. I'll jave to look into making these. i was amassing the GW versions when I fund them, but you need so many that it takes forever to get enough for a good terrainpiece to be made.


Made in se
Dakka Veteran


Stockholm, Sweden

Samus_aran115 wrote:Good tutorial. The title caught me off guard though

"Tank Traps" would have sufficed.


There's a huge number of different tank traps.
Czech hedgehogs, dragons teeth (I think they stopped using pretty quick them since they provide cover from infantry), tank graves (steep graves)... etc.

http://www.cyber-heritage.co.uk/cutaway/trap.jpg - a bunch of different varieties.

TheRhino wrote:Nice work. Very detailed hedgehogs. I'll jave to look into making these. i was amassing the GW versions when I fund them, but you need so many that it takes forever to get enough for a good terrainpiece to be made.


Making them yourself is actually pretty cheap (and fun). The only specialized parts you need are the L-beams, the brackets and endpieces can be made out of cardboard or thicker paper.
One pack of L-beams (2 beams in each) is enough for about three hedgehogs and it'll only cost you $3 per pack.

This message was edited 1 time. Last update was at 2010/08/11 16:38:45


Made in us
Napoleonics Obsesser


I just came up with a name for one, Rhodesian Ridgebacks

Anyway, I'll repeat, great Tutorial! I just made them out of glued together pieces of sprue :3


If only ZUN!bar were here... 
   
Made in se
Space Marine Scout with Sniper Rifle


Swedn

This kind of hobbying is what makes the hobby.

A bittuf realism, bittuf cool-factor.


Made in se
Blood Sacrifice to Khorne


Neat, seen a few guides to making hedgehogs before but they never get it just right, this one is spot on!
Keep em comin'
   
Made in us
Drop Trooper with Demo Charge


Thanks for this. I had my own way of makeing them but this is alot better!


On, Wisconsin! On, Wisconsin!
Plunge right through that line!
Run the ball clear down the field,
A touchdown sure this time. (U rah rah)
On, Wisconsin! On, Wisconsin!
Fight on for her fame
Fight! Fellows! - fight, fight, fight!
We'll win this game.  
   
Made in hu
Regular Dakkanaut


I read this yesterday and made a couple of them today out of scrap. Though they don't look as great as yours I like them.

Thanks for the inspiring tutorial! Oh and I'll make a few of the steel rails as well!

The flesh is weak!  
   
Made in se
Flashy Flashgitz


That looks sweeeeeet.
   
Made in us
Blood-Raging Khorne Berserker


Riverside, Cali

I got dragons teeth from my local model shop, great looking hedgehogs though I will make a few to add to my terrain box.

Chaos rules you all drool! Blood for the Blood God!
10,000 pts Black Legion
2,000 pts Traitor Catchian Guard (1067th).
8,000 point Sam Hain Eldar.
2,000 pts Squat Biker Force.
1,500 Orc Hoard (painting for a friend).
 
   
Made in us
Anointed Dark Priest of Chaos


Nicely built and painted.

++ Death In The Dark++ A Zone Mortalis Hobby Project Log: http://www.dakkadakka.com/dakkaforum/posts/list/0/663090.page#8712701
 
   
Made in us
Abhorrent Grotesque Aberration


Connecticut, USA

Awesome, might have to make some!
   
Made in us
Fresh-Faced New User


I made some very similar ones from plastic I beam. Managed to get 4 traps per stick of I beam about as tall as an infantry figure.

Rather than basing them I took the trap once glued together and just rubbed one side against a piece of sand paper to flatten off three corners so they look like they have sunk into the ground. One could of course also do this then base them.

I then primed dark gray and went at them with pliers, knives, candle heated paperclips, and the candle flame itself for battle damage. Went back with some brown and black washing for streaks of dirt/rust. Then brown, orange, and black paint for more rust and burned spots and a bit of metallic silvers for recent bare metal scrapes.

Quite happy with the results and it was not at all hard.
   
Made in us
Monstrous Master Moulder


Secret lab at the bottom of Lake Superior

Great job. Difficult and Dangerous terrain for infantry, impassible for tanks? Maybe a 2 or 3X dangerous terrain test, so immobilized on a 4 or 5+?

Commissar NIkev wrote:
This guy......is smart


Forum Index » Painting & Modeling Tutorials
Go to: