| Author |
Message |
 |
|
|
|
|
Advert
|
Forum adverts like this one are shown to any user who is not logged in. Join us by filling out a tiny 3 field form and you will get your own, free, dakka user account which gives a good range of benefits to you:
- No adverts like this in the forums anymore.
- Times and dates in your local timezone.
- Full tracking of what you have read so you can skip to your first unread post, easily see what has changed since you last logged in, and easily see what is new at a glance.
- Email notifications for threads you want to watch closely.
- Being a part of the oldest wargaming community on the net.
If you are already a member then feel free to login now. |
|
 |
2017/02/20 19:07:57
Subject: Terrain Tutorial - Plastic Drainage Channel Buildings
|
|

[MOD]
Making Stuff
|
From the Maelstrom's Edge Comm Guild blog:
 - by Iain Wilson - by Iain Wilson
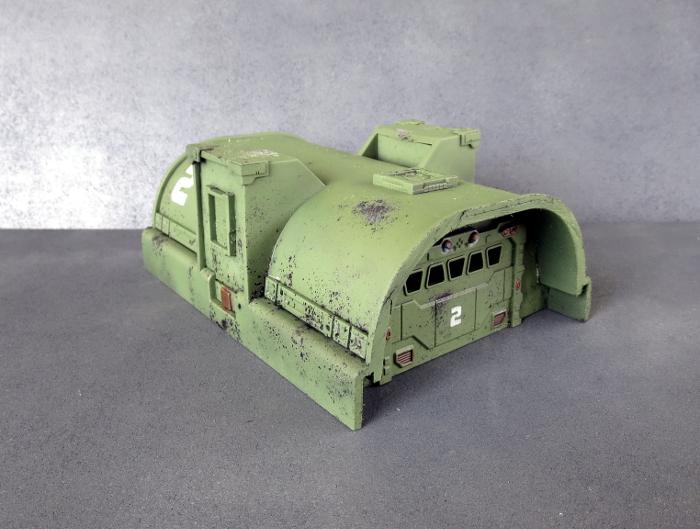
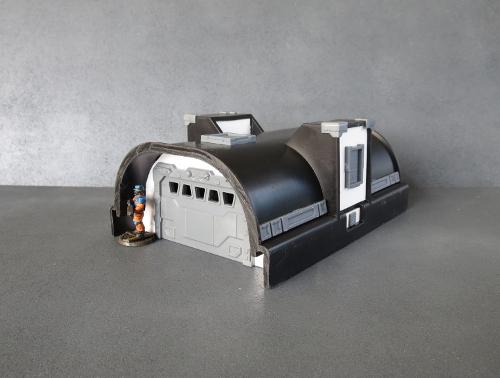
In my continuing quest to turn every interesting thing I encounter into wargaming terrain, I often find myself wandering up and down the plumbing aisle of the local hardware store. The result of the latest meanderings, once combined with some foamcore and an assortment of parts from the Maelstrom's Edge Terrain Sprue, looks like this:
This started out life as a section of plastic drainage channel, that looks like this:
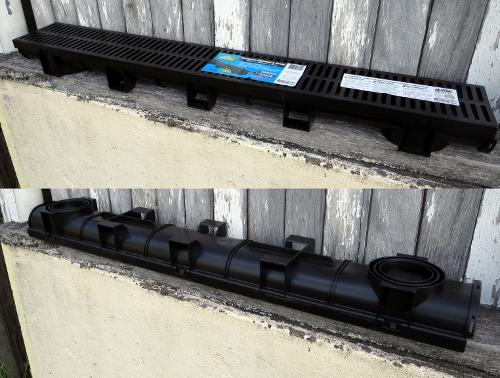
There are a whole bunch of variations on these, in different sizes and with different detailing on the undersides, which become the buildings' roofs. I chose this particular one through the arcane process of just buying the cheapest one (which was around AU$15).
Clearly having designed this product with wargamers in mind, the manufacturer has quite helpfully broken the length of channel into 5 sections.
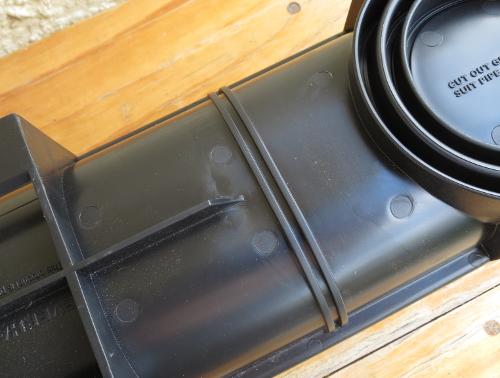
Taking to those dividing lines with a hacksaw results in 5 equal lengths, just the perfect size for a building.

Rough edges on the cut ends can be sanded or trimmed with a sharp knife.
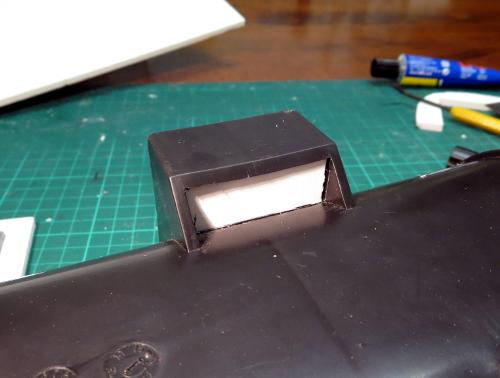
To fill in the ends, I used foamcore. You could also use plasticard, cardboard or corrugated plastic signboard, but I like foamcore for its ease of use.
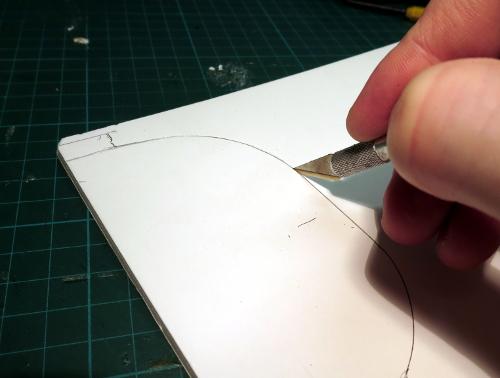
To get the shape right, sit the building shell end-wise on the foamcore, and trace around the inside with a pencil.
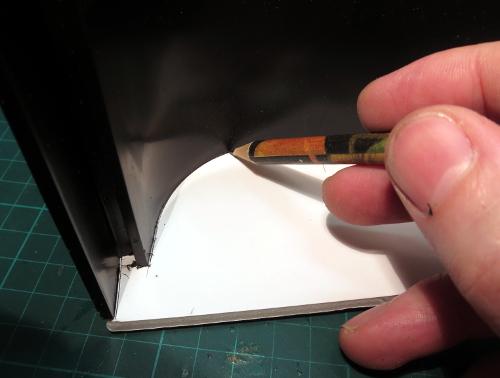
Cut out the resultant shape with a sharp knife.
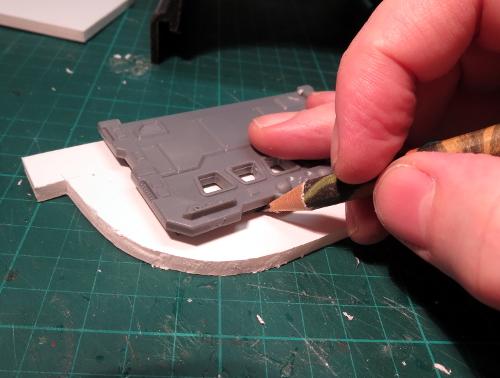
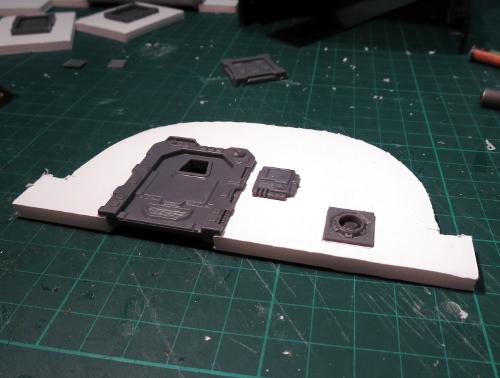
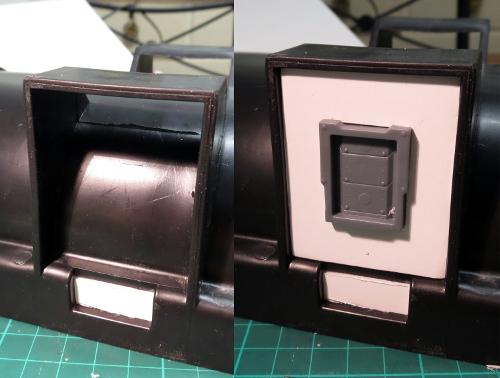
Once your end piece is cut out, check the fit against the shell, and trim wherever necessary to get a neat fit. Then add details from the terrain sprue components. I'm starting with a garage door - these are designed to be inset, so cut out a hole for it by tracing around the frame and then cutting out. Check for fit, and then glue the door in place.
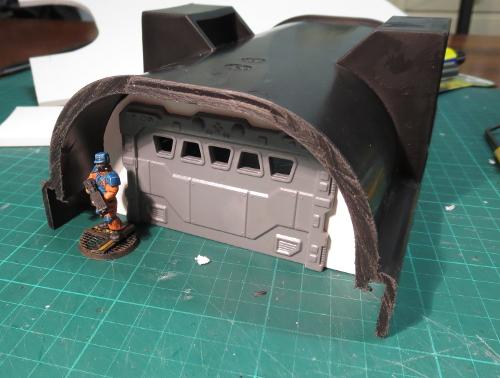
The end panel can then be glued in place in the end of the building shell. Recessing the wall a little, rather than having it flush with the end of the shell, will provide a nice little nook for models to take cover in.
A note on glue - Skip this part if you've read any of my previous articles on gluing things to random assorted plastic objects: Plastics used for plumbing fittings are not generally designed with gamers in mind, but you can usually get away with a good quality superglue. For gluing plastic to plastic, you can buy specialised 'all plastic' glues, some of which are a two-part system (a tube of superglue, and a 'primer' that helps the glue stick better) and some that are just really sticky glue. For foamcore, you can use superglue if you're just gluing onto the cardboard outer shell, but superglue will melt the interior foam, so for gluing to the edges of the foamcore you'll need a goo PVA glue or a specialist Foam glue, which you should be able to get from any craft store.
Repeat for the other end, using whatever detail components seem appropriate.
Each section of this channel has a raised, rectangular detail midway down each side, which I believe is to help keep it in place in the ground, for those rare situations where you might feel inclined to buy these for their actual, intended purpose. These are turned into windows by adding a panel of foamcore with a shutter window inset into the middle. On this section, there is also a small hole below the window where the grating clipped in. This is also covered over with a little foamcore.
The back on some of the sections also needs filling in with a little more foamcore.
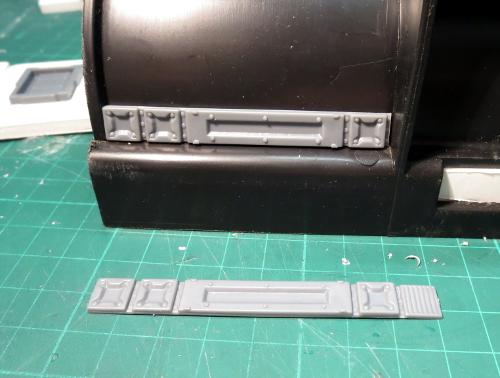
A couple of reinforcing struts from the terrain sprue add a little extra detail down the sides of the building shell.
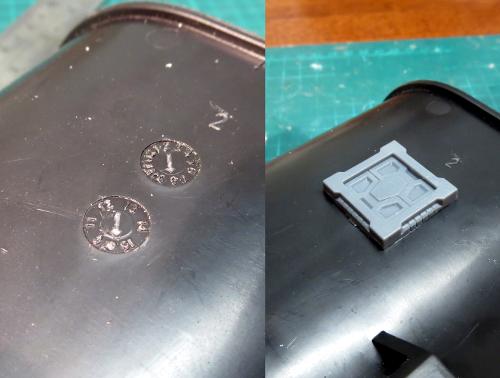
On the roof, errant text or (in this case) batch symbols can be covered over with hatches or extra reinforcing.
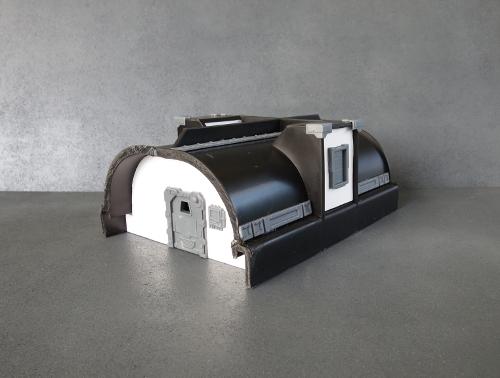
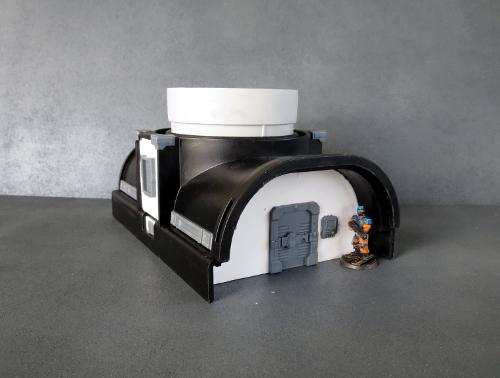
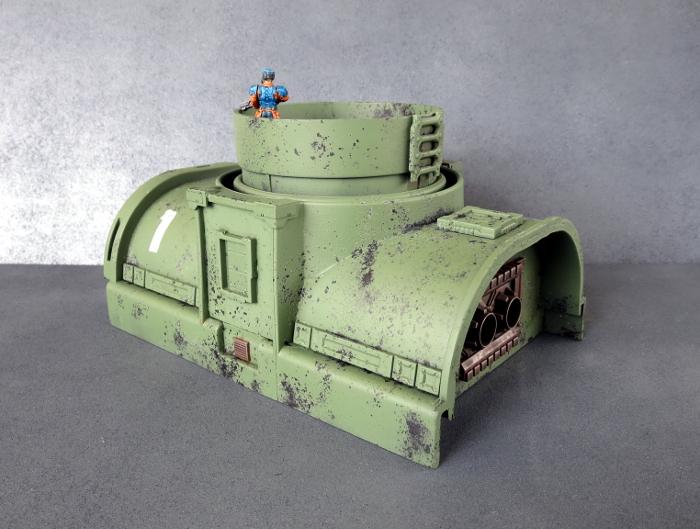
With detailing complete, the building winds up looking something like this:
There are some differences between the separate sections of this channel. The above was from the middle section. The next section along is almost the same, but with a raised ridge down the middle.
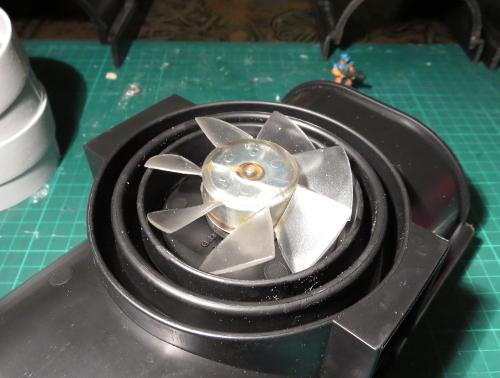
The sections on either end have a circular detail in the middle, for attaching downpipes.

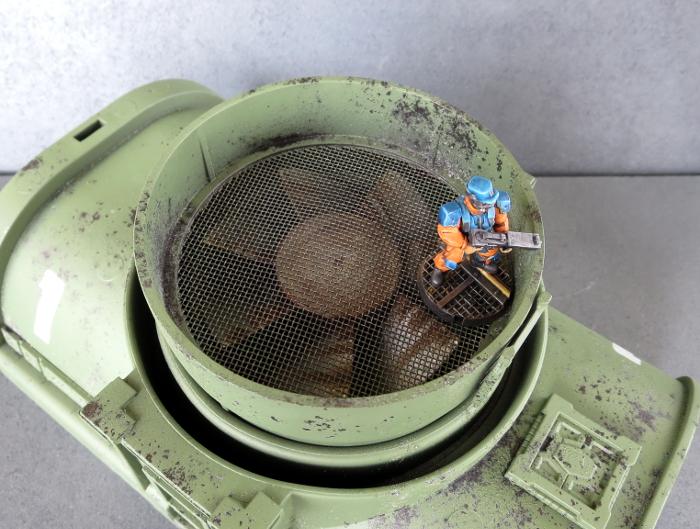
This turned out to be a perfect spot to place an old PC fan.
Over this, I added a section of mosquito barrier, intended for insertion into guttering downpipes. This had some text around the outside, which I removed with a bit of sanding.
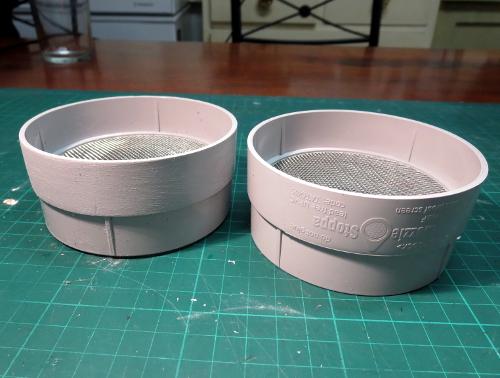
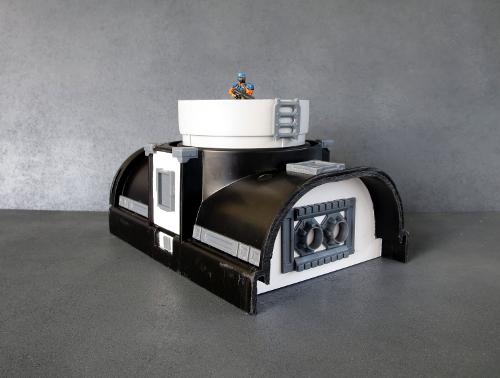
Once clipped in place over the fan and with a section of ladder glued onto the outside for access, this creates a nice visual detail, and a functional watch platform.
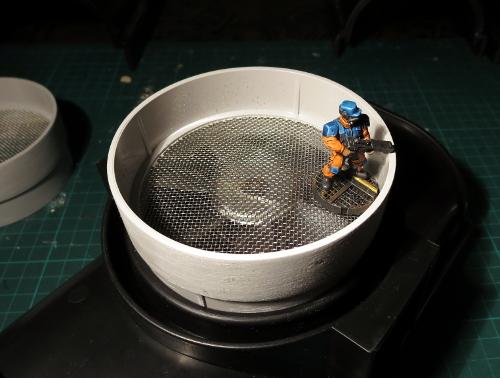
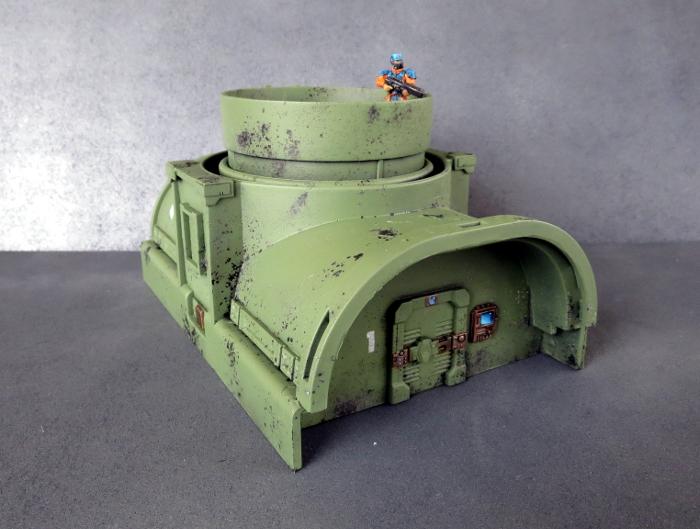
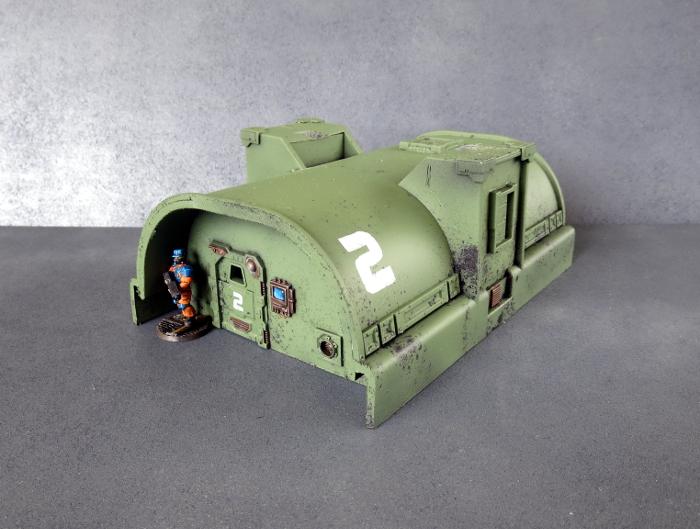
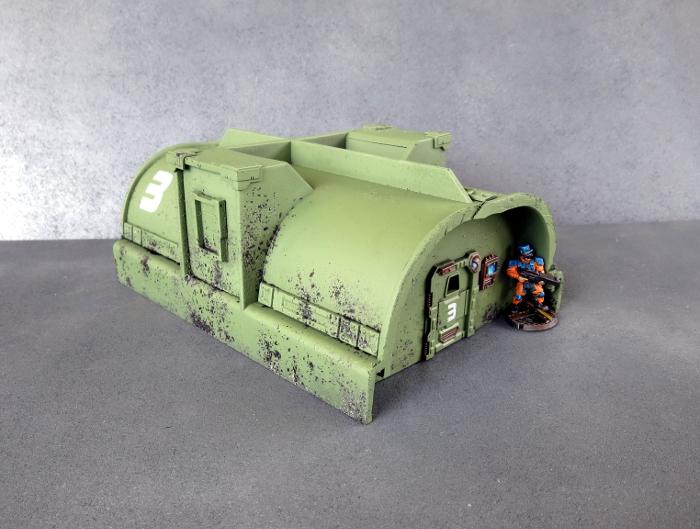
So the resultant building looks like this:
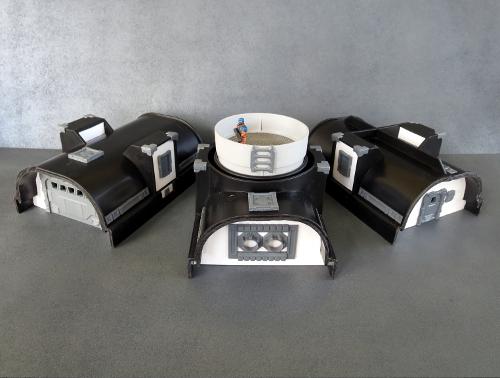
Construction complete, the end result is three different buildings that all look similar enough to represent mass-produced structures with slight variations for specific roles.
Astute readers may realise that this leaves two sections of the original channel. The only logical thing to do with them was, of course, to combine them and make a two-story version:

On the upper story, I recessed the end walls even further in and added a floor from foamcore, to create a good-sized balcony on either end of the building. The railing was made from two ladders.
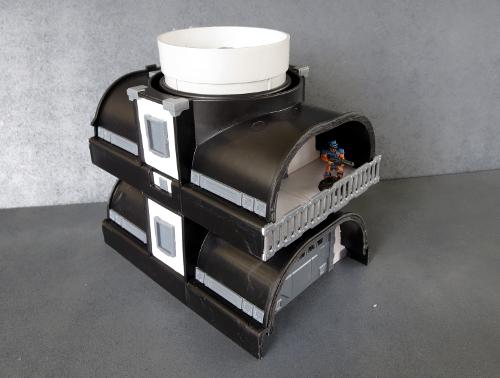
From there, all that's left is to paint them!
I used a Killrust Satin Black spray as a basecoat - a decent quality spray is a good idea, as cheaper sprays may not stick as well to the plastic used for these channels. This was followed up with a coat of Rustoleum 'Oil Rubbed Bronze', which I thought would make a nice, dark, weathered metal layer to show through for the weathering. A coat of sealer and a sprinkle of salt (there's a tutorial on salt-weathering coming in the very near future), and then a top coat with Army Painter 'Army Green', before scrubbing off the salt. Then some final detailing, and the buildings are ready for the table.
If you're feeling the urge to head on out to the hardware store to recreate these yourself, you can pick up a two-pack of the Maelstrom's Edge terrain sprues from the online store here. As always, feel free to share your creations on the Comm Guild Facebook page!
|
|
This message was edited 1 time. Last update was at 2017/04/02 09:05:48
|
|
|
 |
|
2017/02/20 19:21:53
Subject: Terrain Tutorial - Plastic Drainage Channel Buildings
|
|

Bounding Assault Marine
|
That is very cool! I think I am goin to make some of these.
|
|
|
|
|
|
2017/02/21 21:51:36
Subject: Terrain Tutorial - Plastic Drainage Channel Buildings
|
|

Incorporating Wet-Blending
|
Very nice!
|
-James
|
|
|
|
|
2017/02/27 23:33:08
Subject: Terrain Tutorial - Plastic Drainage Channel Buildings
|
|
[DCM]
-
|
I love it, and want to make some!
Anyone have a link to comparable product here in the USA, via Home Depot or Lowe's?
I can't locate it...
|
- |
|
|
|
|
2017/02/28 11:01:06
Subject: Terrain Tutorial - Plastic Drainage Channel Buildings
|
|
[MOD]
Making Stuff
|
 insaniak wrote: insaniak wrote: Alpharius wrote: Alpharius wrote:I love it, and want to make some!
Anyone have a link to comparable product here in the USA, via Home Depot or Lowe's?
I can't locate it...
Not sure about specific stores, but here's an Amazon seller with what looks like a pretty much identical piece of kit to what I used.
|
|
|
|
|
|
2017/02/28 16:14:31
Subject: Terrain Tutorial - Plastic Drainage Channel Buildings
|
|
[DCM]
-
|
Awesome!
Thanks!
|
- |
|
|
|
|
2017/02/28 18:00:38
Subject: Terrain Tutorial - Plastic Drainage Channel Buildings
|
|

Fixture of Dakka
|
These are outstandingly good! 
|
|
|
|
|
|
2017/03/01 07:37:18
Subject: Terrain Tutorial - Plastic Drainage Channel Buildings
|
|

Jovial Plaguebearer of Nurgle
|
Dude these are absolutely awesome and your creativity with that sprue is amazing to see
|
Facts are chains that bind perception and fetter truth. For a man can remake the world if he has a dream and no facts to cloud his mind. |
|
|
|
|
2017/03/05 21:59:07
Subject: Terrain Tutorial - Plastic Drainage Channel Buildings
|
|
Squishy Squig
Cape Cod, Massachusetts
|
Brilliant! Really like them. Inspiring.
|
|
|
|
|
|
2017/03/11 03:29:14
Subject: Terrain Tutorial - Plastic Drainage Channel Buildings
|
|
Bonkers Buggy Driver with Rockets
|
Thanks for the tutorial. The fan and the screen cover is a stroke of genius. You should mass produce and sell these!
|
|
|
|
|
|
2017/03/12 01:45:59
Subject: Terrain Tutorial - Plastic Drainage Channel Buildings
|
|
Slippery Scout Biker
|
You win my Best Building Set of the Day Award. 
Srsly these actually are awesome enough to sell.
I know that's not your point.  Automatically Appended Next Post: Automatically Appended Next Post: So good I have to post it again: it's flipping hilarious how good these look.
|
|
This message was edited 1 time. Last update was at 2017/03/12 01:47:08
( Well I'm Master of the Forge at MY house anyway  ) ) |
|
|
|
|
|
|


