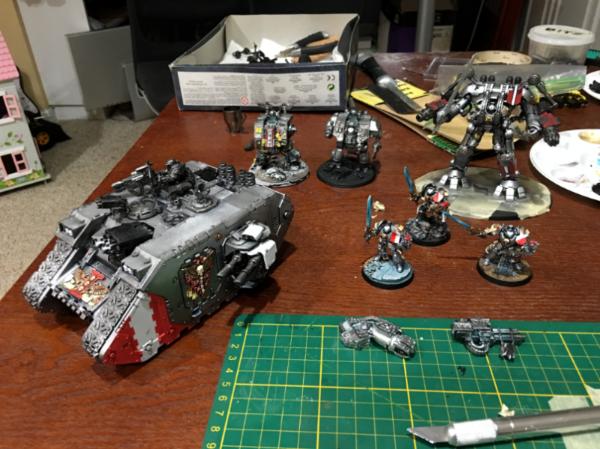
Made some progress on the Dreadknight, Land Raider and Paladins. None of them are complete, but I am trying out different techniques that should lead to a very nice looking army.
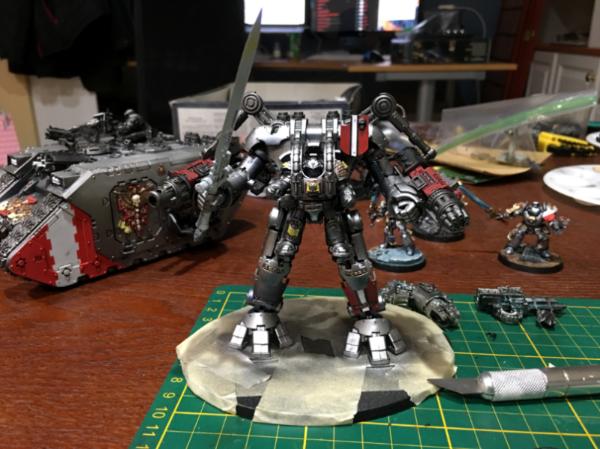
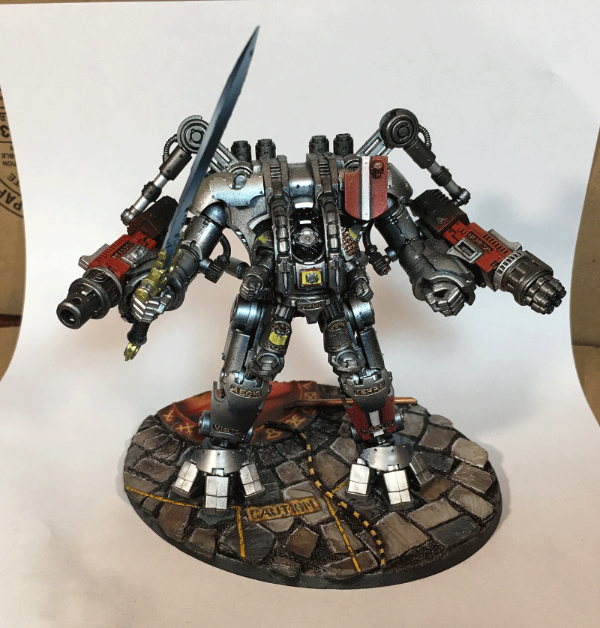
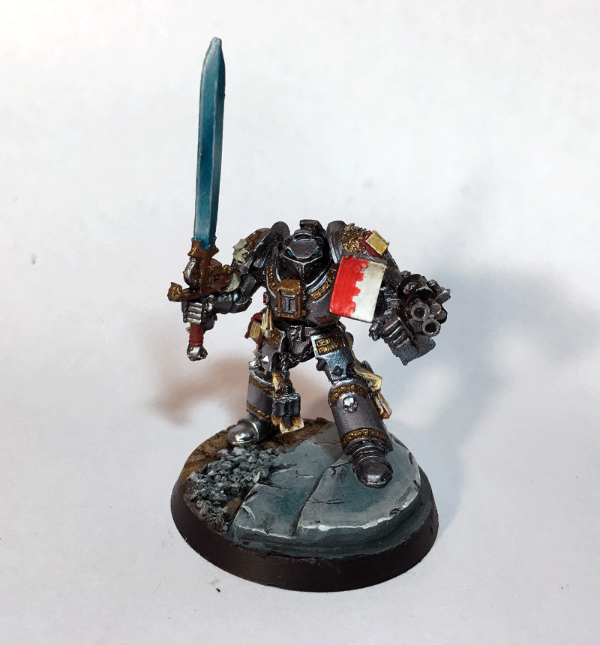
First up, the Dreadknight. Since I posted the original image, I painted the gunarms and some of the heraldry on the model. It's just a basecoat at the moment, the plan is to come back and do more detail work once the base is complete.
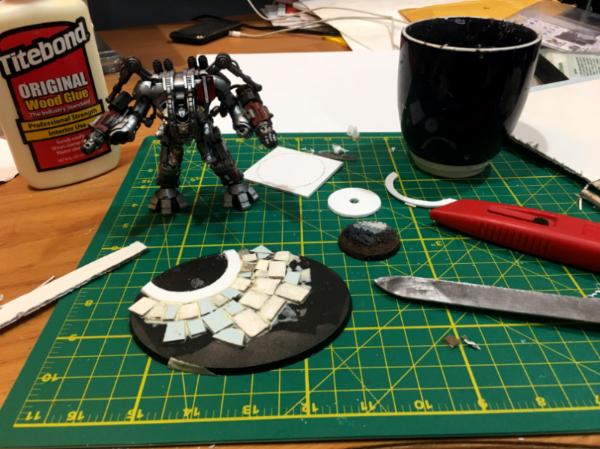
In searching for tips on cutting sheet styrene,
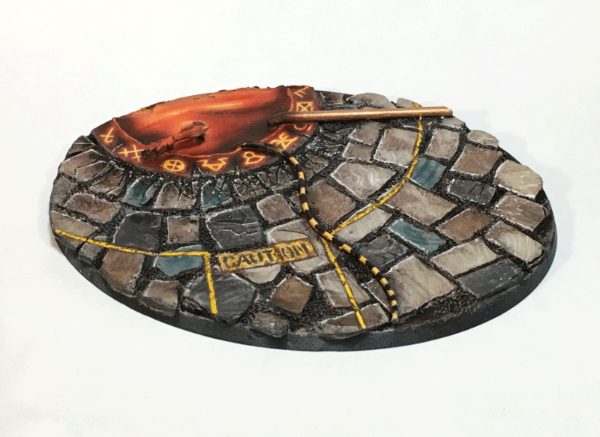
I came across this post by Rob Hawkins for flagstone surfaces. Following the techniques outlined there, I've been laying a tiled surface on the base using thing sheets of cardboard and wood glue. That crease around the edge will become a summoning pool with something coming out of it, to sell the idea the Dreadknight just smashed up some unholy altar in the midst of a summoning ritual.
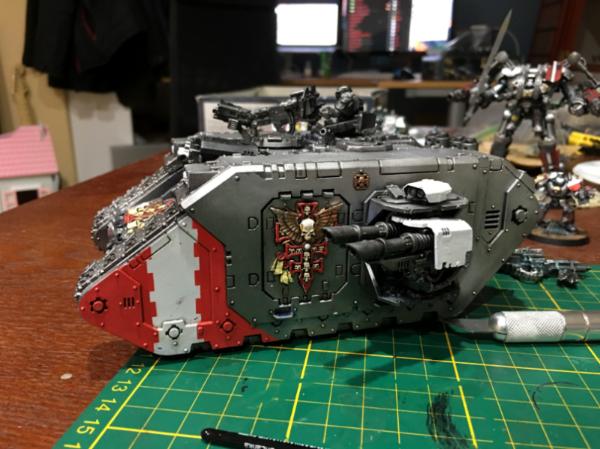
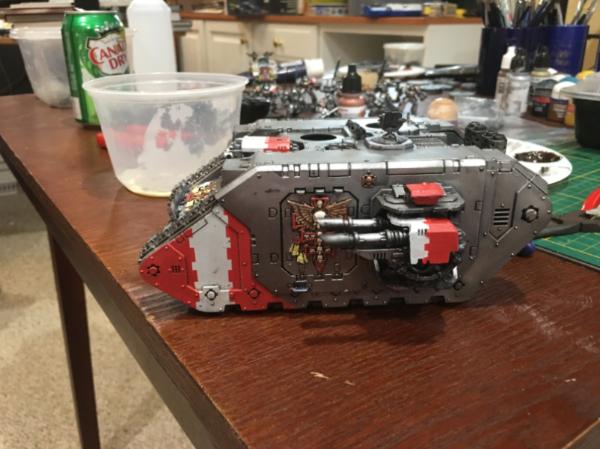
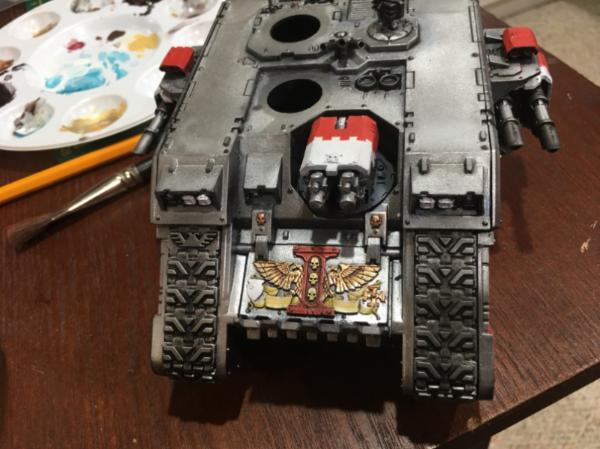
The Land Raider has come along since the first images. I've been working on the heraldry, and run into a few roadbumps along the way.
Remember that I'm using Vallejo Metal Colors for the surfaces on this project. It goes on very smooth, so smooth other paints do not always adhere to it. When I went to paint the sponsons, the white base I was using pooled and streaked worse than anything you could believe. In retrospect, what I should have done is sealed the surface with a varnish before I started painting the sponsons. Lesson learned.
The pooling and streaking was too much to bear, and I did not want to strip the entire model. What I did to correct the issue was sand down the paint using a Dremel. It worked, but it did screw up the surfaces a little. It's hard to see with the naked eye, but it's going to be hard to complete the edge highlighting as some of the edges are gone. I'm unhappy with what I did, it feels dirty, but it looks much better than what was there.
To do the heraldry, I created a stencil using painter's tape, cut at 0.5
cm x 0.25
cm. It looks good, but not as good as some other patterns I have seen. I am going to take the checkers down to 0.25
cm sq for the Land Raider Vortimer and apply them diagonally. The paint is Miniitaire Scorching Red, which I really like on these long, flat panels. The fact it's just a little brighter than the colors
GW uses makes it stand out a little more by comparison.
Like the Dreadknight, the details are being left to the end, there will be some swords and skulls in the white areas.
Pictures follow.
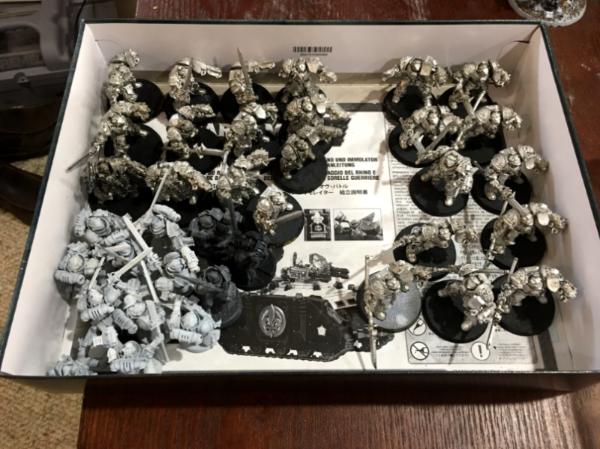
I've also been working on the Paladins, which have been coming along nicely. I've been working on them in batches of 3, but that's probably going to change.
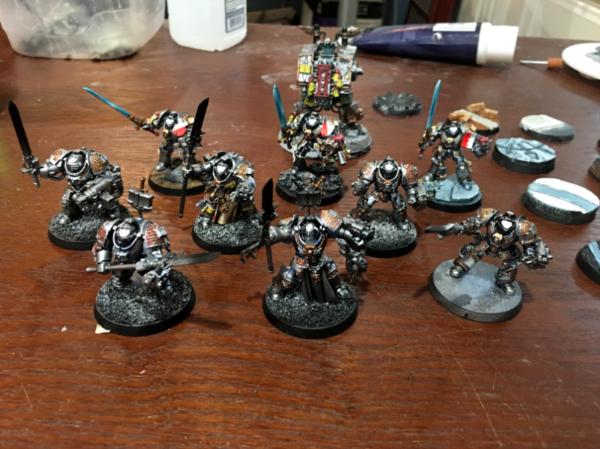
Each Paladin is being mounted on a unique base, in keeping with the theme of raiding a Chaos Temple. Most of the ones in the picture are not yet on their final bases, you can see some of the
WIPs off to the right.
These models are base coated with a 50 / 50 mix of Vallejo Metal Color Steel / Silver, then washed with Minitaire Ghost Tint Blue. Then they are highlighted with VMC Aluminum, which creates a sharp contrast between the light and dark areas of the model. While this photo makes it look like there are some black areas on the armor, there's not. The paints are just very reflective and capture the light in a way that makes it hard to process mid-tones. I will get better pics in my next post to show off this effect.
Can't stress this enough, the VMC requires a very low PSI. Anything above 5 is spraying too much paint on the model and it's easy to lose control. While this paint doesn't really pool, what does happen is the surface takes on a gritty appearance that needs to be covered up with another layer. The Ghost Tint Blue is the same, I am blowing 90% air each time I work with it. One of the challenges I run into is paint freezing on the needle, which turns the Ghost Tint into dots. While it's actually a nice effect in some ways, it is something to watch out for.
For the cut outs in the greaves / armor, I've been using Vallejo Model Air Copper and a dark brown oil wash. Very impressed with this paint, it doesn't require a lot of thought and it's very forgiving. The VMA Copper can be wiped away easily from the base when I make a mistake, and the wash goes on with the touch of a brush. The models in the front rank are just Copper and a wash, the ones in the second rank have been drybrushed with gold. Trying to decide which I like better.
For extreme highlights, I've been using VMA Aluminum. It's brighter than VMC Aluminum and looks almost white by comparison. I'm using it around the edges of the helmet and on edges of the shoulder pads.
Like I said, these are test models, and I am trying to get a process down to produce a uniform, attractive appearance for all units in the army. The 6 Paladins closest to the camera took about 1.5 hours to get to this stage and they already look ready for a tabletop. I still need to make the gun housings red, do the purity seals, highlight the eyes / force weapons, etc, and will provide some details on each.
This is what the next batch looks like. I'm going to finish the Paladins first, then try the same techniques on a Strike Squad. Unfortunately, everything in this batch is modeled with halberds / great swords, so the army might not be
WYSIWYG on the table. But it will look good.