 Craterus vs. Eumenes of Cardia
Here is another Heirs to Empire battle report featuring the armies of Eumenes of Cardia vs. his rival Successor’s in Anatolia. These battles took place early in the Diadochi wars between Alexander’s successors, and helped shape the political map of the wars to come. As such, the armies were probably similar to those that Alexander himself used in his great campaigns.
After Neoptolemus’ defeat by Eumenes, he fled and joined up with Craterus. Craterus was crossing the Dardennelles from Greece to pressure Eumenes and force the Pro-Perdiccan loyalists out of Turkey. Meanwhile, Perdiccas himself was assembling and leading an army to face off against Ptolemy in Egypt after Ptolemy stole the body of Alexander.
Most of what remained of Neoptolemus’army from his Satrapy in Armenia was easily absorbed into Eumenes’ army to absorb losses. However, Craterus’ force had much greater numbers than Eumenes could muster. In addition, the core Phalanx was made up of reliable Macedonians from Europe.
The two forces faced off. The details of the battle have been lost to ages. We only know the outcome. In a daring attack, the outnumbered Eumenes managed to smash the larger army of Craterus. Craterus himself was killed in the battle. Neoptolemus was also killed in a duel between himself and Eumenes. It is said that Eumenes and his cavalry unit squared off against Neoptolemus’ cavalry on purpose to face the treacherous enemy general personally.
The Forces:
The forces are pulled from the sample armies in the rules. They are both 54 points.
Craterus’ Army
Center
2 Bronze Shields- 1 Led by Craterus
2 Irregular Peltasts
1 Thureophoroi
Right Wing
Asphract Cavalry- Neoptolemus
Asphract Cavalry (Javelin)
Left Wing
Archers- General
Skirmishers
Skirmishers
Eumenes of Cardia
Center
Silver Shields- General
Bronze Shields
2 Thureophoroi
Right Wing
Epilektoi Cavalry
Left Wing
Companion Cavalry- Eumenes
During this battle, it is probable that the Silver Shields were probably deployed with Perdiccas for the Egyptian campaign, and not with Eumenes of Cardia. However, for simplicity and uniformity of the campaign I am going to keep them with Eumenes.
In addition, it is likely that Thureophoroi were not a distinct and established part of the army. Such troops played a role of that of the Hypaspists in Alexander’s army. Since the main difference between these troop types is the Hoplon versus an oval shield they are interchangeable this early in the Diadochi period.
Mission:
It is unclear how this battle actually took place. Some scholars believe it must have occurred during a river crossing or similar situation for the victory to have occurred as described in the sources. It is unclear as the sources that remain spend little time on the actual battle, only the aftermath. To that end, we rolled a random scenario and came up with Raze and Loot.
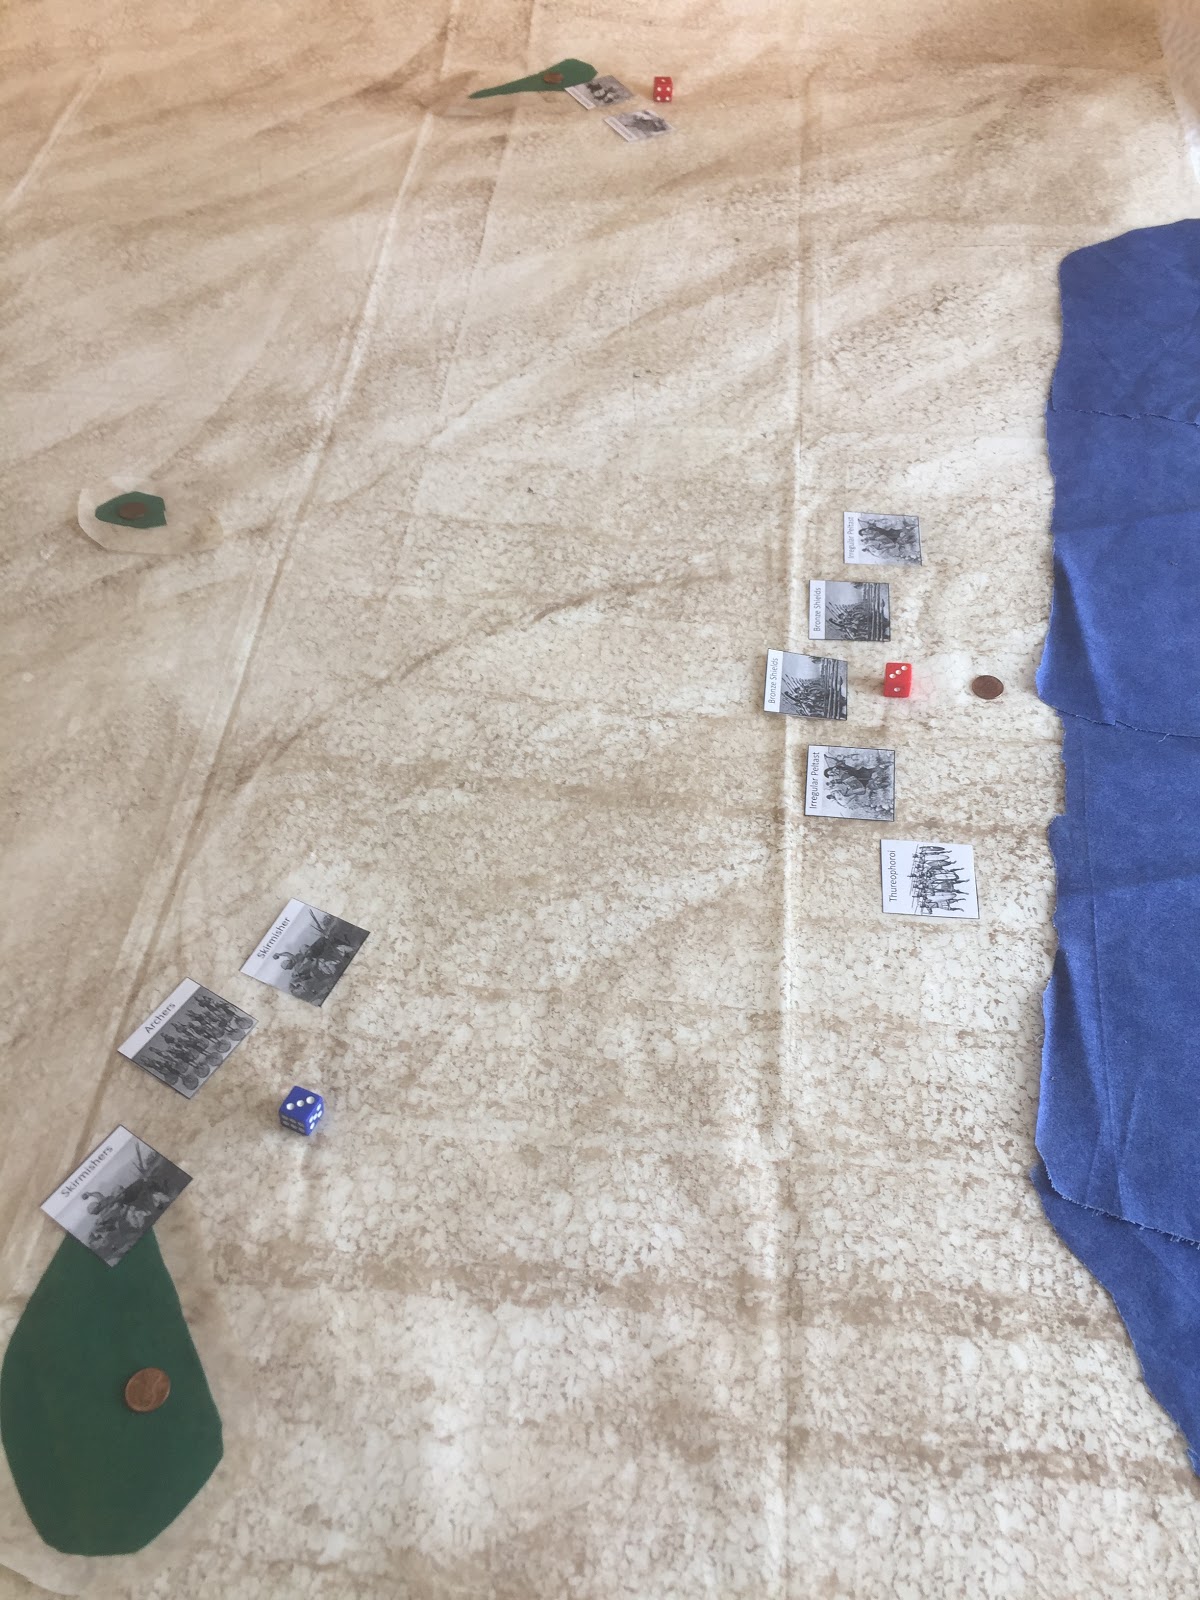
In this scenario there are 5 markers placed on the board to represent valuable items such as wells, supplies, sacred sites, etc. The Defender tries to protect them while the attacker tries to destroy them by attacking them in melee. Craterus was determined to be the defender.
Set-up:
To match the situation, we changed he deployment a bit. We made sure that Craterus and his army was by the river, to help match the potential historical match-up. Also, this scenario allows Craterus to deploy a bit seperated based on the location of the objective counters. This also probably helps match the situation Eumenes and Craterus faced.
The objectives were watering holes spread across the desert, and the river crossing Craterus and his army used. Eumenes’s deployment was pretty standard. He was on the right flank with his Companions. The center was his phalanx flanked by Thureophoroi on each side. The Epilektoi were on the left. Nothing fancy and fairly compact and in a straight line.

The Left wing (of Archers and Skirmishers) deployed forward to protect the watering hole, but also potentially harass the main advance of Eumenes army. The Center was deployed just past the river ford in an arrowhead formation. The right flank was the Asphract cavalry units and they deployed out near another watering hole.

You can see the results of this historical match-up at my blog if you are so inclined.....https://bloodandspectacles.blogspot.com/2018/08/heirs-to-empire-first-war-of-diadoch.html