Forum adverts like this one are shown to any user who is not logged in. Join us by filling out a tiny 3 field form and you will get your own, free, dakka user account which gives a good range of benefits to you:
No adverts like this in the forums anymore.
Times and dates in your local timezone.
Full tracking of what you have read so you can skip to your first unread post, easily see what has changed since you last logged in, and easily see what is new at a glance.
Email notifications for threads you want to watch closely.
Being a part of the oldest wargaming community on the net.
If you are already a member then feel free to login now.
2019/04/13 20:22:22
Subject: Guardsman - Inspired by Crimson Slaughter Paint Scheme - Wet over White Technique
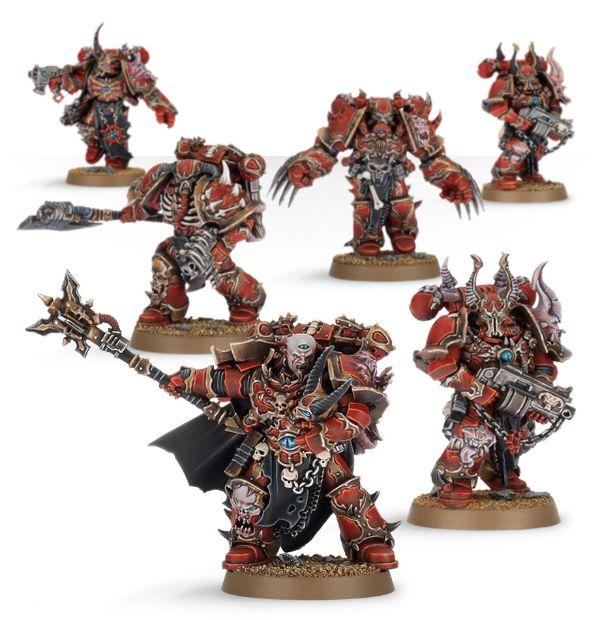
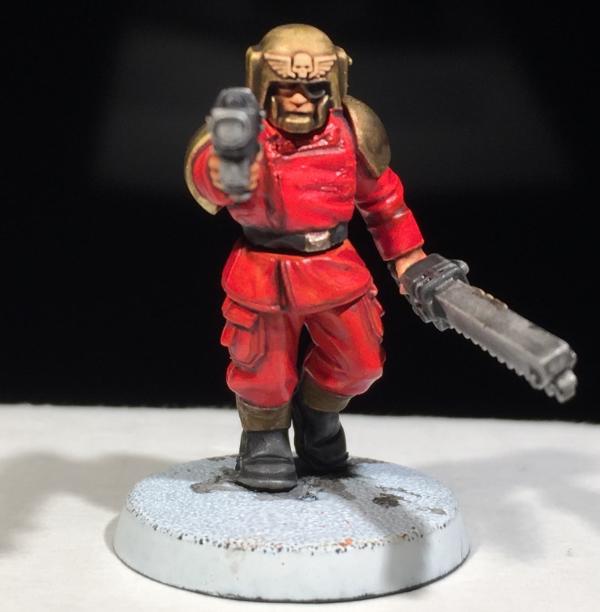
Inspired by another thread, I've put together a how-to of how I painted a Guardsman in a manner inspired by the Crimson Slaughter Palette.
I paint using a "Wet over White" technique. This technique allows the white primer to create natural highlights "beneath" the base coats and washes. I like it, because it's easy, quick, and forgiving. I recommend this technique to anyone trying to learn to paint, that wants to get decent minis on the table quickly, or that has trouble with "getting the colours right".
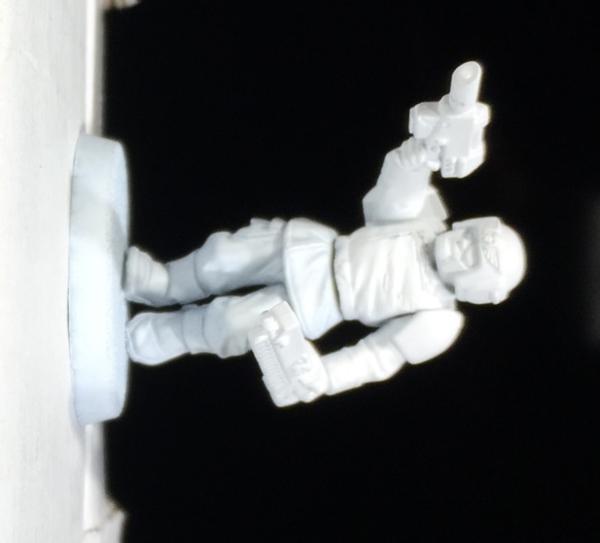
It all starts with White Primer. Because Dakka likes to screw with my pictures, I decided to prime this guy while holding him sideways. I thought it would help...
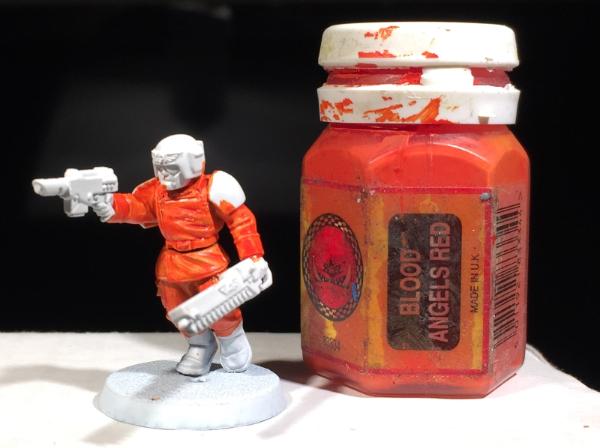
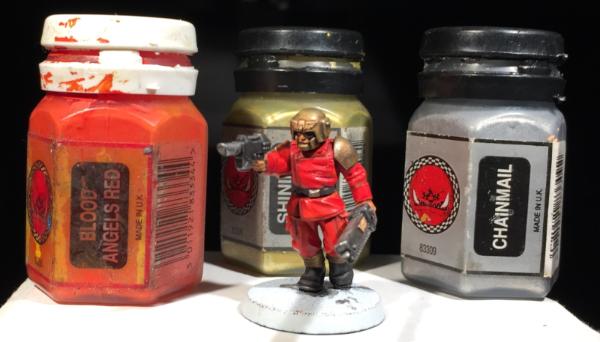
Looking at the CS Models, I noted that the red is highlighted up to orange. Orange is my least favourite colour. For my reds, I generally start with "Red" as the highlight, and darken down with either black or browns, but I've decided to step out of my comfort zone and give orange a try. Using the horribly mis-named "Blood Angels Red", I applied two thin coats over the primer. CS minis are mostly red, so I chose to colour the cloth in the major colour.
With the Wet over White technique, you want your "highlight / mid-tone" to be the base colour you apply. By keeping the paint thin, you should see a little bit of white come through on the upper ridges of details. I went a little heavier than normal, as I was concerned the red I was planning on using later would overpower the orange and leave pink highlights. If you look at the ridges of the cloth, you will see a brighter orange, compared to the darker recesses. Normally, I would want to see just a smidge of white on the tops, but this is also ok as you can see distinct shading between highlight and mid-tone.
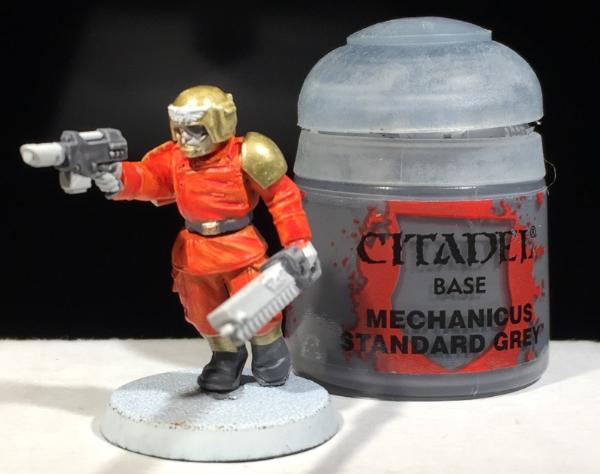
To my eye, the next major colour is the antique, burnished gold of their armour trim. I think it's non-metallic-metal, in the GW design. You know who's got time fo'dat? Nobody. So I'm taking the easy way out, and starting with Shining Gold. Again, we want to use a bright colour for the base, as we'll be darkening this down later. If you look at the edges of the details, like the edges of the shoulder pads and the details on the helmet, you'll notice that a bit of white is showing through. That is deliberate. Two thin coats, with a bit of white showing through.
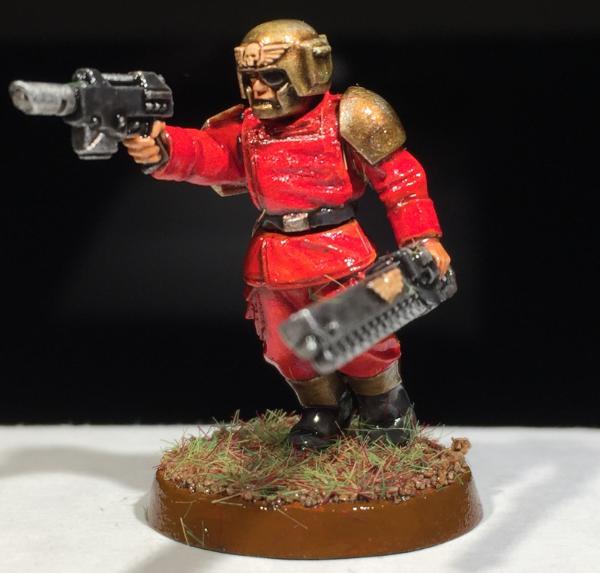
Next, I'd noticed that charcoal-black was the colour of some rags and horns and other lesser details. I decided that would make a good choice for the leather on the Guardsman. Belt and Boots. I also wanted to break up the weapons a bit. While the CS models' weapons are mostly steel with some hints of rust, I wanted to break that up a bit as I (personally) don't like the look of all-steel weapons. I went with two thin coats, very thin, to ensure that some white would show through the upper ridges of details. This is deliberate! Most noticeable on the pistol housing, and boot tops, you can also see the edge of his eye patch.
This is the point of a model where I look at it, and it just looks awful. All that chunky orange, the gold's way too bright, the grey is patchy. I think this is the most defeating part of the painting. You know you're about 1/3 of the way in, and it doesn't look good. Your brain is telling you this is a waste of time, it looks like crap. Give up or try something else.
Screw you, Brain! This is a time for baseless, unfounded, undeserved confidence! I'm amazing. I'm going to make this work. It's gonna be awesome! Yeah! That's the ticket! Up yours, doubt! I'm finishing this thing!
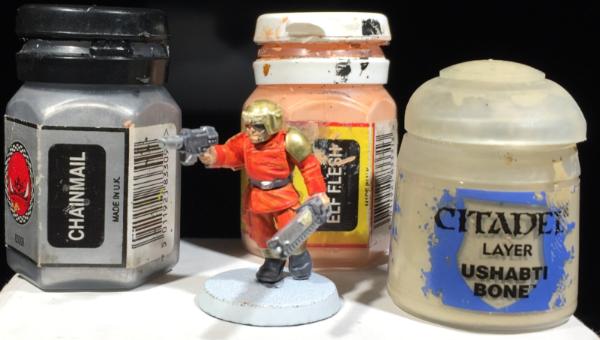
So I move on to the smaller details. The weapons are mostly steel in the CS photo, so to keep it distinct from the charcoal grey, I'm going to use a bright steel colour. Chainmail it is. You may have guessed that I've had that same pot of Elf Flesh for 20 years or so. You'd be correct. It's a bright, light flesh tone and that's what I want for Wet over White. I noted there is quite a bit of bone details on the CS models, so I'm going with Ushabti Bone on the Aquilas. Not much, but it captures an important part of the palate.
Two thin coats for Chainmail, one each for Elf Flesh and Ushabti bone. Try to keep a bit of white showing on the edges!
So that's the basic blocking. I'd suggest that this is a good time to go around and tidy up any slop over. Try to use the tip of your brush and the shape of the model to clean up the spots where colours meet. For example, in the blocking around the shoulder pads, I did the orange first, then gold, so that when I go back for tidyups, I can carefully push along the cloth until I touch the bottom of the armour before sliding down to keep clean definition of the shapes. Learning to work with the contours and "hard edges" of a model really helps to keep models from looking "muddy". Clean sharp edges to colours are important for finished models, which the upcoming shading is going to help with.
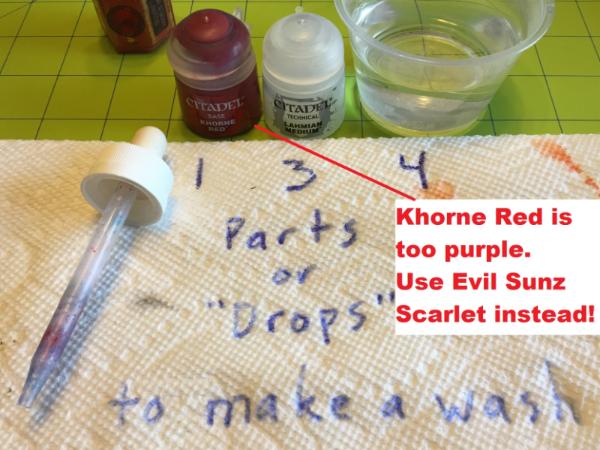
Making Custom Washes is SUPER EASY! You need clean water, some medium (I use GW's Lahmian Medium) and a darker shade of colour. The best part of custom washes, in the Wet over White technique, is that you can start with a wash of your base colour, and add a darkener to it! Maybe you're like me, and just don't have an eye for colour. You know what you like, but you don't know how to make it "work" on a model. You see a colour, and you start looking at washes and layers and you think about highlight colours and you screw it all up because you can't tell teal from turquoise and you wind up with weird looking colour shifts.
With this technique, you can make a wash from your base colour, and start adding to it. Just keep track of your drops, so you can add proper amounts of medium and water. Or just add something like Nuln Oil to your base wash until it's dark enough. Or another colour. Want greenish-blue for your Alpha Legion? Start with a greener-blue base, and add a dark-bluer-green wash over top. The raised edges will stay green-blue, while the recesses will colour-shift towards a darker blue version. Custom washes are great for people like me, that have trouble with making similar colours work together. The recipe for a wash is 4 parts CLEAN water, 3 parts Medium, and 1 part paint.
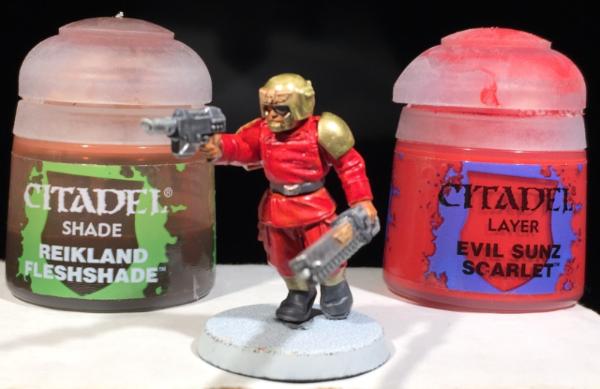
I was worried that a mid-red would not darken the cloth enough, so I started with a Khorne Red wash. It wound up way too purple, so I went over that again with an Evil Sunz Scarlet / BA Red wash mixture. I tried to cheat, and wound up blowing it. If you're trying this at home, I'd suggest a straight Evil Sunz Scarlet wash would probably do the trick. I needed to brighten the model back up, so blended BA Red into it.
So, having fiddled with my Red Wash (two coats, technically), I applied Reikland Flesh Shade (one coat) to the Elf Flesh and Ushabti Bone. This was the result. Sigh, it still doesn't look right... Insane Bravado to the rescue!
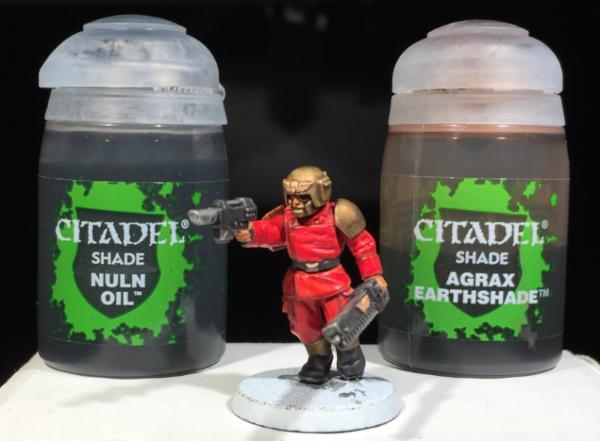
Ok, now we're looking like a model. Two coats of Nuln Oil over the steel and grey, two coats of Agrax over the Gold. For the second coat of Agrax, I stayed away from the very edges of the shoulder pads, as I wanted to keep the shinier edges. Normally I'd use Reikland Flesh Shade over the gold as I like a warm, ruddy gold. However, I noted that the CS Models by GW had a dark, antique, burnished look to them, and I wanted to emulate that.
At this point, I would normally base this miniature for normal grunts. I'm happy enough to put this on the table, but I'm going to keep fiddling with it and see how it turns out.
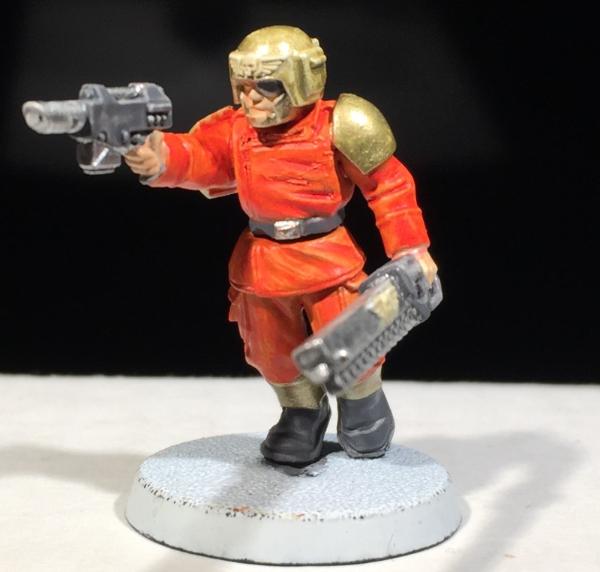
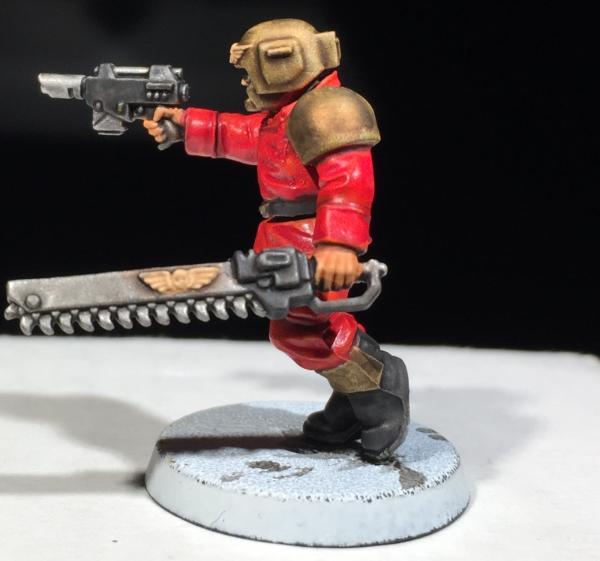
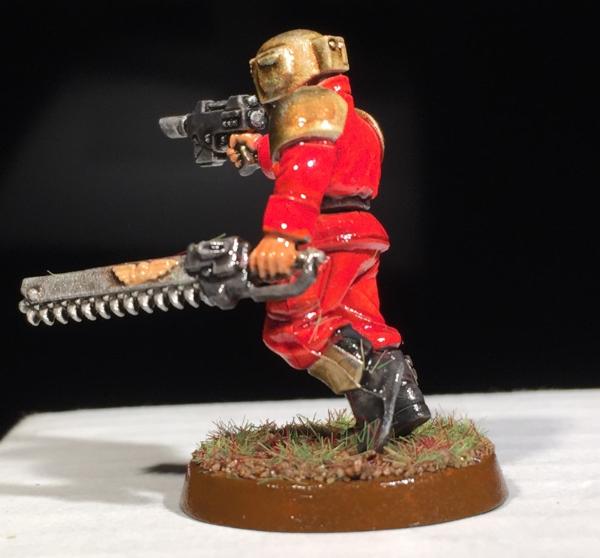
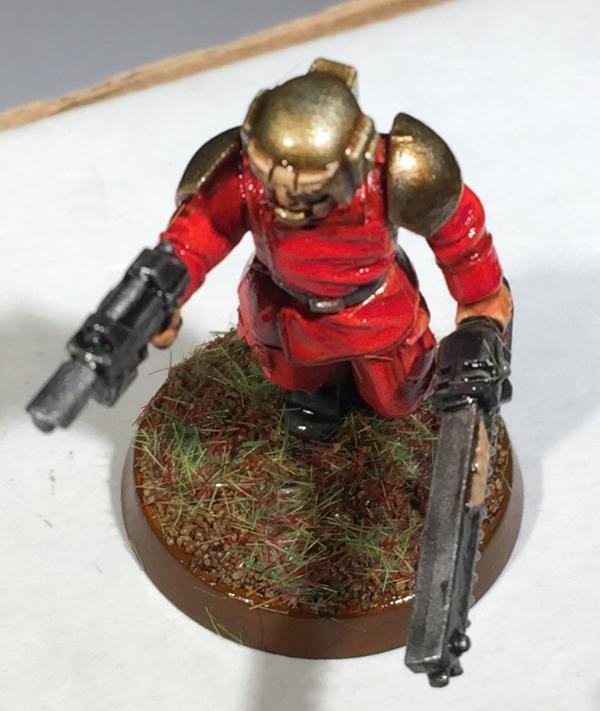
Looking at the left side, we can see where letting the white show through the grey and steel has paid off with highlights on the edges of the chainsword engine cowel, and along the length of the teeth. On the Pistol housing in particular, you can see what looks like edge highlighting that's simply the result of thin paint letting the white show through.
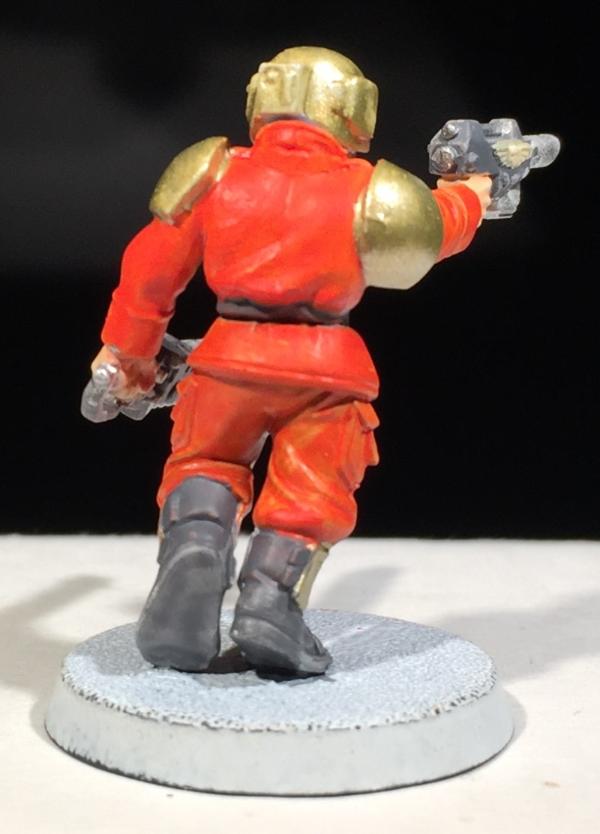
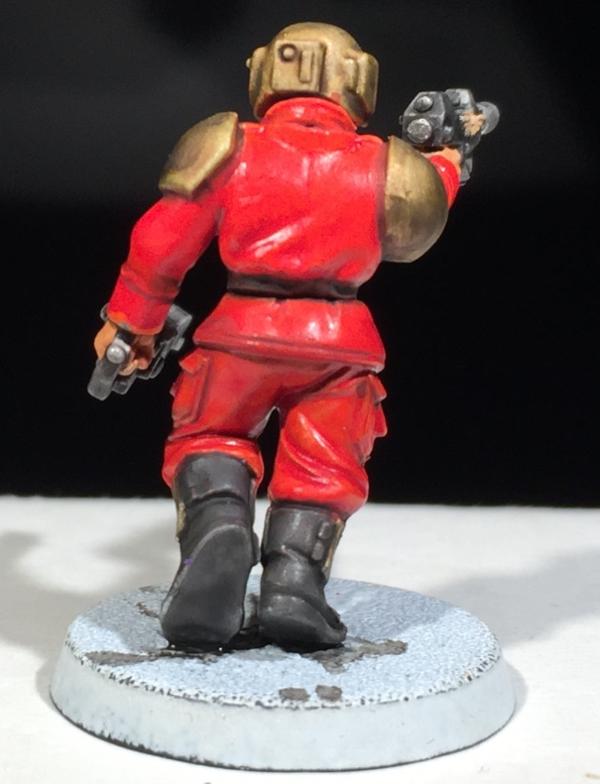
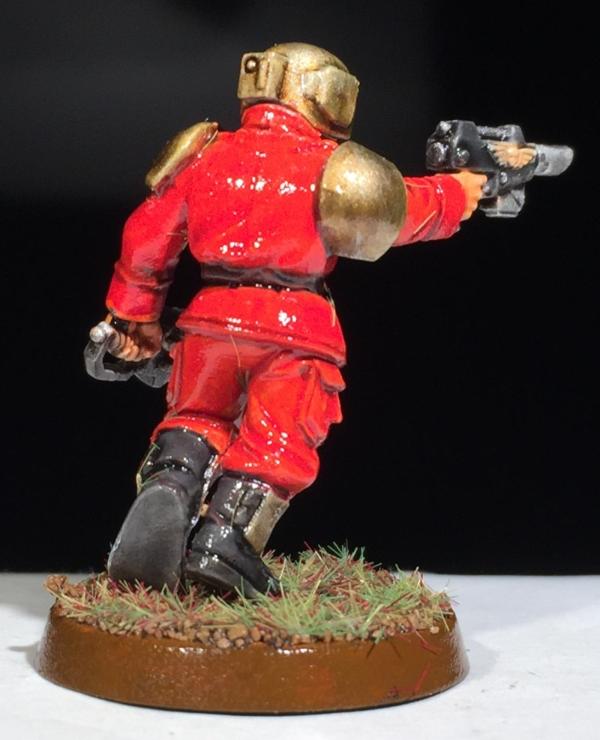
Looking at the rear... nobody's judging... looking at the left shoulder pad. You can see the darker outer shoulder, the lighter edge of the armour (only one coat of Agrax on the edge), the *actively darker* shadow zone (double Agrax) between the gold armour and the red cloth, before getting back to a brighter cloth. The light / dark contrast between colour changes is important to keep the details sharp and avoid "colour smear". If you've ever watched Saint Ross paint a picture, you'll have heard him express the importance of contrasting light and dark while creating happy little trees. Same thing applies, and more, to miniatures. Contrast stops the smear effect. Wet over White finishes with darker washes, ensuring that there's always darker recesses and shadows to maintain the sharpness of details.
From the Right Side, looking at the model's left shoulder again, you can see from this angle the active shadow between the shoulder pad and the cloth, and how it forces your brain to "separate" the two details. On the side of the model's helmet, you can see the lighter main helmet, darker definition around the "box" before becoming brighter again on the raised edges. It's just thin gold paint over white, with Agrax x 2 coats over top. Looking down at the model's right boot, you can again see the darker gold, lighter gold, dark shadow between gold and boot top, the lighter boot leather getting dark between the boot and sole, before becoming light again around the edge of the boot sole. No edge highlighting, no drybrushing, no layer paints... just the white of the primer coming through.
From the front, you can see the darker Agrax separating the gold from the "cheek protectors" and the face. I also put an extra layer of wash around the Aquila, to keep it separate from the gold helmet. I could never edge highlight the eyepatch, hands aren't that steady, but I can let the primer do the work of the thin grey, then a drop of Nuln Oil on the eyepatch. It naturally pulls away from the ridge, leaving a highlight for definition. You can also see the natural edge highlights along the back of the chainsword. No extra effort, just a side effect of the technique.
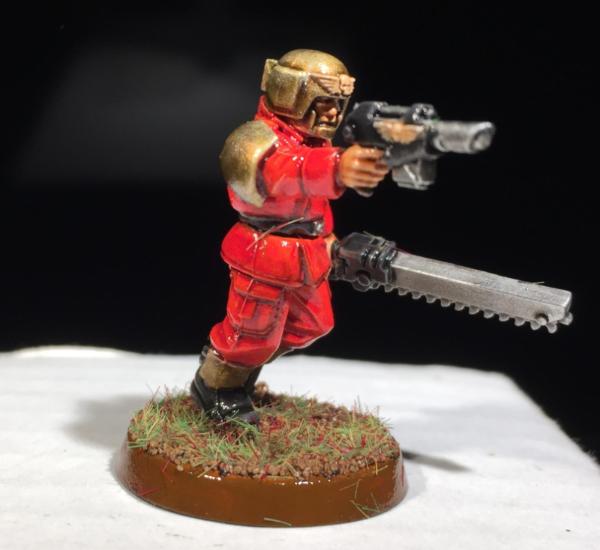
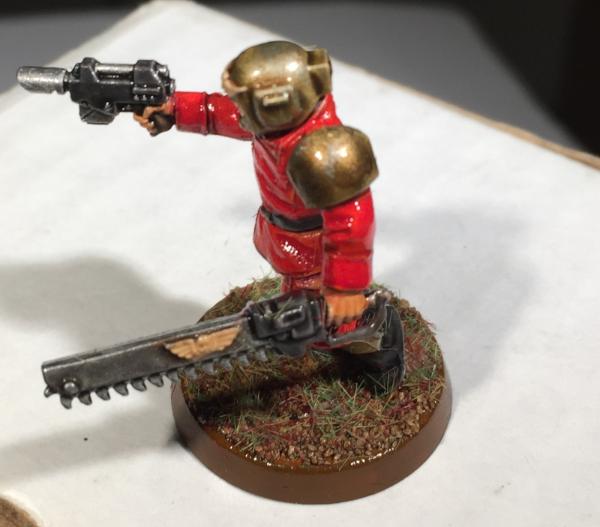
I couldn't help myself, I decided to keep dicking around with this model. I KNEW I shouldn't mess with the cloth, but I did it anyway. I thought I could drybrush some BA Red onto the cloth to help sharpen the edges, but it started looking muddy so I thought I could get definition back with a bit of Agrax along the major edges of the cloth (Should have used Reikland, or not started this in the first place...) which got too dark so I had to touch up with Evil Sunz Scarlet which basically put me back to where I started, except I'd now overshot some shadows, and gave myself some more touch-ups from not-careful-*enough* drybrushing. But... I did go and do a bit of edge highlighting on the steel, that I liked, and a touch of drybrushing around the gold armour helps it to pop just that little more.
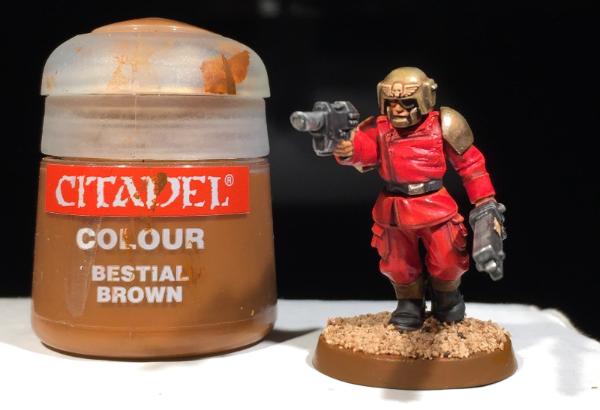
Basic Bestial Brown Basing Begets Better Bodies. Start with Bestial Brown base, glue sand on top.
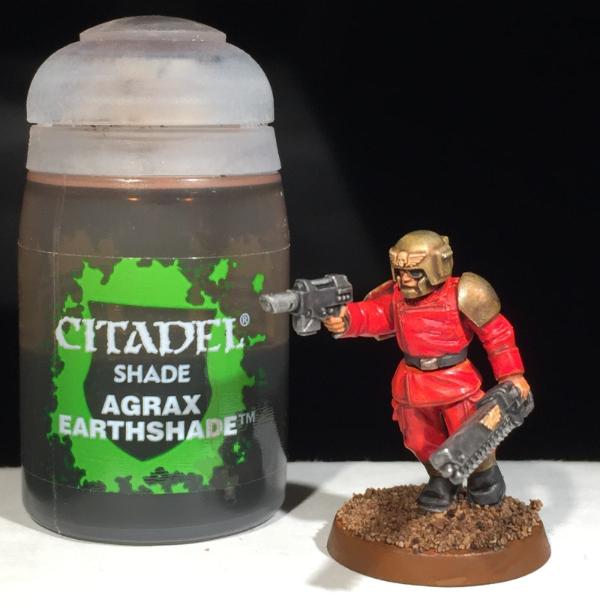
Soak that sand in Agrax Earthshade!
Seal it to your liking, add a little static grass, and Tadaa! You have yourself a finished mini.
Now my friends, we've come to a cross-roads, and some of us should part ways. Not that I don't enjoy your company, but we head to a conclusion you may not like. A famous author once wrote a similar warning in their book and I failed to heed it. I carried on and read a conclusion I didn't want, but wound up accepting because it was the only conclusion that fit.
So now, my friends. If you like what you've seen, and are happy to remember the model as you see it, I bid you farewell. Thanks for coming out, I hope you've had fun and enjoyed seeing the Wet over White technique performed adequately. I've had fun playing with a miniature by painting outside my normal palate. Making a one-off miniature and a tutorial was fun. Thanks again.
But seriously. The tutorial's done and once seen you can't unsee what's next.
Spoiler:
Who likes gloss sealer?!?! I do!
Sorry for the static grass all over the place. I was impatient and I didn't wait long enough for the sealer to dry completely, so the grass will need to be picked off at a later date.
.
.
.
.
.
.
.
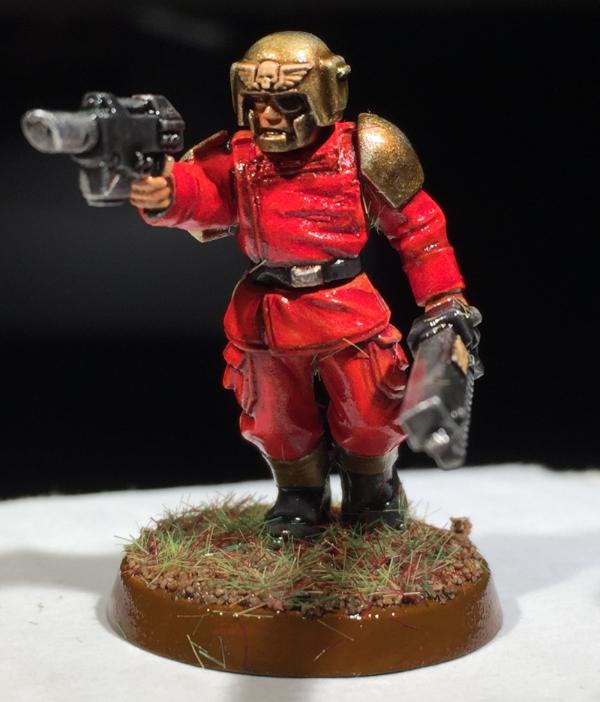
Now behold, the glory of my shiny new Guardsman! I love the way gloss sealer makes the colours pop. I know the internet considers me an abomination for what I love, but I don't care! It's beautiful, bright, brilliant! Blinding in it's garishness but I love it! Don't like it? You don't deserve to see! Poke yourself in the eyes with a screwdriver! But to those with a keen sense of taste, gape in wide-eyed amazement at the gloss. Live the gloss. Love the gloss!
The Golden Angle
Inspired by...
Thanks for checking this out!
This message was edited 1 time. Last update was at 2019/04/13 21:22:22
2019/04/14 01:20:10
Subject: Guardsman - Inspired by Crimson Slaughter Paint Scheme - Wet over White Technique
Looks great! This is pretty much the method we've evolved, especially for doing wee little 1/72 figures- to keep the details intact, start bright and wash down. One thing you might want to try, after priming hit the mini with a thin black or brown wash, helps pick out the details and define the edges.
Skinflint Games- war gaming in the age of austerity
Thin the wash with medium (too much water will stop it settling on the primer) and clean it off the high points, let it collect in the crevices. Actually works well as a "black lining" substitute, gives you the best of both worlds :-)
Check out the 2nd Ed Orks and Gretchin in the last few blog posts to see what we've managed with it
This message was edited 1 time. Last update was at 2019/04/15 23:26:54
Skinflint Games- war gaming in the age of austerity
Those ancient paint pots.. did you put them into a time capsule or how did you manage to keep them fresh over 20 years? And actually not really mis-named, Blood Angels used to look nearly orange in 2nd Ed But I guess you know that already
I used to paint my Khorne Berzerkers in a similar way, but that was ages before the internet was full of tutorials and before I learned to paint.. so the result was not even close to this one
To be honest, I didn’t paint much when I was younger. I’d say I’ve bought next to no *40k* models in the last 5 years, but painted more 40k models than I did in the 15 years before that.
So the reason they’re still good? A mixture of not opening them, and adding a couple drops of water and/or medium to revive glue-y paints.
That said, the elf flesh is the flesh tone I’ve used for 20 years now. I don’t have much call for flesh... hands and faces kind of thing, but it just keeps on going.


 Most noticeable on the pistol housing, and boot tops, you can also see the edge of his eye patch.


 But I guess you know that already
