Okay, so whether you want a ghillie suit style camo suit/ weapon covering or a nice thick bear fur cloak topper for a fantasy knight, or to jazz up an old metal monster? Look no further, actually do if you can find it, I just worked this out for myself. Whether you are using green stuff or milli-put the technique I will outline is the same. I prefer milli-put becasue it is cheaper and you get a lot more in a box.
This is also great for camo-cloaks or similar.
Firstly some finished results so you know what you're in for.
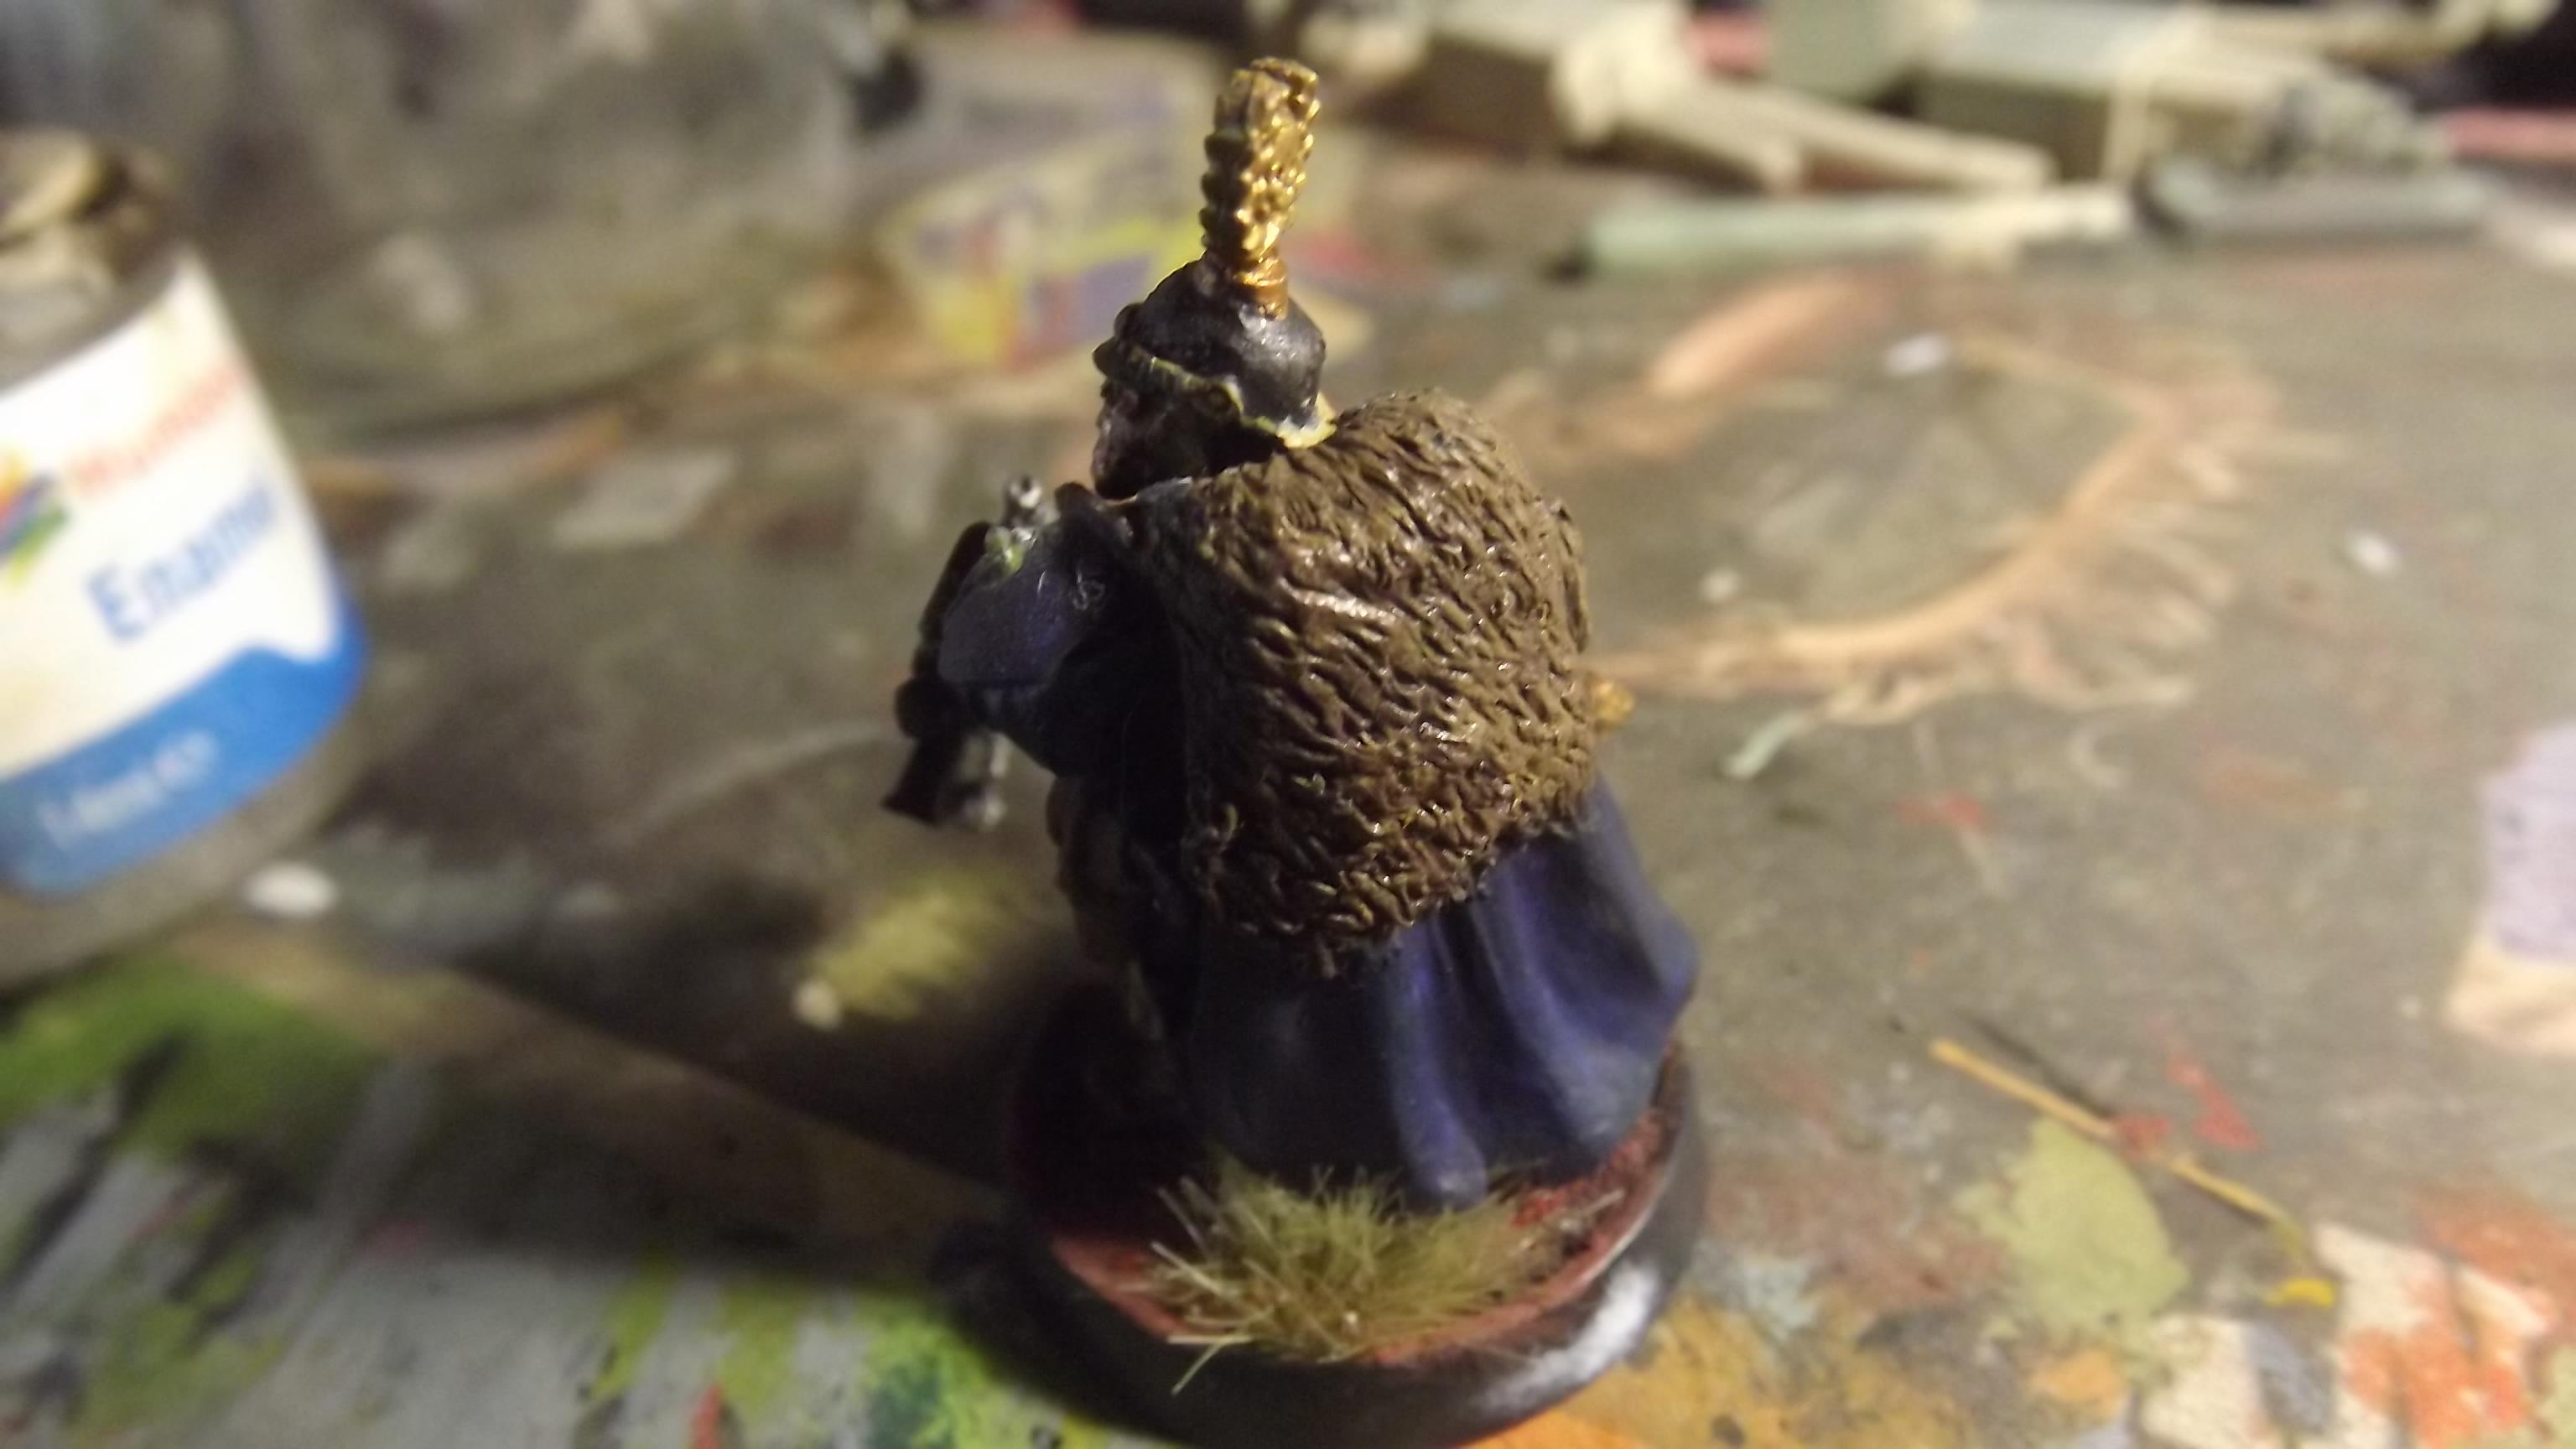
Fur
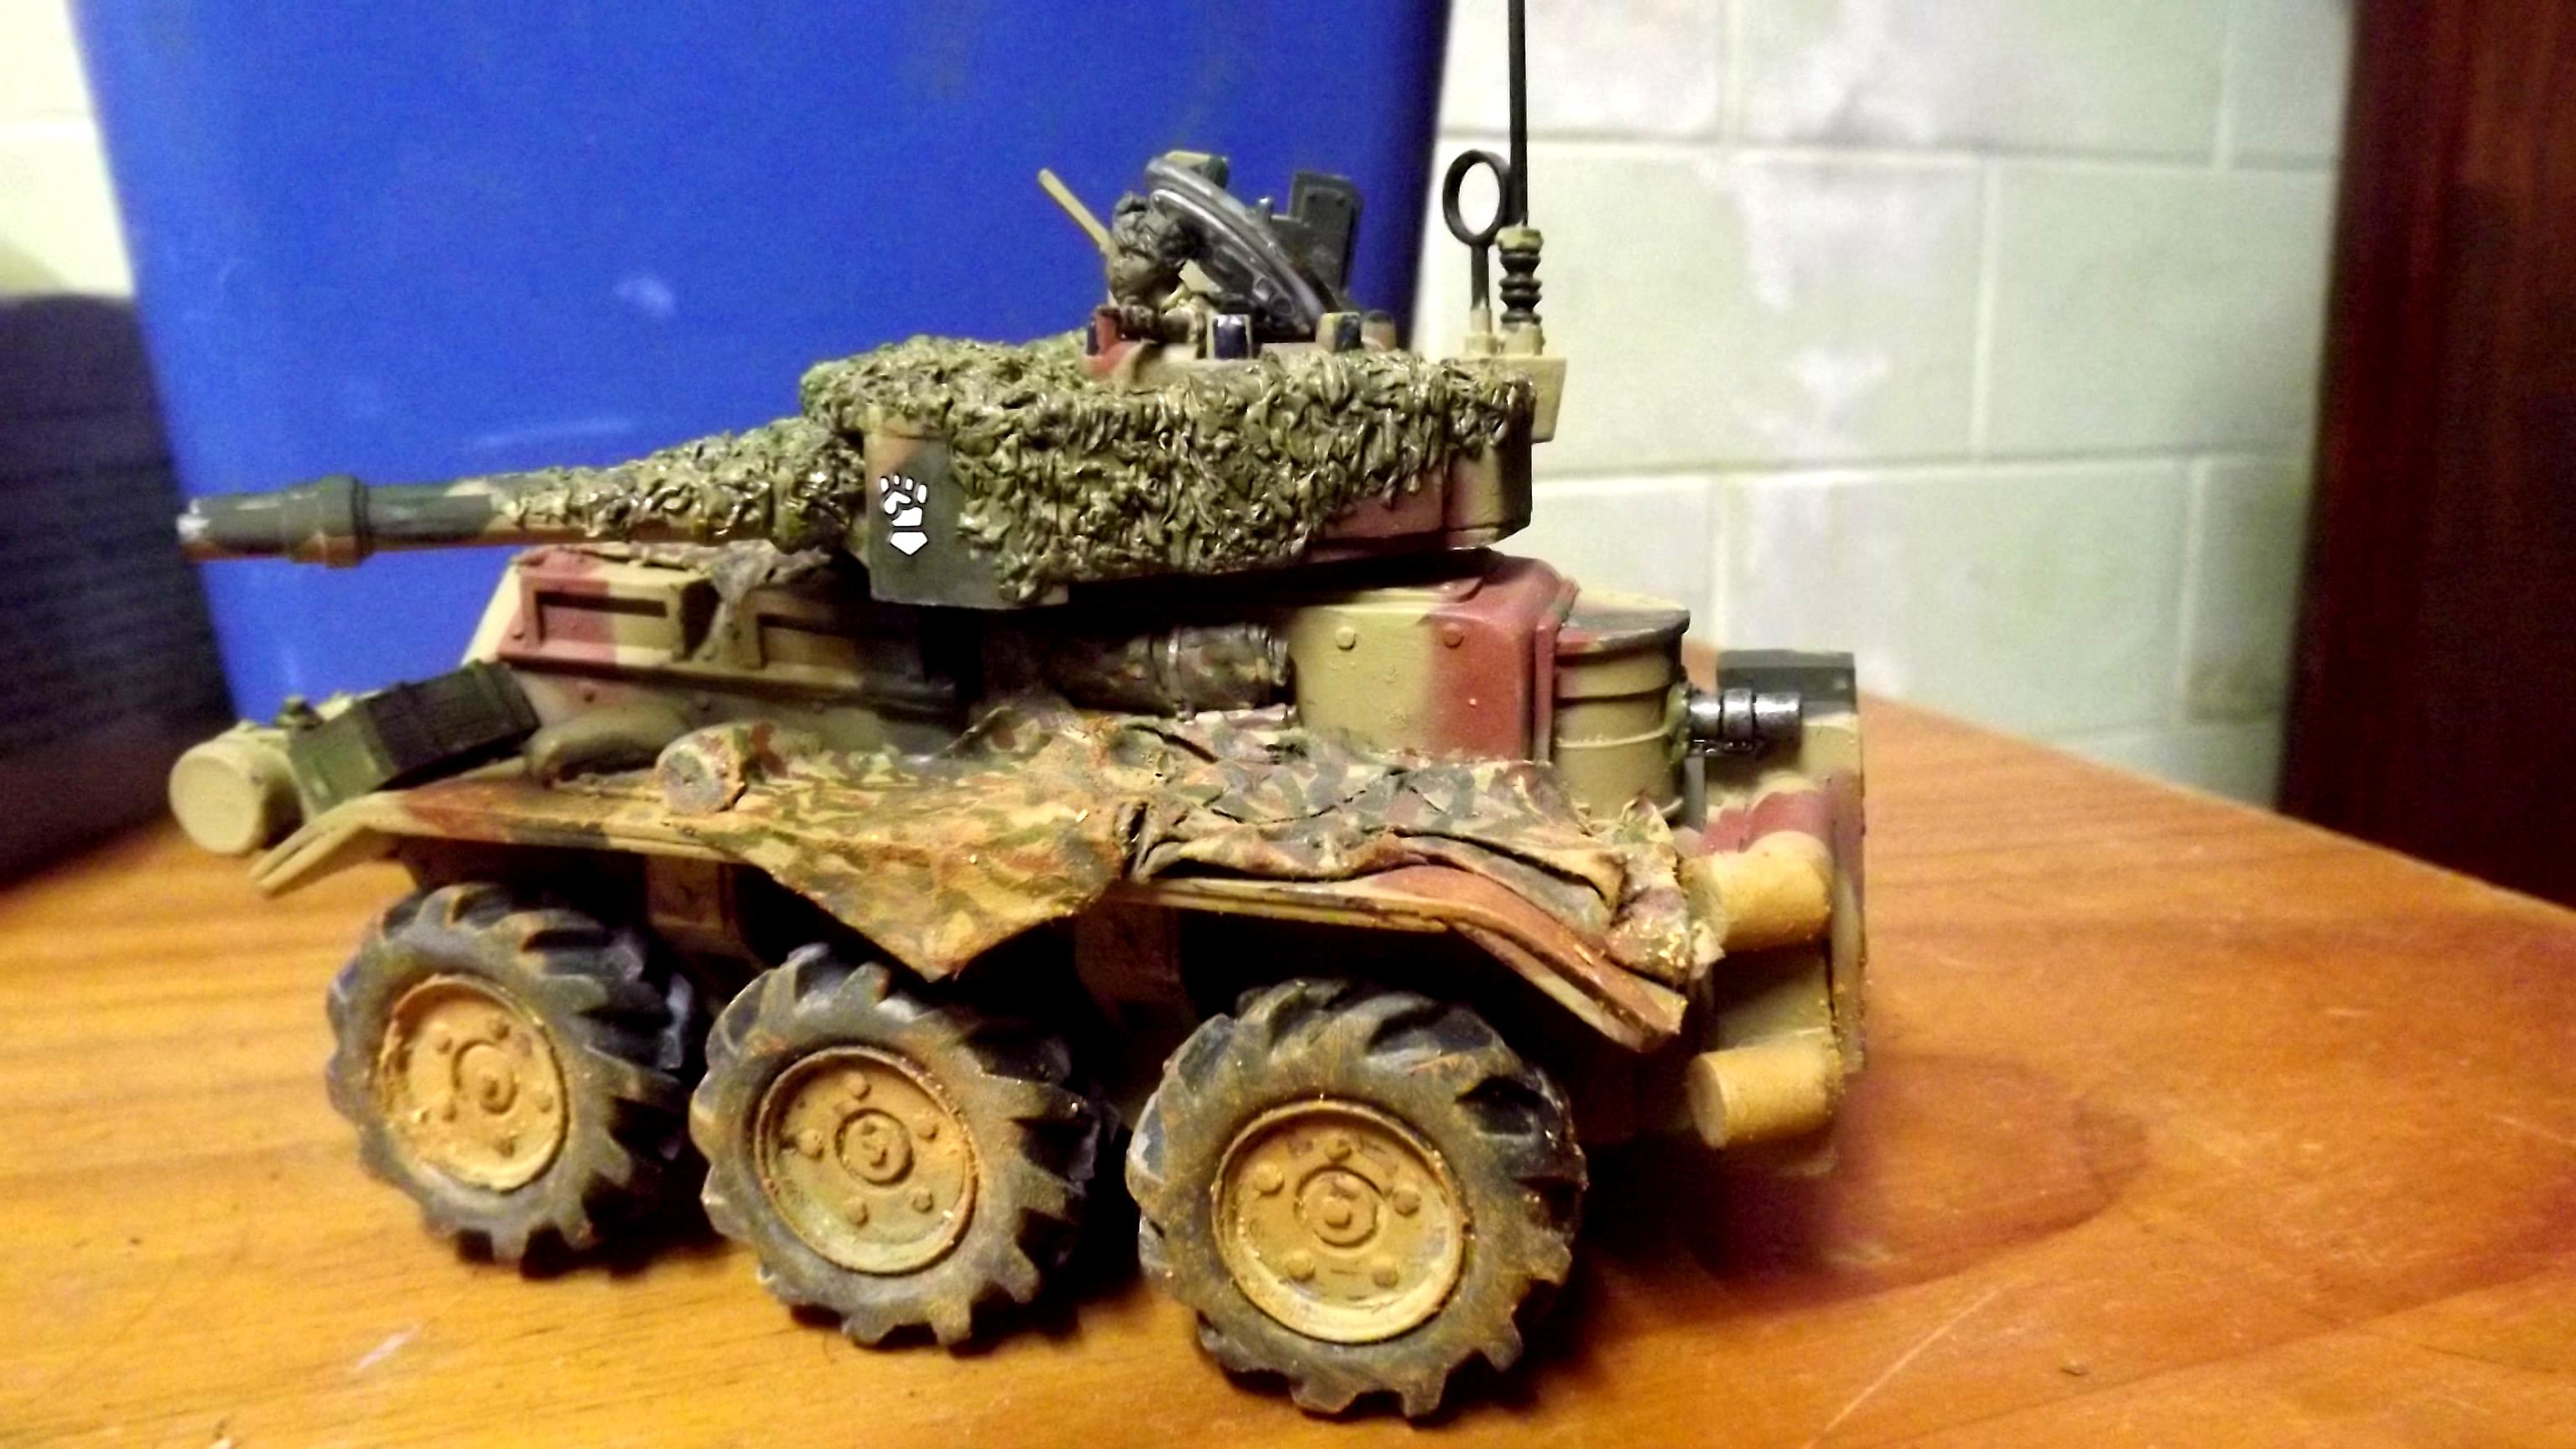
Camo-netting
Camo-suit
Tools:
Hobby knife
milli-put/greenstuff or a similar putty
Technique
Step 1: Flatten your putty out into a pancake roughly the shape of the area you want to cover, whether it is over a vehicle turret or just over the shoulders of your fantasy hero. For a vehicle camo net you get best results by doing small areas at a time and having gaps where you can see the armour beneath.
 Step2:
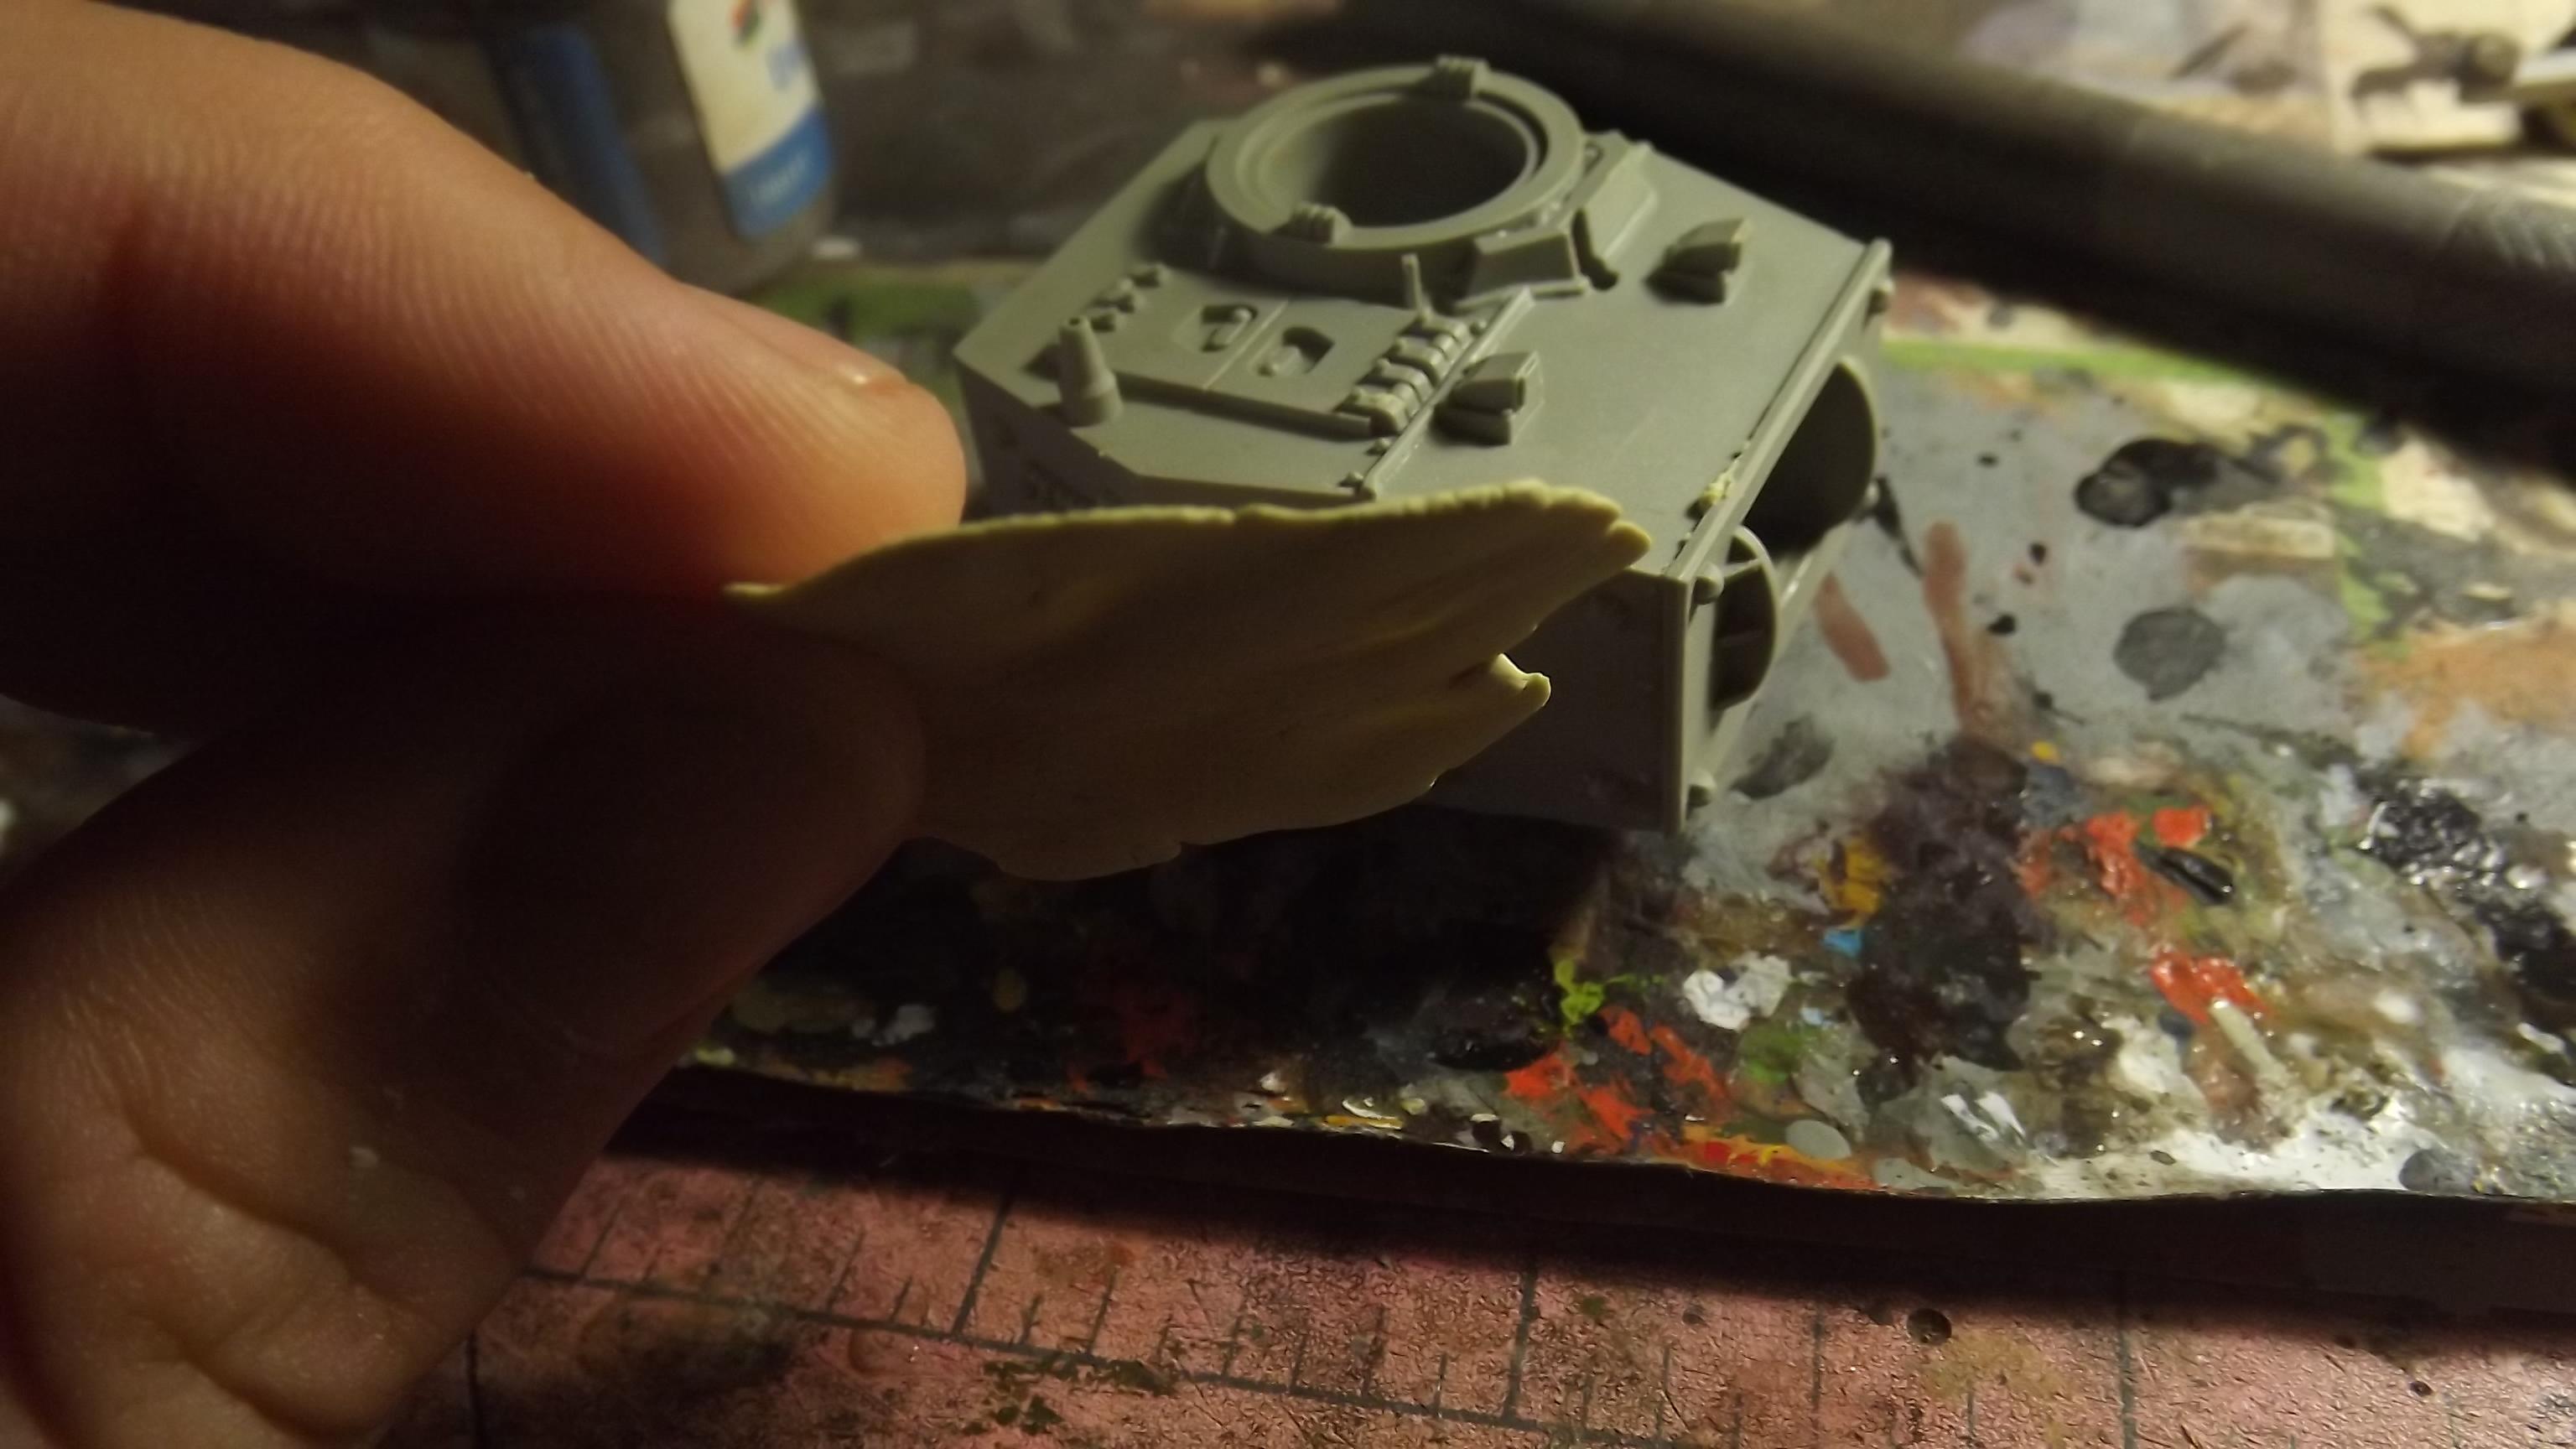
 Cover the area with the putty, make sure you don't put it on too thick.
Uneven application works more effectively to break up the outline. Little blobs work quite well.
If you are working on a small area like a firearm roll the putty into a sausage and flatten it, then wrap it around or drape it over the object.
 Step 3:
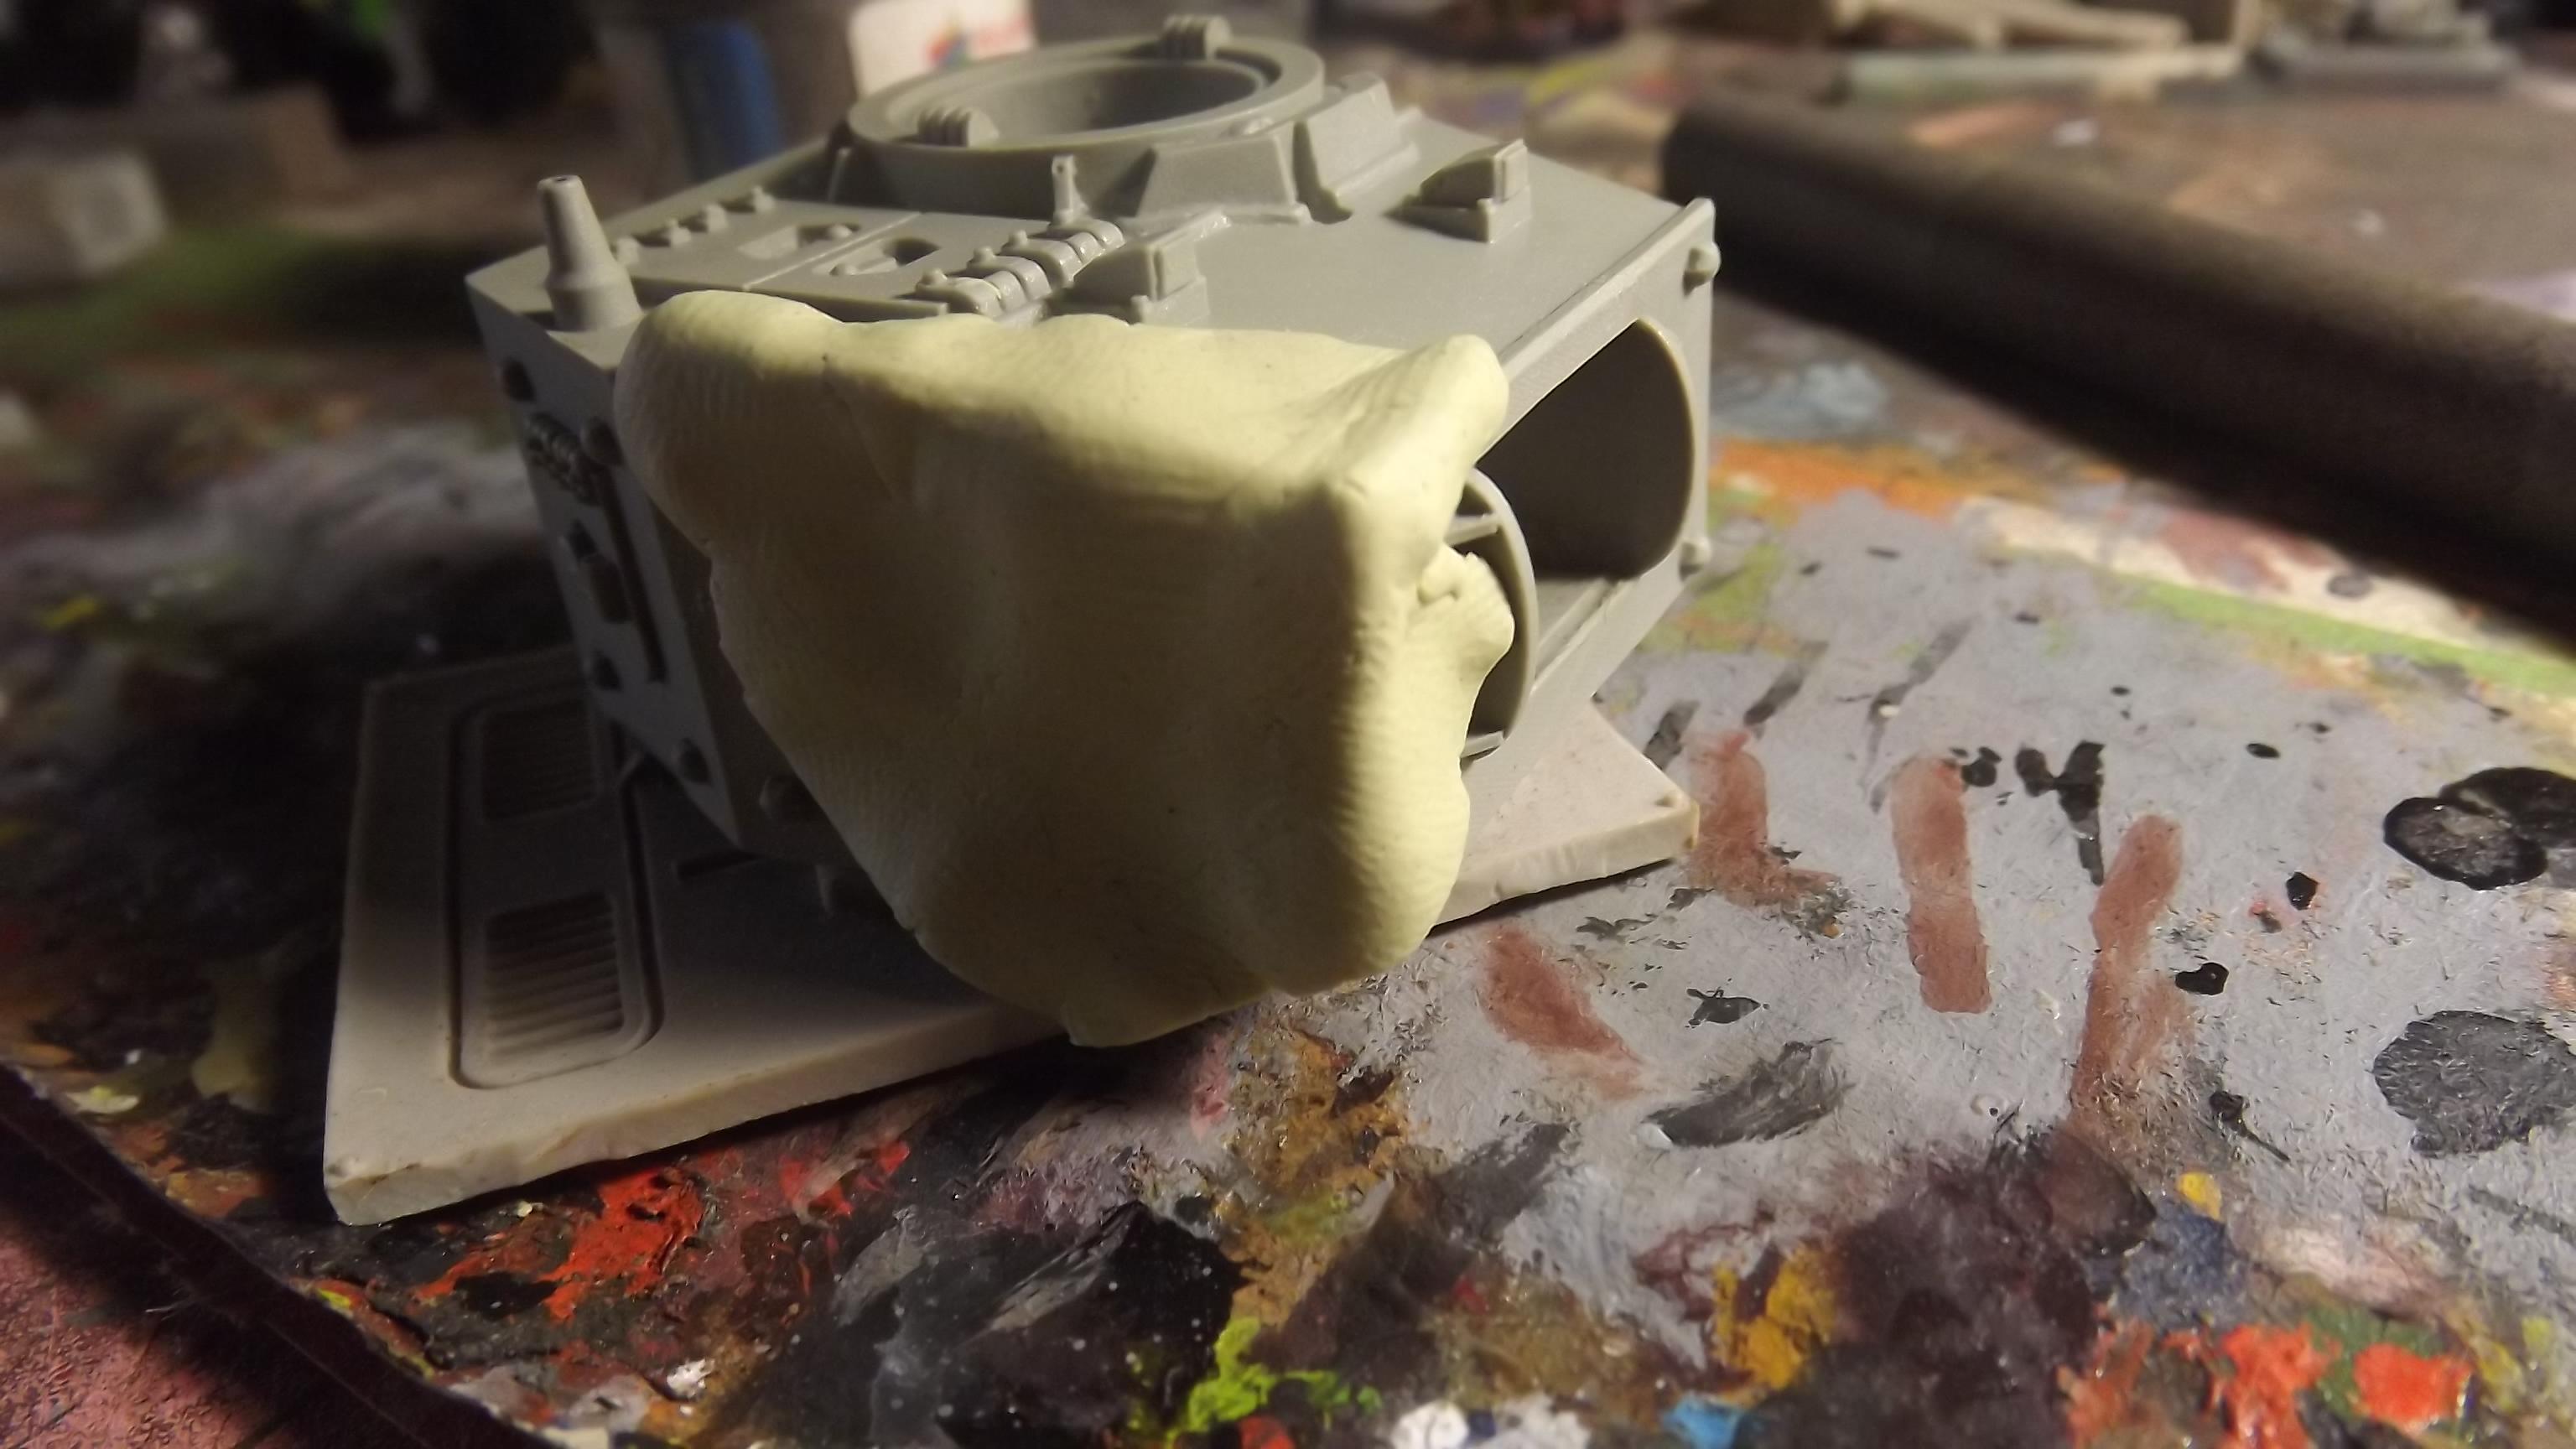
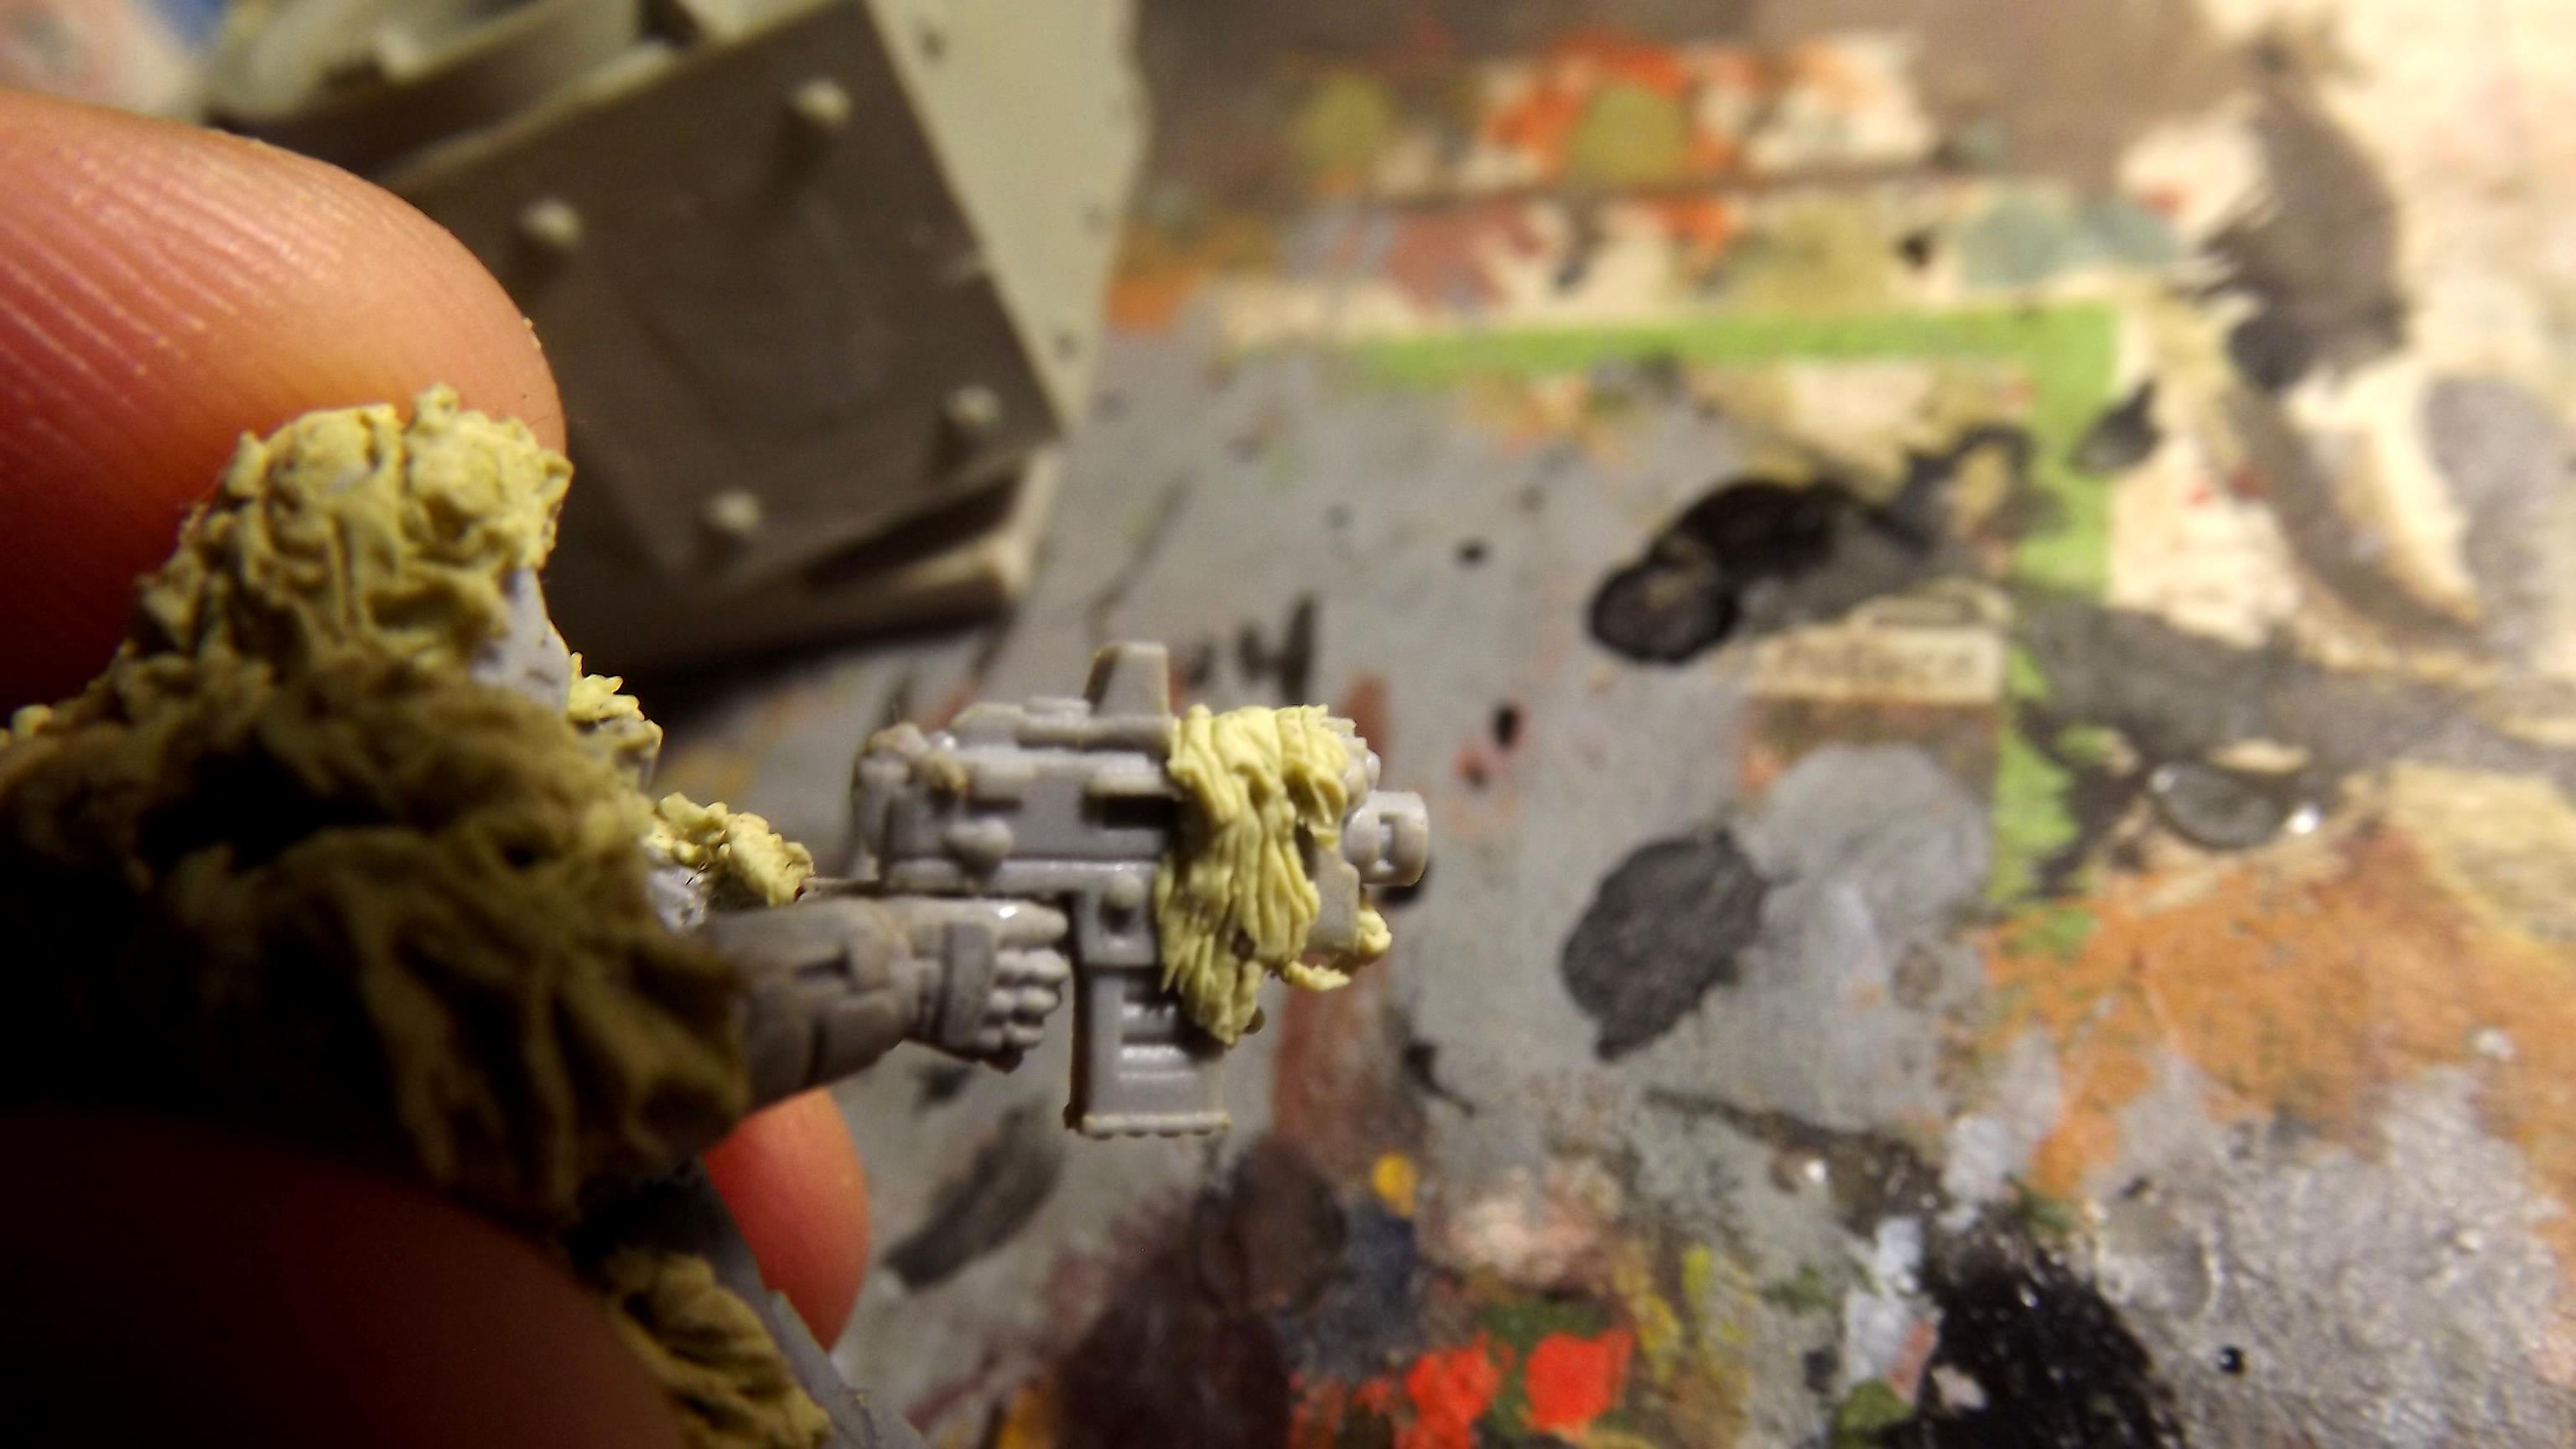
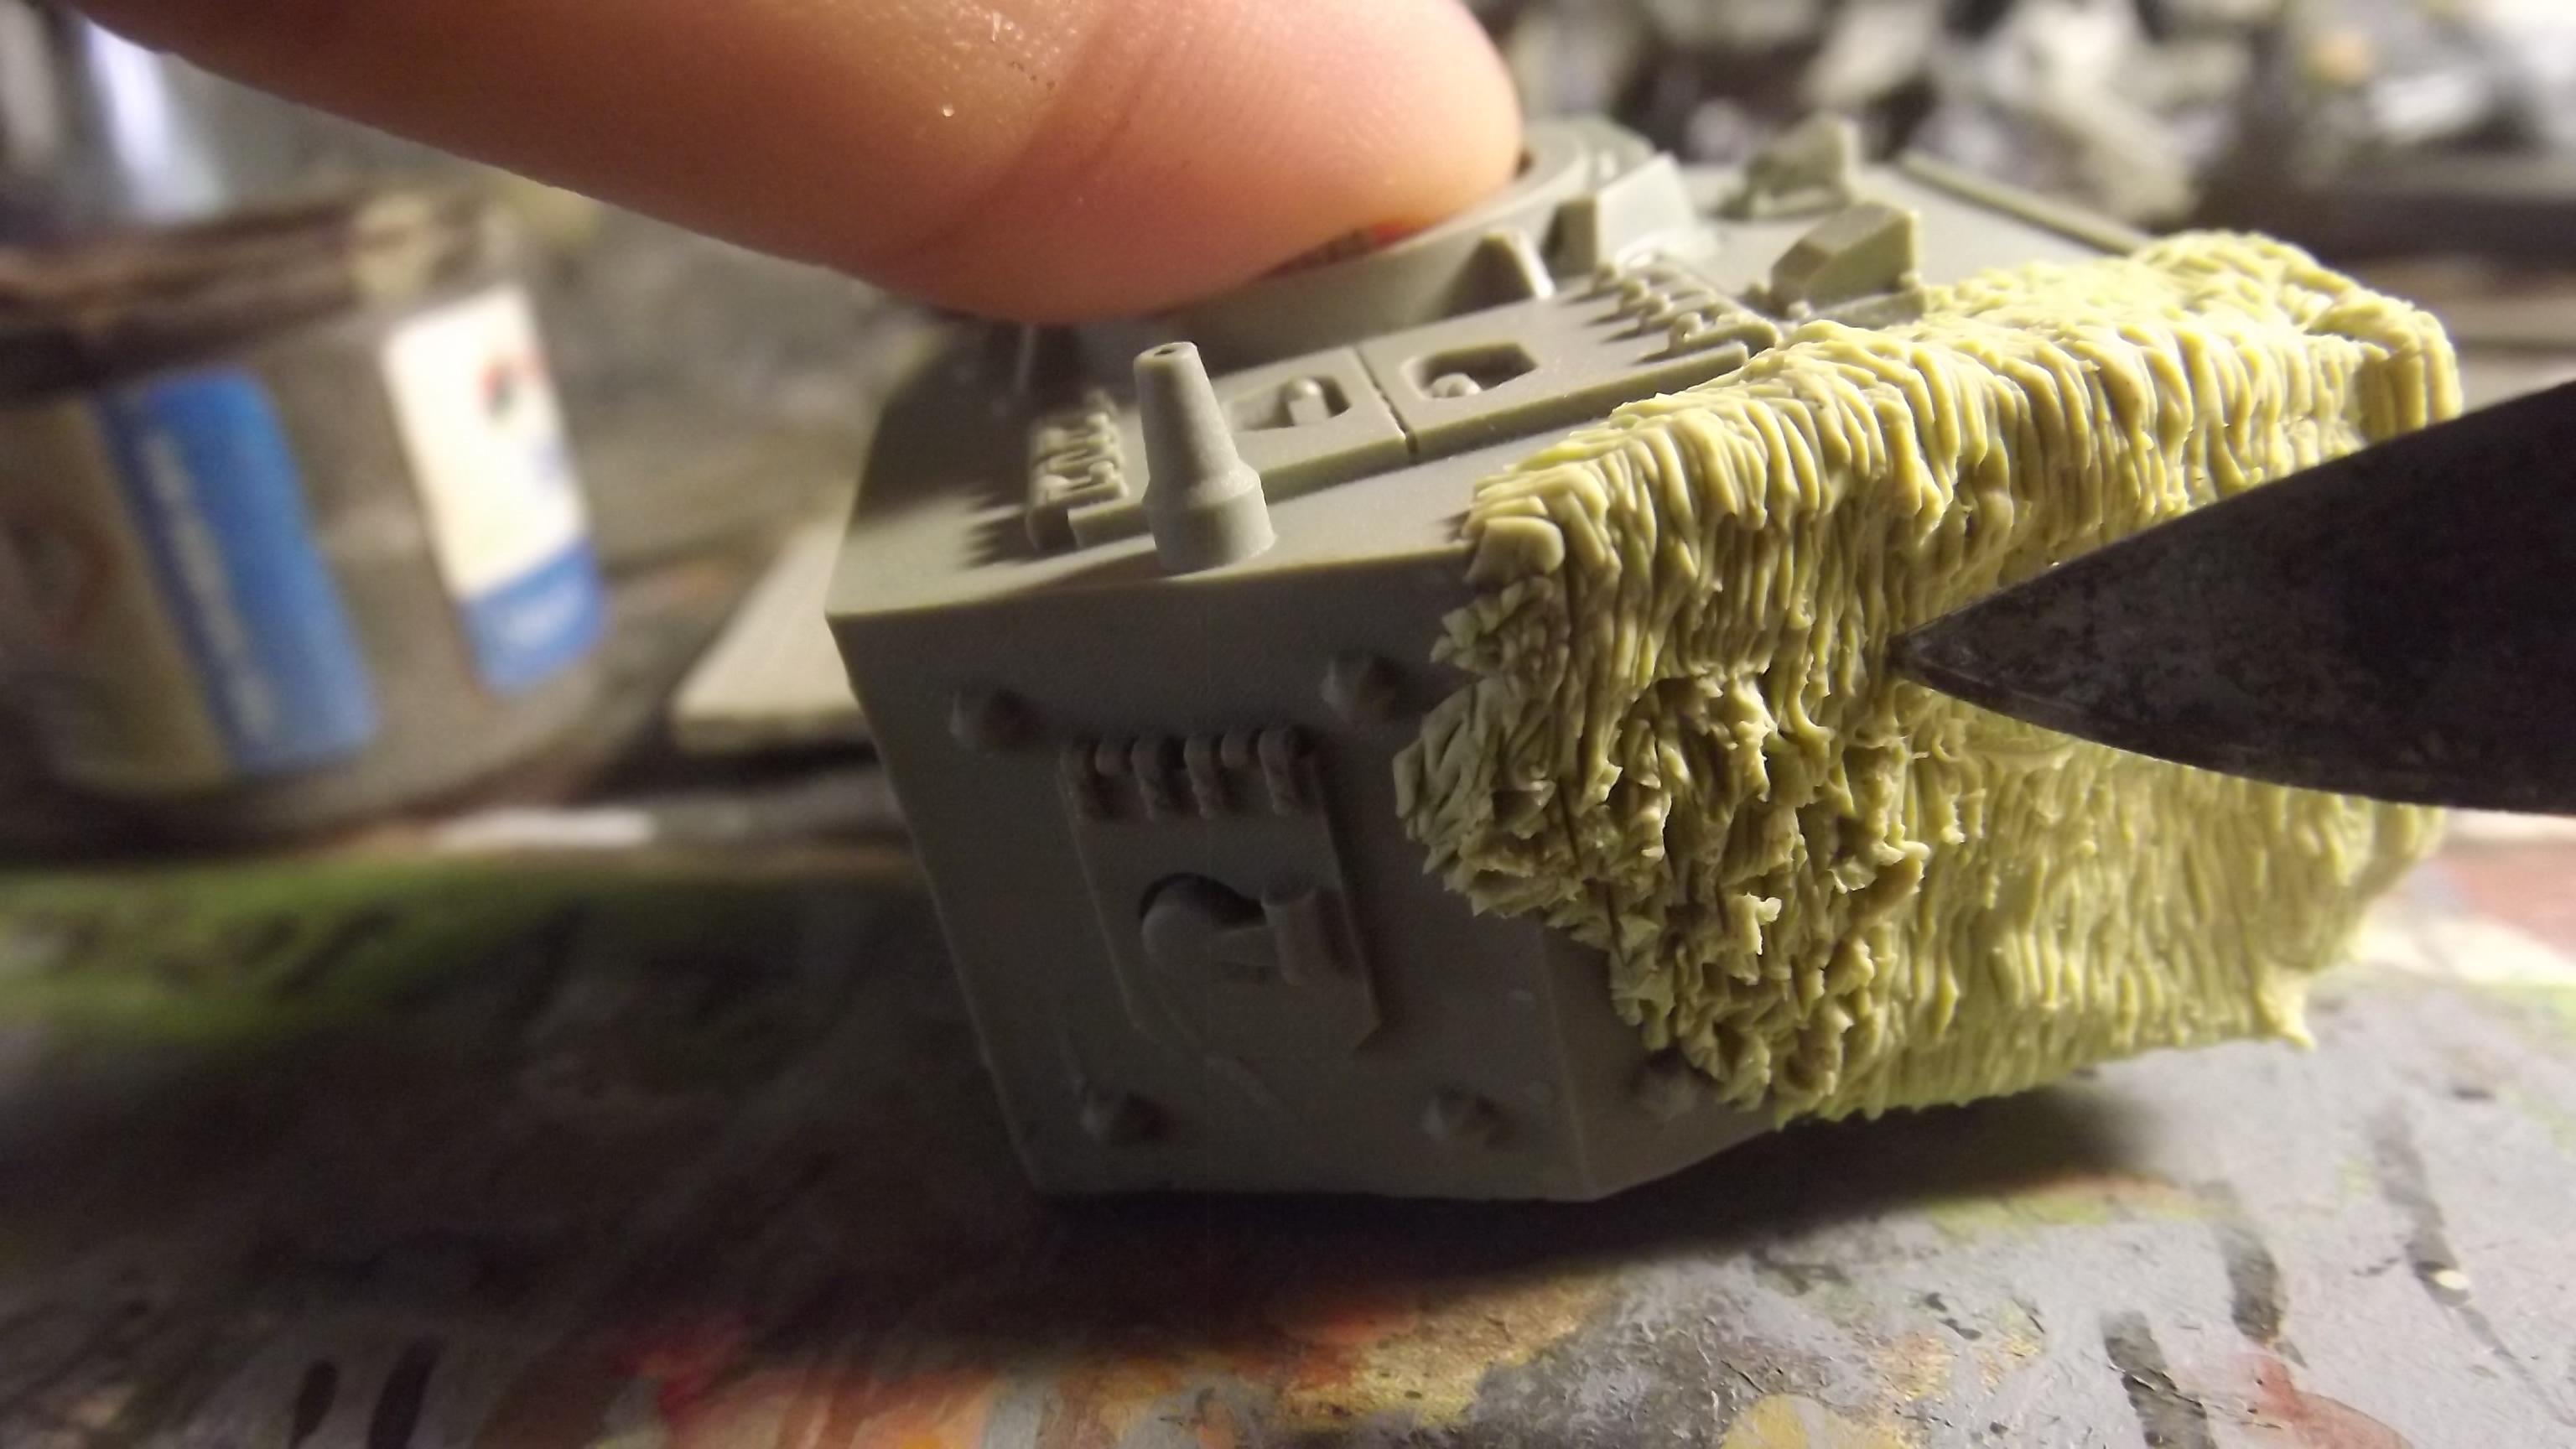
 Striate the putty with the very tip of a hobby knife. Cover the surface evenly and thoroughly and remember if you are doing fur that it points towards the rear of the body, with camo netting you can do the pattern horizontally or vertically, I prefer verticle pattern on verticle surfaces for no particular reason. For most furs this may create enough texture for the desired effect. Remember to work on the edges and make them rough, if they are too sharp it will look off. Camo netting or camo suits should never have sharp edges, you are trying to disrupt the outline of your object.
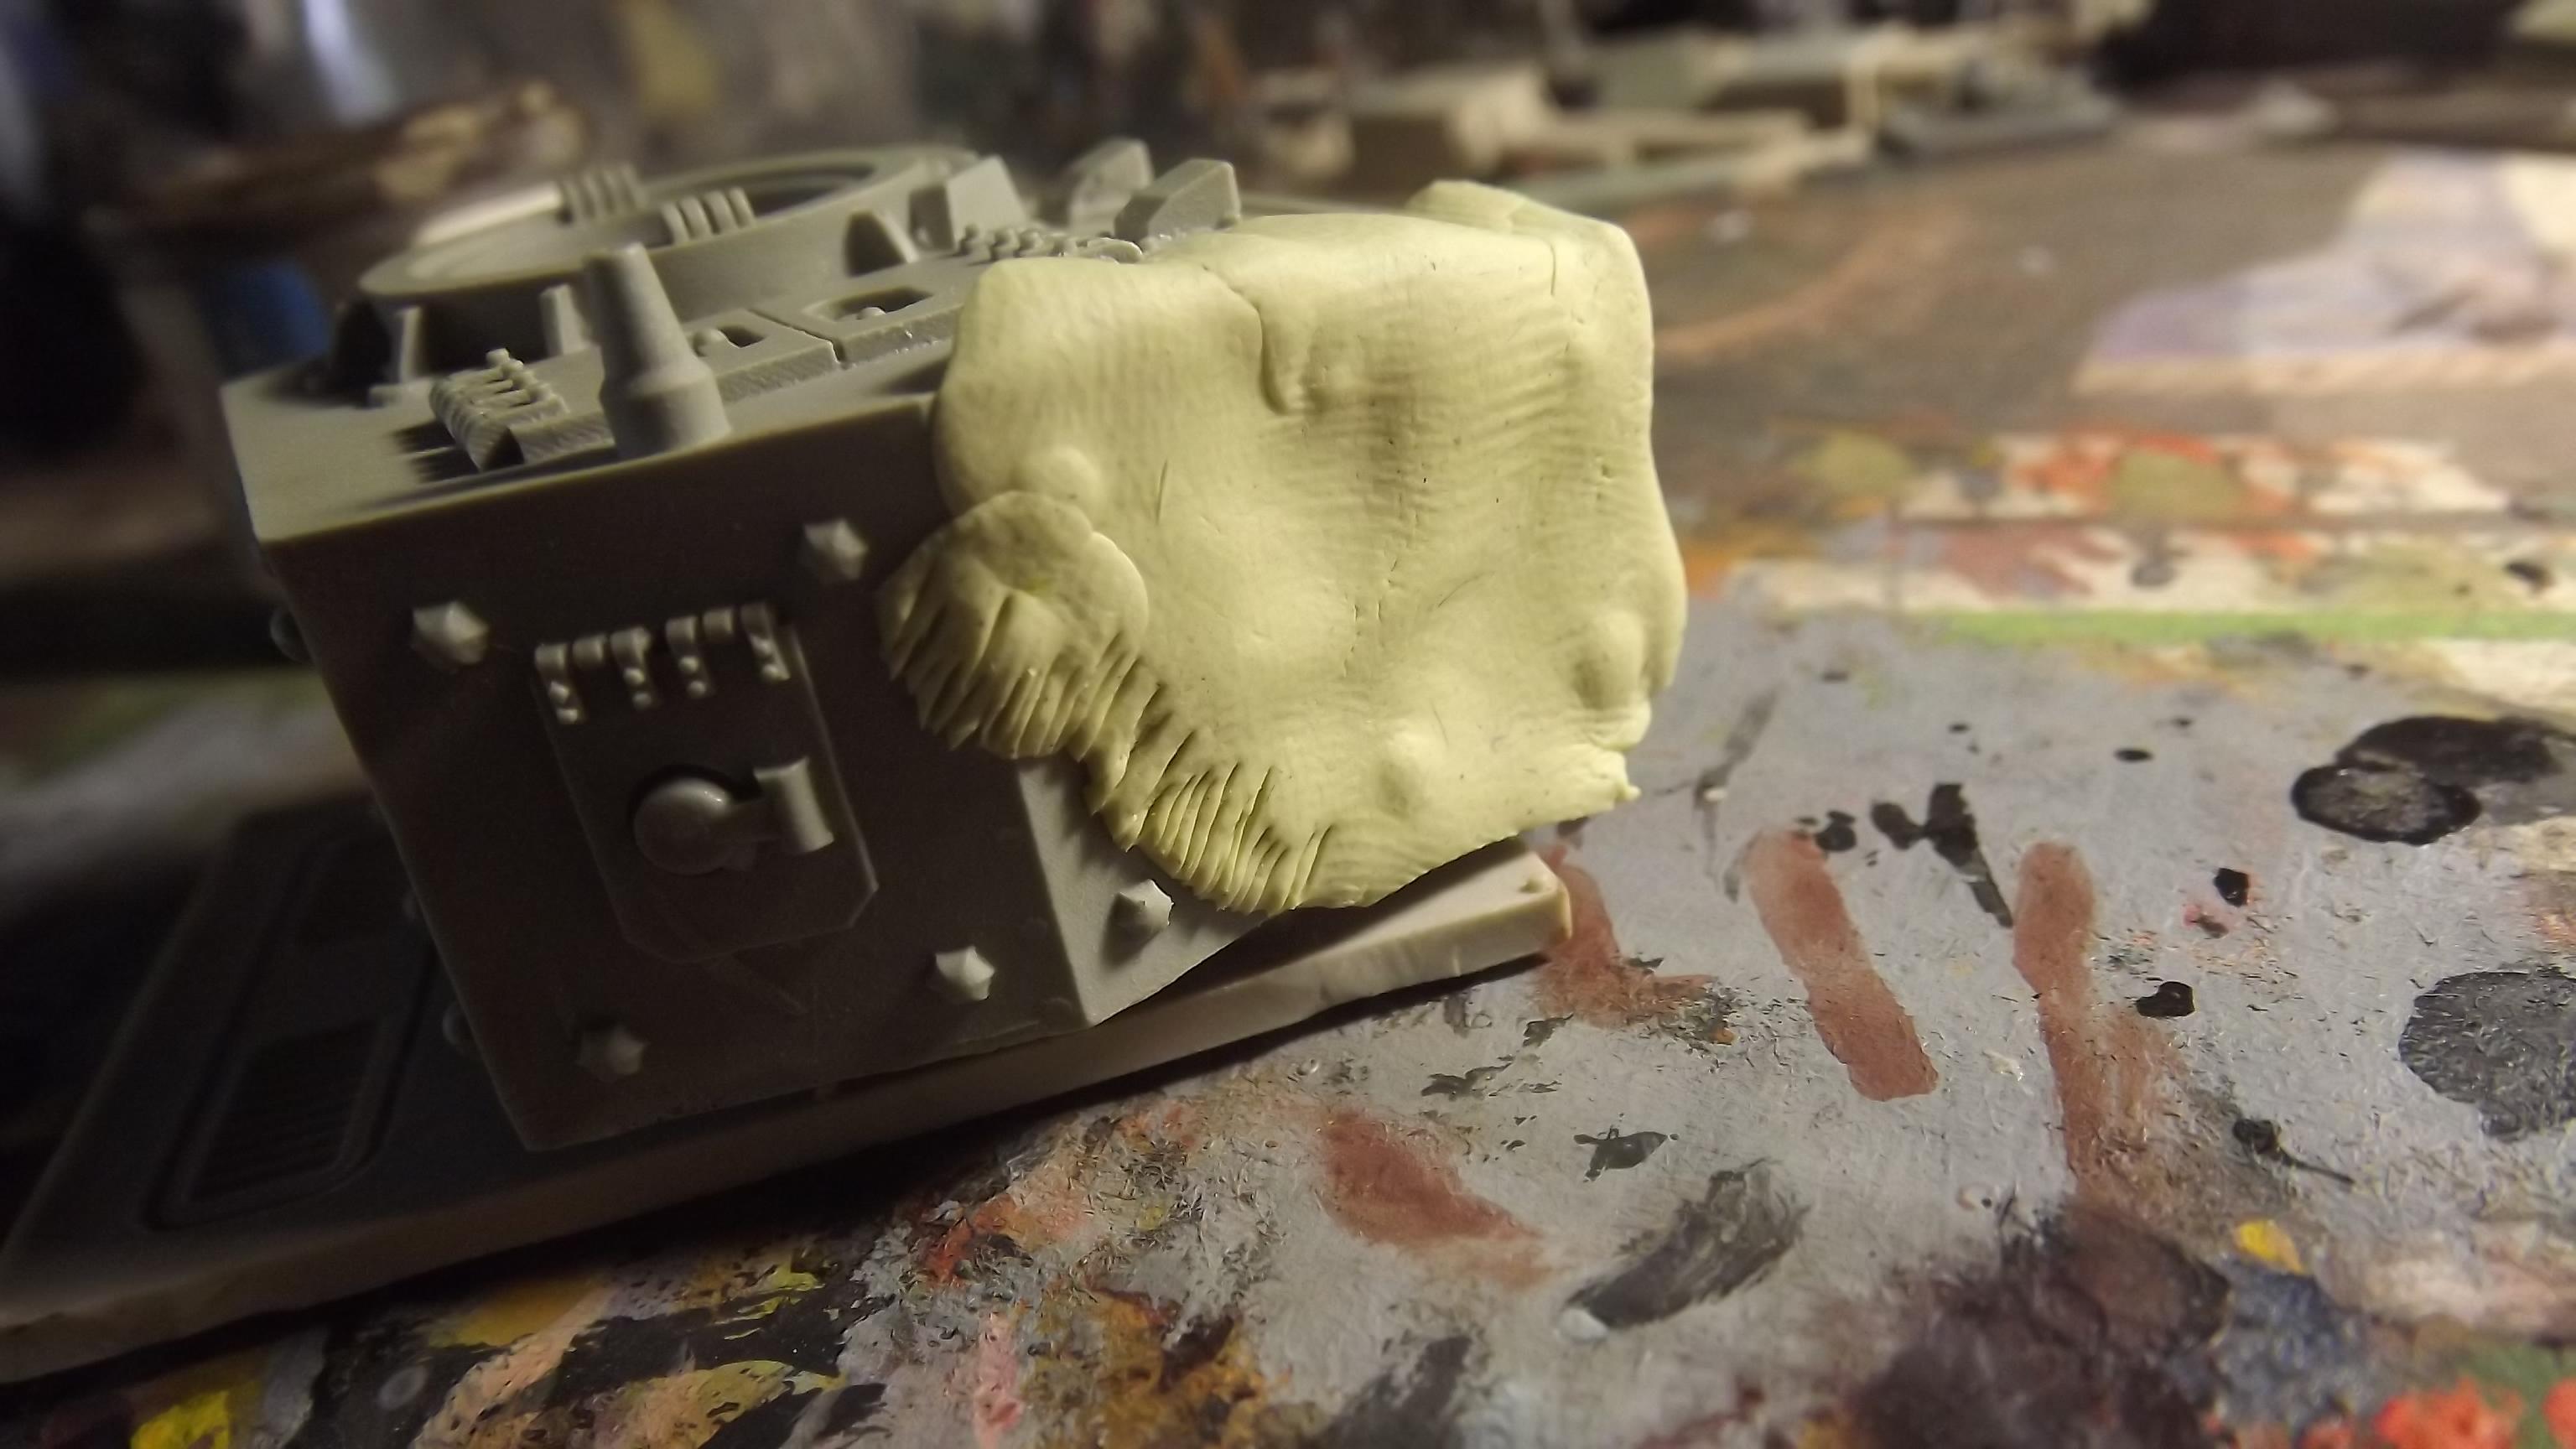
I like to work in from the edges of the the object, edge work is very important for the finish and should not be neglected.
Someone left their shaggy carpet within reach of this tank crew.

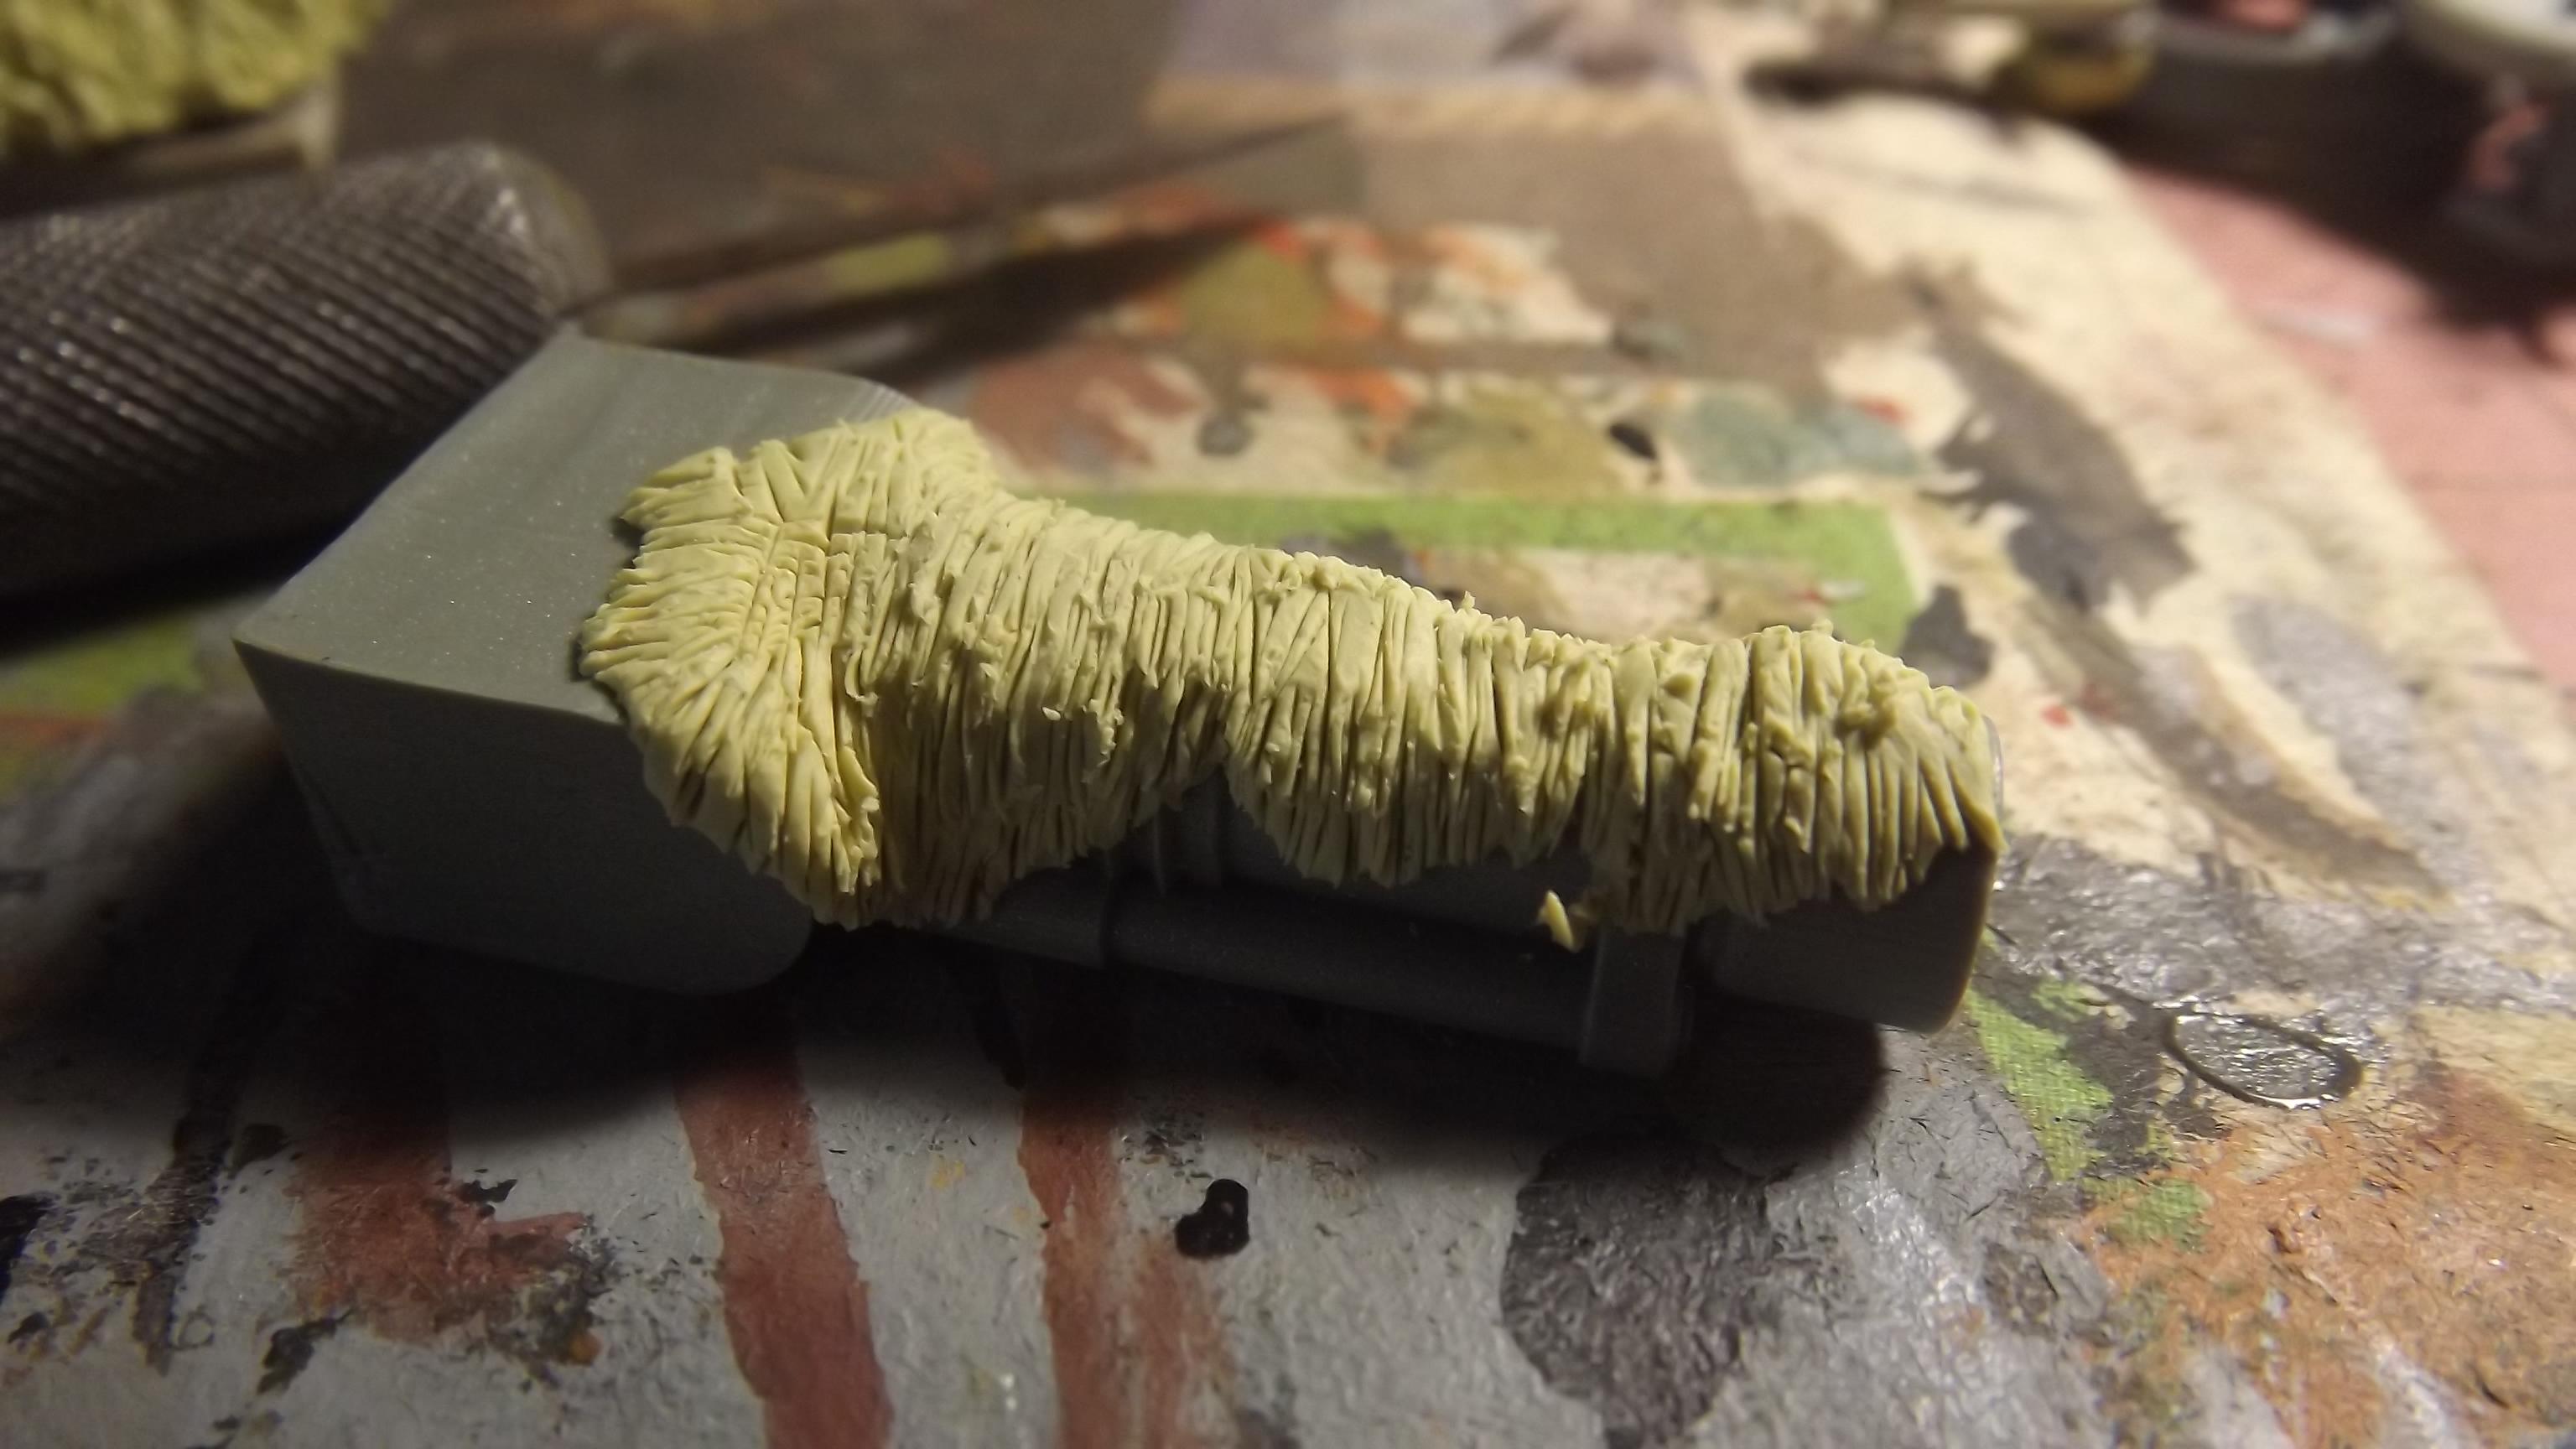
It's important to work from and to the edges in this step on gun barrels as the camo will want to drape over it, and also you don't want ti rip the putty off in the next step.
Whole turret done.
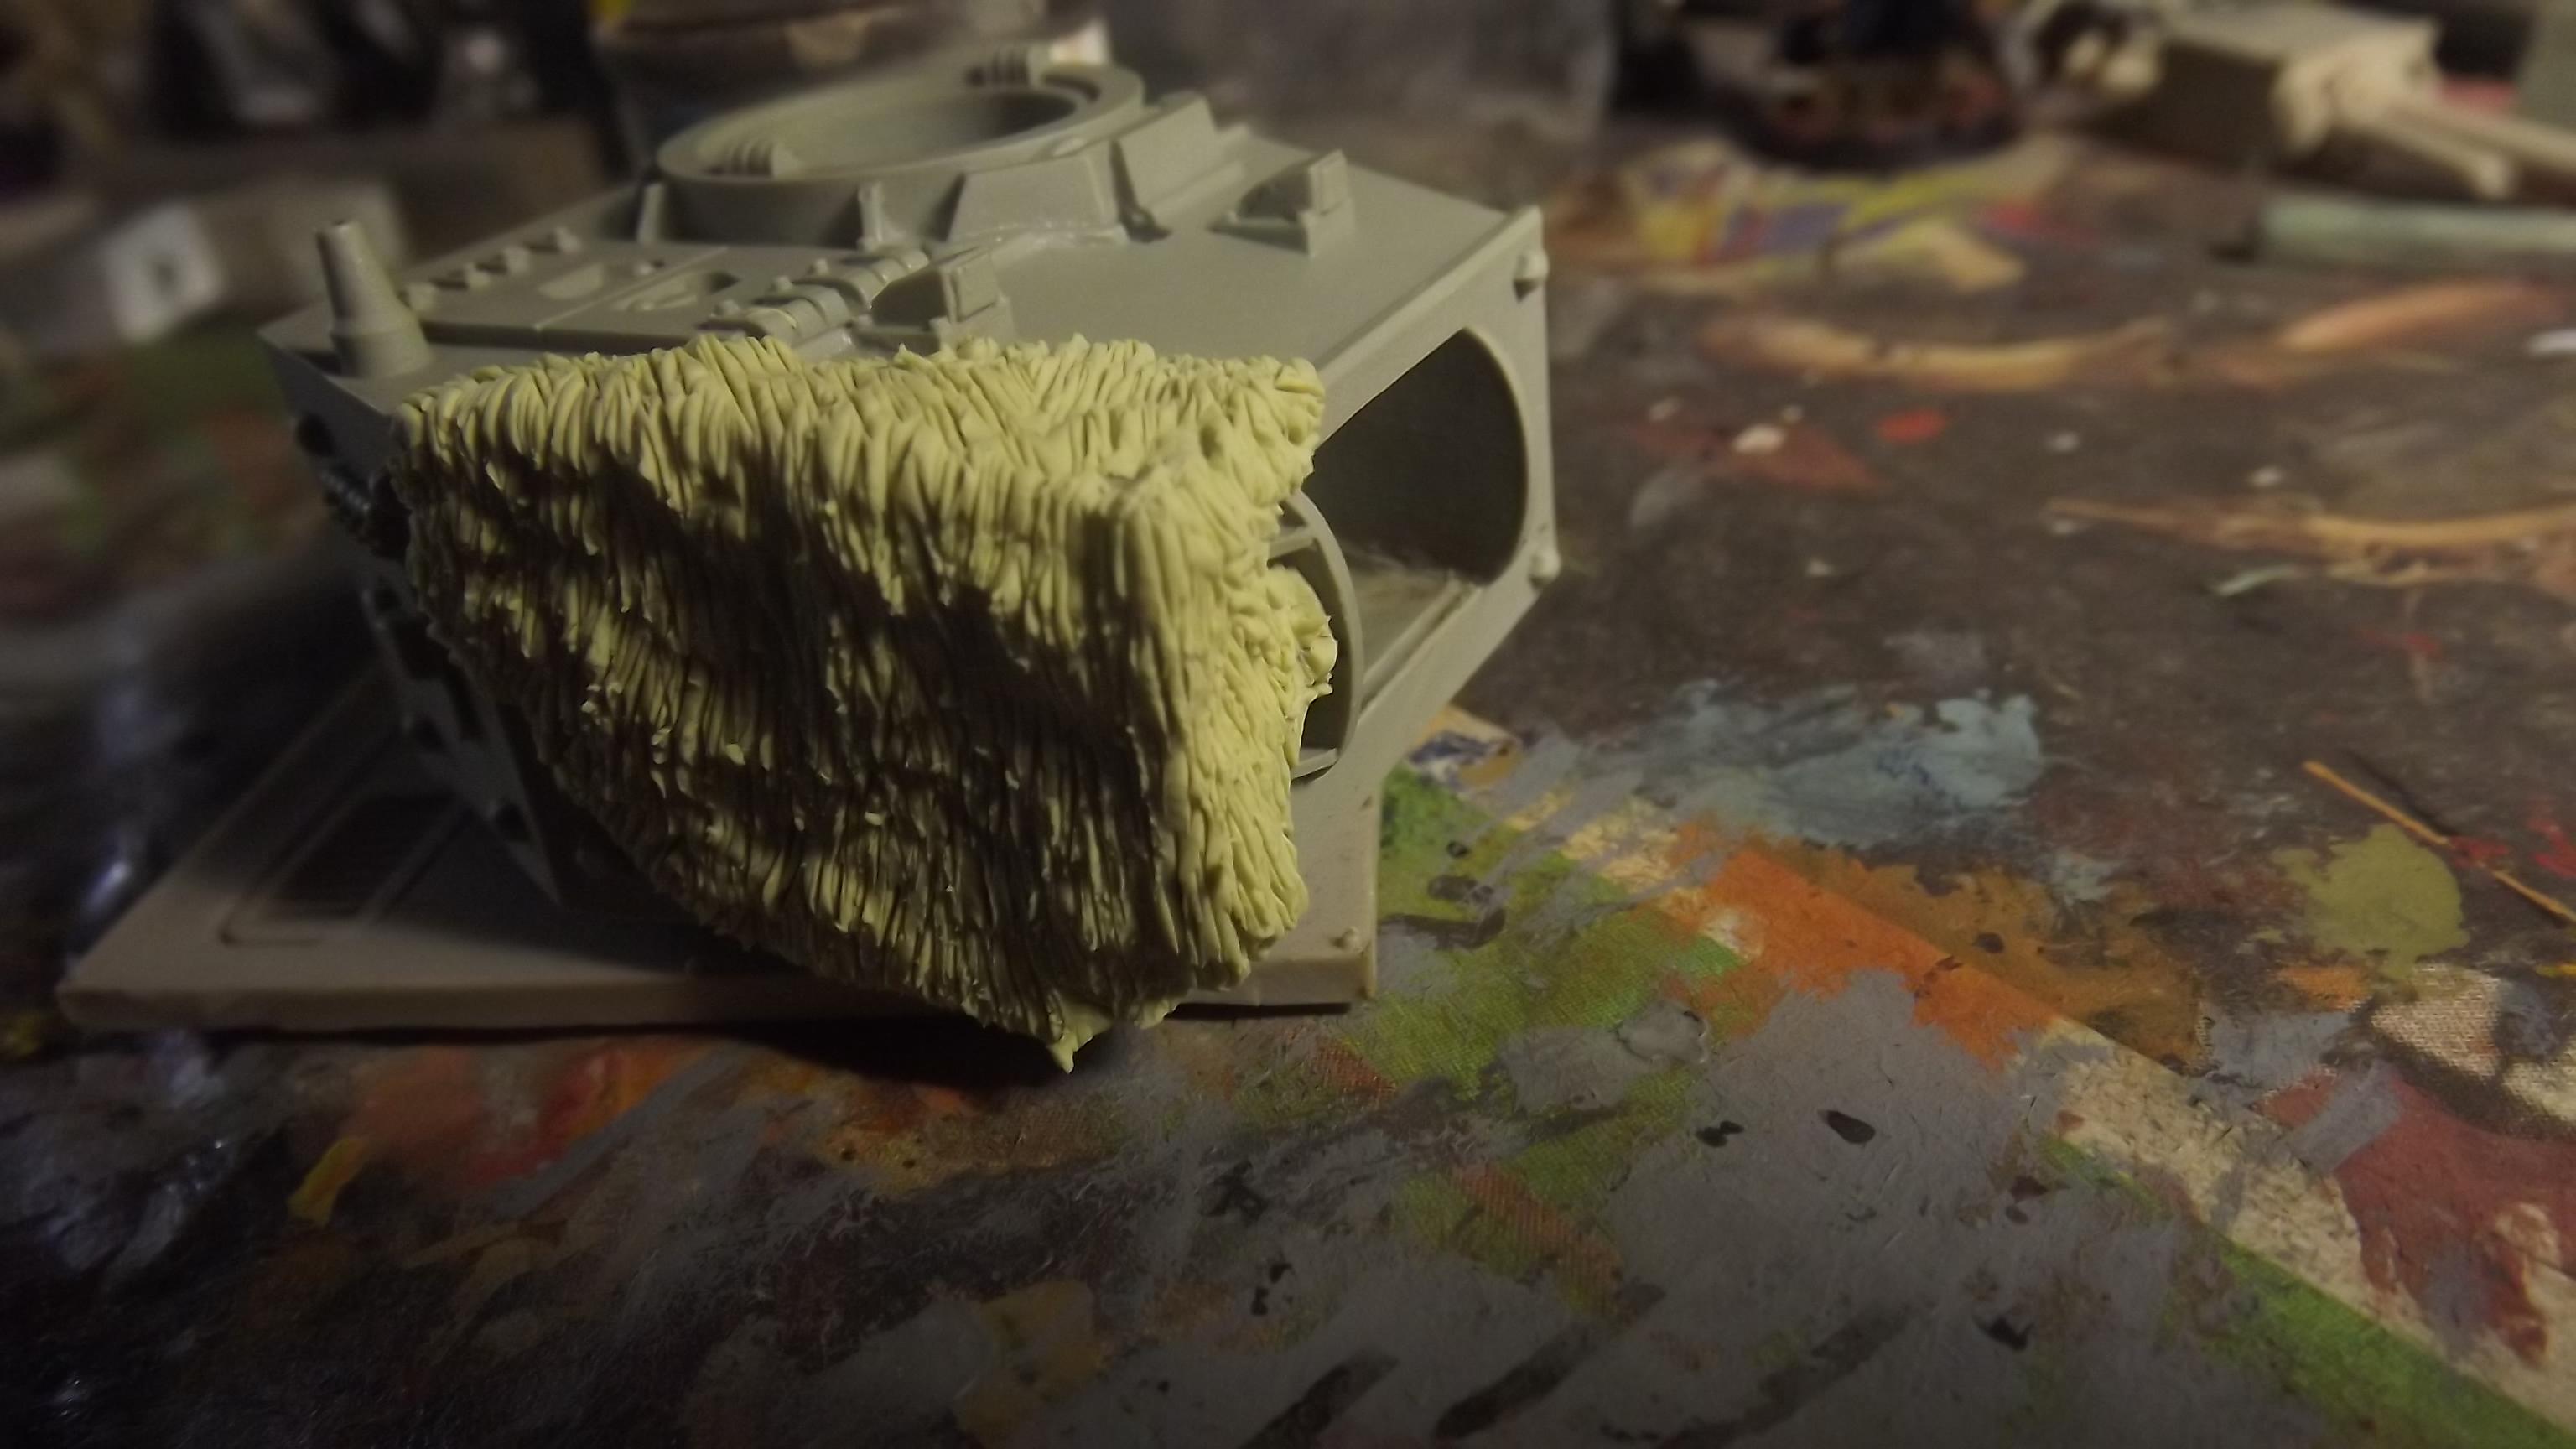
Remember do not put camo covers/netting over hatches, ejection ports, perescopes, or sighting optics these are quite important or so I'm told.
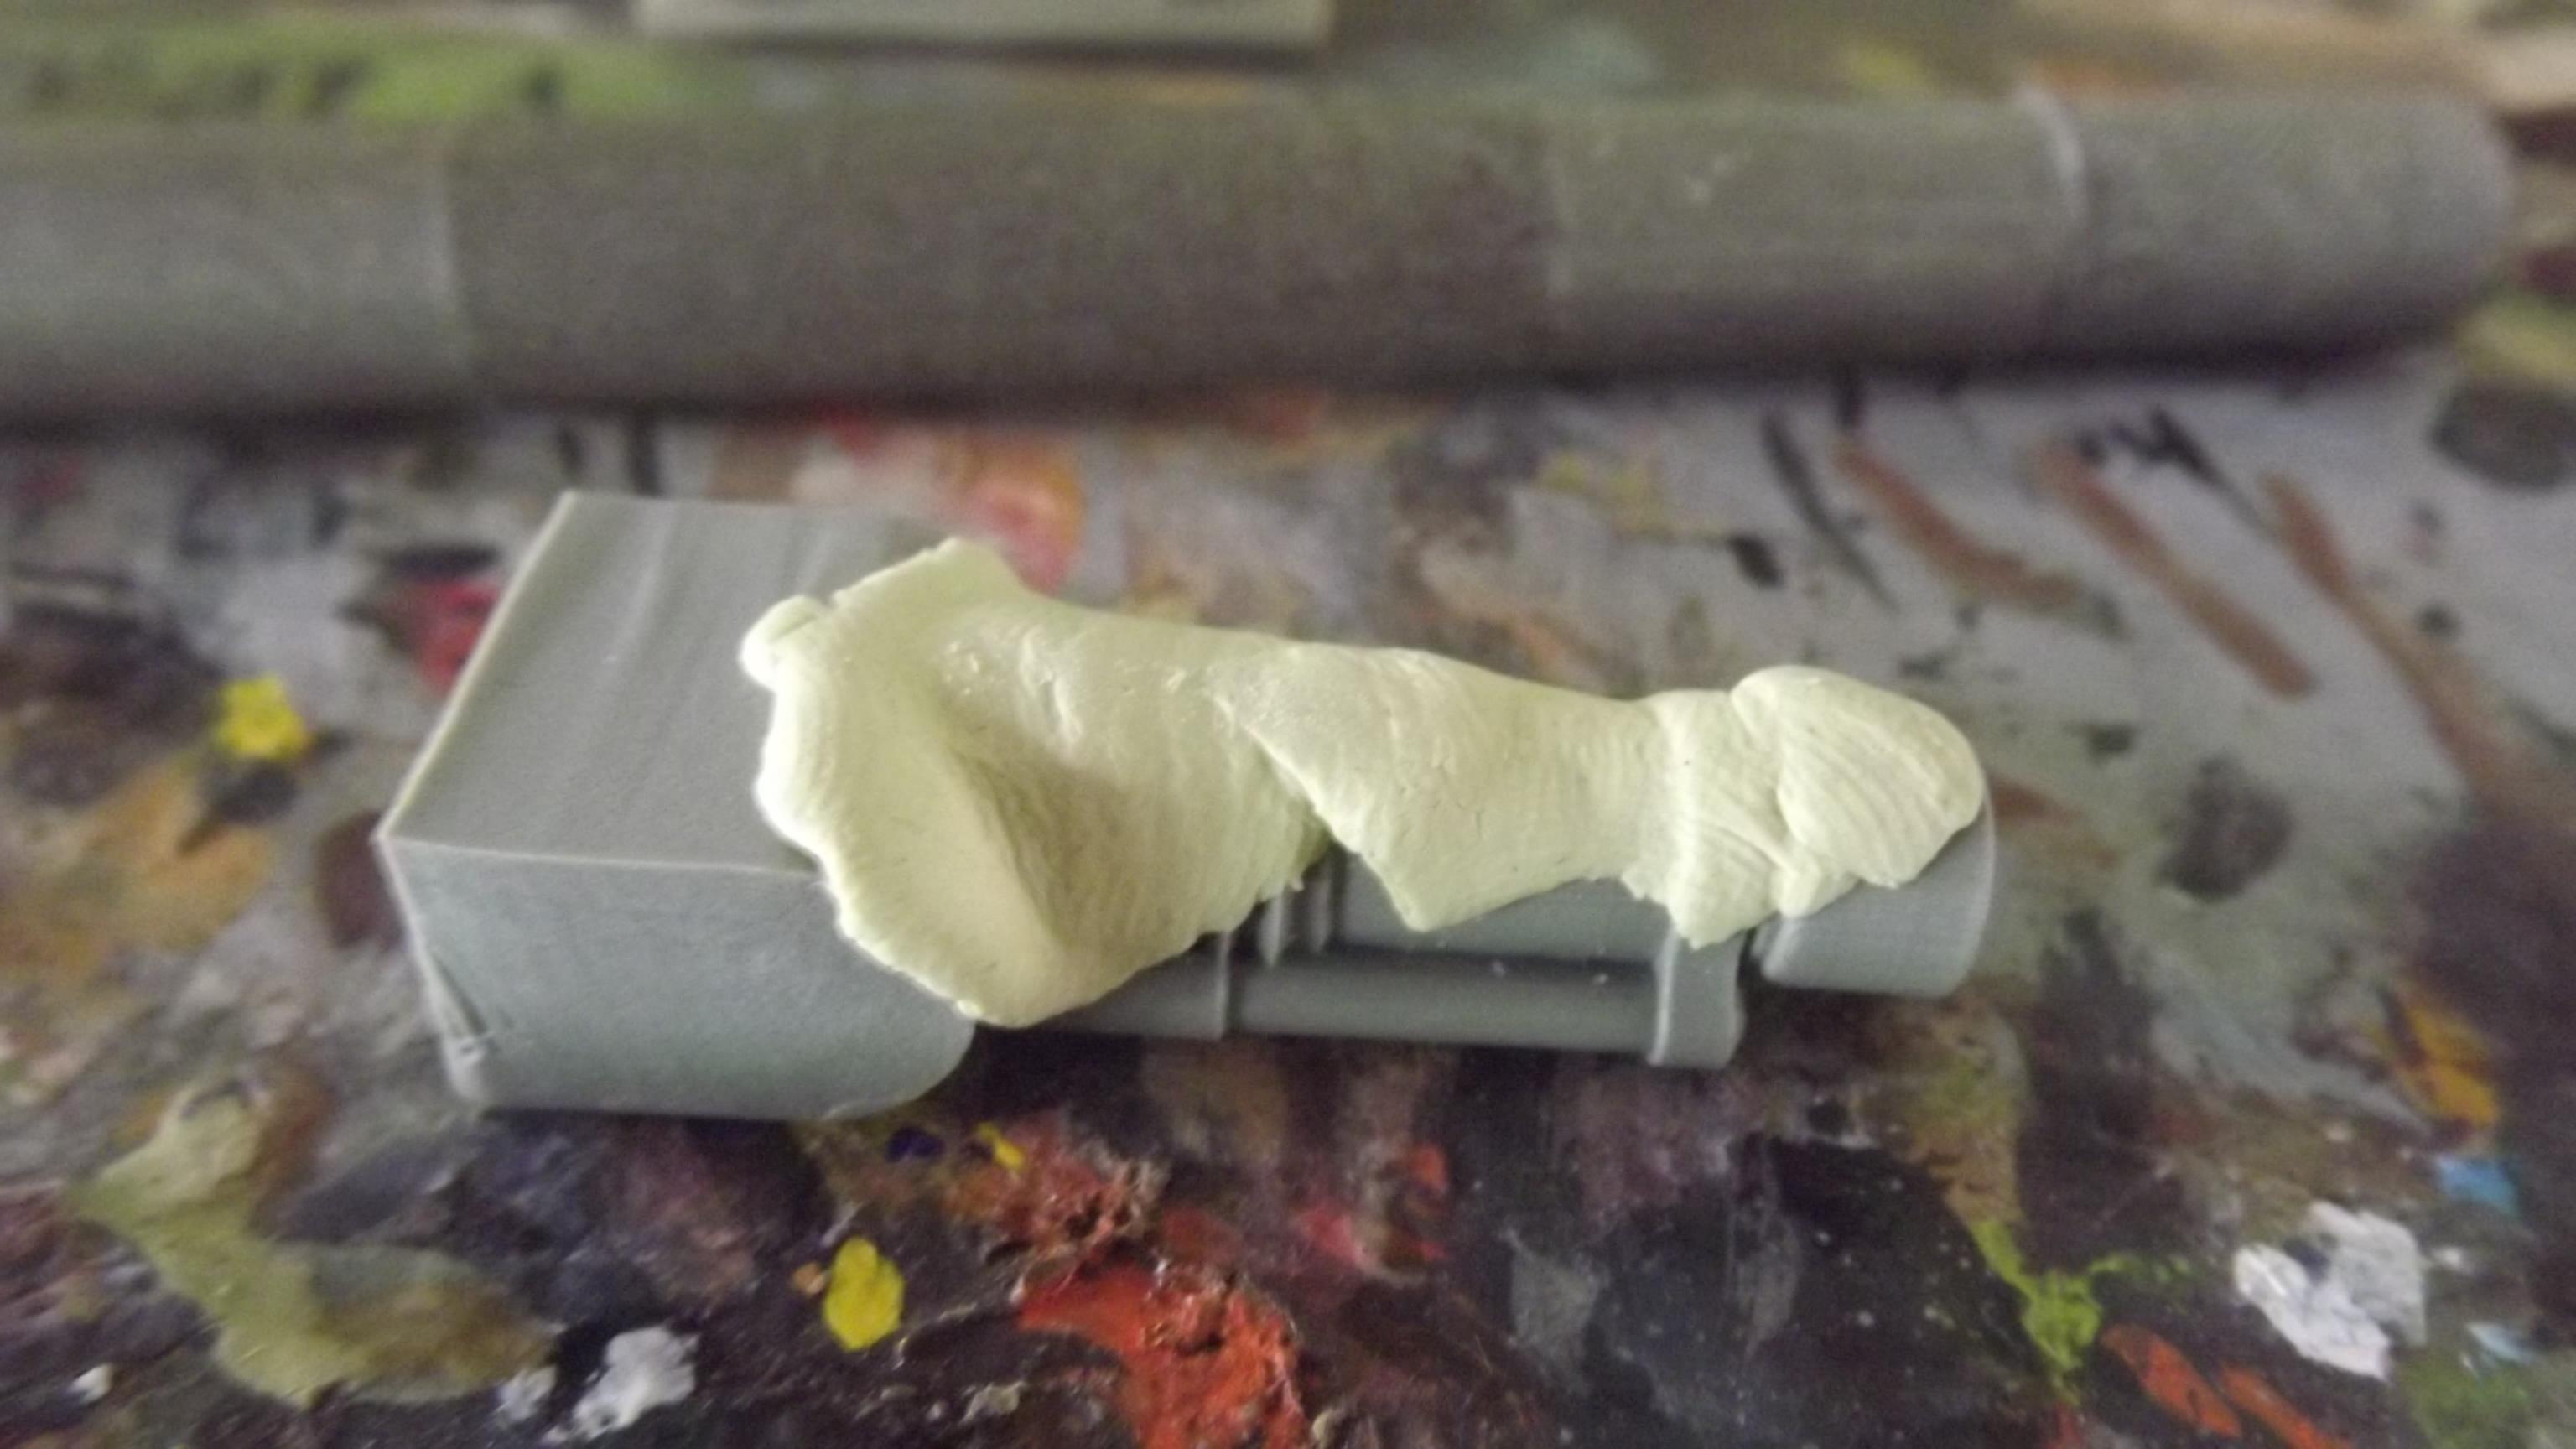
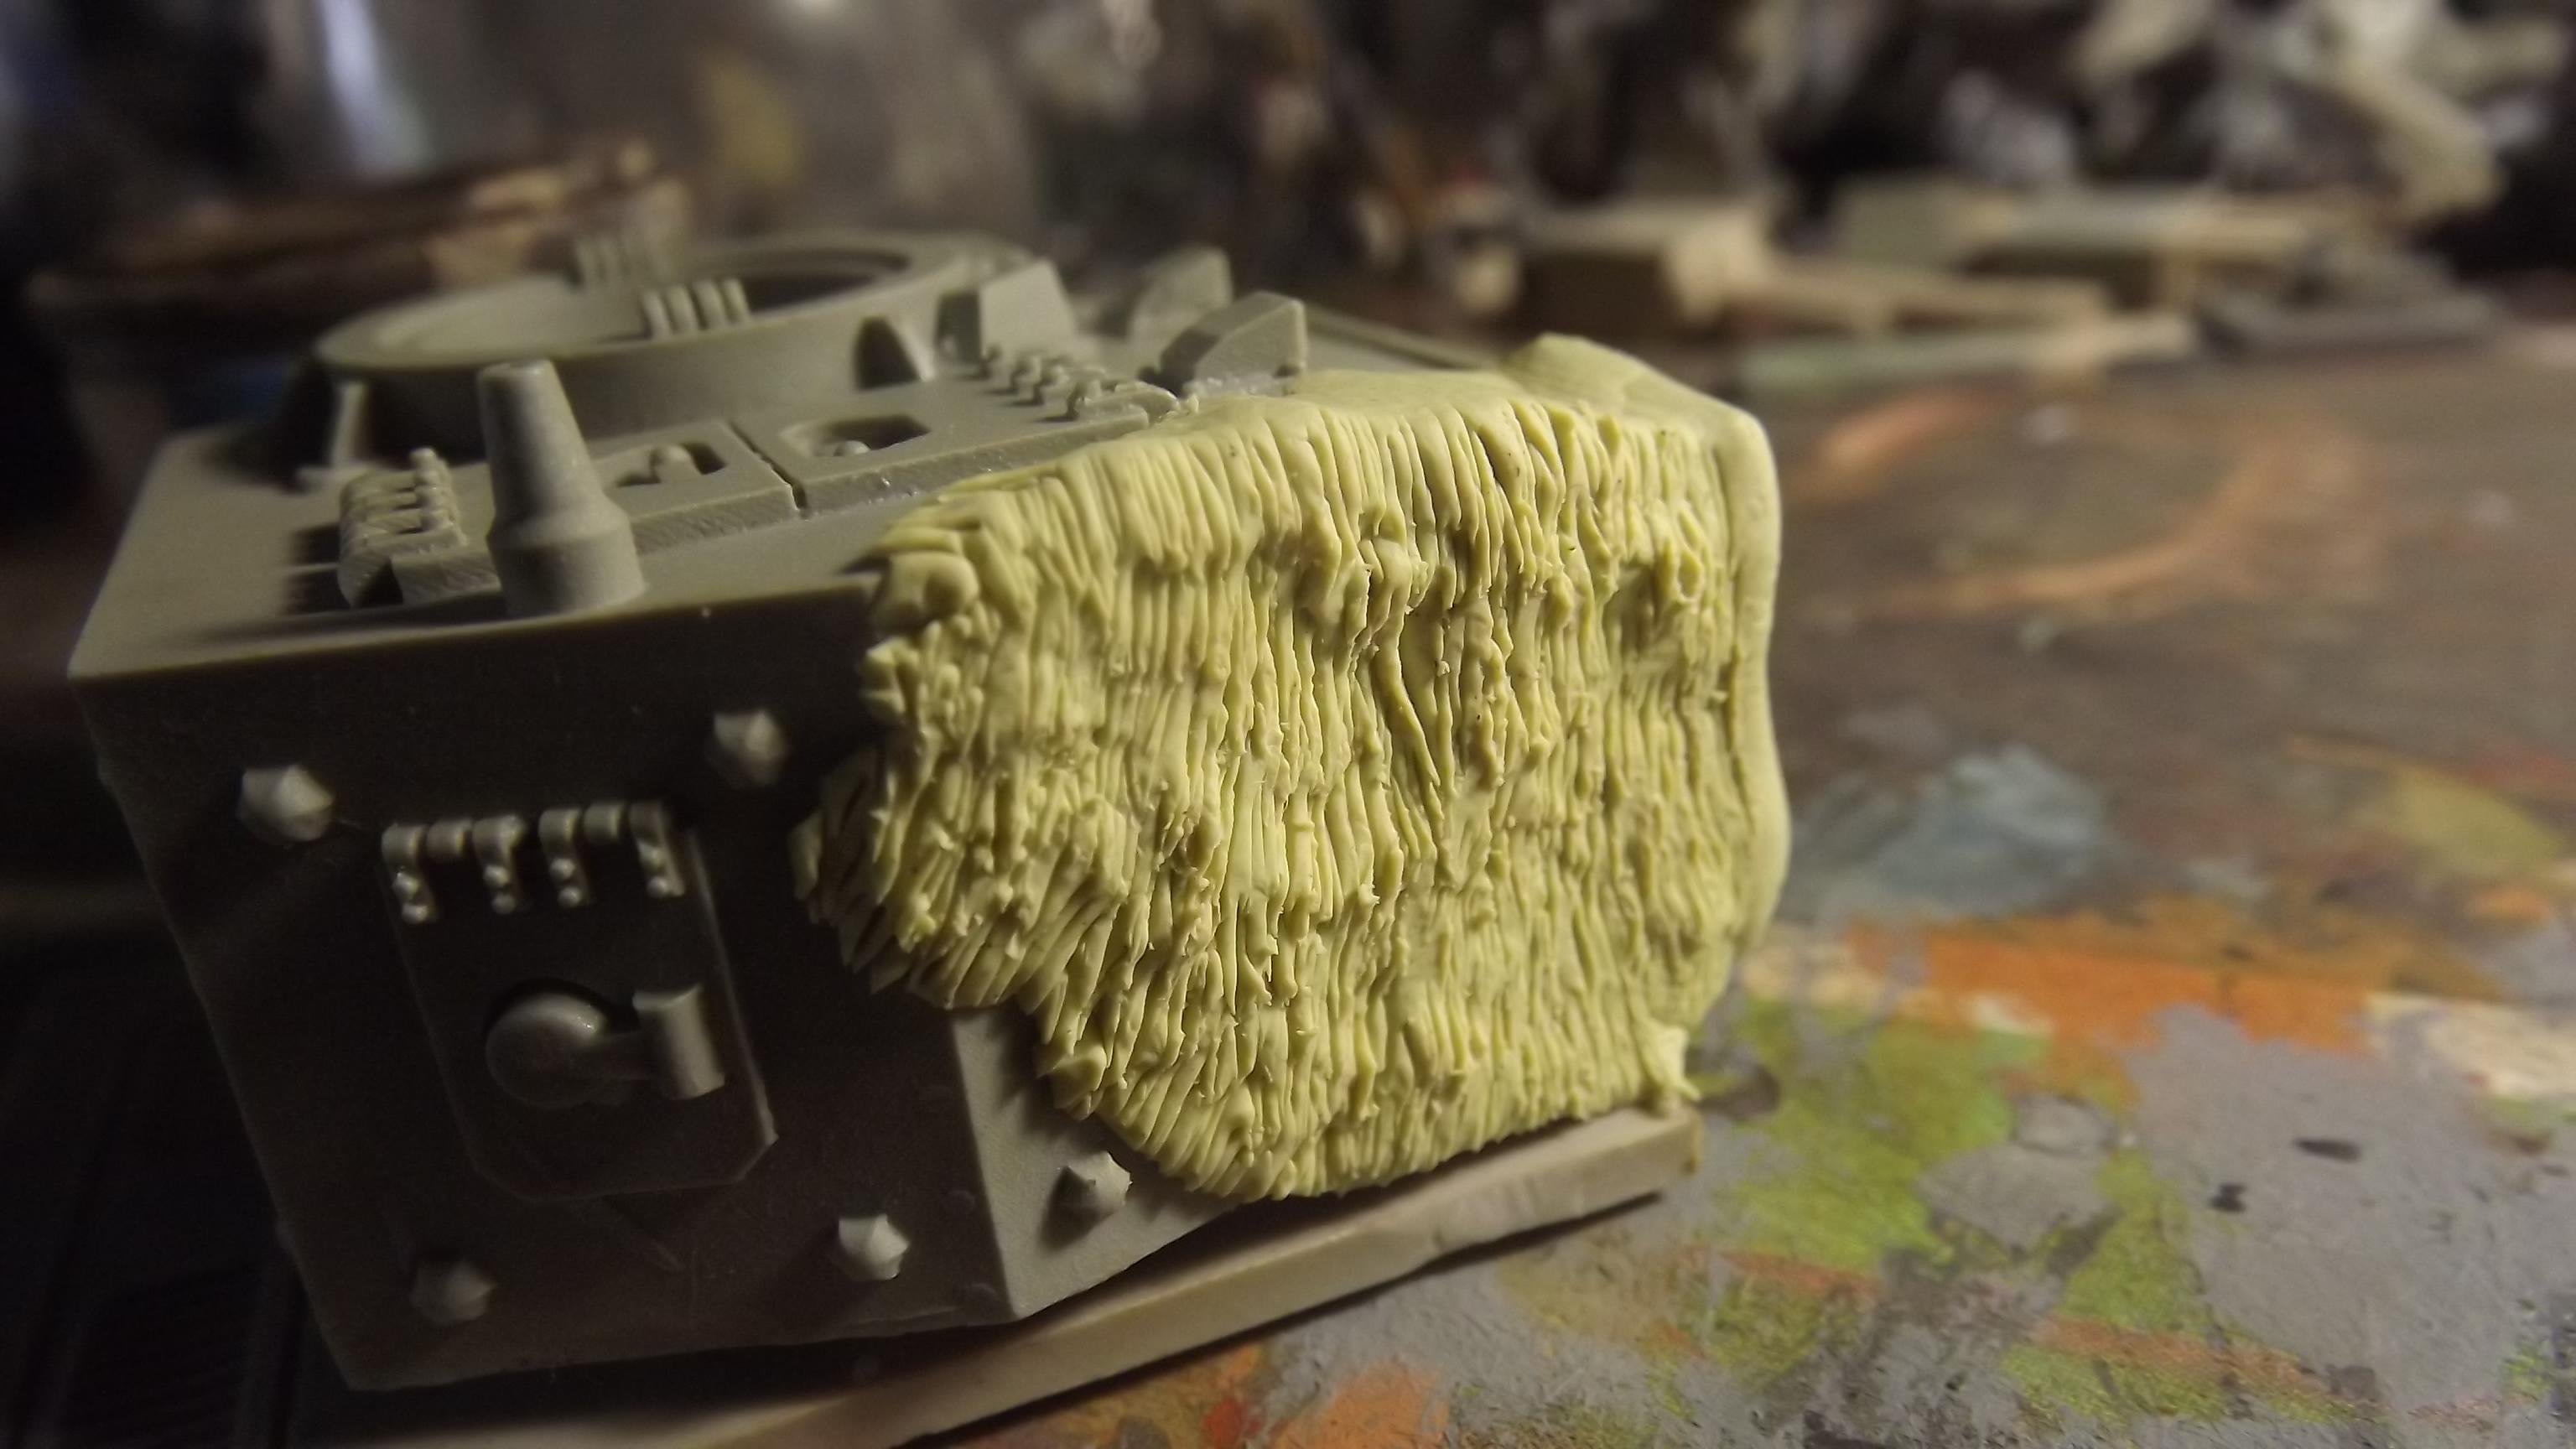
Step 4: Poke the very tip of the knife into the putty, do not poke it through the putty. The blade tip should just in maybe half a millimeter or so depending on the size of the object you are working on and then flick it to either side, I like to randomly pick at my and it's a rather quick and easy technique, work like this over the whole piece. For coarse fur like a big bear or something you want to just have the tip of the knife blade in the putty, you want it coarser than other fur, not chunky like camo netting. You have to know when to stop.
For camo-netting you want it a bit deeper, basically you are ripping up the material up and also moving it to the side, creating texture and depth differences over the peice, you should have large strips pulled up which look like torn hessian or fabric such as used in vehicle camo netting in ww2 or in ghillie suits.
If you are doing camo netting on a vehicle and you end up with holes these will look good if painted as armour
again work on the edges, these will be very apparent when casually glanced at.
Poke, swish, poke, swish, like you're using a paint brush.
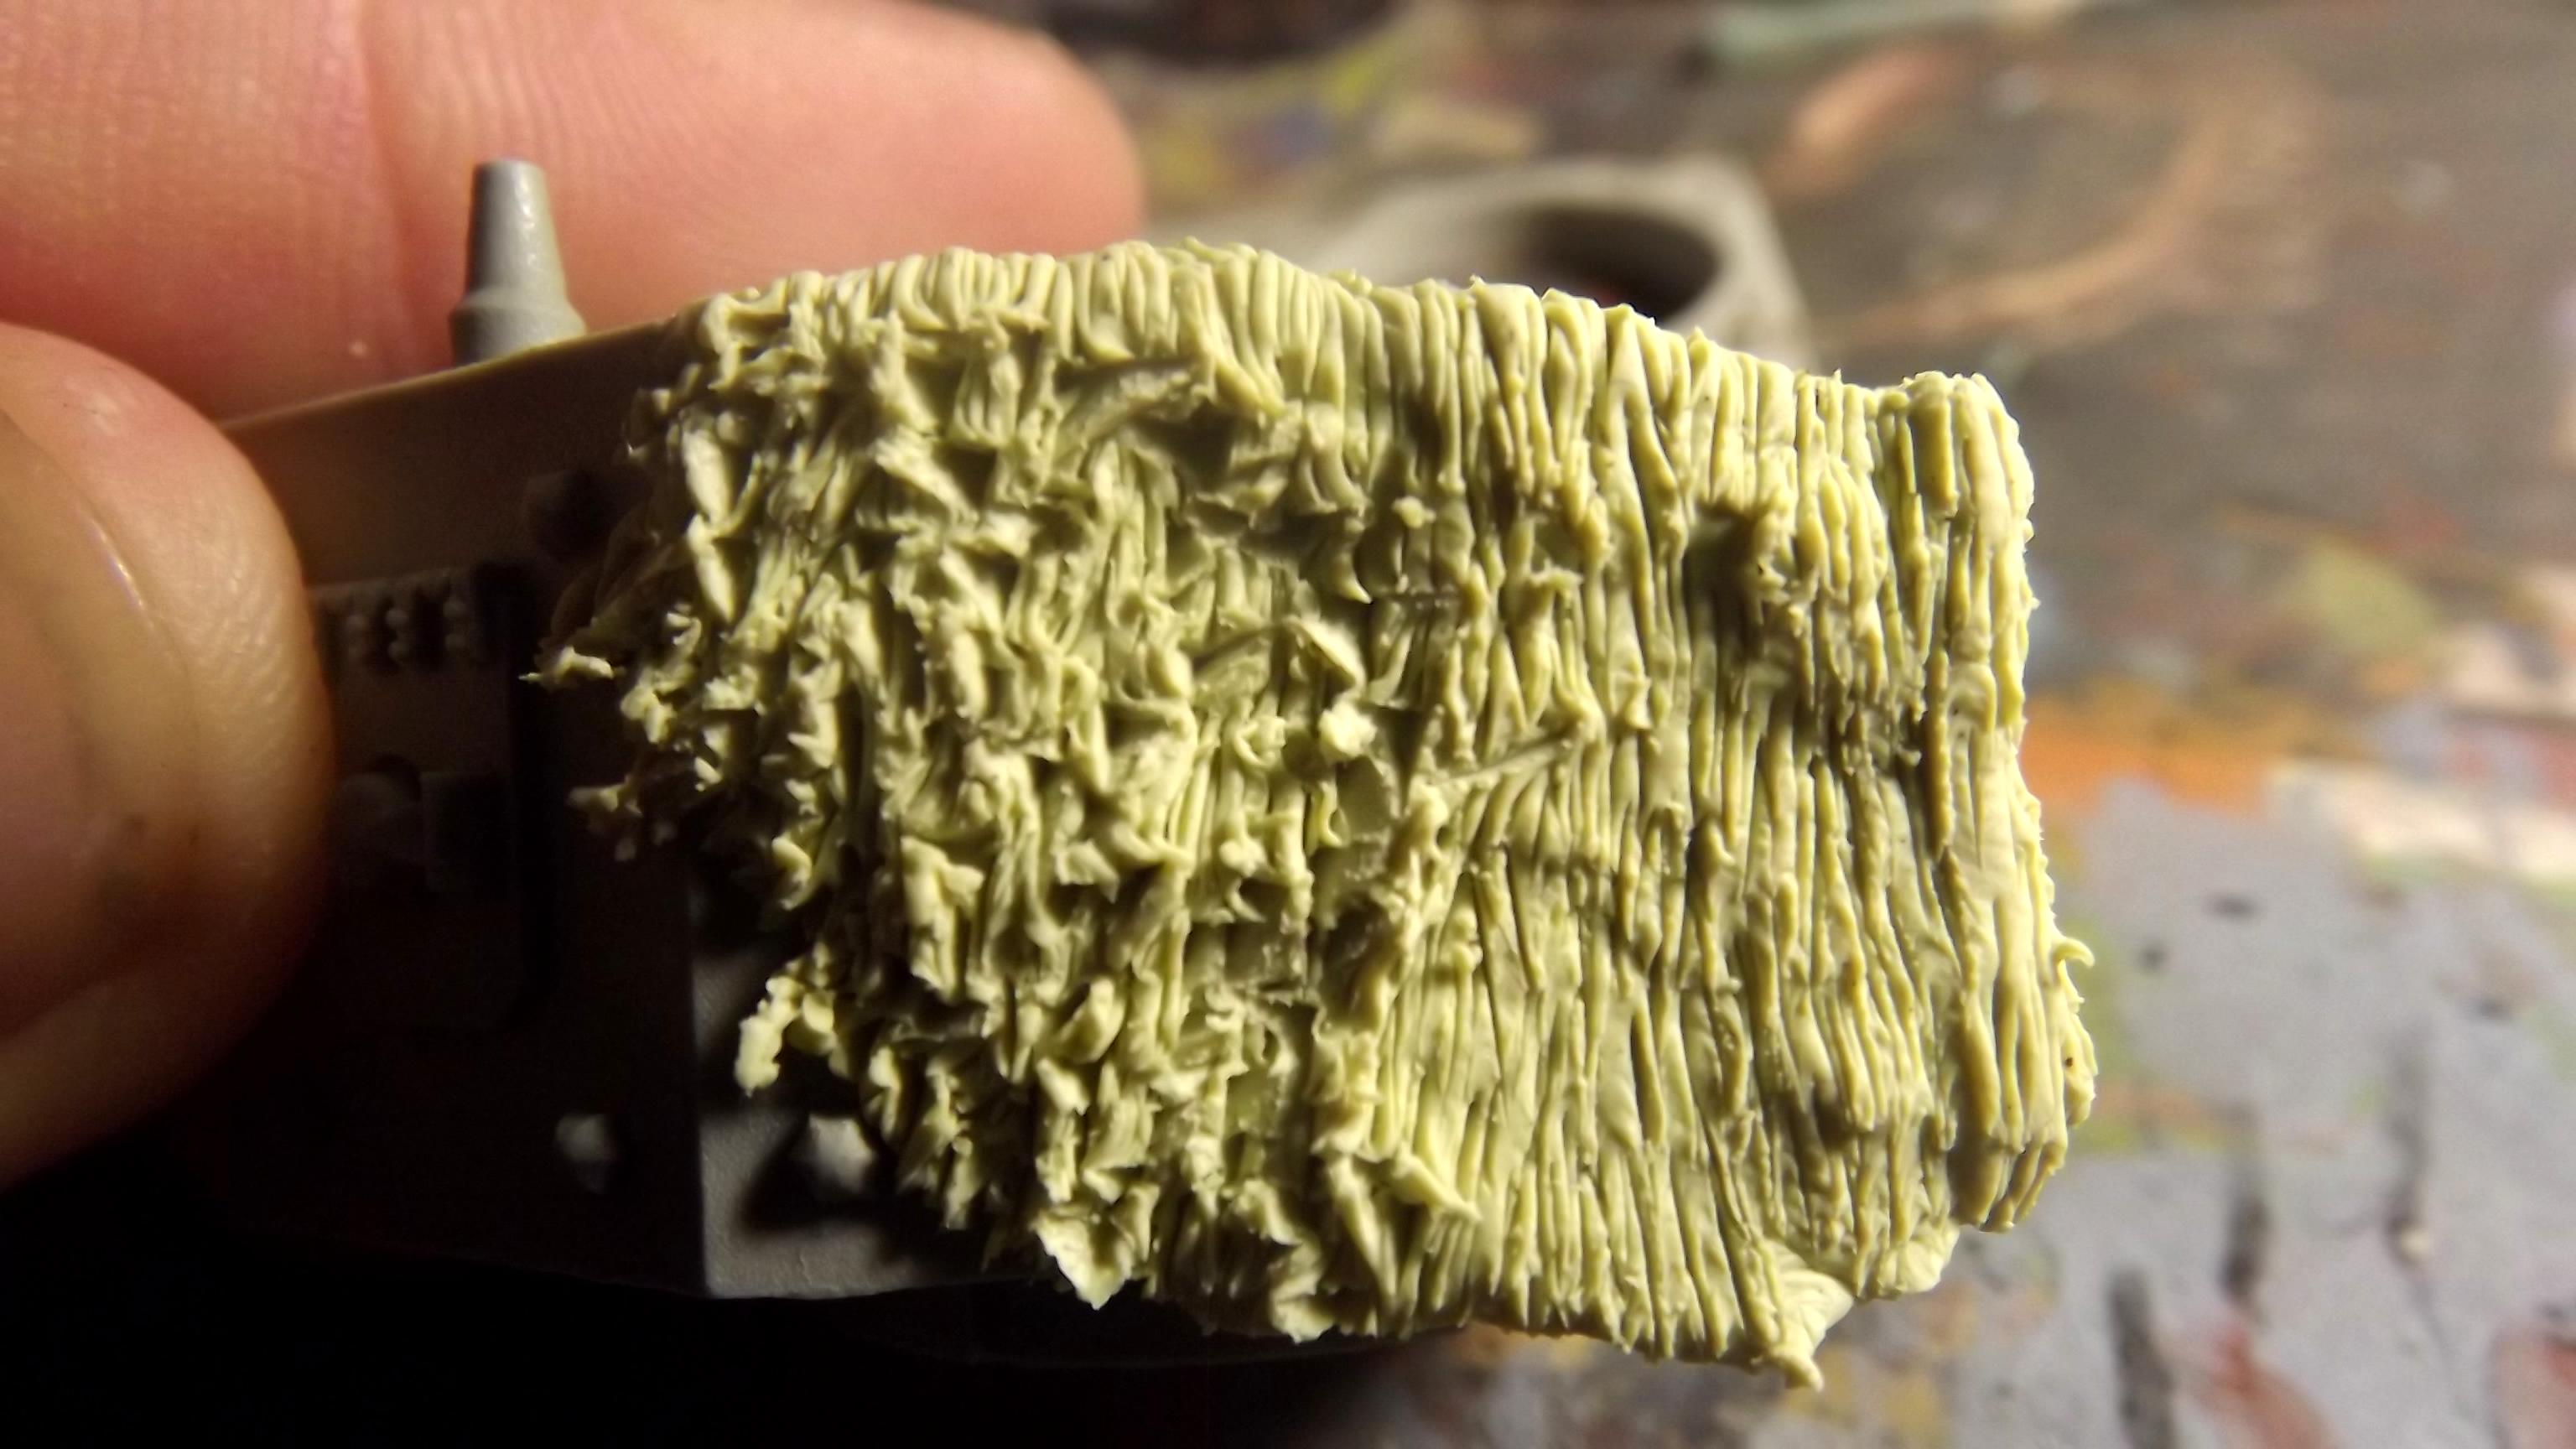
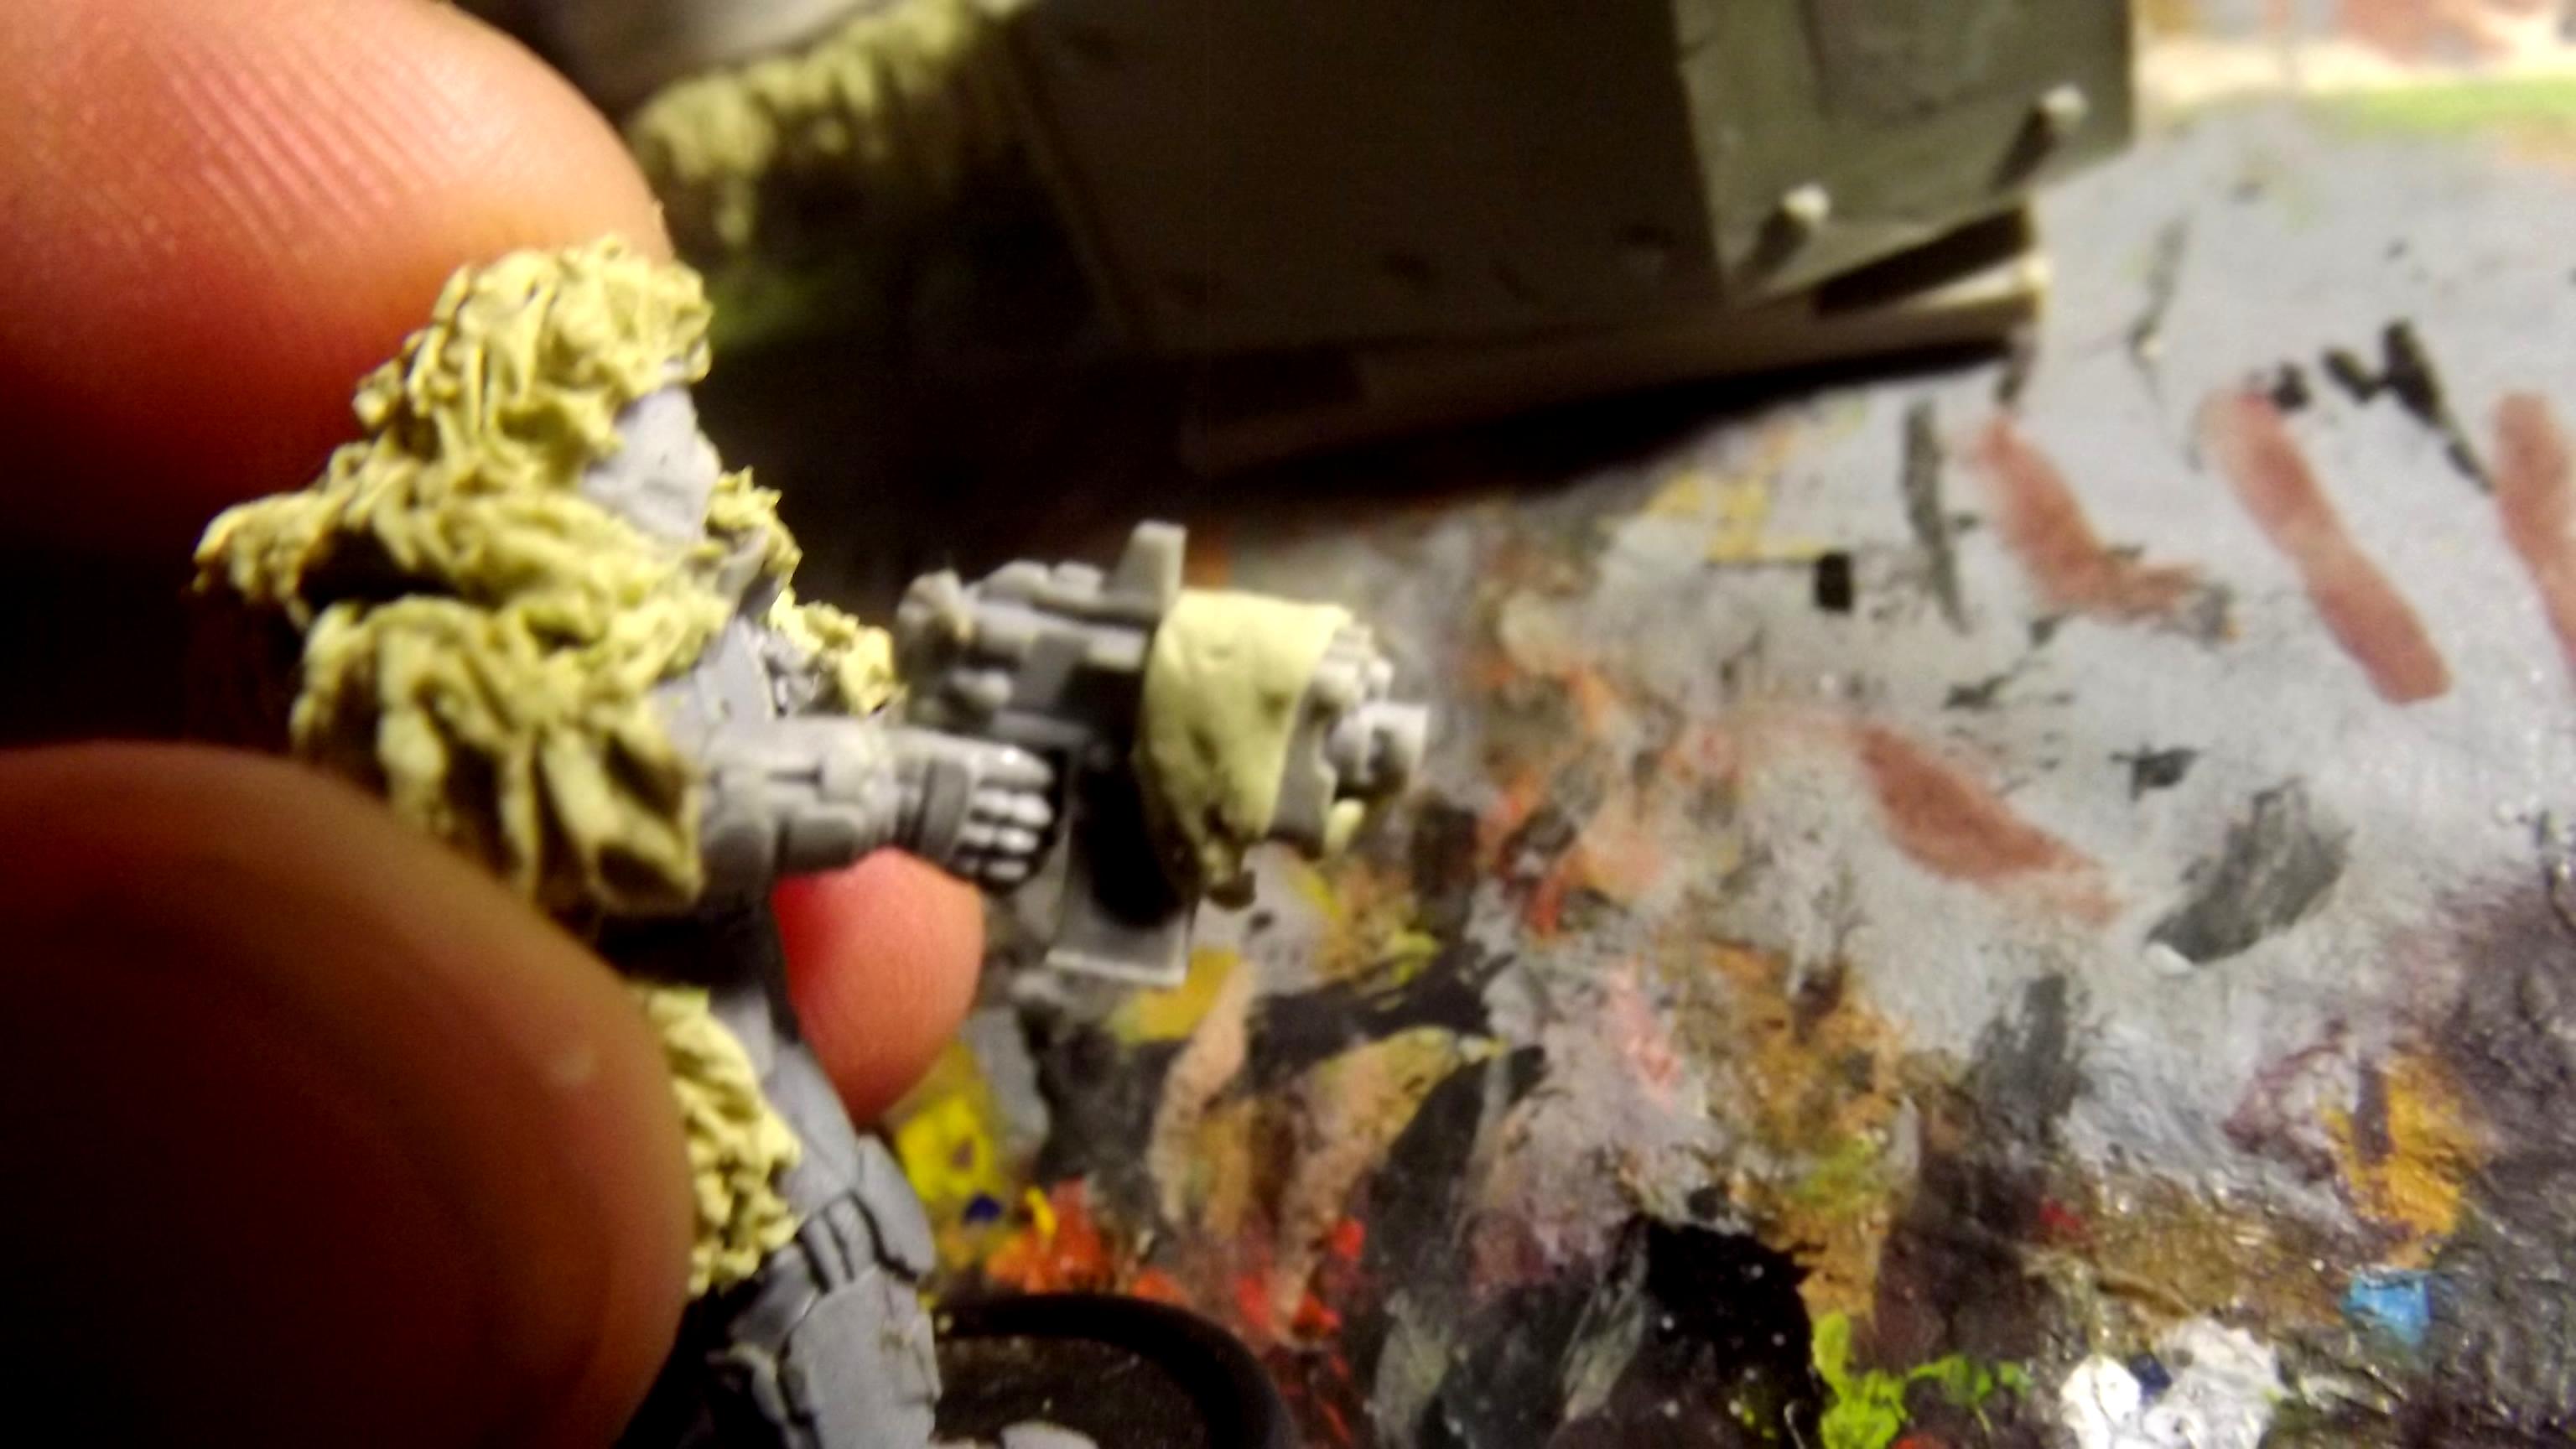
See the difference between the material I have 'torn' with the tip of the knife and the striated putty. The result should be large ragged blobs in the pattern.
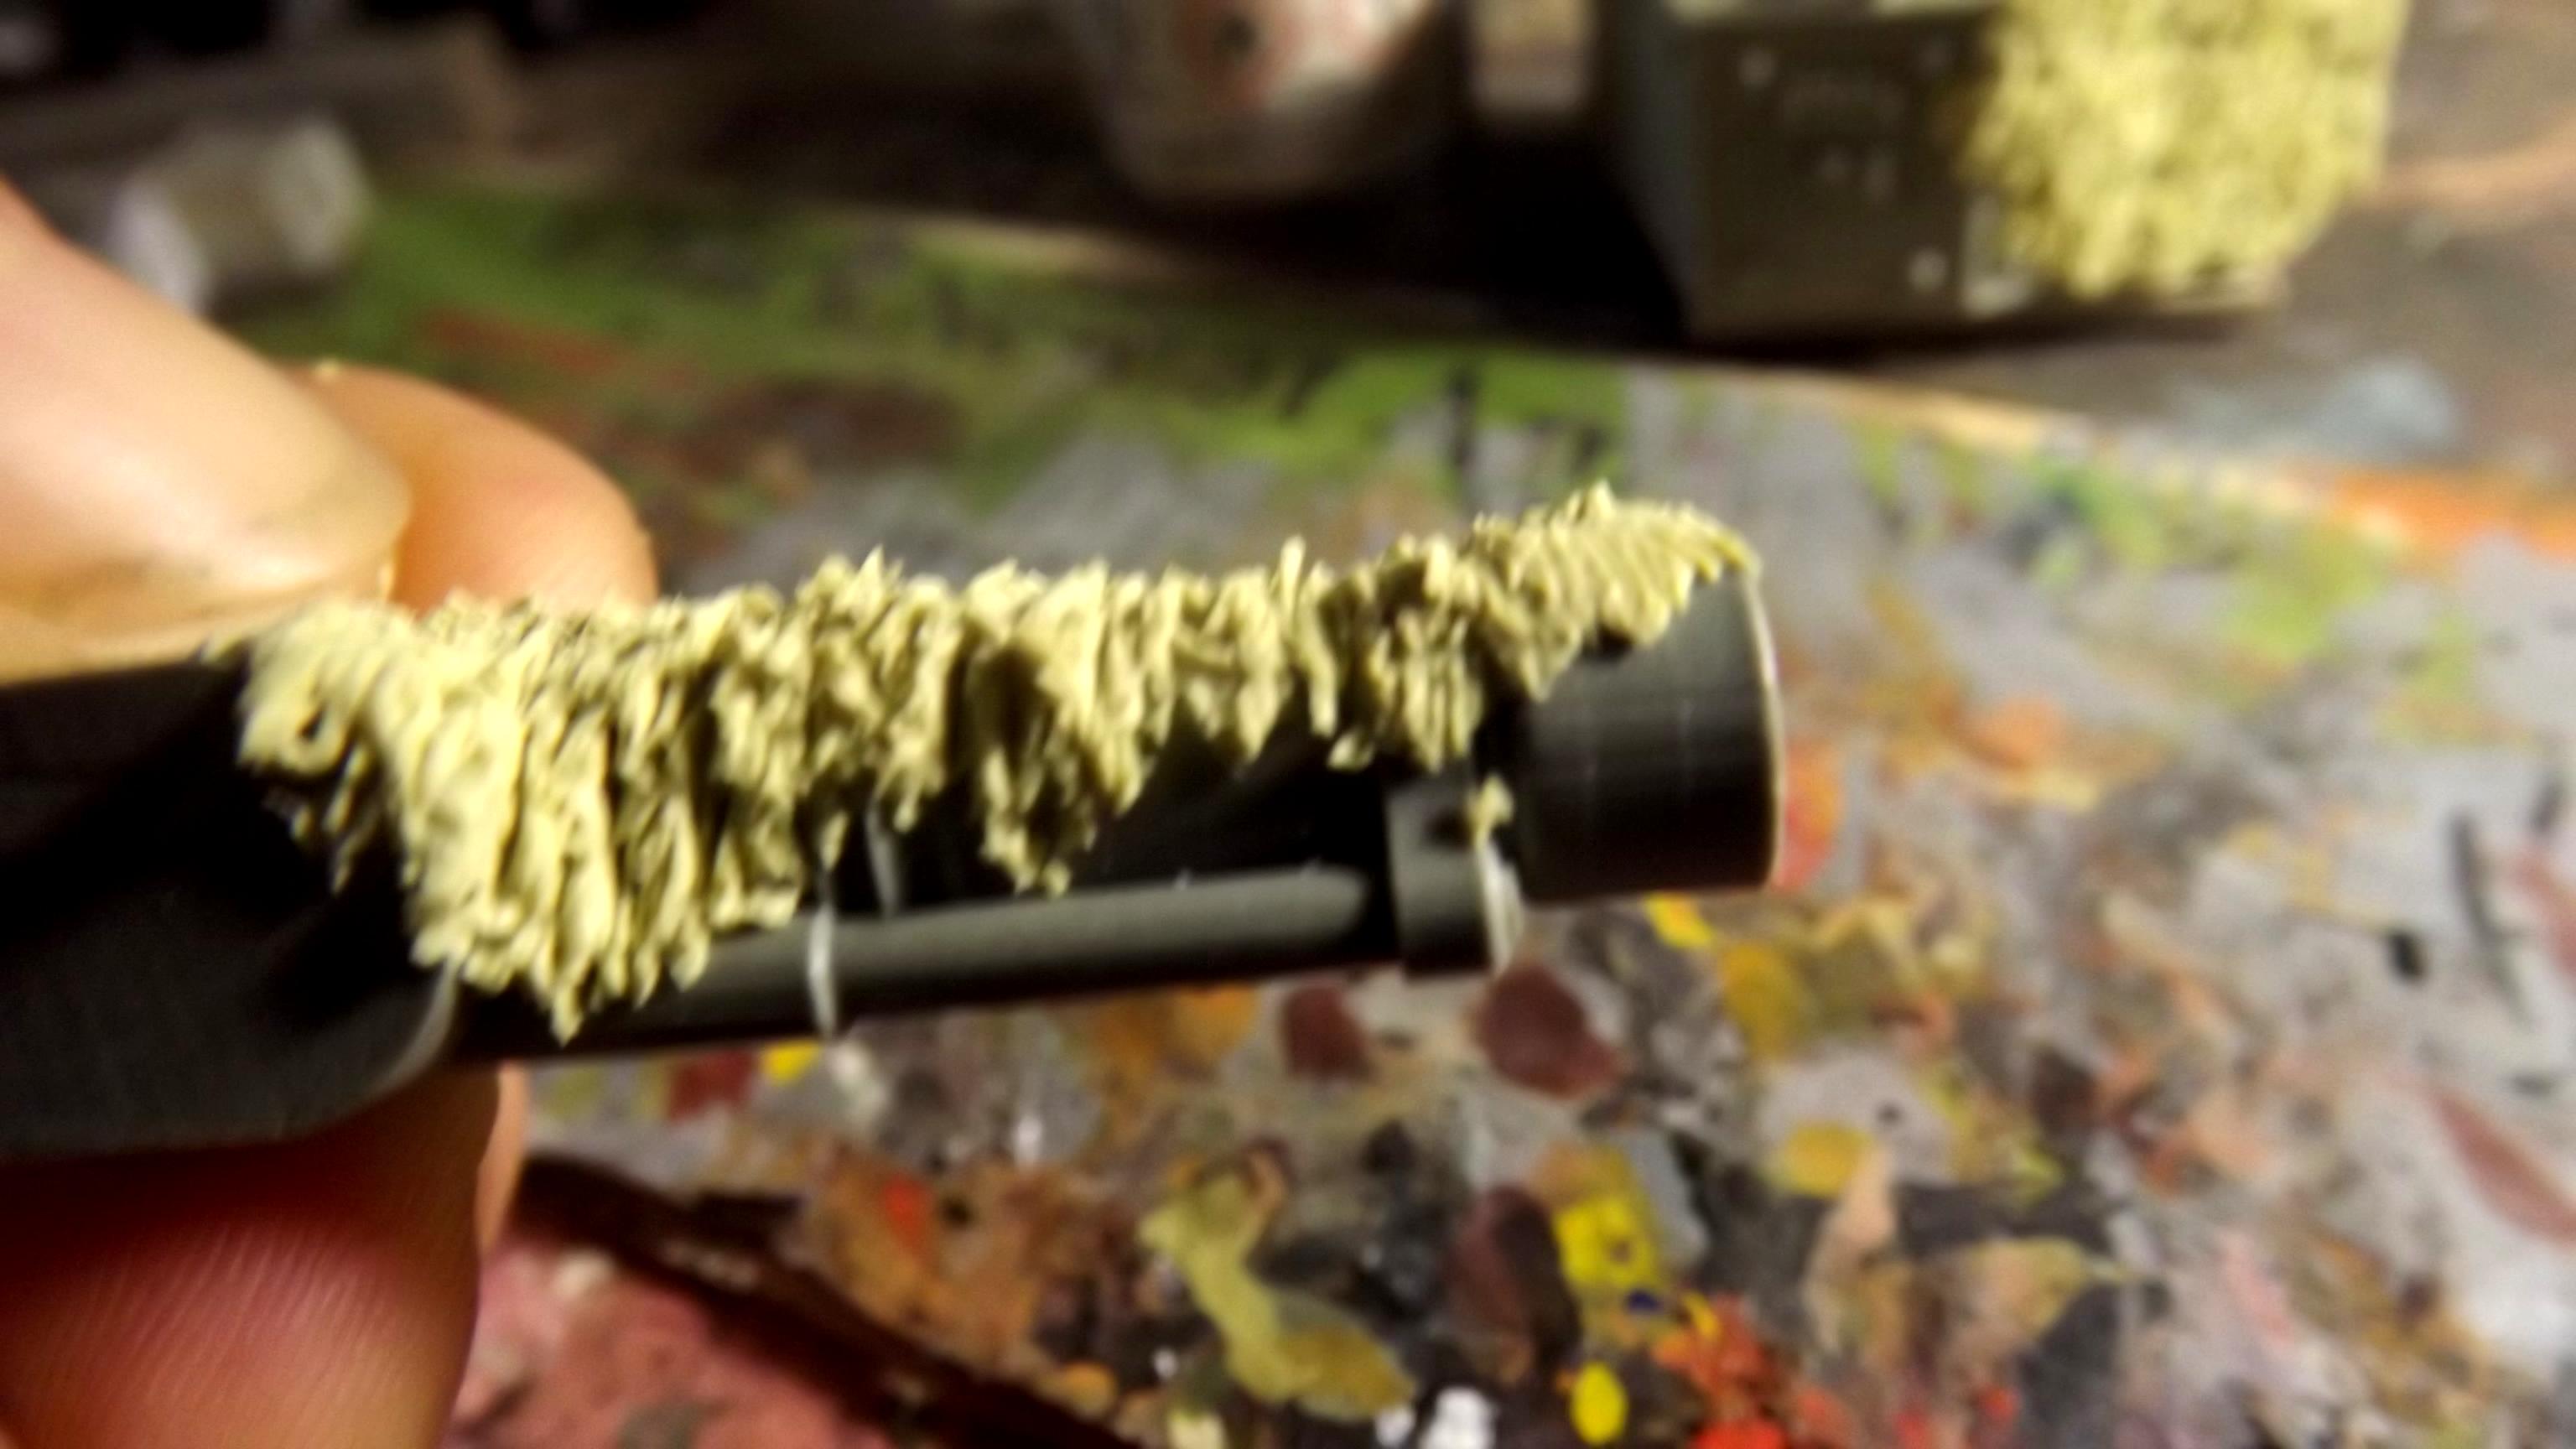
See how the camo netting draped over the barrel is irregular, it is worth taking care that the putty is not clinging to the underside of the barrel (unless you are going for a sleeve) It looks much better when you have irregular pieces hanging down from the barrel.

Careful work and good results.


 ~9200 build and painted
 1312 build and painted
 1200
1200