Hello guys!
Thanks for the comment
IGtR=!

I finally found the time to write up the tutorial on how I made the shipping containers. Let’s jump right into it.
Oh, and just as a warning, I will give all measurements in the metric system. I’m sure you can do the math yourself

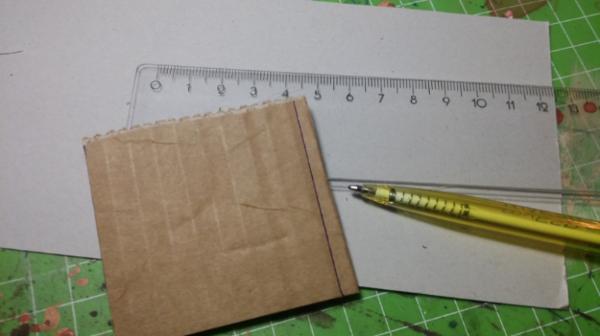
First off, here is what you will need:

First off, some corrugated cardboard of course. Make sure to use some with small corrugations. Furthermore, you will also need some thin cardboard for detailing. Then you also need two toothpicks, a pair of sharp scissors, a pen, a tool for gouging, an x-acto-knife, a ruler, lots of superglue and a hot glue gun with a sufficient supply of glue sticks.
Got everything ready? Alright, moving on
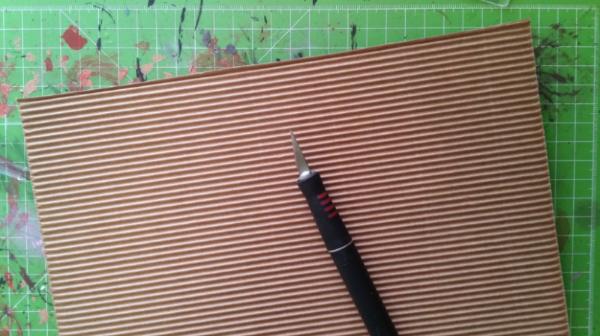
First, cut a piece of 24cm by whatever length you want your containers to be.

Along the 24
cm long side, make a mark every 6
cm.
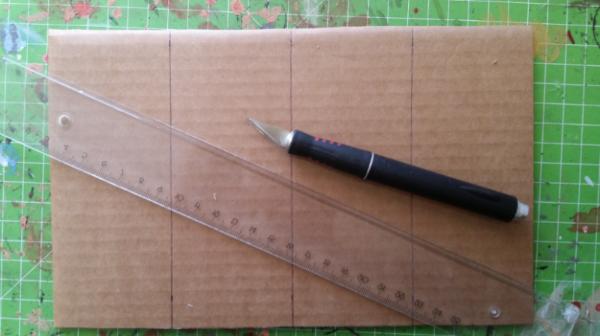
Score the cardboard along your pre-marked lines using the x-acto-blade, but be sure not to cut all the way through. You want the corrugation on the other side to remain intact.

Now, use the gouging tool to widen the gap along the cut you just made.

Your piece should now look like the one above.

Fold along the deepened cuts and see if the container sides will line up properly, as shown in the picture above.
Whoa… sorry for the blurry image. I actually became a little dizzy myself from looking at that

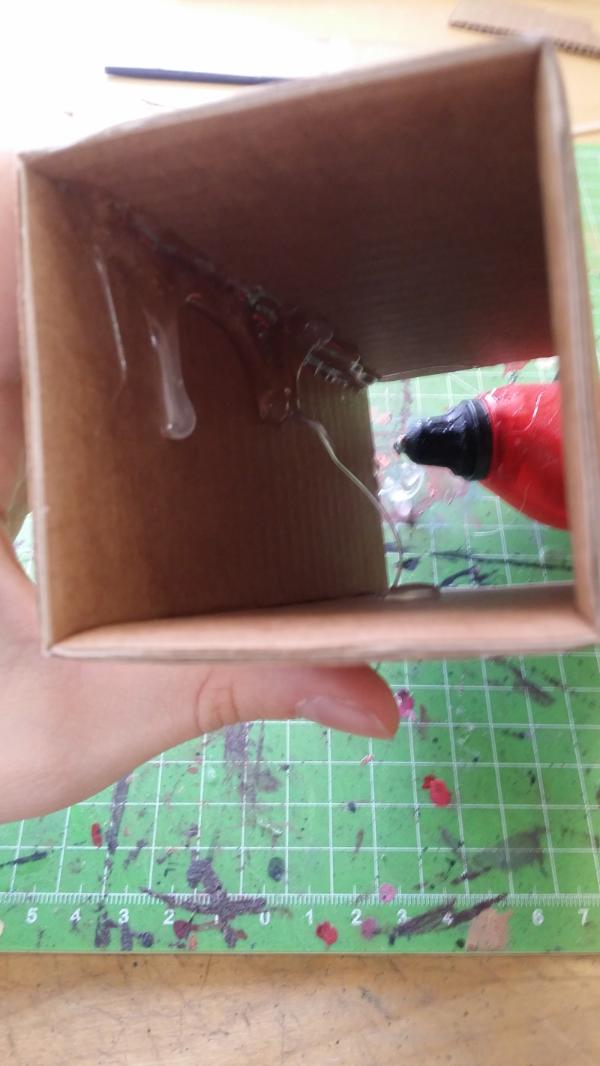
Anyways, if the sides lined up nicely, you can glue them together by applying hot glue to the inside of the container. Don’t worry if you are messy, most containers will be closed, so the mess won’t be visible as long as you keep it to the inside
If you are making an open container, I would suggest applying a little less glue and being a little more careful.

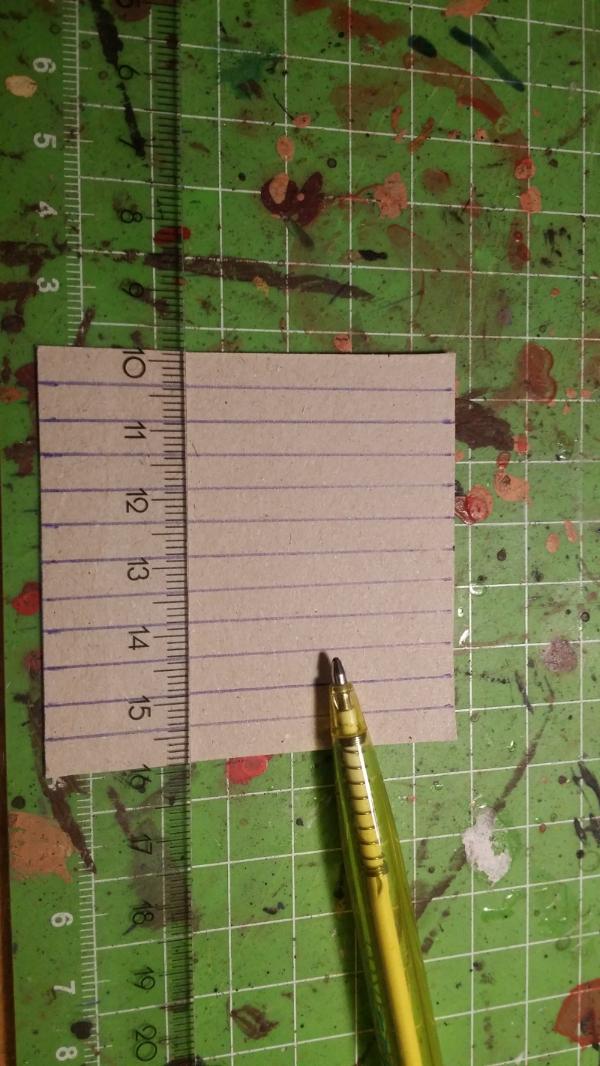
Next, take your thin cardboard. Mark out strips of 1cm width by the length of your containers. You will need four strips per container you are trying to make. In my case, 20. Also mark along the half-centimetre line.

Now, score along the half-centimetre lines. Then cut out the strips along the full centimetre lines. Hold the strips against the edge of your desk (or use your ruler) to fold precisely along the half centimetre mark in the middle.
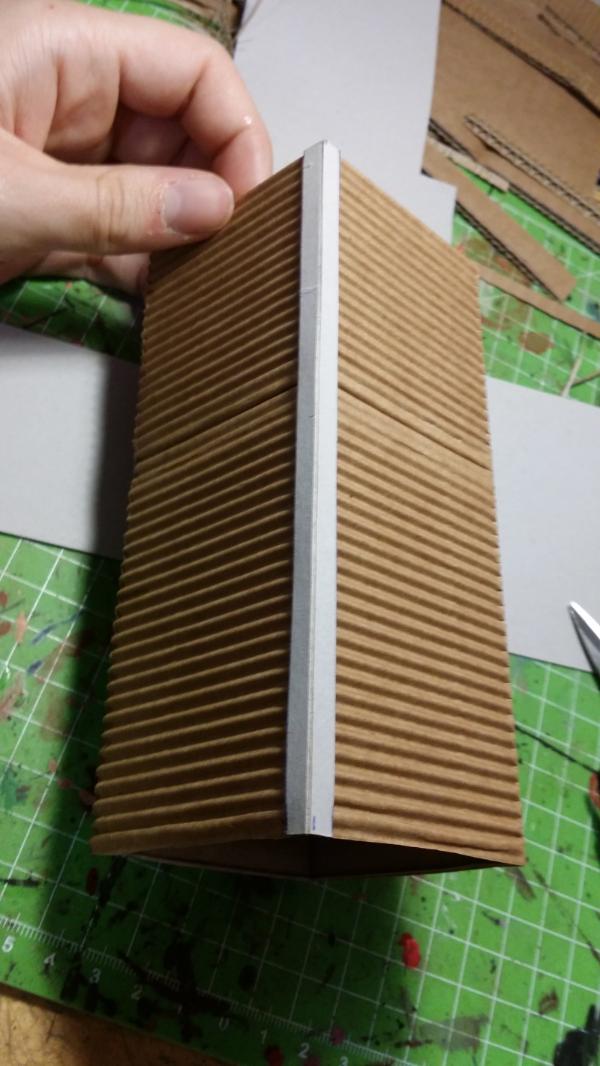
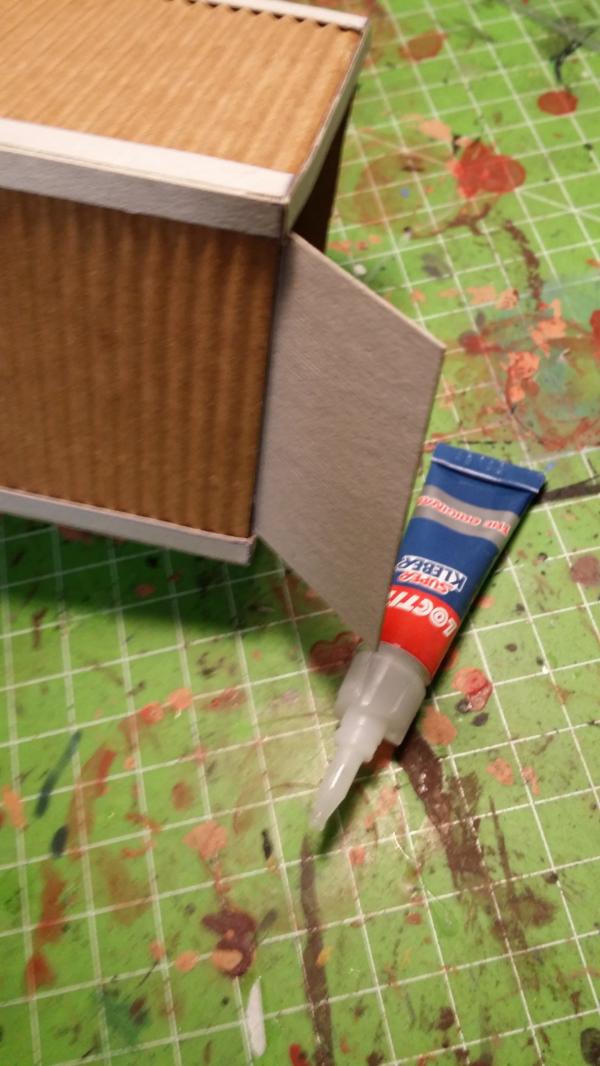
Next, the strips are lined up with the container and attached using a few dabs of super glue. Trust me, any other glue will drive you crazy as it won’t cure quickly enough or make a horrible mess.
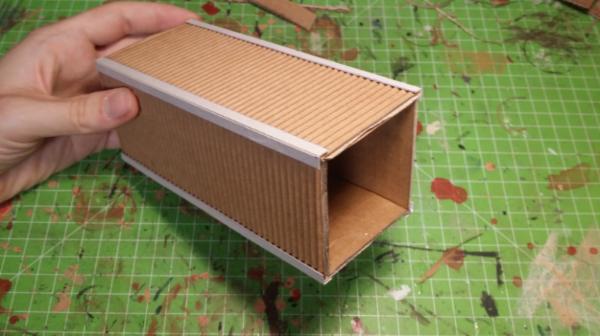
With all four strips attached, your containers should look like in the picture above.
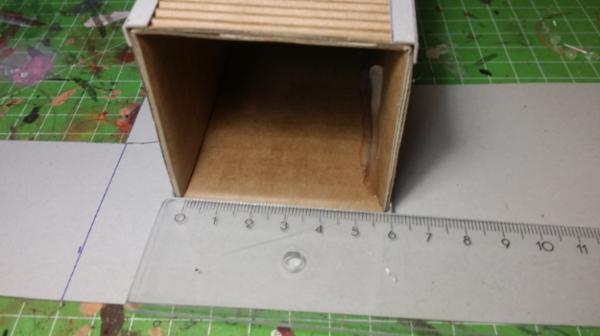
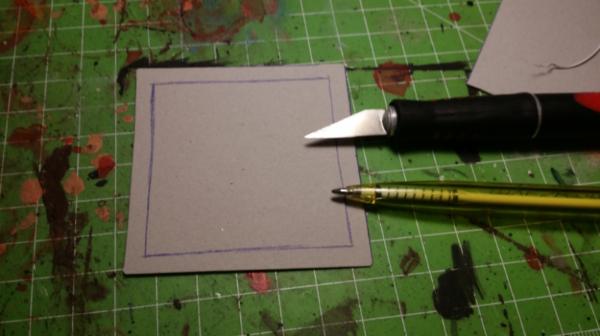
Time to cover up the hole on one side of the containers. Measure the gap on the inside edges (as shown in the picture, which in this case results to about 5.7cm.)
Now, cut out an appropriately sized (5.7 x 5.7
cm in my case) square. Turn this square over and bevel the edges on what will be the inside of the container, so they are at about 45°. This will help the covers slide in place without leaving any gaps. However, this step is not necessary and can be skipped. Make one such cover for every container you are building.

Test fit your squares and see if they match the openings. If they do, just apply some more super glue to create a secure bond. Believe me, this method will make your containers rock-solid.

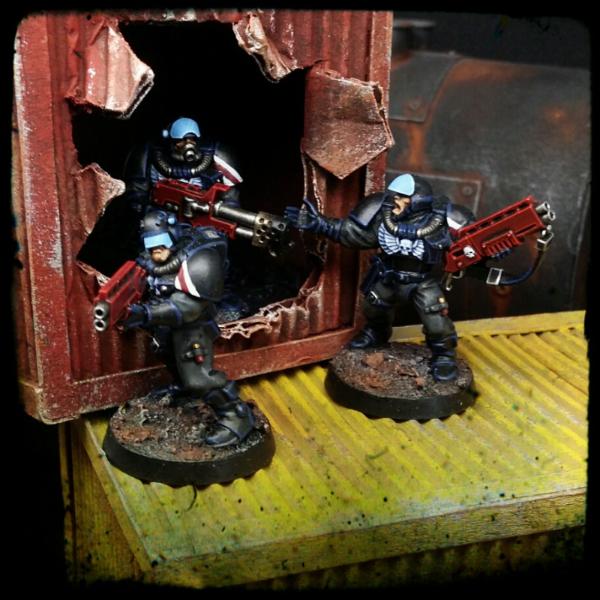
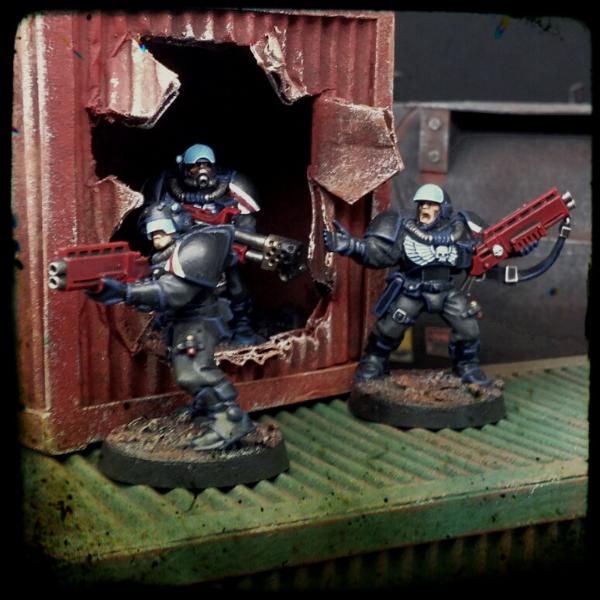
If you want to make open containers like I did, now’s the time to tear a big hole into this end. Stab in your x-acto-blade, make a few cuts, an then bend the resulting bits outwards to make it appear as if the container had ben wrenched open with some heavy tools or maybe a power claw… To reinforce these pieces, add superglue again to make the bent metal more sturdy.

Barney the barnacle boy has already tried out the path through the container and is pleased with the result

Now, there’s two ways to add the frames to this side of the container. Number one is more work intensive but saves cardboard. Number two is quicker but quite wasteful. You decide. I start off with number 1 here. Mark out some strips that are 6
cm long and 0.5
cm wide. You need four of these per container.

Cut these strips out and bevel the edges at a 45° angle, as shown above.

Apply the four strips as shown above. If you are more careful than me with your angles, it might look nicer
Just apply them with superglue as it saves time and creates the strongest bond.

Method number two for the frames: put the container down on the cardboard and mark along the edges.
Cut out the resulting square, and draw lines 0.5cm in from the edges once more.

Cut out the inner square. Attach the resulting frame using superglue.

Of course, even the busted containers need these frames to look complete.

Barney approves.

Moving on to the front side of the containers. Mark out 0.5 x 6
cm strips of thin cardboard, and cut them out using your scissors. You need two per container.

Apply them to the top and bottom edges of the front face of your containers to complete the frames.

Now for the doors. Let’s start with the closed doors. Cut a square of about 5.5 x 4.5
cm. It’s best if you just measure out the remaining open space on the front face of the containers and cut the square accordingly. Now split it in the middle vertically so you end up with two equal sized doors, as shown above. Then, you need another strip as backing, which should be about 1 – 2
cm. It doesn’t really matter, as it will be hidden inside.
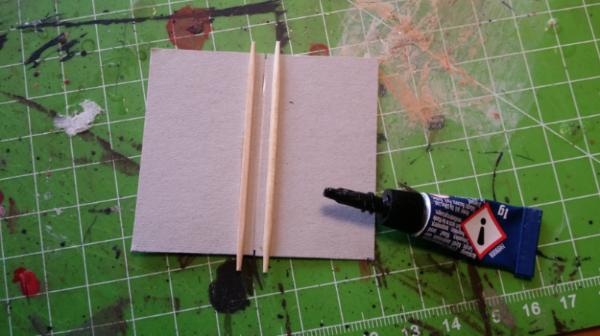
Glue the two doors to the backing using superglue, leaving a minimal gap to indicate the door slit. Also attach the two toothpicks to the front with superglue. These are supposed to represent the lock mechanism.

Glue the finished door onto the container using superglue again. Now, your basic, closed container is finished. Let’s look at opened containers as well:

Again, measure out the width of your door.

Cut fitting door halves, but leaving an additional
cm or so as a flap for glueing later. Score the cardboard along the line and bend the flap at the angle you want your doors to be in the end. Mine are wide open, but you could also have them partly closed or have the two sides different from each other, as you prefer.
Glue the door to the
inside of the container using… you guessed it… superglue.

Of course, you also have to attach the toothpick to the opened doors as well.
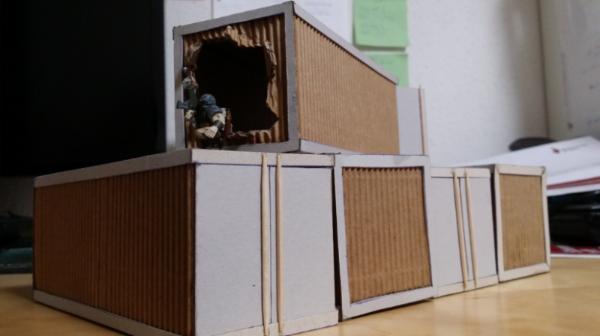
There’s a cadian sniper perched up on the containers, taking an elevated position to pick off some targets.

The nice thing about the containers is that they can be assembled in many different combinations, giving a variety of tactical uses.

Now, if you made some opened containers like me, they might look a little bland on the inside. To remedy that, I would suggest adding some playground sand to the inside corners to make it look like the battlefield dust already got inside them.

Unfortunately, I realized too late that I forgot to take more pictures of the painting process as well.

Ah, well, I will just talk you through it.
First up, decide on the colours you would like for your containers. I went with yellow, green and red, but something like blue, grey, orange or brown might look very cool as well. When you have decided on the colours you want, you will first need to mix a darker shade of those colours as a basecoat. In my case, I used a mustard/tan colour for yellow, and darker shades of red and green.
Next, apply the original paints by overbrushing. Make sure not to get the paint into the crevices to create some visual contrast. Then, let that dry thoroughly.
When the base paints had dried, I sponged on some weathering. First, I applied some paint chips/dirt with a black paint and a coarse sponge. When that was dry, I moved on to silver paint chips. I applied these liberally around all the edges where I thought there would be the most wear and tear, and also in random spots all over the pieces. Finally, I used some orange paint to apply some rust with the sponge. You can apply this in random spots all over, but I would suggest to also add some especially on the metallic chipped paint, to imply that rust has started to settle there first.
Ok, that’s it, your containers should be done!
Unfortunately, I don’t have any new pictures of the finished product that you haven’t seen yet, but if you want I could take more when I get back home! Maybe together with some other terrain?

Anyways, I hope you guys enjoyed, and I'm looking forward to your comments. Also, I hope this tutorial will help you create your own containers or inspire you to make even cooler terrain
Catch you all later, thanks for looking! Until next time


 "Hard pressed on my right. My centre is yielding. Impossible to manoeuvre. Situation excellent. I am attacking." - General Ferdinand Foch


 Considering I don't have any


 Eldar- 4436 pts