I'm gonna keep this thread bookmarked, I'm painting my own BA and so much of this is so exemplary I can't help but watch and learn the epic and perhaps apply it to my army
Bedankt DijnsK!
Well, I paid around 140, shipping included. That's Euro's, in Yankee Dinars it would be around 175 with the current rates.
^_^
I'm especially hyped about that nozzle... just two little prongs, no 'cone' so most likely this will not clog up fast. Probably needs more attention when cleaning though...
Cheers Titan Atlas! Welcome to the thread, kick yer feet up and grab a beer.
In the mean time, some progress on the Land Speeders. The end is in sight. these pictures are right after the decals and some weathering done with a little sponge. I applied some dark grey, some tin, some boltgun metal, and some light brown.
The decals might shine a bit too much in these pics as they all have a little coat of gloss varnish on them to seal them.
At the moment the models are coated in satin varnish and I'm ready for the oil paints. I decided to go with satin instead of gloss as I don't want the surfaces to be tóo slippery for the wash with oil paints.
Cheers fellas! I would have taken some pics today post-oil work but it's pouring outside and a dark as hell. Looks as if somebody accidentally poked Mordor with a stick.
Honestly, I can't remember... :( I ordered quite a bit of exotic bits from here and there. It's not from the Coolminornot shop I think, but if I remember correctly, it's from a little Polish company that makes WH40K bits.
I'll see if I can dig it up, as they had other nice stuff as well.
Yeah, if you look around on site like coolminiornot and ebay, you'll find a lot of cool non-GW, clearly 40K stuff. I think there's even a thread here on dakkadakka somewhere that has a list of 3rd party companies.
So, here they are after the oil wash (mostly black, with a little bit of dark brown)and dried out. I did some small corrections using pointy cotton sticks damp with turpentine. I cleaned up some plates, the shoulder pads, gave the yellow helmets a light 'polish', etc. This really helped to brighten up some areas, and using the flat bits of the ear swabs I lightened some too-darkened areas while leaving the wash neatly in the recesses.
Now I need to seal it with a coat of of satin varnish and then I can go to work with thinned inks to add some heat distortion to engine- & weapon nozzles, and pipes. Seal it again and then some more oil paints for grease stains, seal that layer with varnish and then add some weathering powders.
Oh and I just saw i need to give the two silver areas of the crests on speeders 2 & 3 with an oil paint wash using purely black, to keep the tint of the light blue/purple wash intact.
Man your weathering is ace! Notably on the metals. the weapons and engine parts. Also very uniformed and consistant.. the bumper /skirting on the speeded for example.
Cheers mate! Well, i must say that the key to weathering, especially with a sponge is dryness. Even more critical than with a drybrush. Even when dabbing a little sponge that appears almost 'dry' and ready, applying some more pressure can suddenly bring forth unwanted wetness, so it's a matter of balance. For edges you'll need a slightly wetter sponge so paint comes off a little easier on the edge you're working on, and when when attacking flat surfaces you'll want a very, very dry sponge so you can stab it like a madman without smearing paint everywhere, but rather building up the paint gradually, even with mad-attack-sponging.
Yay! The decals got printed!
Crap! I already managed to frak up two of them! Maybe because it's Chinese waterslide paper, possible because of the reasons outlined below.
As you can see it's rather dark and cracked although in real life it does appear more crisp than on these photos. The dark probably comes from the fact that the white waterslides are ever so slightly transparent, probably warranting a white undercoat. And as you can see it's also cracked. But that probably comes from the fact that to try out, I just gave the decals one coat of satin varnish from a can because that was easy and fast. Also, considering the size of it, it also has to soak for quite a bit until it comes loose from the paper. Yesterday, I coated them with a second and third satin varnish and just now with a coat of gloss. This will probably seal in the ink strongly enough. I'm going to leave this to dry overnight and then put on a new decal. luckily I added those side panels 7 times per sheet I printed, so I have 5 left and can always print some more.
That's pretty amazing, Meph! I just went back and looked at your original idea, and even though this one isn't quite as sharp, I think it still has a pretty cool quality to it. I've heard that printing complicated designs on decal paper can be difficult, so it may not be the specific paper you're using. I wonder if there's another way you could do it. Since it will be solid and square, does it actually need to be on decal paper? Could you just print on a heavier stock paper, glue it, and seal it? You might be able to get a crisper image that way. And I kind of like the cracking; it adds an interesting effect to it, making it a little worn and weathered. Are you going to leave the sharp corners on or trim it to fit the raised piece?
Yellowbeard wrote:...Could you just print on a heavier stock paper, glue it, and seal it? You might be able to get a crisper image that way. And I kind of like the cracking; it adds an interesting effect to it, making it a little worn and weathered. Are you going to leave the sharp corners on or trim it to fit the raised piece?
Curse you and your logic! lololol Since it's a solid print on a raised and defined surface, that's actually a great idea, dammit!!! I'll print some tomorrow and see how it goes. The prints themselves are actually nice & bright, as well very crisp. They're printed at 600dpi And even on the smaller decals with text everything is still readable while it's the tiniest of fonts. I'm actually pretty sure now that it's a combination of the single coat of varnish in combo with the Micro Sol used to 'seal' the decal that both softened the lines and darkened the colours a bit. I think I'm stretching the capabilities of the paper a bit with the fine detail and subtle colours. Printed with a colour laser printed on nice & slick paper it might work better.
The crackling effect in itself looks nice indeed and since I'll have a few extra prints to spare I think I'll experiment with the crackling medium I also used on the large FW marine. If the medium is painted on very thinly it will crackle in very fine cracks. Even if applied to a varnish coat, which will be needed to protect the decal in any case, it might not actually tear the underlying print apart but it will provide some fine texture that might hold a thin oil paint wash. And who knows, it might still perform exactly as it should and crack the underlying ink in a satisfying manner. Another thing worth trying out.
And indeed the decal/print will indeed be cut down to the panel shape and the edges neatly worked away by some gentle cutting, sanding, and painting. I do not want anyone to clearly see that that thing has been stuck on there. No sirree
paulguise wrote:I am a bit jealous of the skill here. I am a big fan of red and this was/is being done very well. It'll look awesome when the whole army is together.
Are you using the new GW paint sets or the old ones?
Cheers mate. Well, the paint effect is actually not thàt hard to achieve. You can basically boil it down to a few simple workflows in terms of material use. The actual accuracy or layering/blending is not that complex here as it involves mainly washed and drybrushing. To break it down to its simplest form:
-Inks: thin them, heavily. I also find that using demineralized water works better than regular water. Just the cheap unscented kind used for ironing clothes and found dead-cheap in any supermarket. I would recommend easily a 60/40 mix of ink/water, or even up to 40/60 depending on the desired effect and the general 'darkness' of the ink. Obviously more ink if you want to for a heavy wash, way more water if you want to use it as a glaze and just change the tone or depth/warmth of the colour.
And apply it in two to three layers at least., making sure the previous layer is at least touch-dry, preferably completely dry before putting on the next layer. play with the mix untill you get a feel for it and what you want to achieve with it.
-Drybrushing: Simple rules, but you have to stick by them.
-Only start drybrushing when there's almost nothing coming off by testing it on some newspaper or the meat of your hand. If you see any clear streaks, rub off your brush some more on a (dry) piece of cloth. Start with a very gently touch on the model and see how it goes. The goal is to really dust on the paint on the edges. The dryness is good, you can really have at it pretty wildly. Not only will you highlight the edges, as they will catch the most paint, but you also add some very subtle texturing on the flat area's. This is why your brush needs to be very dry with almost nothing coming off. Any streaks will just smudge up the flat area's and pool on the edges.
-Always, always use a 100 completely dry brush. Even the slightest dampness of the hairs will make your life more difficult. Use mutliple brushes, if you can, so you can clean one colour and let it dry while you continue with another. Also, because of the necessity of a dry brush, when highlighting, don't bother cleaning your brush when you add some lighter colour to the paint for the next highlight. I usually go for three highlights, with perhaps a very light last one to pick out some edges. it sounds a lot but as it's drybrushing it goes pretty fast.
-Layering: I usually built up the red like so (after the undercoat):
-base coat
-dark wash
-drybrushed highlights
-thin glaze to blend in the highlights
-if needed, a touch-up on the highlights here and there.
Of course, protect/seal your paint with spray varnish before every wash or glaze. And the thinned oil paint wash I mostly do also give a nice subtle extra shade to the colour.
Oh, and I mostly use the previous GW paints, just because I bought a bunch of reds in one go. But I also used a lovely red acrylic from Humbrol, and reds from Vallejo. The base coat is roughly a 50/50 mix of mechandendrite red and blood red, thinned with vallejo's thinner and demin. water.
nos fregit enim feles lol Good one! In any case that decal is coming just under the tail, right above the aft ramp and obscured by the dreadnought clamp.
Cheers 2Spartan!
Automatically Appended Next Post: So apparently the few coats of gloss were the key. ^^
Ta-daaa!
So obviously they still need some work in terms of a few coats of Micro Sol, and the pilot's name needs some trimming. The pilot's name is a tribute to the generous Texan who sold me his pre-order extension kit for the errrr Thunder Raven!...?
There's also a request for another Texan coming onto the missile pods.
Funny how all these Texans ended up involved in a Belgian build... Must be the beer.
Decals complete! I just need to do some light touch-ups here and there. The home-printed decals are a tougher breed than their regular cousins. Days of furious stabbing and applying Micro Sol and rubbing, stabbing, rubbing, coating... still left me with the off air bubble here and there that won't go away. I already camouflaged most with some paint but the close up pics revealed some more.
But basically, this birdy is ready for weathering!
Thanks guys! Yeah, I'm really happy with the way the design is turning out. For something i had absolutely no plans of, or even sketches, it's not too shabby. Even-if-I-do-say-so-myself.
If you guys are interested, I'd be happy to share the sheets I used for the home made decals.
I'll take some pictures later on today or tomorrow of the Stormraven, that's received it's first weathering, but first:
Here's some progress. The speeders are 99% finished. They just need some light weathering powder and then they're done. Enjoy!
Here's the birdy after the first few weathering passes. Just some brown, grey,boltgun metal, and black stippled on with a little sponge, and some streaks with thinned boltgun metal. And I must say, getting nice streaks with acryllic paint ain't easy. Quickest compromise I found between look & speed is applying a thin line of the thinned paint along the edge of a plate and then, using a large flat brush, streak it backwards in one smooth go before it dries. On some parts it looks very good, on others, not so much... It'll need some adjusting and correcting here and there but I think I also can camouflage the dodgy bits with some more haint-painted detailed streaks. And once i hit that puppy with oil paints, I'm sure I'll be able to to add some nice black re-entry burn streaks using the larger metallic streaks as a base to work on.
Thoughts & comments are always welcome.
I thought to take some pics of the fully finished speeders but the weather outside is gak as usual. It's kind of annoying/scary to read here and there that this summer weather shift might be more and more frequent thanks to the Gulf Stream being pushed south because of the warming of the planet's poles...
Cheers, mate!
Well, it's actually a rather wet technique. I mixed some boltgun metal, Vallejo thinner, and water to a ratio of roughly 3:2:2. This mix as to be stirred often as it the metallic pigments sink rather fast.
Working in short sections (2-3 cm) with a fine brush I applied a thin line but with some thickness along the leading edge of the section, added some perpendicular 'T's'. Working very fast I then took the large GW drybrush and quickly swiped the paint backwards in one or maybe two swoops, creating the effect. This was done with a light touch.
If you're vèry fast you can even correct it a bit before the paint dries using a pointy cotton stick or brush.
As you can see here and there, it can appear to be a bit too broad and even, but that can be worked upon later with a fine brush to introduce some finer streaks.
Painting straight, perpendicular lines in one smooth move is damn hard, I tell ya.
Slow, controlled lines won't look as good will be less tapered. I feel it's more akin to calligraphy rather than pin-striping. I did a few tests on a piece of paper before committing and slow lines do tend to show and not convey the same a sense of speed as smoothly 'pulled' lines. Damned tricky that.
Wow, time went fast. Sorry for the lack of replies, but I'm back! Time went by pretty quickly with some holidays, busy days at work and general busy-busy.
But here's some progress. Just before going to Warhammer World in the UK last weekend I managed to finish the 2nd devastator squad. Well, finished... they need bases and two of 'm need bolters, but still. They were ready for gaming and saw some good action.
And I peeled off the masking tape on the Stormraven's cockpit. The bird's ready for oil paints now and since the cockpit seams need some dirtying up as well it seemed like the time.
Well... DAKKA DAKKA! Great to mow down weaker enemies. Keeping 'm as a big squad give you a lot of dice. ^^
They're not much of a danger against tanks, but lighter vehicles are worth shooting at.
Very impressive work! As a fellow BA player I am often very critical of others work, usually I find most people's angels the same old look for the most part and rarely unique. But your force does not fall in with those heheh. Great converting on the Storm.
Oh Meph, you just made my night! those Devs look beautiful, I really am fond of the way you paint the Blood Angels, every colour looks brilliant and the HB's are fantastic, i really like the way you've used the aged metal on the magazines etc. it works! simple as that! :-) and you're right it has been ages since we've seen stuff from you, hopefully this is the start of more pics to come?....
Well, there are currently three non-GW models first up in the pipeline. Two of them are overdue birthday gifts so they have priority and the other is my large scale Terminator and then:
In my posession and in need of finishing or even starting:
-Baal Predator
-Land Raider
-FW Spartan
-10-man FW MKIV Assault squad
-10 Scouts
-15 Terminators
-FW Librarian+ command squad
--Shadowsword/Stormlord superheavy
Gitsplitta wrote:You need to make a second base with either an NFL or soccer goal post on it and display them about 18" apart.
Hehehe, that would make a great objective marker! Bloodbowl, 40K style
Yellowbeard wrote:Woo Hoo! Meph is back!
Very nice. Glad to see you're working on the Contemptor. Love that pose!
Solar_lion wrote:Welcome back. I always like the story poses.
GiraffeX wrote:Welcome back Meph. The Contemptor is looking great so far, love the about to be squished scorpion.
Cheers fellas! Well, there are two more Striking Scorpions coming up. One is already impaled on the assault cannon's bayonet (oh yeah, I went there), and another is going to be crunched by the power fist, although I'm still pondering for the least-effort-maximum-effect to make it so as he appears to be in the process of being casually, but slowly, squeezed to death, clamping onto the fist in sheer agony.
Snrub wrote:Great looking Contemptor Meph. Been scouring your blog and you have some utterly beautiful models.
I really like your Stormraven conversion on page4. It's just standout looking.
Cheers, mate! I'm still amazed that I managed to pull that one off as I wanted.
Oh happy days! Meph is doing stuff again! :-) and it looks as if it's going to be fantastic too! I love the 3rd shot of the Contemptor booting the Scorpion! that same shot when it's painted will be on the gallery front page for sure!
Hehehe, cheers, mate! Feels good to be at it again.
Here's the start on the right arm and erm.. decoration. ^^
I drilled out a hole right through his torso, rather than try to get two parts of the blade perfectly aligned. And that way I can paint the victim separately before sticking him on and adding some guts/blood.
I'm actually doubting whether I should magnetize the weapon arms or not. Any extra weapons from FW do not come with the large shoulder pads and the small shoulder-joint-elbow seems too small and fragile to accept any magnets large enough to hold the weight.
Anyone any experience in magnetizing contemptor weapon arms?
I did mine.. but not calculating for the additional weight of the figure. I did mine with one Mag,in the body to hold the arm and one under the shoulder peice. This way I could get the maximum out of the pose as possible. Secondly the body magnet could be adjusted to change the center of G on the weapon arm by allowing the shoulder to rotate.
Some weapons are better centered than others.
Solar_lion wrote:I did mine.. but not calculating for the additional weight of the figure. I did mine with one Mag,in the body to hold the arm and one under the shoulder peice. This way I could get the maximum out of the pose as possible. Secondly the body magnet could be adjusted to change the center of G on the weapon arm by allowing the shoulder to rotate.
Some weapons are better centered than others.
Hmmm, yeah, and this weapon+bayonet+eldar kebab is not very balanced at all. I guess it's worth a try, in worst case I can still glue it all together... I'll go ebayshopping for the right-size magnets.
Snrub wrote:Assault cannon with bayonet? How sweet it is!
Will you be repositioning the libs of the Scorpion?
Oh yes! I'm not a green stuff master, but the idea is to detach his pistol from his hand and have it dangling on it's power cable. Also remove his chain sword and try to reposition the hand to be either clutching the bayonet or simply hanging limp. And the legs need some repositioning as well. Luckily, this is easy with finecast models. Just soak the part in hot water and adjust by hand, then hold it under cold running wtzre to fix again. I did that with the kicked eldar, just the right foot needed a tiny cut to help it bend further.
Meph wrote: Sneak peak! After some slow painting of some large models, I felt I needed a change. ^^
i like how that dread is casually going 'nah, cya later' and just booting him away!. pretty sure that striking scorpion has just been emasculated by that gesture lmao
Progress so far, I've decided to glue the weapons. Magnetizing will be better suited for a less posed model. That, and I was unwilling to search & wait for the suitable magnets.
The arms themselves are just temporarily attached. I'll paint them separately. The 'fist' is not attached to the arm either, but the eldar is firm within its grasp. ^^
OneManNoodles wrote:very nice, thats a pretty epic contemptor you've built
I take it you have had problems with striking scorpions in your gaming group and I quite like your painting style too
Cheers, mate!
Hehe, striking scorpions are actually one of my favourite eldar units of all time. I love their menacing look. A long-, long-, longterm idea is to resurrect my old Eldar army, as I'm doing with these Blood Angels, but considering my tempo...
the pipeline for the following months, quick photos. The first ones up will be the Contemptor and Spartan I think.
I decided to ditch the stock Spartan tracks as have no love whatsoever for those 'old' style Land Raider tracks, they never made sense to me. So after searching around on the net a bit I decided to go for 1/35 scale tracks from a Merkava II, which had the right width. I decided to with tracks from the modeling company fruilmodel, which seem to be very good as they can easily be found in many model webshops, and ebay .
For those of you who might be interested in something like this; older tanks like a T-55, and the larger WW2 tanks would suit a Rhino nicely, as the more modern MBT's like Merkava 2 and above, Abrams, T-90, Leopard 2 suit the width of a Land Raider.
A T-55's tracks in 1/35 are 15mm wide, which was too small for the Spartan. And I found that modern MBT's tracks are 61-65 cm, so I guestimated that they would be around the desired 20mm for the Land Raider/Spartan. Luckily, that was the case.
So I ordered two sets, 800 grams of Merkava II tracks, from Djermany. Arrived in two days. Together with the huge weight of the resin brick which is the Spartan, this is going to be a mighty model indeed, capable of crushing any styrofam hill on the table. But luckily it turns out I actually need just one set. Guess I have spares for another tank. ^^
One track completed, 42 centimeters worth of little links put together one by one. It took me 3-4 hours I think. I made them over a few sessions and kinda zoned out each time as those links and holes are rather tiny. :S But after a while I got the hand of it; clip off 5-10 pieces of wire with a few mm to spare, chain up tracks using flat nosed pliers because sometimes you need to apply gentle pressure to pierce through a little membrane of metal in the 'hinges', and repeat until you run out of wire. Then cut some more wire.
But the result is sure worth it, looks a million times better than the stock tracks. Even though they do have a lot of leeway between the running wheels, they do stay on track quite nicely when going round. Depending on how it goes during the painting progress, I might even leave them loose. The little kid in me grins at the sight of moving tank tracks. But with weathering powders 'n all... ah well, we'll see.
Hehe, yeah, good idea on the termy. I still have the little besagews from the 28mm terminator sergeant.
Automatically Appended Next Post: For a superheavy, you might even have to go for WW2 German Elephant tracks.
The Merkava II ones I used are 19mm. How wide are those Super Heavy tracks?
Depends which ones. Two of them are based on the same chassis as the spartan. I think the big ones may have the same size tracks as well, I'll have to email FW.
Ow, sorry for the 'late' reply, mate. Cheers, Ivanhog.
Time sure flies too damned fast. Snap, snap, snap, and gone are a few months...
I managed to get some painting done here and there so here's the current progress. The Spartan and Contemptor are ready for weathering, the most fun and casual part of the painting process. Personally I can't wait to see the tracks weathered up evenifIdosaysomyself.
Looking good any chance of a photo of the spartan from directly above, you don't quite get the blood drop look from the front due to the way that it lines up
awesome conversions and the painting is off to a great start, and by the way, you don't by any chance happen to be the same Meph who created the Masterwork DF mod? just wondering.
Young_Logan wrote:Looking good any chance of a photo of the spartan from directly above, you don't quite get the blood drop look from the front due to the way that it lines up
Young Logan
Yeah, sure. I'll take some tomorrow.
OnlyWar wrote: awesome conversions and the painting is off to a great start, and by the way, you don't by any chance happen to be the same Meph who created the Masterwork DF mod? just wondering.
Hmmm, nope as Masterwork doesn't ring a bell. What game, now I'm curious.
Question, the vents at the rear (not the circular ones) the look to be WIP, however in case they aren't, could you care to comment on the thought process behind their paint style/scheme?
Well, indeed they're WIP, and they will become a lot darker and dirtier. But they're red because it made more sense. The 'instinct' is to paint most vents on vehicles and building black or metalic in their entirety, but I feel it feels more natural to paint them in the hull colour and then weather them down, even to the point where there might be little of the hull colour visible.
When you look at current day military vehicles, all the little doodads such as vents, hatches, latches, and whatnots are simply painted over in one go with the main colour scheme, so I went the same way.
Paint will be chipped and dirtied with dry-sponging and the future washes will outline the vents itself. So as a whole those vents will appear a lot darker than they are now.
Gaaaah!!! Frosting!! brand new can of Purity Seal...
The spartan is after the frosting and attempt to smooth it out after a coat of Klear. Which improved it slightly.
The Contempor is àfter the attempt to further rectify the fix. I mean, WTF??!!! I'v had some run-ins with frosting before, but never, ever something like this.
Currently I will attempt a polish with some pure alcohol or turpentine, see how that goes...
Phew... worst case scenario averted...
First attempt was moistening with airbrush cleaner and then gently applying the Dremel with a felt polishing head. Not a good idea as you can see from the removed paint. So I moved onto manual polishing using some turpentine and some old stockings.
That worked somewhat but was too slow, considering the amount of surface on all models. Next up, same fluid, but with an old toothbrush. Still not getting what I wanted I took my electric toothbrush with an old-, all-brush, head.
I managed to get everything up to an acceptable level. Most parts are fully clean again, some parts need just some re-deepening of the colours using some inks and perhaps a touch-up highlight& weathering.
The main body of the Contemptor is as clean as I can get it I'm afraid. Still, it's salvageable but I'm reasonably confident I can restore it without having to resort to stripping the model and staring over.
The white crap, even when removed, left some texture in the paint here and there and I think I might even be able to incorporate that into the weathering.
And yeah, from now on, those models will only receive airbrushed varnish. As there are no propellants involved, this should do nicely.
I really love the fact that you use the metal tracks they use on model tanks. I have used that on some of my 1/35 scale tanks. Such a great way to go by using those. Great Work. I might suggest you can get Magic Tracks from Dragon they are the plastic versions of the metal ones and much easier to assemble. IMHO
Oh, those magic tracks look nice indeed. Say, did they take a lot of time to clean up? Mold lines & such. Because those metal tracks required zero cleanup time. ^_^
Automatically Appended Next Post: Here's the post-restoration. This morning the frosting was a little bit more present this morning, after night's drying and curing. So misted some oil paint thinner on with the airbrush and then immediately followed up with a coat of Klear, to capture the moist state (which made the white disappear). Then I needed to touch up some areas; basically again a thin basecoat, wash, highlights, glaze, and then re-apply the weathering.
And now the model is sealed with Klear again for a black oil paint wash.
As you can see on the Contemptor's body, the frosting did leave some texture behind on some parts of the model but actually I don't mind. The picture's don't do it justice because of the gloss glare, but the texture is fine enough to pass off as layered paint of an old and battle-worn machine.
I had absolutely no desire to strip and start again so I decided to roll with the punches.
Wow, the weathering really brings it together, real shame about the frosting, it didn't really show up on the Spartan, however the poor contemptor looks like he had a case of Charlie Sheen covered in white, certainly not winning, but luckily your bring it back
Well, stuff like that does bring out the alchemist in me.
Last night I applied a black oil paint wash, some slight touch-ups here and there while it was drying and let it fully dry out overnight. Following some other advice, I took that demon spray can of Purity Seal and shook it hard for a good 4-5 minutes and tested it on an old model and lo and behold, no frosting. It came apparently from the satin coat consisting of both a gloss and matte component that weren't properly mixed (probably due to long storage before sale), and if there's a concentrate of matte, that produces the frosting. I usually shake my cans pretty well before use but usually in the 30s-1m timeframe. This took several more to fully mix.
So lesson learned; when buying new cans, or using ones that have rested for a long time, shake it like you're single.
On the arm of the dreadnaught (last pic) on his wrist looks like a BA icon outline, is that free handed or is that what you had suggested for me as a computer printed decal?
On the arm of the dreadnaught (last pic) on his wrist looks like a BA icon outline, is that free handed or is that what you had suggested for me as a computer printed decal?
Ah, no, that one comes from the Forgeworld BA decal sheet, which has some brilliant decals on it. For examples of home-brewn decals, you'll have to back-paddle a few pages to my Stormraven conversion. I've used them extensively on those. As well as on my large scale terminator.
whalemusic360 wrote:Oof, that frosting is brutal. Nice recovery though. The Spartan is really looking nice.
Cheers, mate. yeah, I panicked there for a while, before my inner alchemist took over. (What do you mean, mortally wounded? Put him on that table of there, I'll see what i can do. But don't come crying if he can't remember your name afterwards, or go to the potty unassisted.)
the pipeline for the following months, quick photos. The first ones up will be the Contemptor and Spartan I think.
I decided to ditch the stock Spartan tracks as have no love whatsoever for those 'old' style Land Raider tracks, they never made sense to me. So after searching around on the net a bit I decided to go for 1/35 scale tracks from a Merkava II, which had the right width. I decided to with tracks from the modeling company fruilmodel, which seem to be very good as they can easily be found in many model webshops, and ebay .
For those of you who might be interested in something like this; older tanks like a T-55, and the larger WW2 tanks would suit a Rhino nicely, as the more modern MBT's like Merkava 2 and above, Abrams, T-90, Leopard 2 suit the width of a Land Raider.
A T-55's tracks in 1/35 are 15mm wide, which was too small for the Spartan. And I found that modern MBT's tracks are 61-65 cm, so I guestimated that they would be around the desired 20mm for the Land Raider/Spartan. Luckily, that was the case.
So I ordered two sets, 800 grams of Merkava II tracks, from Djermany. Arrived in two days. Together with the huge weight of the resin brick which is the Spartan, this is going to be a mighty model indeed, capable of crushing any styrofam hill on the table. But luckily it turns out I actually need just one set. Guess I have spares for another tank. ^^
One track completed, 42 centimeters worth of little links put together one by one. It took me 3-4 hours I think. I made them over a few sessions and kinda zoned out each time as those links and holes are rather tiny. :S But after a while I got the hand of it; clip off 5-10 pieces of wire with a few mm to spare, chain up tracks using flat nosed pliers because sometimes you need to apply gentle pressure to pierce through a little membrane of metal in the 'hinges', and repeat until you run out of wire. Then cut some more wire.
But the result is sure worth it, looks a million times better than the stock tracks. Even though they do have a lot of leeway between the running wheels, they do stay on track quite nicely when going round. Depending on how it goes during the painting progress, I might even leave them loose. The little kid in me grins at the sight of moving tank tracks. But with weathering powders 'n all... ah well, we'll see.
Now the second one...
Yay, great success, I am glad my assistance has lead to success!!
@Tech Guard; Yeah those tracks were definitely worth the effort.
Alright, little progress over the past two weeks. I started on further weathering, which was going well, but I had yet another frosting incident when sealing the models.
And I really had to awaken my inner alchemist. After several other attempts, following some advice i read somewhere, I resorted to a rubbing with olive oil...
And amazingly, this cleared up the frosting 100% while leaving the colours intact. But then of course, I had to seal that olive oil in when it had dried and cured as much as possible.
The big bottle of Vallejo satin varnish had completely shifted after sitting still for too long and even laborious shaking did not re-mix it properly. This seemed to work but it became clear there there was too much risk with matte flakes, or whitening.
I tried all of my other satin spray cans on one part of the models and all of them resulting in frosting; requiring further olive oil treatments, further waiting and drying...
Seriously It seems as if I'm stuck with some painting pixies who peed in all my spray cans...
So I went out and bought a satin spray from Motip, non water based. Works great, but needs 24h to fully dry and harden, and is a bit too shiny for my taste. The models are currently coated with this.
I also bought a water-based can from Liquitex, which I think I'll give a try soon. Fingers crossed for no more frosting.
I think I'll keep further weathering to a minimum, as the model already had a lot of varnish coats, more than it should have had. So I think I'll just do some heat colouring on the lascannons, black weathering powder around vents and exhausts, and then weathering powders for mud and dust
The positive side of all this is that to keep busy during all the waiting, I assembled and undercoated a Vanguard Squad (front) and an Assault Squad (back). Muhahahaha
Wow, you've certainly had more than your share of trials and tribulations when it comes to getting your LR properly varnished. I've heard about (and experienced) the clouding issue before... usually it's associated with high humidity. Glad you seem to have found a way to sort it out. LR still looks fantastic.
Cheers, mate! Yeah, the entire painting recipe is in here somewhere, more than once I believe. And with the #of posts per page on max, it's only 14 pages.
Oh, with the beginning of the Land Speeders you'll find some explanation; page 10 (on max settings)
Automatically Appended Next Post:
Here's some progress on the Contemptor. It's almost finished. I just need to touch up the black weathering powders here and there and I'm calling it done. Now I just need to paint up the Striking Scorpions.
I'm leaning towards a very deep, dark green to lend some credence to their alleged sneakiness. ^_^
Well, I did some painting over the past few weeks, just haven't been online much.
Thanks to all the varnish problems I had maybe there are a few spots here and there that aren't 100%. Because of the olive oil polish they needed there some tiny area's that kept giving trouble during the weathering, but I plowed through them as these models are intended for gaming purposes, and not for competition.
So I call these two finished.
Meph, you are a master of all things Blood Angels.
That contemptor is amazing looking. Perfect posing, great execution, and just the right about of scuffing and damage.
Love the dark green scorpions too. Makes a nice change from the light greens you generally see.
Yeah, I wanted to try something different for the Scorpions. Waaay back, when the animals still talked, I painted up an Eldar force but most of those were GW carbon-copies, bright & blended. And especially since reading Gav Thorpe's Eldar books, I really wanted to give them a darker, grittier, almost-camouflaged look.
Up close they appear a bit too messy because all those plate sections are so damned small for comprehensive stippling and colour variations. But when viewed from a normal viewing distance, it kinda works nice. The dark brown wash worked nicely.
Oh, it's a bit far off from Downunder; The Vigeland Sculpture park, Finland. Sculpted by Gustav Vigeland.
Ah hell, that's even far away from Belgium. I'd love to go there though.
Automatically Appended Next Post: In the mean time I decided to give these old fellas some lovin'. They've been lying around undercoated since a few years and base coated since several months. There are some mold lines here and there, but since they're just gaming models...
Solar_lion wrote:well .. you have been busy.. I too like the dark green on the scorpions.
Terminators look awesome. You have tied them in very well to your overall scheme. Spot on!
Styrofoam04 wrote:Excellent Stuff. I love the weathering
SJM wrote:I really like the Red armour colour you pull off, makes it look like everything has had a hard life.
Cheers, guys. I'm glad you're liking them. Yeah, I'm pleased as well that I can manage to blend 'm in nicely with the rest of the marines, which have been painted a few years ago already.
Tempus fugit!
But nontheless... Almost done I applied the decals, did some light sponge-weathering, sealed the models and gave them a wash with thinned black oil paint.
There are just some spots to clean up here and there, and then I can seal them, paint the lenzes, and base them.
Considering my usual painting rhythm, they're going pretty fast. Probably because it's only a 5-man squad.
The 20 troopers with jump packs will probably take a wee bit longer. ^_^
GiraffeX wrote:They are looking really nice, I really like the red you use on your Blood Angels.
Very clever use of magnets as well I had to double check as I thought you had an illegal squad at first.
Leviathus wrote:Lovely termies Meph! I was thinking of putting weathering on my Blood Angels and I really like how you did yours! Mostly metal paints I presume?
And where did you get those wings from on your sergeant? Are they form a Dark Angel kit? Really like those!
Yup, indeed, just one go with boltgun metal, and another with Vallejo's Dark Rubber, which is basically a warm and very dark grey.
The wings are Dark Angel helmet addons, I first ordered a pair through ebay from a bitz ship, and liked them so much that I promptly bought 10 pairs to have a little stock. I plan to use them on all infantry sergeants and possible other HQ's as well. They just suit the Blood Angels so nicely I think.
GiraffeX wrote:Ah yeah I remember you doing that now, that was five months ago...
lol, yeah, in my grand painting scheme and -rhythm, five months is a blink of an eye... Beware of time percetion, once you hit 30, it's starts accellerating...
jah-joshua wrote:great stuff, Meph...
i really like the subtle outline of the Chapter badge on the power fist...
very nice...
keep up the good work...
cheers
jah
Cheers, mate! That little outline comes straight from the FWBA decal sheet. I love that sheet...
Not all photos are fully stable. Sadly I don't have a large tripod available, the cupboard isn't deep enough to stably set my mini-tripod. :-/
Still they came out not tóo bad.
And for your enjoyment, I whipped up and imgur gallery with the full-res photos.
The army is just so impressive. There are too many things I want to comment on and praise, but if I did I'd be here all day writing an essay, Outstanding.
Thanks guys, I'm really glad you're liking them. That's the result of a snail's process of +-4 years, ahem.. :S
-Baal Predator, basecoated. I'm still trying to figure out what kind of marking to give it. I'd like to break up the red a bit and seeing as it's already sporting the FW Death Company extra plates there will already going to be a few black or copper crosses. Maybe just a broad stripe over the length of width of the vehicle., Perhaps a large chevron?
-Land Raider: I'm really blocked on this one. I have the urge to paint it in some kind of camouflage but I'm unsure as to which path to take. I did a quickie experiment during basecoating but I'm not happy with it. So I see several possibilities: -Screw the camo and go for red, perhaps with some large marking as on the rest of the vehicles. -Keep the abstract red/black camo alive and fix the pattern. Perhaps some pure clack camo bands (angular or rounded?), maybe even introduce a contrasting colour such an ochre, or maybe that khaki colour I use for the infantry cloth. -Go all-out with camo and give it a mud/rock/forest camo to stay in the style of the weathering mud I used on all vehicles. I could even do a 'washed-on' technique as they did with quick winter-camo in WW2 etc. Y'know with parts of the camouflage washed off and the original red coming through in places?
So I'd like to pick your brain on this. I feel the need to see a SM vehicle in camouflage, both as homage to the good ol' Rogue Trader days when Marines still used camouflage, and just because I think it would be interesting to see a Land Raider in some camouflage. So then there's the dilemma to go with a 'dazzle' camo with red, black, and a third calour to stay more into the sci-fi theme, or go with a realistic Cold War style forest camouflage. What are your thoughts on this?
-A normal assault squad, mostly FW MKIV marines.
-And then there's a Vanguard Squad, half of them are the failcast/finecrap ones, and the other 5 are kitbashed from the plastic vanguards and BA box.
And unpainted I still have a FW librarian to convert to Blood Angel, as I realized I do not have a HQ character painted new (I do have quite a bit of choices of older, painted models but I want something new and in tune with these units). And I also have more than enough stuff to kitbash a kickass captain, but then I need to decide on a loadout. Any ideas on that? Also for the libby's equipment. I'm a bit out-of-tune with the two last editions of WH40 so I'm not sure on how to best equip them.
Oh, and there's a Storm Talon hiding in a box somewhere. Sometimes I like to freak it out by tapping a hacksaw on the box, or rattling some plasticard. He knows what's coming...
Stunning army shots Meph. What style of basing are you going to give them?
In regards to the vehicles. Have you thought about doing murals or frescos on them? It's the sort of thing space marine vehicles are perfect for with their large flat surfaces. Land Raiders always look good with some art work on them.
For basing, I'm thinking something relatively basic, like a muddy ground with some small pieces of rock and some hint of flocking. I want to keep it dark and simple to stay in theme with the mud weathering on the vehicles. Nothing too elaborate, to easily seal and protect the bases for storage and transport.
Yeah, I though about some artwork. But honestly, I don't feel like freehanding a gazillion hours on it, and for a huge home-made decal the plating is not that optimal.
I come here every time I need motivation to paint my Blood Angels, that last slew of pictures may hold me over until the apocalypse. Well done, truly awesome stuff here!
Wow, really great army. If I may give my opinion, camo the Land Raider. You got the skills to pull it off. Maybe use gray to match up with the bases. Also I really like the stripes on the Land Speeders, it really adds to them.
Your army shots look Beautiful, Just beautiful. The ammount of detail you put in is astounding. I can't wait till My army fits together like this. (It would be nice if most of my guys had heads or arms lol)
40kFSU wrote:Wow, really great army. If I may give my opinion, camo the Land Raider. You got the skills to pull it off. Maybe use gray to match up with the bases. Also I really like the stripes on the Land Speeders, it really adds to them.
Cheers, mate! Yeah, the racing stripes were originally just done on a whim, but I like the look so much I decided to use them to designate unit numbers on the Land Speeders. It gives them a nice and subtle individual look.
Styrofoam04 wrote:Your army shots look Beautiful, Just beautiful. The ammount of detail you put in is astounding. I can't wait till My army fits together like this. (It would be nice if most of my guys had heads or arms lol)
Thanks, Styro! I don't know if you noticed, but a lot of the unified and detalied look comes weirdly from the omission of details. Meaning, I didn't paint very little blood drop red, nor every little bone or scroll in beige bone, etc.
I figured since even the most basic power armour can be considered old or even ancient, and incredibly tough, that I wanted to give them a really solid look, strong and massive.
Meanwhile, slowly getting there... Over the past few days I've been basing 40 marines, as well doing some more weathering on the Storm Raven, as well as (finally) finished painting the front weapons and magnetized hurricane bolters.
Obviously, one of the heavy bolters dropped down while I was focusing on the lenzes, but they're just manually stuck in so I can switch between the missile launcher, heavy bolters, and multi-meltas.
The bases are not finished yet, this is just bare flint and flock. I'll go over them with weathering powders to make them more brown and tie them in better with the vehicle weathering.
whalemusic360 wrote:You need to do up the base for that big bird, seems like a waste not to finish such a monster.
How right you are! I completely and utterly have been ignoring that... I promptly ordered a Wraithknight's arm with shield off of ebay. The base for that Storm Raven nééds something riddled with bullet holes, doesn't it?
jabbakahut wrote:I just cannot stress how much I hate your beautifully painted BA, an inspiration and curse. Your damage/weathering is some of the best.
Wow! Just found your blog, and as a fellow Blood Angels player, it's great to see such a large, formidable, and cohesive force. Awesome army shots--those are all too rare and are much appreciated.
I like how your troops look weathered and tough, but the red is clearly there, too.
Thanks, guys! The comments are fuel to the engine.
Here's the result of the first round o' powders. I didn't apply a decadent amount, but the little application brush (looks almost like small, flat make-up brush) was pretty loaded. in places, it feels a bit too uniform. The little rocks I'l give brushing of light grey powder, and on the now brown parts, I'll add some lighter brown and/or maybe a tiny amount of original flocking?
Cheers guys!
Currently I'm stiill struggling with the bases, i went just a tad overboard with lighter weathering powders and it's looking a bit too sandy at the moment. I'm going to give the rocks a light drybrushing and have one final go with some dark earthy weathering powders again...
Cheers,
Yeah, not too shabby actually, when you see I've been cobbling this together over a good 4-5 years. I'm actually eager to continue work on the assault squad and vanguards squad. Especially since I've got only 2 troop choices so far (TS & DC) and those Death Company are points sponges.. I still have to paint up 10 magnetized backpacks for them because the original plan was to equip them with jump packs. But they cost 550 points, which is just plain silly.
The assault squad will give another 'normal' option as a troop choice.
From Ebay I ordered 10 scions helmets, because after years of looking around, they seem as the best option for some helmeted scouts. (No bare headed marines in thís army, no siree). I'm still wondering what to equip them with... Sniper rifles or boltguns... any suggestions?
There's also the Baal Predator, magnetized so it can double as Rhino and Razorback. It will receive a nice assault cross on the hull, 'projected' from the top down.
Then there will be the first thing that might break the look of the army, and that's the regular Landraider... I know it might look different, but I feel it in my bones that I need to paint it camo, it's crying out for it. Then I just need to solve the dilemma of whàt camo... My gut's telling me to go all-out forest camo. Y'know, green+brown+black (or grey), but it might also look nice in a russian style khaki green, maybe even with those fancy parade stripes on the side...
Or a desert camo...? Aaah the possibilities!
Aand slowly but surely there is a plan coalescing in my mind to attack the Storm Talon and turn it into something that looks like it can fly... The plan is: extend the nose, extend the tail, put on a V-tail, enlarge the wings significantly, better integrate the weaponry, ditch the ridiculous assault cannon turret and make a better one.
Yes? No? Well I'm going to anyway. I've had this idea kicking around in my head that scouts would look good in balaclavas. I think scouts with helmets look silly as the helmets are often to bulky or don't match the rest of the model. But balaclavas keep the stealthy spec ops feel to the scouts, while also keeping the heads "helmeted" and low profile.
Balaclava's, that's actually something I thought about but I couldn't find the heads I like... In combination with that I would have preferred also night sight, for that specops feel.
Balaclavas... Immediately reminded me of this: I lookied up^a version with english subs.
40kFSU wrote:Wow, really great army. If I may give my opinion, camo the Land Raider. You got the skills to pull it off. Maybe use gray to match up with the bases. Also I really like the stripes on the Land Speeders, it really adds to them.
Thanks, Styro! I don't know if you noticed, but a lot of the unified and detalied look comes weirdly from the omission of details. Meaning, I didn't paint very little blood drop red, nor every little bone or scroll in beige bone, etc.
No I didn't notice it at all and I still kinda don't. It's the details that really get me. They slow me down to a stop. My RCs being 3 different colours don't help either. Thats why I'm enjoying My Oathbreakers unit. The Ultramarine and White Scar I did were very refreashingly easy and no pressure to be perfect either. Tho for my RCs I dont think I can lay off tho
Meph wrote: Balaclava's, that's actually something I thought about but I couldn't find the heads I like... In combination with that I would have preferred also night sight, for that specops feel.
Ohh, Mad Robot Minis, I often forget about those. And they're some good balaclava heads indeed. Food for future projects!
Styro, those RC's are looking good, they have a nice look & feel to them. If I may offer one comment, I notice you often paint the some small cable here and there in a really contrasting colour, bright blue, bright green, and that offers a focal point for the eye and can be 'distracting' at times. I think that if you would do those is a subtle, muted colour, it would immediately change the look of the model and bring more focus to the rest of the model.
Meph, put on your hood mother[bleep]!!!
hahahahahaha
great satire, amazing beat, and hilarious video....
gotta love Marseille...
i still listen to French hip-hop, even though it's been twelve years since i left Europe...
we had a break dance battle here two months ago, and the DJ busted out the NTM track from Le Haine, Nique La Police...
the locals didn't know the track, but went wild for the beat...
it was cool...
lol, de rien. W00p w00p, is de sound o' da police! La Haine is a brilliant, brilliant film. French is my second language and hip-hip is one of the few music genres that can get away with French. (Starflam is a good example).
Fatal Bazooka parody it perfectly, their silly walk during the remix part cracks me up each and every time.
For those not familiar with France, Savoie, to which they refer, is actually considerd a real posh and dandy ski resort area, so the fact that they bring 'gangsta' rap from that area, hilarious... It was Gangam Style avant la lettre
Well, I spent a bit too much time fiddling around with weathering powders on the bases and the result was a bit too flat. So I gave the rocks some drybrushed highlights and re-applied some flock here, just to add some contrast.
Oh, and I've been look all over for the two banner but can't find them anymore... :( I'm sure they'll pop up sooner or later but until then those hands will have to remain empty.
*Ahem* and 10 black backpacks still need to be magnetized and painted as well.
For the moment a flu is preventing me from holding a steady brush so maybe it's time for some assembly and cleaning. I still have a librarian and storm talon lying around...
Well, i just did a rough calculation and over the last 4-5 years I painted up around 3800 points. Which is the force as-is.
And lined up is another 1200-is points. That kind of snuck up on me as it is a rather sizable force already.
I think I'll also cobble together a captain from the parts I have because besides the Librarian that still needs to be started, I have no HQ for this new army I started in 2009.
Just to bounce back some ideas, what would you think of to equip a Captain and Librarian with? My initial thought would be rather standard; a powerfist or relic blade for the Cap, and maybe a fancy pistol for both. I can always magnetize their backs to equip them with jump packs. I don't really have an assault oriented army at the moment, but with an assault squad and vanguard squad on the way, I will have a lot of options.
I've been on the receiving end of Powerfist/Plasma pistol Captains and I have to say it wasn't nice, not at all.
One nasty set up I've seen is a chapter master on a bike, with the relic storm sheild and either the relic sword (burning sword - can't remember what its called) or a thunderhammer. put him with a squad of bikers and my god does he wreck some faces. T5 3++ 3 wounds str 8 just really hurts lots.
No bikes so far in the army. I've always been temped but never fully satisfied by the bike models. It does seem to be a popular choice out there, T5 is a good'un to have for sure.
I was leaning towards a plasma or melta postol indeed. A powerfist for sure, to keep in theme with the rest of the army.
I was thinking about giving him a sword as well. Mostly for the threatening esthetic though... and I could use it asa relic blade or Glaive Encarmine
GiraffeX wrote:The Forgeworld bikes are quite nice.
Yes, yes they are. I'd love a squad of those, but I only have two kidneys. Damn you, Forgeworld! If I win the lottery Il'l make them my personal slaves!
I'm a Blood Angle player since the beginning, so I may be a little bias, Meph... This has got to be the best looking army I've ever seen. You've managed bring out the grit and character in your models much like I imagine while I read the 40K/30K novels. I wouldn't change a thing, I wanted to comment on the "we brake for kittens" but you have a sense of humor. Not for competition?! Really? They should be showcased in a White Dwarf at least, and then in a battle report so we could all "see them in action".
You have an inspiring talent! Thank you for sharing this over the last few years!
Thanks man! From a fellow Blood Angel veteran, that means a lot. I'm glad you enjoy it, and if all goes well, I'll be chugging along for quite some time.
Yes Sir you're welcome! Man I caught your FW large scale Blood Angel... Sheesh man! Awesome! I hope you don't mind but I'd like to save a few of the photos as a painting reference. I went by my local today and grabbed some of the newer golds in hopes to achieve that gritty look you've done on your veterans.
Solar_lion wrote:Bikes are one of the few meta's that work well in the 7th. I've done well with a tapped out command squad.
Cool, and it looks impressive on the table no doubt. Maybe a long term-addition to the force. Although knowing myself, one day I'll blink and realise that I've painted up the entire 5th company
Kelly502 wrote:Yes Sir you're welcome! Man I caught your FW large scal Blood Angel... Sheesh man! Awesome! I hope you don't mind but I'd like to save a few of the photos as a painting reference. I went by my local today and grabbed some of the newer golds in hopes to achieve that gritty look you've done on your veterans.
Have at it man! Inspiring a fellow painter is the biggest praise there is. And in case you want some specifc shots of anything, don't hesitate. I have tons of pics, and a camera, so any extra shots are just a few clicks away.
Ok thanks man, oh by the way I started reading, my simple mind gets overwhelmed by pictures and words just get bypassed... I saw the bit describing the gold technique, I'll go at it a different route but still achievable, I'm thinking some browns as a base then the GW golds with final mithril silver. For ages I shunned the Gold helmets because I didn't want that look of shining gold, the gritty look you've achieved did it for me.
Have you been able to get a studio set up or are you still on the once a week then pick up afterwards? I was in the same boat until my lovely wife gave me a room upstairs. She said have at it, because weekly I took over the kitchen table, it has three great windows I miss but I don't miss the pick up...
I think I see what you did with the battle damage, pretty sharp!
Been playing at all?
I can't get over the vision lenses of the helmets. Serious detail.
@Kelly502; yeah,; same here. For years I lamented the introduction of coloured helmets for the Blood Angels. I think I still have an unfinished assault squad of oldskool plastic beakies lying around boxed up at my parents place from when they first came up with that... But I'd like to think that I managed to come up with deep and slightly muted colours for the devastartor/assault/veteran helmets. And now I'm actually looking forward to painting up the yellow- and gold helmets for the assault marinesa nd vanguards.
As for setup... still stuck on the coffee table I'm afraid... although I have taken the habit of prepping a minimalistic quickie kit to deploy and let disappear. A very, small box o' carton that can hold a half-dozen paints and a few brushes, a cloth, and two small water containers.
So I put some paints aside which I'll need in the immediate future for whatever model I'm working on. When the opportunity arrives, I put down an old newspaper, take the models, the mini-kit and I can start immediately and it's cleaned up in a few minutes. And when the gf is not present for a few days due to work, this can very quickly multiply to the coffee table filled with paint pots and -equipment.
it's amazing how little space a man needs to live comfortably... even though a clean coffee table and living room can be immensely satisfying and resting ofr the mind, one adapts easily to having just a few 'hunting' trails to get to the fridge, toilet, and bed.
As for gaming, not nearly as much as I'd like to. My last game has been over a year ago. The trouble is that between the friends, it's difficult to come together as it is, with spawning spouses and careening careers all over the place. And when we come together with the usual bunch it's usually for a boardgame or roleplay, seeing as 40K is more of a 1 on 1, or 2 vs2 game, and our 'gaming-gang' is 5-7 people, and of those, only two are still actively painting mini's (myself included)
There is a gaming club in Leuven, where I live, but I'm sceptical as I suspect it's still the same cliché'd, shower-o-phobic, overly fanboyish crowd that's been active since a few decades. And I'd rather have more casual games between adults in a well-ventilated space instead of a sweaty, cramped back room of the local gaming shop.
Automatically Appended Next Post: In the mean time I've started work on the Assault Squad. They've been basecoated, four drybrushed highlights, a dark wash, a light glaze, a drybrush-highlight touch-up, and another thin wash & glaze.
Ready to start blacking out the details and secondary colours.
Meph, I understand that completely, I however feel like leaving things out incase I'm not up to painting details on a particular project, I can paint up some terrain or build a kit whatever I see in the "studio" which is under construction and I'm lucky to have it. When I was single and in a tiny apartment I made do with little space. That was a cave for sure, I had to use true light bulbs in my lamp.
I left my mates back in Tennessee, we all had tables and stocked refrigerators with beers... The good ole days, I left in 2007 so I've really played twice since... I am relieved to be back into my favorite hobby. No gaming friends yet here in Bentonville Arkansas...
Chance you could do a layer by layer set of photos on those assault marine's helmets? If it's too much trouble then no big deal.
What are the torsos from? Thanks for post more pictures man, always a pleasure to catch your WIP and the final miniatures.
The torsos are mostly the ones from Forgeworld MKiV assault Squad. The sergeant is made from Death Company parts, and the combat squad veteran has a torso (the one with the armoured tabard) from FW's MKIV power weapons set.
Yeah, sure man, once I get to the helmets I can do a step-by-step.In any case I'll have to reconstruct the yellow recipe which I used on the Land Speeder crew. The mix I saved in a sealed airbrush pot has dried out completely. :( But that means I also have a tone sample of the base colour.
But I can't remember if I started from a black of brown under coat. I'll have to dig through my own thread to see if I mentioned it somewhere or not, lol.
In the mean time I've managed to black out 5 marines already. Damn, this is tedious, really a job where you have to force your mind to shut off...
Cool! I cringe over the dried mixed paint, never has worked for me, I get back to it and it's shot. I've resorted to a small Moleskin notebook for paint mixture notes and small sketches etc.
Do you have a local that carries Forge World or do you mail order? The conversion and price is huge to me as an American. Otherwise I'd be all over FW marines!!
@Kelly502: Well, being just across the Channel from the UK, I order FW stuff straight from FW. The shipping's not that bad that way.
Say but wouldn't it be possible to do a mass-order to the US? Above a certain amount there's free shipping, no? Or just slowly save up for one megalomanic Forgeworld orgasmatron!
@Giraffe: Ah, I assumed they would have a similar setup but that assault squad is the straight-up the MKIV assault Squad, not the Destroyers.
No progress over the weekend though, blacked out another marine or two on Saturday and Sunday went to the airshow of the Belgian Air Force to celebrate their centennial. Damn, saw some cool stuff. The F-16's were impressive as always, and the display teams were toight!. An F-16 poining his nozzle at you with full afterburn sure does make the hair stand up on your arms. And a Rafale doing a show pass at a ridiculous angle makes your bones vibrate to the core...
Too bad the Italian Typhoon and American F-15 wimped out and were only on static display. The Italian commentator during the frecce Tricolore's display was hilarious though, it was like being part of an "'Allo 'Allo" special.
So some pics from their site as my photos were bloody useless...
Looks like a little airfield seizure maneuver there in the one pick with what appears as troops on the ground.
Wow a Fulcrum!
Oh, about Forge World mass orders, I was a DCM here on Dakka, and that is a benefit of connecting with the other DCM's some of them get together and do a mass order. I need to rejoin, I need to give back into the Secret Santa this year, that was a blast! You get assigned a Secret Santa pal and find out discreetly what he/she is collecting or into, then try to give them something nice they can use, they do have an amount that is recommended to give in example the size of the parcel you are sending, but they don't limit it if you want to go overboard, going overboard in giving is always fun!
So being involved in a mass ordering of FW kits could occur if I rejoin the DCM crew.
Yeah, the assault demo was pretty cool. Combat landing and-take off by the herc (deploying an APC in the process). Agusta attack variant doing low cover, two pairs of F-16's doing top cover. Lots of smoke and noise and an incomprehensible commentator.
Finally, the blacking of details is done. I painted a two or three marines a day for a total of of 6 or 7 hours of painting.
Rather slow, but any care taken now makes it easier down the road. Even so, because it was so repetitive my concentration, and thus also my brush, slipped here and there but it's so little it will be easily absobed into the weathering later on.
I've just looked through this whole thing, and in a word: inspirational! Excellent paintwork and conversions making a great looking force. I'm about the be resurrecting my own BA, and this will be a great source of ideas.
Thanks guys!
@Paradigm: Glad you're along for the ride!
Alrighty, secondary colours painted in. Some touch-ups are needed here and there but I'll see how the oil paint was goes later on.
Currently they're a bit shiny as they have a coat of Klear on them, the decals are applied and received two coats of Micro Sol. Some stabbing and more Sol is needed to blend 'm in nicely.
So that means I can get started on the helmets so I can assemble the models and then they'll be ready for an oil paint wash and some weathering.
So, first coat on the helmets, Valejo's Flat Earth. I can't remember at all if I gave the speeder pilots' helmets a brown coat or not, so I'm going to leave it at this second coat, with some of the black still coming through.
I also found the yellow mix I had made for them in an airbrush jar, which apparently doesn't seal 100% anymore so well, erm, at least I have a perfect colour sample of the base colour to try and emulate again.
Alrighty, off the alchemy shed...
Agh I just love when that happens. Hopefully you arent too set back. I know how much of a pain yellow mixes can be to replicate!
So I'm really kicking myself for not popping in and reading through here sooner. Absolutely love your work. I always enjoy watching progress shots of minis. It really gives you insight into the painter's techniques. Maybe ill actually learn to do weathering.... You just make it look so easy!
Those single engine jump packs are the BA ones just without the wings, correct? I rather like the look of them that way.
Also, I'm particularly interested in how you do your golds... They have a nice muted, almost greenish tint to them. Mind sharing a bit?
In any case, keep it up, and I'll be looking forward to seeing more!
(Oh, and awesome Air Show photos... I have a particular fondness for jets, myself... Really have to find out when a show is coming through around here!)
@Ramos Asura: Cheers, mate! Welcome, stay a while!
Weathering is actually easier than it looks. Patience is the key ingredient as gradually adding up 'layers' is what makes it work.
There are quite a few extensive posts in here (only 17 pages at the forum's #posts per page at max ), but feel free whenever you have a specific question. I'd be happy to answer.
For the gold. Well, that was deceptively easy to be honest. As a base coat i use a +- 50/50 mix of Vallejo's Tin Bitz and their copper colour (basically one shade lighter than tin bitz). And then the magic trick is Vallejo's smokey ink. That ink is really thick, I just smear that on pretty thick on the gold/bronze parts (taking care not to soil the surrounding areas) and then... immediately rub it off with a finger in the desired direction. This removes the ink from the raised areas, leaves it in the recessed areas, and gives it a nice feather in the transition areas. And after then I just give it a two drybrushed highlights using two different GW golds.
And that's it. It's really the smokey ink and finger rubbing that do the trick. But you have to be quick and work one one detail at a time as you don't want to leave smears all over your model. But it's a method that goes really fast and produces great results.
The Sanguinary guards received a few more highlights, I went through all the golds I could find, and they received a thinned sepia wash as well. But the difference with my 'short' technique is subtle.
Oh, and on a different notes, check out these two photos from the airshow in Kleine-Brogel (The Belgian air base where the US stores 20-odd nuclear weapons). Last of the show was Al Fursan from the Arab Emirates. The screw they pulled across the runway... (high-res)
And alright, Meph. Ill take a peek through the history of this blog and see if I cant learn a thing or two
Brilliant technique for gold, too. I could have sworn you were using the Vallejo Alcohols- the base coats and blends are just so smooth! Awesome then, I think im gonna look ito the smokey ink. Has a particularly interesting color
The camera's colour balance does goes a bit haywire with such a big block of yellow, but especially the last row is pretty close to the true colour.
I think it took around 8 coats to lay down the base colour. Yellow's notoriously transparent, and then it needed to be thinned more for the airbrush, but it came out pretty nice. It's basically a 1:1 mix of GW's Sunburst Yellos and Golden Yellow (now thóse are some old pots, lol), and then thinned again to roughly 1:1 paint to thinner/Klear/demineralized water. Too much thinner would have faded the delicate yellow colour too much, hence some Klear and demin. water.
Then I drybrushed 6 consecutively lighter highlights on. Sunburst Yellow, SY+Vallejo's Ice Yellow, SY+more IY. Then cleaned the palette and continued with pure IY, IY+white, pure white.
Next up was a wash of 1:1 sepia and yellow inks, thinned to 1:1 paint:demin. water & some Klear. I mixed this with a tiny, tiny drop of dishwashing detergent to better mix the inks and the water. Especially the gryphonne sepia ink tends to be a bit too coherent and the detergent really mixing everything smoothly together. Tiny drop means the tip of a toothpick moist with detergent.
And finally they received a soft drybrush of Ice Yellow to lighten up the edges again.
I'll let it sit for a show while and then decide if they another glaze or wash. In any case they'll get an oil paint wash the colour will be deepened a bit by that.
So here's the last two steps before assembly. (I also updated the close-up photo strip)
Of course, I was a bit eager to glue them together and so I can do the weathering separately...
Aaand here they are stuck together with a coat of Klear on top. I'll have to redefine some edges here and there as the varnish muted it a bit. The sarge already received his freshen-up.
And then it's on to some light sponge-weathering..
Thanks guys!
I tried to emulate the yellow I used on the Land Speeders. Looking back at the WIP pics surprised me a bit on how pale yellow they were. It was clearly the oil paint wash that gave them the necessary depth.
The plan is to apply only light weathering, like some chips & scratches, as the previous infantry also received very, very little.
The terminators received the most of the lot, not counting the vehicles.
Now we need to see them finished... Basing? anything planned yet? Did you do the JP thrust ( you didn't show a pic you cheeky git ). Inquring minds want to know!
Cheers lads! Well, Monday and Tuesday I was lethargic and didn't touch the minis.Yesterday sponged on some boltguin metal (or the Vallejo equivalent in any case), and I gave 'm another coat of Klear.
And today after work I'll give them their oil paint wash.
I took some pics yesterday but I'll post them together with the ones I'll take after the oil paint wash.
That way there's a nice 'before and after'
As for basing, i'll base 'm the same as the rest of infantry. Some flint, some flock, some weathering powder, some drybrush, some weathering powder, and some flock;
As for the jet pack thrust, the new pics have some rear shots (Good spotting SL, hehehe), but I don't think I'll be airbrushing on a jet thrust. I've seen it done many a time and to be honest, the times it's done well are very few and very far between.
i mean, on first sight you think, woah, cool! But then you look close and see that those glowy effects make absolutely no sense at all... I mean, even a jet at dusk, with full afterburner lights almost nothing of the craft itself.
So mine will be just metalic drybrushed, nad weathered with some weathering powders.
Here's the continuation of the Assault Squad. A before, and after the oil paint wash. I'm doubting a bit if I should deepened the shadows on the helmets a bit, especially next to the top, erm, 'mohawks' or what would one call such an air scoop on top the helmet. And of course, the oil wash needs some cleanup here and there where it pooled a bit too much. I'm really such a fan of an oil paint wash because of the adjust and correct it.
That wash gives instant patina over any colour, innit?
Actually I have a hunch that a thinned oil paint wash might work similar as what's called 'Enamel Filters'.
From the description it sounds like it's pigment in a thin solution that fills the tiny imperfections in a coat of paint or matte, giving subtle hues. And that's basically what this wash does. Even on flat surfaces it adds some depth and texture.
Neat work on the marines, Meph. looking real good!
As far as the filters... I havent used the MIG ones (though they sound awesome!), butl I sorta use my own custom blend of black filter when I paint Red Scorpions. Darkens the overall colors, sinks to the recesses with a bit of finnagling. I imagine the MIG ones would work similar, if not better as they're gonna have more consistency than my mishmash of blends.
Ramos Asura wrote:Neat work on the marines, Meph. looking real good!
As far as the filters... I havent used the MIG ones (though they sound awesome!), butl I sorta use my own custom blend of black filter when I paint Red Scorpions. Darkens the overall colors, sinks to the recesses with a bit of finnagling. I imagine the MIG ones would work similar, if not better as they're gonna have more consistency than my mishmash of blends.
Cool, yeah, I think that they might be fun to experiment with.
DeathzHellShotz wrote:Mehp you inspire me to get my Blood Angels done, but i'm no way as good as you and then that makes me want to give up,
Cheers, mate! Ah, no, no desperation in necessary. My techniques consist mainly of drybrushing and washes. For the rest it's just patience and material choices.
Alright, decision time. I'm itching to assemble the HQ units but I'm stumped on the loadout.
First up is the captain. The power fist is a pretty sure thing, seeing as I gave the sarges power fists as well. The cap can't go running around carrying any less, now can he? I though of maybe giving him a gun, but it's visually less interesting than a big sword. But then which one?
I like the katana look of the two top one, plus they have BA iconography. The two bottom ones are from the Grey Knights kit and have a nice beefy feel too them.
And then there's the helmets. The three choices are;
-A Ravenwing helmet with antenna and wings on the forehead.
-A ravenwing helmet with a laurel wreath.
-A beakie with stud on the forehead, and then the plan is to transplant the spiked halo from the right helmet.
Next up is the librarian. For the left hand I think I'll just take the two-finger pointing arm. That's just too good-looking to ignore.
And for the right arm I definitely want to change the standard force axe by a force sword, in order to change the look sufficiently from the standard model.
I was thinking of one of either one of the three that are also on the short list for the captain, or either the BA sword held in a back hand pose. That's easily converted so there's only one hand on them.
And I can either mount a sculpted BA wing & drop or an angelic shoulder pad.
Hmm, for the captain I'd use the third sword down, and have it on a straight arm down and away from the model, as if he's holding it are rest while gesturing with the first. Having it pointing away sideways also adds width to the model's shape. I'd use the haloed head on the Cap.
The Librarian is harder, as again you want to leave the body open to convey power and importance, but all the BA ones cross the chest quite a bit. The backhand one might work, though.
Shortest one-handed blade. Power fist is an up-close and personal weapon and it makes sense to me that the supporting sword would also have to function at those ranges. Big, long sword would be too unwieldy.
That makes perfect sense, and got me thinking...
The main reason for the big swords was to optionally equip the character with the chapter relic blade, and possibly hoping on them being able to take a Glaive Encarmine blade in the upcoming codex.
To unify the two I could transplant the shorter blade on the second heft, the one with the curved hand guard. Hmm?
That could work, although I think a double edged blade with a protected grip might look odd, as there would be no way to really use the other edge.
If it's purely on the look of that weapons rather the arm position, I'd use the BA swords on both. If there's any game you can get away with impressively/impractically bit swords, this is it!
Alrighty, 'The bullet went through the church', as they say in Flemish.
For the Cap, I went with the blade with purity seal on the arm, and cut it below the shoulder to reposition it. I thought for a minute to position the sword off to the side, and down, but I went with up, and pointed forward instead. Seemed more dynamic to more or less be pointing in the same direction as the power fist.
And for the libby, I went with the backhanded sword, but removed the blade and transplanted the short-bladed force weapon on it.
I'll post some pics after work. The greenstuff's still hardening since yesterday evening (gs to fill in the mm the saw cuts removed from the arms.)
I still have to rebuild the heft on the backhanded sword, and start pinning the parts to corks.
I'm guessing these will be the most disassembled marines I'll have painted so far. Considering the posing, the legs and torso of the Cap will need to be painted separately to ensure access to the legs and loincloth. So that means I might as well paint the arms separately in order not to unbalance the torso sticking on a cork. And the head's already pinned to a cork for ease of access. Oh, and I need to prep a backpack with some bling, which will also be painted separately.
Ok, late though it is, here's my opinion on the captain and librarian
For the captain i'd go with the wreathed beakie head. Swordwise i'd take the top BA sword, cut off the blade at the crossguard and replace it with the blade of the GK falchion (also cut off at the crossguard).
That way you get a short blade with a long hilt.
For the libby i'd do that same thing. Take the BA sword with the nice big winged basket and lop the blade off, replace it with the blade of the GK sword.
Well, here's the as-is on the HQ units, temporarily stuck together. I'm happy with the overall poses, but as you can see I'm still on the fence with the helmets. Those Ravenwing helmets are just so nice and massive. I've actually used a wrong one, I also have one with the DA icon, which can be easily converted to a BA icon. I think I'll make the final decision when I've finished the cleanup of the arms so I can glue the shoulder guards on, and temp fix the backpack. And then see how the helmets suit the overall figure. But I'm curious as to what you guys think?
OK... guess it's everyone's turn to whine about the same thing. (sorry Meph)
With the reverse grip especially, the hand needs to be as close as possible to the blade. I know the Blood Angel symbol thingie is there... but it really looks odd. Get rid of the symbol, have the motor snug-up against his hand & then add a few scale inches of handle & a pommel.
Well, the libby's sword still needs its pommel. I'm hoping that will balance it out.
And yeah, the cap's sword is definitely too long. I've got the replacement blade lying ready already, but first up ahead is a work day. Curses!
Automatically Appended Next Post: And on the other note, I just placed an order on the CMON shop of 4 miniatures for our Warhammaer Fantasy roleplay crew. And to compensate the purchase cost and the shipping cost from Yankeestan to Belgistan, I went bananas and bought this one as well. Mainly because of the rumours that the Blood Angels will get a wheeled vehicle with their upcoming new Codex. Best to be prepared, no?
Ok, so I have never worked with an oil wash and am eager to try. One question, and forgive me if this sounds hopelessly dumb. Is the oil wash a clear type wash, or are there different colors. The results are outstanding. Also good choices on your HQ guys.
So basically it's oil paint from a tube with odourless turpentine. So you can get it in any colour you want.
Top tip, be sure to get enough odourless turpentine from the hobby- or arts shop, as you'll be needing to to make your wash, as well as clean your brush.
Well, here it is. I shortened the body of the melta pistol, as well as the barrel and it suits the fist quite nicely now. And the captain's sword got switched for a smaller blade.
This is just a temp assembly but I think I'll roll with this. I gave 'm both winged backpacks, for the librarian to distinguish him from the standard model, and to keep the captain in line with the rest of the army.
Probably I'll remove the bar of the hand guard of the captain's sword, it will make it look lighter and more balanced with the smaller blade. Oh, and a mold line to clean on the libby's left leg I see.
Well, it's a Sunday with nothing to do but anime and airbrushing. I'm already at basecoat layer three.
Fluent Japanese would come in handy right now. I'm getting whiplash from reading subtitles while painting.
Automatically Appended Next Post: Alrighty, first coats of paint are on, plus the first highlight. It's a bit rough here and there but it'll be toned down.
Oh, I will be actively fighting against GW tendency to go back towards full saturation bright colours they seem to doing again. Every new model they present seems to be so bright and cheerfully colourful. (Orks, Nurgle, Space Wolves, even the 'Dark' Eldar). That just won't do for me. It's a Grimdark future, not Warhammer 40-Ikea.
Oh gak yeah. That'd add an interesting twist to a match.
Do you go...
-Low model count but some assembly required.
Or
-High model count but push fit assembly.
Well, tadaaa! The models received their usual barrage of drybrushed highlights and washes & glazes.
I gave them a light coat of Klear to protect the paint during the next stages so it is a bit too glossy in the pictures, and they're just quickie photos.
Some more blue... I'd like to avoid a blue helmet, so he can't be confused with a Devastator.
I thought to do perhaps just the hood but decided I don't want to 'cut up' the look of the helmet with the psychic hood. Making the hood blue would 'separate' the two, ifyougetwhatImean.
I feel there will be more than enough colour variation on the model as-is. Plenty of metalics to be bronze on the whole model, with some silver details, and he also has a big lointcloth, which according to the Codex Astartes, I should be painting yellow with the black line & semi-circle of the Librarius (which is molded on the cloth).
That being said, perhaps the left knee pad, and maybe even those three bands on his left thigh might look good in blue, giving some nice counter-balance to the blue right arm...
Thanks guys!
The tedious blacking out has been done. I took some quickie photos.
After seeing them like this, the decision was easy; I'll make the tabbard blue with yellow markings, the left kneepad, and top part of his backpack. That should balance out the colours nicely I think.
The helmet still needs some pondering though. I'm doubting whether to paint his ear pieces black(and thus bronze) or not. Not to do it makes the halo look perhaps a bit too 'stuck on'. Making them bronze might make the rest of the helmet seem a bit wide perhaps..?
And I'm actually thinking about putting either a horizontal bronze band on his brow, or a vertical stripe across the helmet. The idea is to give it a nod to the old Rogue Trader rank badges, but because his brow studs the space is a bit too limited for the classic Captain's badge. Personally I'm leaning towards a vertical stripe broad enough so I can put a mini blood drop on his forehead. (The same kind I put on the combat veteran in my assault squad.) Whaddayathink?
Hot DAMN does the Libby look good with the blacks blocked in! Really really sharpens him up. Your plan for the blue areas sounds perfect.
As far as the Captain, The vertical stripe + blood drop sounds like a great idea. Love the homage to the old RT era art, even if Im too young to remember it From that image, though, I cant help but feel that the top two should be switched. The progression through the ranks seems to add more and more to the band, so I think that the captains should have a full band, rather than the sergeants. All imho, of course
Unfortunately I cant give any advice re: the halo. sorry :/ If I was painting it, Id leave the ears red, but I dont have any kind of theory or reasoning behind that.
Great poses on those guys, paint job is rocking as always. I'm all for the RT markings. Like I've said before, you've got the skills.
It's kinda fun to look back at the old RT book. We had marines of all ranks and branches, camo marines, even military police marines. I remember one picture describing marine mercenaries. Very heretical.
Yeah, the more I'm staring at that helmet, the more it starts to look appealing to put on a vertical stripe. It will really help to give the cap a unique look between the rest of the models.
My gut feeling says to make an attempt to mask the stripe using very thin strips of masking tape, but my practical sense tells me it will be next to impossible to get a straight line. There's just nothing like the 100% crisp line of a masking tape compared to any freehand. If i can't get the tape right, the only solution is to test my über-ohm-zen-sniper-jedi-fu breathing skills to paint straight lines between heartbeats.
Love the shading on the tabbard, very muted and understated but I think works great. Not totally sold on the stripe down the beak, I perhaps would have only had it on the top of the head, but that is only my opinion.
Yeah, I'm getting eager to see him assembled. I'm hoping to finish all the secondary colours this week, and by doing so, the phallus will be even more disguised!
I like the stripe, but I would have done it in an off white for a more drastic look. Plus break up the red and gold and draw the attention to the head.
Ah, nice idea. That would look great actually.
In any case, the stripe will be highlighted up to gold, and I think the khaki tabbard, plus the unusual shape of the torso's 'collar' will frame the head nicely.
I'll look forward to it and the Libby. Intresting concept with just the arm. I nnow I'll be amazed by the paint job , just want to see how the concept works when finished.
Me too. The secondary colours are inching closer to completion. I'm currently working on all the gold bits, and then i still need to tackle to the two swords. And the they'll be ready for assembly!
Secondary colours and assembly complete! (The lenzes and gems will come last.) Maybe some tiny touch-ups here and then and then I can prep 'm for the oil paint wash.
Alrighty! My apologies for the lack of responses. Just went through a two-week painting torpor induced by some work and RL issues. But here and there I managed to squeeze in enough time to finish the Captain and Librarian, as well as base them and the assault squad.
So wizout further ado, ze photographs, yes?
The libby and captain both look fantastic. Good choices in regards to the swords. They fit really well. The gold stripe on the captains head has grown on me since you first did it.
I especially like the marine who has his head down, sword pointing forward. It's a great pose.
Snrub wrote:The libby and captain both look fantastic. Good choices in regards to the swords. They fit really well. The gold stripe on the captains head has grown on me since you first did it.
I especially like the marine who has his head down, sword pointing forward. It's a great pose.
Cheers, mate! Yeah, I'm really happy how they turned out. I'm personally especially proud on how the power fist & melta pistol look, as that was quite the fiddly business to shorten it enough fit on there.
Hehe, and that marine really does have a 'You're next'-pose, doesn't he?
Hey meph. If you don't mind me asking what color reds do you use? I love that they're red but not cartoony like most ba. Also these are looking so awesome. Love the converted Libby.
Thanks guys, it helps the motovation! So I decided to dig up the cardboard box that was holding this metal bawx. I felt the need for some frantic drybrushing, but almost got a heart attack after masking so many tiny bits of masking tape. The 'X' is not perfectly 100% but I stuck to a nice middle ground between zen-style-, tongue-sticking-out-, belly-breathing practice of patience and -control, and throwing that thing out of the window and watching fly over the horizon with a renewed sense of peace and justice.
The Metal Bawx is magnetized so it can be run as a Rhino, Razorback, or Baal Predator.
Thanks guys! I'll see to get some more WIP pics later today. I'm working my way through the secondary colours, and evenifIdosaysomyself, it's looking mighty spiffy with some bronze & kakhi already added.


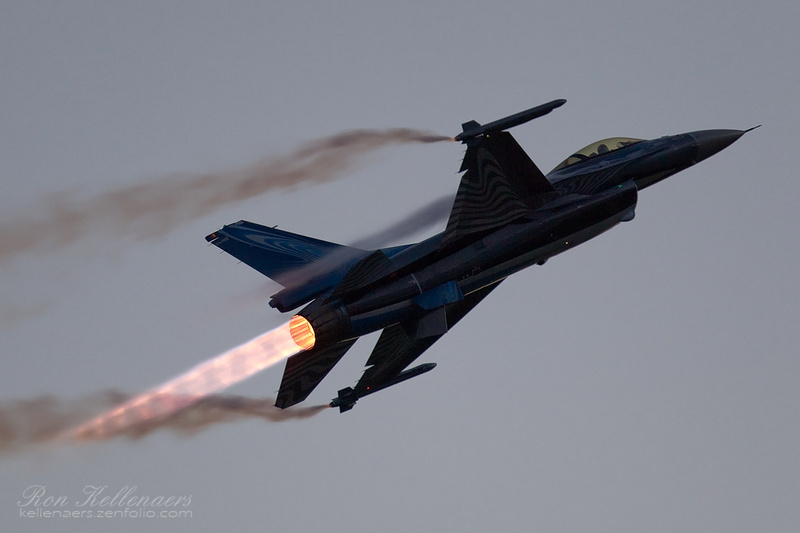


.jpg)


