An Article by MajorTom11
Spray Seal Hell
Some of you will have felt the searing rage that comes along with going from this -
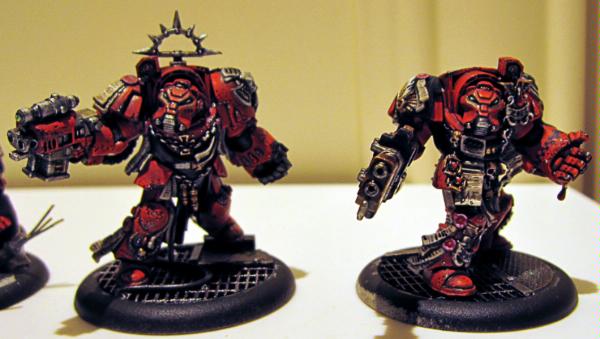

to this -
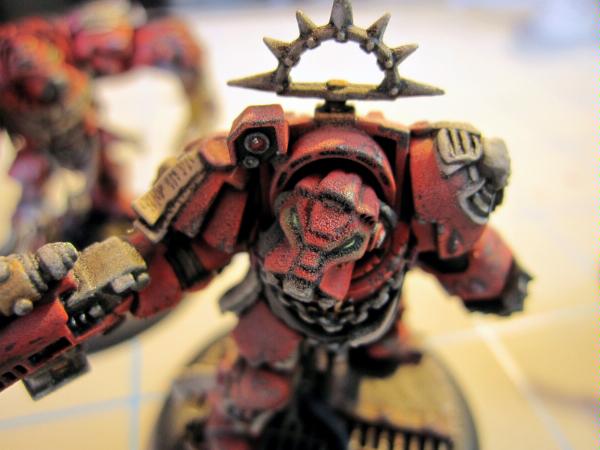

Spray Seal Hell.
Why does this happen?
There are many reasons this can occur, but the main culprits will be technique, temperature and humidity. If any of these factors are off, the sealer could begin to set before it hits the model, resulting in the frosted glass grainy texture you see above.
How can I avoid it?
Refer to the instructions on the can is of course most important. However, in general, you are looking to be spraying in temperature of 10 to 24 Celsius, on a nice dry day. You want to spray from a distance of about 9-12 inches or so, in long, even strokes. Spraying should both begin and end not on the model, get the flow going, move the spray over the model smoothly, move it off the model and cease spraying. This is to ensure that the spray will always be perfectly consistent.
If you have a basement, and you know the house will be clear at some point during the week, wait til then, spray inside (after all, your house's environment is controlled and predictable) and then open a window after about 20 mins. This is a pretty viable option if you are only sealing a few models and you know no one will be getting upset at the smell! (which should be gone in about an hour).
NOTE: Ask your parents, wife, kids, roomates before spraying inside!
How can I fix it?
I panicked when it happened to me. It was only 5 models, but these are models that I spent literally 100's of hours on so you can imagine I desperately searched for ways to fix the problem short of stripping them.
Enter Dakka.
The suggestions that didn't work.
I received plenty of options on asking, ranging from re-applying a brush on sealer, applying alcohol, applying white spirits and applying acetone. The intention with the last 3 (alcohol, acetone and white spirits) was to slightly melt the sealer and allow it to reset, theoretically smoothing it and clearing it to acceptable levels. Now, as a caveat, the helpful people offering the advice clearly had these things work for them. Unfortunately for me, they did not. There was a very minor difference with white spirits, but not nearly enough to save the models. Brush on sealant also did absolutely nothing.
What did work?
Just as I was about to give up, I got one new suggestion. Spray them again with Gloss sealer.
Seems a bit counter-intuitive right? I mean these were matte coated, which is a thinner sealer, and still got ruined... why would gloss help, especially when the brush on version did nothing?
Well, the answer seems to be a combination of 2 things. 1, the thinner present in the medium of spray gloss sealer, and 2. the nature of gloss itself. The thinner seemed to do a better job melting the frosted sealer than any of the actual solvents, and then as it reset, the gloss itself seeped in to all the nooks and crannies. You will instantly see a difference after applying the gloss sealer. The best part is, you can restore your intended matte finish by simply spraying matte sealer on top of the gloss!
Saved Models
The results speak for themselves -
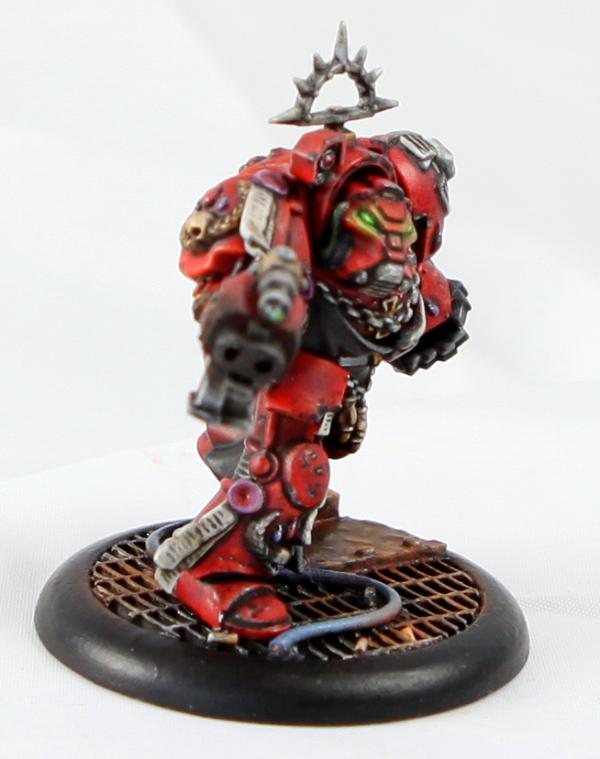
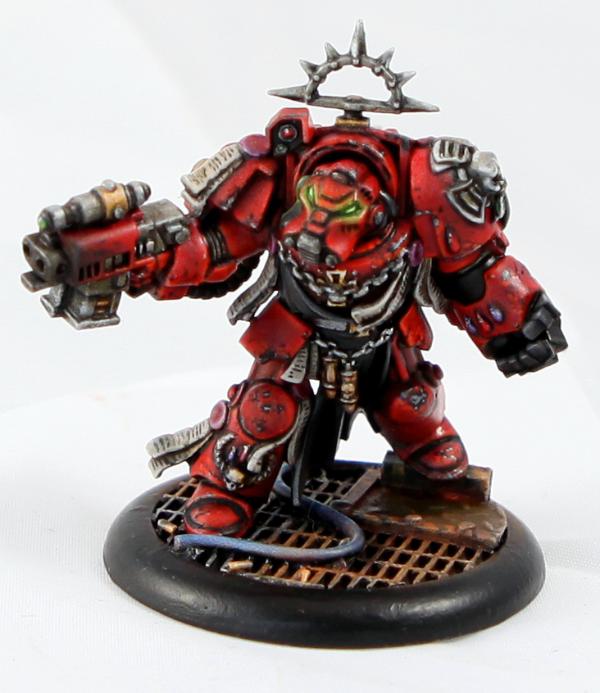

A caveat must be given here... this may not work for you. I am sure there are instances that are in fact irrecoverable. However, I do 100% believe this is worth a shot!
Summary of Steps
The specific rundown, just in short -
1. Wait 24 hours after disaster occured
2. Spray with Gloss Sealer (I used Testors) in the right conditions, dry, 10-24 Celsius, if you can swing it, do it indoors in a basement for example.
3. Wait 24 hours
4. Spray with Matte, or, if you want to really play it safe, use brush on matte varnish.
That's it! Good luck and may the Spray God's smile on you!