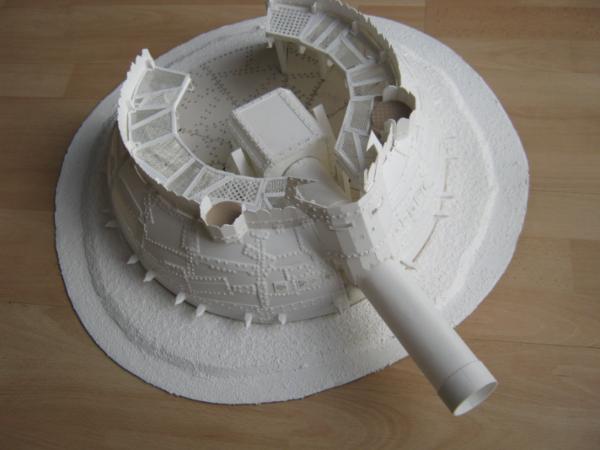
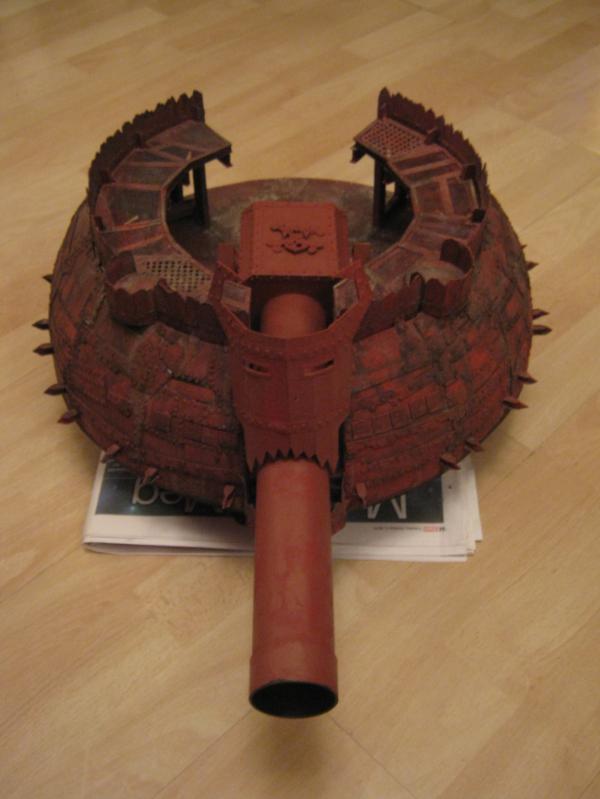
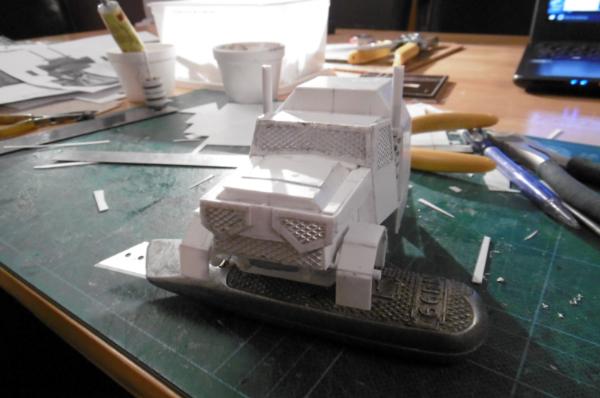
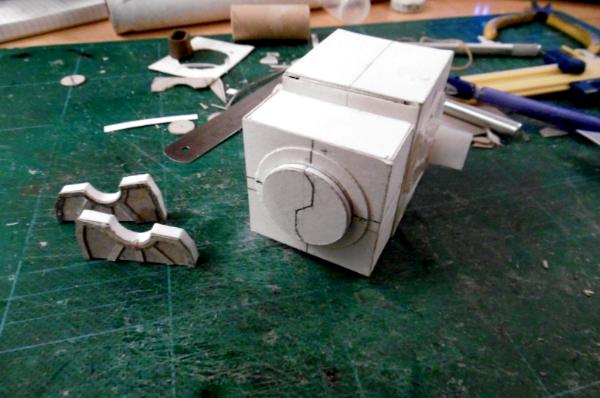
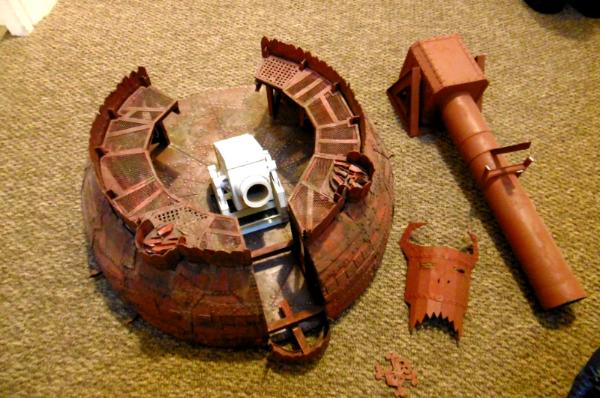
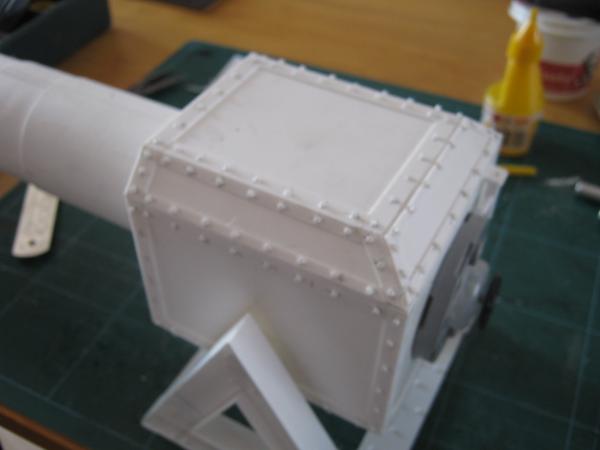
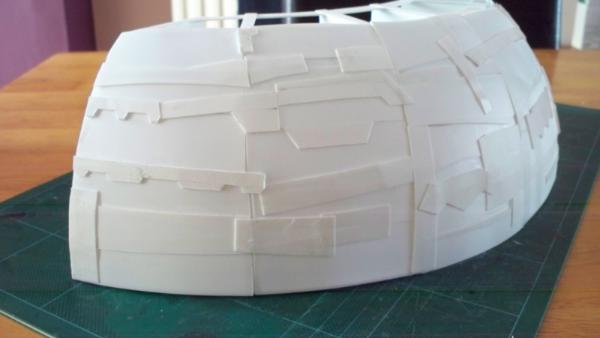
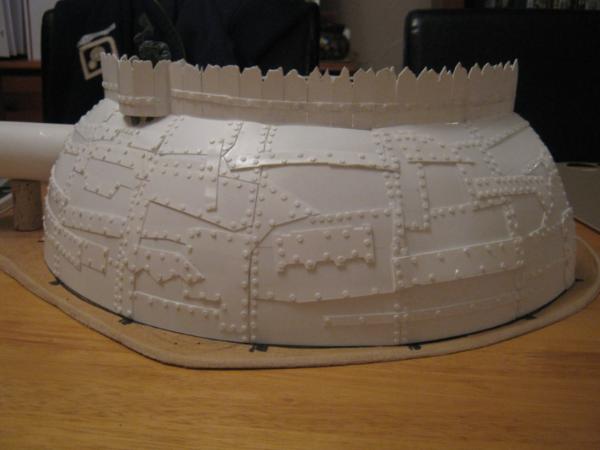
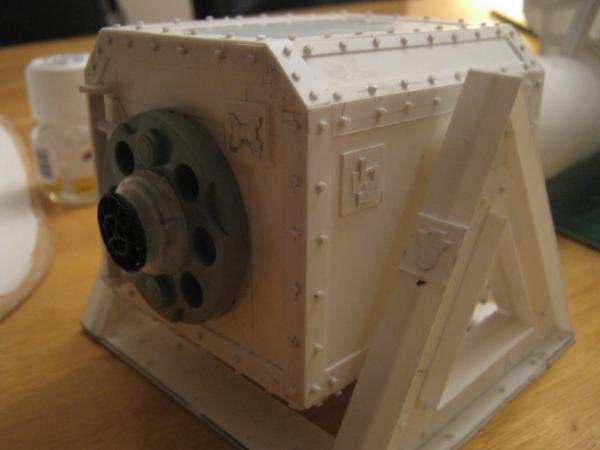
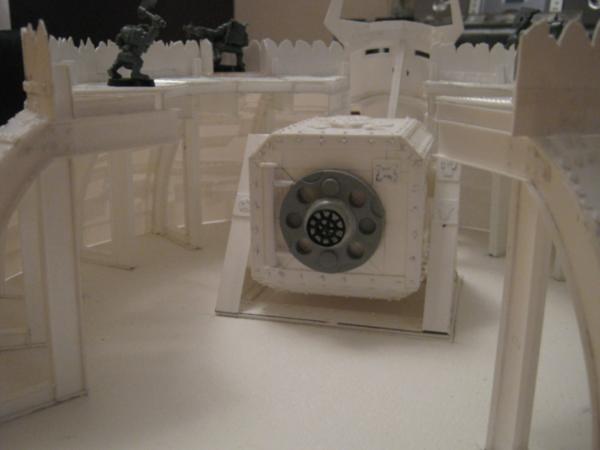
The only problem is it's not looking very Orky at the moment, but give it time... The first draft fluff is that the Orks have looted this gun from an Imperial warship or battlecruiser which explains it's a nice neat edges and well spaced rivets... I will add some orky effects like glyph plates and stuff though to mess it up a little
i have the compass cutter too... i hope you can work better with that than me... i always produced rubbish with that...(ok... mine is red... but there you go)
and... is that really you ruglud???...LOL... what a brilliant idea!the amount of bling is probably just right!
Viktor von Domm wrote:i have the compass cutter too... i hope you can work better with that than me... i always produced rubbish with that...(ok... mine is red... but there you go)
and... is that really you ruglud???...LOL... what a brilliant idea!the amount of bling is probably just right!
Here's hoping i have better luck Vik...
Nope, not guilty on the costume - i did once have a cool terminator costume, will see if i can find the photographic evidence of that...
I'm planning to stop by the local Hobbycraft in the morning as gotta pick the kids up after they stayed at Nans house for the night (was our 14th wedding anniversary so had a meal out tonight). I know they stock Evergreen which is pricey per sheet, but want to see if they have any embossed stuff and how much it is. May also get some 0.8mm plastic rod as I'm pretty much out of that and it's my current weapon of choice for rivets
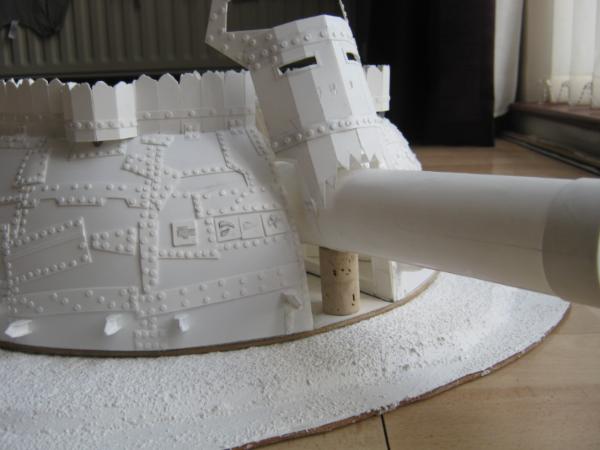
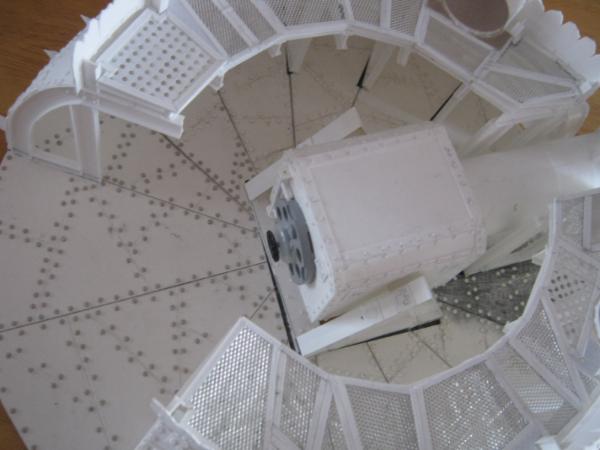
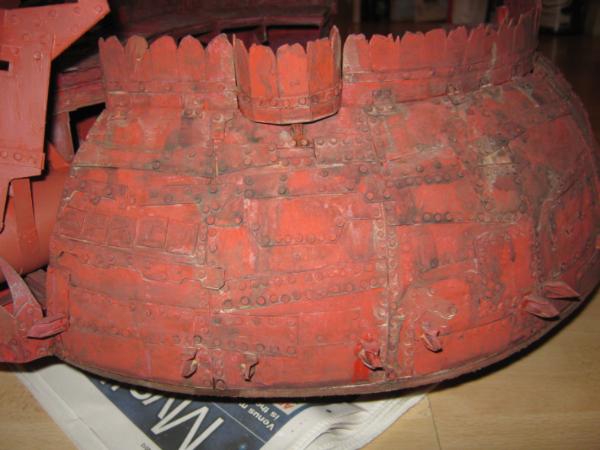
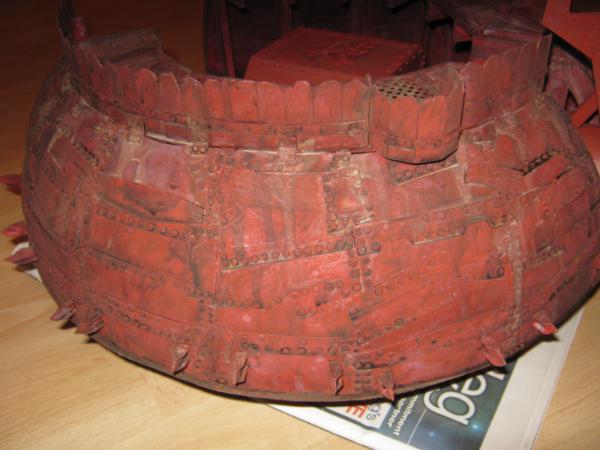
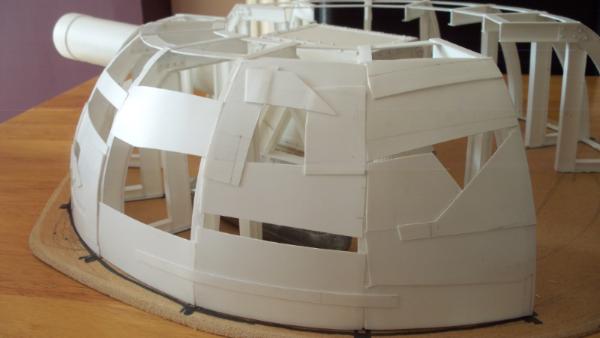
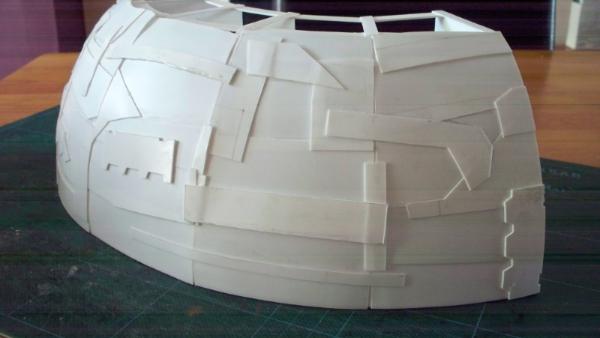
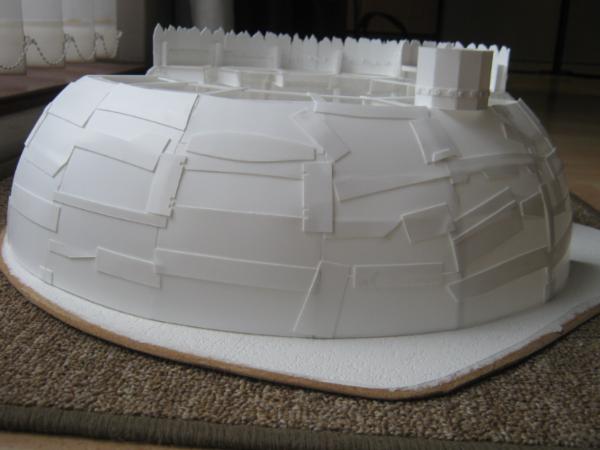
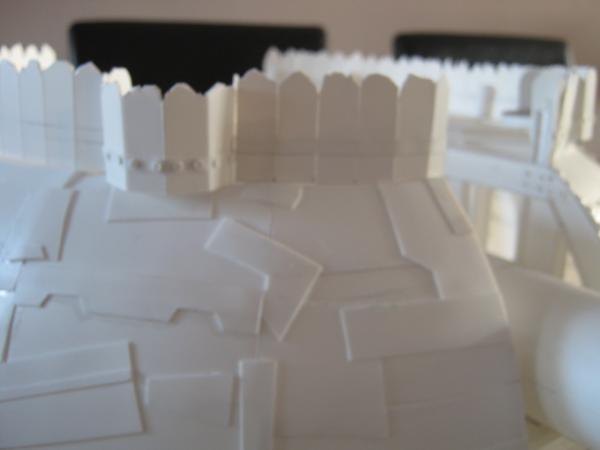
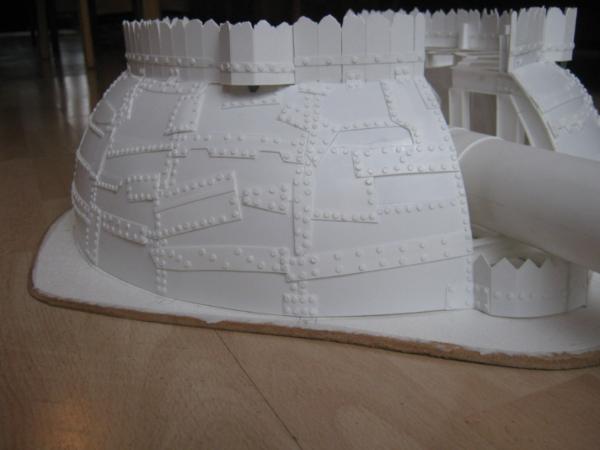
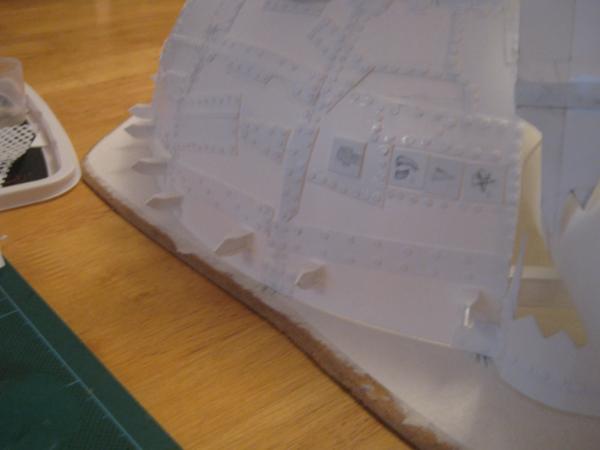
Started to sheet the exterior with armoured panels - otherwise known as 0.5mm plasticard. I had previoulsy put some 0.25mm plasticard on this with the intent to build up the panel effect on top, but realised it would look wrong from the inside, so stripped that back and instead went with individual plates, strips, etc...
Half way through and I knocked my pot of plastic glue flying - wasting half of it in the process and ruining many useful pre-cut pieces of plastic. Also managed to take the guide lines off the top of the cutting mat where I wiped up the spill
@ Theo, yeah I have an ice cream tub full of of plastic scrap, no ice cream though...
@ Spruemeister, Pretty? Pretty? Your infatuation with plastic is affecting your brain... I do though still need to roughen the panels up. Maybe also add some murder holes for the horde of grots that the Big Mek has working for him
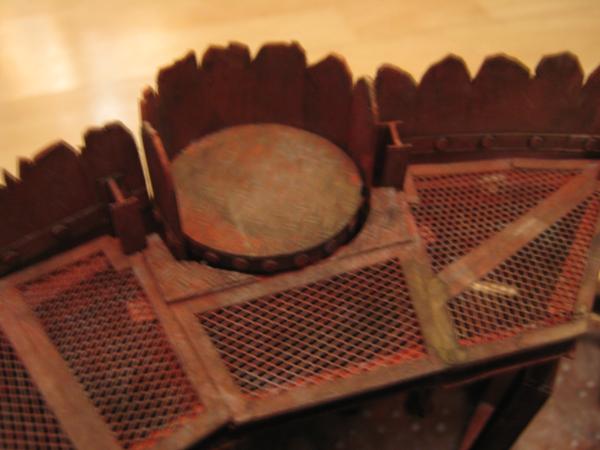
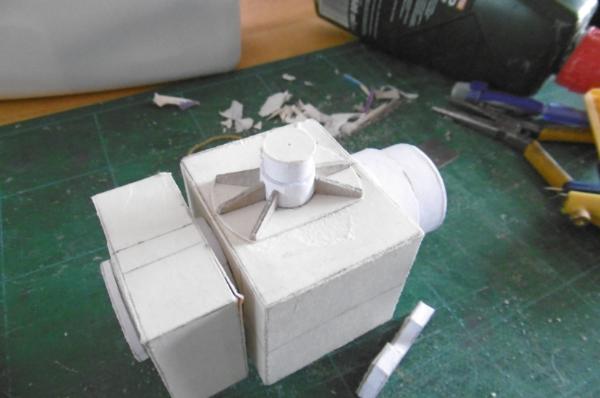
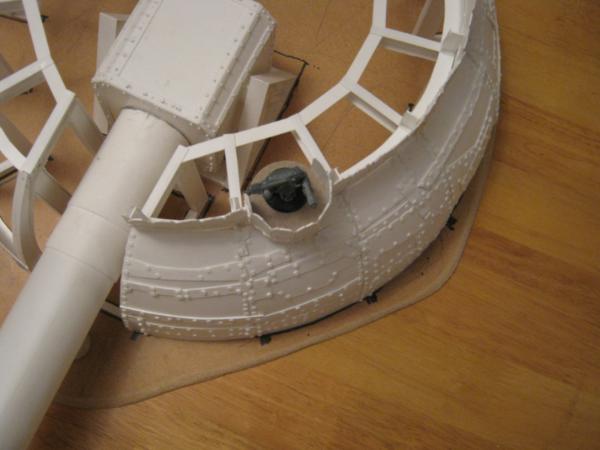
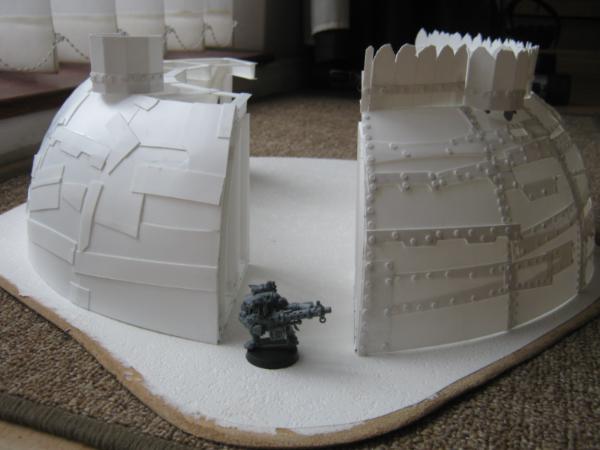
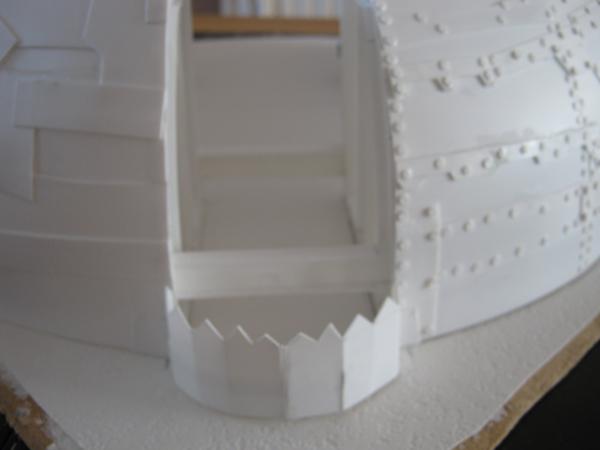
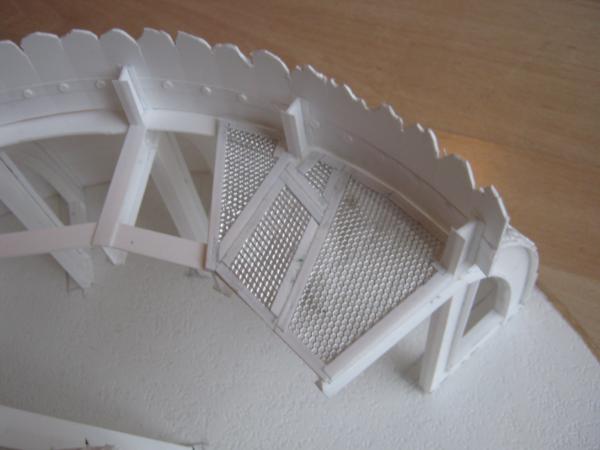
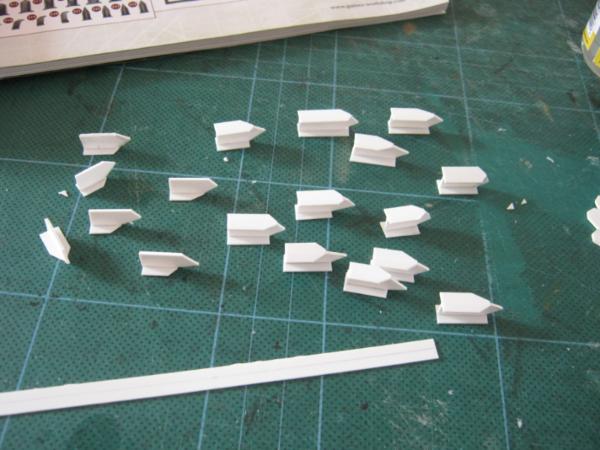
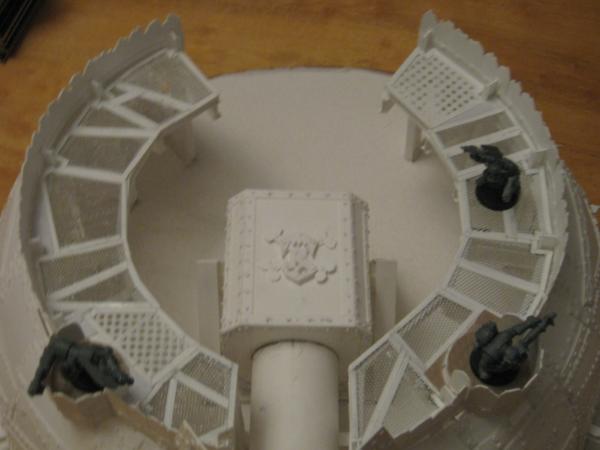
WIP on the firing platform and mini turret for the one side that I have armoured so far. Still need to put a walkway on the firing platform, going to use some wire mesh for this
Oh and here's the gun turret for the other side, still a lot of work to do though...
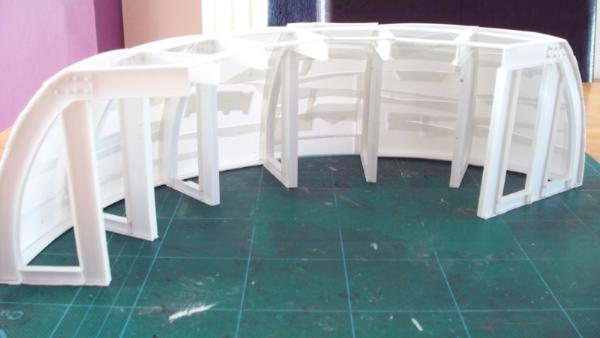
Largeblastmarker wrote:Those are some pretty great I-beams.
They are scrathbuilt and I'm also very impressed with how they turned out
Camkierhi wrote:Now that looks just about perfect, Brilliant.
Thanks Cam
So no updates as busy re-covering wardrobe doors since the weekend. Hoping to get back to modelling duties tomorrow morning though. Bit concerned that we are fast approaching the deadline on the contest - I may need to lobby for an extension to the date :(
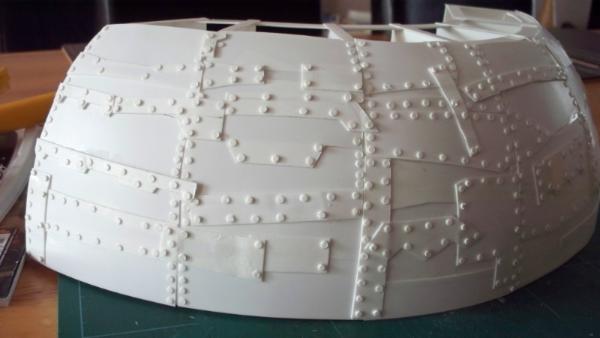
Bloody hell... And no mistake... That riveting sure marksyou yet again as a true riveteer! I like the additional fortifications! Makes the whole so much more convincing!
Da un o Da nuva-Ork. One shot from that hold do it of course after each shot a team of grots will be needed to go tighten all the rivets loosened by he overpressure.
Ha ha right, I think they'd be lucky if the whole thing doesn't explode on the first shot, with the shell still in the breach and the Mekboy standing there, scratching his head in puzzlement and not noticing that his clothes are on fire...
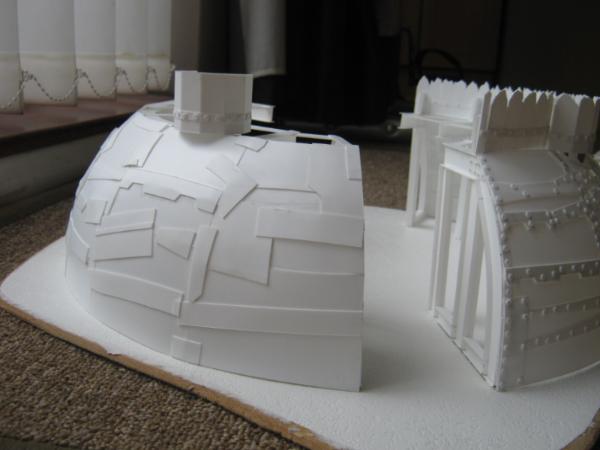
while the second side looks awesome already...
i see light seeping through the thin walls...... somehow that looks funny...of course nothing will be seen later on...once paint hits this hughe ...something
Ok Ruglud, when I was trying to come up with an idea for the comp, I thought about a huge gun, but the firing pin had to be hammered home. Sooooo I thought of a queue of Grots carrying big hammers. And a greasy red stain where the last grot hit it and the recoil squished him. Thought I ought to share as your model is rapidly becoming the most epic build I have seen in a while. It will look truly awesome, and Not sure if this idea would fit, but I really loved it.
Theophony wrote:Fires one strength D shot unlimited range, also every model on the table takes a strength 4 hit ap - as shrapnel from the gun hits everywhere.
Dese is da 'fishal rulz
Viktor von Domm wrote:while the second side looks awesome already...
i see light seeping through the thin walls...... somehow that looks funny...of course nothing will be seen later on...once paint hits this hughe ...something
0.5mm plasticard - thin but damn easy to scratchbuild with Da paint boyz will fix da flimzy walls
Camkierhi wrote:Ok Ruglud, when I was trying to come up with an idea for the comp, I thought about a huge gun, but the firing pin had to be hammered home. Sooooo I thought of a queue of Grots carrying big hammers. And a greasy red stain where the last grot hit it and the recoil squished him. Thought I ought to share as your model is rapidly becoming the most epic build I have seen in a while. It will look truly awesome, and Not sure if this idea would fit, but I really loved it.
Thanks mate, that's a cool idea - sad part is the only greenskins I own at present are those from the AoBR set - and all unpainted
Viktor von Domm wrote:what a bloody imagination you have cam....
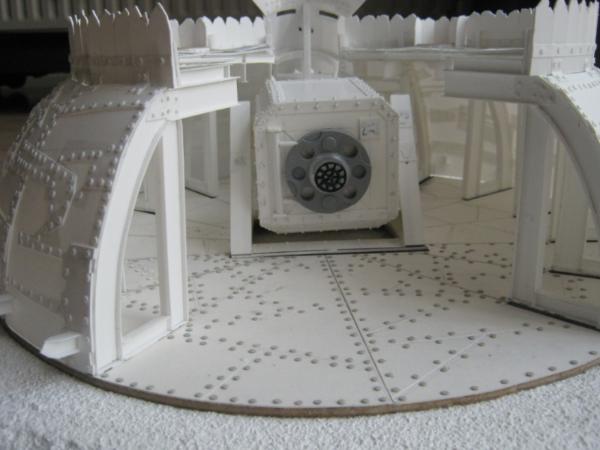
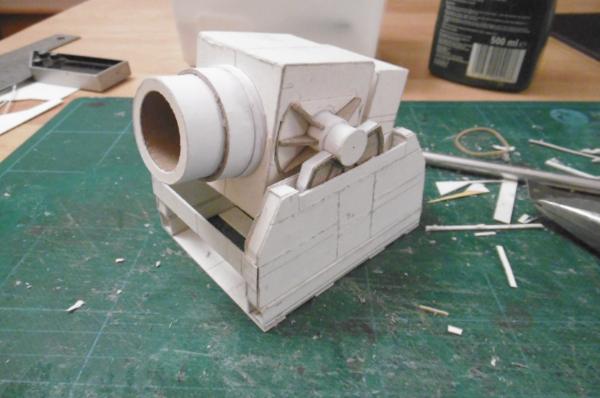
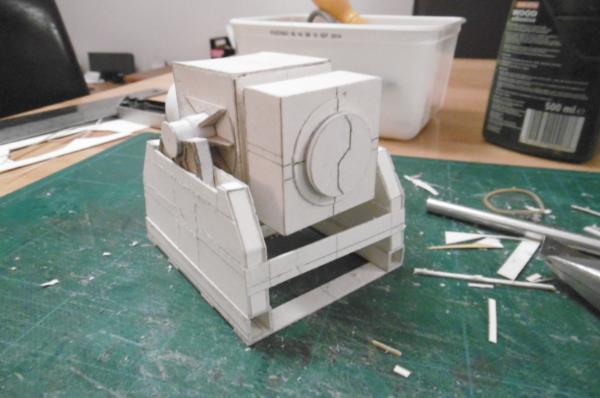
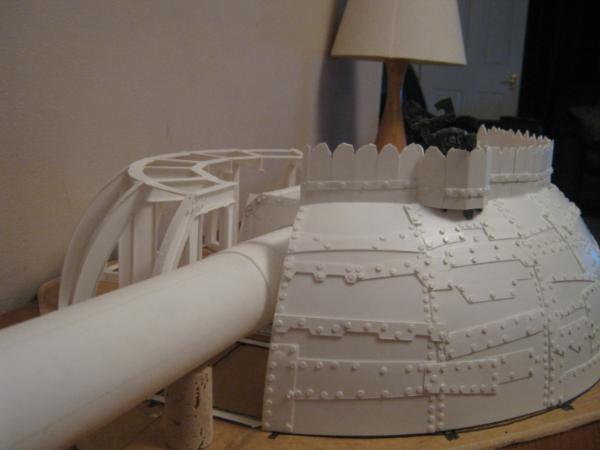
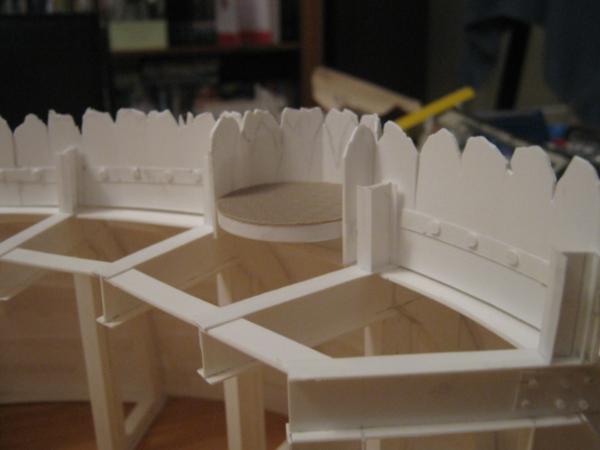
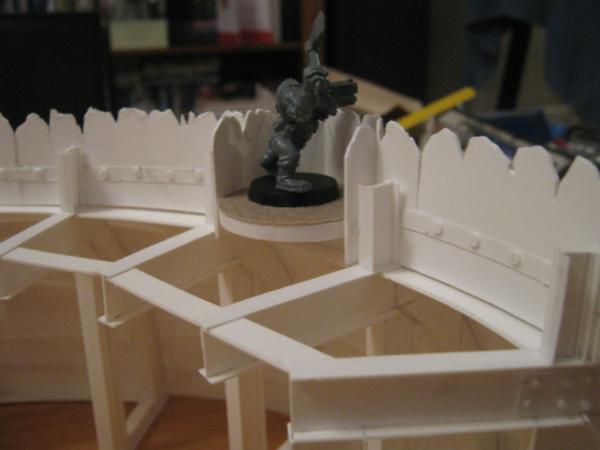
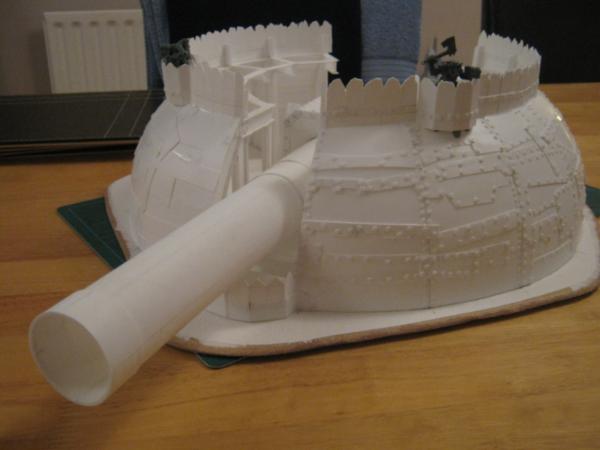
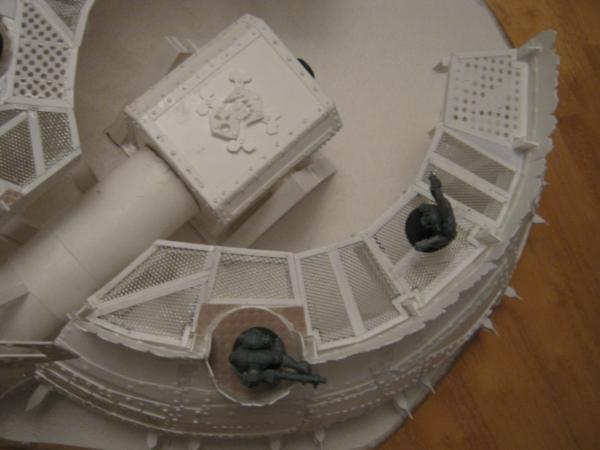
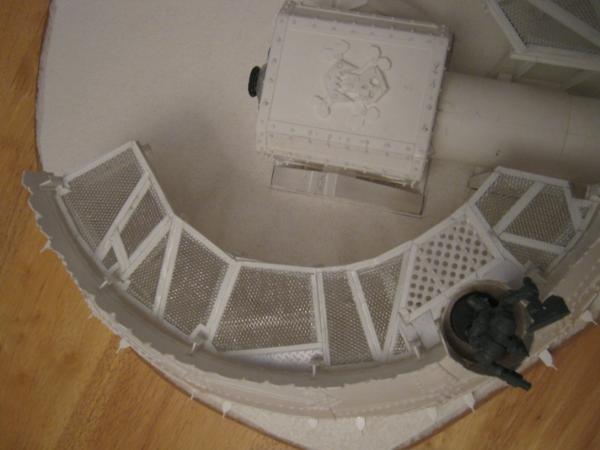
For now I got the second side battlements sorted and glued in place, then created some more I beams and used them as a barrel stop / rest. Also added some armour plate Teef at the front to keep the enemy out...
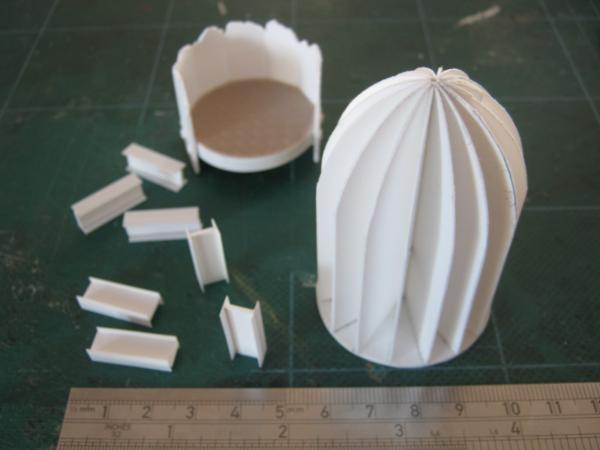
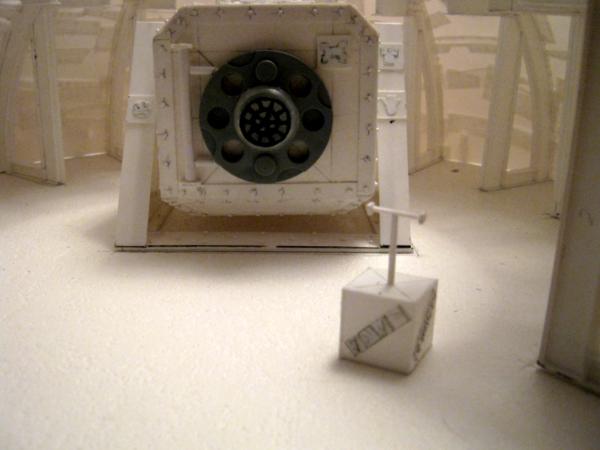
Lastly, I've started to make a prototype for the shell...
Someone thought my current tank had a difficult shape... Boy was that fella wrong... Ruglud you are plain crazy... To make a shell this way is amazing...and ridiculous...amazingly ridiculous...wow
... But that she'll now needs a crane...or an army of grots....probably both...sheeeesh...some peoples ideas...
shasolenzabi wrote:what will the walkway boards be?
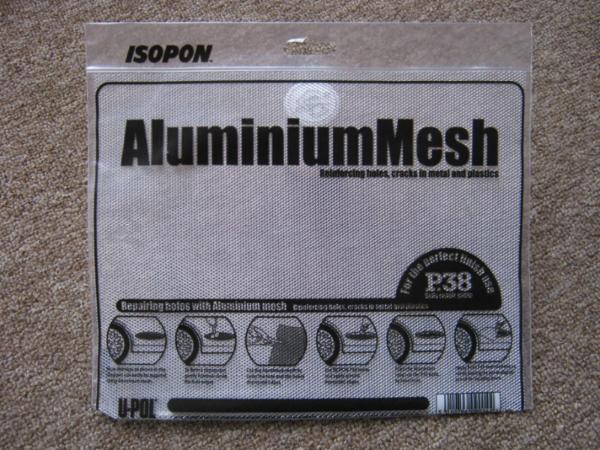
Thinking about using aluminium mesh for this, will give it a nice texture and mean that I don't totally cover up all the detail work underneath...
Viktor von Domm wrote:Someone thought my current tank had a difficult shape... Boy was that fella wrong... Ruglud you are plain crazy... To make a shell this way is amazing...and ridiculous...amazingly ridiculous...wow
... But that she'll now needs a crane...or an army of grots....probably both...sheeeesh...some peoples ideas...
The shell was to get right, this is the second attempt - I did consider using a piece of wooden dowel, but as it's 40mm diameter it would have taken ages to shape the end into the cone shape...
As for the loading of the shell - I have a few ideas, but as I don't own any grotz, it will need to be 'mekanikal' This may not be completed until after the competition though
Right, I'm of to manufacture rivets before work - thousands of the little
Steady hands! Make a milion rivets For getting the shells shape, pencilshaper? Probably your kids had these bigger ones too for those colored pencils (forgot the correct name...) 40mm probably not the right caliber fir any pencils
Viktor von Domm wrote:Steady hands! Make a milion rivets For getting the shells shape, pencilshaper? Probably your kids had these bigger ones too for those colored pencils (forgot the correct name...) 40mm probably not the right caliber fir any pencils
I didn't get any rivets punched - too busy watching reppeats of Top Gear on Dave (tv station not dsteingass)
hk1x1 wrote:This just gets better and better every time I see it , plus you seem to be moving at quite a steady pace now.
Thanks Hk, I'm getting there slowly I feel, but progressing none the less...
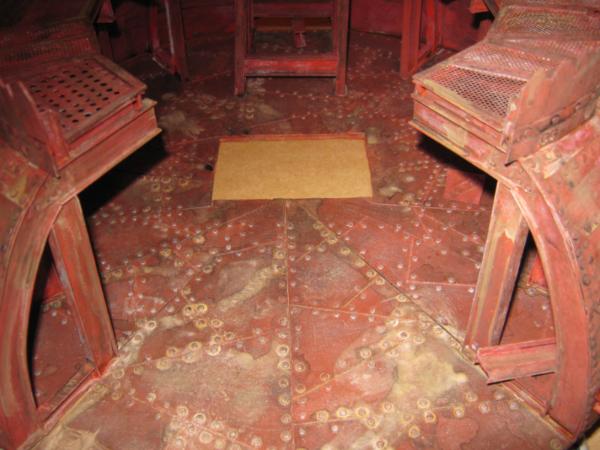
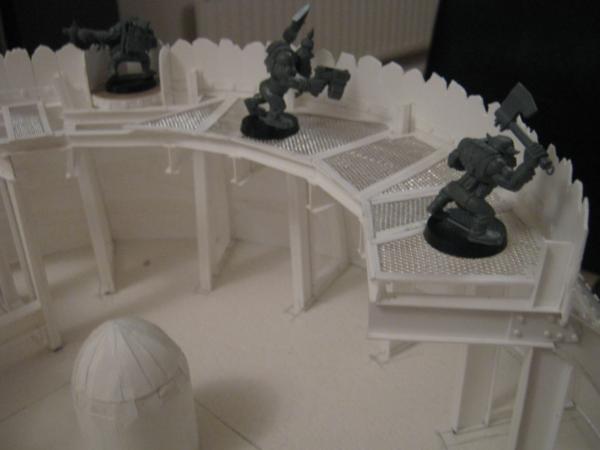
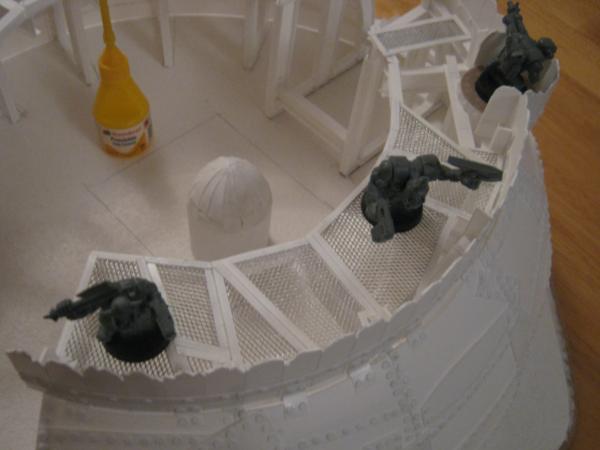
Theophony wrote:It looks great, especially with the grates , I do wonder how you'll get he inside of it all painted with the layers. The rivets though steel the show.
Cheers Theo. It's not fully glued down yet, I'm hoping that will make it easier to paint the inside and underneath of the structure and the walkway is also currently removable (when I finally reach the paint stage that is...)
Got back from my business trip late on Friday, then we had our daughters 13th birthday party followed by a sleepover on Saturday, into Sunday...
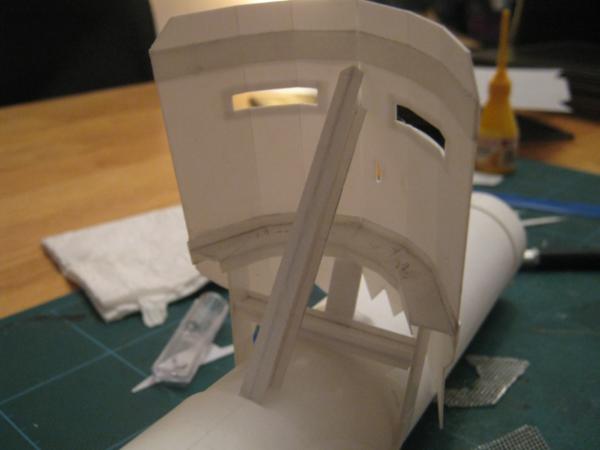
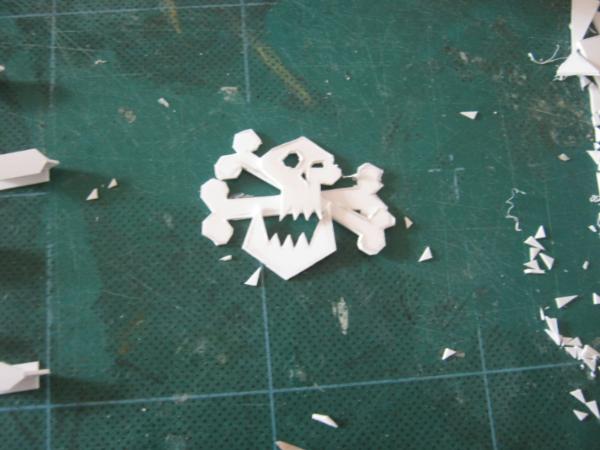
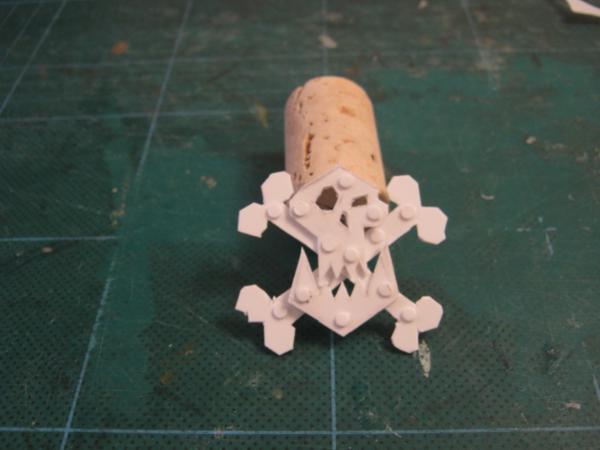
Finally got some time though this afternoon to have a play around and managed to add a faceplate / armour shield to the gun and some glyph plates... Either side of the gun reads : BIG BERFA in glyphs. Then there are some on the gun and it's mounting...
While looking at the pics again, I was wondering if your going to make a targeter position behind the big Ork head? The orks could look through the eyes, and the grots could look through the nose.........
"what's that coming out of its nose?"
"Space balls"
"We'll , there goes the neighborhood."
i am telling no stories here... that really sends shivers done my spine... the icon, the mask... wow... you are doing a wonderful job here!!!...this project has a soul!!!!
Had to quickly post this... Check out the latest LEGO Cuusoo product to go into production - LEGO Exo Suit and I really hope they use the classic LEGO SPACE figures on these...
Okay, so I have come upon the realisation that I've made a serious error in my gun emplacement. I have a gun that can adjust it's trajectory of fire (i.e the vertical / up & down movement) but there is no horizontal movement - that is it will only ever fire in one direction (or on One Direction, hopefully...)
Now, this makes me sad as while this piece is an ideal siege weapon, it's no use against a (slow-moving) moving target such as a Titan.
So, I find myself contemplating a major design change at this late stage - that being, I am going to have it sitting in a sunken pit with a rail system or something similar that allows the entire emplacement to pivot on it's central point.
Basically, in modelling terms I need to now go crazy with manufacturing more i-beams and rig up a raised base for the armoured walls and Berfa herself, then alter the exisitng base so that it incorprates a shallow pit...
So enough waffle and time for some serious A-Team style action... cue the music as I move to the welding machine (or plastic glue in this case...)
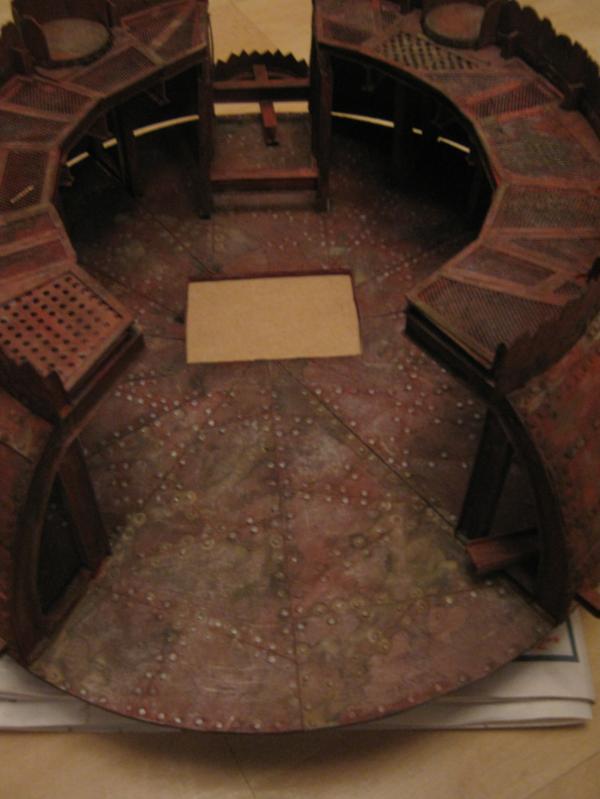
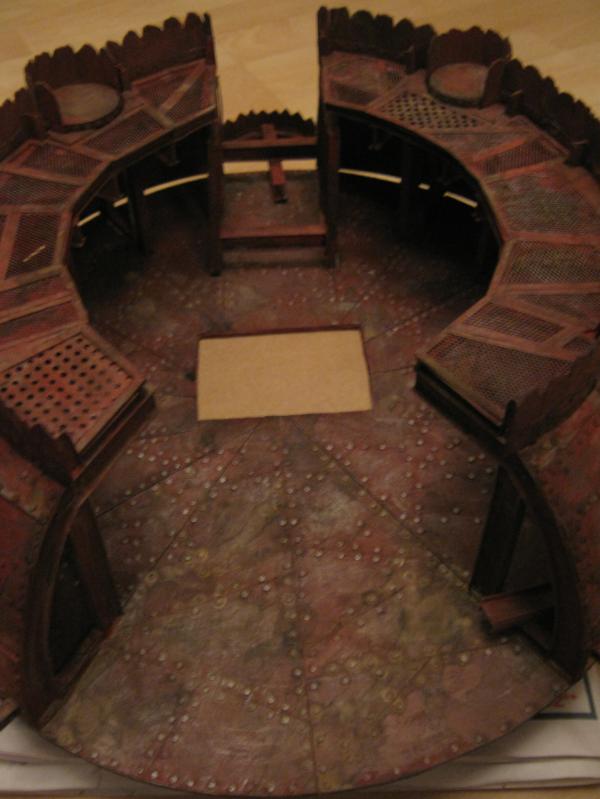
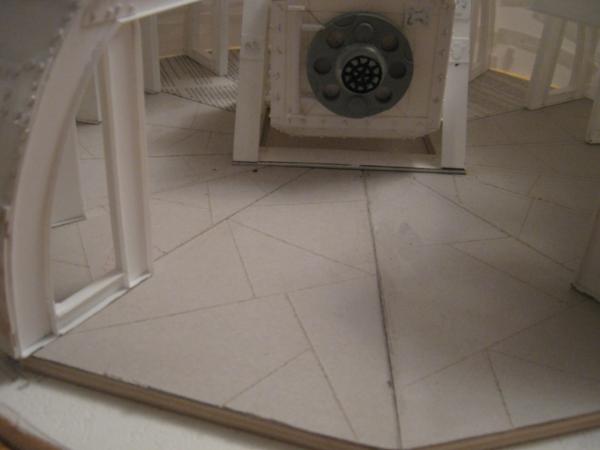
Forgot to take photos during the frantic build process, but here's the new flooring on a raised platform.
Ended up using 9mm square strip wood for the framework, rather than scratchbuilt i-beams, then with cereal box card made the basic metal sheets for flooring and scored them up to resemble smaller plates. Will need to add some more rivets though...
Oh poor fella, now that you mention this it seems obvious, but rest assured we all didn't think of this dilemma too... But you are coping with this very well I see! This will be an awesome gun...will it look pivotal or be pivotal?
Totally do not want to put pressure on, but you have to finish this for competition, it is so awesome it's my winner hands down. BUT no pressure! You have to do her justice. She is soooooo beautiful.
Viktor von Domm wrote:Oh poor fella, now that you mention this it seems obvious, but rest assured we all didn't think of this dilemma too... But you are coping with this very well I see! This will be an awesome gun...will it look pivotal or be pivotal?
Thanks Vik, yeah, the idea is that it will actually pivot so is fully usable in a game of Apocalypse or as a special objective - i.e. destroy the gun before it has turned a specific distance...
Dr H wrote:Yeah, I didn't think of it until you said. platform looks good.
Looks like we all got lost in the detail...
Camkierhi wrote:Looking awesome.
Totally do not want to put pressure on, but you have to finish this for competition, it is so awesome it's my winner hands down. BUT no pressure! You have to do her justice. She is soooooo beautiful.
Cheers Cam - no pressure !!
Littletower wrote:Looking amazing, and although I see your point, I'd be unforgivable not to finish her in time
Keep going!
Thanks LT - Berfa will be finsihed just maybe not in time for the competition
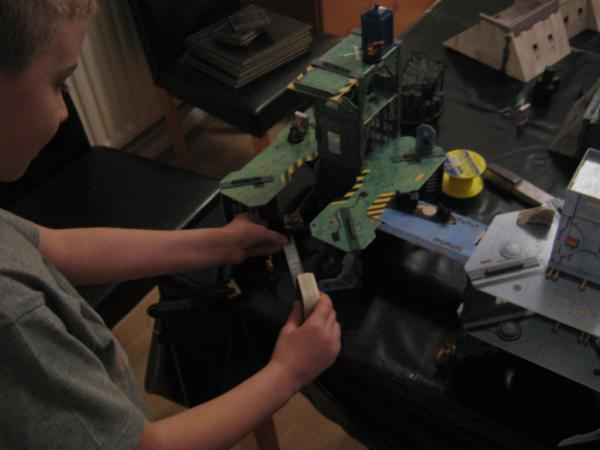
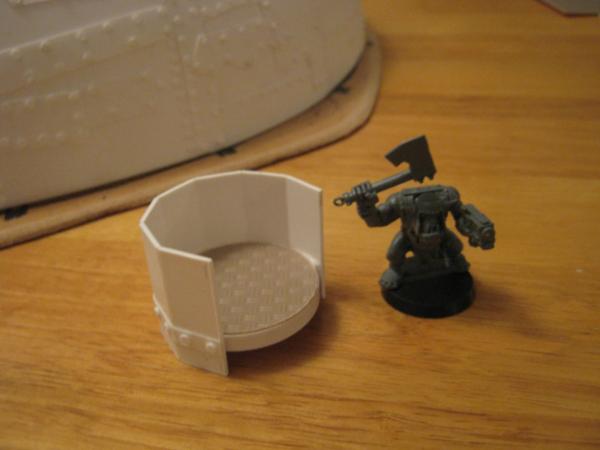
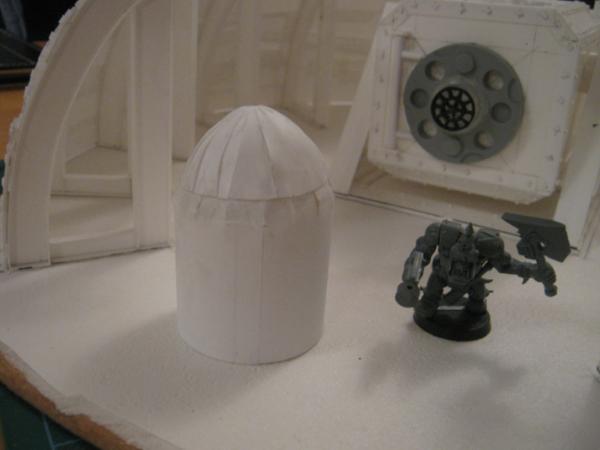
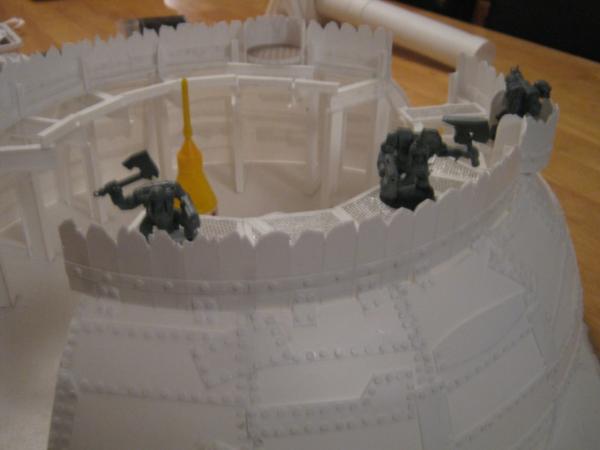
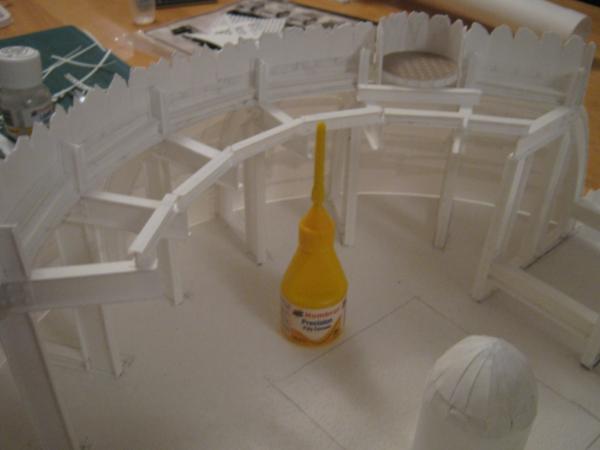
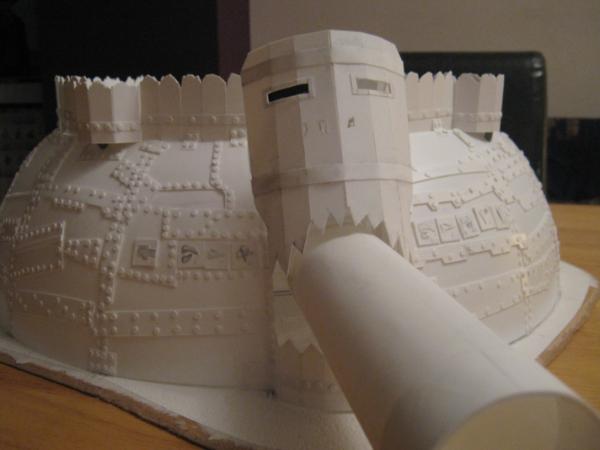
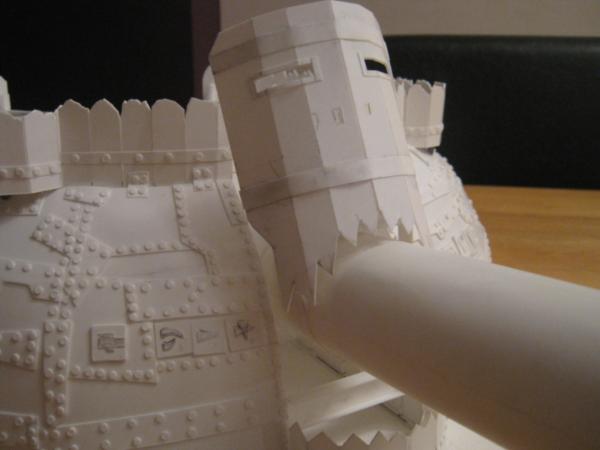
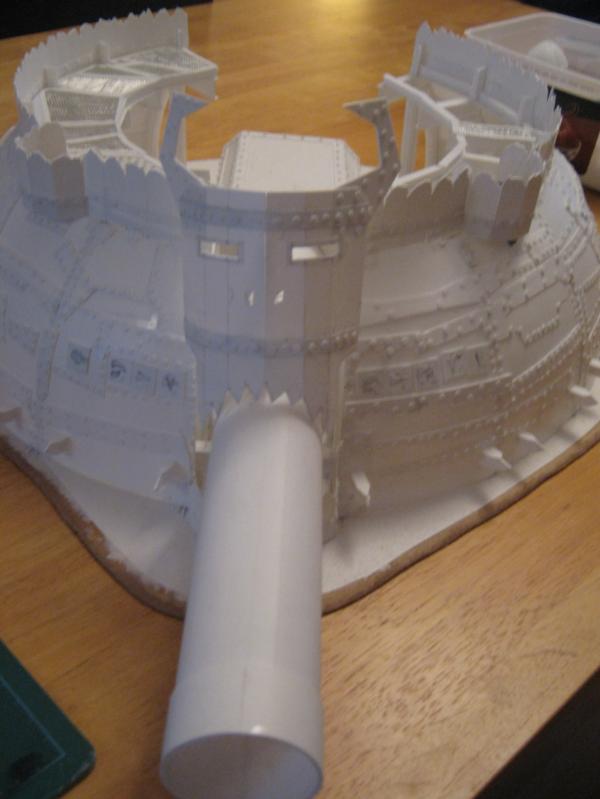
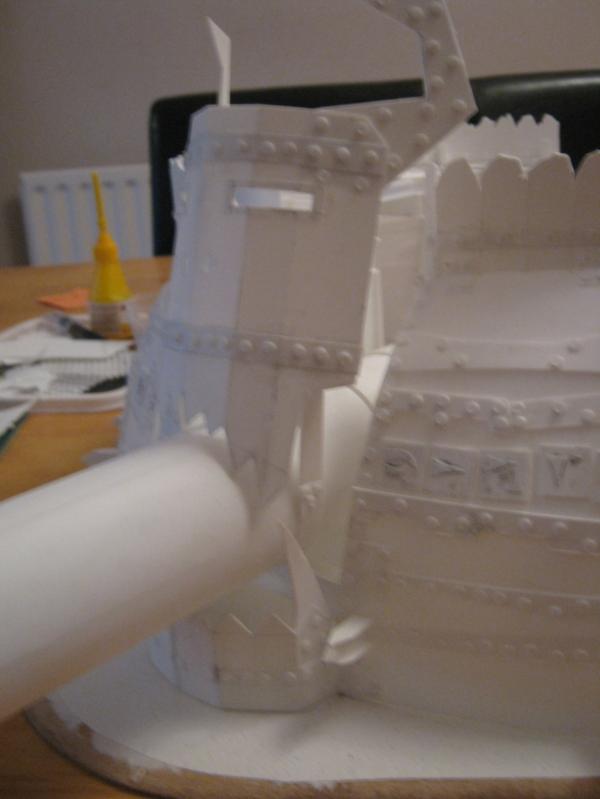
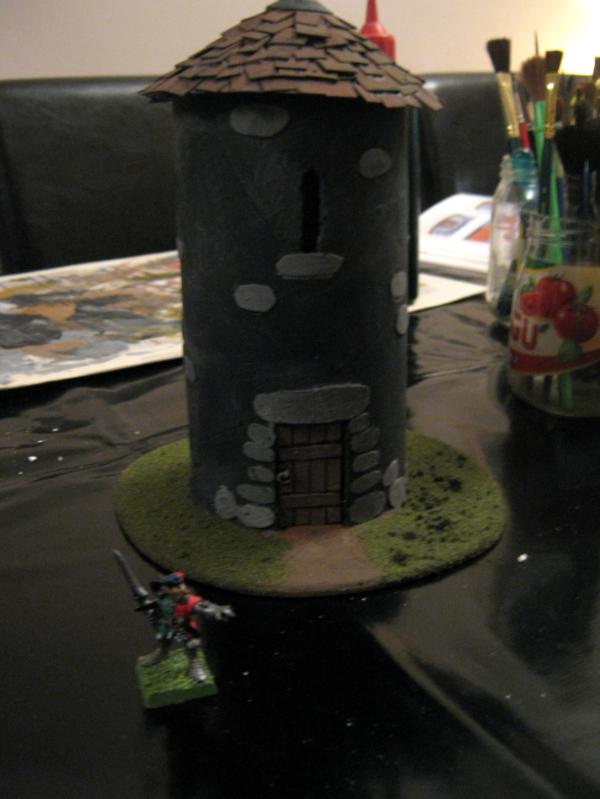
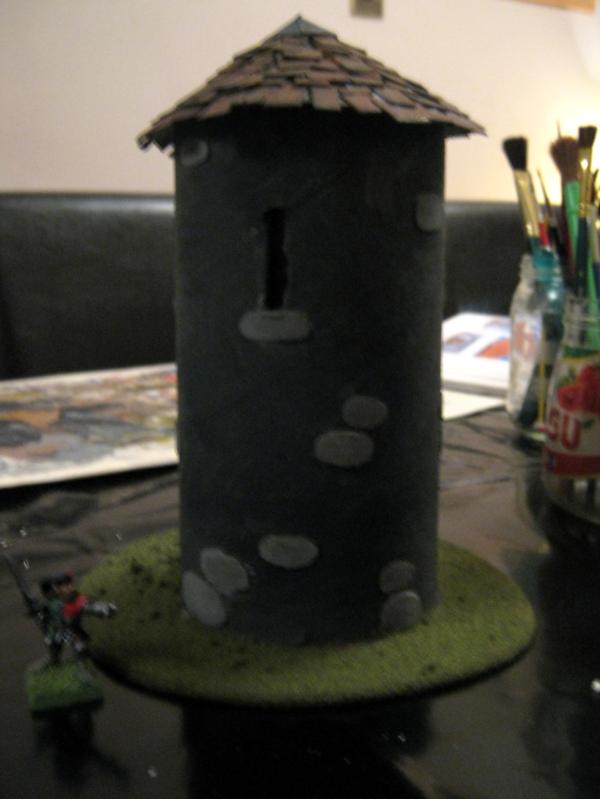
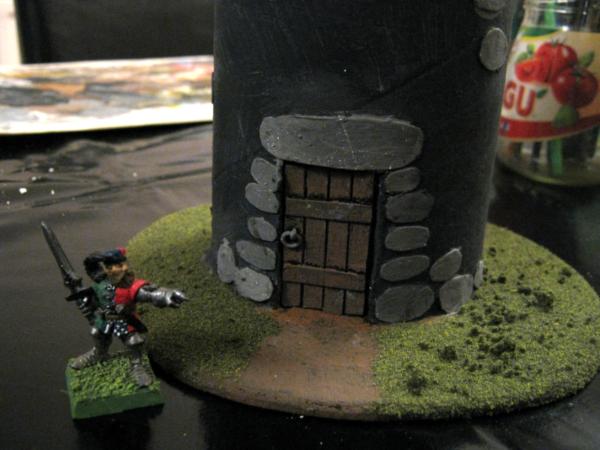
On a side note, my 9yr old finally finished his tower...
Roof is removable so he can use it to keep his pens and pencils inside
Roof looks brilliant, so does the door, the stone work could use some more work...but if we scale our hobby prowess done on a nine year old base, than this is lightEars away from what I was able to do!
And fully functioning models have always q special place in my heart
Yeah, that's the idea - a giant, Orky Lazee Sooz'n for Big Berfa...
I'm failing though quite magnificently to get it working properly - had a rage quit moment after I managed to do some damage to the platform that the gun sits on ( broke a few of the supporting struts off and damaged the card flooring...
Two parts, lower fixed base, upper revolving plate (Unto which the gun - or the full emplacement, if you wish ans still want to go large! - is placed). Carve or rout if you can a circular channel into both pieces, concentric and relatively close to the outer edge, equally placed. Fill said channel with marbles (It should be marble-wide, and almost half a marble diameter deep). That, plus the centre axis, should (could!) give a stable, smooth rotating base.
(I did something like that following dsteingass' suggestion of a turning table for painting, and came out basically OK)
Thanks LT, I did see that on your blog and will have a look to see if it's possible - an alternative I just thought of was to use some old plastic paint tub lids (the large type you get with fence paint and the like) as they all have a lip on them which would serve asa perfectly circular rail...
What about those big fridge magnets? You could use two of these to make a turnable platform...I used this method for my current tank for its turret...the basees rim then would be just for show...and transport would be less delicate too...
Um, why do you actually require this to turn? Why not, for the competition at least make it look like it turns.
i.e. A rail running around with wheel bogies running on it. But Its actually all fixed. Just an artificial rail and wheel system.
Make the whole base circular, so for games it can be turned in place to face if desired.
Just a thought...
If you must have it rotating, I would suggest listening to Vik. Magnets is the way to go. Big fridge magnets, or a couple speaker magnets if you want something a bit more powerful. If you are anything like me you have a set of car speakers in the shed. Or order up some large ferris magnets, off ebay, should get of in a day. While your waiting you can paint her up. Just build the base to loosely fit together.
You could just do loads of scrape marks and muddy footprints / churned up mud all around the outside so it looks like the Orks just Ork(man)handle the whole fixed structure around each time. It's the sort of solution the Orks would come up with...
Viktor von Domm wrote:What about those big fridge magnets? You could use two of these to make a turnable platform...I used this method for my current tank for its turret...the basees rim then would be just for show...and transport would be less delicate too...
Good idea, but not sure it will work as the 'basin' where the worky bitz go is quite shallow and I don't want to add any further height to the whole piece...
Camkierhi wrote:Um, why do you actually require this to turn? Why not, for the competition at least make it look like it turns.
i.e. A rail running around with wheel bogies running on it. But Its actually all fixed. Just an artificial rail and wheel system.
Make the whole base circular, so for games it can be turned in place to face if desired.
Just a thought...
If you must have it rotating, I would suggest listening to Vik. Magnets is the way to go. Big fridge magnets, or a couple speaker magnets if you want something a bit more powerful. If you are anything like me you have a set of car speakers in the shed. Or order up some large ferris magnets, off ebay, should get of in a day. While your waiting you can paint her up. Just build the base to loosely fit together.
You got this dude, no worries.
Interesting idea - make it 'appear' to turn... Hmmmmmm, cogs are whirring now... Nope, it hurts my head - to damn late... Will think more in the morning before I head out to Ed's Diner for a tasty Breakfast Burger...
Theophony wrote:What's the size of your base right now? I got a used turntable for a train set that works. Might be the ight size for you.
No idea - I threw the whole base up in the garage in disgust. Berfa is sitting back on her original base now - although I did manage to break a couple of bits off so her protective shell is in 2 pieces now... Note that I didn't do this in my rage quit mood - I did this before that - I should have realised then that things weren't working the way I had planned...
Dr H wrote:You could just do loads of scrape marks and muddy footprints / churned up mud all around the outside so it looks like the Orks just Ork(man)handle the whole fixed structure around each time. It's the sort of solution the Orks would come up with...
Good luck Ruglud, don't let it beat you.
Haha, yeah I like that and also works nicely with Cam's idea of 'make it look like it turns'
You guys are all awesome - have a man hug from me to you
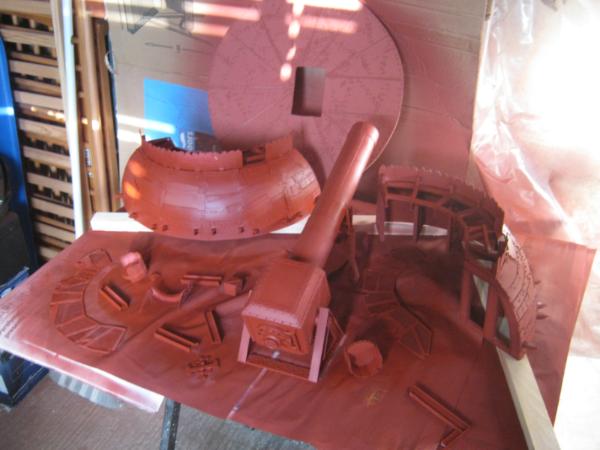
Plan today was to lay down a primer coat on the bare plastic, but the rain intervened and instead I spent much of the morning mopping up after the roof leaked (again...) Still, it's getting fixed on Monday so all is good...
I mentioned this on the League comp thread, but these are my plans for Berfa;
a couple of cranes;
a shell loading system;
murder holes;
a crows nest;
targeter position;
some more shells;
ammo crates;
ladders;
and lastly - get Berfa on a working rotating base...
Phew !
So, what did I do today? Well, I took a look at the base and decided it was total gak. To that end I stripped it back to a bare piece of hardboard and started over. No pics I'm afraid as it's all in the garage and I didn't have the camera with me. Hard to explain what progress was made, but I'm basically going for a lower profile to the final piece. I also found a better rail system to make Berfa rotate...
Hopefully the weather gods are kinder tomorrow and I can get some primer action...
Well, it's nothing too fancy, just that I found a perfect rail, just need to adjust the scratchbuilt trolleys / bogies / whatever they are called that I'd made already.
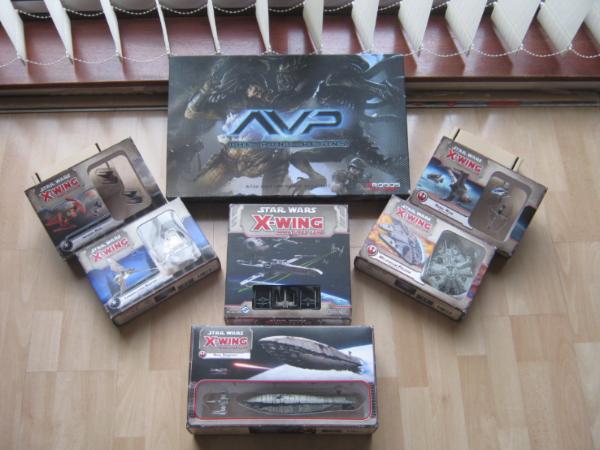
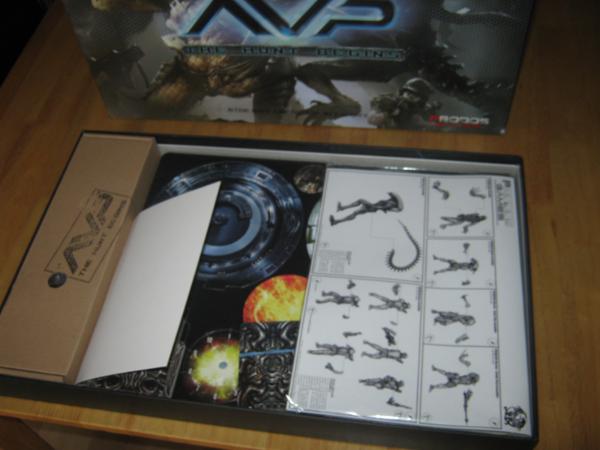
As an aside, i've been spending some time over on the News & Rumour board as I'm backing the Alien v Predator Kickstarter. If you even have a slight interest in the Alien or Predator franchises or ever wanted to own high quality miniatures then head on over to the Kickstarter and put your money down...
Okay, so after the roof leak, our dishwasher failed, a crazy busy week at work and watching the updates on the AvP Kickstarter, I finally got some work done on Berfa - although no paint got to see the light of day
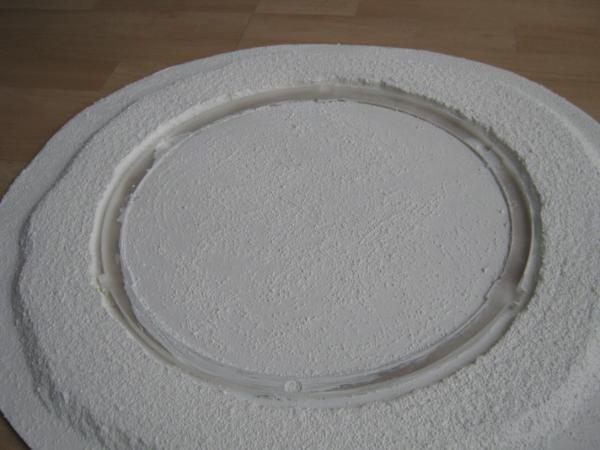
Instead I sorted out the base - stripped the previous version down, and re-cut the original hardboard base so that it fits Berfa's curves... Also added more rivets
Now the DIY tasks are out the way, I'm hoping to get the painting started over the weekend...
Looking good, have to say you get distracted far too easily, I mean if the dishwasher was on fire while a tornado ripped the roof off, and you where busy curing the common cold, then maybe then we could except these excuses.
Camkierhi wrote:Looking good, have to say you get distracted far too easily, I mean if the dishwasher was on fire while a tornado ripped the roof off, and you where busy curing the common cold, then maybe then we could except these excuses.
Still looking great though.
I apologise - no more excuses
Dr H wrote:Looking brilliant. Although I don't think the cork fits the aesthetic..
Keep going, getting ever nearer.
Haha, the cork is a temporary fitting whil Berfa gets some reconstructive surgery on her lower jaw (it broke off !)
hk1x1 wrote:Brilliant, cant wait to see this painted... keep going
Paint? You mean I gotta paint her ?
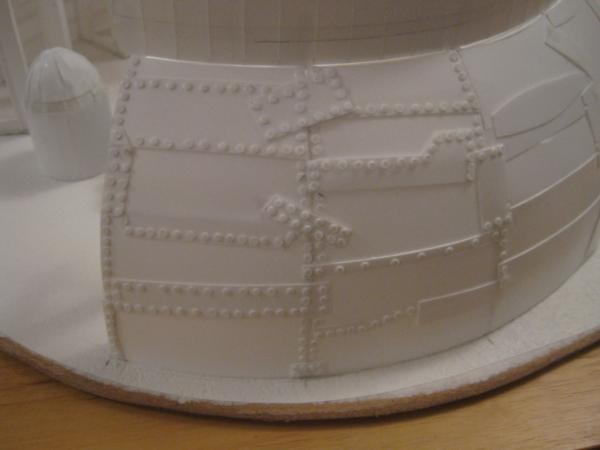
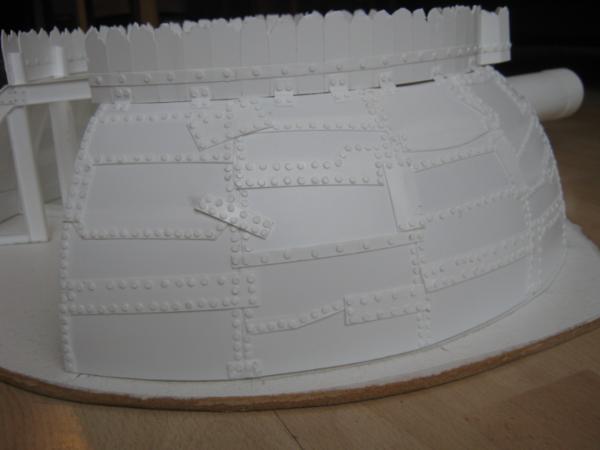
Today, Berfa got a pimply bum...
Well, that's most of the detailing done. I do need to make and add some extra parts but I'm thinking that I'll just try and get her in a painted state first so I don't hold the comp any longer...
i am totally with you on this... it looks tho as if you used the lacquered side of those rivtes on the underside? did you use PVA for these or superglue?
now that makes me wonder...why did you do it that way? the shiney side would be better upwards as the rougher side would let the PVA soak into it better...thus having a more secure bond...but if you use enough PVA it wont matter i imagine...^^
In my experience, it doesn't matter which way up, the PVA will hold once set. For painting though, the raw side up is better as the paint takes to the surface - I've found that the shiny side really needs for the paint to be mixed with PVA other wise it can be prone to rub / peel off...
Ruglud wrote: In my experience, it doesn't matter which way up, the PVA will hold once set. For painting though, the raw side up is better as the paint takes to the surface - I've found that the shiny side really needs for the paint to be mixed with PVA other wise it can be prone to rub / peel off...
Interesting point about surface issues...never had these issues but it sounds most likely...
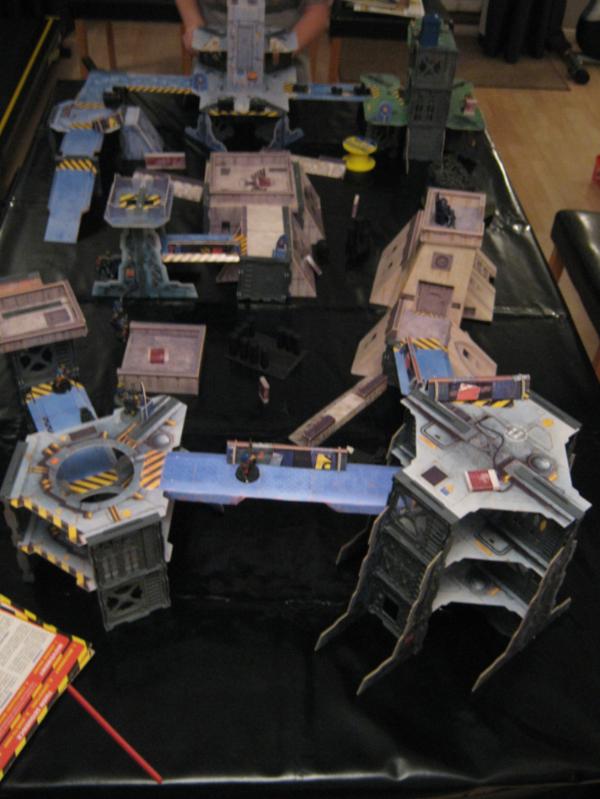
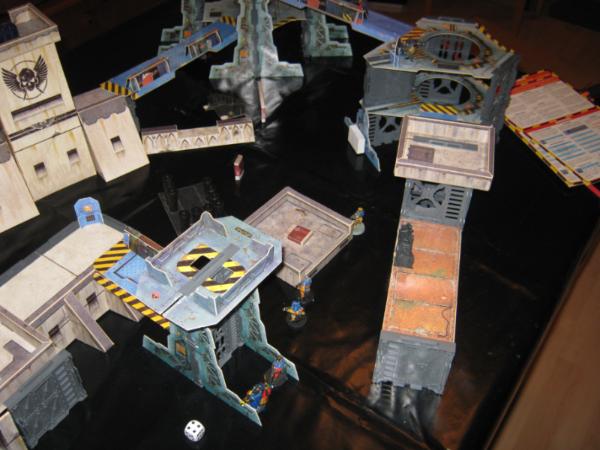
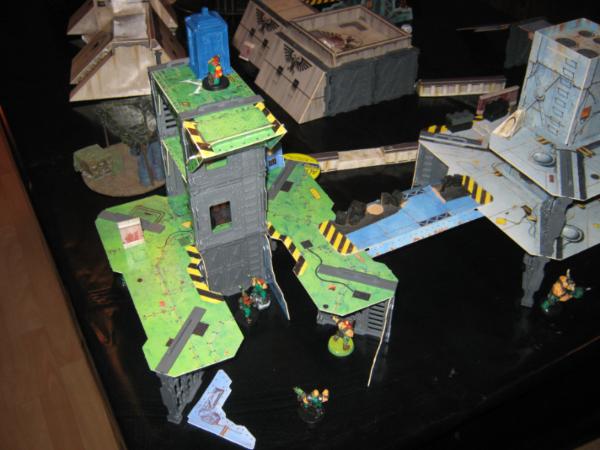
Had a game of Necromunda with my son today - We used basic rules and gang profiles for my Cawdors and his Orlocks (using Catachan's including an Ogryn Heavy!) Great fun and a table chock full of scenery (including a TARDIS). I won, just, although was left with only 3 active figures... We have a rematch on Sunday
Err, painting went awry I chickened out of salt weathering and started to sponge, but ended up using a brush and then running out of red paint. I haven't got anywhere near the effect I was looking for on the armour plating, although the base came out nicely - picture isn't the best as taken with flash. Next stage will be to add some weathering, just haven't decided how...
Casey's Law wrote:Just keep plowing on mate, I know you'll rock it.
Thanks mate
Galorn wrote:Id say a slop, glop and wipe method would work well, especially if followed by weathering powders.
Hmm, yeah. I think this is the best option - it's an Ork build after all. I've deliberatly applied the red in a slapdash way. Will also try and break up the colour somewhat as she looks like she's been out in the midday sun without any sun block...
She is getting closer, Berfa just needs to apply a little more make-up to make her self presentable. She does though ask that you stop looking at her backside, she's getting a bit of a complex about that area...
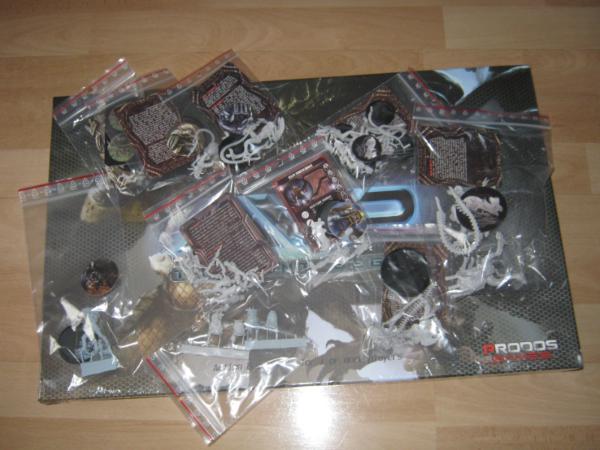
Well, my Kickstarter addiction is finished - AvP: The Miniatures Game funded and boy was it a crazy, exciting end... Now to wait until May and take delivery of all the Xeno goodies
As for Berfa, work will progress over the next three days, expect updates...
Those AvP minis do look good, I'm thinking of getting some myself when their released,
so I can build my self a couple of diorama's, for instance the Alien Queen Vs the Loader,
and another set in the Predator Pyramid from the AvP movie.
Thanks Dave - I thought I knew what I was doing but still mucked it up
After some more delays (all relating to work stuff getting in the way) I managed to progress with Berfa today and think that I've rectified my painting faux pas to some degree of success (I hope...). As per Galorn's suggestion I got a nice sloppy mix of brown and black paint, then liberally coated Berfa's armour skirting and the internal I-beams - allowing the paint to pool in places (such as round the rivets and on panel edges) as well as run freely in others to simulate dirt, oil, rust, etc. As a point of interest, the paint used for this is just simple poster paints thinned down. I also slopped some on the base to dirty that up some more. Next will be the gun, plan is to do something a little different here, just haven't totally decided what - am thinking some checkerboard pattern on the barrel.
As we are so far over the original and extended deadlines on the League comp, Im gong to withdraw and allow the comp to finally close if I can't finish by next weekend... I know I wont be getting some of the extra parts that I wanted to build finished by then, but Berfa will be fit for judging and I can then spend time on adding the other parts such as the shell loading crane, lookout nest, totem pole, and whatever else I can cram in on the model. I'm also going to leave her based as is for the comp...
I think as the gun is meant to be working as opposed to the paneling , I would go with a dirty metalic, greasy black gun more than actually rusted. After all a rusty gun would not operate, and an ork would never let it get in that bad a state.
The job you have done on the panelling is amazing in that it looks totally realisticly rusted through.
Cheers guys I've been feeling burnt out with Berfa these last couple of weeks, but I got a desperatly needed kick up the rear end today to get back to work on her...
I'm in agreement Cam, on the gun. She's got to be in good working order. To give you all some background fluff, the gun was looted from an Imperial warship/ battle cruiser / landship (haven't 100% worked out from where yet...) and the Big Mek in charge has Orkified it (glyph plates and a repaint)
Lookin good ruglud , now my Orky side says it needs an imperial flag on the base where the boys come in with a spray painted logo next to it saying "whyp yuz fhet"
Coming along great, keep going! (And yes, mistreat and abuse the base, walls and walkways all you want, but please, keep the gun herself in working order!)
Well, I didn't make it in the end and now the hobby fatigue plus RL have taken hold..
The RL issues are somewhat more pressing and not to put too much of a downer on proceedings thought I'd quickly explain. My step-sister had a serious heart attack a couple of weeks ago and she's still now in hospital on life support. Whilst I'm not hugely close to her (she's about 18 years my senior and didn't really see much ofher when I was a kid) my Dad has been in pieces - he's in his late 70's and also has a dodgy ticker so I've been what I can to support him through all of this. Hence my hobby juju is on a low of late...
So that aside what am I doing now?
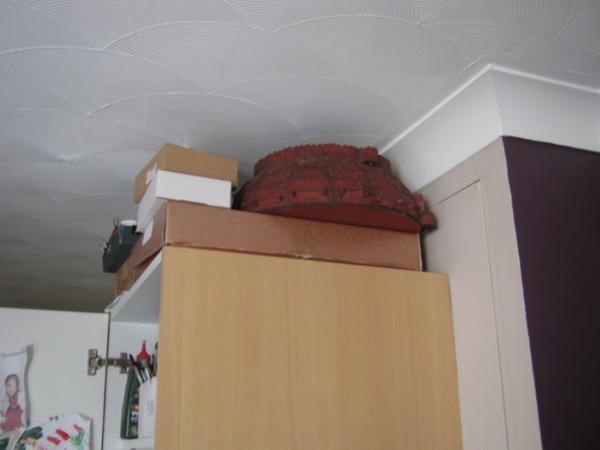
Well Berfa is getting shelved until I can get the inspiration and desire to restart
Berfa shelved
I also have the Thunderhawk, but again I have no desire to progress that at present...
Glimpse of the Thunderhawk and other projects...
So instead I think some figure painting may be the order of the day starting with this group...
Hellboy
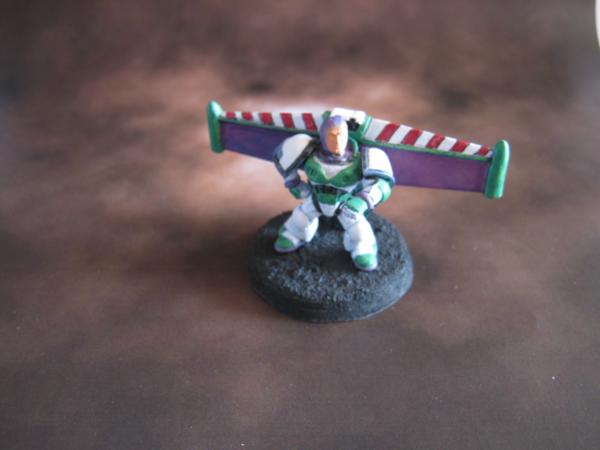
Buzz
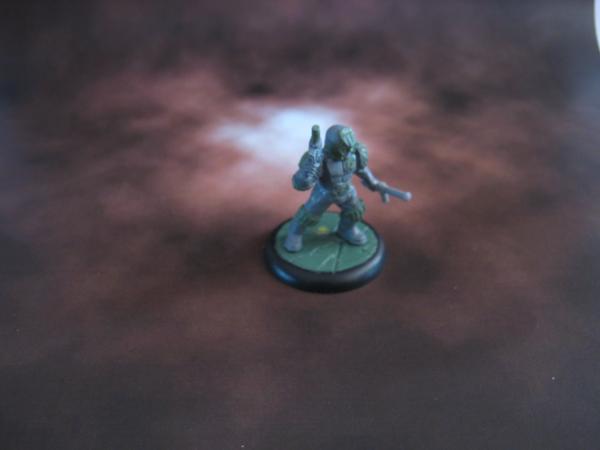
Dredd
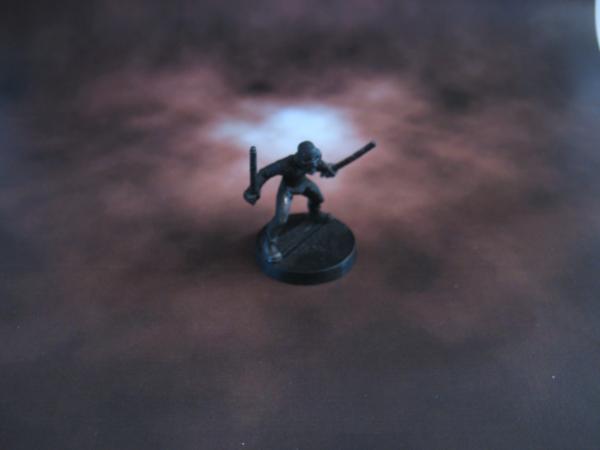
Kick-Ass
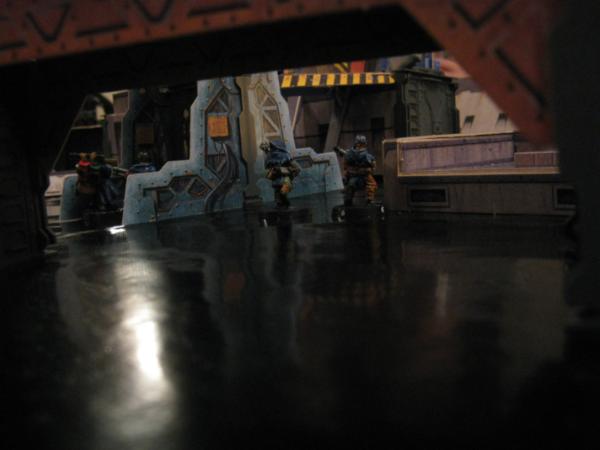
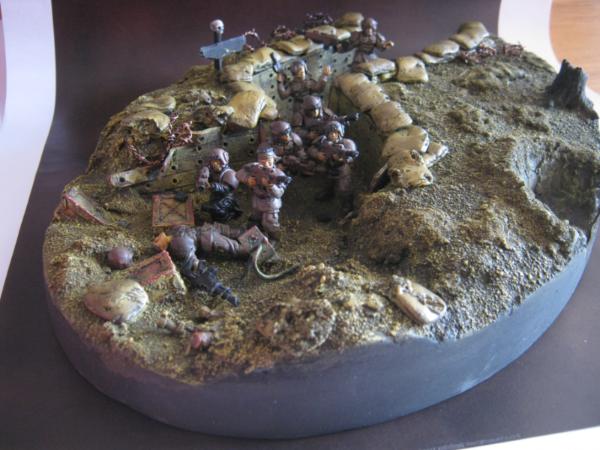
Also, I have a desire to do some worrk on my IG diorama - 'Once more unto the breach'
Ruglud, best of wishes and our prayers are with you. I've been having serious lack of mojo too recently, so I know a little of how you feel, but no idea of how you handle the sister part. Just remember to take time for yourself, otherwise you'll wind up twice as bad. Like they say on the airplane, take care of yourself first then the kids/elderly next, you won't be able to help them if your messed up.
Thanks folks, really appreciate the sentiment here...
I'm afraid no updates on the health or hobby side at the moment. The wife and I took our kids into London today (we live approx 30 miles out of London on the Kent side of the River Thames). Highlights of the day: Visited a crazily busy Harrods (food court is awesome), a bracing stroll around Hyde Park (avoiding the over-packed and over-expensive 'Winter Wonderland'), checked out the Albert Monument and Royal Albert Halls.
Made a nice break and got the Christmas cheer back for us
I finally got back online today after a brief hiatus, I managed to knock my laptop over and the HDD got damaged to the point of no return.. Considered getting a replacement but then saw some great deals in the January sales and treated myself to a nice new Acer Aspire, although unfortunately it comes with Windows 8 *yuk*.
Just going through the set-up process but now need to get a cable so that I can try and transfer some of the data (like iTunes) from the defunct HDD. Hopefully I'll also be able to restore my weblinks and some of the data that I hadn't got round to backing up yet, as some of you may recall I had a similar HDD issue with the Dell early last year, followed by a graphics card failure.
Asides from that, no hobby update... RL still kicking that to pieces unfortunately...
Unfortunately I've been offline as well, my internet decided to simply stop working on new years eve,
only offline for 4 days, but it felt like longer.
Good luck with the new computer, I've not tried Windows 8, but I'm yet to hear anything good about it, think I'll stick with my Vista Ultimate for now.
Windows 8 is pretty damned awful in my book, it's okay on a touch-screen but terrible on a standard laptop and I really don't see the point in a touch screen laptop... Apparently 8.1 addresses the lack of a start menu, so I may give that a whirl, but I'm missing Vista at the moment, wonder if I can downgrade to 7??
I'm going to move back over to my scratchbuild thread now as I suddenly had a burst of energy this afternoon and started work on a new Thunderbolt fighter
good to see you again in better spirits! happy new year ruglud...and seeing your recent works on the thunderbirds....I congratulate you to the regaining of your hobby mojo!
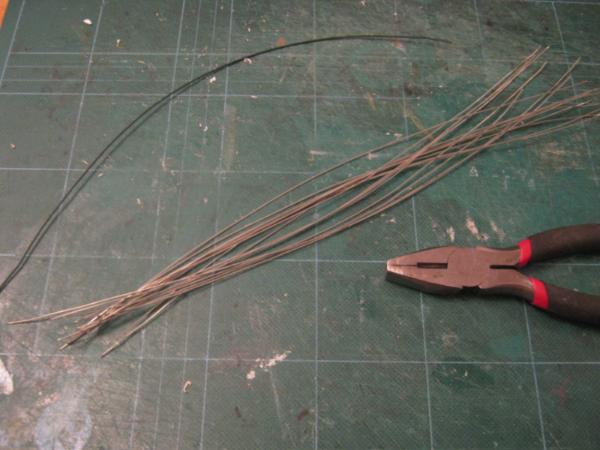
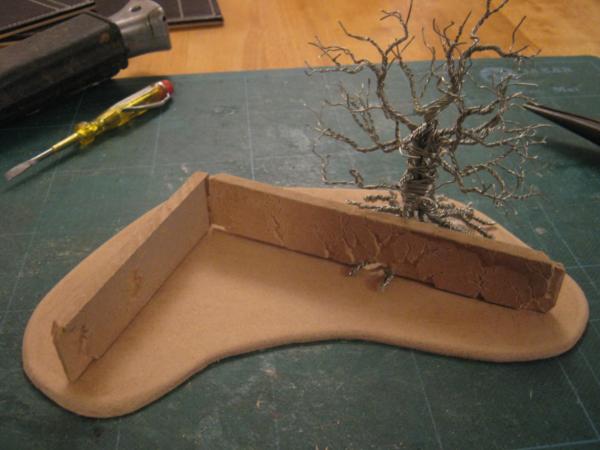
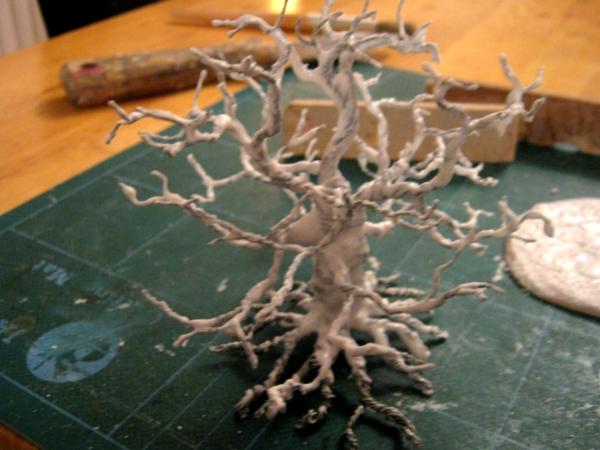
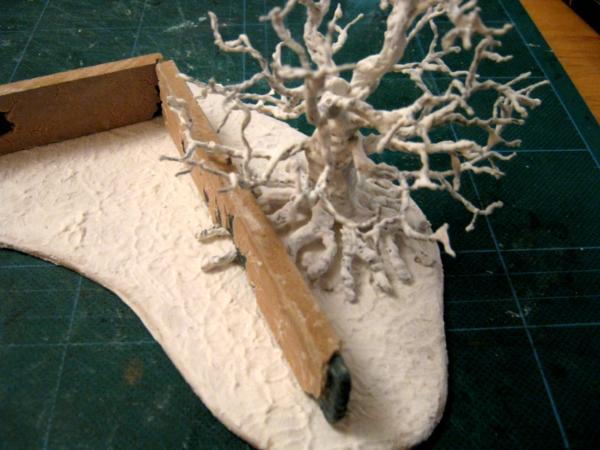
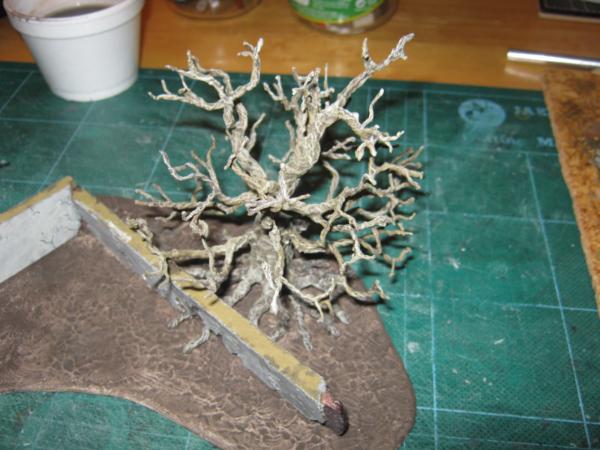
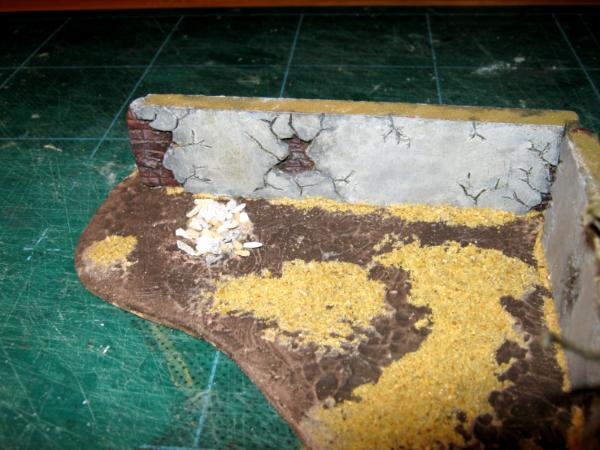
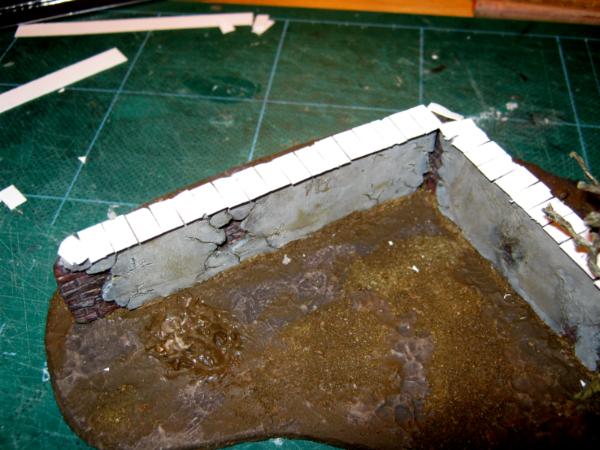
So, here we go. My entry in the LoeR 'Got wood' competition - a tree made from wire and walls made from MDF
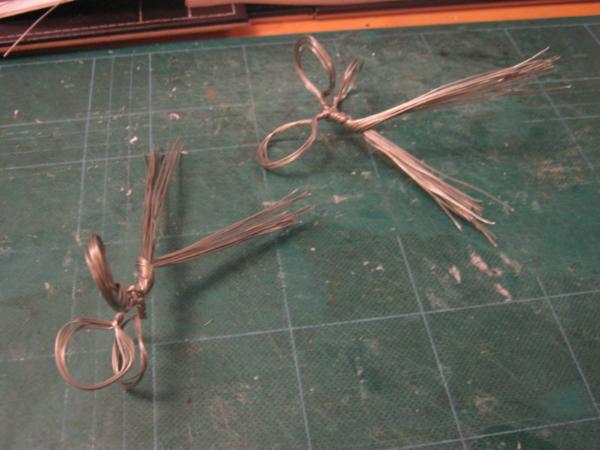
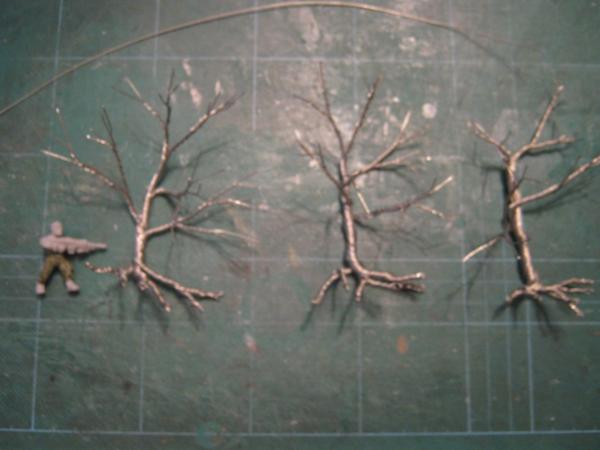
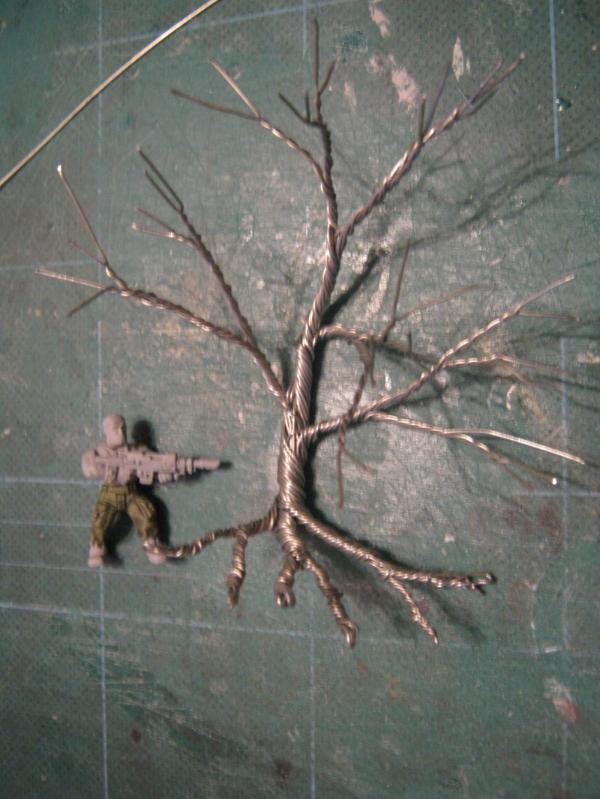
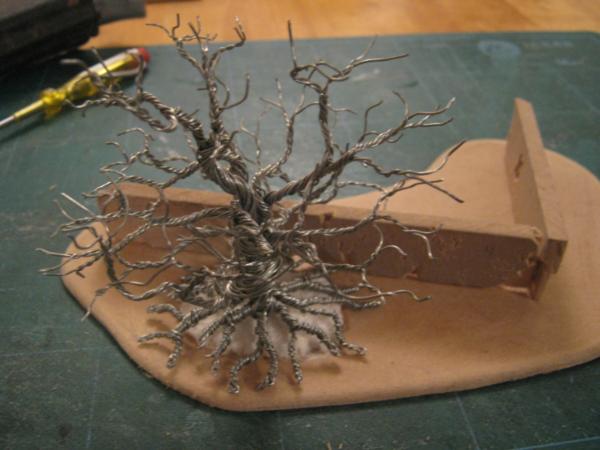
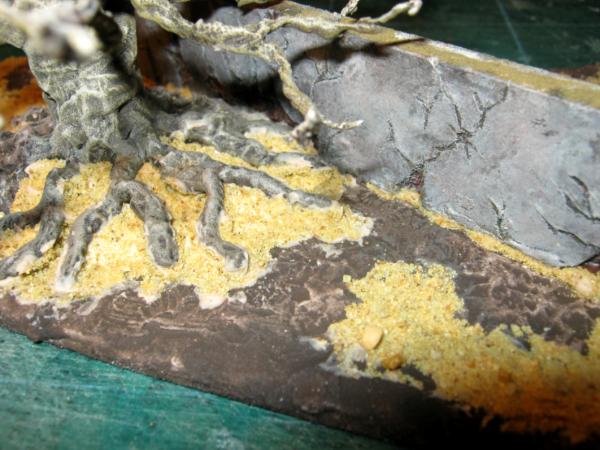
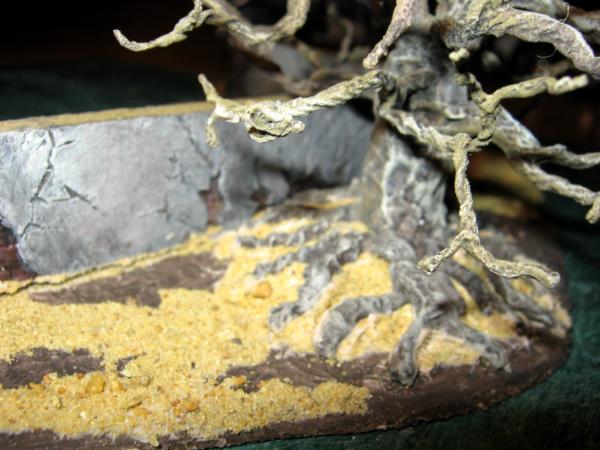
Tree is made for from 3 separate pieces, each one made up from 17 strands of thin garden wire, bent in half and twisted together, the smaller strands pulled off to make individual branches. Then all joined together to make one tree...
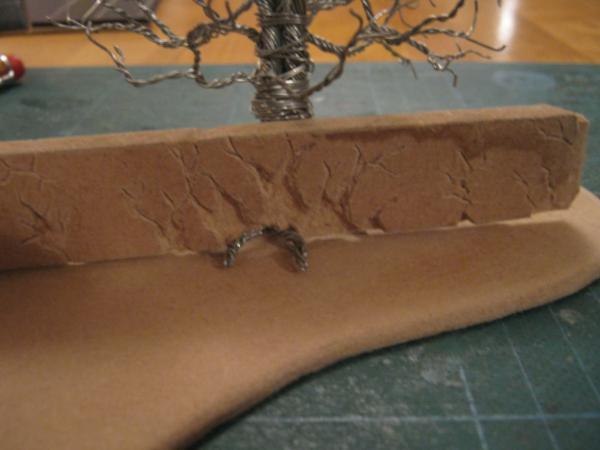
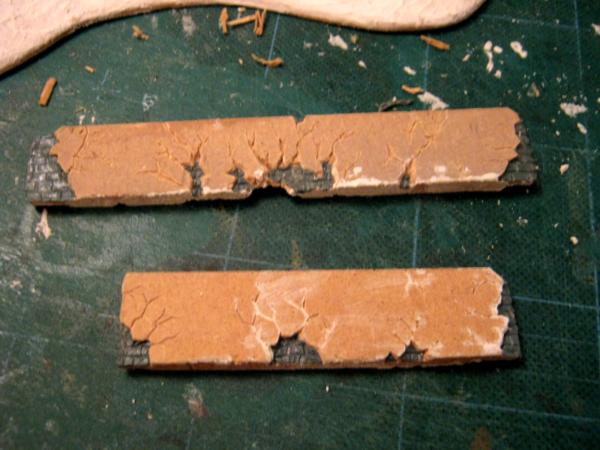
And the walls are from 6mm mdf. They are going to be plastered stone with the roots having caused the plaster to crack in several places.
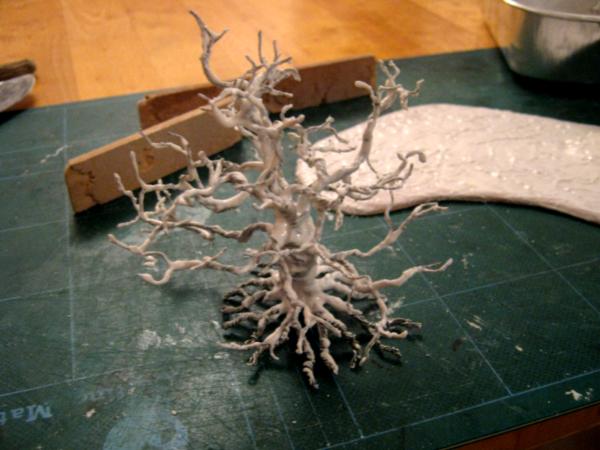
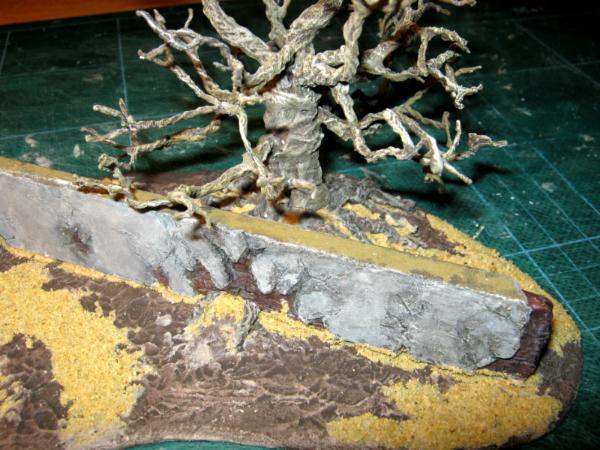
Starting to create the bark texture - PVA mixed with ready mixed filler, to create a paste and brushed onto the tree
Quite a bit more to do... but have a month to do it
As an aside, my Xmas present turned up this week. Looking forward to Christmas day now
Whatever you get, you'll be upgraded to Windows 10; apparently, whether you like it or not :] I left the MS prison years ago. Currently using Linux Mint 17.2. But if you really need the itunes software , Linux is not for you.
Another Star Wars X-wing convert... yeah, that game is really popular these days. I imagine with the new movie coming, it will get even more popular. Enjoy playing.
The tree progresses well. What sort of ready mix filler? Around here people recommend Apoxie-Sculpt or Modge Podge. Never tried either.
Red Harvest wrote:Whatever you get, you'll be upgraded to Windows 10; apparently, whether you like it or not :] I left the MS prison years ago. Currently using Linux Mint 17.2. But if you really need the itunes software , Linux is not for you.
Another Star Wars X-wing convert... yeah, that game is really popular these days. I imagine with the new movie coming, it will get even more popular. Enjoy playing.
The tree progresses well. What sort of ready mix filler? Around here people recommend Apoxie-Sculpt or Modge Podge. Never tried either.
Oh, the laptop issues were a while ago now and all sorted... (I need to post here more regularly again though...)
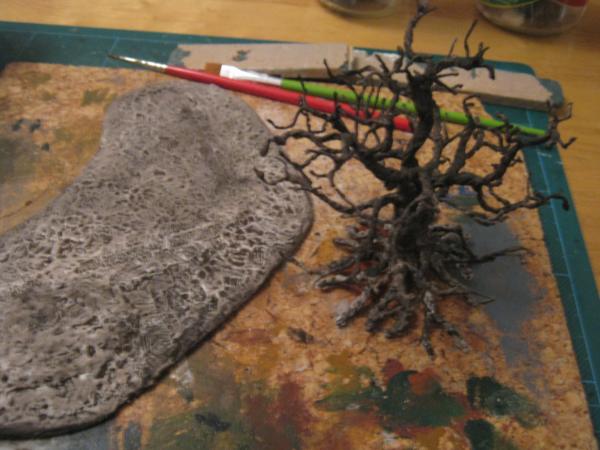
The filler is just the basic, cheap store own brand called Diall, I think, from B&Q. Another option would have been to use some air dry modelling clay, but I didn't have any of that...
UPDATE...
Green stuff in the cracked areas to create the brick under the plaster...
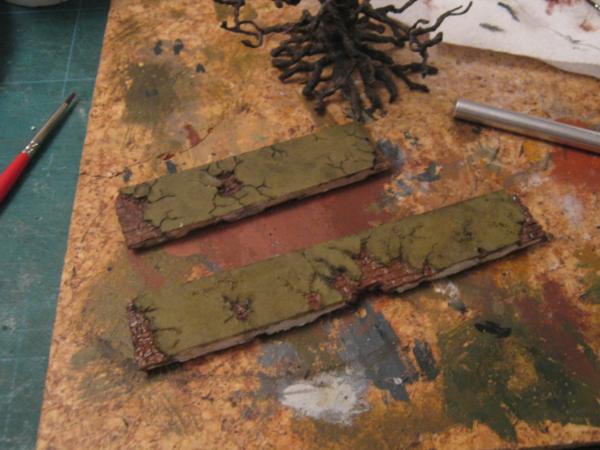
Interesting ideas, although likely going for a flat tiled effect using cut up some wooden coffee stirrers, continuing the theme of wood representing stone and wire for wood...
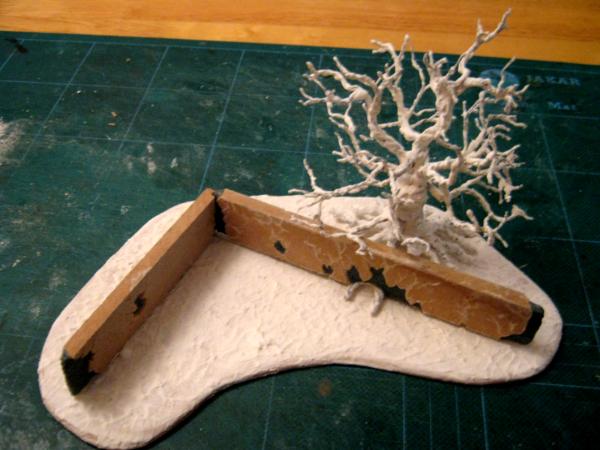
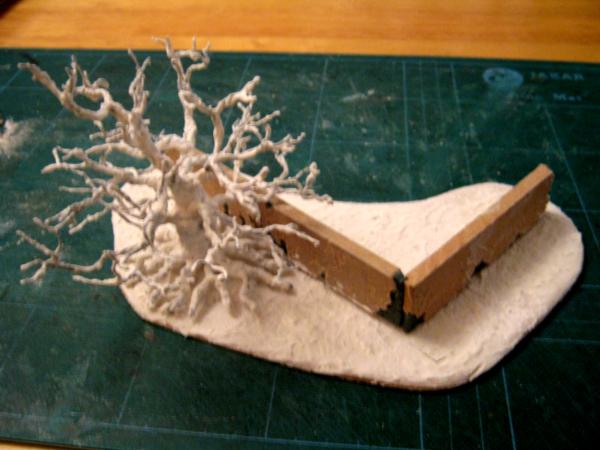
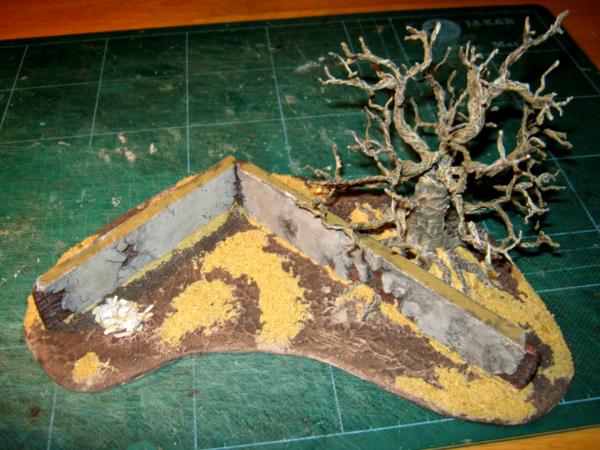
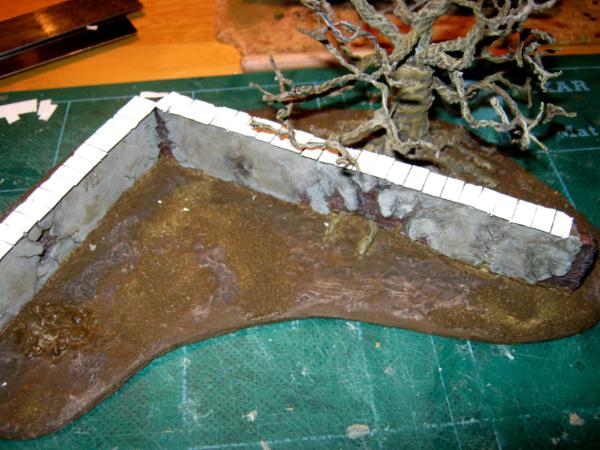
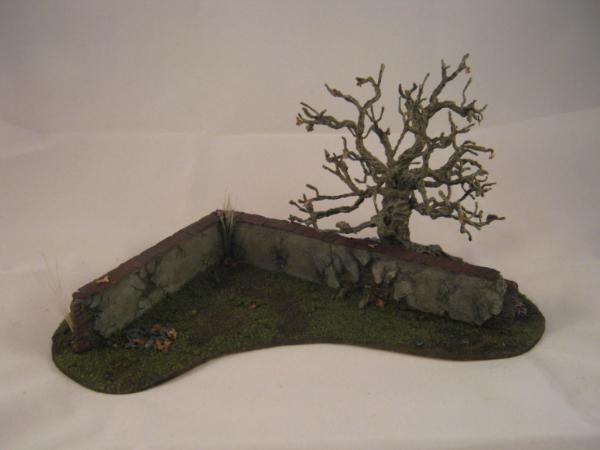
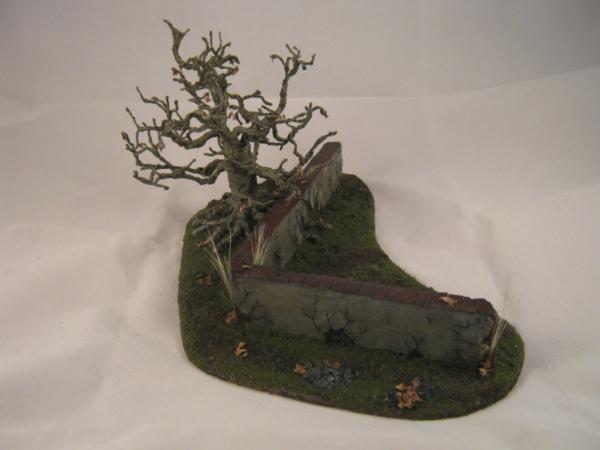
Moved on to the basing (as I forgot to do the stone capping...)
Annoyingly, I've noticed some areas of the tree where the twisted wire strands are quite visible and I should have revisited them with the filler/glue mix. but am going to leave as is for now...
You're using wire for wood,
Wood for brick,
Sawdust for grass (I think),
So for the stone top of the wall you should use... Blancmange... No? How about card then. It's another form of wood, and does work well as stone/concrete if you find some rough card.
You're using wire for wood, Wood for brick, Sawdust for grass (I think),
So for the stone top of the wall you should use... Blancmange... No? How about card then. It's another form of wood, and does work well as stone/concrete if you find some rough card.
Card it is, not sure I can right the right consistency with blancmange... A future project though maybe
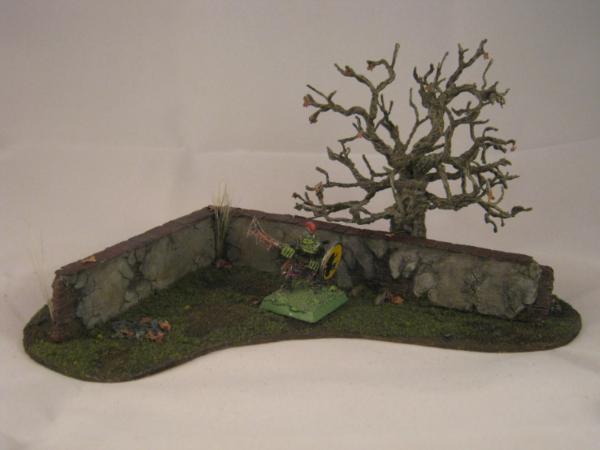
Oh and it's now sawdust but fine sand, however I will use some flock for ground cover which is sawdust (right?). The only part I'm missing though is rivets... Not sure if I can include any on this scene - maybe I should have had a gate of some sort and could have had some rivets on that, but alas I don't...
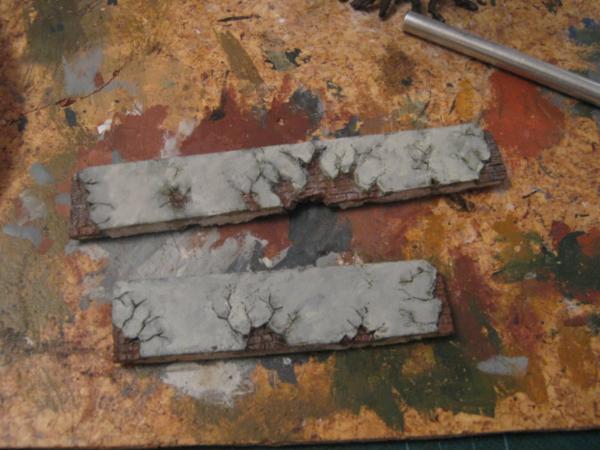
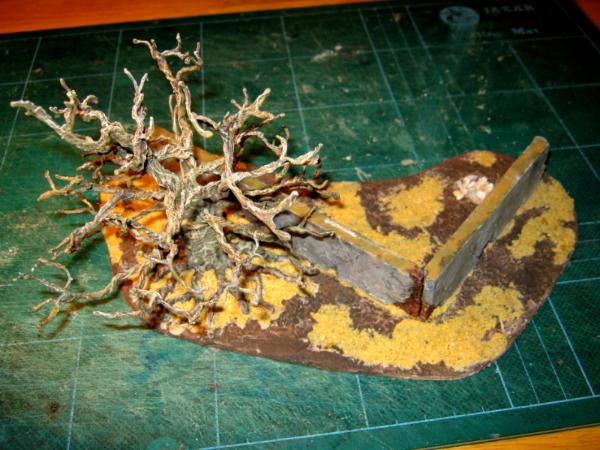
UPDATE: Capping for the wall and some more base paint laid on the err... base...
The capping is thin card strips (5mm x 9mm) and will be painted up to resemble slate or terracotta tiles(not sure which yet). But, card is made from wood, so continues the theme
what have we got, one week to go? I'm on the home stretch now I think so shouldn't be any issues completing in time.
Also got wave 1 of my AvP kickstarter pledge at the start of the week, which was actually my Xmas '13 present and supposed to deliver back in May '14...
You should not be so hard on yourself. We love any and all progress. You have had a tough year. Looking forward to this one though. All those lovely juicy projects to get updated. This should be amazing.
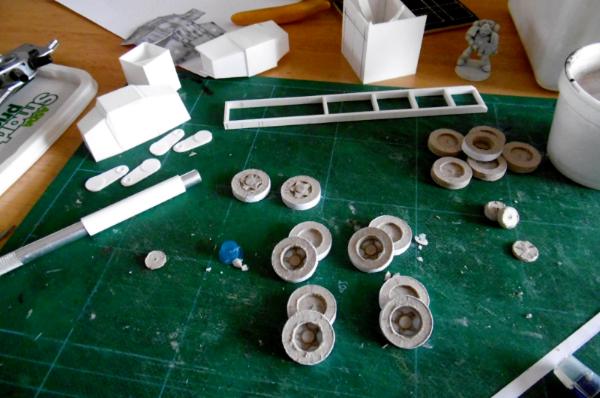
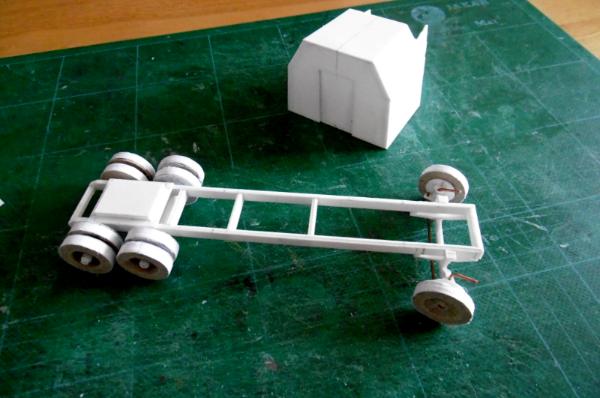
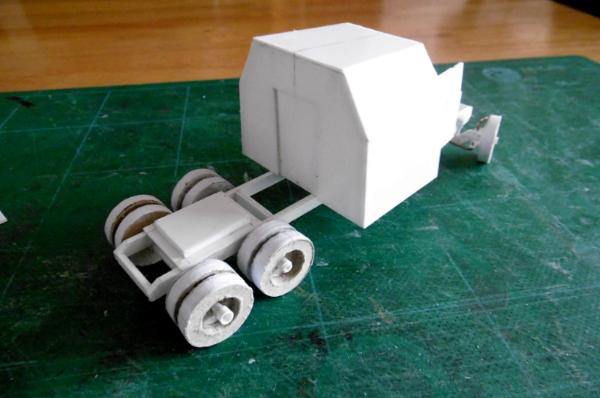
Ah, see I thought that was a chassis, but couldn't see how it fitted with the other shape that you had the wheels originally mounted on (I take it that was just something to hold the wheels as you made them and is not part of the model).
At least the other model is shaping up nicely and looks the part.
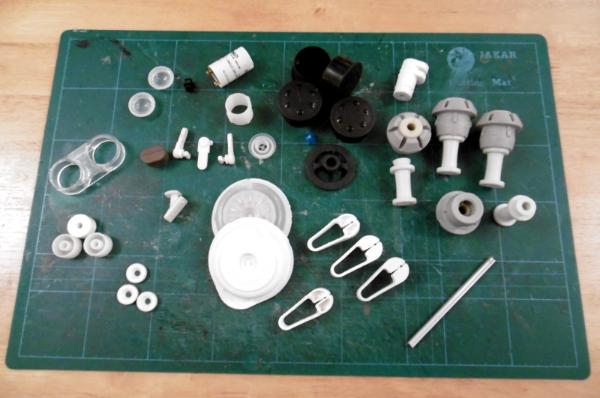
Nice selection of pieces too. What are the grey things, top right?
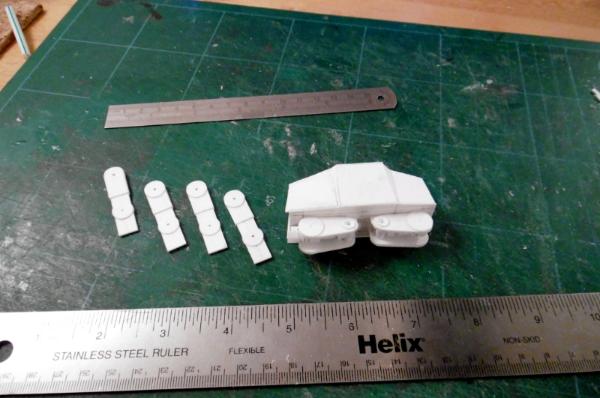
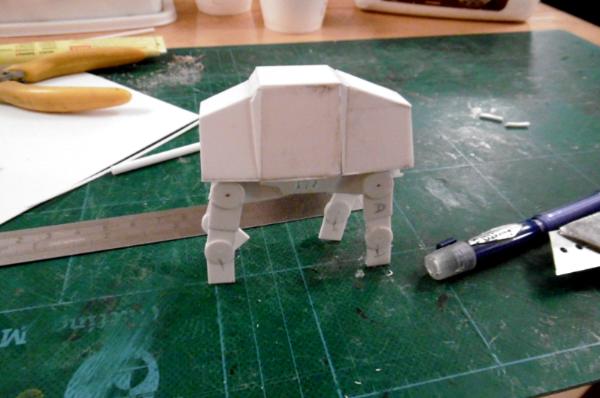
Littletower wrote:AT-AT is looking great. 18-wheeler?
Terrain piece is even harder to guess, but will be following for further clues!
AT-AT is a fun piece and just an exercise in 'can I do it'...
18 wheeler - yes it is... with a twist yet to be revealed.
Still no idea on how that pile of tat is going to tie together for a terrain piece, but it will come to me no doubt...
Dr H wrote:Ah, see I thought that was a chassis, but couldn't see how it fitted with the other shape that you had the wheels originally mounted on (I take it that was just something to hold the wheels as you made them and is not part of the model).
At least the other model is shaping up nicely and looks the part.
Nice selection of pieces too. What are the grey things, top right?
Oh yes, like I said, the obvious clue (chassis) was not so obvious and the foam board I had the wheels mounted on was just a mounting piece for constructing them - it just happened to be an interesting shape In fact it was an early template for my Thunderhawk build... but does happen to also resemble a Land Raider...
As to the grey pieces, they are transport plugs from a washing machine drum. Been kicking around in the garage for years as they are a really interesting shape...
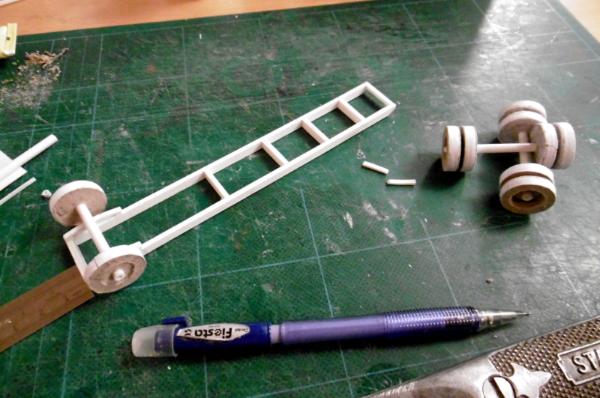
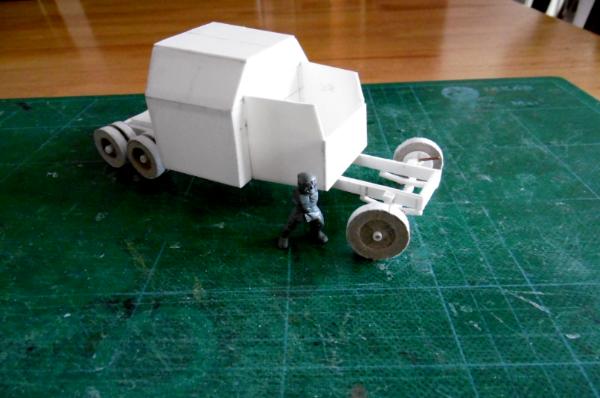
Update time on the truck build... (mystery build #2)
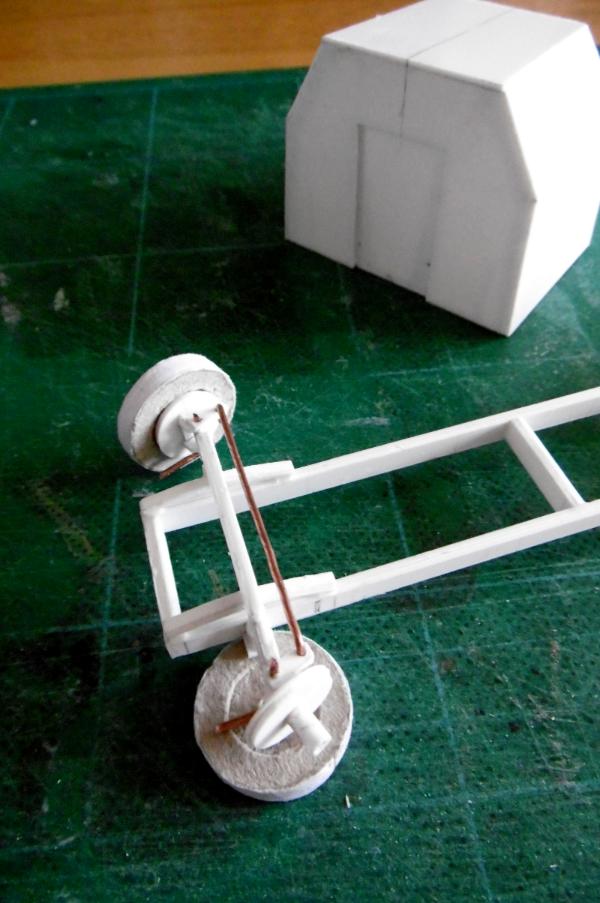
I'm particularly pleased with the working steering on this
Yeah, took me a while to figure out the steering, but then I found a build log of a model Peterbilt truck and the actual instructions had also been photographed which gave me the inspiration. I'm not going for a full on replica here so no engine or running gear, but I really wanted to have working steering
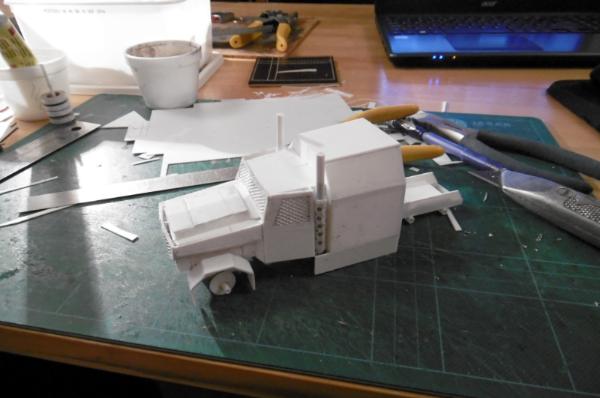
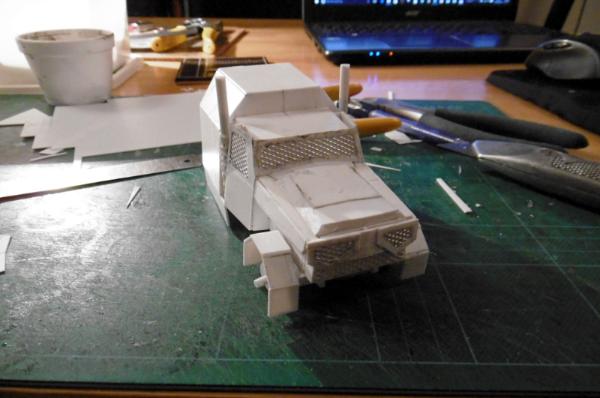
Just built the mud guards for the rear wheels then realised I got my measurements totally wrong so have scrapped them and will start over, but I think it's a sign I need to stop for the night as the poly cement is starting to give me a headache !!!
Cheers Cam - been a frustrating build as I'm basing it from some 3d images I found online and I have nothing to accurately scale it against, so 'loosely' based is possibly an understatement... And now i'm getting itchy to move on to something else that's peaked my interest lately, but I'm doggedly resisting the urge... Must finish this model... Must finish...
No differentials on the rear axles? (Trollin'? moi?)
Truck looks fantastic. I've been meaning to build one myself, but a more conventional version instead of a 'war rig'. Even got a 1:43 scale plastic model some time ago for, uhm, inspiration. (Truth is that I intend to shamelessly take measurements etc of it and clone it at 1:53 or 1:55)
I was going to go full detail, but got bored working out how to achieve the look, so asides from the steering, it's pretty basic...
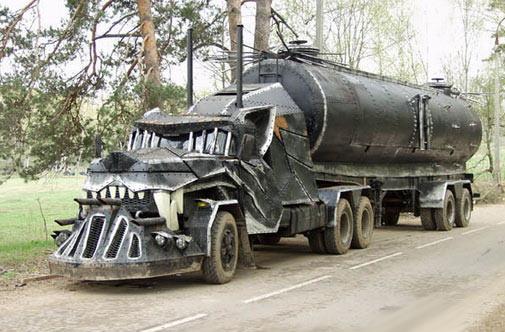
As an FYI, spoilered below is the real life inspiration and the 3D render I found and decided to base it from - Mad Max meets the Wolf / Dragon (I think it looks like a wolf, but online it's listed under dragon truck);
Liking the truck very original. I have a rough plan on paper for a hauler type vehicle but it's way down the list of scratch builds at the mo, loving the overall shape looks like it can take some flak and keep on trucking!!
Struggled to come up with an idea from the junk I had so went back to basics and found some cardboard tubes, cereal box card, waste paper and empty Tassimo coffee pods (other coffee machines are available...)
Camkierhi wrote:Such an excellent build. Bertha was magnificent.
Dora will be wonderful. Maybe a carriage for her as apposed to fixed position, like she could be wheeled away type of thing?
Thanks mate, Bertha was just too big in the end, she may resurface for a future build... Dora is the future.
Yep, was actually considering having a way to move her, just haven't figured it out yet as to how I do it. Looted Chimera or similar maybe
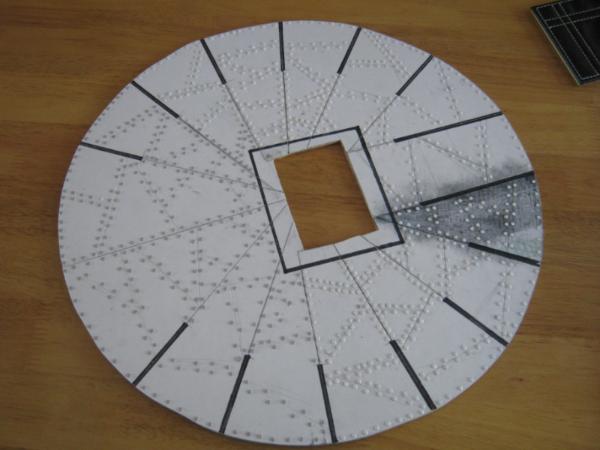
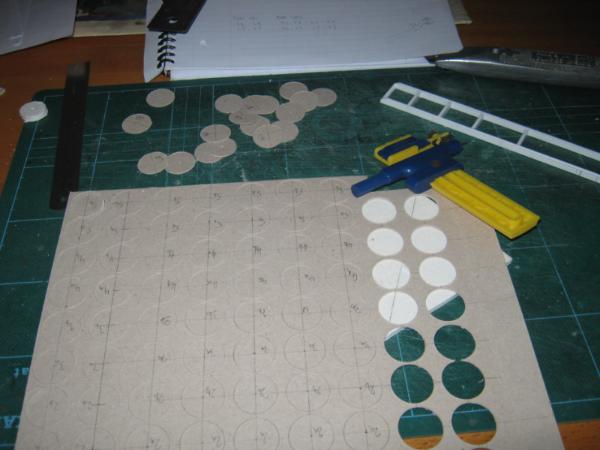
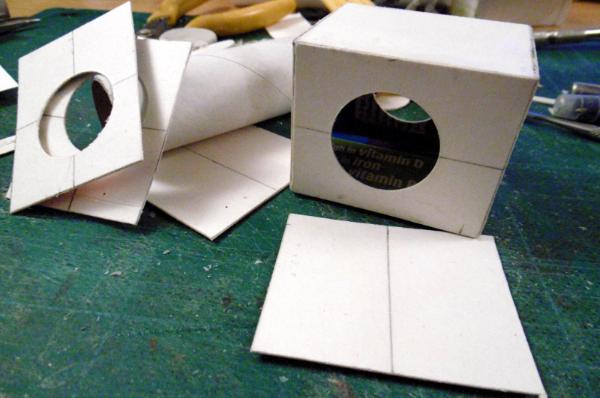
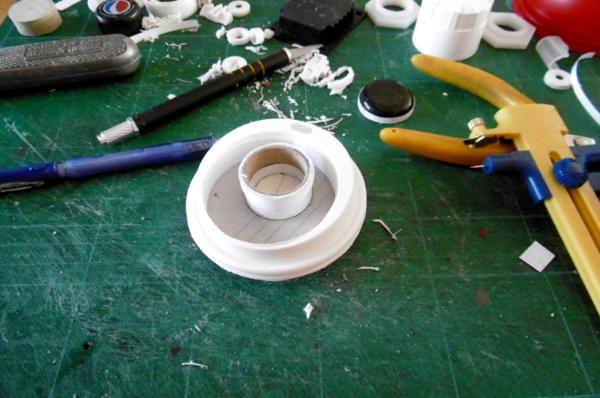
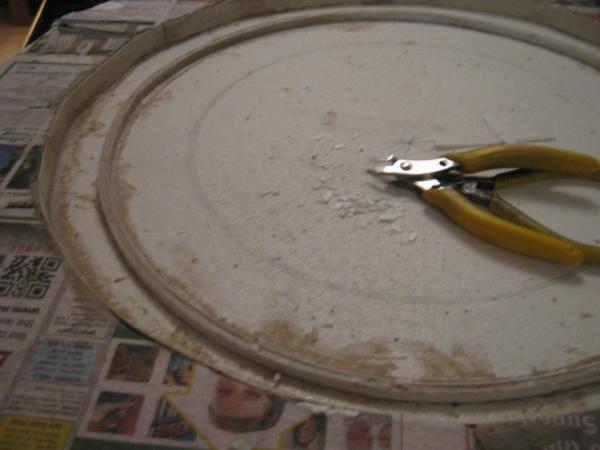
nareik wrote:Nice blog... how do you cut such perfect circles?
Cheers nareik and welcome to the blog of no hope... (no hope of finishing anything that is )
As to the circles, just a super cheap compass cutter from ebay just like this : http://www.ebay.co.uk/itm/COMPASS-CUTTER-CIRCLE-RADIUS-CUT-PAPER-RUBBER-VINYL-LEATHER-ARTS-ART-CRAFTS-NEW-/271744388265 There are better / more expensive versions, but this works for me - works on paper, card, corrugated cardboard and thin plasticard (up to 1mm). Best way to use it is making several light sweeps of the blade. I find on plasticard that it's best to actually score with the back of the blade rather than try to cut - again, several passes. Can also flip the material being cut over and have a go from the back
As with many of my build's, ideas come and go, same as inspiration... The Mortar is on hold for now as I wanted to have a go at the next LoER competition - and this time give my self plenty of time to actually complete !
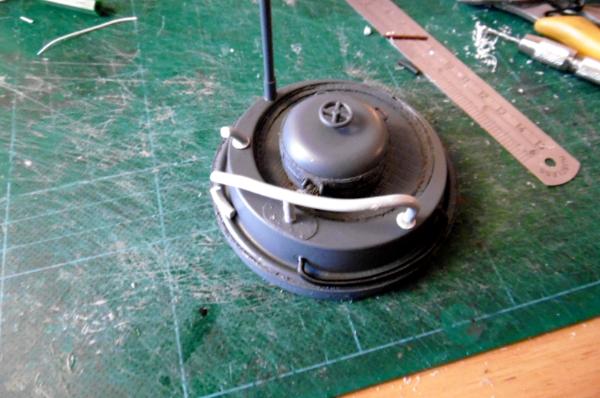
So her we go. Started this over the Easter break last weekend and made some good progress as I'm now to the painting stage...
So, as seen on the comp thread, here's the images, plus two new pics of undercoated glory...
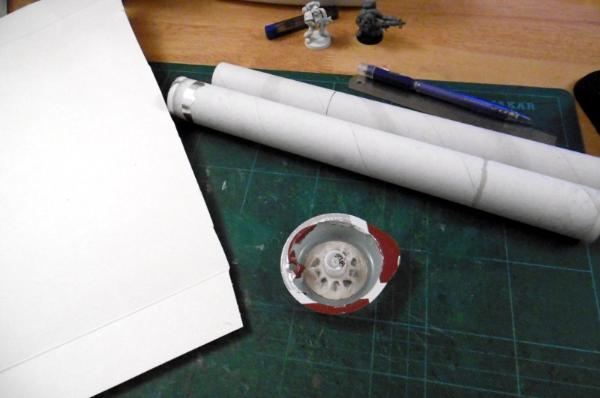
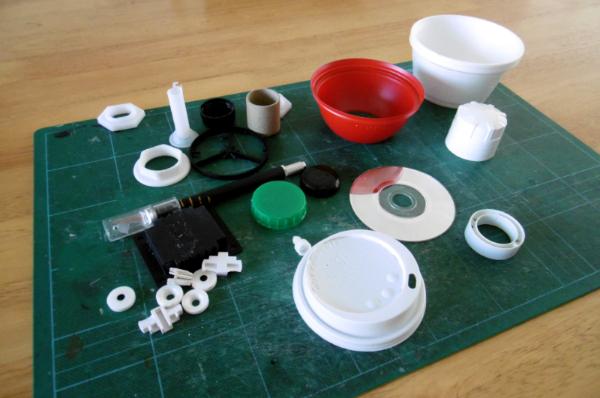
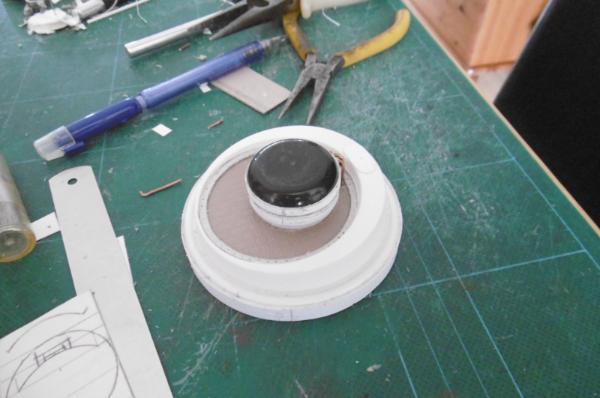
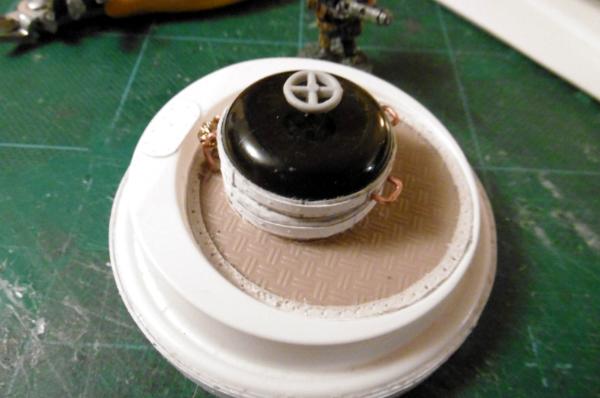
Well, here we go... pulled together some useful bits - likely wont use them all, but we'll see...
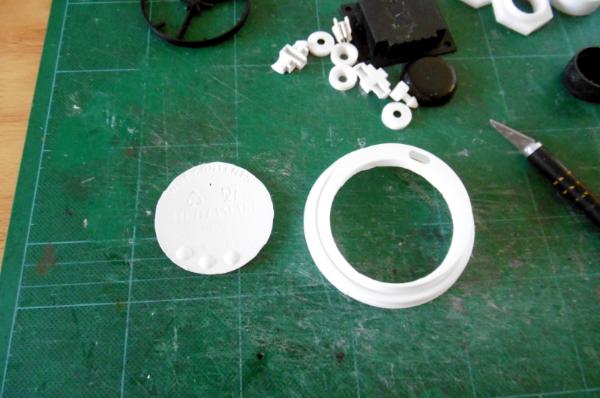
Main build so far uses a coffee cup lid, thick card tube (from a roll of aluminium foil) and some card of various thicknesses and a plastic lid from an empty tube of make-up (the wife's make-up of course...)
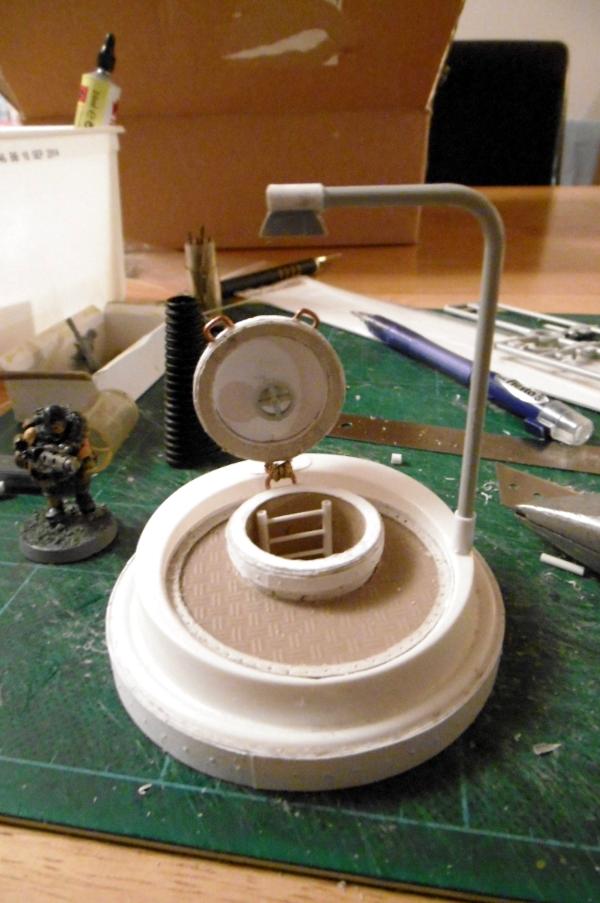
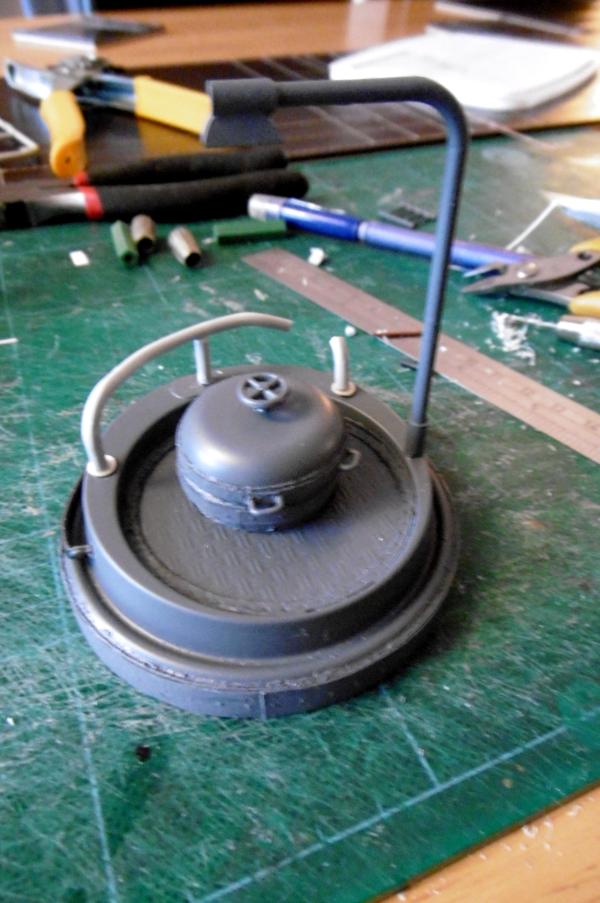
That is looking brilliant bud, is that going to be a light, so we can expect some nice OSL. I would like to see some more rivets, plenty of flat surface for some.
Camkierhi wrote:That is looking brilliant bud, is that going to be a light, so we can expect some nice OSL. I would like to see some more rivets, plenty of flat surface for some.
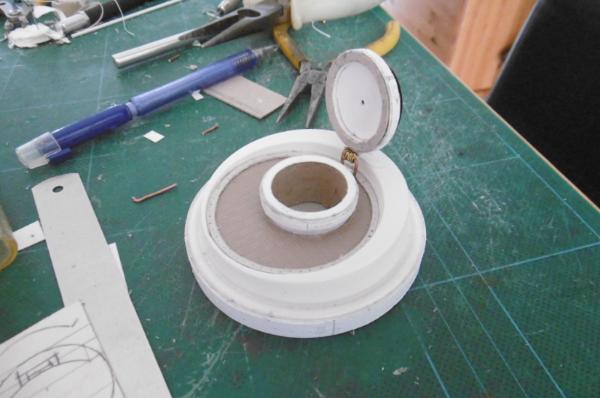
Indeed, it's a light - was toying with the idea of a working LED, but opted against at this time. OSL? Maybe, but given the hatch can open / close, I'm not sure if it will work? Agreed that it needs something more, once you get the uniform primer colour it became more obvious - so have added a broken railing and some cabling. Need to walk away now and have a look at it with a clear mind another day...
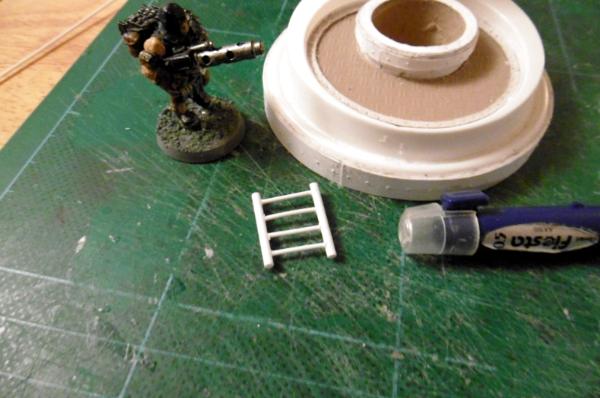
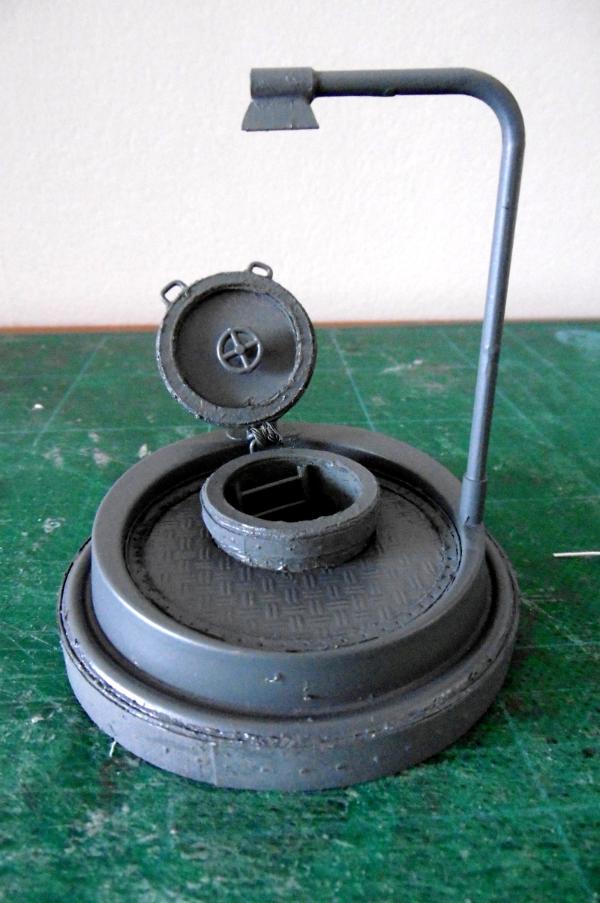
Veteran Sergeant wrote:Such a cool little terrain piece, excellently crafted. The attention to the little details is what really helps make it.
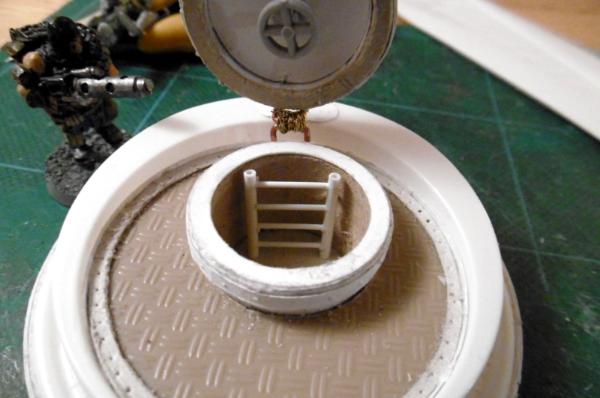
Camkierhi wrote:Looking pretty brilliant bud. Details really great, I take it this is just base colours, your dirtying it up from here.
Yep, base colours only at present... Lots of weathering is in the future for this piece (you can expect to see rust and grime)
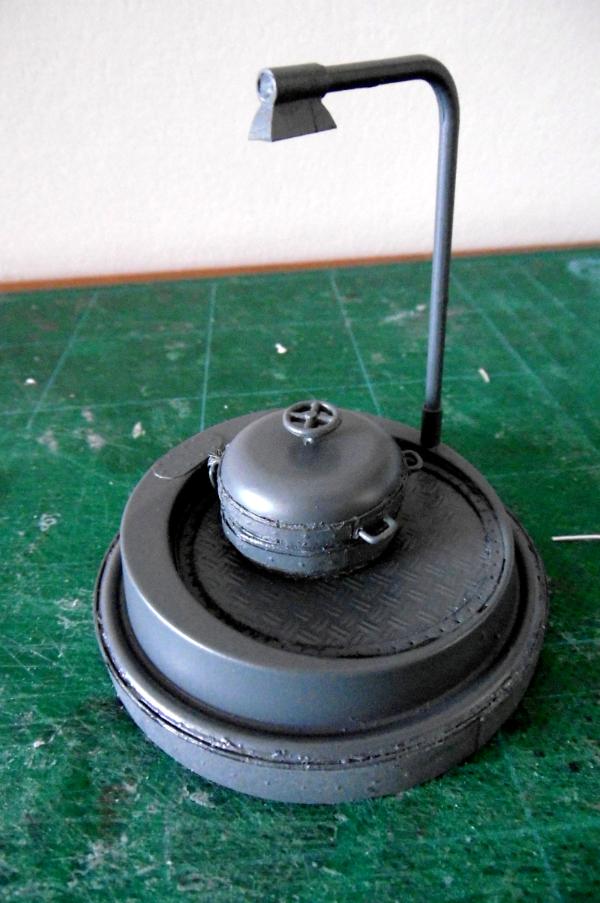
Littletower wrote:Looked nice in grey, looks better in colour. Just yellow, or are hazard stripes planned?
I toyed with the idea of hazard stripes, but think I'll just go with yellow railings - been looking at some real world industrial walkways and pipelines and yellow hand / grab rails are de rigueur...
Blue also appears to be a common companion.
evildrcheese wrote:Incredible. Amazing seeing what you can do with a pile of stuff.
EDC
Yep, that's the essence of this piece - 'pile'o'stuff'
Posted this in my Salute show thread, but thought i'd also leave it here...
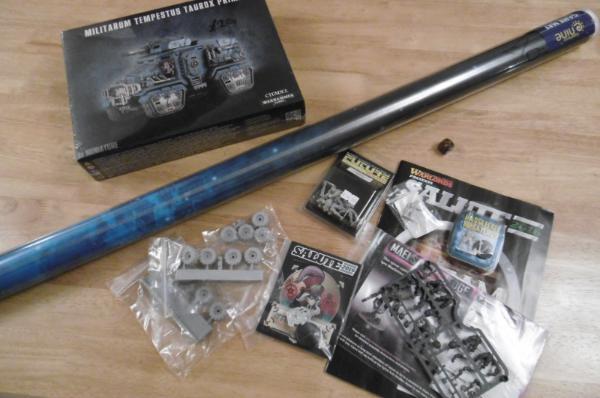
Quick show report: What a day - drove up from N. Kent and parked in the Excel car park (£15) got there just after doors opened, didn't take long in the snaking queue to get in, but boy was it busy within minutes !! So much to see but so little time to see it all ! I didn't manage to get any pictures, but were some amazing games and tables on show.
Other purchases: 3 sets of Zinge Industries 27mm Military Wheels to be used for a Taurox 6x6 conversion and other projects... ...although, since getting home I've found these are actually 23mm wheels so have messaged Zinge to see about swapping them...
...not to forget the official Salute dice & mini and a couple of free Maelstrom's Edge Epirian Handlers (was also great to meet Legoburner in the flesh on the MEdge stand - next time I'll likely be spending some cash with you guys )
Oh and got fleeced again by buying food from the overpriced food stalls in the main concourse... One year I'll learn my lesson and take my own grub
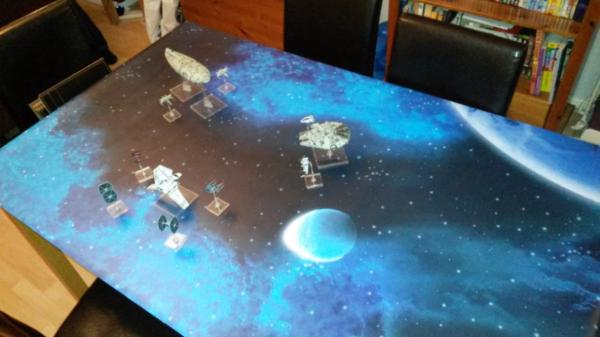
Managed to aslo fit in a few games last night of Star Wars on the new GF9 mat (what a bargain that was for £10 - should have bought them all as I could have sold them for profit on ebay...)
Some randomness dropped onto my cutting board today...
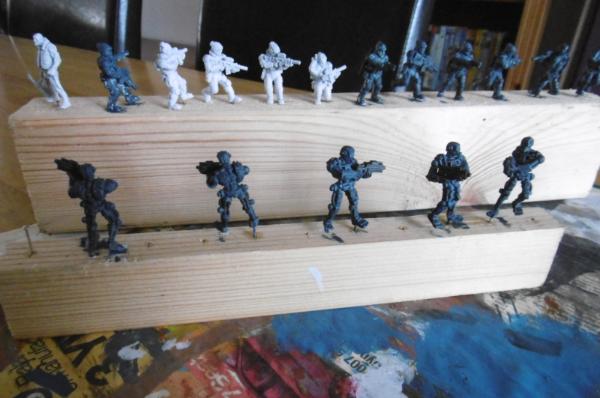
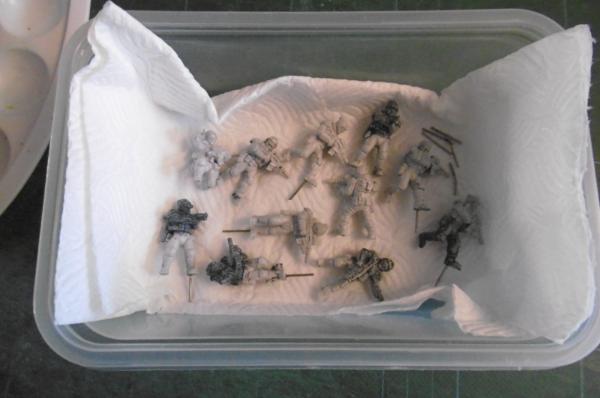
Put together a squad of Anvil Industry Unity Council Marine Corps - very nice models, great casts and the resin is nice and easy to work with. Also chopped the bases off the Copplestone Castings Terminator Robots - what a pain, managed to dismember some of their toes so need to do some greenstuff work now... Also, for the heck of it, got the Hasslefree Lewis ready for a lick of paint...
The Marines and Terminators will hopefully become a near future police force, kind of Judge Dredd meets Chappie. Not sure when the paint will happen, as heading out for vacation on Monday (to Florida)
Been a while since I managed to update or even post... Popping back in though with some paint in progress...
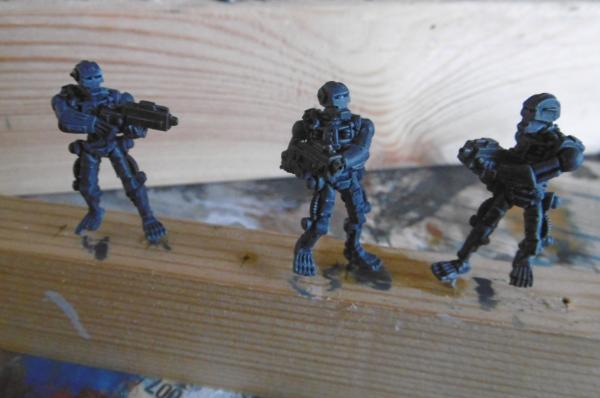
Not much to show, but laid down a base coat on the Treminator Robots of Dark Prussian Blue mixed with Black Grey (Vallejo paints), then started to pick out details on them with Black Grey. Much more to be done yet...
Annoyingly the resin Unity miniatures must still have some release agent on them as the undercoat and first coat haven't laid down nicely in patches, so will need to strip them, rewash and start again...
Cheers bud, I have seen the LoER comp that Tek's running, but I'll politely decline - need to work on stuff at my own pace at the moment and re-find the hobby mojo... I'll offer some moral support from the sidelines though...
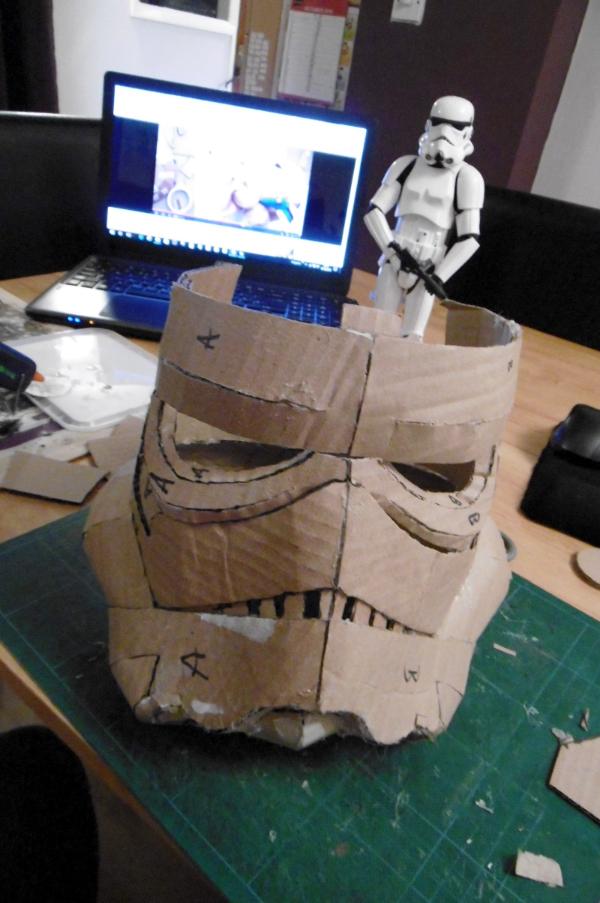
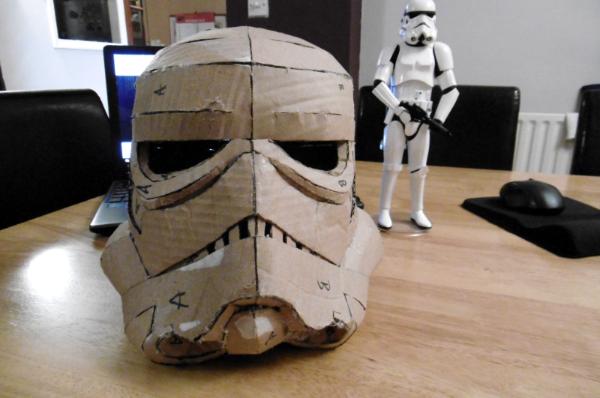
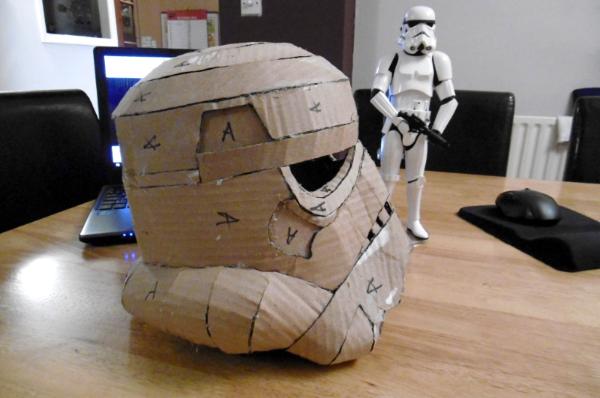
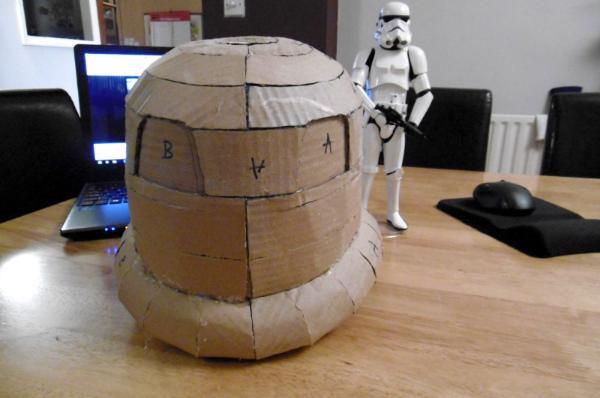
As expected, still not back to painting, but for a total change of pace (and scale) I've made a cardboard Stormtrooper helmet (1:1 ish scale) based on the original trilogy troopers... It's all cardboard with hot glue. The helmet is wearable, if a little tight, but I plan to rectify that after the next step which is to cover it all in car body filler and smooth it out so that it's no longer resembling a crudely made piece of cardboard...
Well, here's the prototype ST bucket build - as I said, the template is not really sized for my noggin and I realised that I wont be able to easily rectify this, so... my son will get this one and for my bonce, I'll need to print the v2 bucket at 5-10% larger...
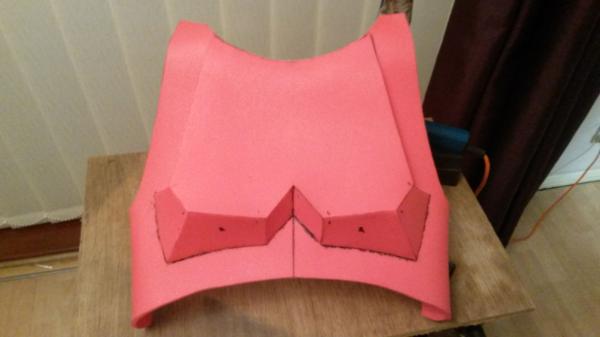
In the meantime, I've started worked on the stormtrooper armour costume in EVA foam... Note: this armour will not be pink when finished,, I'm using yoga mats for this build as they were dirt cheap I will be painting in regulation white...
While this isn't totally 'screen accurate', it's close enough for my needs (I won't be able to join the 501st with this...)
Cheers guys. Vik you should have a go. If your previous costumery efforts are anything to go by, you'll be able to tackle this no issues.
Update. Have made the thigh pieces and made a start on the shin armour. Found the templates are v snug on me so have had to add some extra width...
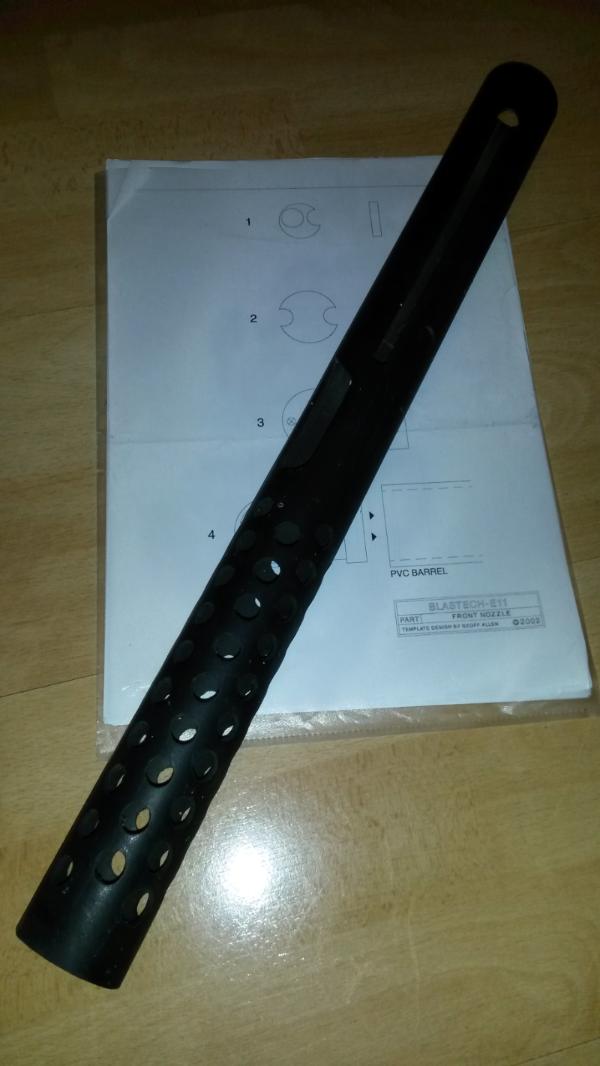
I also found my E11 blaster that I started. Is currently just a length of pvc pipe cut and drilled using some templates I found a few years back. Will cracking on with it when I've finished the armour
Ruglud wrote: ... Found the templates are v snug on me so have had to add some extra width...
Are you saying that the troopers spent too much time keeping trim and that's why they are such bad shots?
Could well be the reason - they do all seem perfectly trim - maybe they sweat all the excess calories off inside the armour... Saw Rogue One yesterday morning - great film with some brilliant ANH cameos going on throughout. Wont give any spoilers here, suffice to say it's in my top three SW movies now
I was hoping to get some progress updates on the armour, but I've been waiting on some webbing, elasticated material and nook & loop (Velcro). Finally arrived early this week so will get back to the build after Boxing Day (26 Dec). Have also got some supplies in for the E11 blaster build so will be cracking on with that as well
For now I'll wish you all a very Merry Christmas (or Happy Holidays for those who don't celebrate it)
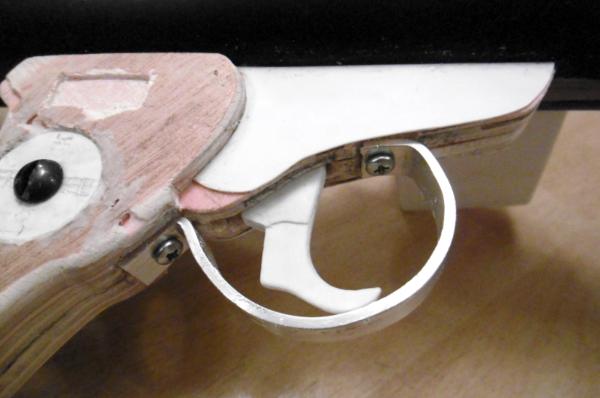
Camkierhi wrote:Impressive carving of the handle, looks good so far.
The handle is a couple of pieces of plywood glued together, some really cheap looking packing pieces from flatpack furniture IIRC. I cut some styrene templates and used these to draw out the shape then cut as close as I could with a jigsaw. No perfect, but close enough. used a 'mouse' sander to curve of the edges. Being plywood it's also nice and easy to remove layers and get the inner stock part looking right...
Viktor von Domm wrote:How the hell did you be able to drill out those holes so regular...?...
Amazing piece of work!
Erm, on closer inspection they are not even near perfect I really should have borrowed a pillar drill off my dad to do this part. But basically to get them aligned I just used a template that You can find at various websites - Although I go them from here: http://www.whitearmor.net/forum/topic/16705-the-best-sterling-templates-ever/?p=203898. Once the 't-bars' are on, these holes will be mostly covered up anyway so should't really notice the wonkiness...
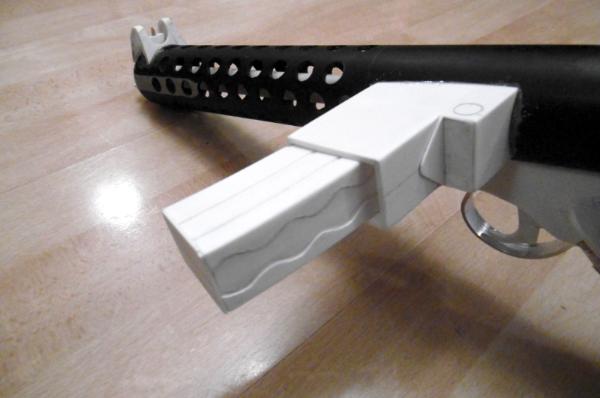
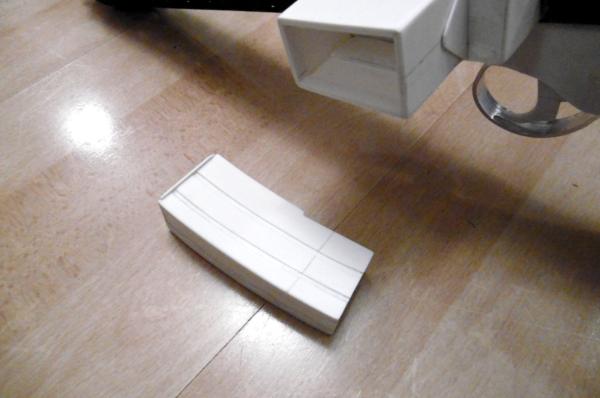
I realised though after I made the magazine housing that i's totally wrong - so have scrapped it and am now in the process of making anther... Need to order some more styrene soon !
i wonder though...since you´re not after the 100% 501th worthy look...why didn´t you stop by and got yourself an E11 nerf?... tho fully appreciate the scratch build
Are you building all of the armor out of cardboard? I've been wanting to make some Halo ODST armor myself, and most of the tutorials use foam as the base, and then cover with 'bondo' as you are doing.
It's all going to be eva foam,the helmet build started with a cardboard base, but it turned out too small then I discovered (and bought) a Hasbro Black Series STrooper helmet... I'll just be painting the foam white, so no bondo (or p38 this side of the pond) needed with this build
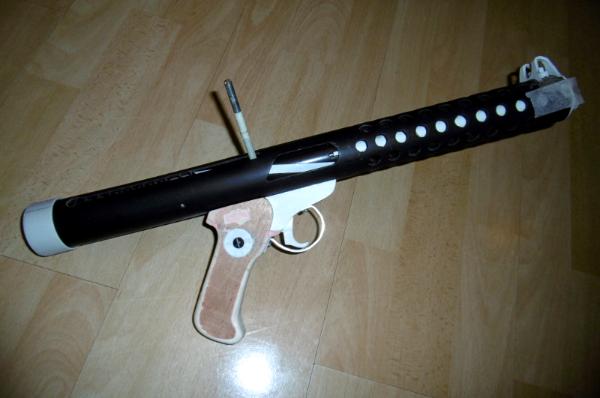
Grip has been epoxy glued on, with some pins drilled into the barrel and grip to help and keep it all nice and sturdy. The long bolt will be cut down and become the charging bolt 'cocking' handle (that's not me being rude, that's what it's called...)
Close up of the grip and attached magazine housing. Grip has a working trigger using a simple technique of pin through the trigger to hinge and a spring from a pen to make it, err, spring back into position... Also have created the selector switch with 'safety', single shot and full auto
Trigger release lock close-up
Return spring is a length of solder that I twisted round a thinner tube to fit the barrel - it's a bit too thick though so may look for an alternative
Close-up of front sight and barrel - need to add some hex nuts to the front
Trigger guard made from 10mm wide, 2mm thick aluminium strip and bent to shape
Ab armour: Buttons added - these are just screw covers that you find on flat pack furniture..
Gauntlets: Velcro fasteners at the wrist as I needed to have a cut here so I can pull them on over my hands...
Hand plates: Fastened onto running gloves with Velcro. The gloves had a Karrimor logo on the index finger that I removed with nail polish remover. Also had a flag logo and diagonal strip across the back that I removed the same way...
Thigh armour: Have the knee ammo packs ready to attach - made from 1mm craft foam and the yoga mats for the ammo packs
Shin armour: Sniper plate made as a separate piece using the craft foam again. Used Velcro on the back with a strip of craft foam to make putting these on nice and easy
Next stage is lots of Velcro for fitting the armour... Need to buy more Velcro...
Camkierhi wrote:Armour is looking great, that helmet for your son is looking outstanding, looks a lot easier than yours though.
Well, I cheated in the end and bought the Black Series Stormtrooper helmet, the cardboard one was too small so my son has that, but it's still in a raw state... The Iron Man was fiddly as the foam has quite a bit of flex - hence the wonky rear view...
Maniac_nmt wrote:The Iron Man helm looks promising.
Cheers Maniac, and here's an update:
So... This costume is for my 13 year old son, and is for a fancy dress party being held in just over 8 weeks. I have this to make now, as well as finishing my Stormtrooper (for the same party...).
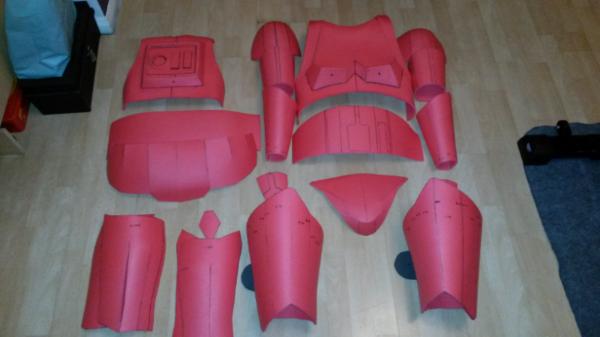
I printed the templates (Mk IV templates from theRPF.com users; robo3687 / JFCustoms - armour & Sharkhead7854 - helmet) at 90% which seems to fit him quite well... As with my stormtrooper, this is mainly made from 6.5mm exercise mats from Decathlon. For finer detail, I've used 1.5mm craft foam. For the soles on the boots I used 10mm eva foam floor mats, all stuck together with hot melt glue...
I made the helmet last weekend, so this weekend I moved on to the the boots, body brace and chest. Have run out of glue sticks now though, so no more progress until I get some more (ordered and due to arrive mid / end of the week...)
Pieces completed so far:
More pics, spoilered as this isn't actually model related...
Spoiler:
Boots:
Chest:
Body brace rear detail:
Helmet:
My theRPF.com threads in case you are interested in this sort of thing: Iron Man Stormtooper
Back armour - used the thicker 12mm foam for the collar part as it gave more shape and structure to this piece
Codpiece...
Hands/gloves - Using a pair of fingerless cycling gloves underneath which give some additional padding and shape. These are made from the thin craft foam and currently just stuck together with double sided sticky tape- I will go back though and properly glue once I'm happy with them
I've also bought a cheap (£1.00) torch - the type that straps to your forehead, and put some filters and an Arc Reactor pattern behind the lense - you can see it alongside the hands...
For the hand repulsors, I've bought two LED bike lights (again, £1.00 for the pair) and will rework them to fit the space - they have two settings, constant on and flash, so gives my son a choice of lighting effects with them..
Have recently growing an interest in cosplay blacksmithing too...since everybody is relying on Eva foam and so on I always wondered why no one uses leather for these things...after all you can glue that maybe even easier than foam, and painting is likely to be easier too... Also, say, how much square meters of material have you been using overall for one suit already?
I have looked into Worbla and considered trying it, but decided against it for a first build... The other medium i considered though was cardboard, but for a speed build, it had to be eva foam
Next stage is to trim up some of the pieces to get them fitting nicely (mainly the legs which are a little long at the moment), then sort out some straps and joints for fixing the legs and arms. After, it's paint time - going to seal with PVA then use automotive spray cans to get the classic red & gold
Asides from that, I need to finish the gloves, arc reactor, hand repulsors and work out a neck seal - possibly just make this from red fabric and draw on the armour pieces with a sharpie...
Feel like I'm ahead of schedule at the moment, so feeling quite satisfied with progress ...
Sorry for the delayed reply - have been busy finishing of the suits... And here they are...
And more of Iron Man...
Cam - to answer your questions, The foam isn't great to paint straight on, it should be PVAd first to both seal and prime. I didn't have time though, so for IM I just used Rust-Oluem All Surface which went on well, but did rub off in places as the evening wore on (no pun intended). I may go back though and re-do the paint job at some point... For the trooper, I used some gloss wood paint - this was a mistake as it split and flaked from the get go. To get over this I PVAd over the top then used some Wilkos gloss white spray paint - this worked a treat, although did get some chipping on the edges... On the whole though the suits came out well and they had the wow factor... lots of photos got taken (which will no doubt be on facebook soon) and my lad won a prize for best outfit
Learnt a lot over the last few months and would consider something like this again - although not just yet
Good news though, I can get back to making scale models now Got the pilgrimage to Salute next Saturday, then I have week off work. The world is my oyster. Time for the hobby mojo to resurface...
My hat is off to you mister, both for finishing and daring two such enormous projects in time and to such a breathtaking outcome. Be sure of my utmost envy...
Thanks Vik - you should give it a go - head over to The RPF, lot's of inspiration there...
As Monty Python would say 'and now, for something completely different...'
I was in the Top Gear audience for tonights episode That's me in the background.... shiny bald headed bloke (was standing on a raised platform - I'm not really that tall...)
Well, as ever, I've been rubbish at finding time fr the Hobby... DIY (new kitchen floor) and RL (work) have monopolised my time over the last few months...
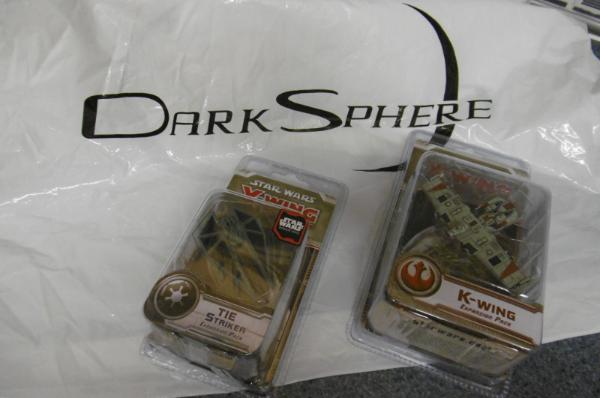
I did though go for a family trip to London today and spent a glorious day in the sun cruising along the River Thames - a great way to see the Capital. As chance would have it, we also found time to pop into the Dark Sphere shop, which is about 10 minutes walk from Waterloo Station and I picked up two expansion packs. Not sure how they would rate for competitive play, but I liked them and they bolster my Rebel & Imperial forces... Will break them out of the packs tomorrow and check the cards, etc... Not sure when I'll get a chance to use them - hopefully in the coming weeks...
You were on TV and did not wear your cosplay! Come on dude...
Sounds like a nice day out, squeezing in a little hobby time, even if it is just shopping is great. No idea on the ships, they look cool if that helps.
while i think matt leblanc is cool, even more so now that he has grey hair i still miss the old crew...shame they had to go...top gear is top notch entertainment! hilarious and even sometime educational^^
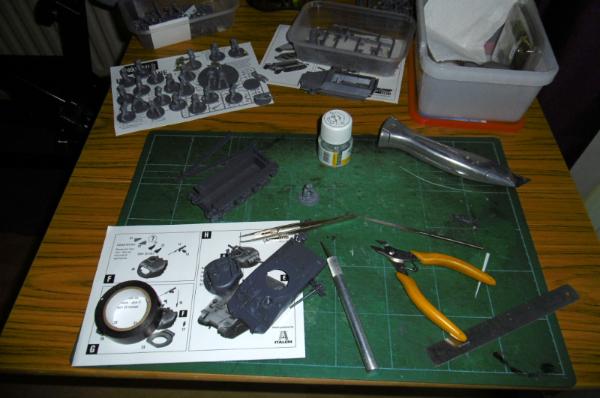
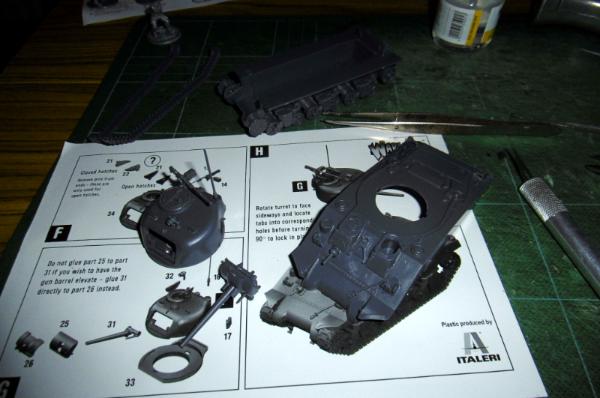
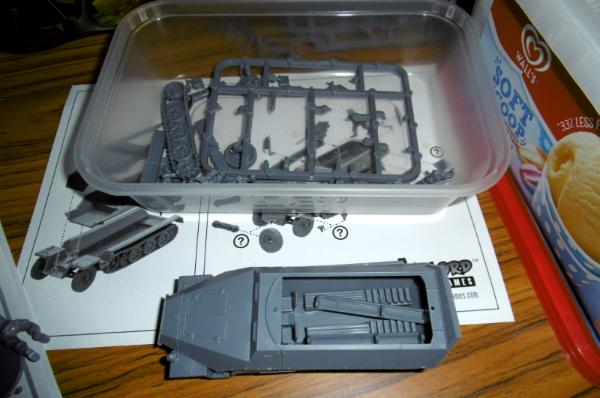
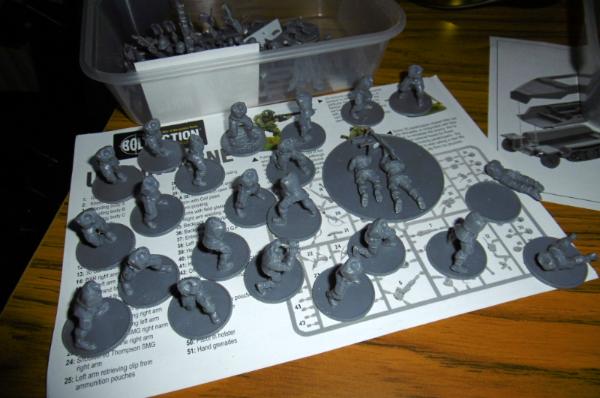
Not sure whether to start a new thread for this, but while I ponder on the pros and cons, I'll quickly showcase what I'm currently working on. WW2 Bolt Action starter set and an M4 Sherman. May was a slow month, but I'm hopeful that June will see an upturn in hobby time...
So here goes - starting with the M4, a SdKfz 251/10 AusfD. 3.7cm PaK half track and US Airborne
Well I'm in, I just started gates of antares which is bolt action using 10 sided dice, so I'll be watching what you do for terrain and stuff. Also I just ordered through warlord and have a free Lt speirs coming in a couple weeks, not sure he's useful or available otherwise, but they still have the offer up as well as the sprue sale going on.


 SUPPLY DROP
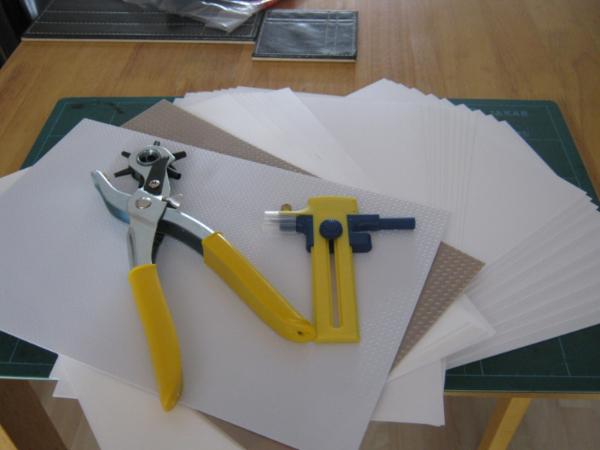


 "
"


 94
94