| Author |
Message |
 |
|
|
|
|
Advert
|
Forum adverts like this one are shown to any user who is not logged in. Join us by filling out a tiny 3 field form and you will get your own, free, dakka user account which gives a good range of benefits to you:
- No adverts like this in the forums anymore.
- Times and dates in your local timezone.
- Full tracking of what you have read so you can skip to your first unread post, easily see what has changed since you last logged in, and easily see what is new at a glance.
- Email notifications for threads you want to watch closely.
- Being a part of the oldest wargaming community on the net.
If you are already a member then feel free to login now. |
|
 |
2009/01/30 10:47:52
Subject: Thunderbolt Diorama
|
|

Regular Dakkanaut
|
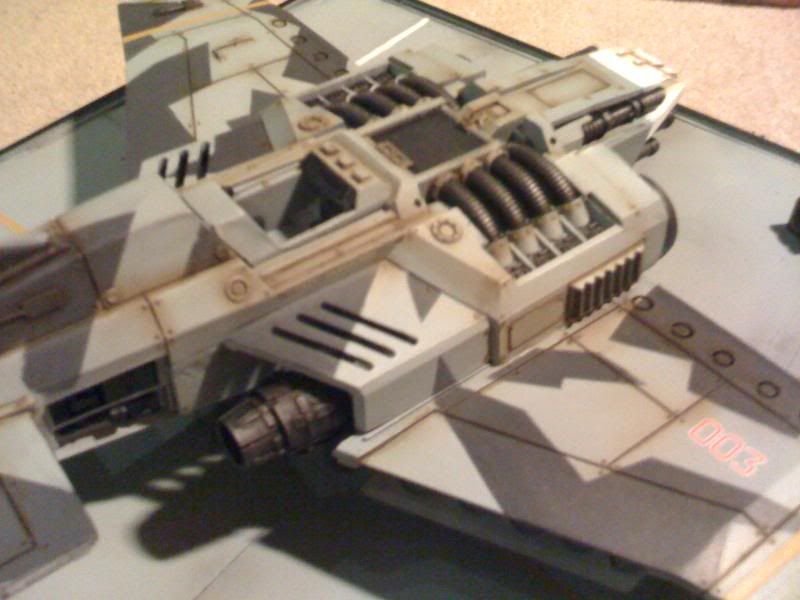
For Christmas I got a Thunderbolt as a present so I decided to really go to town on this forgeworld piece and make a full blown landing strip diorama on a nice scenic base.
Having recently purchased the Imperial Armour Modelling Masterclass book I felt inspired and decided to branch out into some new areas and techniques which I hadn't tried before. The book is fantastic actually, I'm normally sceptical of GW painting guides but as usual the forgeworld books are really a class apart.
I also spent alot of time reading books and magazines on scale modelling techniques and especially the work of Mig Jimenez, as well as a great deal of reference material, photos of modern and past military aircraft as well as deck crews and airfields.
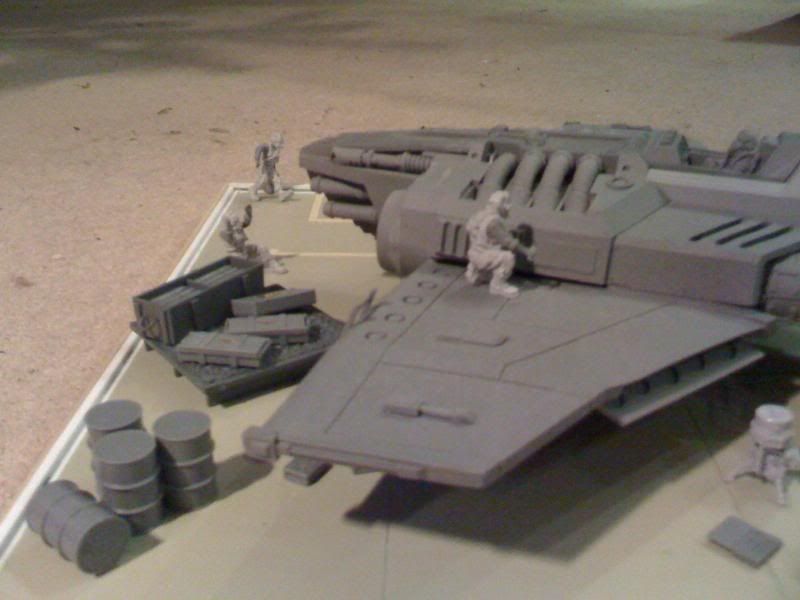
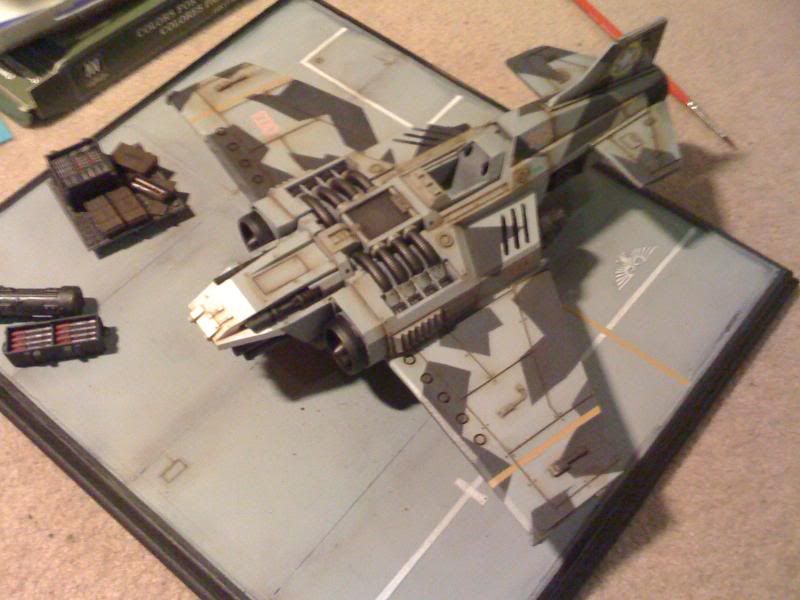
The Diorama consists of 4 main elements, the Thunderbolt fighter itself, a deck crew of four, two pilots (one seated in the fighter and one on the ground), and scenery. These were made up from GW, Forgeworld, and Tamiya kit pieces along with plasticard and scenic material from model train suppliers.
Step 1:
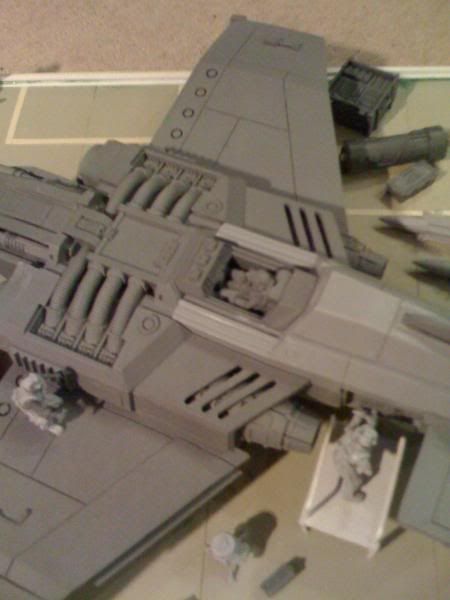
Washing and cleaning up all the kits. The Ground crew are made up from conversions of forgeworld Elysians and Tamiya 1:48 scale plastic military scale kits. I've also used a forgeworld Limited edition Thunderbolt pilot (available only via events), and the forgeworld Thunderbolt kit itself. So as you can imagine there was a lot of resin cleaning to be done! Some Hot water, a toothbrush, rubber gloves, and some Cif mild abrasive (jif) cleaner later the components were all sparkly fresh and ready to work with.
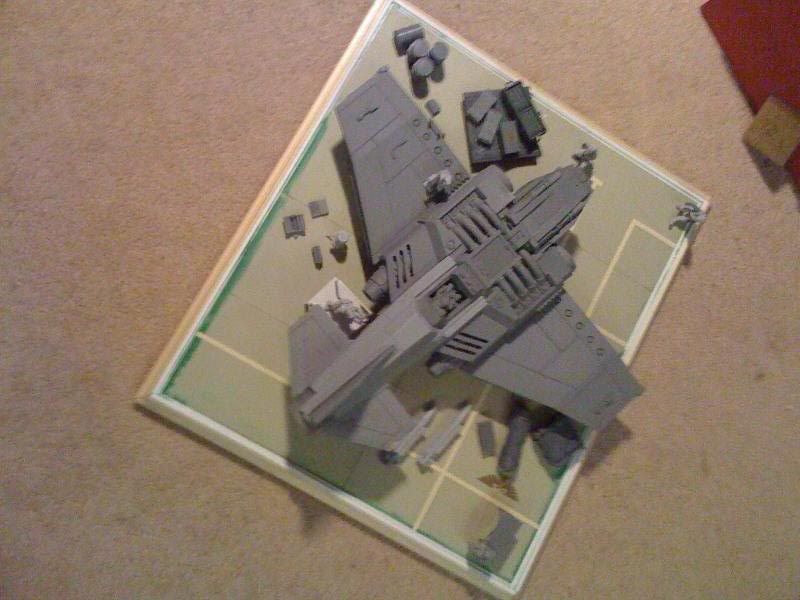

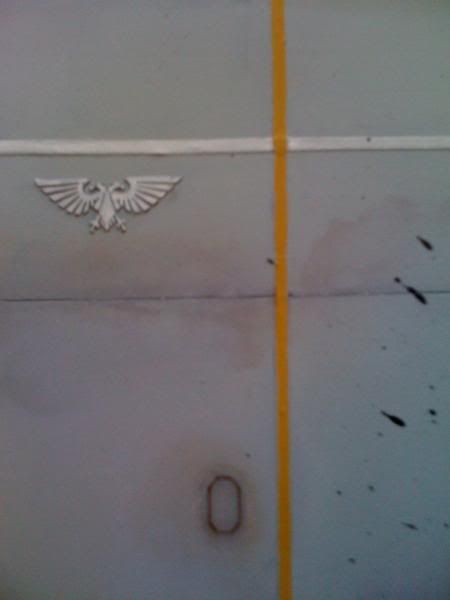
The first step was build the base, I measured both the length and wing span of the Thunderbolt prior to construction and cut an appropriately sized piece of chipboard. I then cut some beading strips from a local DIY store to size and attached these to the edges with PVA glue to give the base a nice presentable edge. You can buy ready made specialist wood bases (such as those used for trophies and via specialist model stores, however these are usually very expensive and for a fraction of the price you can produce the same effects yourself.
Once the basic shape was set out I placed the plasticard tiles onto to the base to make the surface, filled any gaps with pre mixed modelling filler, and used plasticard strips to tidy the edges. The tiles were textured, I picked them up from a model train supplier, they also allowed me to create a natural looking airfield tarmac effect as they were individual slabs that left gaps around the edges. This saved me having to panel scribe lines into a large sheet of plasticard and gave a nice interesting breakup pattern to work with rather than one large featureless area. Once there had dried in place I moved onto adding some surface details such as panel scribing flaps and little hatches into the floor surface and adding an Imperial Eagle (Forgeworld brass etch). I also cut thin strips of electrical tape to make the painted lines on the tarmac as they gave me a nice raised profile from the surface than painting alone lacked. Again this added detail and some variation for later painting and shading.
Close ups of the build
|
|
|
|
 |
|
2009/01/30 10:49:12
Subject: Re:Thunderbolt Diorama
|
|
Regular Dakkanaut
|
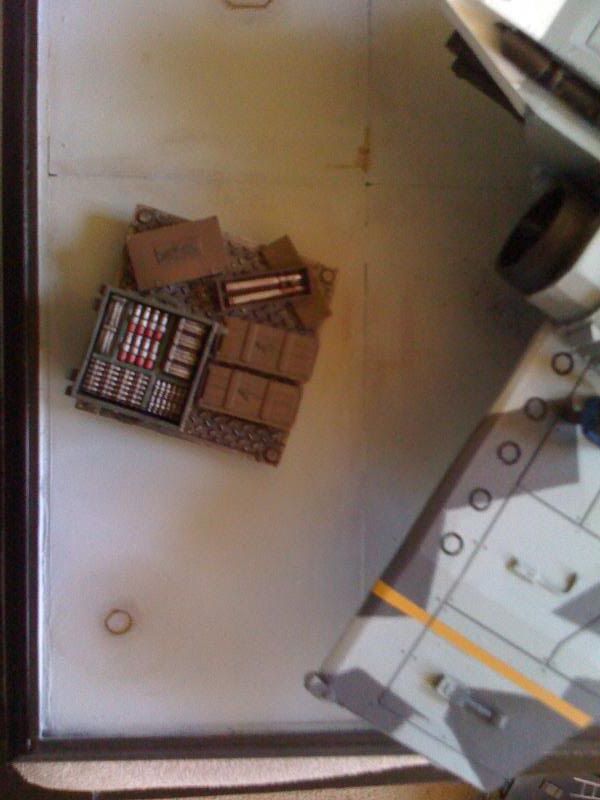
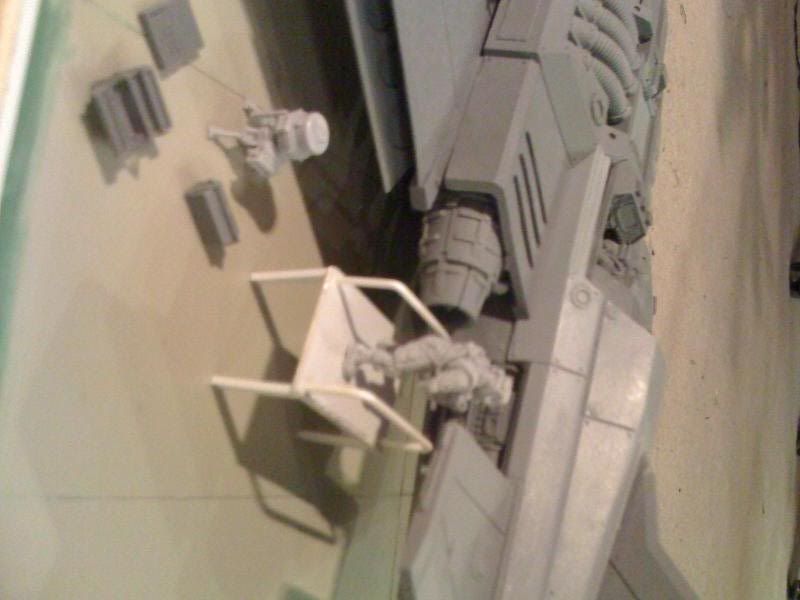
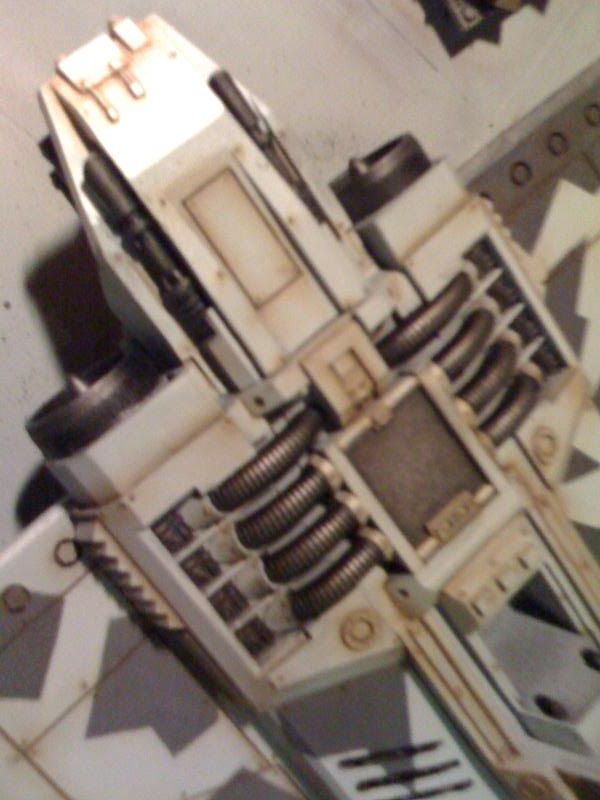
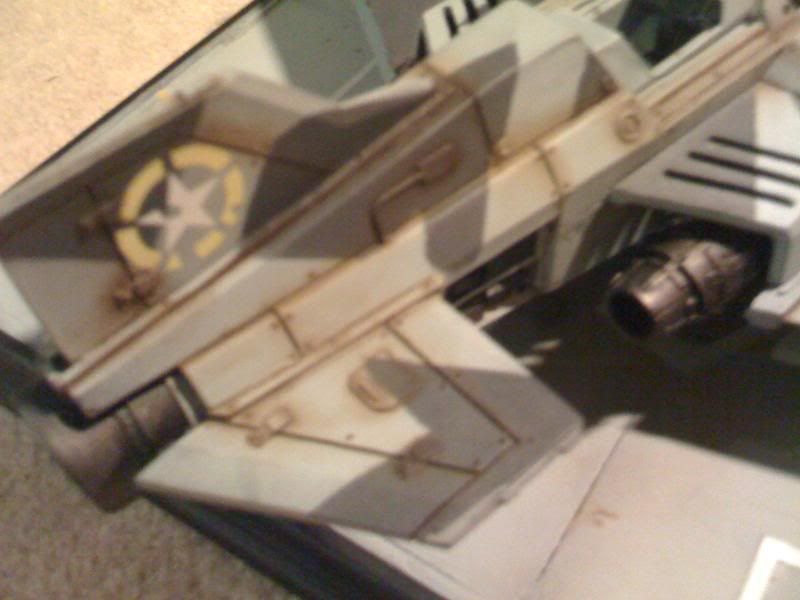
Some more close ups of the building stage:
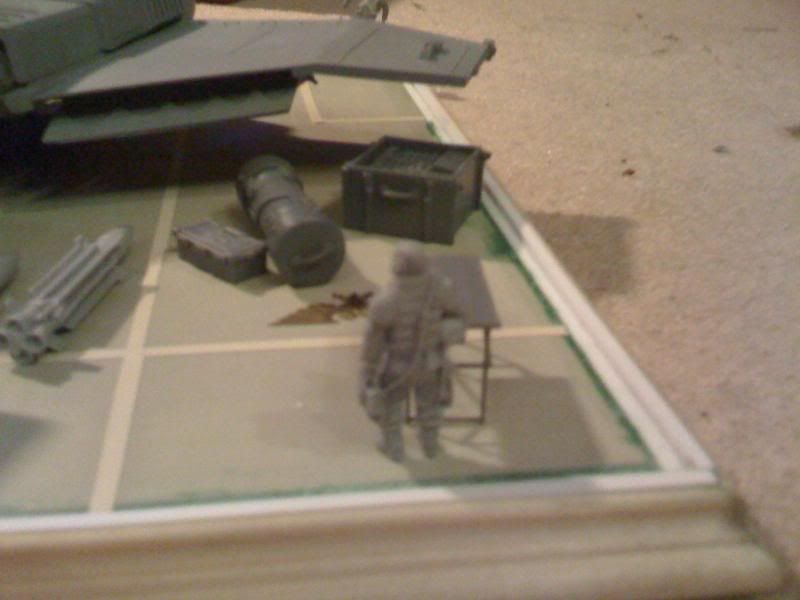

Apologies for the low quality of these photos, I didn't have my digital camera with me at the time and had to rely on my mobile phone camera. They should still be able to give an idea of the layout even if the figures are somewhat out of focus.
|
|
|
|
|
|
2009/01/30 11:13:43
Subject: Thunderbolt Diorama
|
|

Homicidal Veteran Blood Angel Assault Marine
|
Hey - that's ace!
Love it - always worth going the extra mile on special pieces.
|
|
|
|
|
|
2009/01/30 11:18:24
Subject: Re:Thunderbolt Diorama
|
|
Regular Dakkanaut
|
Thanks Tallmantim
It's just a dry run at this stage, to get a feel for the layout and try some variations. I'm painting the components seperately from the base so the final position and layout of the scenery might change a little on the finished article.
I'm actually halfway through painting now and will post some WIP painting shots shortly.
|
|
|
|
|
|
2009/01/30 11:29:28
Subject: Re:Thunderbolt Diorama
|
|
Regular Dakkanaut
|
Stage 2:
Straight into the painting! As I mentioned earlier I decided to try some new techniques on this diorama, so after experimenting recently with the GW Spray Gun I decided to go the whole hog and get myself and airbrush and a compressor.


The airbrush is a Badger 200, nothing fancy but a good solid airbrush for most uses.
The painting on the fighter itself will be a mixture of airbrushing, brush painting, pigments, dry transfers, oil washes thinned with turpentine. I really decided to try all of the various techniques explained in the Imperial Armour book and even used washes mixed from Citadel Inks and Klear floor cleaner!
Some of the paints I used included Vallejo Model Colour, Citadel Colour, Citadel Foundation, Oil paint, Artists Gouche, Citadel washes, Inks, Mig Pigments, Tamiya weathering master, Tamiya Thinner.
|
|
|
|
|
|
2009/01/30 11:41:57
Subject: Re:Thunderbolt Diorama
|
|
Regular Dakkanaut
|
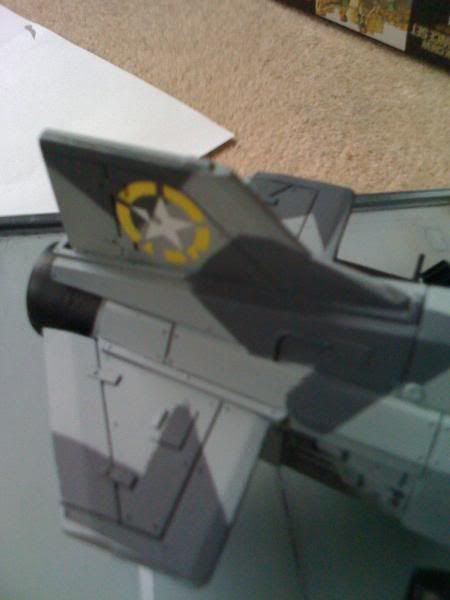
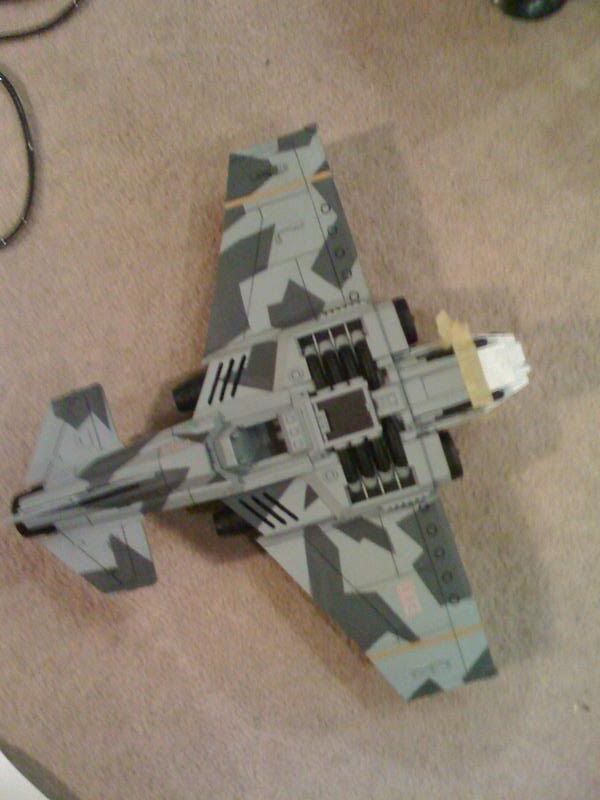
First stage painting:
First off I worked on the base, after an undercoat of citadel Chaos Black spray I went at it using the airbrush to do the large areas and blend in the colours, building it up in multiple coats of grey.

I then moved onto to Thunderbolt. For this I didn't use Citadel Spray, instead I primed it with a Primer called Mr Resin. This is produced by a Japanese firm Gunzo Sangyo (or something!), and is a specialist primer for resin kits offering better solvent strength and bonding to resin than GW's standard spray.
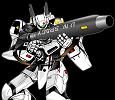
Once this was dry I covered the Thunderbolt with a coat of Adeptus Battleship Grey Foundation paint, thinned and applied with the airbrush. After the base coat had dried I moved onto the Camo pattern.

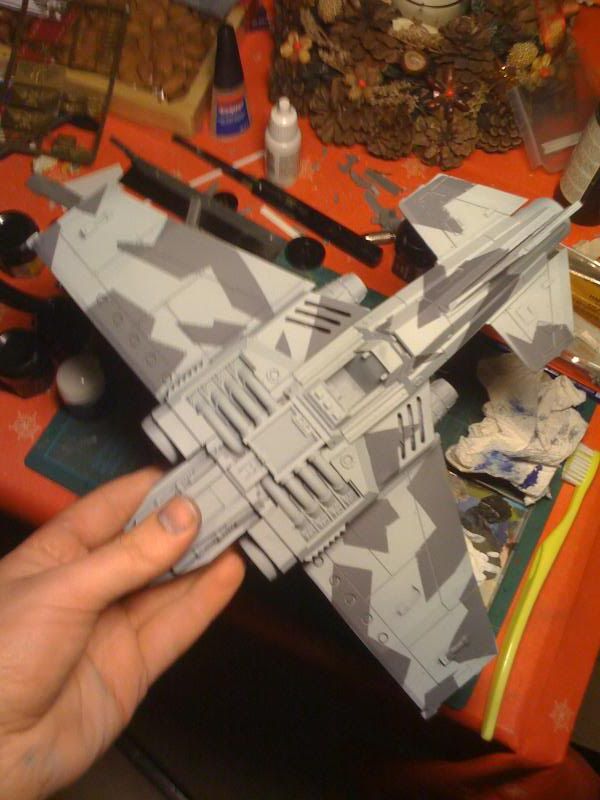

This was applied by carefully cutting peices of masking tape to the desired shape with a scapel blade and masking the areas I wanted to leave dark grey. I then once all the tape sections had been layed gave the model a coat of Astronomican Grey foundation paint thinned and airbrushed. As you can see once the paint had dried and the tape was removed it leaves you with very clear crisp camo shapes. It's a little messy at some edges where there was masking tape bleed at this stage but that will be corrected and tidied up later in further painting stages.
|
|
This message was edited 1 time. Last update was at 2009/01/30 11:43:16
|
|
|
|
|
2009/01/30 11:48:10
Subject: Thunderbolt Diorama
|
|

Junior Officer with Laspistol
|
Very cool,I like it!
|
"I refuse to join any club that would have me as a member."-Groucho Marx
|
|
|
|
|
2009/01/30 12:00:28
Subject: Re:Thunderbolt Diorama
|
|
Regular Dakkanaut
|
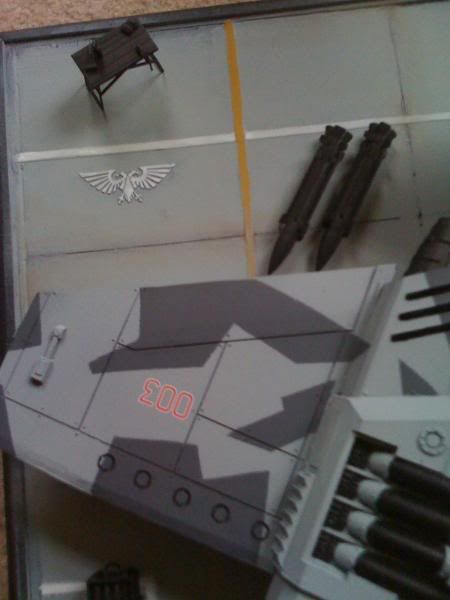
Heres a shot of the basic colours and some more work on the base.

Building up on the fighter, areas of detail were picked out and dry transfers were applied for serial numbers and flight markings etc.
I used dry transfers because unlike wet ones they leave no silvering when applied, no nasty shining or obvious evidence of a transfer. The transfers I used were from Archers Dry Transfers a compnay who specialise in modern and WW2 military scale kits. It's a bit of an assortment of different generic misc WW2 logos, with ideas coming from Imperial Armour Volume one in terms of what to add and positions.


|
|
|
|
|
|
2009/01/30 12:18:07
Subject: Thunderbolt Diorama
|
|

Mutilatin' Mad Dok
|
o_O
That is so beautiful.
Wasn't there an old diorama made in the gw studio about the same?
|
|
This message was edited 2 times. Last update was at 2009/01/30 12:19:16
|
|
|
|
|
2009/01/30 12:20:14
Subject: Thunderbolt Diorama
|
|
Regular Dakkanaut
|
Paul Atreides wrote:O_O
:_:
That is so beautiful.
Wasn't there an old diorama made in the gw studio about the same?
Thanks Paul!
As to an old diorama I'm afraid I wouldn't know. I've never visited the studio or even Warhammer World, and I don't remember seeing any photos in a magazine or online. I based this one off different reference photos of real life airfields, but I guess the Studio could have also done something with a Thunderbolt as well.
|
|
This message was edited 1 time. Last update was at 2009/01/30 12:20:42
|
|
|
|
|
2009/01/30 12:42:45
Subject: Re:Thunderbolt Diorama
|
|
Regular Dakkanaut
|
I moved on next to some more detail work on the fighter.
Following the examples from my reference photos I Painted the nose white and added yellow stripes to the wings to give it a bit of colour and some more authenticity.
The nose was masked off with Tamiya modelling masking tape and brush painted with Vallejo Model Colour white. The Vallejo white is a great white and coveres really nicely, however it still needed to be built up in gradual thinned layers to give a smooth and even coverage.
I also used the masking tape to mark out the yellow stripes which I then airbrushed with thinned Iyaden darksun foundation paint. The yellow foundation paints don't give great coverage so this was done in multiple light coats to get a solid colour. Once dry the tape was removed and and bleed was tidied up with a brush.
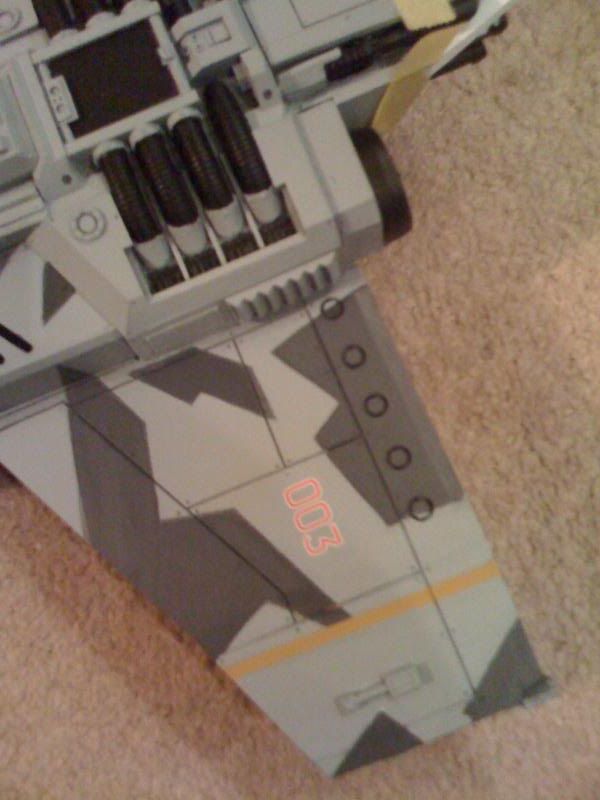
If you're going to use masking tape for model painting I definately recommend investing in some Tamiya tape, it's specifically for models and small applications and masks much better than general DIY masking tape that allows much more colour bleed into the areas where you dont want the colour to go!
|
|
|
|
|
|
2009/01/30 12:52:10
Subject: Re:Thunderbolt Diorama
|
|
Regular Dakkanaut
|
|
|
|
|
|
|
2009/01/30 13:10:45
Subject: Re:Thunderbolt Diorama
|
|

Unbalanced Fanatic
|
Well done sir. I can't wait to see how this turns out.
|
 Finished 3rd Co Starting First Company Finished 3rd Co Starting First Company

 Arbites Arbites
DS:70+S+G+MB+IPw40k03#++D++A++/wWD280R+++T(D)DM++
Adepticon TT Headhunter 2008 1-800-INQUISITION |
|
|
|
|
2009/01/30 13:53:25
Subject: Re:Thunderbolt Diorama
|
|
Regular Dakkanaut
|
Next up I moved onto weathering the base and building up the tarmac.


The blending, shading and oil and grime were done with a mixture of Burnt Umber Oil paints thinned with Turpentine, and airbrushing. I also used a modelling wash on the etched hatches and details by a company called pro modeller. When using Turpentine make sure it's odourless or your give yourself a rotten head ache!
I used a reference picture of a tarmac airfield from a scale modelling magazine for the final effects.
|
|
|
|
|
|
2009/01/30 14:00:22
Subject: Thunderbolt Diorama
|
|
Battle-tested Knight Castellan Pilot
|
This looks incredible...keep up the great work. I hope the ThunderBolt sees some use in a battle also!
|
Stick to the shadows - Strike from the darkness - Victorus aut Mortis - Ravenguard 1st Company |
|
|
|
|
2009/01/30 14:06:18
Subject: Re:Thunderbolt Diorama
|
|
Regular Dakkanaut
|
Thanks for all the positive feedback guys! Much appreciated!
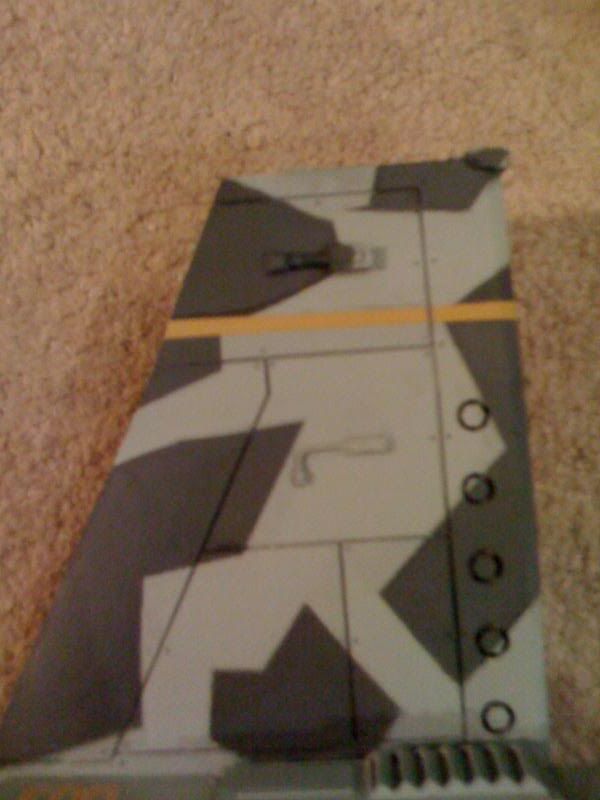
Weathering the Thunderbolt:
Now that the basic colours, and decals were added to the fighter it needed some work to take off that factory fresh look. I wanted to give the Thunderbolt the look like it was in active duty under service in the middle of a long gruelling campaign.
So like the tarmac I gave it some washes with thinned burnt umber oil paint.
The whole model was sprayed with Purity seal first (any varnish will do though)
and when dry given a wash around the panel lines, rivets and details. Once the thinner had evaporated I blended the oil paint into the surface using a small and large drybrush. The purity seal helped the blending process, and any messy areas could be tidied up with thinner or turpentine.
Close ups


Tail fin
The silver work on the engines, jet turbines, and gun barrells was done by grinding pencil lead into a fine dust and rubbing the graphite directly onto the model with my finger.
This gives the metal a really nice metalic dirty effect thats hard to do with paint alone.
|
|
This message was edited 1 time. Last update was at 2009/01/30 14:09:56
|
|
|
|
|
2009/01/30 14:14:09
Subject: Thunderbolt Diorama
|
|
Krazed Killa Kan
|
OMG.. it looks a LOT like WW2 era photos..
that is just beautiful (in a manly manner)
-Porkuslime
|
2+2=5 for sufficiently large values of 2.
Order of St Ursula (Sisters of Battle): W-2, L-1, T-1
Get of Freki (Space Wolves): W-3, L-1, T-1
Hive Fleet Portentosa (Nids/Stealers): W-6, L-4, T-0
Omega Marines (vanilla Space Marine): W-1, L-6, T-2
Waagh Magshak (Orks): W-4, L-0, T-1
A.V.P.D.W.: W-0, L-2, T-0
www.40korigins.com
bringing 40k Events to Origins Game Fair in Columbus, Oh. Ask me for more info! |
|
|
|
|
2009/01/30 14:16:47
Subject: Thunderbolt Diorama
|
|
Agile Revenant Titan
|
Wow. This is an amazing piece. Are the groundcrew also FW models? Thanks for posting such great work.
|
No earth shattering, thought provoking quote. I'm just someone who was introduced to 40K in the late 80's and it's become a lifelong hobby. |
|
|
|
|
2009/01/30 14:17:03
Subject: Thunderbolt Diorama
|
|
[SWAP SHOP MOD]
Barpharanges
|
Looks absolutely stunning. Can't wait to see the completed thing.
|
|
|
|
|
|
2009/01/30 14:21:14
Subject: Thunderbolt Diorama
|
|
Drop Trooper with Demo Charge
Bedfordshire, United Kingdom
|
I do alot of airbrushing and it is very evident you have read alot and taken it all in. She looks lovely, i hope you airbrush more models now.
As for the diorama i realy like the theme and you have kept it simple which works for me.
|
|
|
|
|
2009/01/30 14:53:09
Subject: Re:Thunderbolt Dioram
|
|
Regular Dakkanaut
|
Thanks guys, the ground crew are forgeworld Elysian drop troops from the lascutter team set, they have been converted with Tamiya 1:48 scale figures. The pilot standing is also forgeworld.
I'm glad you liked the WW2 vibe, that's what I was hoping to get across 
Thank you also for the compliments on the air brushing. It is my first kit using an airbrush so I'm glad it worked out I did a lot of practice on sheets of paper first!
|
|
|
|
|
|
2009/01/31 01:27:50
Subject: Thunderbolt Diorama
|
|
Battle-tested Knight Castellan Pilot
|
Graphite grinding=pure genius
I'm gonna put some in my coffee! I hope it helps me paint as good as you!
|
Stick to the shadows - Strike from the darkness - Victorus aut Mortis - Ravenguard 1st Company |
|
|
|
|
2009/01/31 01:35:48
Subject: Thunderbolt Diorama
|
|
Lone Wolf Sentinel Pilot
|
Is this plane going to be removable for Gaming purposes.
|
My Blog http://ghostsworkfromthedarkness.blogspot.com/
Ozymandias wrote:
Pro-painted is the ebay modeling equivalent of "curvy" in the personal ads...
H.B.M.C. wrote:
Taco Bell is like carefully distilled Warseer - you get what you need with none of the usual crap. And, best of all, it's like being a tourist who only looks at the brochure - you don't even have to go, let alone stay.
DR:90S+GMB+I+Pw40k01-D++A++/areWD 250R+T(M)DM+ |
|
|
|
|
2009/01/31 05:46:12
Subject: Thunderbolt Diorama
|
|
Fireknife Shas'el
A bizarre array of focusing mirrors and lenses turning my phrases into even more accurate clones of
|
So which Golden Demon competition will this be placing in?
|
WARHAMS WARHAMS WARHAMS WARHAMS WARHAMS WARHAMS WARHAMS WARHAMS WARHAMS WARHAMS WARHAMS WARHAMS WARHAMS WARHAMS WARHAMS WARHAMS WARHAMS
2009, Year of the Dog
 |
|
|
|
|
2009/01/31 06:33:06
Subject: Thunderbolt Diorama
|
|
Executing Exarch
|
That thing looks terrible!
Feel Free to send it my way and I will get rid of it for you 
|
|
|
|
|
2009/02/01 14:26:58
Subject: Re:Thunderbolt Diorama
|
|
Regular Dakkanaut
|
@ s.j.mccartney Thanks but I can't recommend it, the taste might be a little sharp
@Ghost in the darkness, the plane won't be fixed to the base as such, but I don't intend to use the thunderbolt for gaming (well not this one at least). I preferred just to make it a diorama for modeling and painting purposes.
@ stonefox actually I had just painted this for my own enjoyment, I never really thought about any competitive elements. But hey if I'm happy enough with the end result a Forgeworld best of show might be a cool idea as an entry. The issue for me with Golden Daemon is having to attend Gamesday to enter the models. To be honest Games Day doesn't really appeal to me as an event to visit. Perhaps some other comp though, or a scale model thing or something like that.
@ Clthomps totally! Thanks for the offer of support!
Today I'll be working more on the ground crew and pilots. Here are some reference photos that I'm working from (these are from a modern US aircraft carrier example).


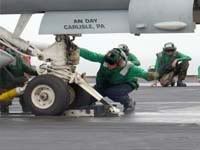
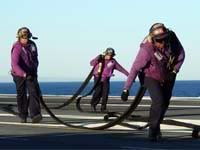
A deck crews role on the deck is identified by the colour of their jersey. Purple for aviation fuel, Green for ground support equipment, Blue for plane handlers etc. In this case it will be marked out further by the carapace and helmets.
Here also are some reference shots that I'm working on for the pilots
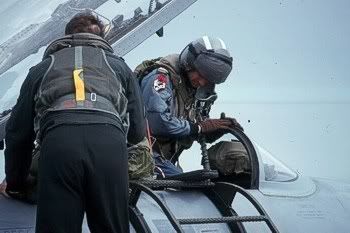

These are taken from Canadian airforce examples, but the flight suit colours are quite universal and similar in most modern airforces.
|
|
|
|
|
|
2009/02/01 14:50:49
Subject: Re:Thunderbolt Diorama
|
|
Martial Arts Fiday
|
Sweet, just awesome. It is hard to not go whole hog on FW models they are so nice!
I will definitely have to pick up that book myself.
|
"Holy Sh*&, you've opened my eyes and changed my mind about this topic, thanks Dakka OT!"
-Nobody Ever
Proverbs 18:2
"CHEESE!" is the battlecry of the ill-prepared.
 warboss wrote: warboss wrote:
GW didn't mean to hit your wallet and I know they love you, baby. I'm sure they won't do it again so it's ok to purchase and make up.
Albatross wrote:I think SlaveToDorkness just became my new hero.
EmilCrane wrote:Finecast is the new Matt Ward.
Don't mess with the Blade and Bolter! |
|
|
|
|
2009/02/01 16:41:20
Subject: Thunderbolt Diorama
|
|

Tinkering Tech-Priest
|
Freaking fantastic man, can't wait to see it finished.
|
|
|
|
|
2009/02/01 16:43:29
Subject: Thunderbolt Diorama
|
|
Pyromaniac Hellhound Pilot
|
I thought our airforce was largely composed of Geese.
|
It's better to simply be an idiot, as no one can call you on it here. -H.B.M.C.
Cap'n Gordino's instant grammar guide:
"This is TOO expensive." "I'm going TO the store, TO get some stuff."
"That is THEIR stuff." "THEY'RE crappy converters."
"I put it over THERE." "I'll go to the store THEN."
"He knows better THAN that." "This is NEW." "Most players KNEW that." |
|
|
|
|
2009/02/01 21:34:55
Subject: Thunderbolt Diorama
|
|
Swift Swooping Hawk
|
Very nice.
Lovely work so far.
Going to try that tip with the pencil lead.
Thanks.
|
 
"Now I am become Death, the destroyer of worlds." - J. Robert Oppenheimer - Exterminatus had it's roots way back in history. |
|
|
|
|
|
|