| Author |
Message |
 |
|
|
|
|
Advert
|
Forum adverts like this one are shown to any user who is not logged in. Join us by filling out a tiny 3 field form and you will get your own, free, dakka user account which gives a good range of benefits to you:
- No adverts like this in the forums anymore.
- Times and dates in your local timezone.
- Full tracking of what you have read so you can skip to your first unread post, easily see what has changed since you last logged in, and easily see what is new at a glance.
- Email notifications for threads you want to watch closely.
- Being a part of the oldest wargaming community on the net.
If you are already a member then feel free to login now. |
|
 |
2012/08/30 13:59:40
Subject: Crazy Ivans random infinity blog ( Fusiler with HMG pg 6)
|
|

Parachuting Para-Commando
|
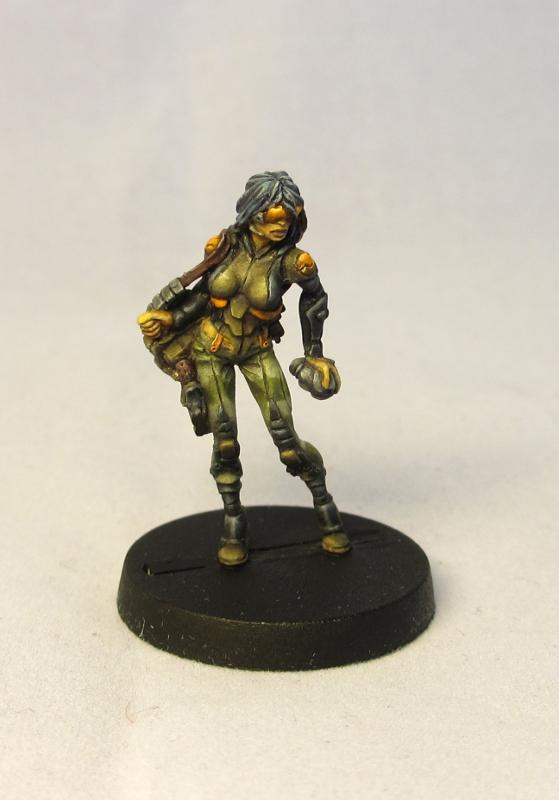
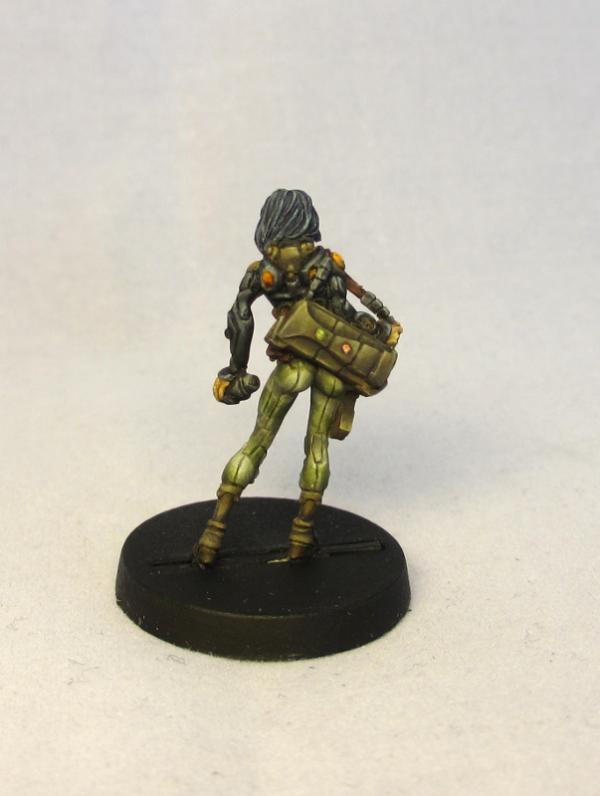
Hi I'm Working on some Yu Jing I'm painting for a friend. He wanted a darker colour scheme so that they will look evil and sinister hopefully I can make them look like the evil scheming bastards that they are  .
I would really like some comments an feedback on them.
This is what I have finished so far.
I have some more pictures of them in my gallery.
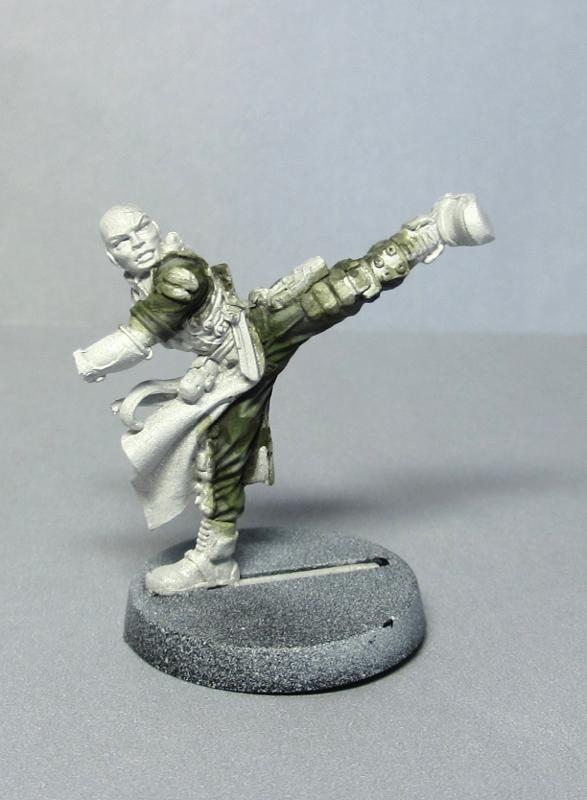
I,m currently working on a Shaolin monk just finishing up is uniform, going to work on his armour next.
|
|
This message was edited 46 times. Last update was at 2020/06/14 14:33:09
|
|
|
|
2012/09/01 16:59:54
Subject: Re:Crazy Ivans random infinty blog (Currently working on Yu Jing)
|
|
Parachuting Para-Commando
|
Thanks I'm glad you like them.
Just a small update I have worked on the armour plates and the robe currently working on the face. The robe gave me some trouble with the shading and I will go back an touch it up when I'm finished with the face.
|
|
|
|
2012/09/04 17:36:48
Subject: Re:Crazy Ivans random infinty blog (Currently working on Yu Jing)
|
|
Parachuting Para-Commando
|
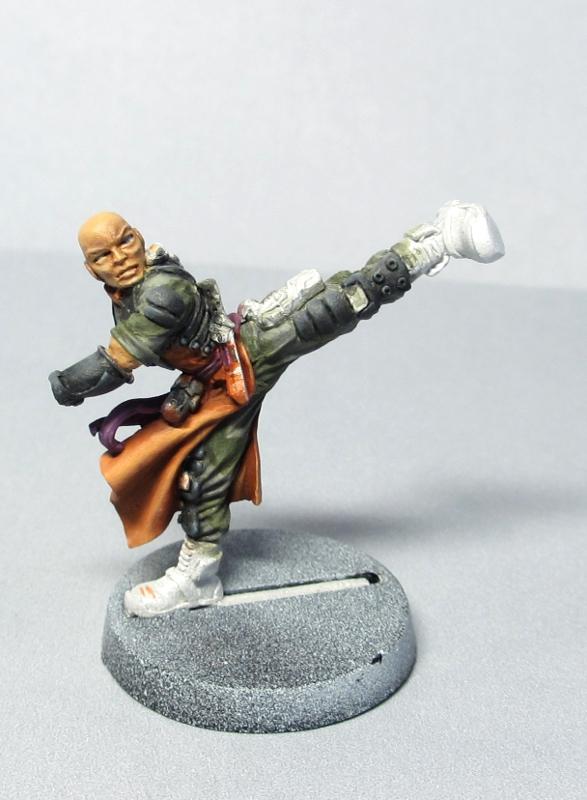
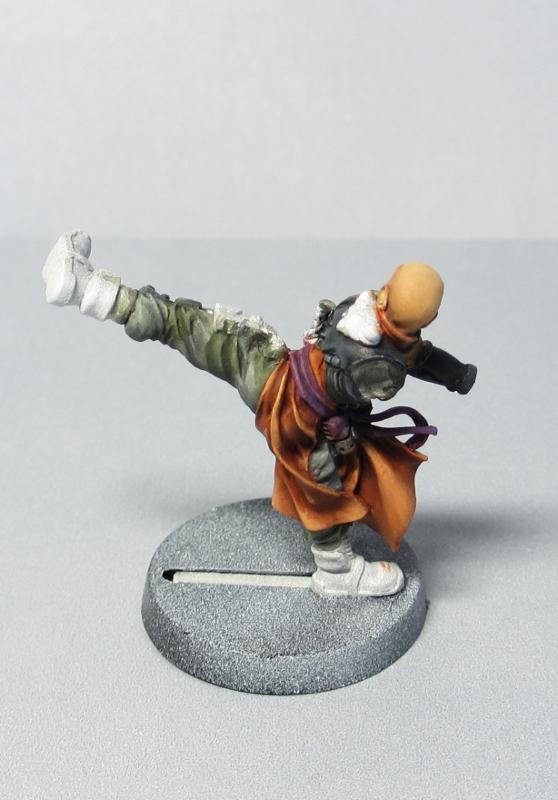
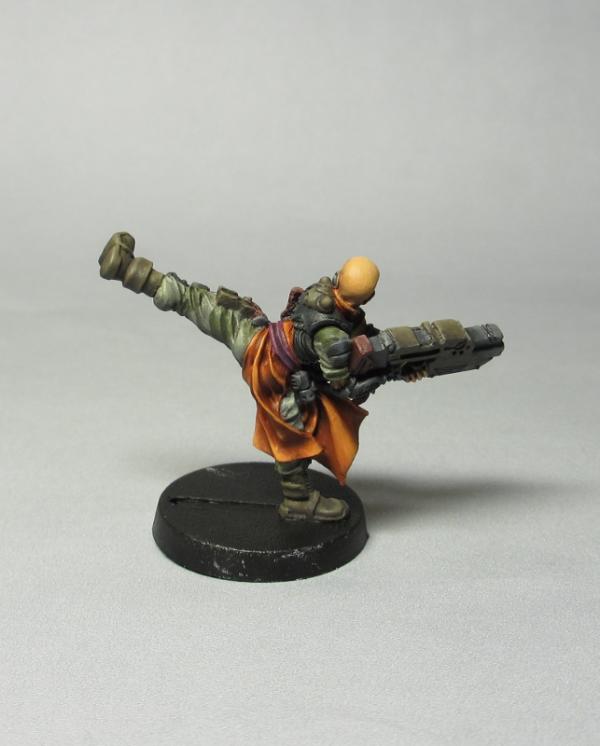
I finished up the last parts on the shaolin monk and attached his gun.

|
|
|
|
2012/11/16 14:21:13
Subject: Re:Crazy Ivans random infinty blog (Metros w.i.p)
|
|
Parachuting Para-Commando
|
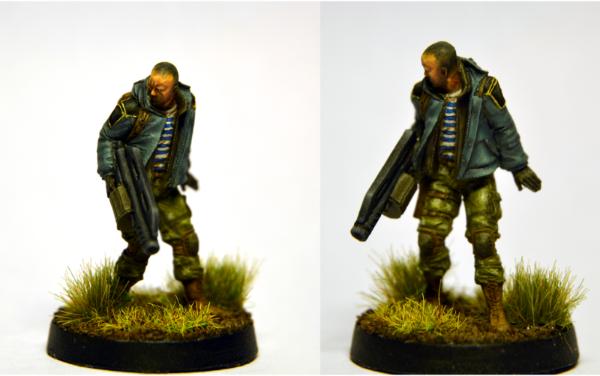
I have started work on two new metros. Have worked on the trousers and boots so far, will work on the jacket next.

I have a slight problem I'm not sure what colours i used on my previous metros jackets. I think it was P3 coal black and codex grey, will have to do some experimentation to get it right.
|
|
|
|
2012/11/18 15:27:00
Subject: Re:Crazy Ivans random infinty blog (Metros w.i.p)
|
|
Parachuting Para-Commando
|
Thanks for the comments.
@BurstFire
It was a while since I played Mordheim, but I would say that it is less luck since there are a lot of modifiers you can use to improve your odds the weapons range, cover, equipment, etc.
This also helps infinity become an extremely tactical game since it has a reaction system, so the enemy you are shooting at can fire back or try to dodge. So it becomes a contested roll where the player with the best roll wins so you want to stack the odds in your favour as much as possible. The game really rewards movement and positioning if I lose a game I usually wonder about how I could have played differently and not how I should change my list which was the case when I played 40k.
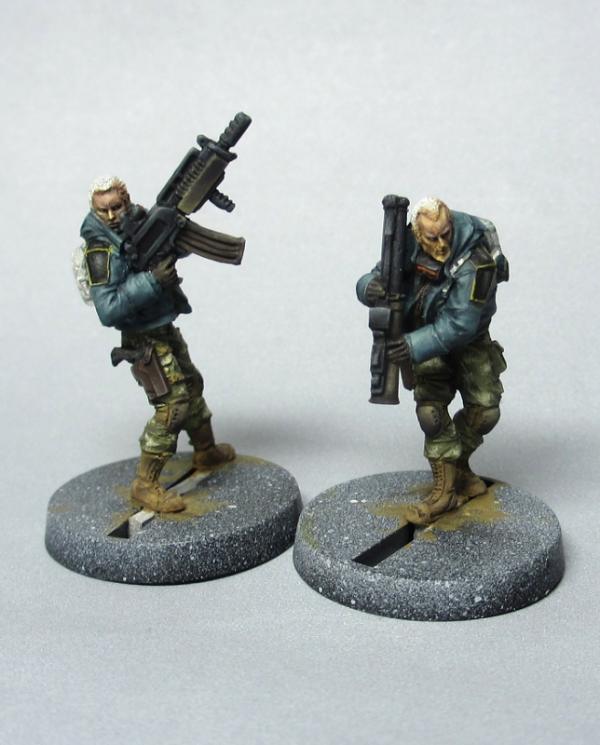
There are no real RPG elements in the original game, but the Paradiso campaign book introduces spec op units which skills and equipment can be improved. Automatically Appended Next Post: I have had some more time to paint the metros. Worked on the weapons and jackets I haven't been able to match the jacket colour to the old ones exactly but I think it is close enough comments and criticism are welcome.
|
|
This message was edited 1 time. Last update was at 2012/11/19 01:00:55
|
|
|
|
2012/11/20 11:08:23
Subject: Re:Crazy Ivans random infinty blog (Metros w.i.p)
|
|
Parachuting Para-Commando
|
Thanks for the coments.
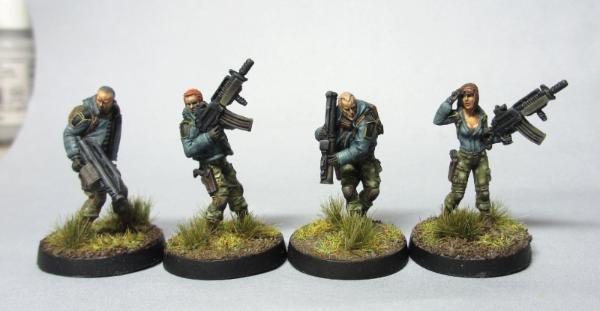
@Hinderburg That didn't actually cross my mind but thanks for reminding me now I have to watch varan teatern again  .
I finished the last parts of the metros so now they are compete.
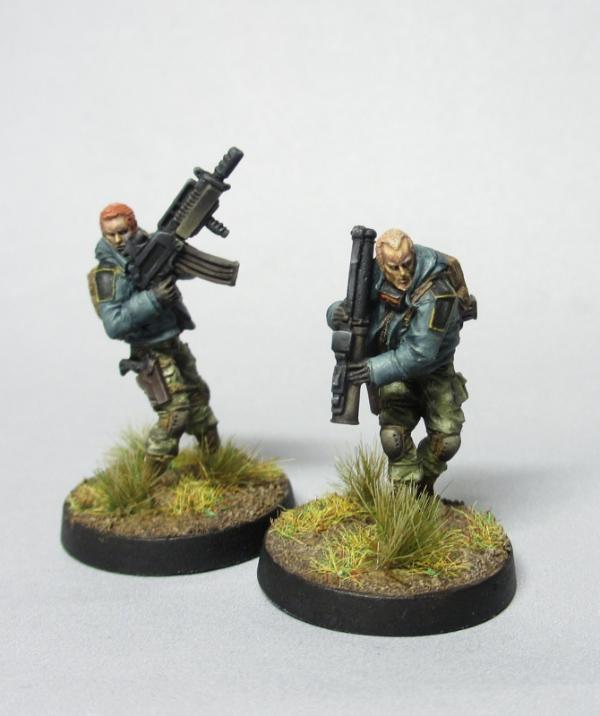
Here is a group photo with all the Metros I have painted, now I have to order the HMG metro so I can have the complete collection .
|
|
|
|
2012/12/08 23:55:56
Subject: Re:Crazy Ivans random infinty blog (Metros done)
|
|
Parachuting Para-Commando
|
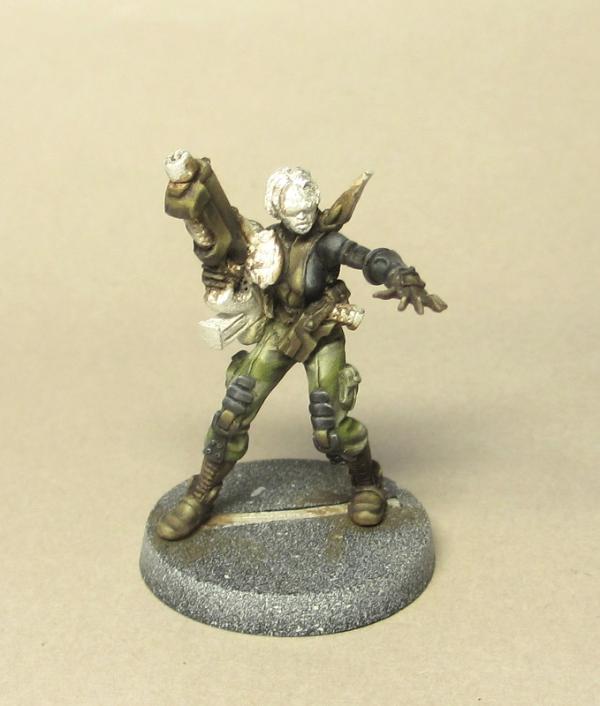
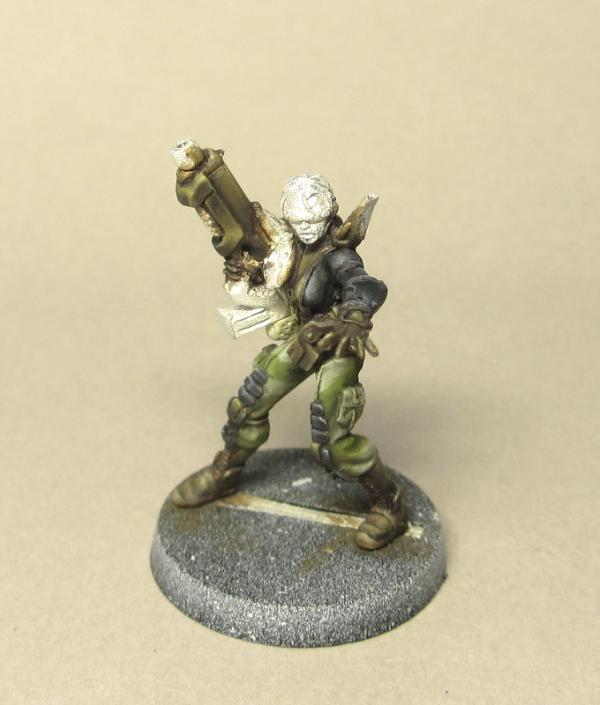
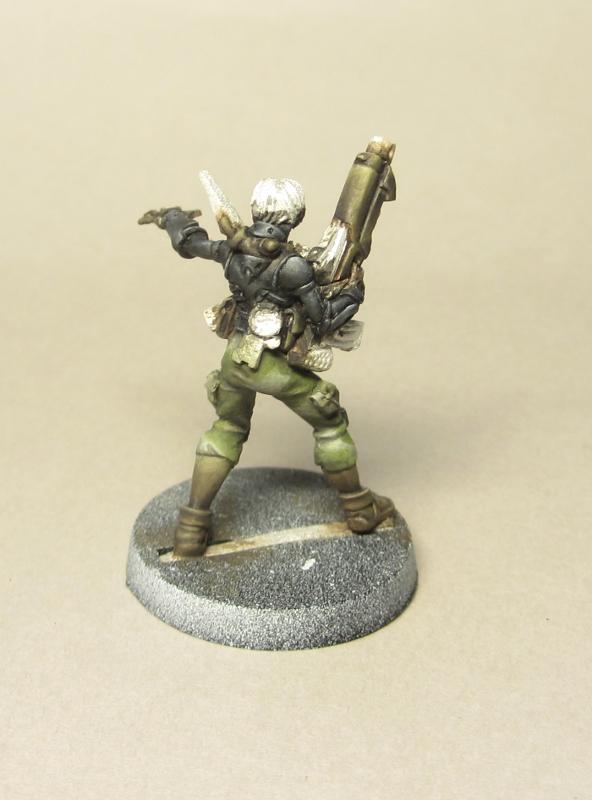
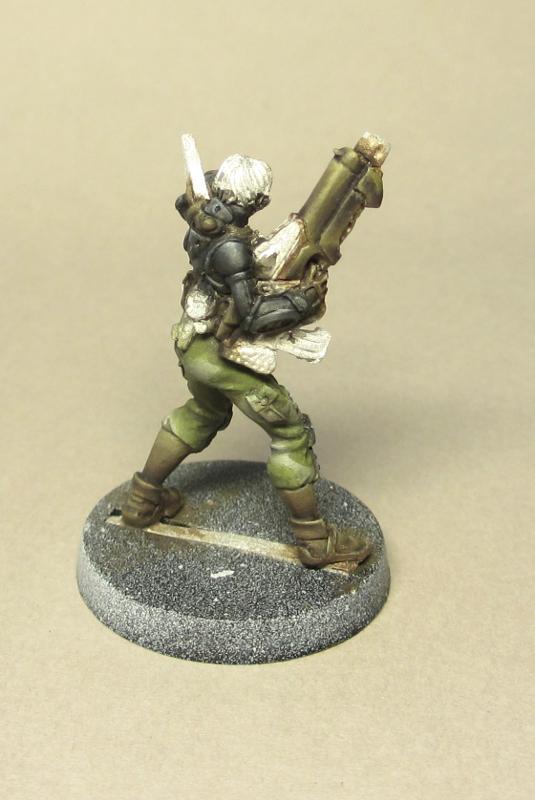
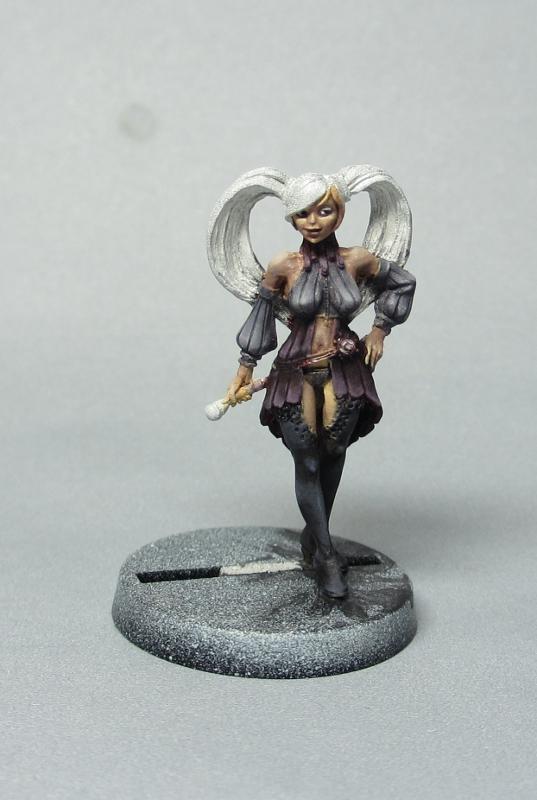
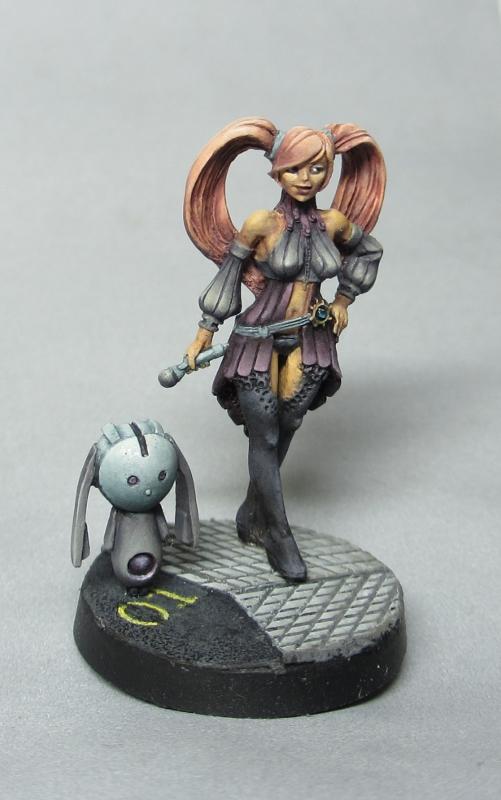
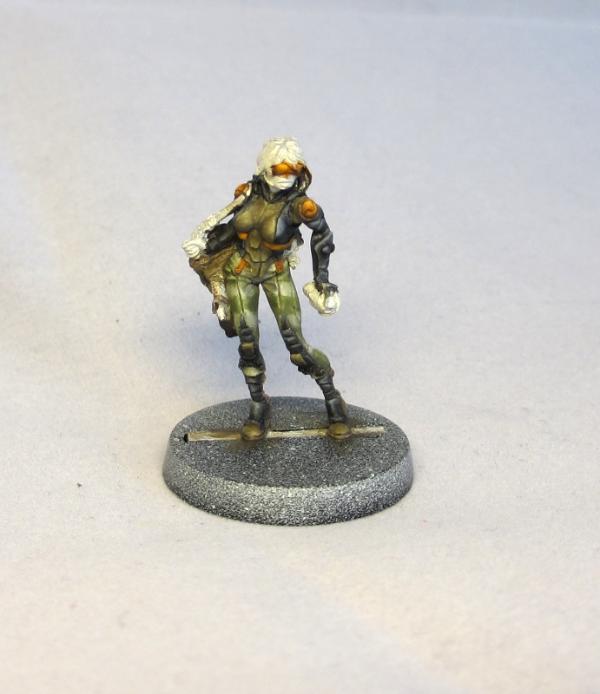
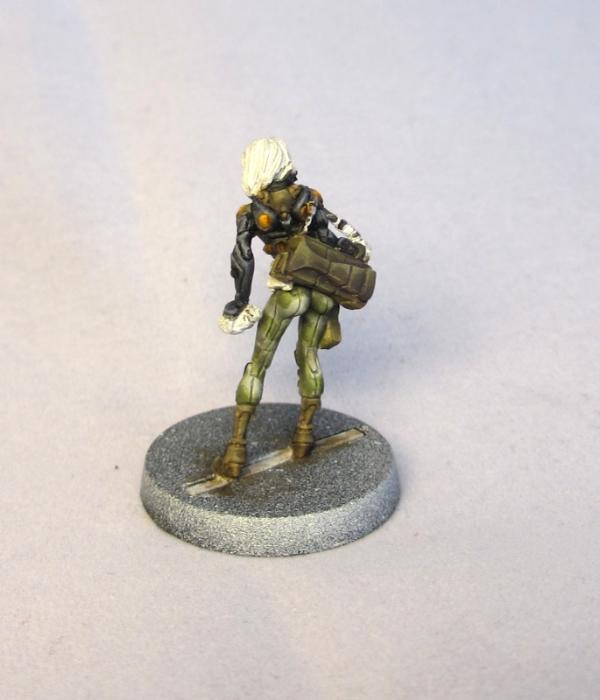
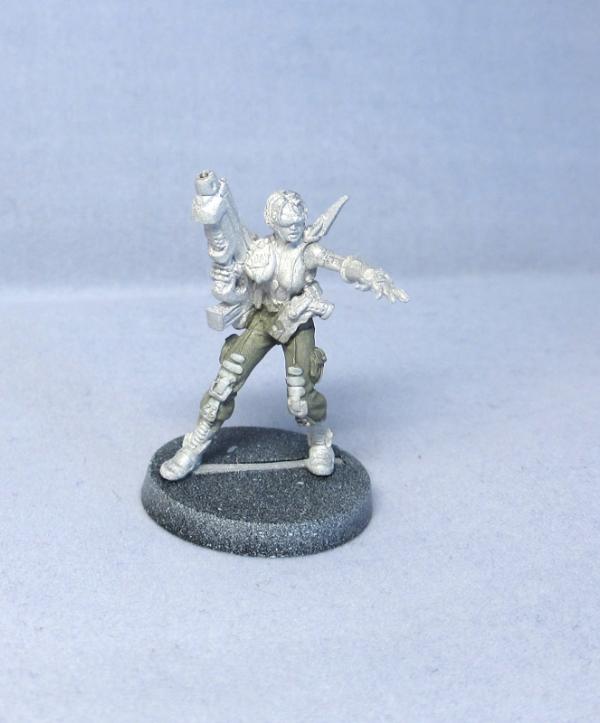
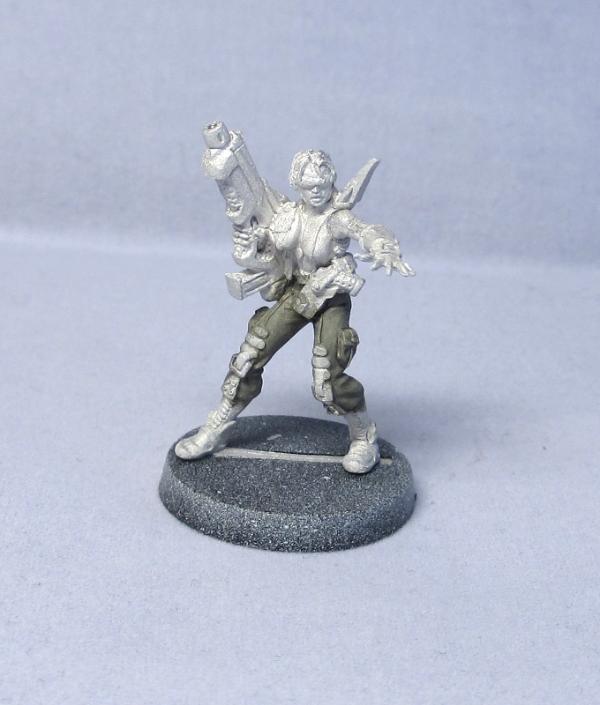
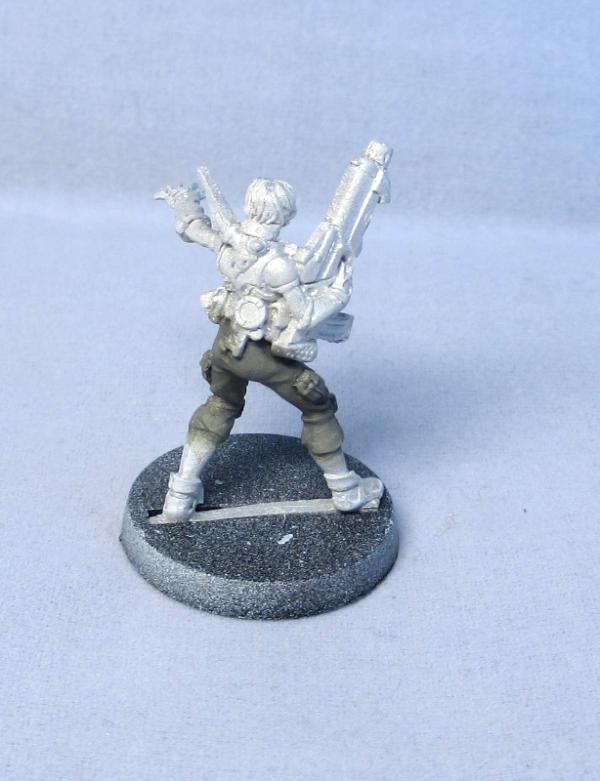
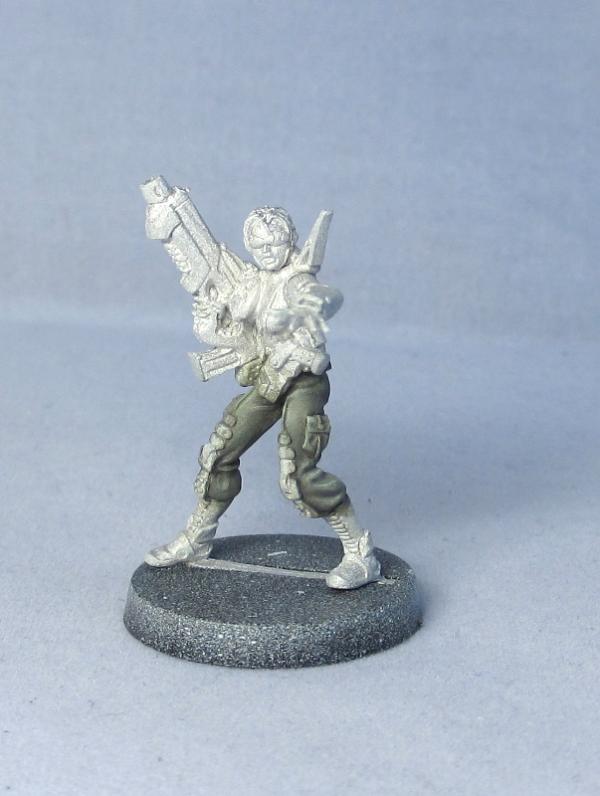
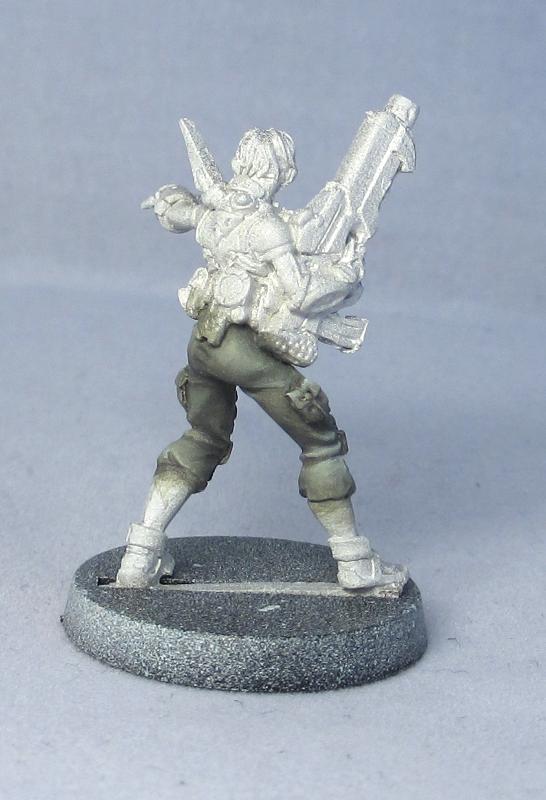
Since I managed the pass my last maths exam I rewarded myself with some new Windsor and newton brushes. I decided to try them out on the Marlene figure that came with the Infinity campaign book.
Here are some early w.i.p photos

|
|
|
|
2012/12/12 22:08:55
Subject: Re:Crazy Ivans random infinty blog (Marlene wip)
|
|
Parachuting Para-Commando
|
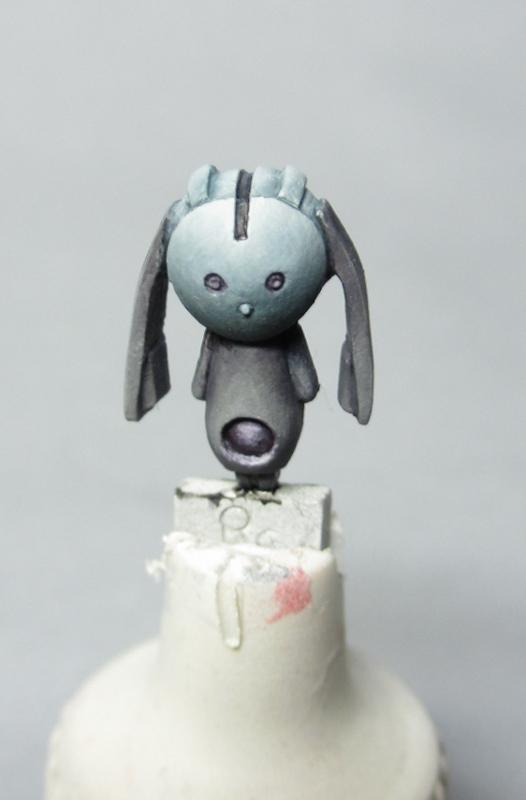
Thanks for the comments, I worked a bit more on the Marlene mini painted her little robot.
|
|
|
|
2012/12/20 02:30:03
Subject: Re:Crazy Ivans random infinty blog (Marlene wip)
|
|
Parachuting Para-Commando
|
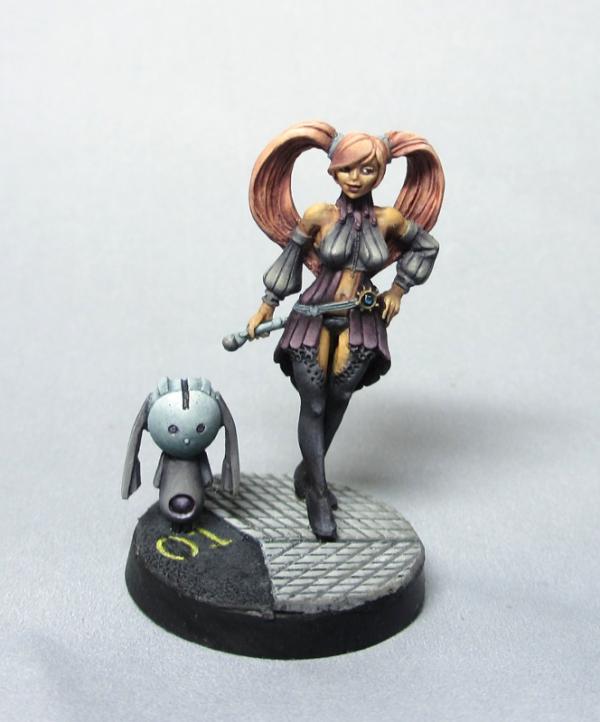
Sorry for the late reply.
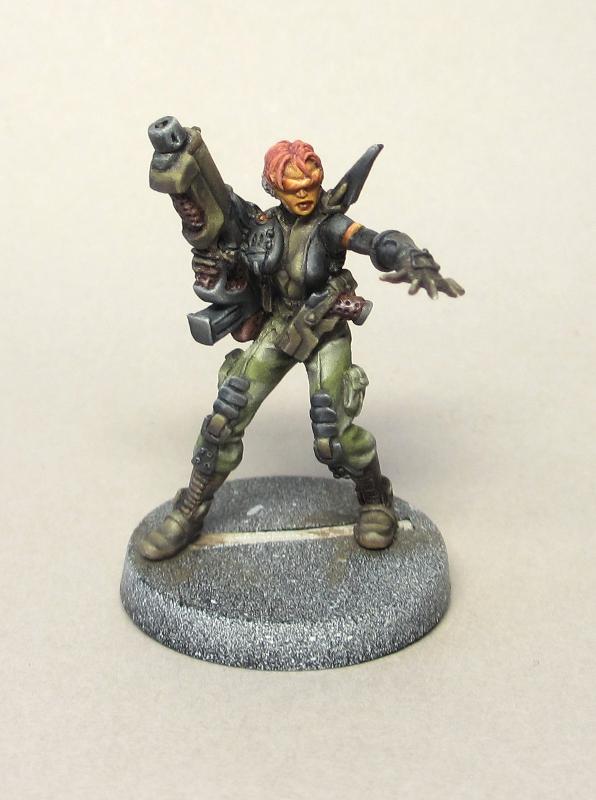
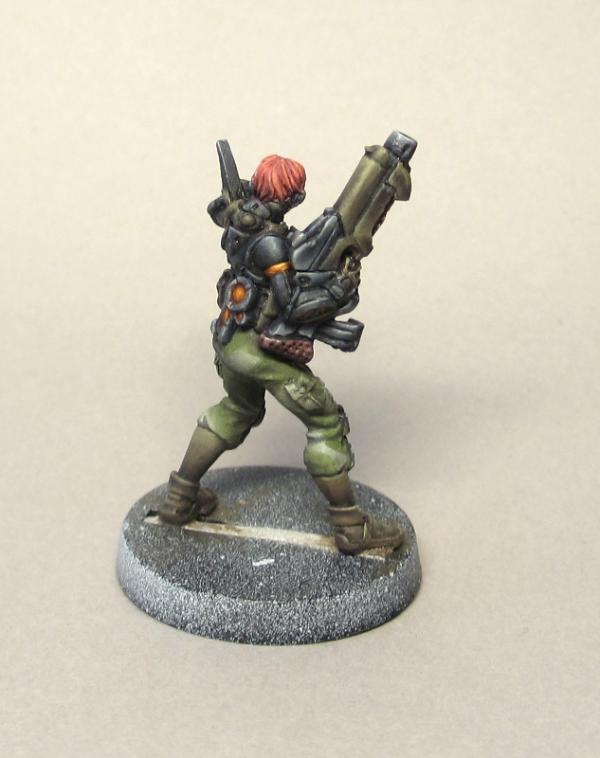
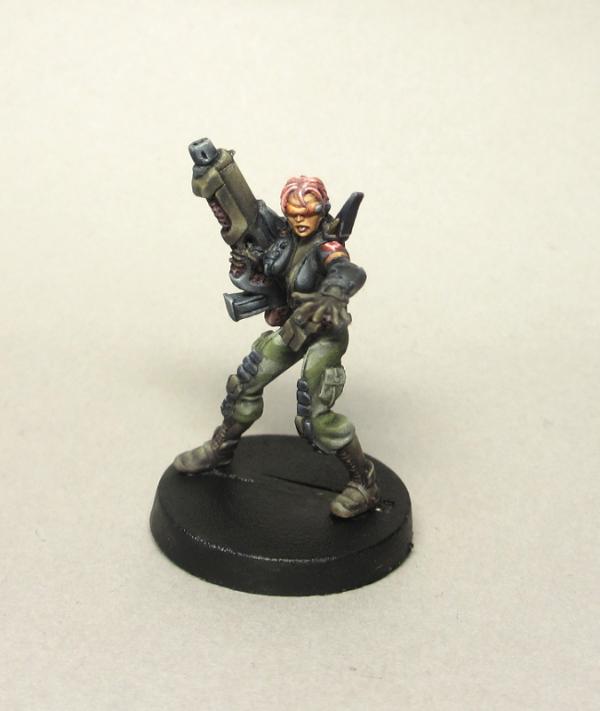
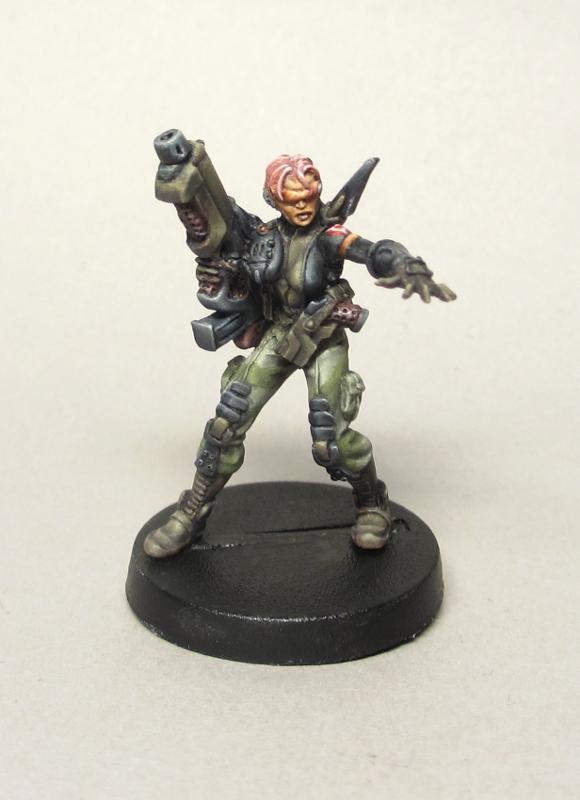
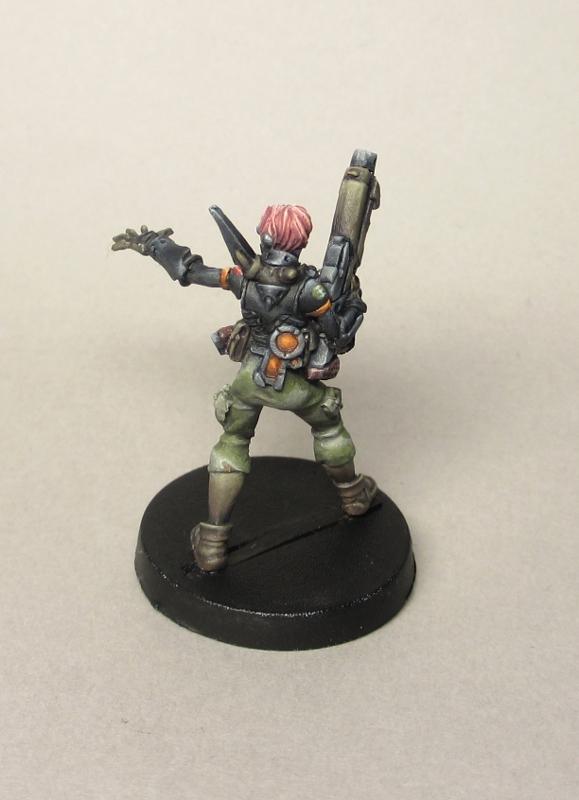
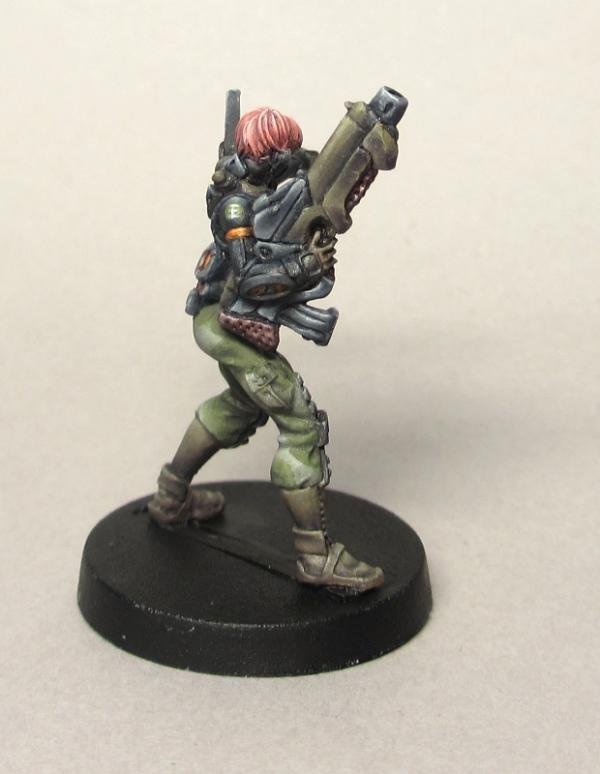
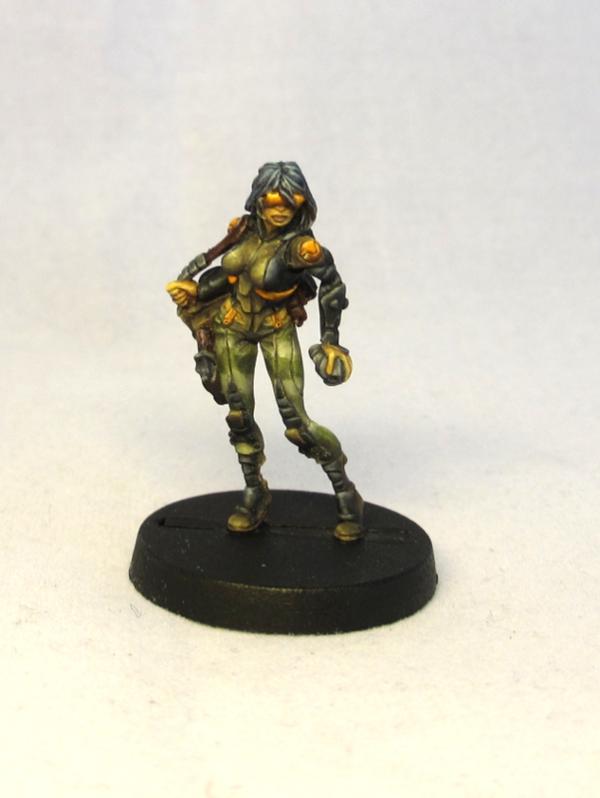
@CDK I painted the hair bright pink hopefully it will add some brightness to the figure.
@Alpharius I don't use an air brush, just thin layers of paint and some patience
Here is the finished figure.

|
|
|
|
2012/12/22 23:39:29
Subject: Re:Crazy Ivans random infinty blog (Marlene done)
|
|
Parachuting Para-Commando
|
Thanks for the comments
@Alpharius I have never seen the need to use an airbrush on normal sized, I'm tempted to get one to paint T.A.G.s with but for normal infantry traditional layering techniques works well. The trick is to use really thin layers and remember that the highest concentration of paint will be where ever you finish your brush stroke. So for example when highlighting you always want to drag your brush towards the part that should be the brightest and toward the darkest part when shading.
|
|
|
|
2013/02/17 21:13:01
Subject: Re:Crazy Ivans random infinty blog (Marlene done)
|
|
Parachuting Para-Commando
|
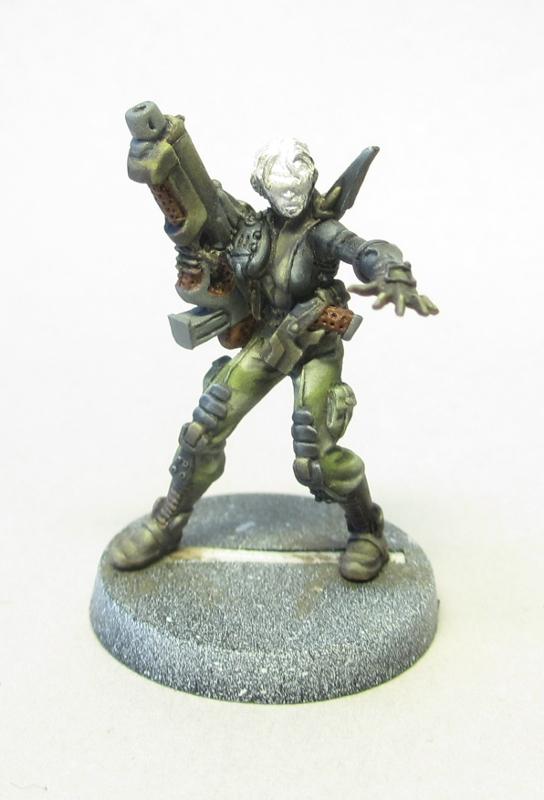
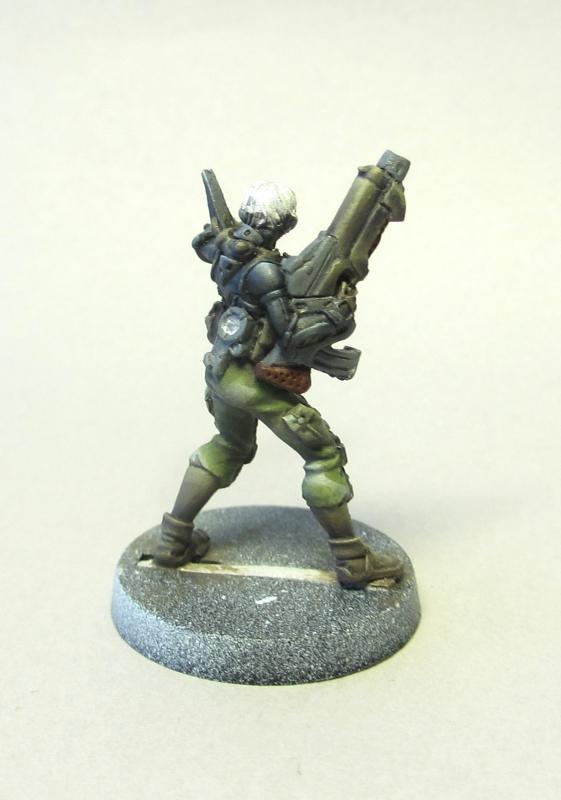
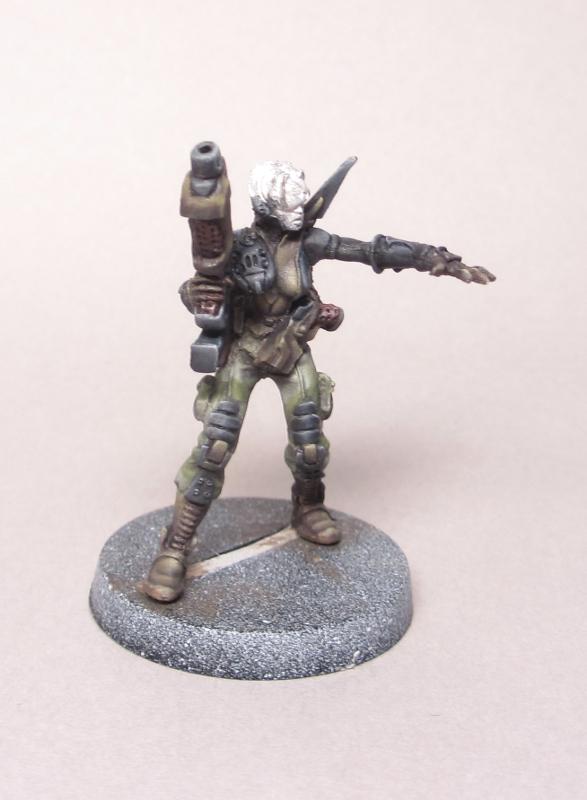
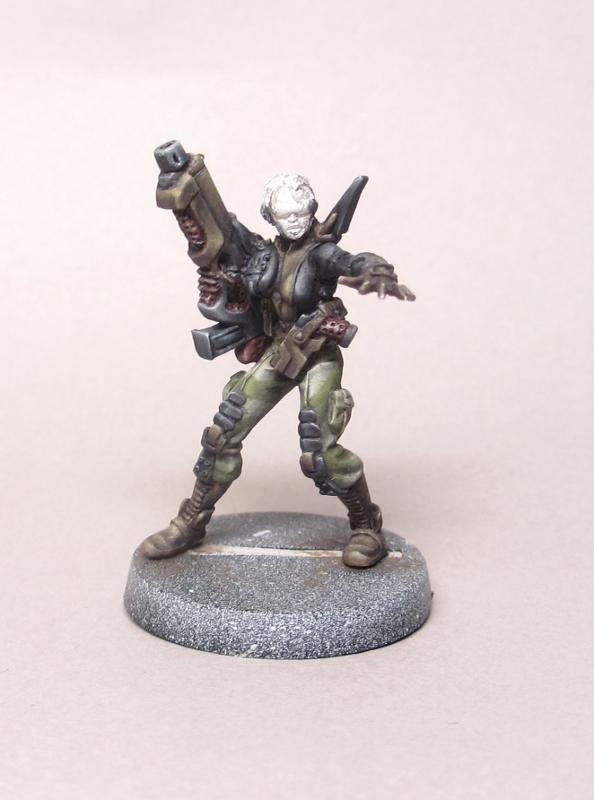
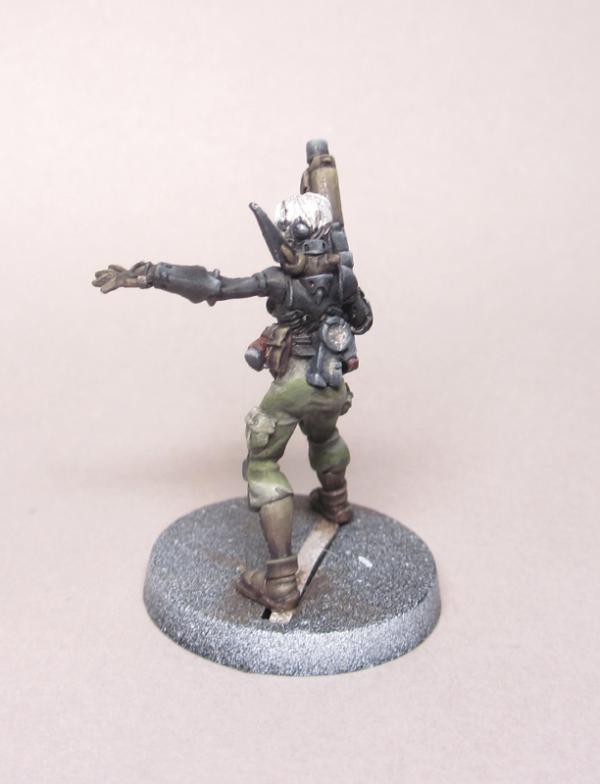
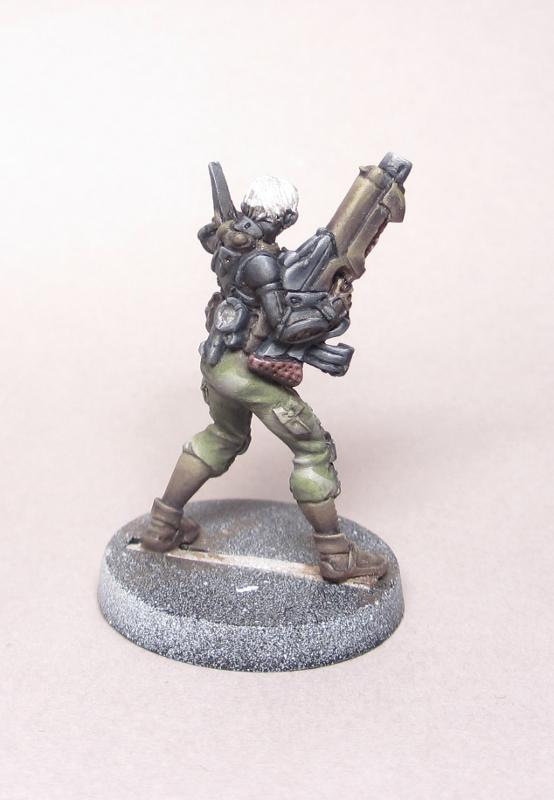
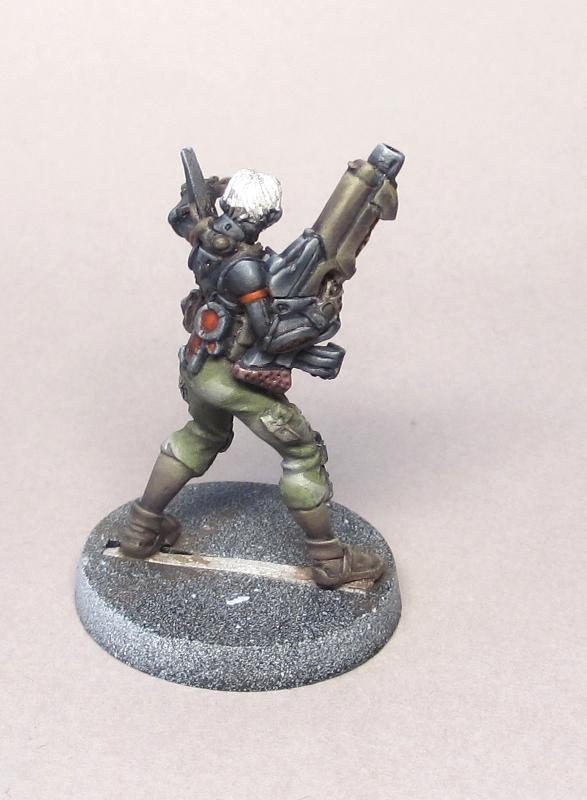
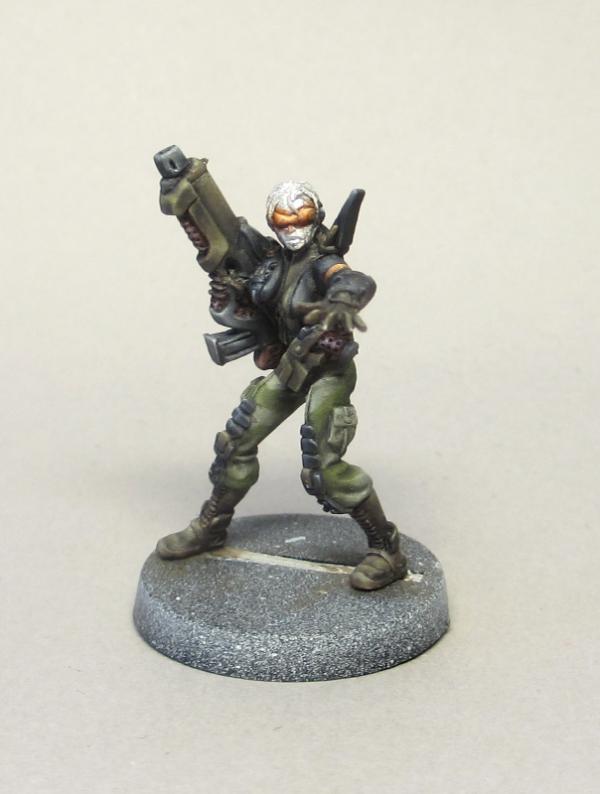
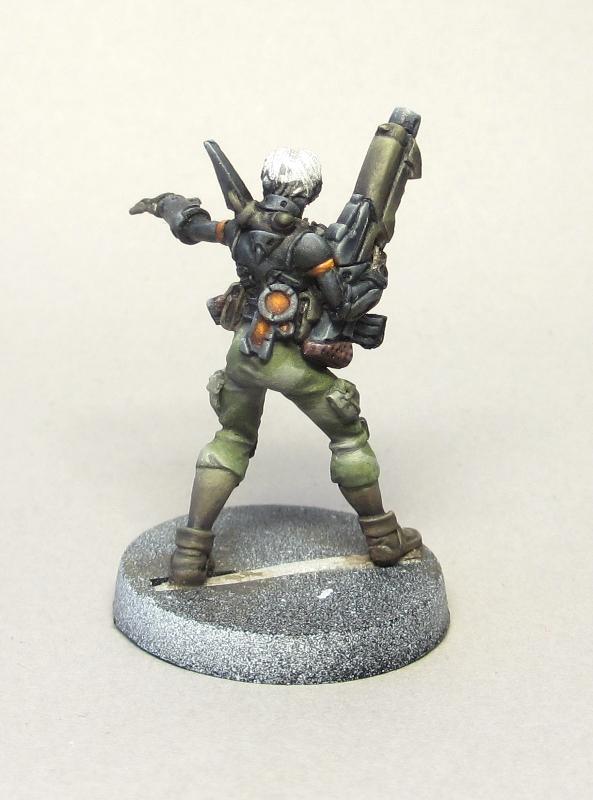
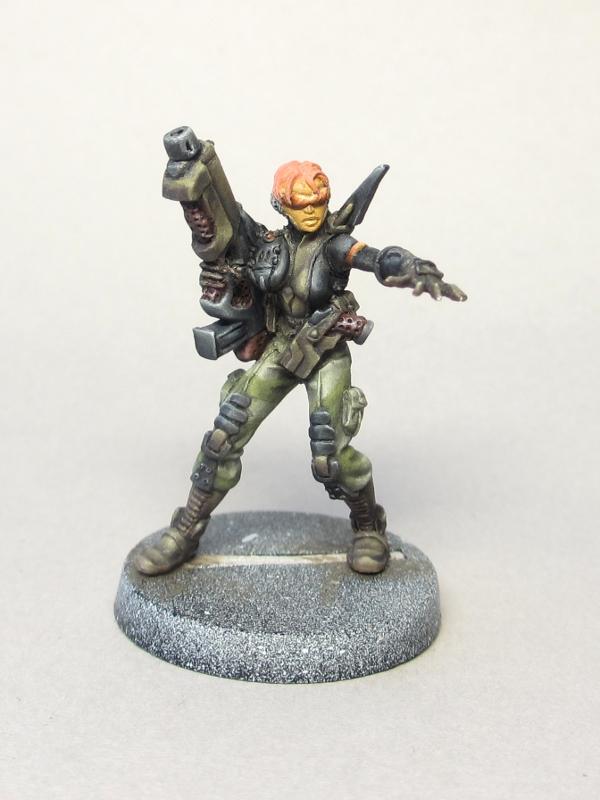
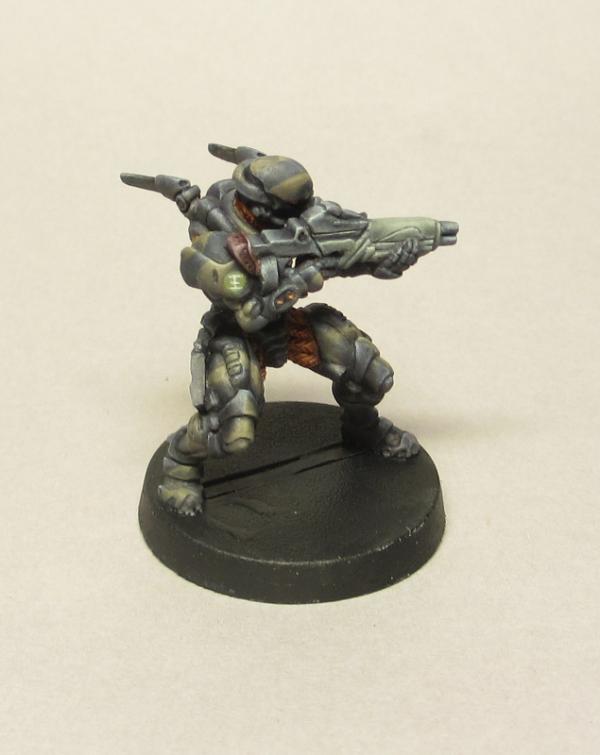
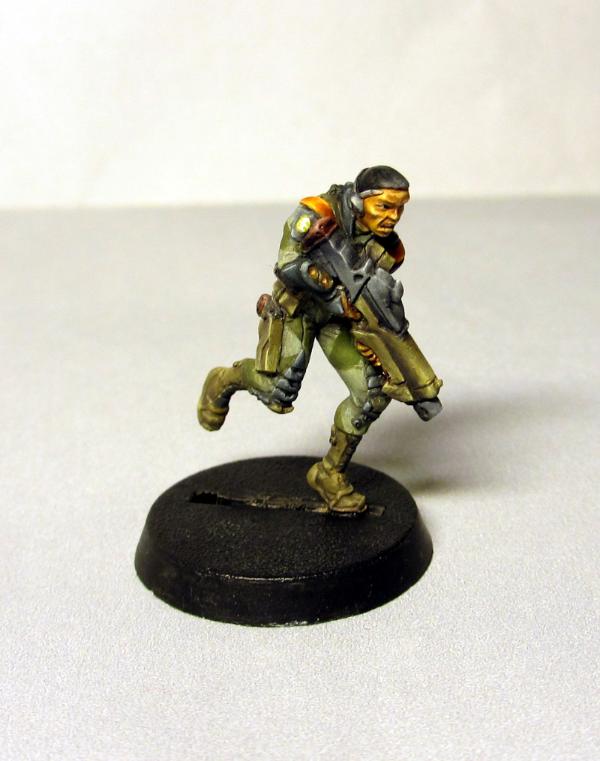
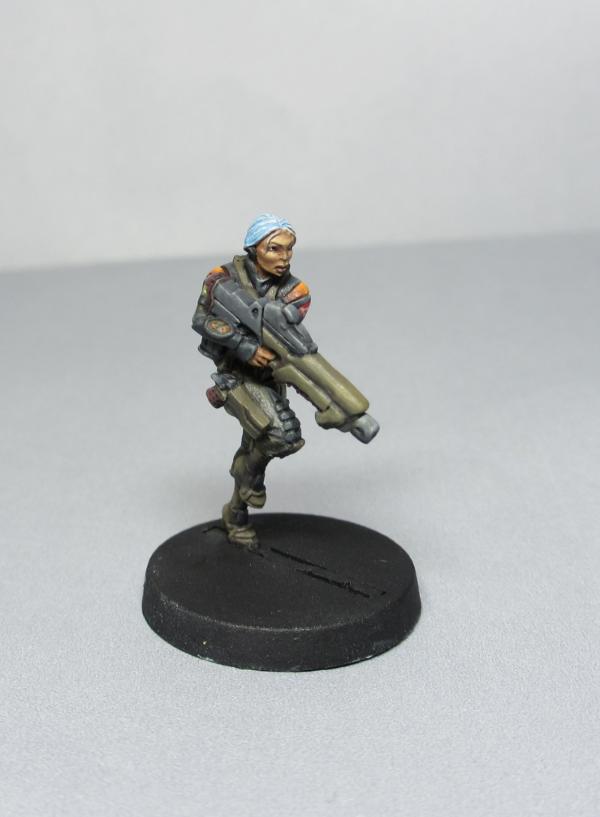
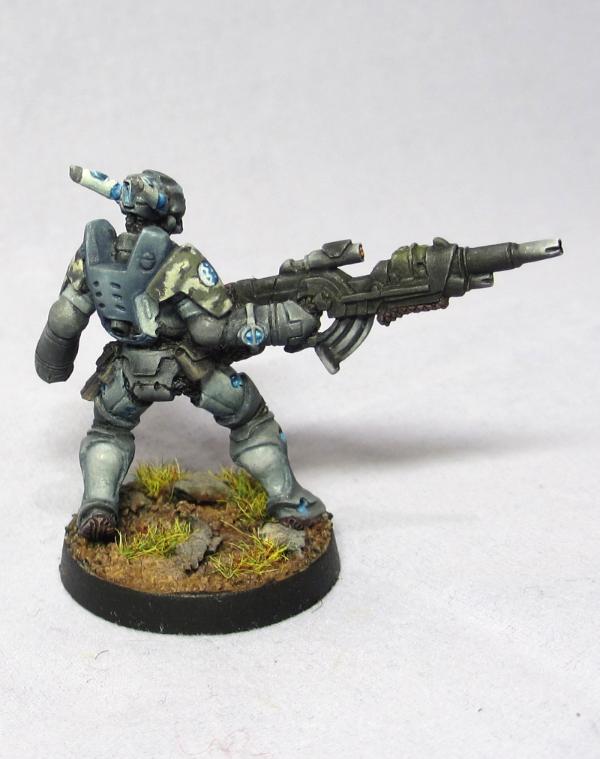
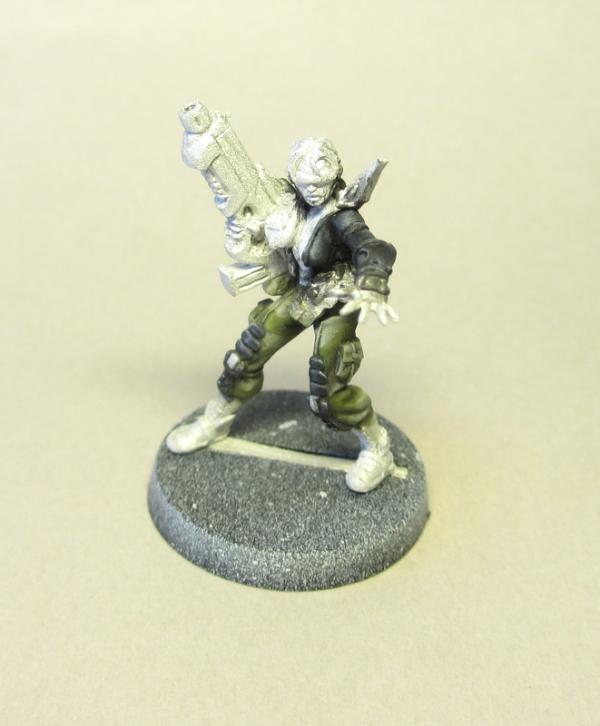
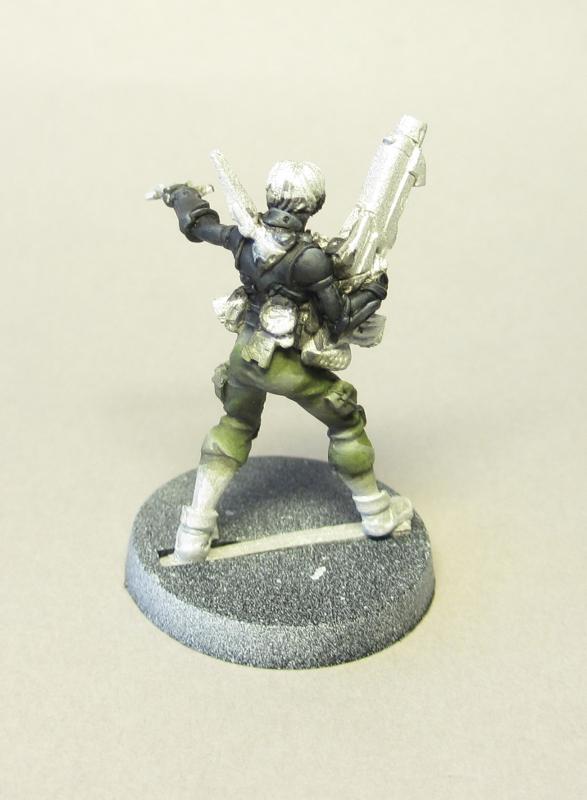
Thanks for the comments. I have not painted much for a while but I finally decided to start working on my PanOceania army. I painted a test figure a while ago but I was not happy with how it looked for some reason I found it tricky to get a good colour scheme for PanOceania. I liked how the Shock army of Acontecimento looked so I made a colour scheme inspired from them. I'm not totally satisfied with it particularly the gun could use some more work so I would really appreciate some feed back on the figure.
This is how the old colour scheme looked like.
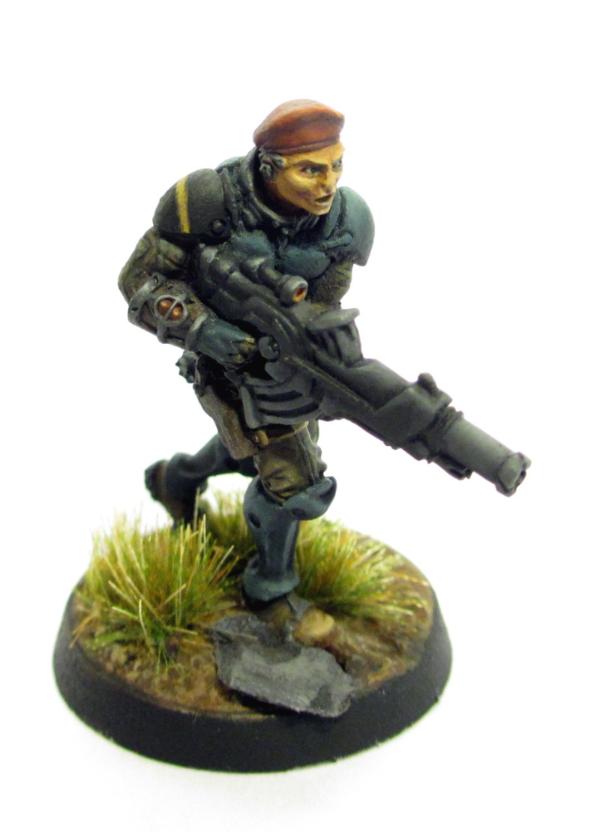
And this is the new colour scheme
|
|
|
|
2013/02/18 08:29:34
Subject: Re:Crazy Ivans random infinty blog (Started work on PanO)
|
|
Parachuting Para-Commando
|
Thanks I'm glad you like it most of the time I use wet on dry blending (layering) mostly because I feel it gives me more control over the paint .
|
|
|
|
2013/02/18 12:29:33
Subject: Re:Crazy Ivans random infinty blog (Started work on PanO)
|
|
Parachuting Para-Commando
|
Yes I freehand the symbols it is actually easier than it looks because you don't have to be totally exact with it. Neither of the circles are perfectly round and the symbols them selves are simplified.
|
|
|
|
2013/02/23 16:56:16
Subject: Re:Crazy Ivans random infinty blog (Started work on PanO)
|
|
Parachuting Para-Commando
|
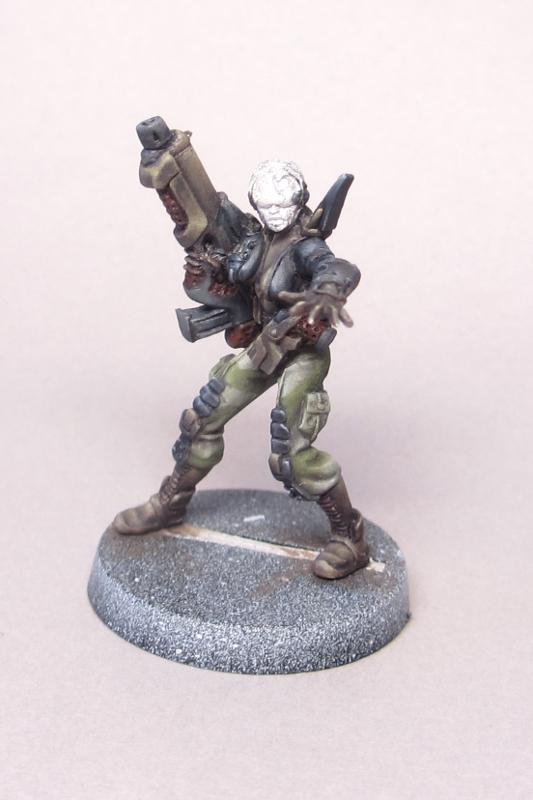
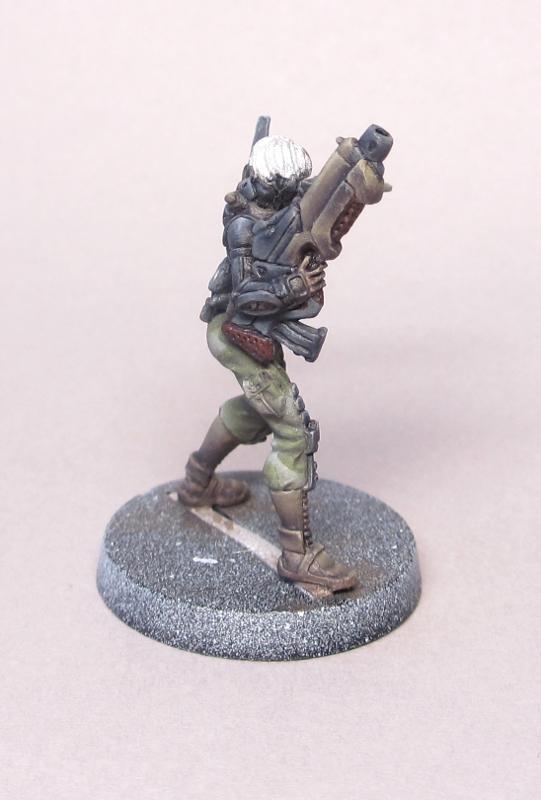
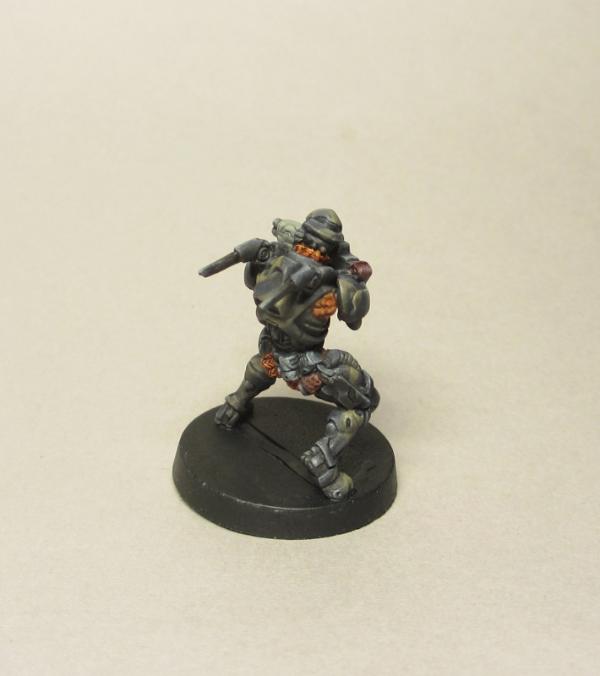
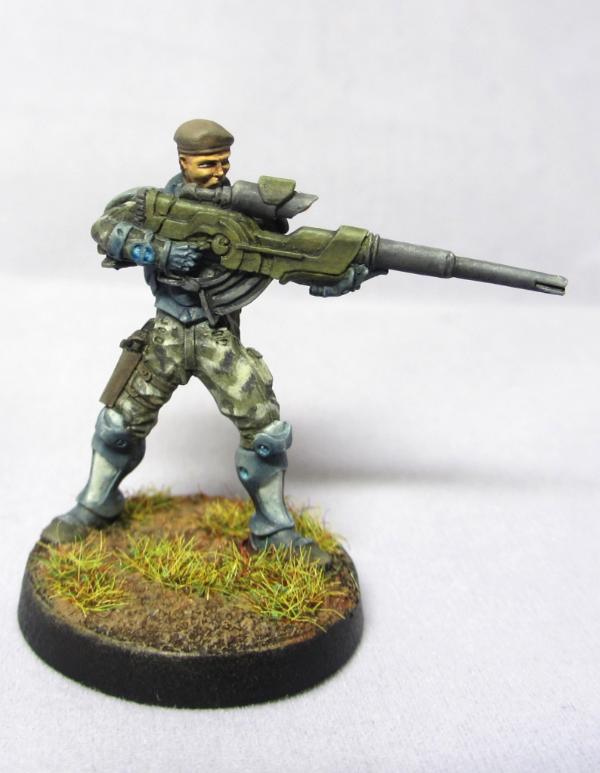
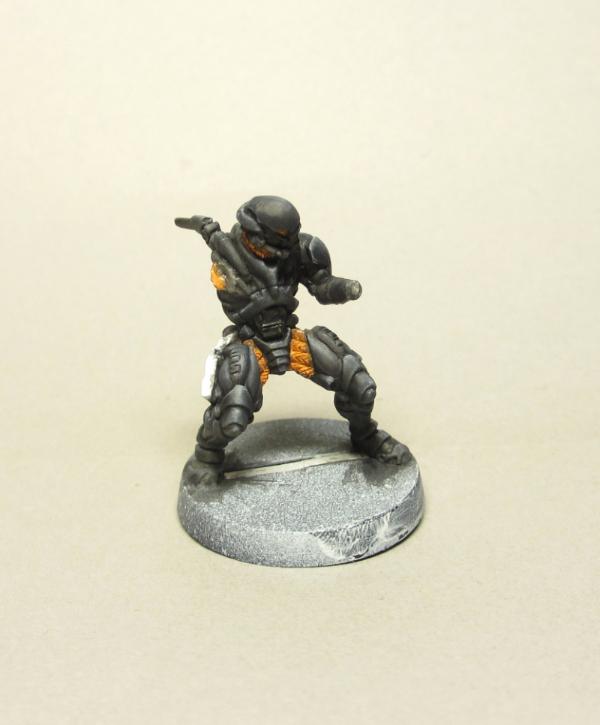
Yes the big secret is practise some swearing and some more practice . Started work on an ORC trooper not totally sure on the colour scheme yet it probably needs more panels to be painted as camouflage.
|
|
|
|
2013/03/18 01:31:30
Subject: Re:Crazy Ivans random infinty blog (ORC troop done)
|
|
Parachuting Para-Commando
|
Thanks for the comments and sorry for the late reply.
@kestril The blue didn't really work so I changed it to a light grey instead.
@Pacific I borrowed the colour recipe from Giraldez blog
http://studiogiraldez.blogspot.se/2012/12/hospitalario-hmg.html
If you got a backstage pass at beasts of war there is a good blue grey armour tutorial video there.
http://www.beastsofwar.com/backstage/painting-teutonic-knight-pano-armour/
@Alpharius I also have a Jotum waiting for a paint job I'm really tempted to get an airbrush to paint the tags with.
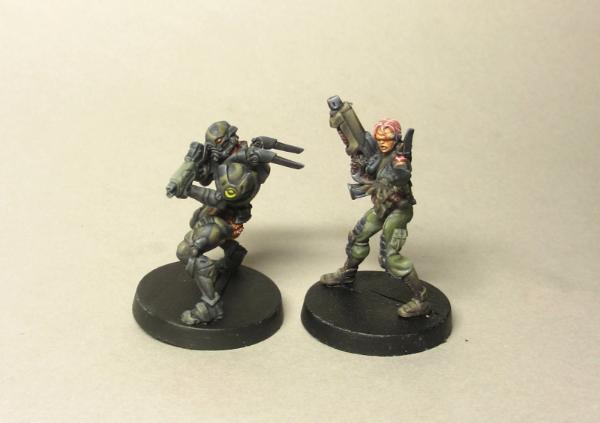
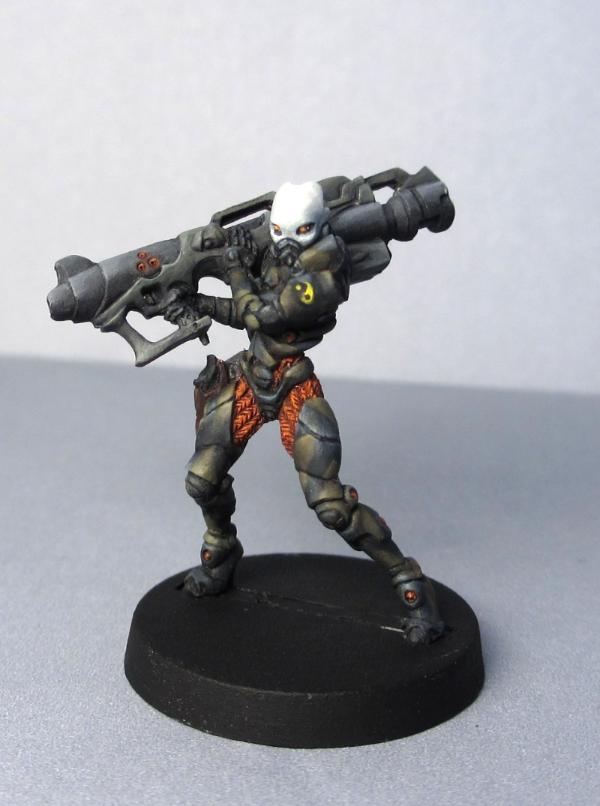
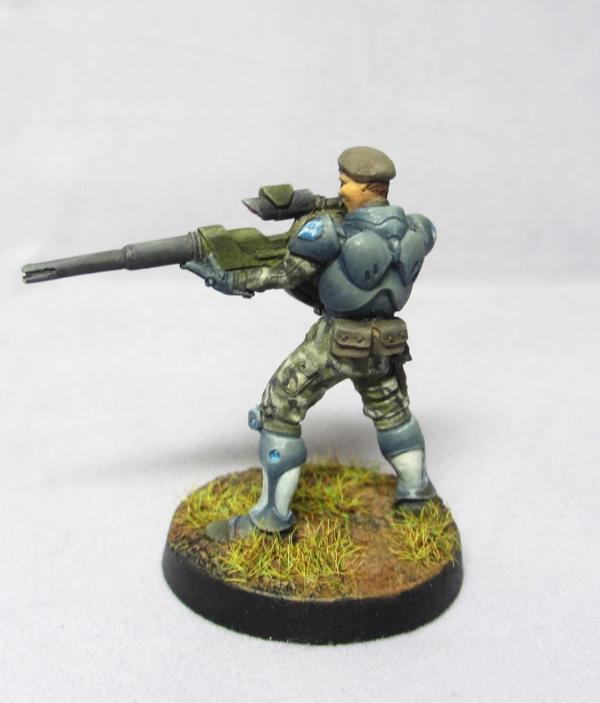
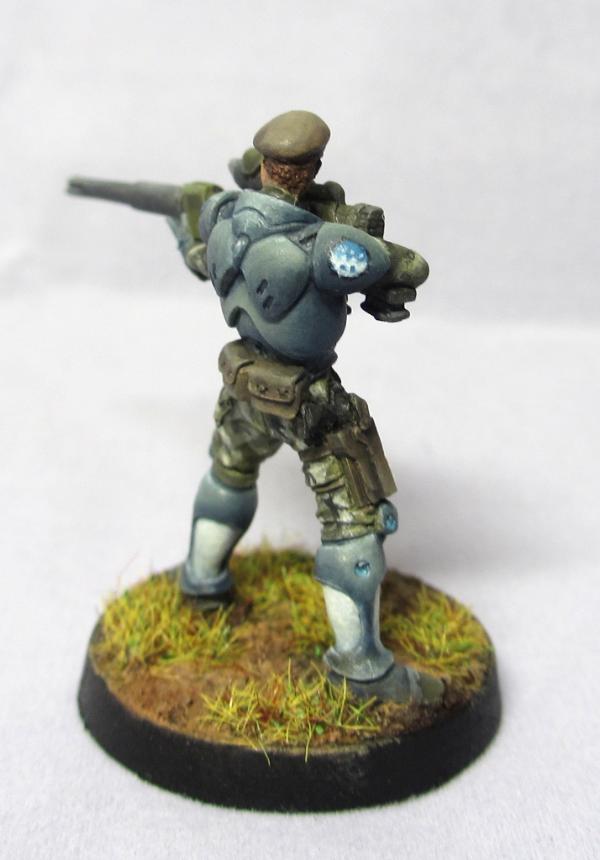
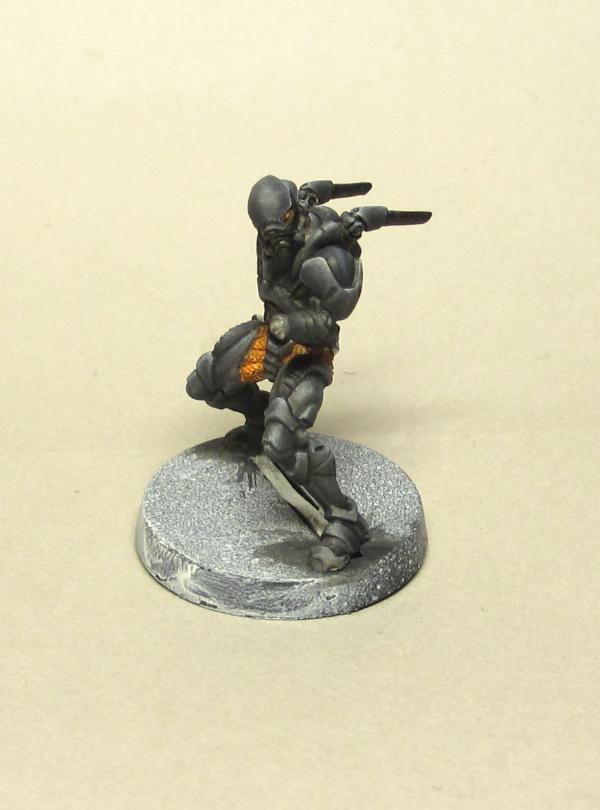
I have finished the painting the ORC trooper, I did a few changes on it switched the blue to light grey and altered the weapon colour I will repaint the sniper rifle on the fusilier to match it.
|
|
|
|
2013/03/19 21:29:30
Subject: Re:Crazy Ivans random infinty blog (ORC troop Done)
|
|
Parachuting Para-Commando
|
Thanks for the comments I'm glad you like it. I think it is my second attempt at painting OSL I just painted the mini as normal and added some thin coats of VMC electric blue where wanted the blue light adding in some white as I got closer to the light source. I think the trick to OSL is to work up slowly to the brightness you want and not to overdo it.
|
|
|
|
2013/03/24 09:50:17
Subject: Re:Crazy Ivans random infinty blog (ORC troop Done)
|
|
Parachuting Para-Commando
|
Thanks for the comments. I have started painting a Mech-Engineer from the Yu Jing faction. I really like this sculpt it is a bit fiddly to paint but a really nice details on it.
|
|
|
|
2013/03/26 10:20:00
Subject: Re:Crazy Ivans random infinty blog (Mech-Engineer finished)
|
|
Parachuting Para-Commando
|
Thanks for those kind words  I have finished the mini had to go back and make some touch ups after I applied the varnish since it messed a bit with the colour transitions.
@Casey's Law I could try to make a tutorial although I haven't made any before so I don't know how useful it will be. I have a Yu Jing hacker primed and ready that I could use or should I use PanO mini for the tutorial?
|
|
|
|
2013/03/27 18:01:46
Subject: Re:Crazy Ivans random infinty blog (Mech-Engineer finished)
|
|
Parachuting Para-Commando
|
Thanks for the comments
@Alpharius I agree nothing wrong with a few grey hairs it is a sign of wisdom As for the secret to good colour transitions I would agree with the two first statements and substitute talent for practise (been painting for 15+ years now) and reading lots of tutorials and watching some painting videos.
@CDK I could add blue glaze or two to tint it a bit I wanted a dark hair that could stand out from the dark armour.
@Casey's Law I didn't intentionally aim for a Deus ex colour scheme but I do really like the art direction in that game so I might have done so subconsciously. I will try to make some step by step guides on the next mini I paint, just need to remember to take some pictures when I'm painting.
|
|
|
|
2013/04/04 16:41:29
Subject: Re:Crazy Ivans random infinty blog (Zanshi hacker tutorial part 2)
|
|
Parachuting Para-Commando
|
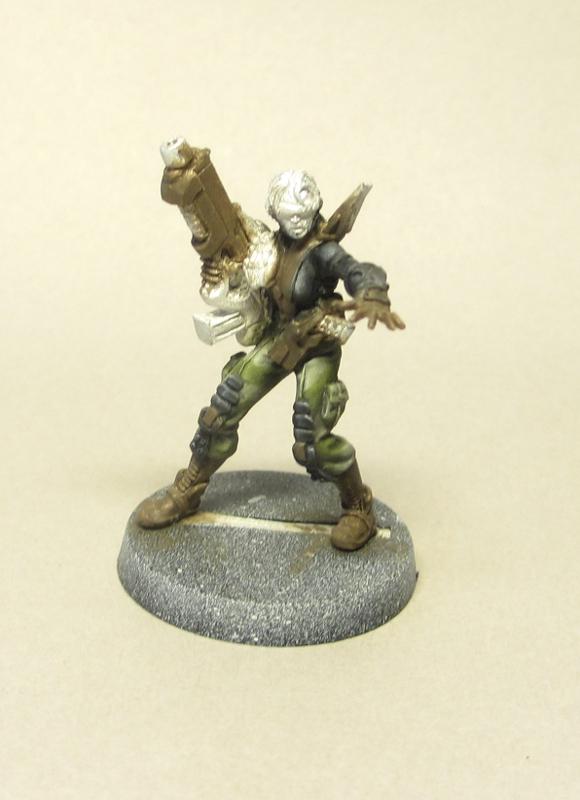
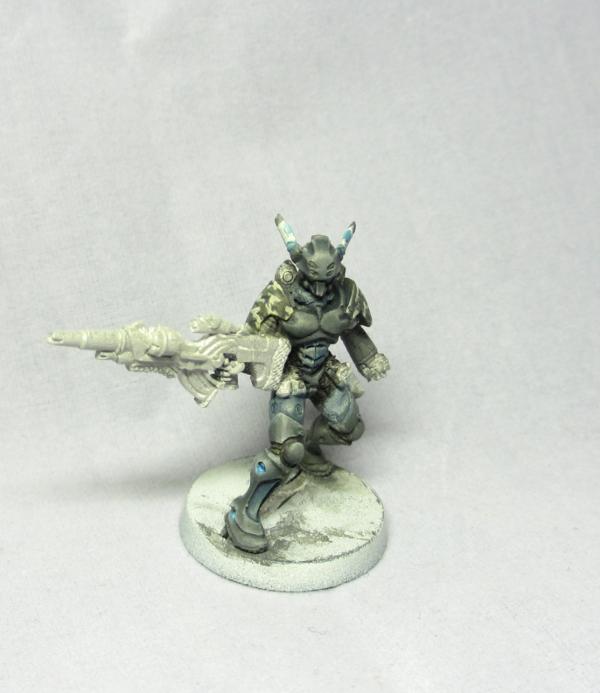
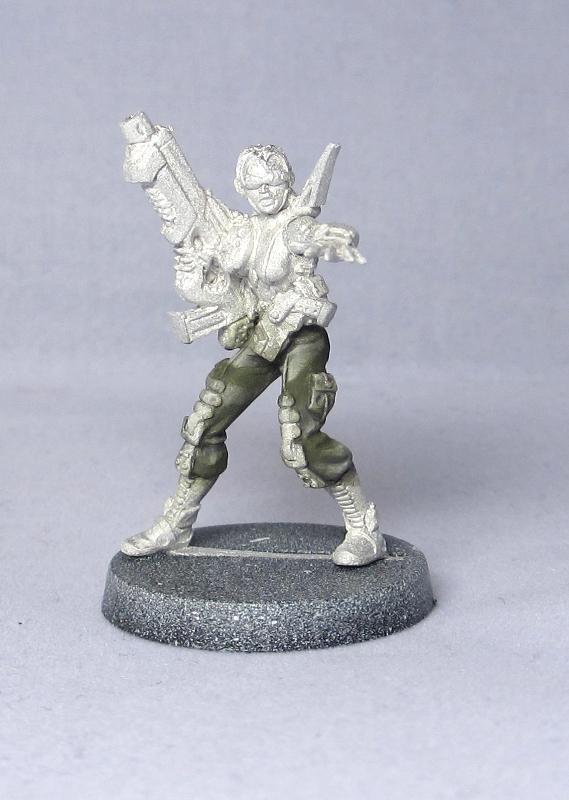
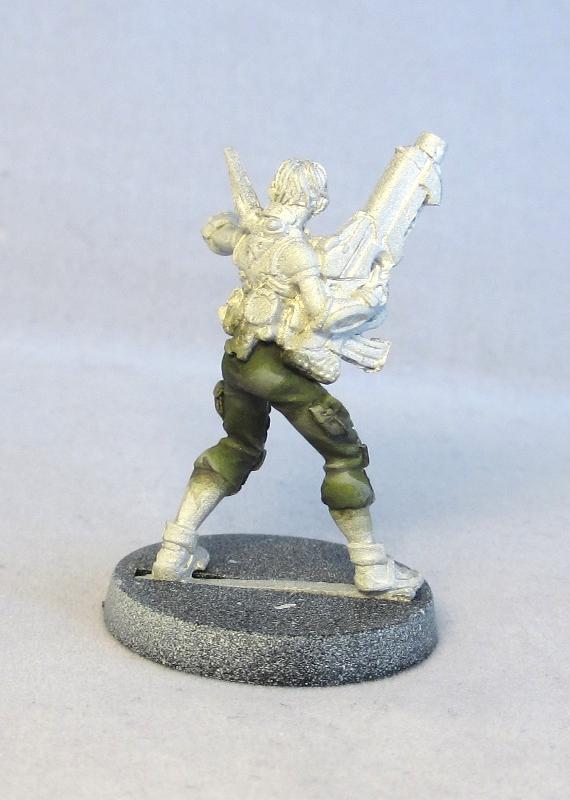
Here is my the first part of my tutorial attempt. I will go trough the paint job step by step first the mini it self a Zanshi hacker fromt the yu Jing faction. I have chosen a white primer since it will give cleaner colours in my opinion and that is more fitting for Infinity. As you can see I have mounted it on an old spice jar to give a better hold on the mini and to avoid accidentally touching the mini during painting.
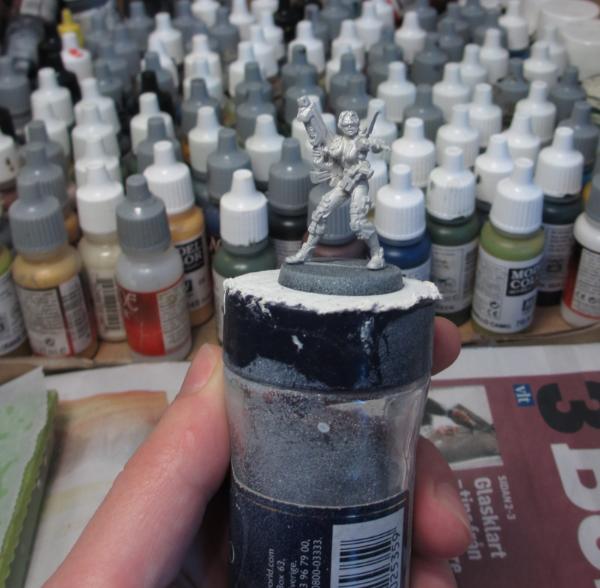
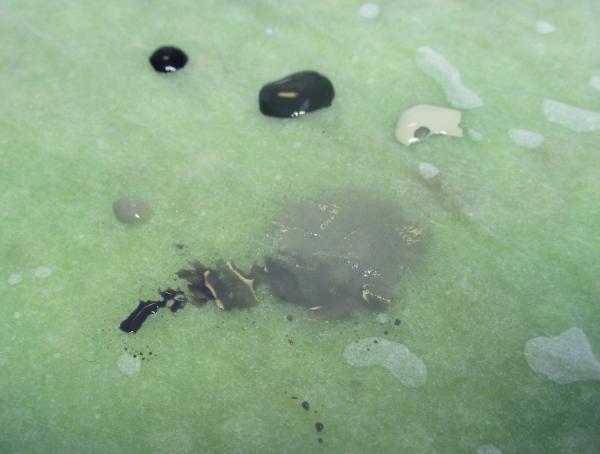
The colours I will use in this tutorial comes from several different paint ranges I use paint from the Vallejo model colour (VMC), Vallejo game colour (VGC), Privateer press (P3) and Reaper master series paints (RMSP). I use a whet palette for mixing the paints on. For the base coat I used a mix of RMSP Pale Olive and P3 Cryx bane base to obtain a pale grey green mixture.
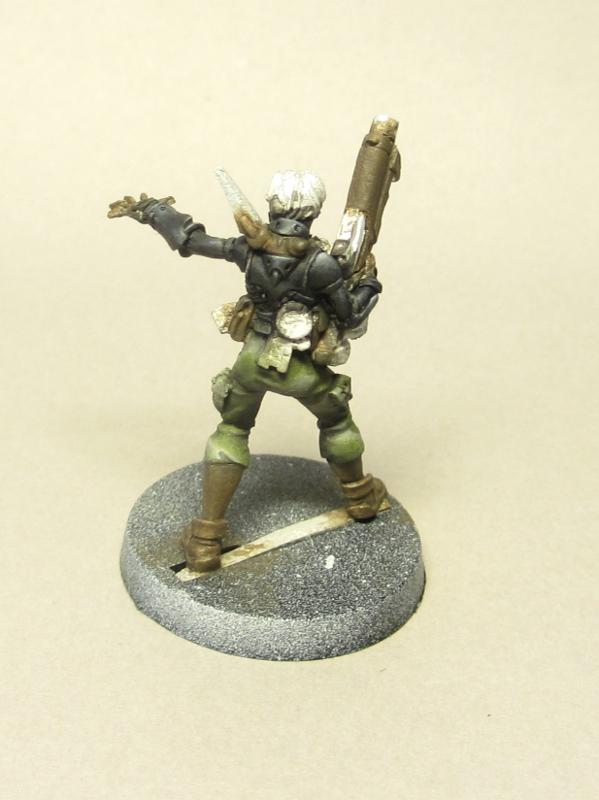
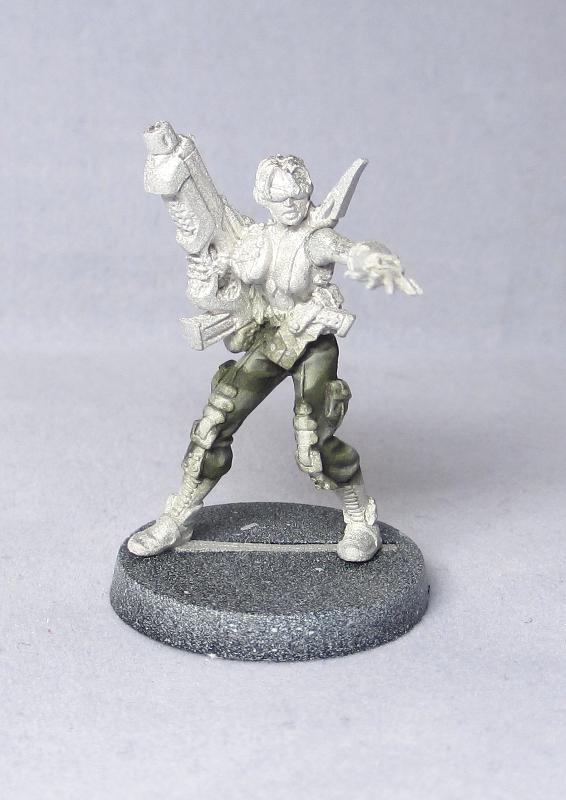
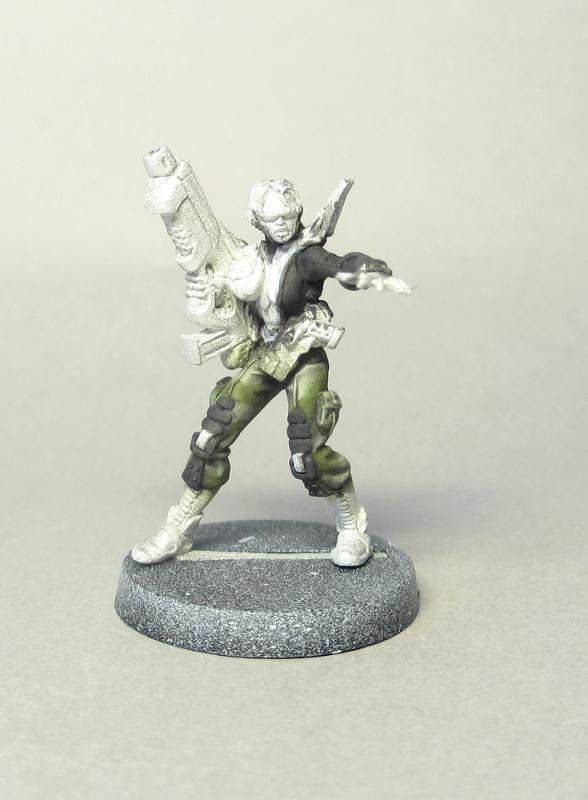
I applied about 3 thin coats of this mixture on the mini for the base coat.
When the base coat was done I started to apply shades and highlights. I usually paint my minis with zenithal lighting i.e that the light source is directly overhead the mini. I recommend reading this tutorial for a better explanation of light sources http://massivevoodoo.blogspot.se/2010/08/tutorial-zenithal-lightning-work-order.html
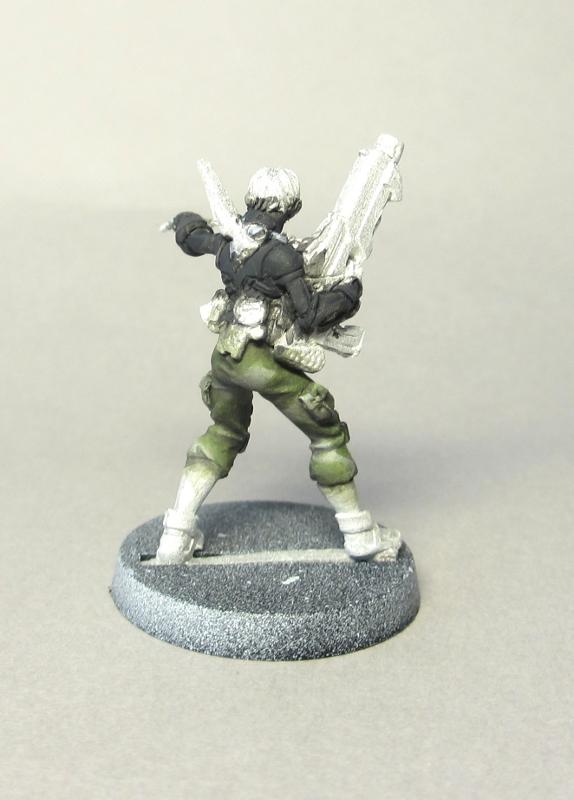
To shade I added more P3 Cryx bane base and RMSP Nightshade purple to make a progressively darker colour mixture.
I shaded the mini with thin layers of this paint mixture pushing the paint towards the darkest parts of the mini to obtain a colour transition and using darker paint with each layer. Here is some pictures after I added a few layers of shading.
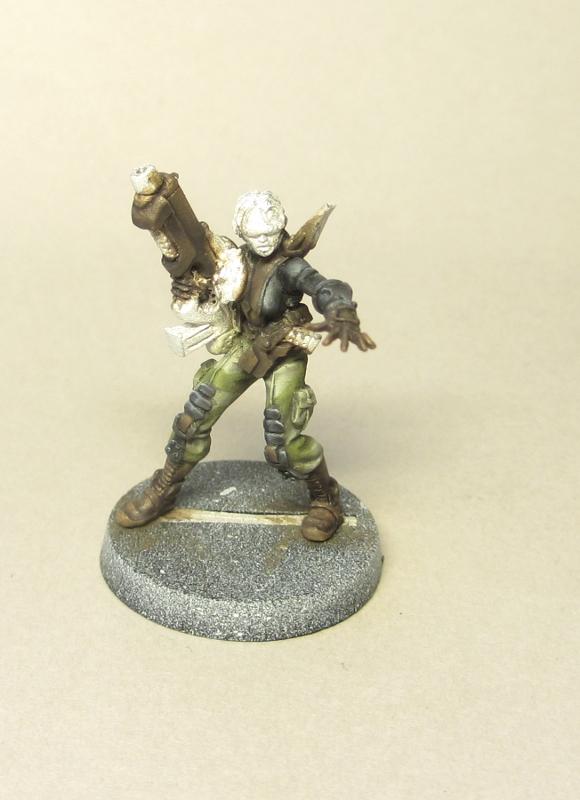
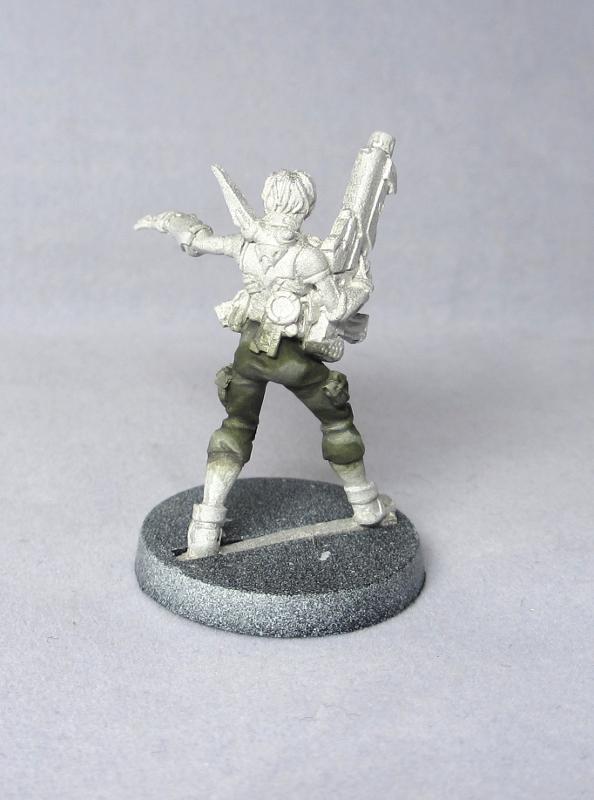
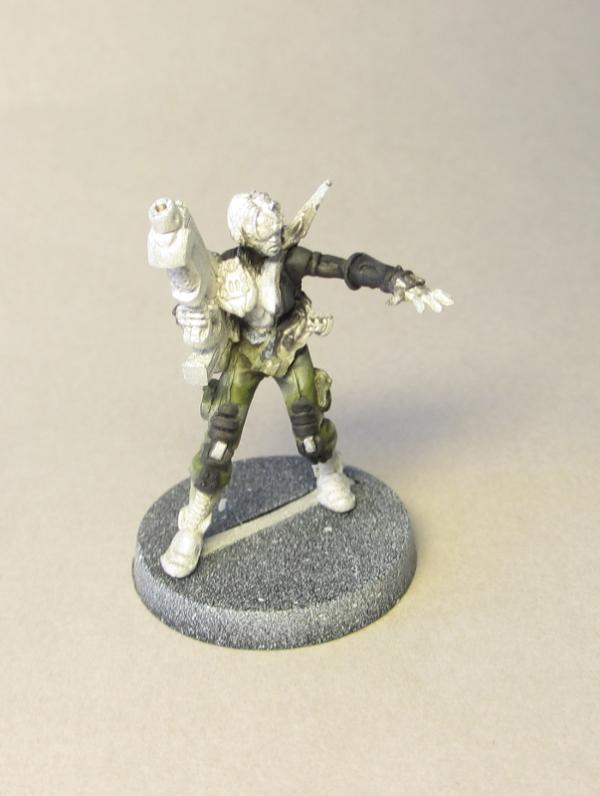
For highlighting mixed some VMC dark sand and VGC dead white with the base colour mixture.
Just like with the shading I added progressively brighter layers of paint to the mini pulling the paint up towards the brightest parts of the mini. Here are some pictures after I have finished the shading and highlighting of the base coat.
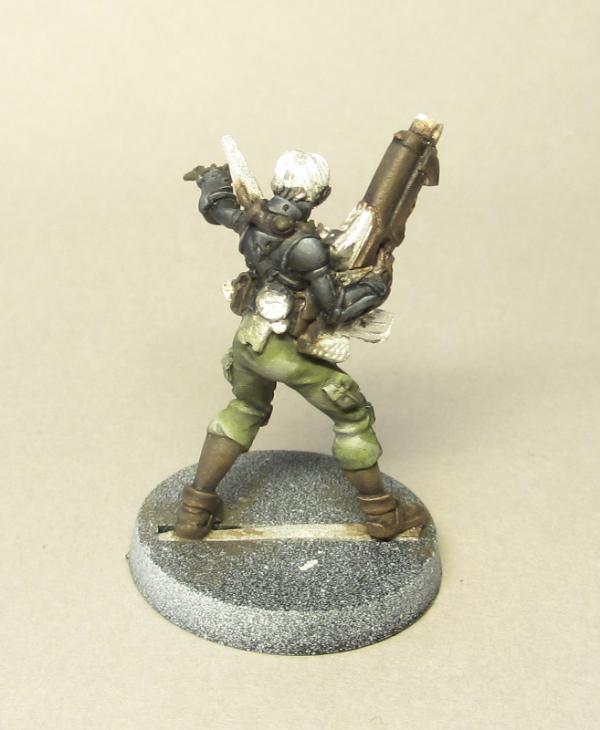
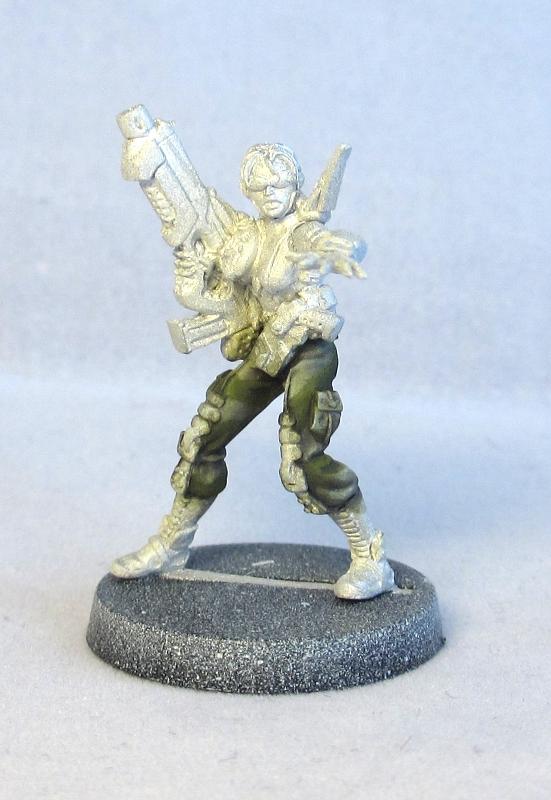
When painting camouflage I shade and highlight each layer completely before moving on to the next. I do this because when using thin paints the shading and highlighting from the previous layer show through so I can use it as a guide for shading and highlighting the next layer.
For the next layer in the camo I used a mix of RSMP muddy olive and VGC Charred brown to obtain a moss green colour.
I applied this colour in large bands on the mini.
I did forget to take pictures of the palette for the final steps but I added some of the RMSP Nightshade purple to the colour and used it to enhance the shadows. The advantage to use the same shading colour on both camo fields is that you tied them together so that they looks unified.
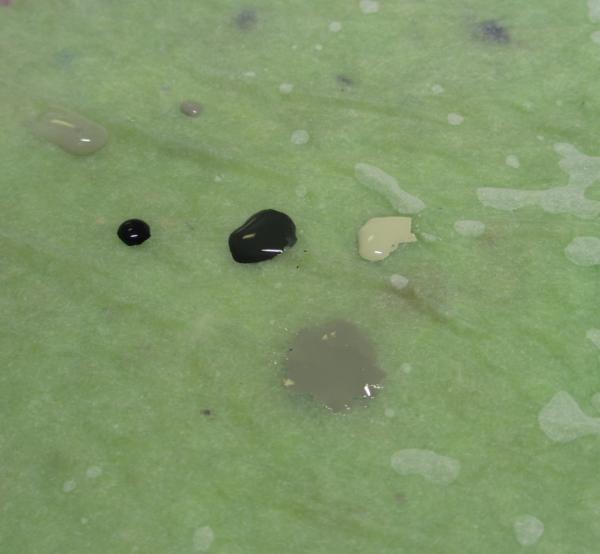
To highlight I used some VGC sun yellow and VMC dark sand yellow.
I hope this tutorial can be of some use, if you are looking for the colour equivalents of the colours I was using from other brands I recommend looking at this colour conversion chart.
http://www.dakkadakka.com/wiki/en/Paint_Range_Compatibility_Chart
For the next part I will work on the armour.
|
|
This message was edited 2 times. Last update was at 2013/05/25 19:26:38
|
|
|
|
2013/05/25 19:26:17
Subject: Re:Crazy Ivans random infinty blog (Zanshi hacker tutorial part 2)
|
|
Parachuting Para-Commando
|
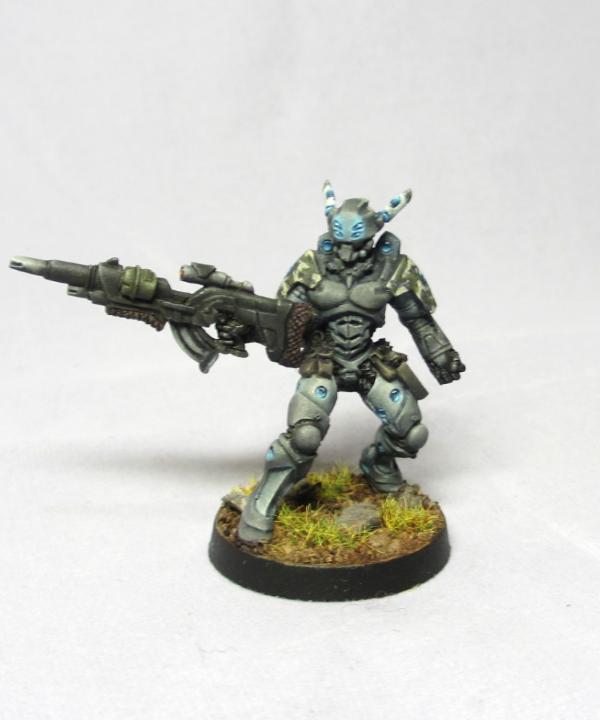
Sorry taking so long to update the tutorial, have been a bit busy and I moved to a new city so there haven't been much time for painting. I have finished the grey parts of the armour.
@Casey's Law I can recommend this paining dvd Painting miniatures with Jérémie Bonamant Téboul He does a great job explaining the technique and it is much easier to see a video of it than try to explain it in words.
First I painted a base coat of vmc German grey the paint was applied in thin layers to give a good coverage and to sink in to all the crevices.
Then I used some black for shading which and mixed it with the grey to make smoother transitions for the larger areas. A useful thing to remember when shading and highlighting is that the sharper curve of the object you are painting is, the more dramatic the shift between light and dark should be. So for example things like the back plate and shoulder pads has gentler transitions and as you will see later the edges of some of the armour plates has harsher highlights. Since the armour is fairly dark the shading wont stand out so much before the highlights are added.

When I applied the highlight I first mixed some vmc pale blue with German grey to add the first layers of highlight and continued on with adding in some more pale blue and white as I worked towards the brightest parts. Finally I use some pure white to make some bright spots here and there on the mini.
I will work on the green parts of the armour next
|
|
|
|
2013/06/02 18:26:22
Subject: Re:Crazy Ivans random infinty blog (Zanshi hacker tutorial part 3)
|
|
Parachuting Para-Commando
|
|
|
|
|
2013/06/03 21:04:21
Subject: Re:Crazy Ivans random infinty blog (Zanshi hacker tutorial part 3)
|
|
Parachuting Para-Commando
|
Thanks for the comments, unfortunately I don't have the free time to dedicate to getting a mini ready for the painting contest right now. Hopefully I will have a bit of time to work on the tutorial this weekend.
|
|
|
|
2013/06/07 00:29:46
Subject: Re:Crazy Ivans random infinty blog (Zanshi hacker tutorial part 4 pg3)
|
|
Parachuting Para-Commando
|
|
|
This message was edited 3 times. Last update was at 2013/07/03 18:06:55
|
|
|
|
2013/06/07 06:57:23
Subject: Re:Crazy Ivans random infinty blog (Zanshi hacker tutorial part 4 pg3)
|
|
Parachuting Para-Commando
|
Hi I primed it white but the coat was a bit to thin so the metal is shining trough the primer a bit
|
|
|
|
2013/06/07 22:33:32
Subject: Re:Crazy Ivans random infinty blog (Zanshi hacker tutorial part 4 pg3)
|
|
Parachuting Para-Commando
|
Thanks for the comments
@killykavekommando There are a few advantages from using white primer you don't need as many layers of paint to get a good coverage which is nice when you are painting whit thin layers of paint, this means that it becomes a bit easier to make transitions of the colours from shadow to highlight.
The colour also tend to look a bit more crisp and clean which is good if you are aiming for a brighter colour scheme. A definitive disadvantage is that you need to paint every little bit of the miniature especially the often hard to reach deep recesses of the mini because it would look strange to have white paint show trough in areas where there should be shadows when using black undercoat you can cheat a little bit and leave these areas black.
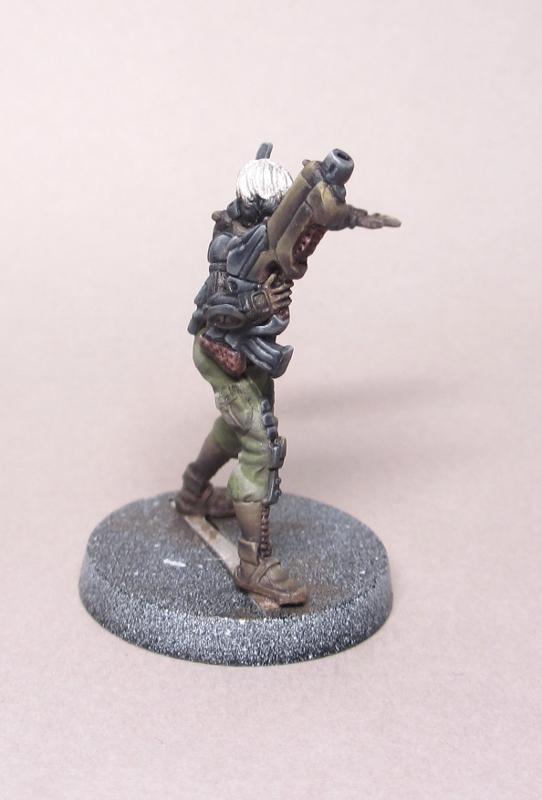
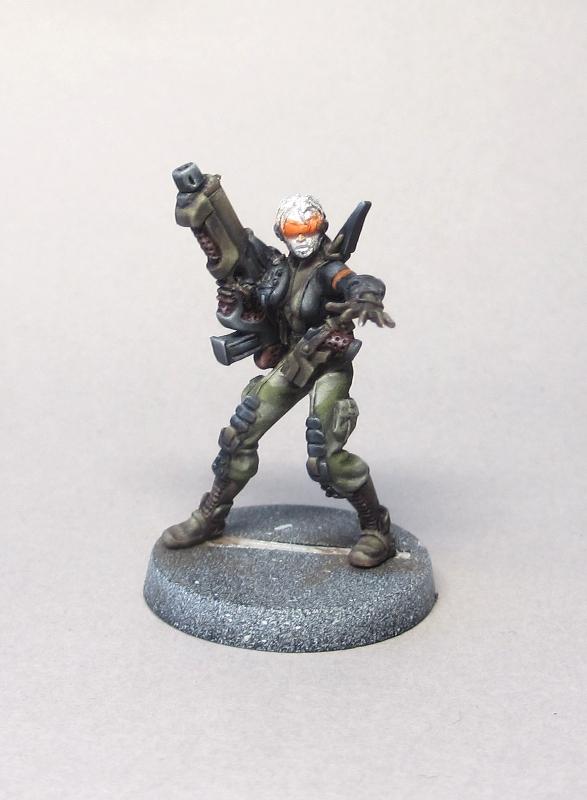
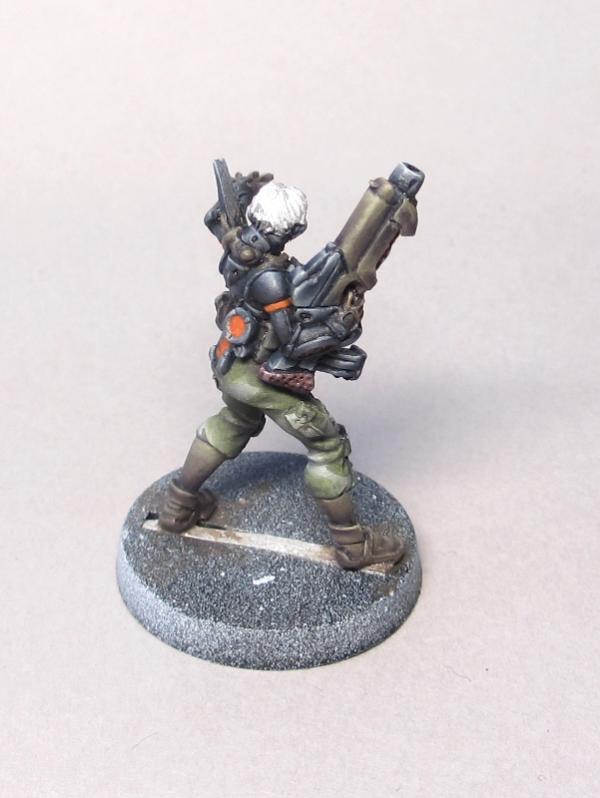
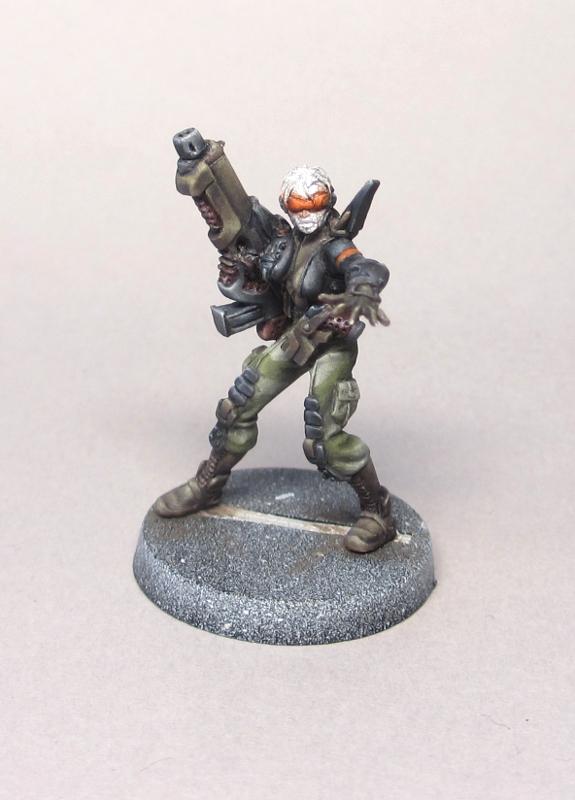
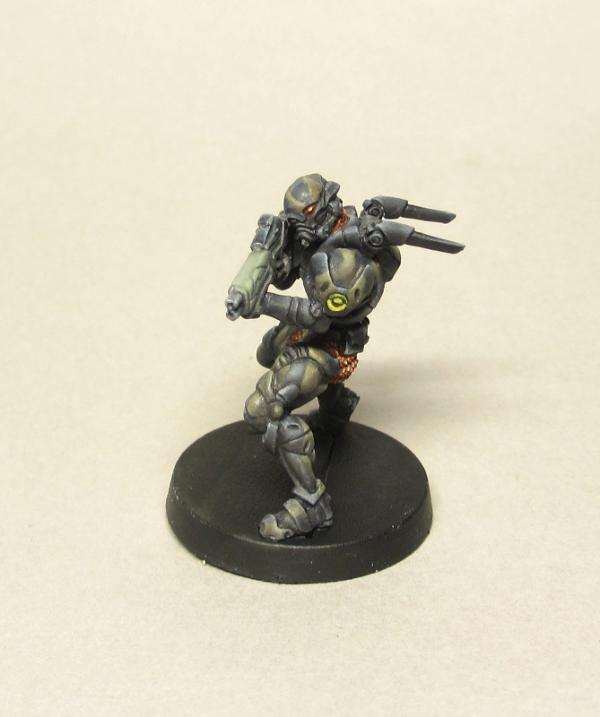
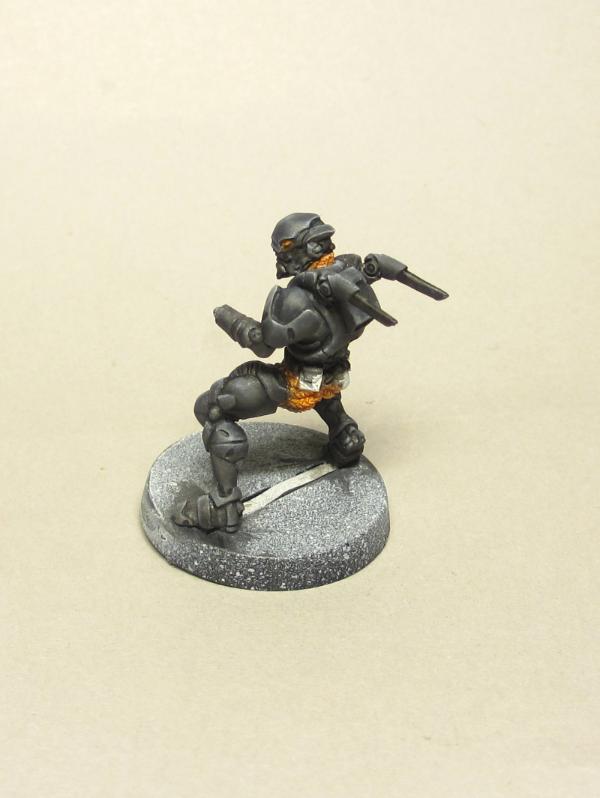
@Casey's Law It depends a bit on what I'm painting but I try to plan a bit on how I want the overall feel of the faction to be. For Yu Jing it was easier since I'm painting these for a friend he had some ideas on how they would look he wanted them to look dark and sinister with a military feel to them a bit like b movie bad guys or enemies in a computer game.
So I used dark grey on the armour I choose dark grey so that I could add some shadows to the armour and make the different sections of the armour stand out. To add to the darker look I used some Cryx bane base since it is a colder green that tends to lean a bit to the blue and mixed it with some pale olive this gave me a colder grey green. I didn't have a good plan for how I wanted the gun and equipment to look so I chose to use thornwood green since I like that colour and I had used it on the Hac Tao this helped to tie them together. I did need some contrast colours to make the mini stand out a bit and red is always a good contrast colour to green so I used it for the grips on the weapons and some Orange details the give it that computer bad guy look.
When I tried to create a colour scheme for PanO I had some trouble to come up with something I liked until I decided that since Yu Jing and PanO is mortal enemies I should paint them as the direct opposite to Yu Jing so I went for a lighter colour scheme with blue accents. It also gave me an opportunity to take a break from painting so much green and use some colours that I don't use to often. So I try to make a plan on the general feel and look on the mini and work from there it is always tricky for me to get the colour scheme right I the first attempt but I think it is important to not be afraid to go back and change parts of the mini you don't like.
|
|
|
|
2013/06/09 20:03:08
Subject: Re:Crazy Ivans random infinty blog (Zanshi hacker tutorial part 5 pg3)
|
|
Parachuting Para-Commando
|
|
|
This message was edited 2 times. Last update was at 2013/07/03 18:09:19
|
|
|
|
2013/06/16 22:17:54
Subject: Re:Crazy Ivans random infinty blog (Zanshi hacker tutorial part 5 pg3)
|
|
Parachuting Para-Commando
|
Thanks for the comments sorry to be so late in my reply.
@Casey's Law not sure as I have not tried to paint neon pink hair but i would try to start with a really strong pink colour and for shading I would try to experiment a bit to see what colour would work best purple, dark blue or dark red perhaps? you need a colour that helps the pink to look clean and not muddled for highlighting I would go for straight white.
|
|
|
|
2013/07/02 21:58:40
Subject: Re:Crazy Ivans random infinty blog (Wu Ming pg3)
|
|
Parachuting Para-Commando
|
Started working on a Wu Ming here is early wip pictures currently working on the armour I will add some camouflage to it in the same way as I painted on the Hac Tao.
|
|
|
|
2013/07/14 00:52:35
Subject: Re:Re:Crazy Ivans random infinty blog (Wu Ming pg4)
|
|
Parachuting Para-Commando
|
|
|
|
|
|
|