 - by Iain Wilson
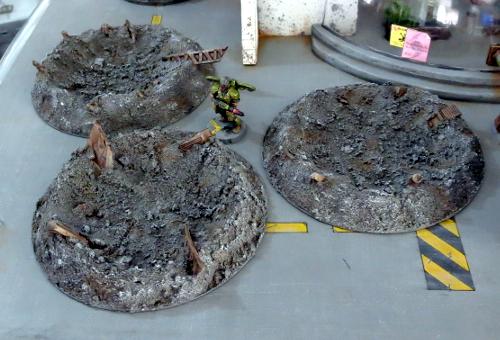
Last week, I went through some options for building a few different types of scatter terrain from components on the Maelstrom's Edge terrain sprue (if you missed it, you can find the article here). There is one other essential piece of scatter terrain that wasn't covered in that article, though: the humble blast crater.
Craters are a ubiquitous component of gaming tables from just about any genre (or at least any that deal with firearms of any kind) and along with those other staples of sci fi gaming - the soup-can storage tank and the spikey-polystyrene-ball cactus - you'll never be gifted the location of the secret lounge of the Terrain Builder's Guild if you don't have at least two or three in your terrain collection.
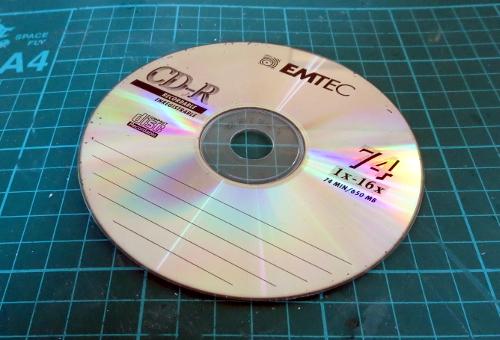
To get started, you'll want something round and flat to use as a base. Old CDs are perfect, as they're a good size without being too thick, and it saves them from going into landfill.
If you don't have any old CDs or DVDs kicking around, craftboard, cardboard or foamcore will also do the job, although cardboard or foamcore may bow slightly.
Take some air-drying clay (I'm using Jovi Air Dry Modeling Clay) and make a ring that's a little smaller in diameter than the base.
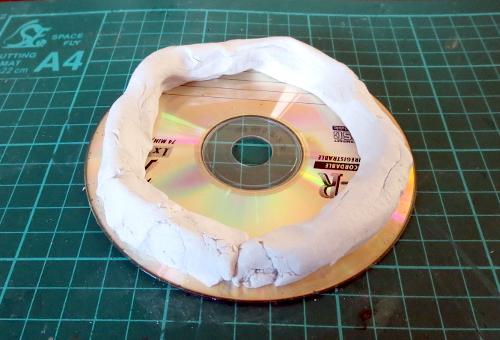
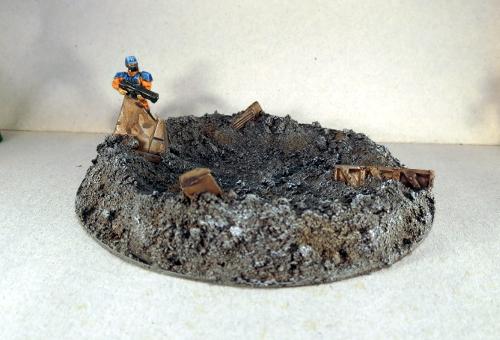
Smooth the clay down onto the base by pressing or rubbing it with your fingers, working around the ring on both the inside and outside and leaving a raised ridge. Don't make it too neat - you want a certain amount of irregularity to avoid the crater looking like a neatly-dug hole. There should be a steeper slope on the outside of the ridge than inside.
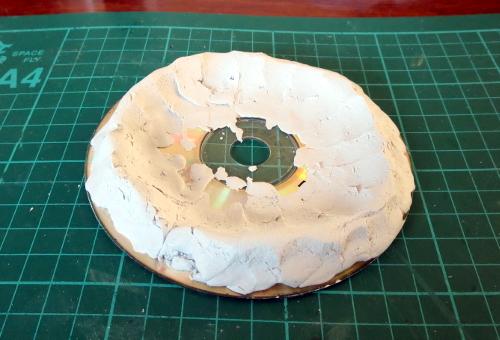
While the clay is still soft, add some chunky features. I'm using some leftover scraps from other terrain projects, from the Maelstrom's Edge terrain sprue. Just push them into the clay wherever seems appropriate. Longer pieces should be angled towards the outer edge, as if they've been pushed there by the explosion.
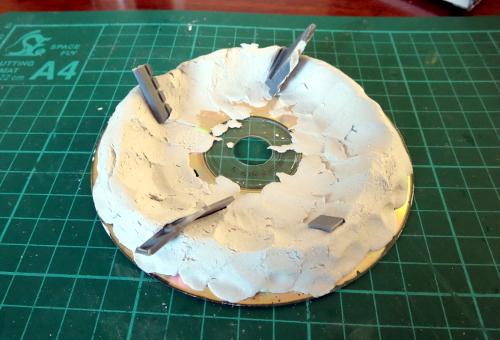
Air-drying clays aren't generally particularly adhesive, so the parts won't be held in there very firmly. The next step with stick them in place fairly comprehensively, but if you're concerned about them getting knocked around while you're working, you can add a little superglue on the part before pushing it into place.
When the clay dries, it may contract a little and lift up around the edges. You can avoid that by pressing it back down periodically as it dries, but it's not really a big problem - Once the clay has set, you can just chip off any bits that are sticking up more than a couple of millimetres and ignore the rest. The edge will be obscured by the texturing that happens next.
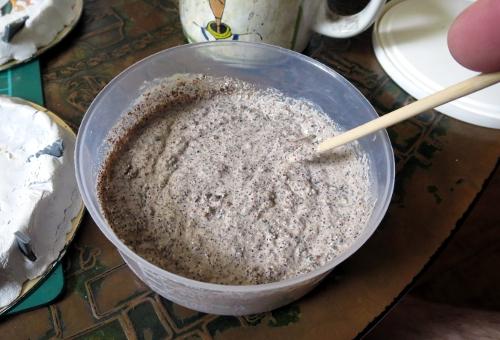
Take some coarse sand/fine gravel mix. I have a pot that has a mix of silversand, sandpit sand, small chips of slate, fine gravel and a little model railway ballast for good measure. You want a bit if a mix of textures for best effect, but if you don't have access to all of that just some regular sand with a little railway ballast or fine gravel mixed in will do just fine.
Into this, mix a generous dollop of PVA glue (also known as Elmer's glue or wood glue) and a little water. You want the mix to be thoroughly wet through, but not runny.
Using a large paintbrush that you're not emotionally attached to (because it's probably not coming back from this) spread a coat of the sand mix over the crater, starting from the middle and working up and over the ridge. That will naturally give you some radial detail running outwards from the blast area. You can accentuate that a little if you want by dragging a toothpick or wooden skewer gently outwards through the sand mix layer.
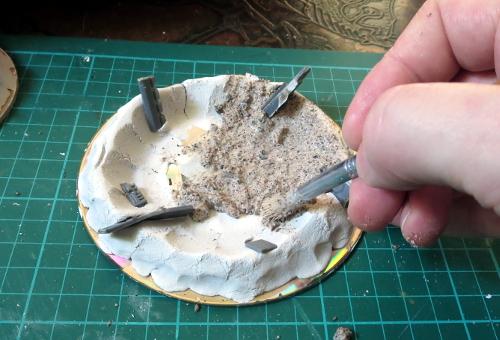
(If you haven't covered over the hole in the middle of the CD with clay, sticking on a small piece of masking tape before you apply the sand will take care of that.)
Don't worry if the detail looks a little soft at this point. As the glue dries, it will sink in and leave some nice, gritty texture.
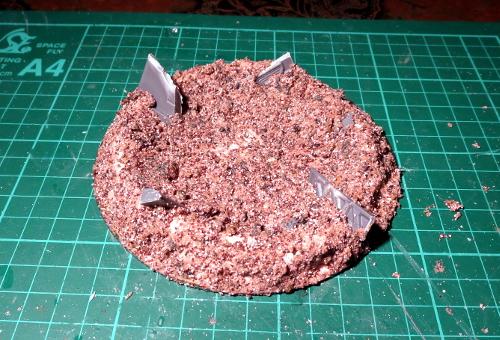
Once the sand layer has completely dried, paint up in some suitable colours to match your table. Here, I've used a grey spray undercoat, a coat of Army Painter Strong Tone, and then a drybrush of Vallejo Basalt Grey, Light Grey and white, to match my urban terrain. A little brown drybrushed around in patches helps dirty things up a little, and the terrain sprue parts are painted with Vallejo Beasty Brown, drybrushed with Citadel Boltgun and then washed with Army Painter Strong Tone.
For some variety, use a mix of different base sizes to create different craters.
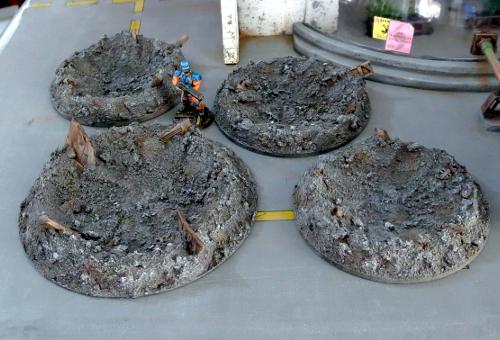
You can easily customise this basic design through using different sized bases, linking multiple craters together, or using larger or smaller rubble and terrain parts for detail.
And that's all there is to it! If you're feeling inspired, you can check out a bunch of other terrain-building articles by clicking here, or you can pick up the Maelstrom's Edge terrain sprue (in a handy 2-pack!) from the Maelstrom's Edge webstore here.
And as always, feel free to share your creations on the Comm Guild Facebook page!


