 - by Iain Wilson
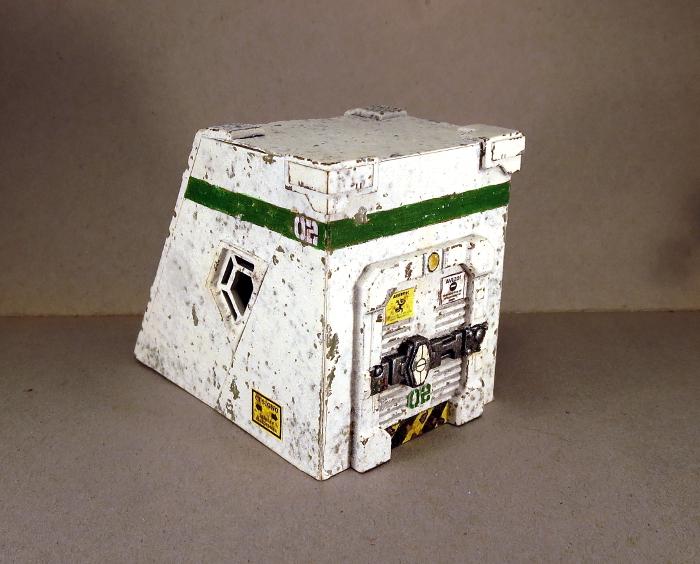
This week, we're sharing an easy building tutorial that would be perfect for those looking to dip a toe into the terrain scratch-building pool for the first time. The project is a small outbuilding, which I think of as an access to some sort of underground facility, although it could also double as a small utility or detention building.

You will need some 5mm or 6mm foamcore (either will work, although the roof piece will overhang the sides slightly with the thinner foamcore), some thin cardboard - around .5mm thick, PVA glue, and the Maelstrom's Edge terrain sprue. A sharp pencil, a steel ruler and a sharp craft knife will get you by for tools.
You will also need the building template, which can be downloaded from here: Minehead.pdf
From the terrain sprue, the following components are used: one of the small doors (either will do), two trapezoid windows, two corner braces and two of the long support struts.

Print out the building template, and cut out the panels using steel ruler and knife.
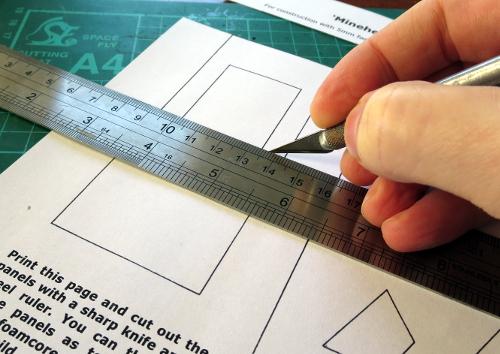
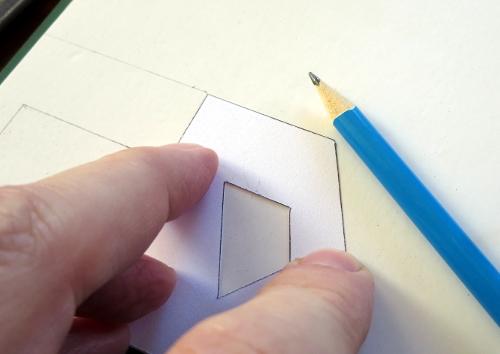
You can then lay the panels on top of the foamcore and card (the parts are labelled for which material they need) and draw around them with the pencil to transfer the outlines.
Once you have traced all of the parts onto the appropriate material, use the ruler and knife to cut them all out. If you have never cut foamcore before, don't try to cut through in one go. Lay the ruler along the line you want to cut, and then make several passes with the knife, working deeper as you go and being careful to keep the knife blade vertical so you don't wind up with a bevelled edge.
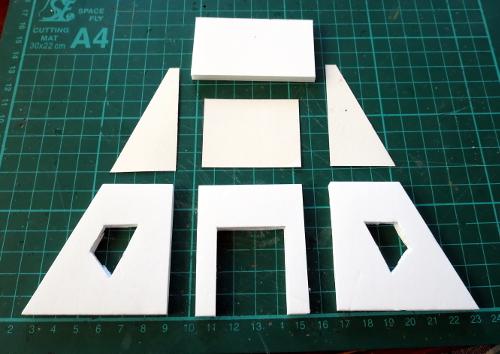
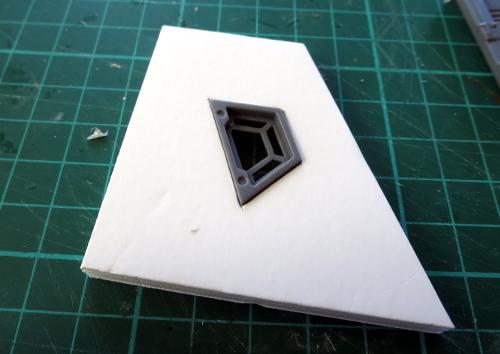
Check the fit on the holes for the trapezoid windows by pushing the windows into place. You can trim around the edges where necessary to make them fit nice and snug. If you have cut the window holes too large, you can pad them back out by gluing a strip of cardboard onto whichever cut edge has a gap. Once you're happy with the fit, run some glue around the edge of the window hole and then push the window into place.
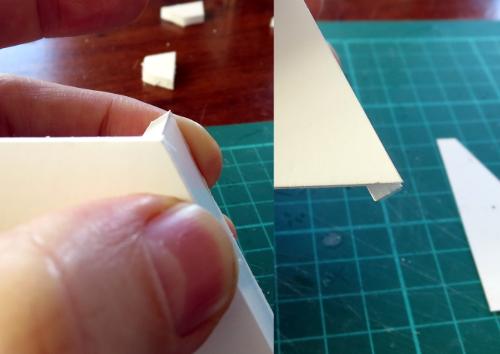
next up we need to glue the walls together. Because of the angle on the back wall, the bottom of the wall will protrude past the bottom of the building, so will need a little trimming. If you hold the back wall against the side as below, so that the top edge of the back wall sits level with the top of the side wall (left-hand image) you can see the triangular part that needs trimming off (right-hand image) - trim this off with the knife, or sand it down, so that the bottom of the back wall sits flat on the table.
From there, glue the side walls to the rear side of the front wall. The run a little glue down either side of the back wall section. Spread the side walls out slightly, hold the back wall in place, and squeeze the side walls back in against it. Give the glue 30 seconds or so to start to grab, and then sit the building down on the table. You can look down from above here and nudge the walls around as necessary to square everything up. A cutting mat with a printed grid is a big help for this step, as you can line the walls up with the grid.
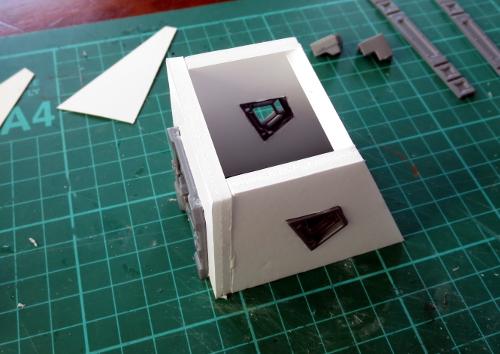
The cardboard side panels can then be glued one onto the front of each of the side walls, so that they cover over the exposed polystyrene edges of the front wall. The roof panel goes (surprisingly...) on top - run a little glue around the top edges of each wall, and sit the roof on top.

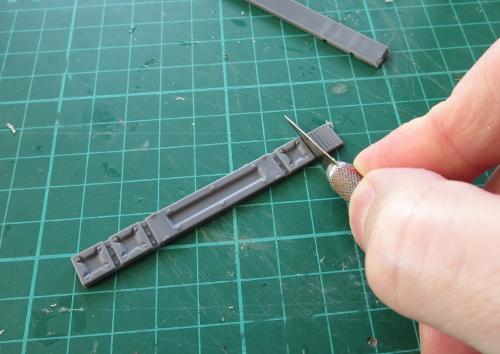
Take the two support struts and slice off the grill piece as below, leaving the recessed rivet strip attached to the grill.
The grills are glued onto the back edge of the roof, one at each corner with the rivet strip to the edge. The remaining sections of the support struts are then glued running up the sides of the back wall, covering over the exposed polystyrene edges of the side walls. Check for fit first - if they protrude past the bottom of the building when lined up with the roof at the top, bevel off the bottom of the strut with your knife before gluing in place.

Finally, take the two corner pieces and glue them to the front corners of the roof. What you wind up with should look something like this:
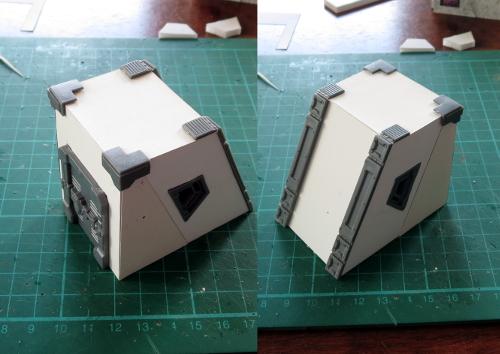
All that remains is painting, once the glue has set. Paint the building up in whatever colours suit your table or preferences. I like to weather my buildings, but it's not necessary - a simple spray with grey, white or a muted (not pastel, but not too bright) primary colour with the details picked out where appropriate works quite well with these as well.
Here's my prototype version painted up, with some added salt weathering and some paper signs created in Gimp and printed out on paper for gluing on wherever they seem appropriate.
The graffiti on the back wall was made in an online graffiti creator (google it, you'll turn up a few different ones with different functions and fonts), printed and glued in place. You can see the edges of the paper if you look closely, but from game-playing distance it does the job. The numbers on the green strips and door were done the same way.
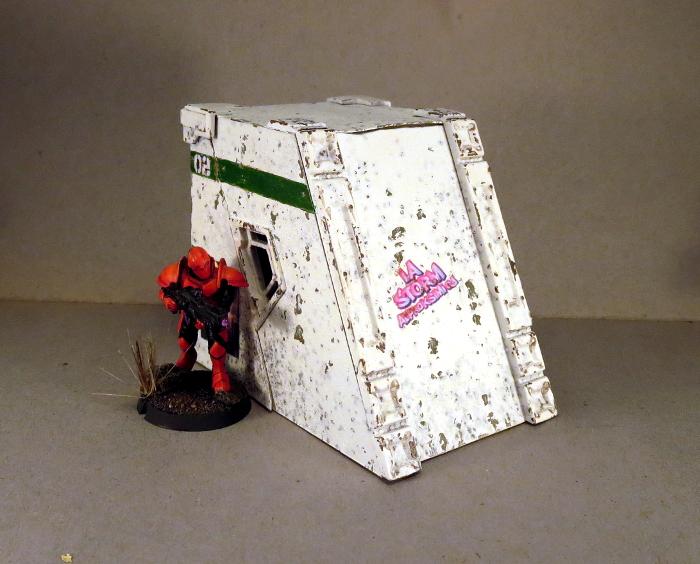
(Note that the windows in the painted example above are in a slightly different position to the template. This was a design change between the prototype and the template creation, as I think it looks better with the slight gap between the window and the raised side panel.)
And there you have it - one mine access/detention cell/utility closet/bike garage/whatever else you can think of to use it for.
If you want to try it for yourself, you can grab the template from here and the Maelstrom's Edge terrain sprue from the webstore here. I'd love to see what others can come up with to do with the design, so as always please feel free to share your creations on the Comm Guild Facebook page!


