
- by Iain Wilson
The Maelstrom's Edge Terrain Sprue lets you quickly and easily build some awesome-looking terrain to play your games around and over. Finishing that terrain off with a stand-out paintjob is sure to make your games look even better!
A while back, I shared a tutorial on
sponge weathering, which is a great way to quickly and easily add chipping effects to your paintjob. This time around, I'm looking at salt weathering, which is a little more involved than doing it with a sponge, but gives a much more detailed and realistic effect.
While it may look daunting at first, the most complicated part of the salt weathering process is actually just planning out what colours to use. The paint goes on in 2 or more layers, depending on how involved you want your weathering to be. For this tutorial, I'm going to just use a base layer which will become the 'weathered' part, and a top layer which provides the core colour for the building.
What you'll need.
-
A building to paint
-
Salt. You can use ordinary tablesalt, or rocksalt, or anything in between. The coarseness of the salt changes how your weathering will appear, so some experimenting can be required to find the effect that you like most. I use a coarse rocksalt that I grind up finely with a mortar and pestle. This gives the grains a less consistent size than just using table salt, which I think enhances the overall effect.
-
Hairspray. The cheaper, the better. It doesn't need to hold your fabulous 'do for the whole party, just keep some salt in place while you spray it.
-
A small, stiff brush. An old toothbrush is ideal.
-
Spray paint. You can use an airbrush for this technique if you have one, but if you don't then spraycans will do just fine - that's all I use.
First step - Apply the basecoat. This is the layer that will show through as your weathering. If you're after a chipped cement wall look, then a dark grey is appropriate. You can use a metallic colour if you want a painted metal feature, or a rusty brown for more weathered metal. If you want multiple effects over the building, then you can mix-and-match as required. If you're worried about the basecoat scratching off, which can be a problem with some plastic or metal materials, then also apply a generous coat of gloss sealer at this point.
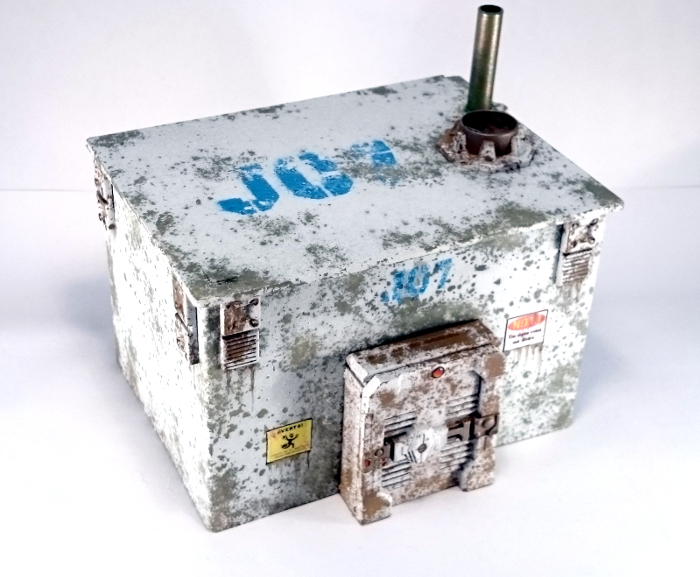
For my building, I'm going for cement walls with rusty metal details, so I've sprayed the whole building grey, and then gone over the parts that will be metal with brown for the rust.

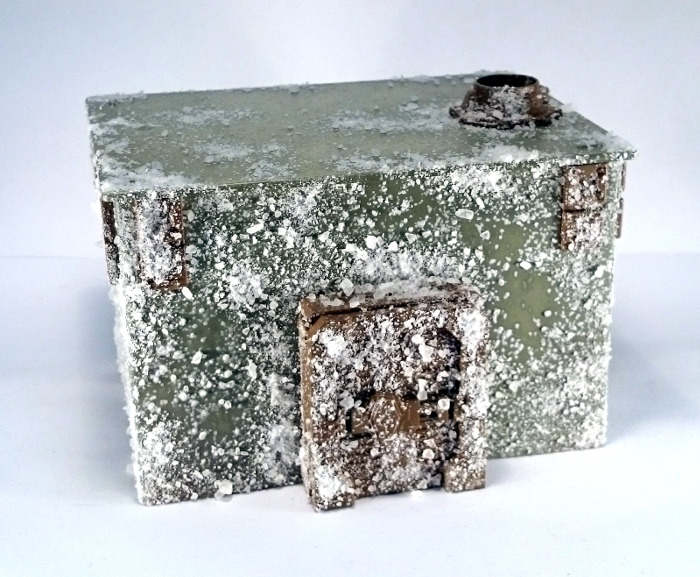
The next step is to apply the salt. Working one facing at a time, spray on a generous (but not dripping!) coat of hairspray, and then sprinkle on the salt where you want your weathering to appear. For the most realistic effect, concentrate on areas that would be most likely to see wear and tear - exposed corners, raised edges and the like.
Note - You can use water for this step instead of hairspray, using a spray bottle or a paintbrush to apply the water where you want the salt to go. This can be a little more precise, but requires much more careful handling as the water doesn't bond quite as strongly to larger grains of salt and takes longer to dry than the hairspray.
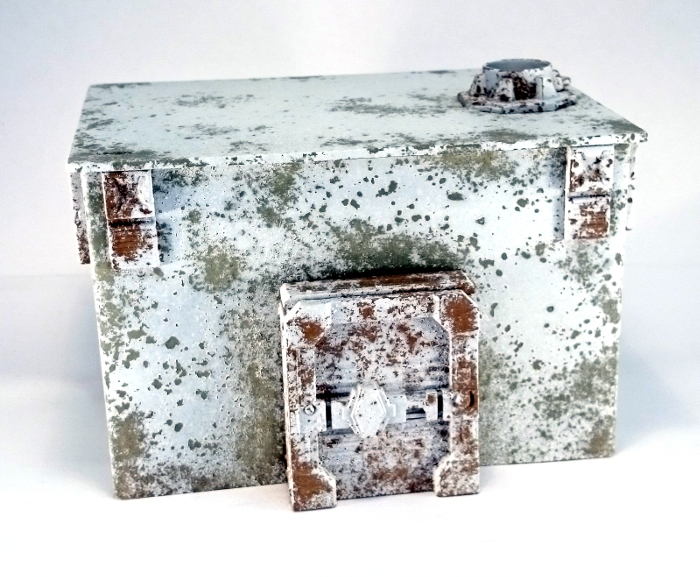
When you're done, your building will look something like this:
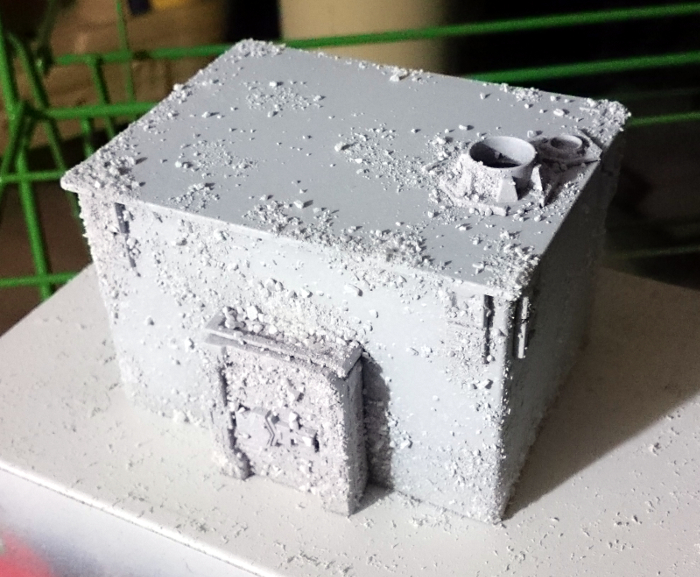
Once the hairspray has dried, you can apply your next coat of colour - I'm using a flat white. Keep this coat light, as too much paint will make it harder to remove the salt. Set aside for the paint to dry.
Now comes the fun part!
Using your brush, gently scrub off the salt. If your building is made from water-proof materials, you can hold it under some running water while you scrub. If you have used something cardboard, foamcore or similar, dip your brush in some water and keep it wet while trying not to soak the building too much as you scrub instead.
As the salt comes away, your base layer is exposed in a lovely chipped pattern.
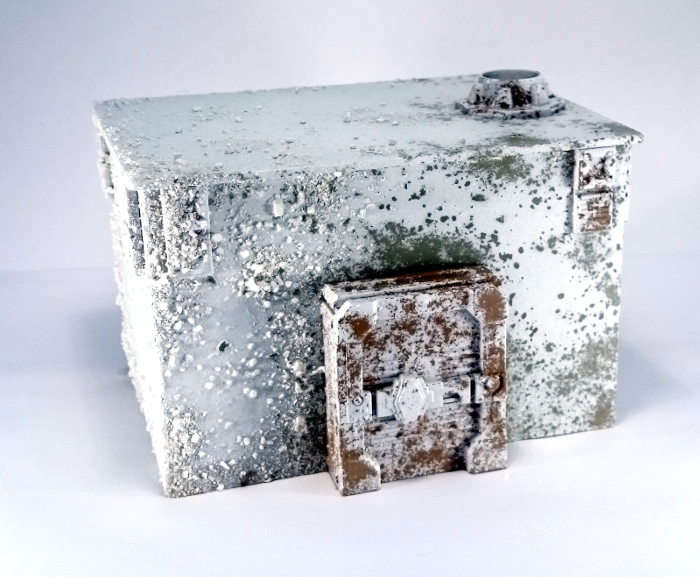
Let it dry before applying any final detailing. Any leftover salt residue will dry as a white powder on your paint, so can need a little bit of cleanup with a damp cloth. At this point, I like to apply a coat of matte sealer just to keep everything pretty while I do any detail work to the building, to avoid damaging the paint with the extra handling.
You can apply multiple layers of colour by repeating the above steps, either over the whole building to show different paint layers or more detail on corroded metal, or by masking off part of the building to apply specific detailing. Here, I'm adding a building
ID to the top and front by taping a stencil in place.
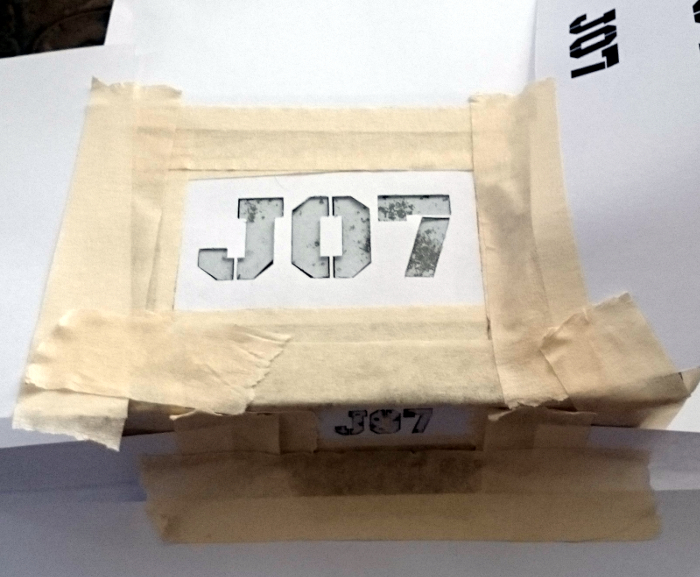
Salt is applied over the stencil, followed by a spray of the new colour. Once you remove the stencil and scrub away the salt, you're left with detailing that looks as weathered as the rest of the building.
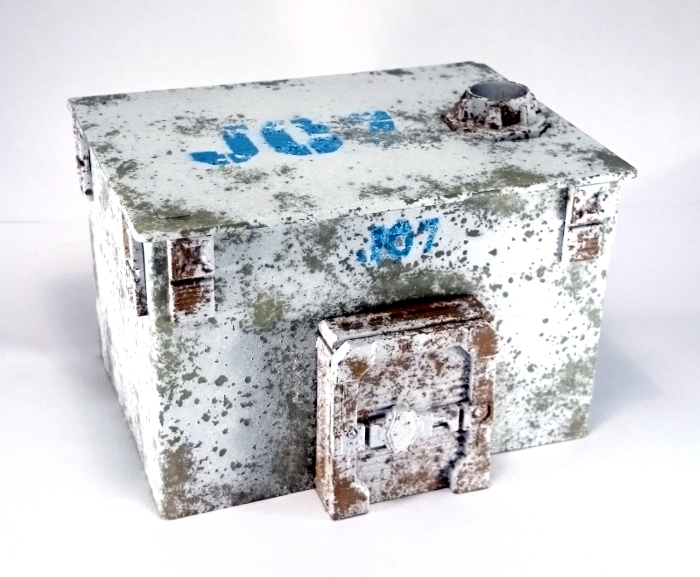
Once you have applied as many layers of weathering as you feel it needs, all that remains is to apply your final detailing
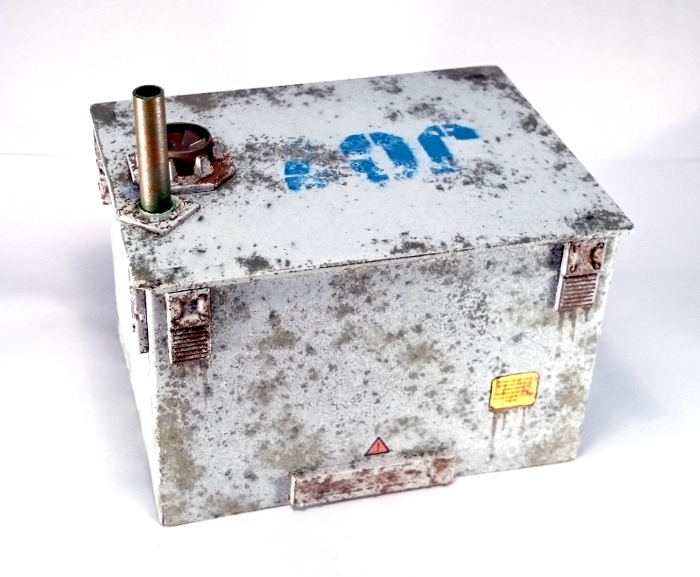
And that's essentially it. You can vary the amount of weathering by using more or less salt, and can create all sorts of nifty effects through layering and careful use of colours. A good idea if you're not sure of what will work is to google images of derelict buildings or machinery and use those for inspiration.
Why not give it a go? You can pick up the Maelstrom's Edge terrain sprue along with the rest of the Maelstrom's Edge model range from the webstore
here.
As always, feel free to pop along and share your work, or ask any Maelstrom's Edge- or hobby-related questions on the
Comm Guild Facebook page!
For other Maelstrom's Edge modeling articles, including tutorials and walkthroughs of a wide range of different building and miniature projects, check out the article roundup
here.


