
- by Iain Wilson
I'm venturing back inside the box this week, with a new building variant based on a couple of cardboard gift boxes, with some detailing help from the Maelstrom's Edge terrain sprue as usual.
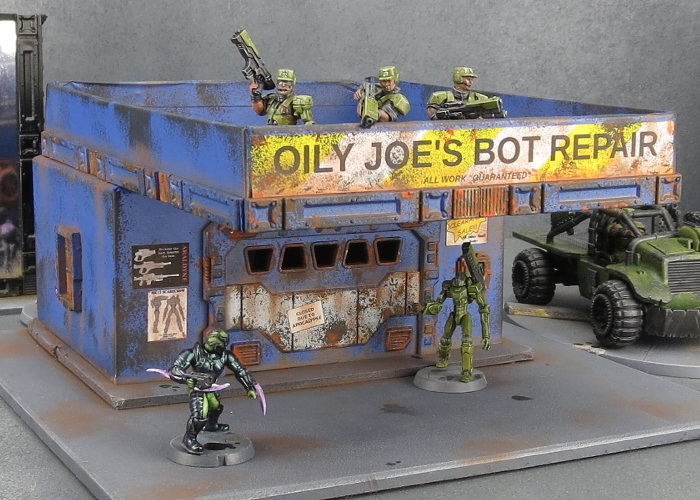
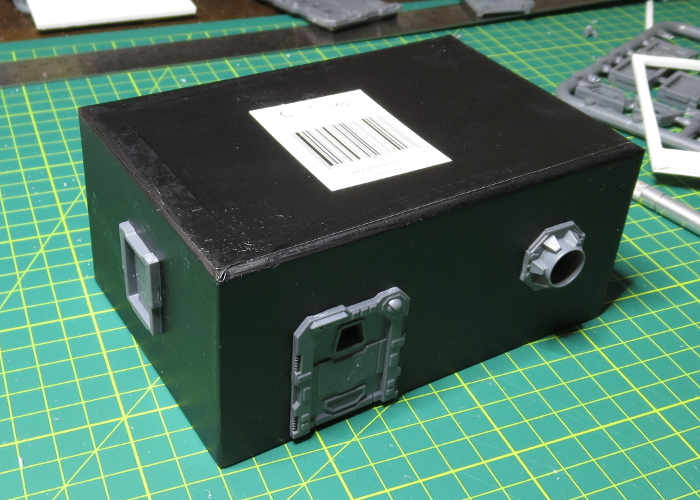
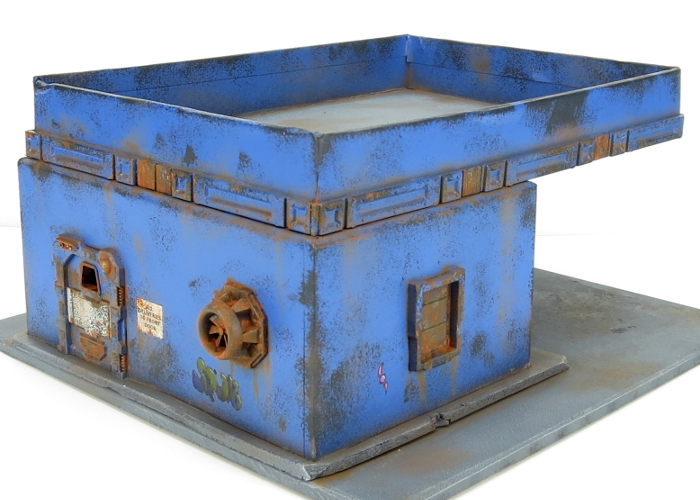
Need your bot repaired, pronto? Want to pick up some spare power converters to get those units in the north quadrant back up and running? Well, don't bother heading down to Oily Joe's, because he's closed down and scarpered, to try to get a berth offworld before the Maelstrom hits.
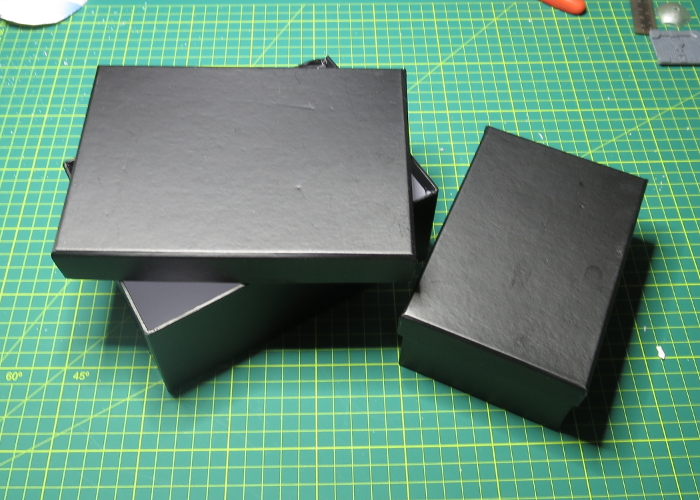
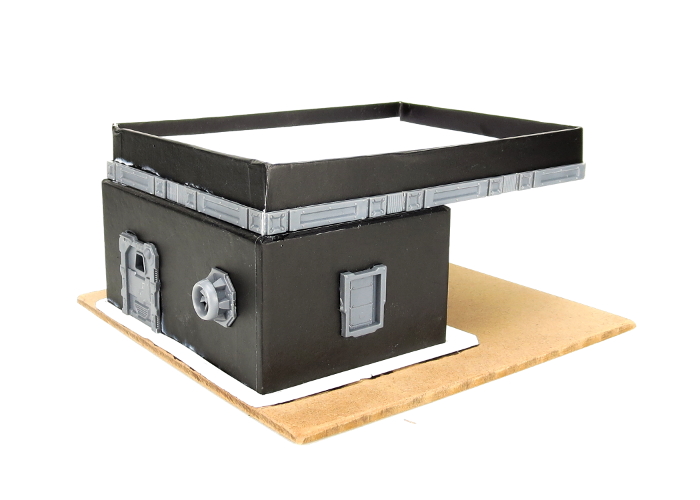
The base structure of this building uses two differently sized cardboard gift boxes, sourced from one of the local discount stores. The smaller box forms the walls, while the lid of the larger box, which is just a fraction narrower than the small box is long, is used for the awning roof.
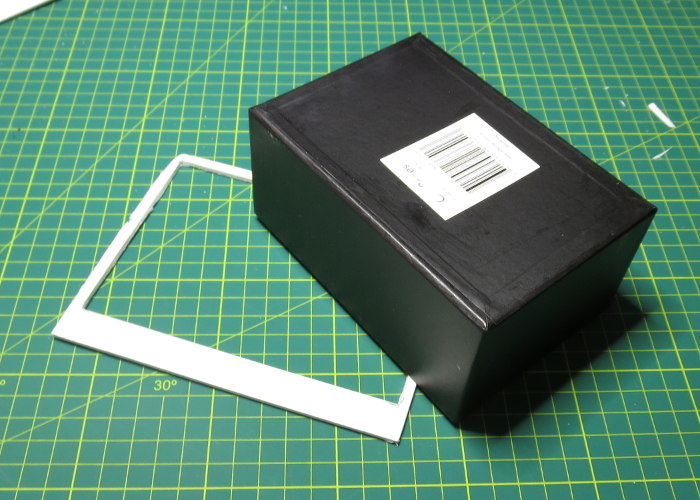
I started out by flipping the small box upside down, and using it as a template to mark out a surround of 2mm thick foamed PVC, which I cut out with an exacto knife and a steel ruler.
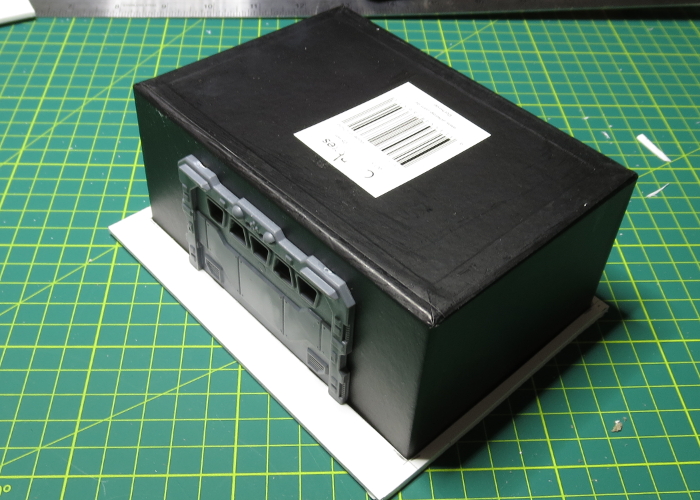
Then I grabbed a large door from the terrain sprue, and held that in place on one of the long walls (remembering to account for the 2mm surround at the bottom) to draw around it, and then cut out the door hole with the exacto knife.

I glued the door in place with some superglue.
I did the same with a small door on the other long wall, and shutter windows on either short wall. I also added a large pipe fitting one the side with the smaller door.
Next up, I slathered superglue generously over the top of the upside down box, and sat the roof in place.
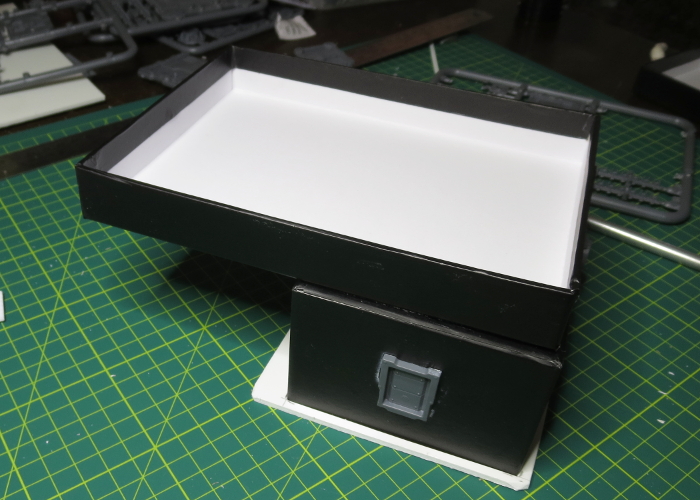
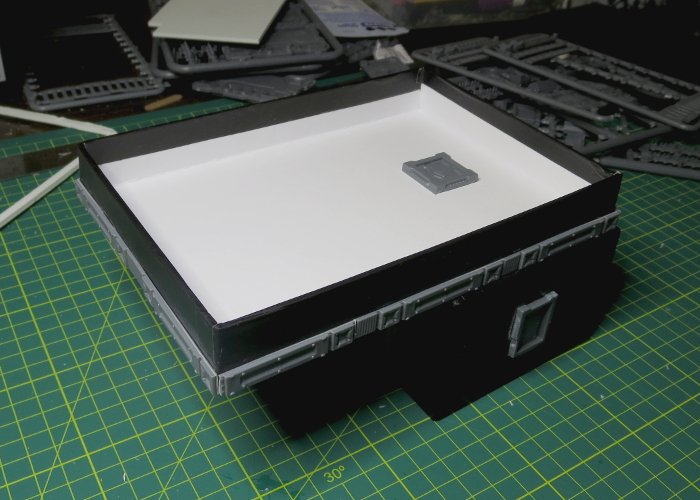
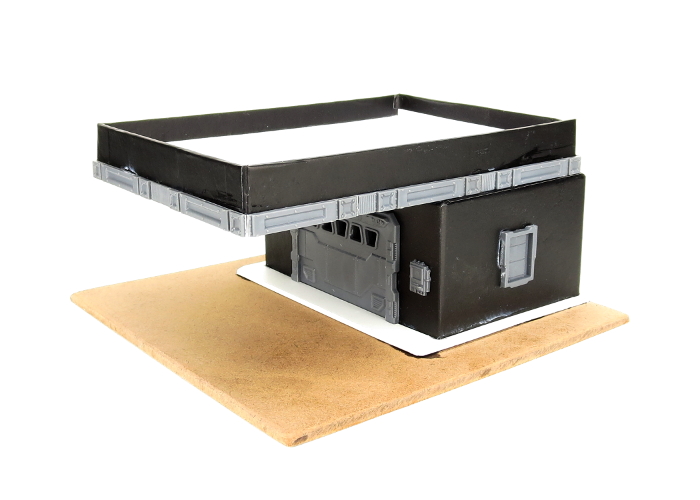
To help disguise the the roof isn't quite as wide as the building itself, I added a strip of reinforcing struts from the terrain sprue around the lower edge, cutting them to fit neatly. I also added a square hatch on the roof to provide access.
Finally, I glued a comm panel on the wall beside the large door, and glued everything down onto an 8" x 8" piece of masonite. I also added a fan attachment to the end of the pipe fitting - this one is a plastic bit from an upcoming kit (Shhh, don't tell anyone - it's a secret!) but you can also create a fan blade using some cardboard or plasticard, as per the tutorial
here.
With that, it was time to paint!
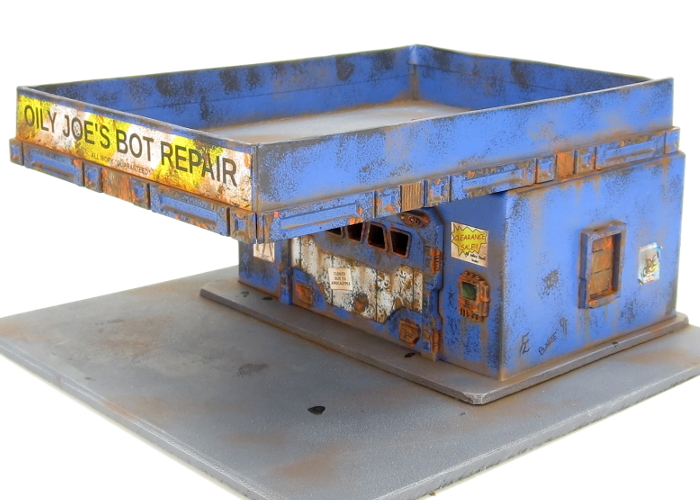
I gave the whole thing a light coat of flat black spray, and when that was dry added a layer of Army Painter Ultramarine Blue. On the doors, I added a white strip with Army Painter Ash Grey and white, and then weathered the whole thing with a sponge and some Vallejo Heavy Charcoal. (See the tutorial on sponge weathering
here!) The base and roof were painted with Vallejo Basalt Grey and drybrushed with Light Grey.
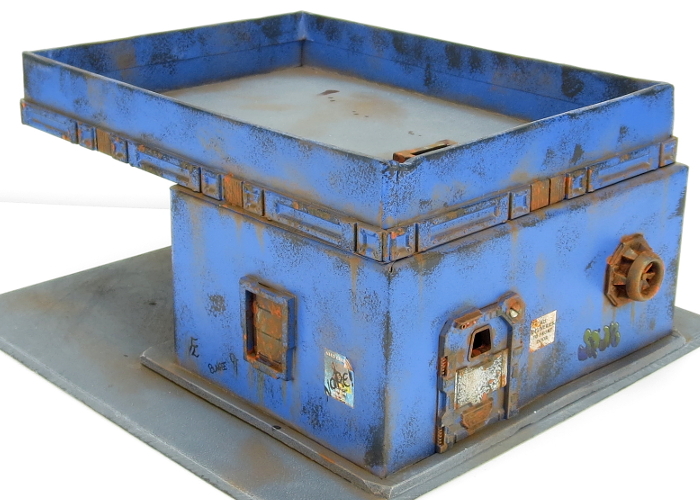
For the rusted metal bits, I started with a base layer of old Citadel Scorched Brown, lightly drybrushed with P3 Pig Iron and Ember Orange, and then applied liberal dabs of Army Painter Dry Rust.
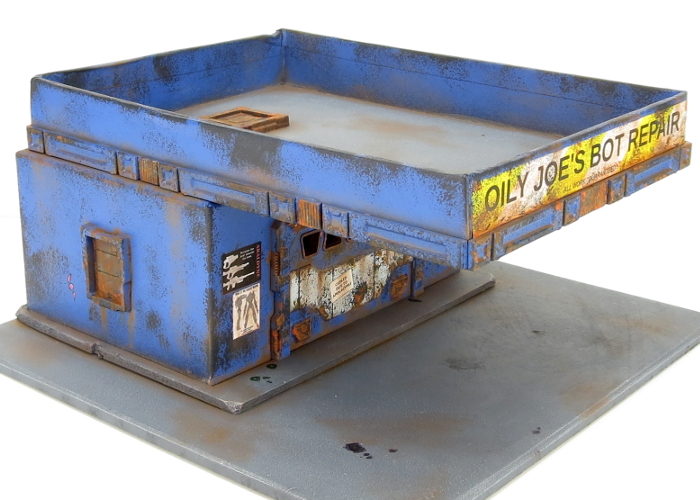
For a bit of extra colour, I printed off the sign for the front and a few smaller signs to scatter around the place after drawing them up in Gimp. These were stuck on with PVA glue, and then a dirtied everything up with a drybrush of Vallejo Beasty Brown in the corners and wherever else seemed appropriate. A few finishing details like the comm screen, lights, and some graffiti on the walls, and Oily Joe's was ready for the table!
To build your own retail champion of the future, you can pick up the Maelstrom's Edge terrain sprue, along with the rest of the Maelstrom's Edge model range in the webstore
here.
As always, feel free to pop along and share your creations, or ask any Maelstrom's Edge- or hobby-related questions on the
Comm Guild Facebook page!
For other Maelstrom's Edge modeling articles, including tutorials and walkthroughs of a wide range of different building and miniature projects, check out the Hobby section of the Maelstrom's Edge website
here.


