After seeing CNC Workshop's nifty generic
Urban Grounds terrain tiles, I figured it was a good time to start making the portable terrain board I always wanted. So I bought enough to cover a 4'x6' board (2 sets).
That was 10 months ago....
So last week I got the bug out of my butt to get started on making this thing a reality instead of sitting on hundreds of dollars worth of product and doing absolutely nothing with it.
This combined with the enormous amount of
COD stuff I also bought last year, "Crusader 29" terrain from 6 years ago along with a bunch of scratch built plastic card buildings should be enough for a really packed board with enough to have options so the board isn't the same every game.
So lets begin with two sets of Urban Grounds tiles.
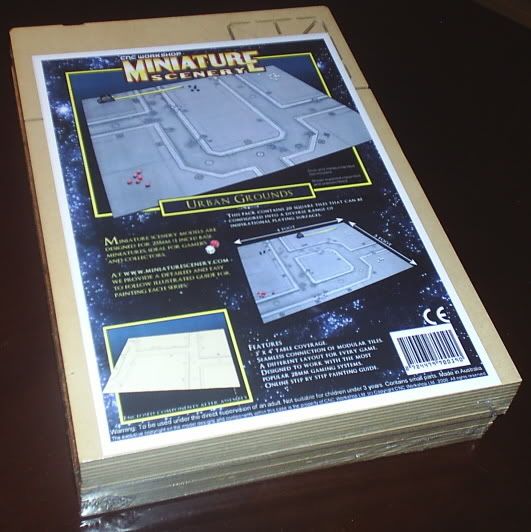
When these first came out, they were available for under $100 for a set (enough to cover 37" x 46.25" ) after shipping. Now they cost nearly $170 each after shipping all the way from OZ. For this reason alone, I wouldn't recommend buying these right now due to the weak american dollar. Prohibitively expensive doesn't even begin to describe these tiles at this moment.
Anyways, in each package you get two sub packs. One for 10 blank 9.25" square tiles and one for 11 various road tiles.
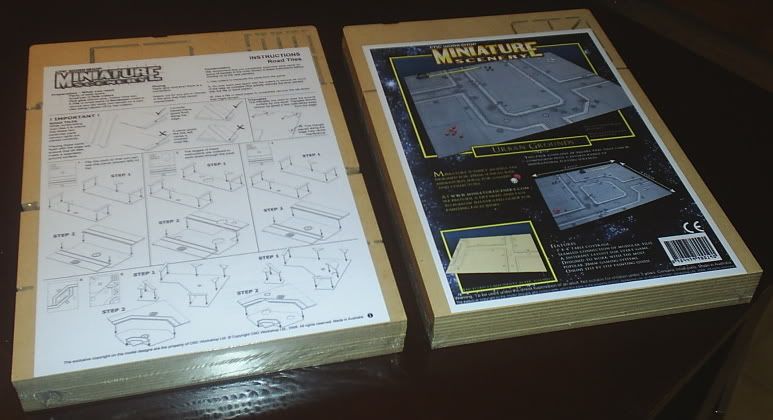
Constructing the blank tiles is a breeze you can do with your eyes closed.
Constructing the road tiles requires infinitely more care. You must also assemble the road tiles in the order packaged and by the directions given. This point cannot be reinforced enough as it is very easy to mix up pieces. So, take one sheet, assemble it and then move on to the next! It makes it more labour intensive, but it saves you a headache in the future.
I had to construct a squaring Jig out of legos so that I could ensure that the tiles were straight.
CNC claims that the tiles are basically perfect if you construct them according to their directions, and for the most pat this is true, but they have enough leeway that you can make something either funky crooked or strait edge straight.
So the lego Jig was a lego frame 10" square so that when I fit in the tiles, I could ensure that they were not only aligned straight, but also square.
But thats not all, as it gets even more tedious!
After assembling my first tile, I noticed that it started to warp due to the glue drying on the Masonite board.

Well, I am not going to waste a couple hundred dollars on a funky twisted up board. So I went to a buddies house who has metal shop tools and a few pieces of spare quarter inch steel sheet. I asked him to cut me a couple 12" squares of the thick sheet metal and build me a "flower press" so I can flat clamp these stupid tiles... ( I am a bit miffed as this is one thing I wasn't expecting. Having experience in cabinet making, I should have expected this, so I blame myself)

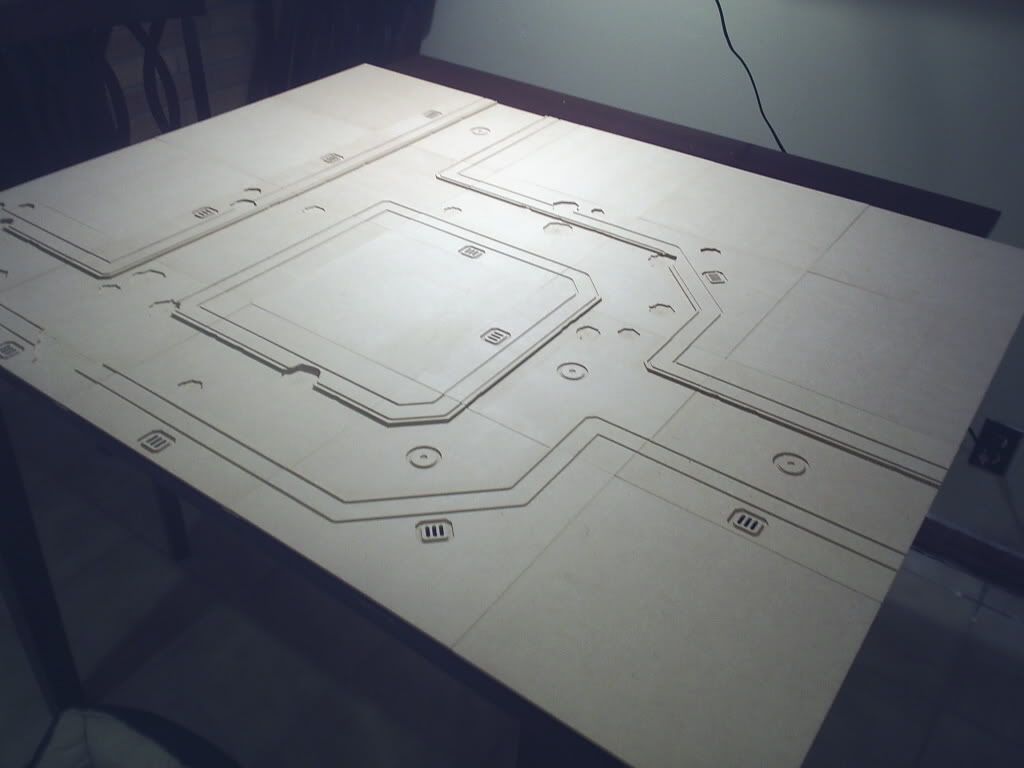
I am not going to post a bunch of pictures of the tiles, but I will
link to them for you in case you happen to be interested in how they are constructed. (in the link you will see both top and bottoms of each tile)
After sanding, laborious squaring, gluing, pressing, I was able to construct 21 tiles (one pack) in about 10 hours (spaced over three days and another three days in the press to allow complete drying).
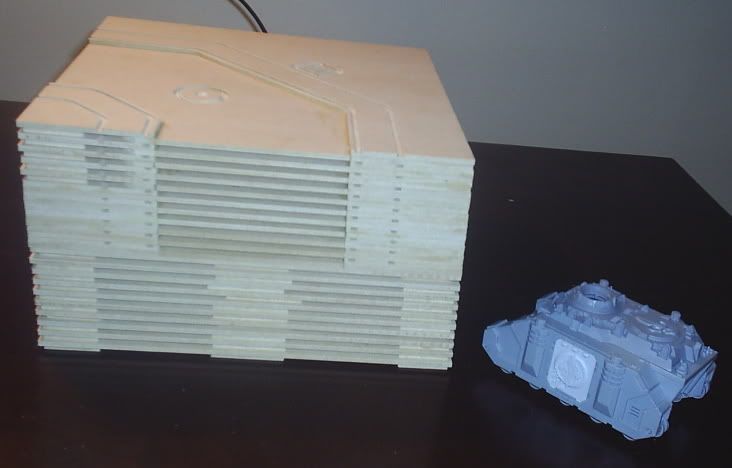
(Rhino for scale)
And here is one packages worth (2'x3') of tiles completed before adding any debris and paint.
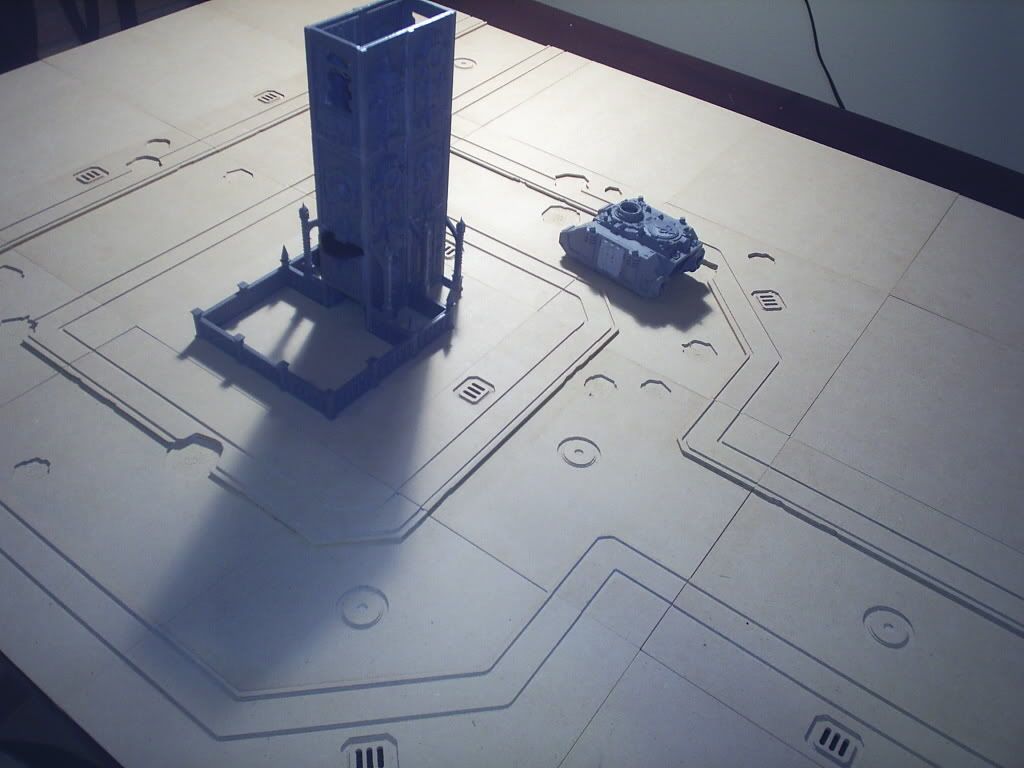
And here is a three story
COD building and a rhino to give it scale.
After all the aggravation and money spent on this, I am happy with the outcome so far. I dont recommend this type of tiles for anyone who doesn't have atleast access to a well stocked workroom though as you may find you may need more tools than originally planned.
One pack down, one to go...
The next 3'x4' pack should be much easier to do now that I have built one. I expect about three hours to be shaved off due to experience.
By the way, the building is a dice mill I built last year. You can see its thread
HERE.


