Switch Theme:

Darkkt's Simple Green Stuff Scales - Alpha Legion  [RSS] Share on facebook Share on Twitter Submit to Reddit
»
Author Message
Advert


Forum adverts like this one are shown to any user who is not logged in. Join us by filling out a tiny 3 field form and you will get your own, free, dakka user account which gives a good range of benefits to you:
  • No adverts like this in the forums anymore.
  • Times and dates in your local timezone.
  • Full tracking of what you have read so you can skip to your first unread post, easily see what has changed since you last logged in, and easily see what is new at a glance.
  • Email notifications for threads you want to watch closely.
  • Being a part of the oldest wargaming community on the net.
If you are already a member then feel free to login now.


Made in au
Morphing Obliterator


rAdelaide

G'day - I was asked by CLV to do a tutorial explaining how I do my Alpha Legion Scales (although this could also be used for salamaders too I guess). So here a few simple steps for the easiest scales you will ever do. There are other guides out there, and I recommend you try them all to get a look that you like.

I apologise in advance for the blurry pics (I may come back and replace these at some stage).

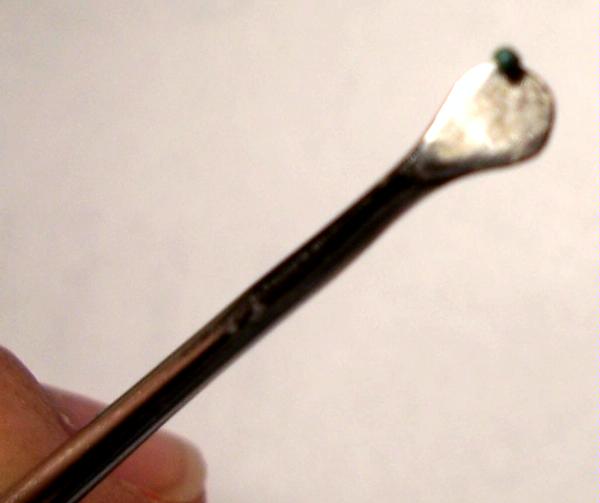
Step zero:- mix up some greenstuff. I recommend only mixing a very small amount (ie a ball the size of a match head. Once its well mixed, roll the ball out into a long thin thread.

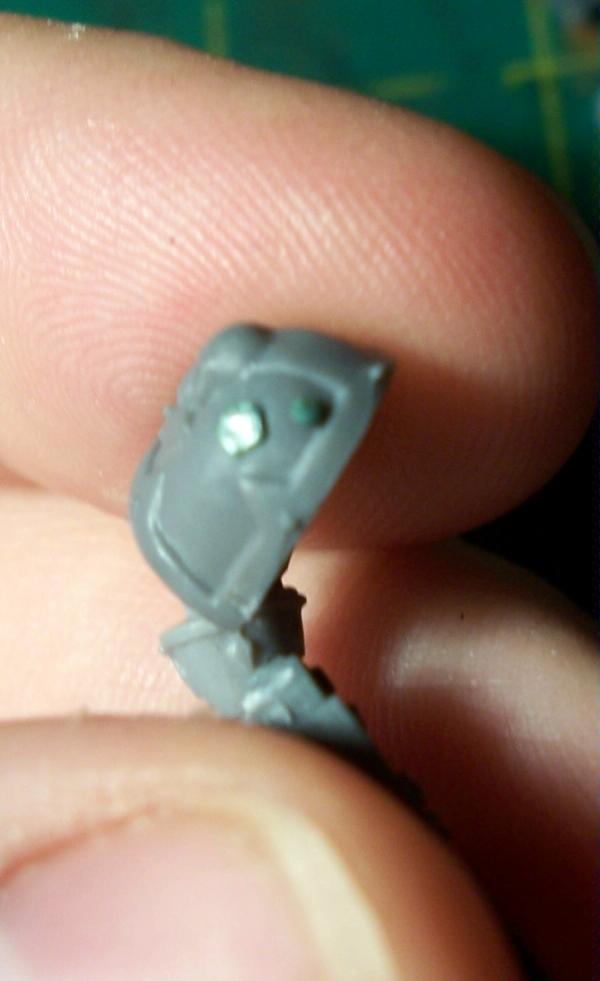
Step one:. Cut off an exceptionally small piece and roll it into a ball. You want about this much (see pic)


Step two: 
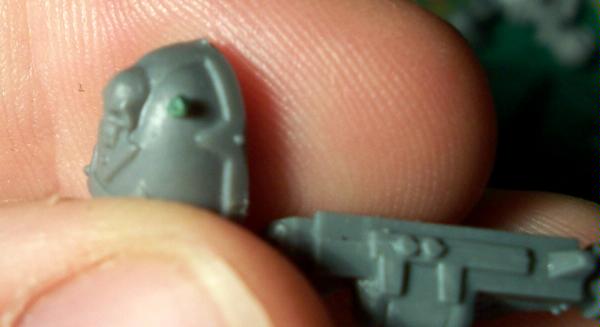
Place the ball on the large flat areas of the model.
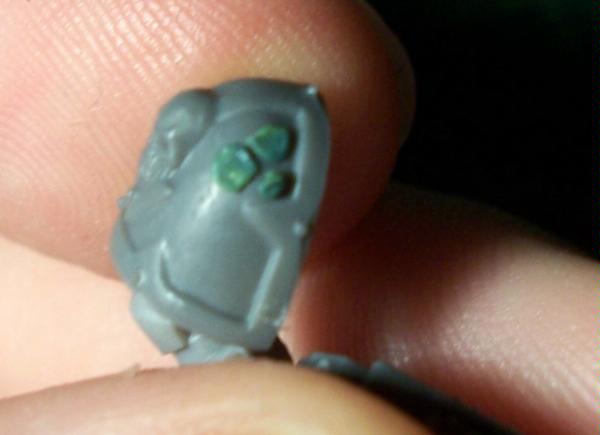


Step three: 
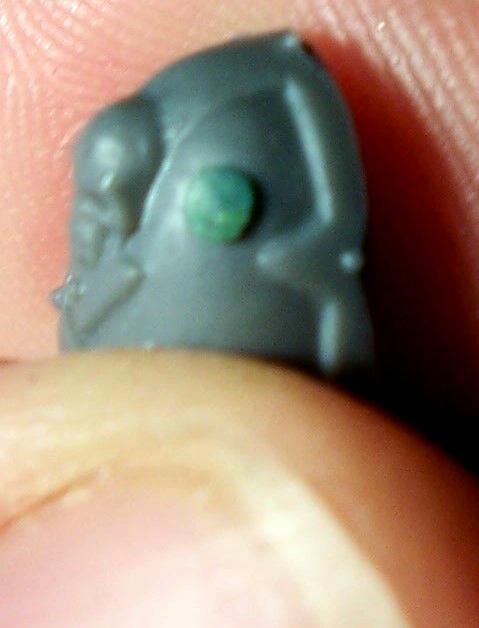
Squash the ball flat. You should end up with a slightly raised circle.


Step four: 
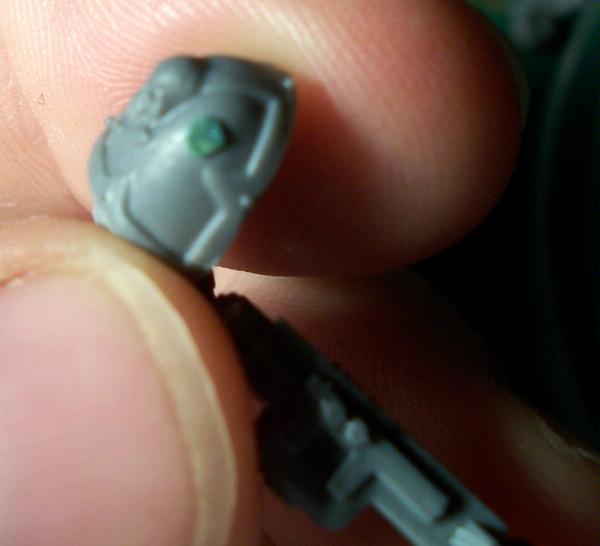
Flatten the edges of the circle until you have an irregular ploygon (I try for at least 5 uneven sides). It doesnt matter if they arnt exactly flat, near enough is good enough.
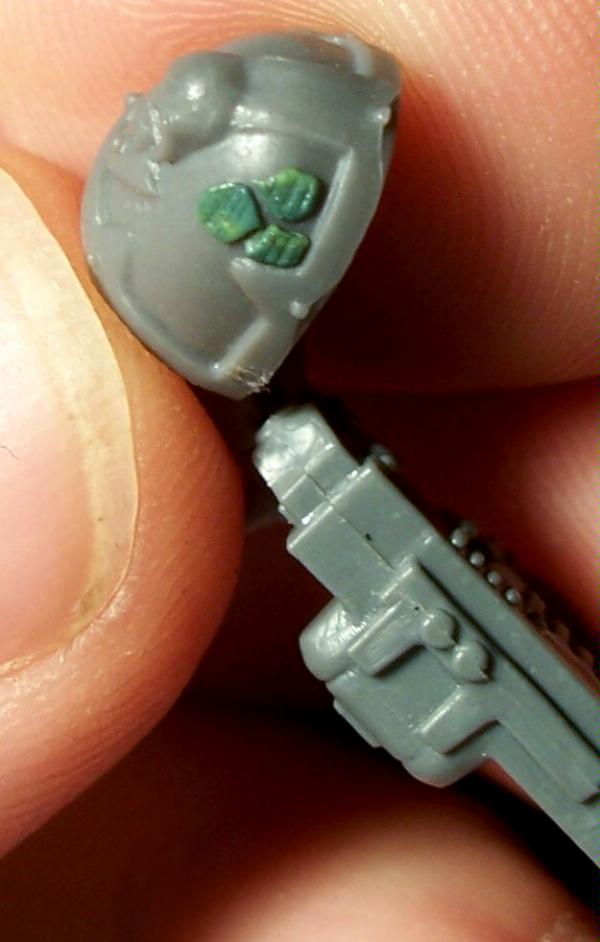


Step five: Rinse & repeat (that is, keep placing the small balls next to each other, and flattening the edges).


Step six: Texture. Whilst its fine to place the scales and leave them flat, I found that adding some texture made highlighting and drybrushing more effective.

I chose straight lines.
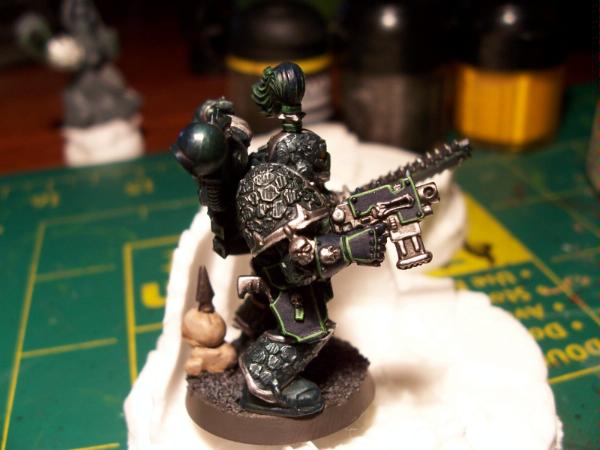


And thats about it!

Let me know if this is of interest, and if you have any suggestions improvements, please let me know!

This message was edited 1 time. Last update was at 2009/11/29 05:16:03


Made in us
Enigmatic Sorcerer of Chaos


Buena Park, CA

O.o I might have to try this... It looks like it would be cool for a molten lava kinda deal! Thanks for the idea
   
Made in gb
Elite Tyranid Warrior


Thanks for the tut. mate gonna try it out later on. Btw thanks for the mention

"I hope they can fight without their commmander because he's lost his head."
Alatair, Vindicare Assassin of the Blood Dragons.

Emperors Faithful wrote:Assassin: One shot is all it takes...
Slaneesh: Bow chika wow wow!


Made in us
Fresh-Faced New User


That looks great! Very good Tutorial. Thanks.

   
Made in us
Irked Blood Angel Scout with Combat Knife


Jacksonville,NC

Nice tutorial, I plan on using it when I have the urge to rebuild my Alpha Legion. I have a question though. Since they aren't glued on, have you have any problems with them falling off?
   
Made in au
Morphing Obliterator


rAdelaide

Lord Alaric wrote:Nice tutorial, I plan on using it when I have the urge to rebuild my Alpha Legion. I have a question though. Since they aren't glued on, have you have any problems with them falling off?


Good question - I was worried about it that too. I recommend using the gs when its freshly mixed (and at its stickiest). Then make sure that you undercoat it, and Ive found no probs with them falling off (yet).
   
Made in gb
Growlin' Guntrukk Driver with Killacannon


wolverhampton

if it falls off jus glue it back on

mean green fightin machine 
   
 
Forum Index » Painting & Modeling Tutorials
Go to: