| Author |
Message |
 |
|
|
|
|
Advert
|
Forum adverts like this one are shown to any user who is not logged in. Join us by filling out a tiny 3 field form and you will get your own, free, dakka user account which gives a good range of benefits to you:
- No adverts like this in the forums anymore.
- Times and dates in your local timezone.
- Full tracking of what you have read so you can skip to your first unread post, easily see what has changed since you last logged in, and easily see what is new at a glance.
- Email notifications for threads you want to watch closely.
- Being a part of the oldest wargaming community on the net.
If you are already a member then feel free to login now. |
|
 |
2018/01/16 19:03:12
Subject: Terrain - Mini Hab Domes from plastic bowls
|
|

[MOD]
Making Stuff
|
From the Maelstrom's Edge Comm Guild blog - http://www.thecommguild.com/roller/thecommguild/entry/terrain-spotlight-mini-hab-domes
 - by Iain Wilson - by Iain Wilson
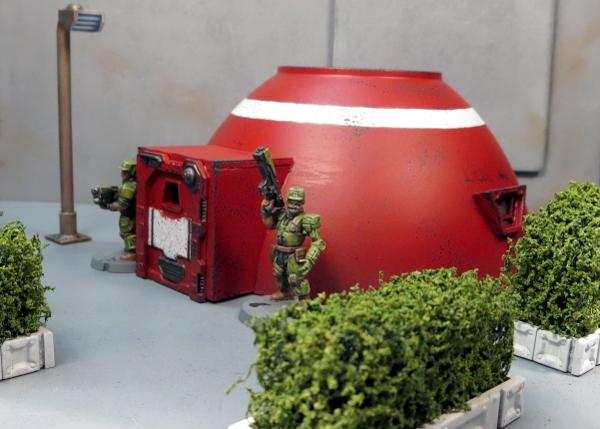
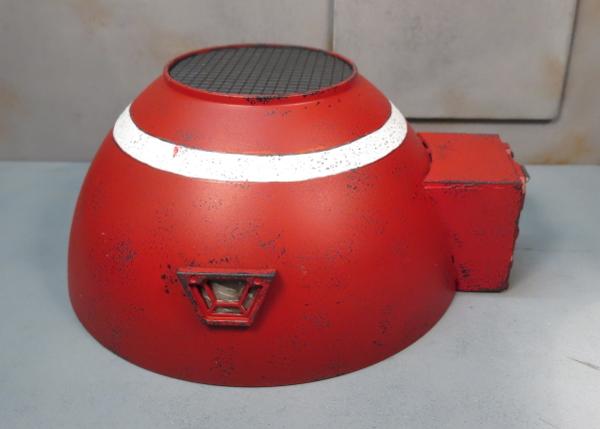
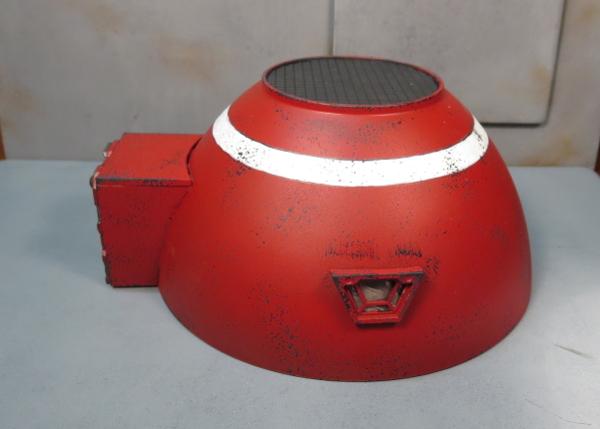
Throughout the galaxy, few structures hold up as well in hostile environmental conditions as the humble dome. They're durable, efficient, and as a bonus look nice and distinctive in a universe filled largely with pre-fabricated, angular structures. So here's a simple way to make yourself some small dome structures for your gaming table, using components from the Maelstrom's Edge terrain sprue, a little foam core board, some plasticard, and a plastic bowl.
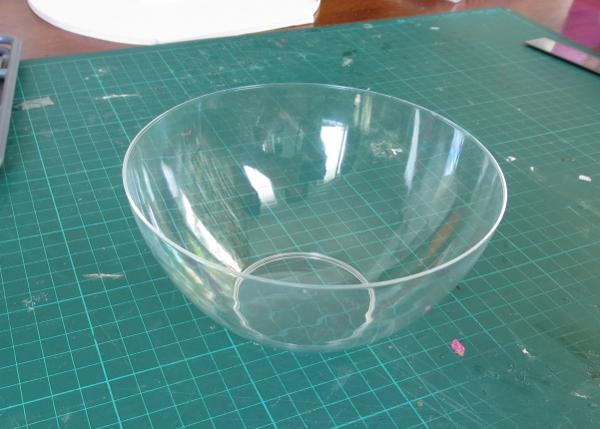
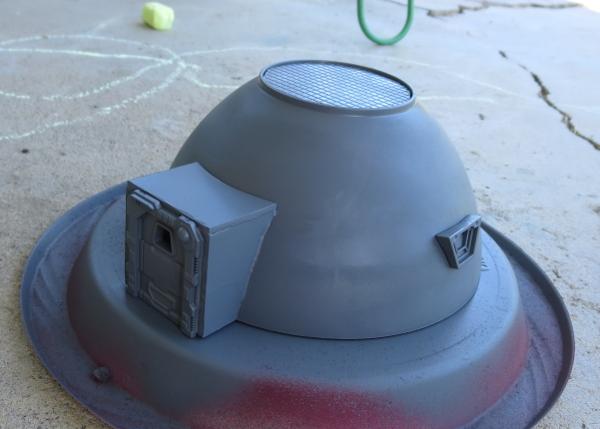
As with the larger plantation dome that I made a while back, the basis for this building is a plastic bowl, in this case picked up in a pack of 8 from a local discount store for a couple of dollars.
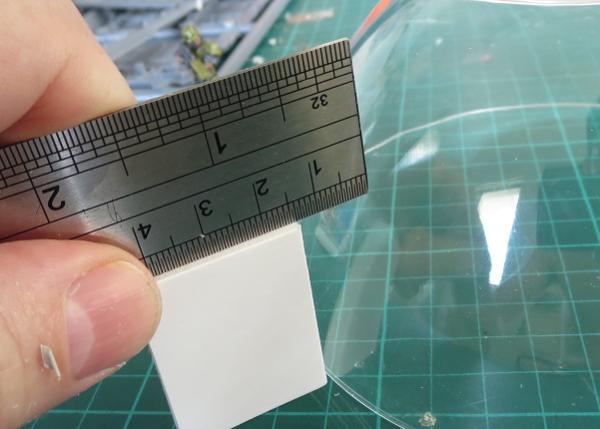
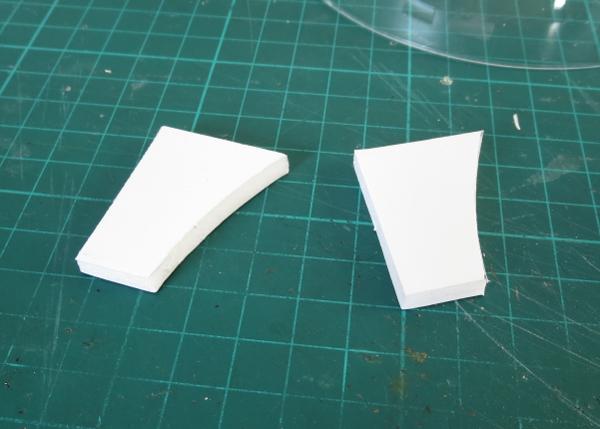
I cut two rectangles of 5mm foam core board, about 30mm wide and the same height as the inside frame of one of the small doors from the terrain sprue. These formed the sides of the building's entrance, and so would need to be curved on the back sides in order to sit flush with the side of the dome.
Sitting one of the rectangles against the bottom rim of the dome, I measured the distance between the top corner and the dome, and marked that distance along the short edge of the foam core.
I then folded a piece of aluminium foil to made a long L-beam shape. With a pair of clippers, I made a series of cuts along one edge.
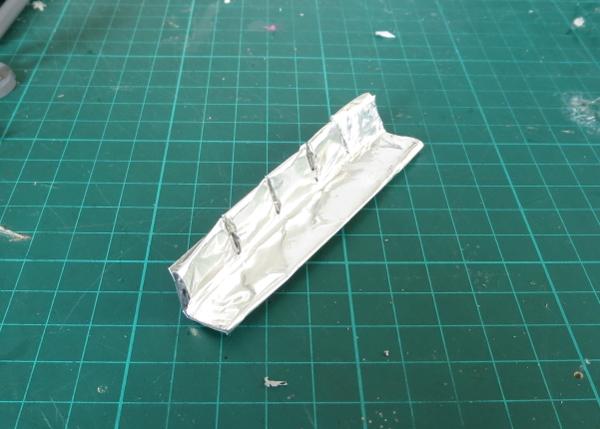
The uncut surface of the beam was then pressed against the side of the dome, with the cuts allowing it to bend to match the shape while the L-beam shape gave it enough rigidity to keep the curve when removed from the dome.
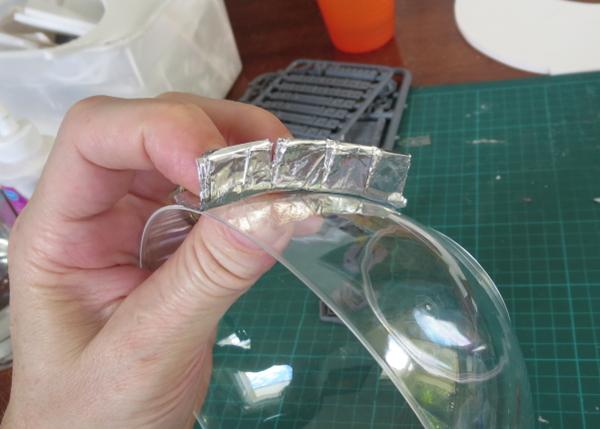
I then used the resultant curve to transfer the shape of the dome to the foam core, matching the foil beam up to the measured mark and the corresponding bottom corner of the entrance wall.
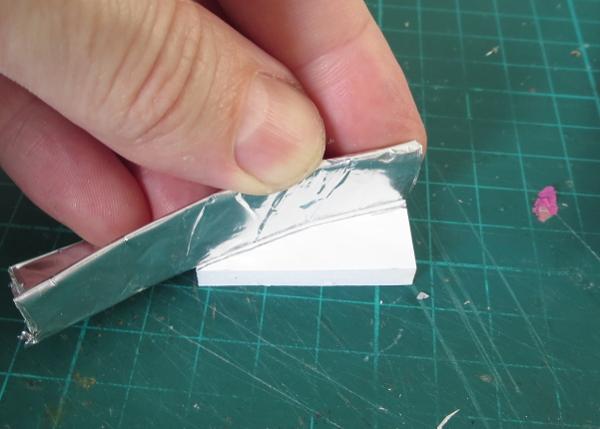
An exacto knife was used to cut along the drawn curve, angling the cut to account for the horizontal ci
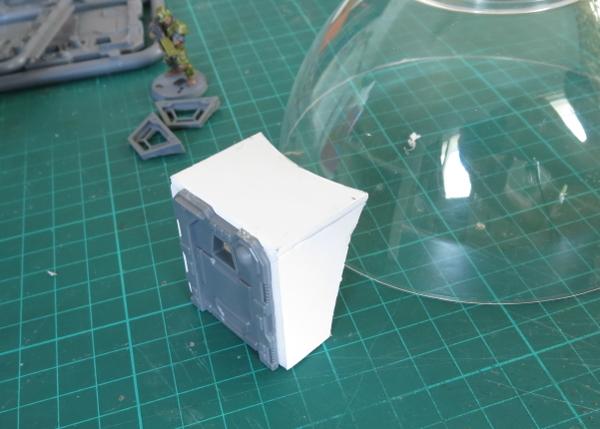
With the addition of a piece of 1.5mm plasticard, cut to shape for the roof, the entrance tunnel was glued together and test fitted against the dome, with a little fine-tuning of the curve with the exacto knife allowing it to sit flush.
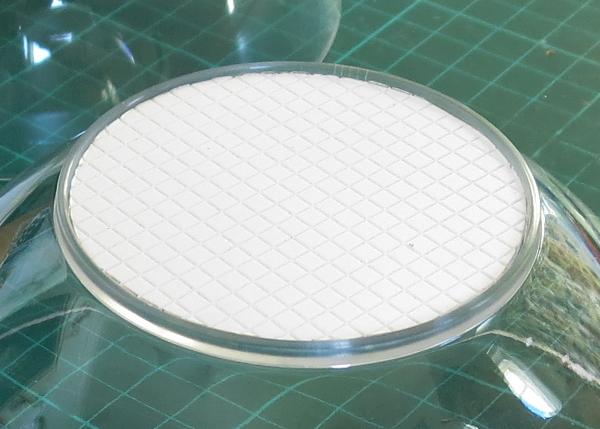
I wanted a little texture on the flat top of the dome, so I decided to use some grid-patterned plasticard. Not having a compass handy, I found a small drinking glass that fit neatly into the circular base of the bowl, and used this as a template to draw a circle on the plasticard. Once cut out, this circle was glued neatly into the recess.
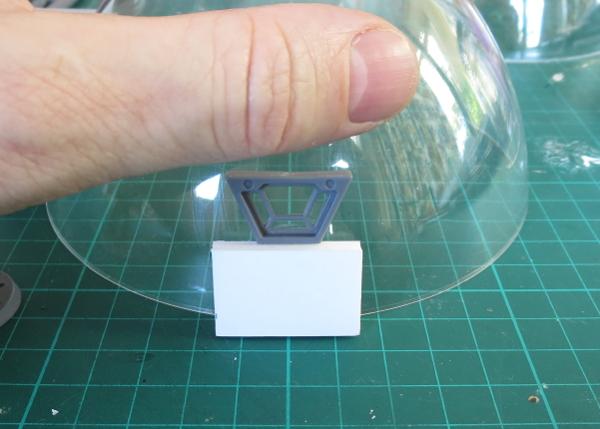
For the windows, I took the trapezoid windows from the terrain sprue and trimmed down one side to help them sit almost vertically on the side of the dome.

To glue the windows in place, I grabbed a small offcut of foam core to use as a spacer, to ensure that the windows on either side of the building sat at the same height.
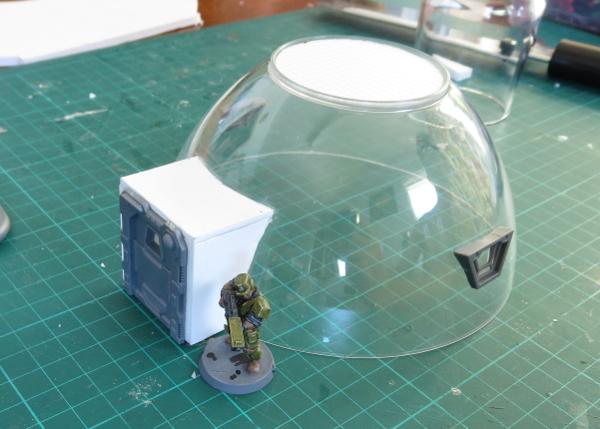
With everything glued in place, the building looked like this:
So, on to painting!
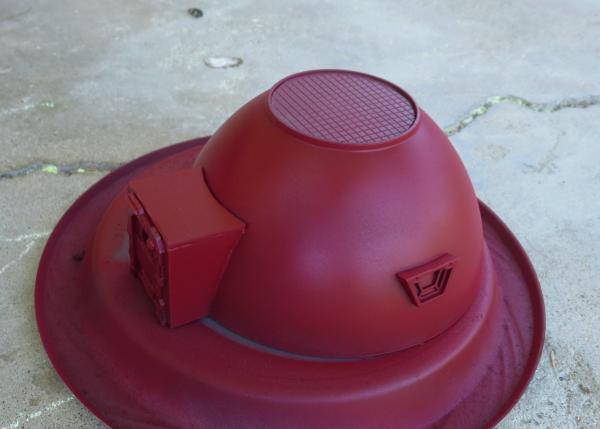
Because the dome is transparent, I sprayed a coat of primer inside to begin with. That way, if the outside of the dome gets a little scratched up from gaming use, it would show grey instead of clear.
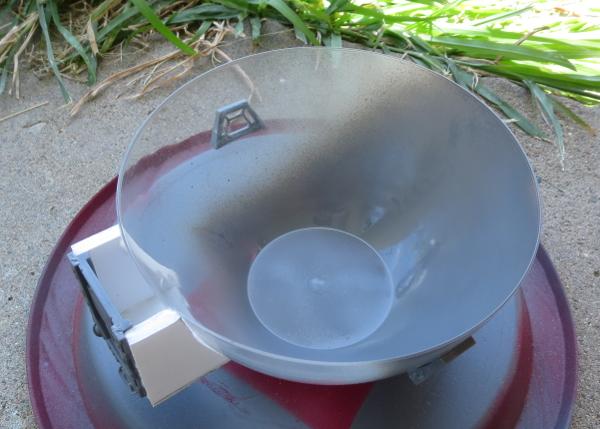
The outside was then also primed grey.
The primer was followed with a coat of Army Painter Dragon Red.
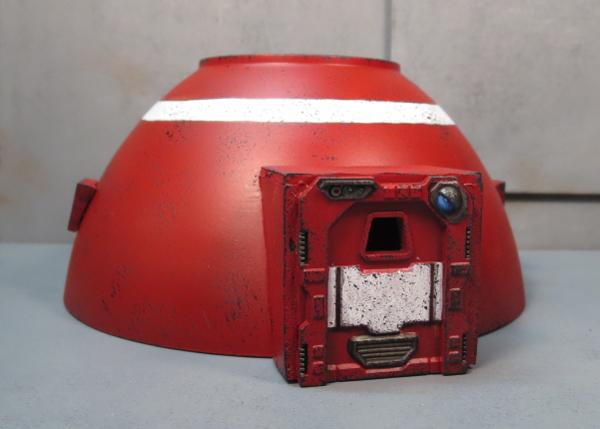
I added a white stripe to break up the red a little, and painted some metal detail with P3 Pig Iron.
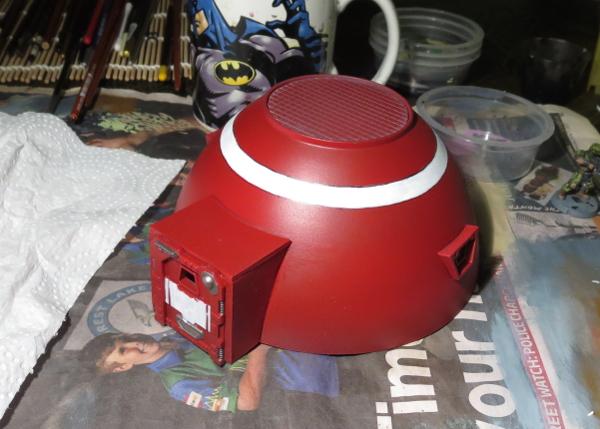
Finally, some sponge weathering and the roof tiles painted with Vallejo Heavy Charcoal, a quick wash with Army Painter Dark Tone for the metal parts and the roof, and some colour on the lights above the door, and the minidome was finished!

To build your own mini hab domes, you can pick up the Maelstrom's Edge terrain sprue along with the rest of the Maelstrom's Edge model range from the webstore here. As always, feel free to share your creations on the Comm Guild Facebook page!
For other Maelstrom's Edge modeling articles, including tutorials and walkthroughs of a wide range of different building and miniature projects, check out the article roundup here.
|
|
|
|
 |
|
2018/01/29 03:32:16
Subject: Terrain - Mini Hab Domes from plastic bowls
|
|

Guarding Guardian
|
Wow. That looks awesome. Where did you get the plastic bowl from? A dollar store?
|
I love my son and daughter. The avatar is of me and my daughter when she was very young. I miss her to death! |
|
|
|
|
2018/01/30 18:51:36
Subject: Terrain - Mini Hab Domes from plastic bowls
|
|

Regular Dakkanaut
|
Very cool looking, I was also going to ask where you got the plastic bowl from...I'm sure I could find something comparable, but those ones look pretty darn perfect. (i.e. what 'dicsount store'?)
|
|
This message was edited 1 time. Last update was at 2018/01/30 18:52:30
BLAH BLAH....blah. |
|
|
|
|
2018/01/30 19:05:10
Subject: Terrain - Mini Hab Domes from plastic bowls
|
|
[MOD]
Making Stuff
|
It was from Kmart here in Oz... probably not much help to overseas folk. It was a pack of 8, sold in the party goods section.
|
|
|
|
|
|
|
|
|
