 - by Iain Wilson
Cities are more than just a collection of buildings. There are a whole host of other little details, many of which we don't even notice because we're so used to them being there, that fill in that urban sprawl. Streetlights, hedges, park benches, statues, gardens, all go towards making a city look lived in and give it character. And yet these things are so often overlooked when we put together gaming terrain. So many urban tables are just a random collection of buildings in various levels of disrepair, which may look good, but are missing those crucial details that make them look right.
I've covered how to make some of the above mentioned details in previous articles, but this week I thought I would run through a few more, using components from the Maelstrom's Edge terrain sprue, and a few assorted odds and ends.

To start things rolling - Park Benches
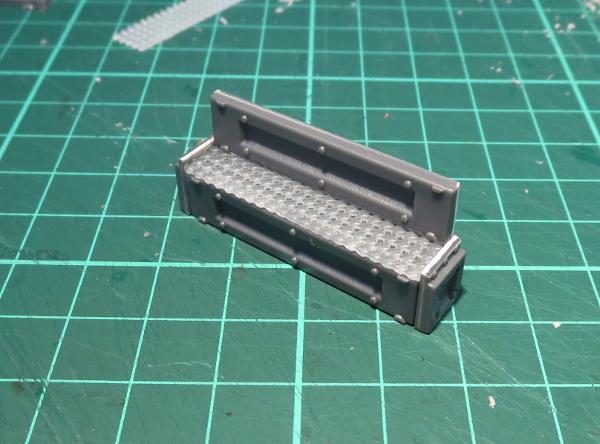
The bulk of the bench is made up using the long segments from three support struts, and two of the short segments. Use a sharp hobby knife to cut through the struts on either end of the long, middle sections, and cut away the two short segments leaving the rivet strip on one side.

Two of the long strips and the two short segments make up the base of the bench. Glue these together as below using plastic cement.

For the seat, I have used a piece of embroidery mesh (which you should be able to find at a craft store or haberdashery), although you could choose to use plasticard or cardboard instead. I cut the mesh to fit over the top of the bench base, fitting inside the river strips on the tops of either end.

The mesh was glued in place using an 'all-plastics' glue, or a superglue with a plastic primer - just using plain superglue can work, but because the mesh is a rather rubbery plastic it sometimes doesn't hold the glue well without the extra help. On top of the mesh, I glued the third strut section, level with one long edge of the base.
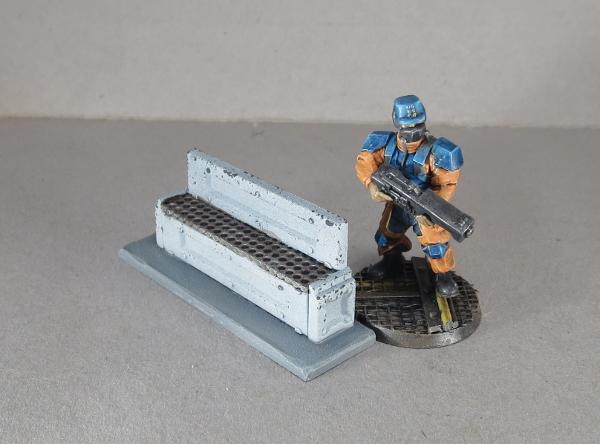
While this comes out just about spot-on for size compared to a 28mm miniature, terrain features often look a little undersized due to the visual discrepancy created by the model's base making it look taller than it actually is. To help mitigate that, I glue a rectangle of 2mm plasticard under the bench to lift it off the ground a bit, which creates a similar illusion of extra height without actually having to make the bench over-sized.

Add a little paint, and the bench is ready to go on the table.
Next up - Let's inject a little art into the scene!
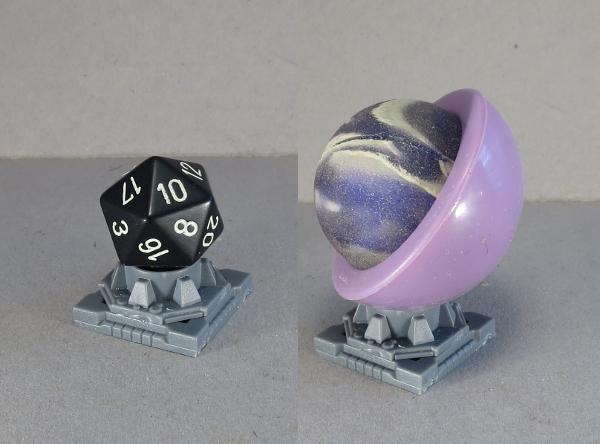
In my first scatter terrain article, I made an orb that I pictured as some sort of holgraphic map tank. I borrowed the same design to make a sculpture using an old rubber ball that I dug up out of the back yard.
The base for the bauble is simply the large pipe fitting from the terrain sprue, glued on top of the square hatch.


On top of that, you can stick a marble, as with my original orb, or any other round-ish thing that strikes your fancy -
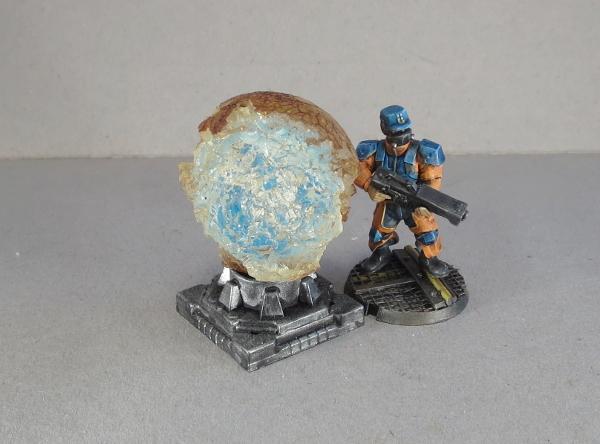
In this case, though, as mentioned, I used a battered old rubber ball. The outside of the ball when I found it was cracked and dirty, and chipped away over much of the ball, leaving a semi-transparent, crystaline shape with a dark crust around it and a blue glow in the middle when the light hits it just right. It was too interesting a shape to not do something with it, and so I promptly glued it onto the pipe fitting base with some all-plastics glue.
Moving right along - let's add some greenery!
If you paint a lot, sooner or later you wind up with empty paint bottles. I found myself looking at my collection of empty dropper bottles and thinking that the lids were just asking to be turned into something. So I took a lid, washed it out, and cut a small pipe fitting from the terrain sprue.

The tip of the lid turned out to be exactly the same diameter as the outside of the hole in the pipe fitting (ie: just a bit bigger than I wanted it to be!) so I scored a line around the top about 1.5mm from the end, and used a hobby knife and a file to narrow down the end to that line.


I used an all-plastics glue to glue the reduced lid tip into the pipe fitting. As with the embroidery mesh used on the park bench, superglue alone isn't likely to bond as well with the lid, so the all plastic glue or a primered superglue is a better option.

I filled the inside of the lid with some 'green stuff' putty, and added a fern made from the leaves of a really dodgy-looking palm tree that came with a set of dinosaur toys bought for my daughter (It's ok, she said I could have it). A quick lick of paint, and the planter is ready for action.

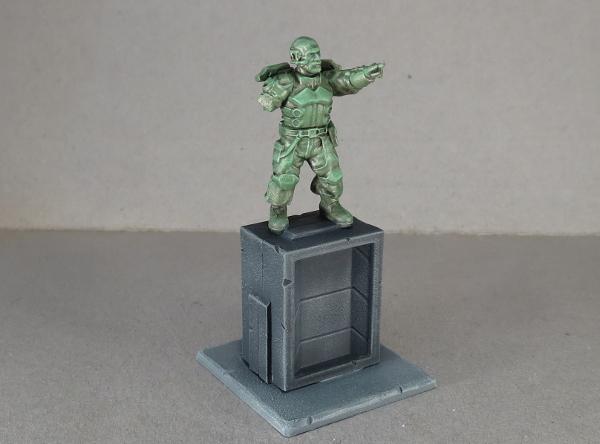
Finally, what sort of city doesn't have statues scattered around to remind people to feel all embiggened?
For a quick and easy statue plinth, I took two shutter windows from the terrain sprue, trimmed off the two protruding parts of the frame on the ends and the rivets on the front surface.
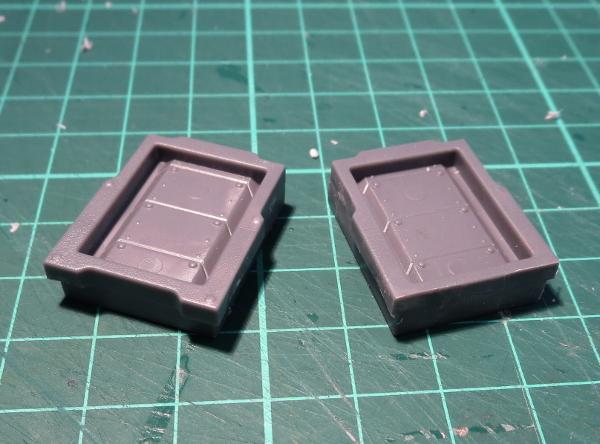
The two windows were then glued together face-to-face, using plastic cement.

I added a statue assembled from some leftover parts scavenged from the Epirian Bot Handler and Broken Rabble sprues, and a base of 2mm plasticard for stability.

Some paint and weathering, and he was looking suitably statuesque, ready to inspire the city's defenders or enrage the rampaging invaders.
All of the above can be easily modified to suit your own table. You can use the individual pieces as scatter terrain, or glue them to building bases to add extra detail without having loose little terrain bits floating around. Be sure to also check out my first scatter terrain article, and also my tutorials on hedges and street lights

Want to share your terrain collection? We would love to see your creations on the Comm Guild Facebook page!
To pick up the Maelstrom's Edge terrain sprue, or any of the rest of the Maelstrom's Edge model range, visit the webstore here.
For other Maelstrom's Edge modeling articles, including tutorials and walkthroughs of a wide range of different building and miniature projects, check out the article roundup here.


