Forum adverts like this one are shown to any user who is not logged in. Join us by filling out a tiny 3 field form and you will get your own, free, dakka user account which gives a good range of benefits to you:
No adverts like this in the forums anymore.
Times and dates in your local timezone.
Full tracking of what you have read so you can skip to your first unread post, easily see what has changed since you last logged in, and easily see what is new at a glance.
Email notifications for threads you want to watch closely.
Being a part of the oldest wargaming community on the net.
If you are already a member then feel free to login now.
2019/02/09 00:06:03
Subject: 3D printed - T H I C C chonk - Godzilla (hybrid)
I'm gonna walk you through the whole process, so if you just want to see the finished "mini" pics, scroll on down to the second spoiled section.
Spoiler:
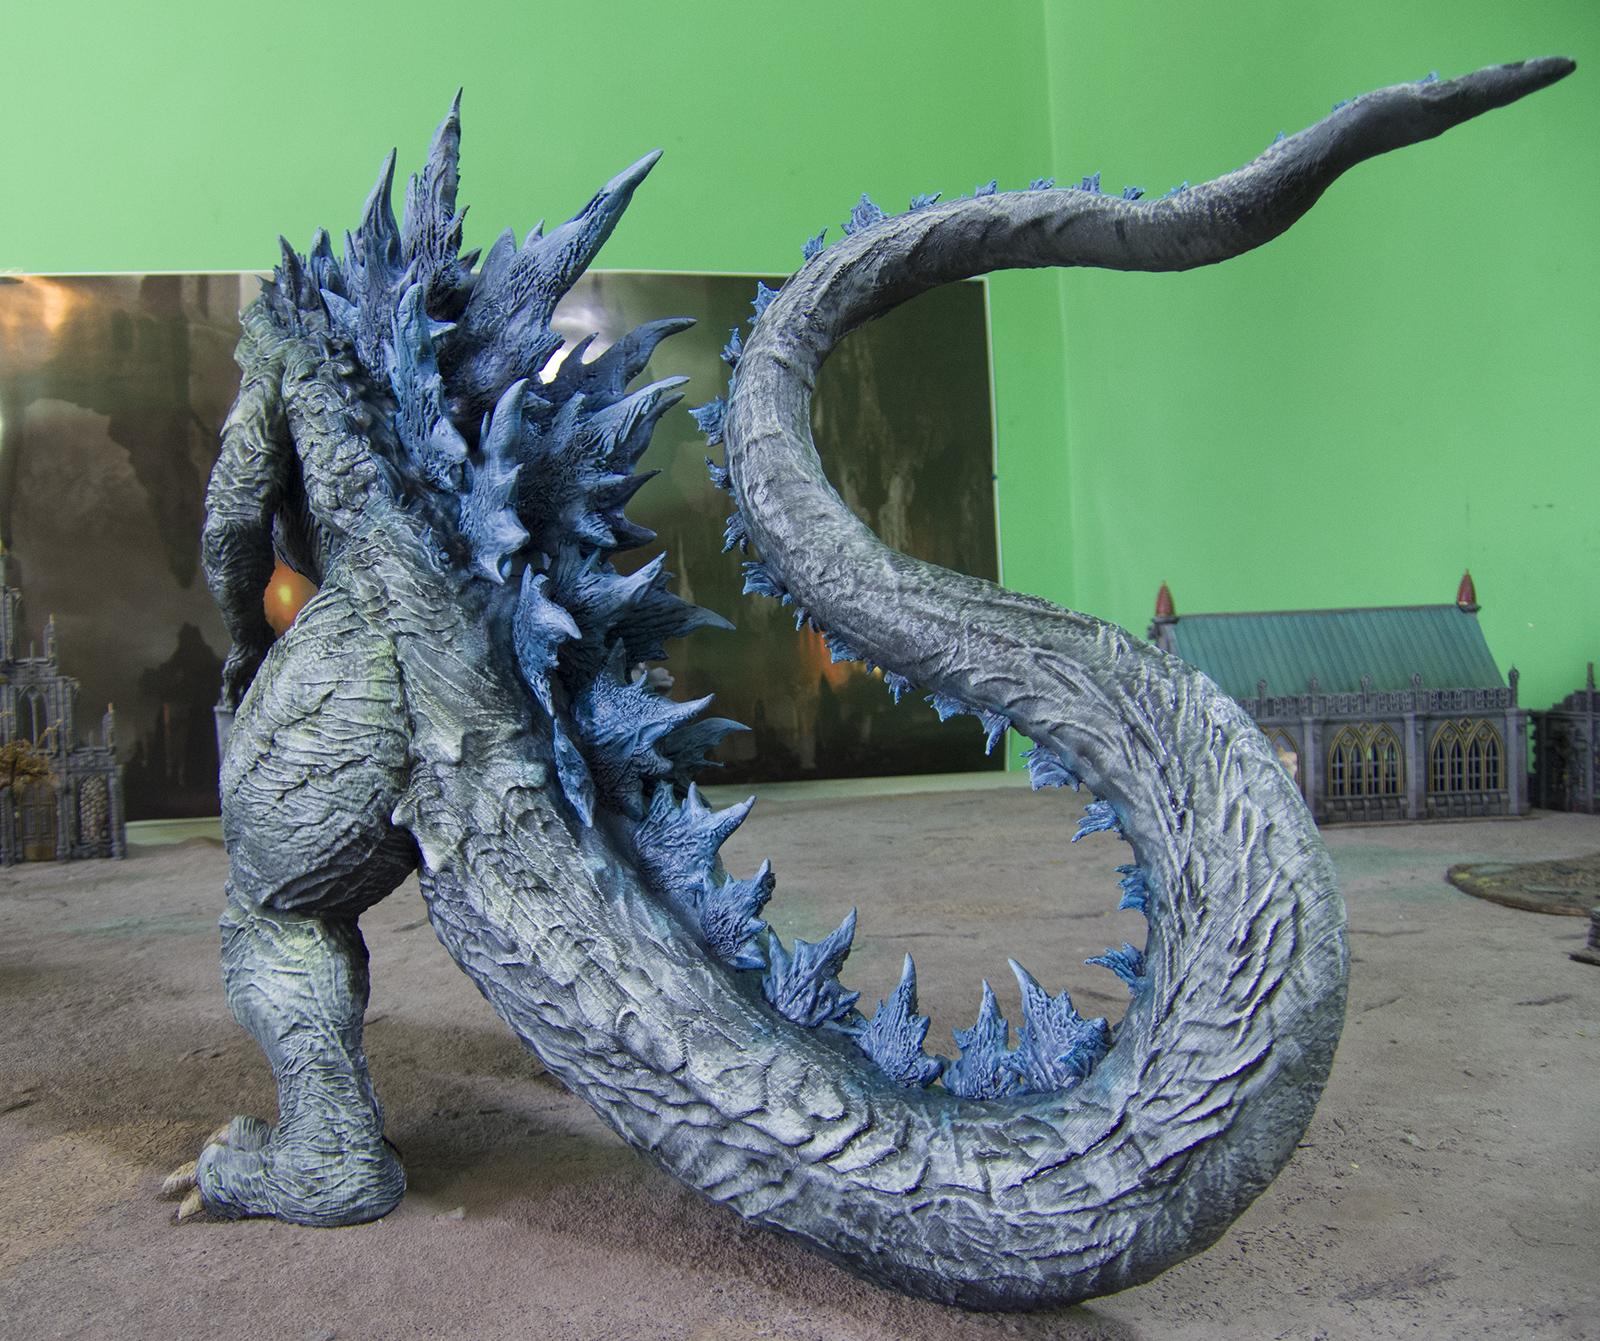
I have always been a Godzilla fan, and when I got a FDM printer with a big printing area (an anycubic i3 mega), my first thought was to see how big of a Godzilla I could turn out. The print bed is 220mm in every direction. I found a nice Godzilla model on Gambody, bought it, and the largest chunk scaled to 95% fit on the printer, so 95% it is.
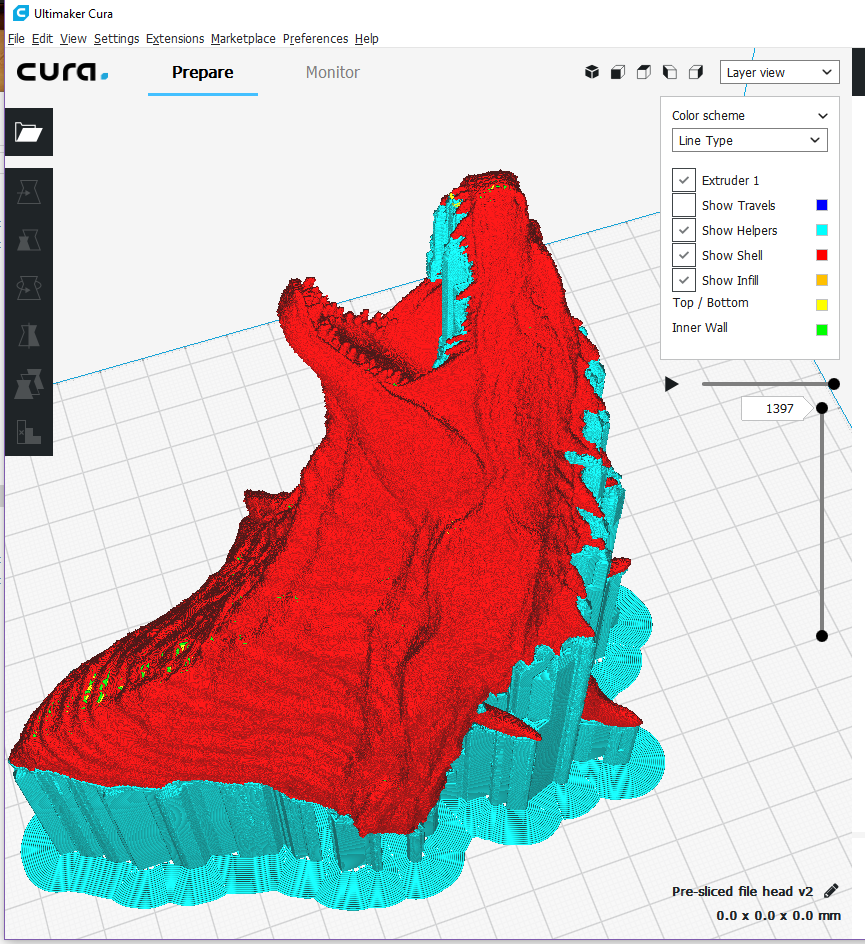
Here is the head in the slicer:
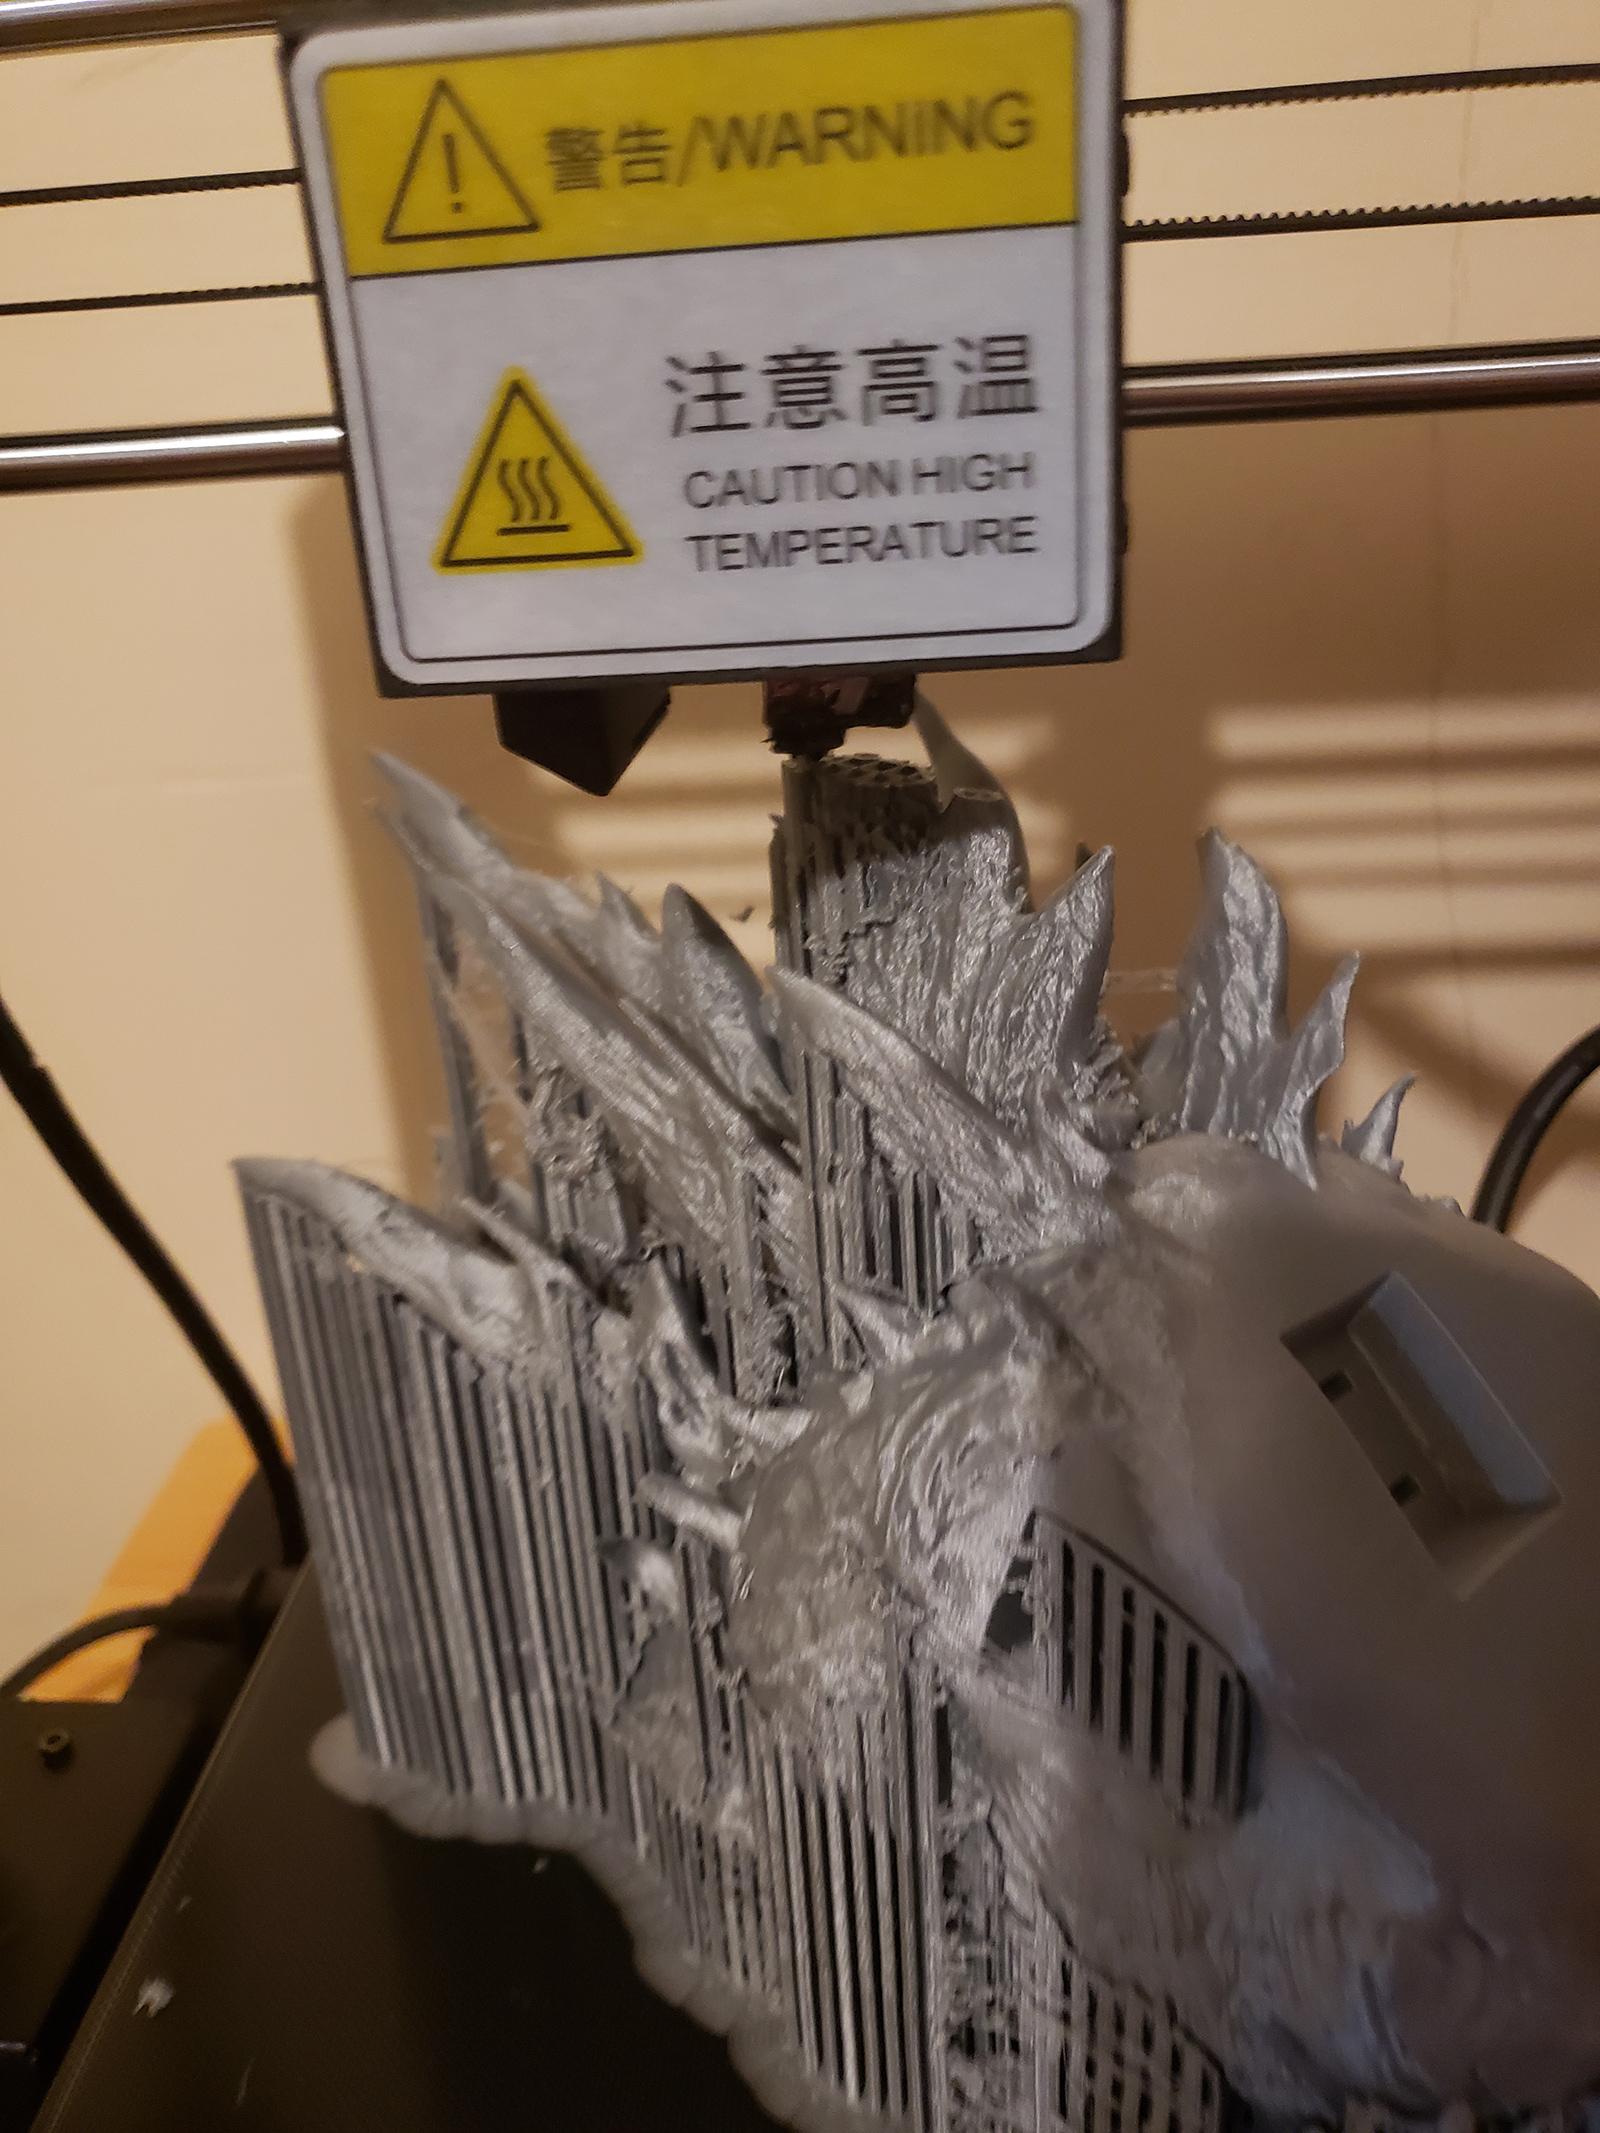
The chest in the printer. Some of these prints took a really long time, sliced at 0.1 meant this piece took about 112 hours and there were originally 9 parts. Some were faster but about 4 days each is probably right.
At one point I ran out of filament mid-print. I knew there wasn't enough to finish the part but I did it anyway to see how gracefully it handled a spool swap, the answer was "pretty well"
I used a few different brands and colors of filament. I eventually settled on Hatchbox PLA in a silvery color.
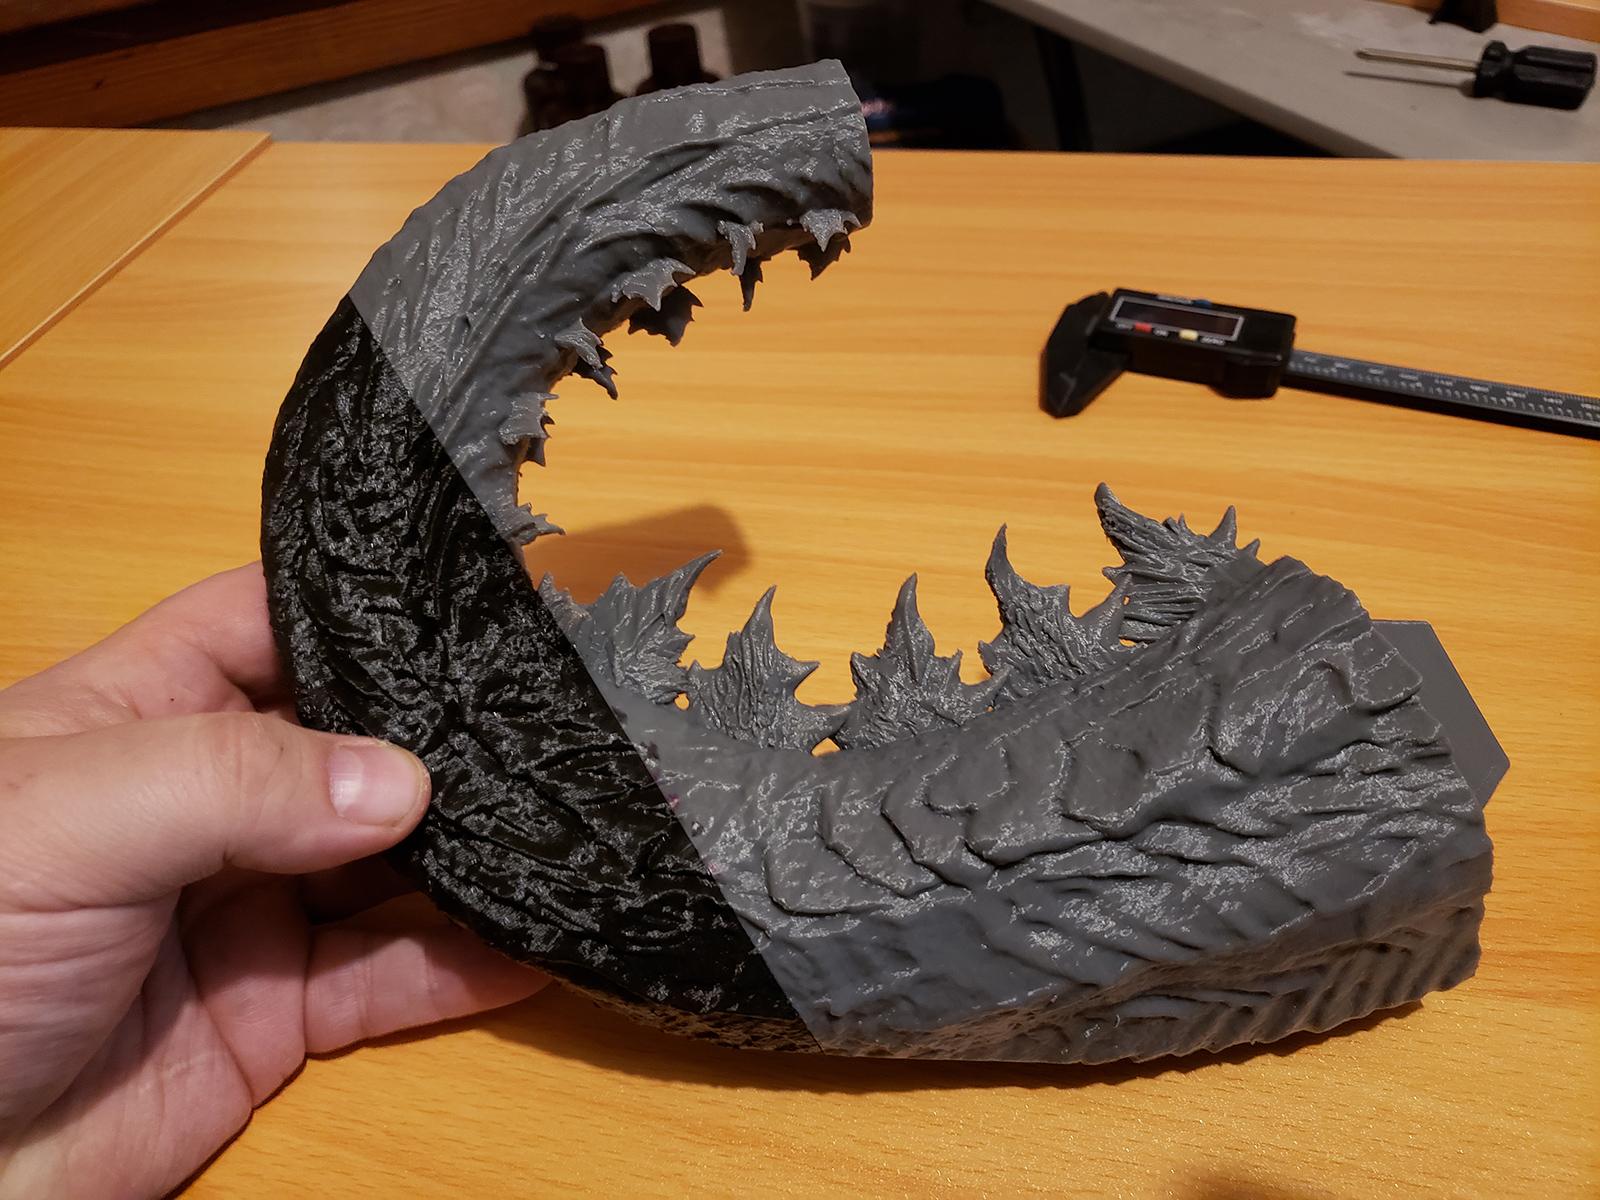
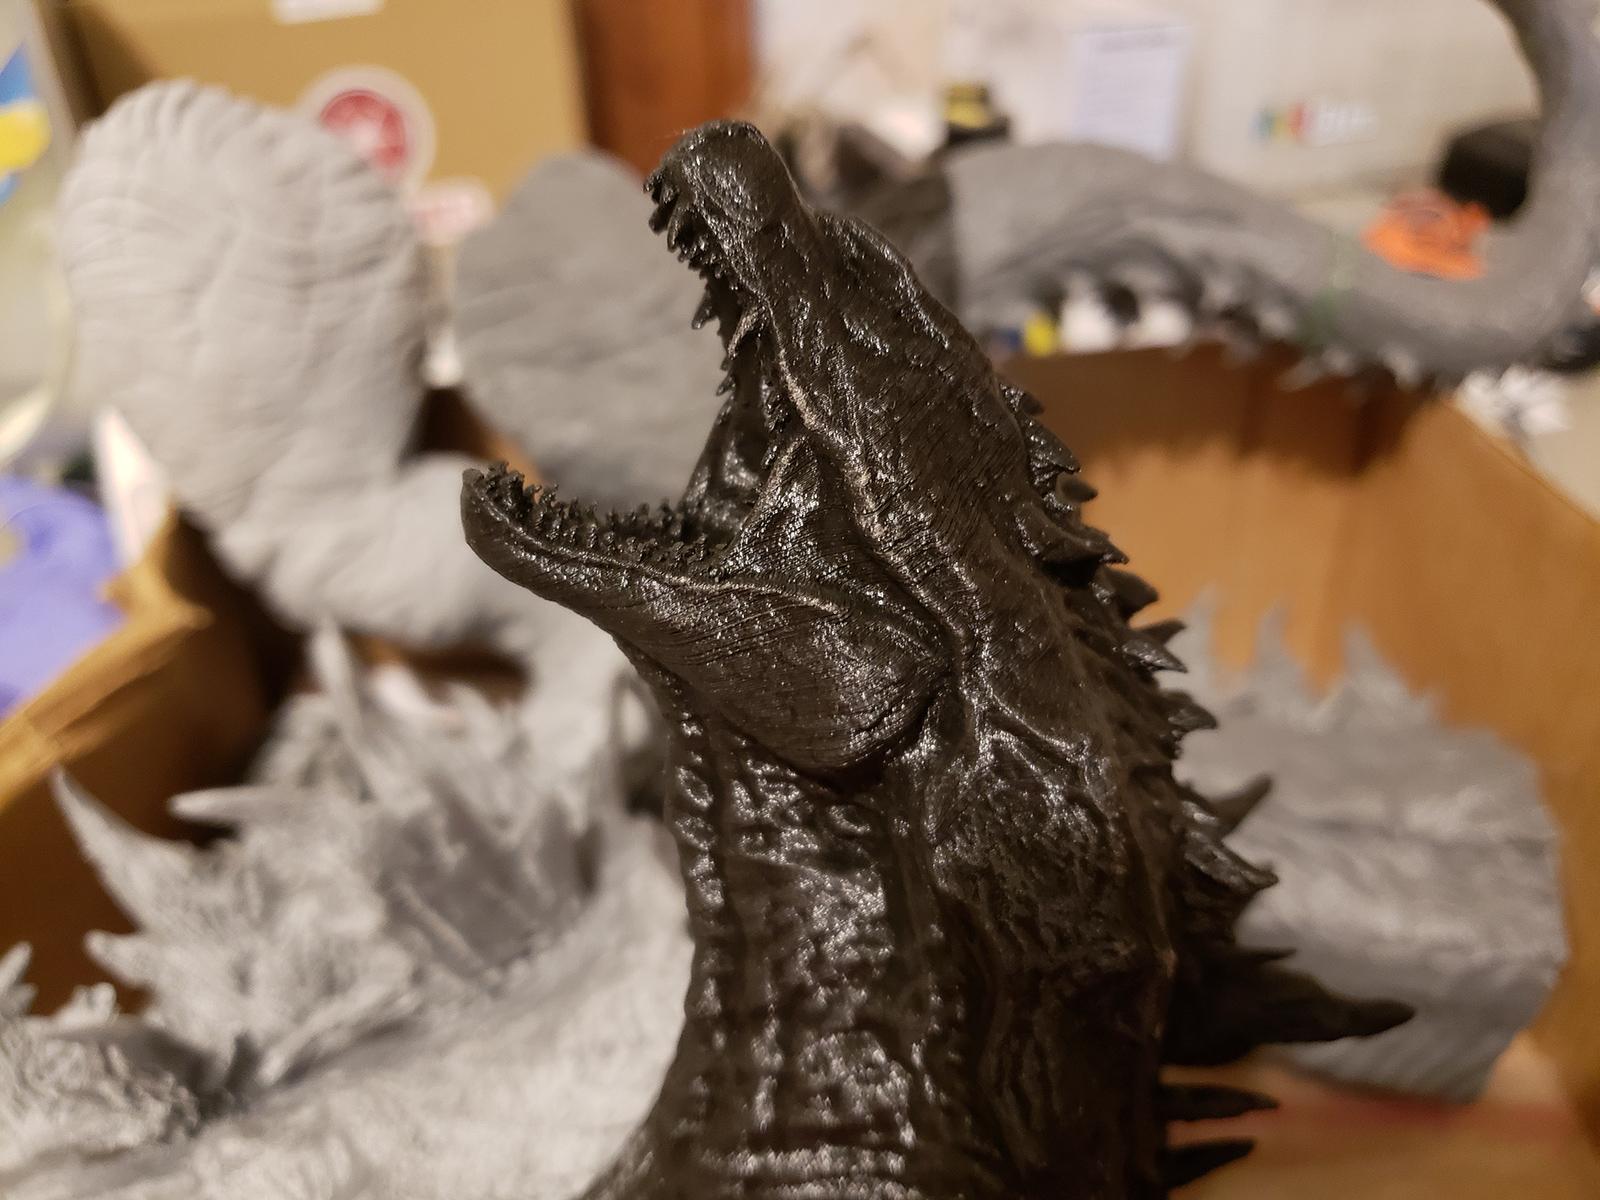
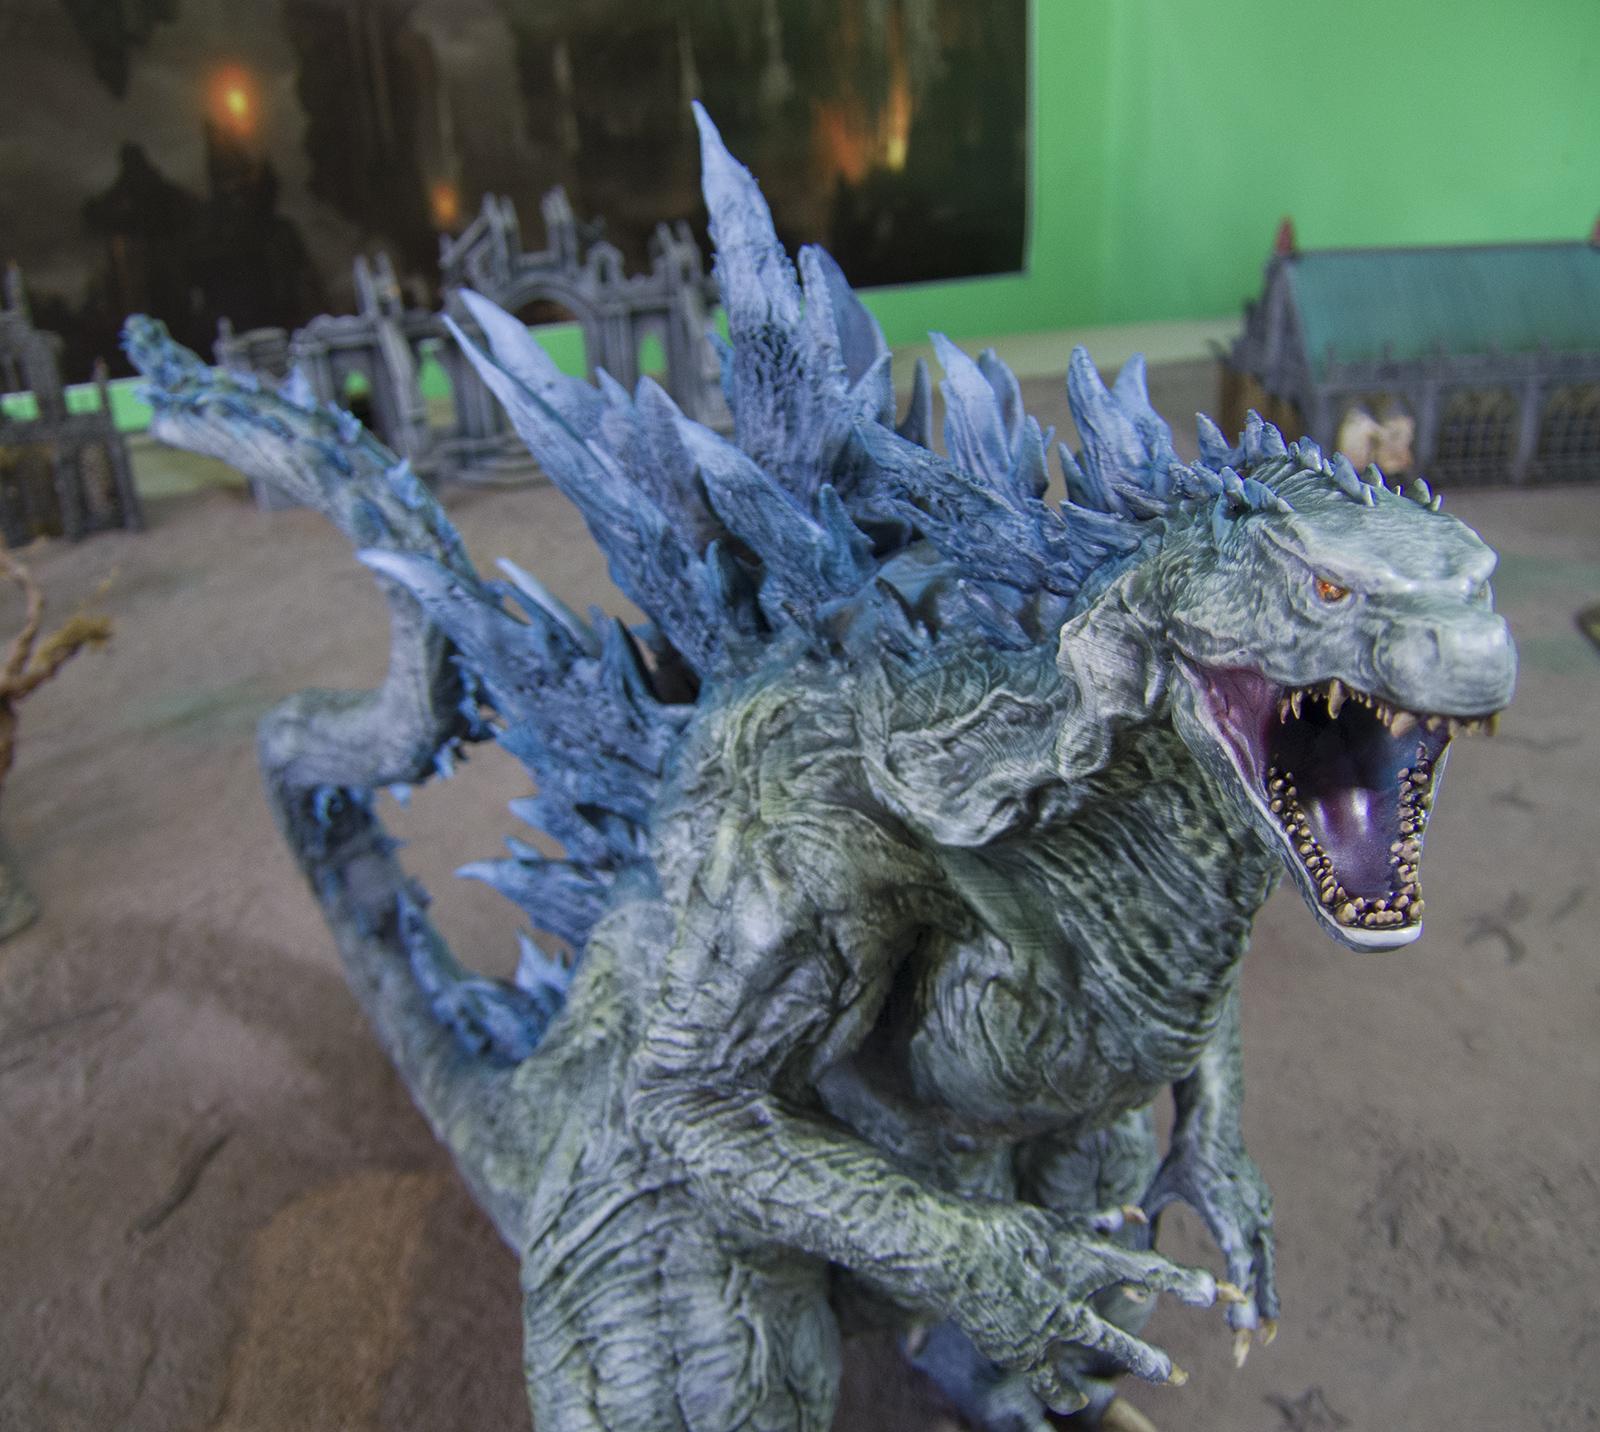
While I was really happy with how the body was coming along, I was pretty unhappy with the teeth. The teeth looked like trash. This is a problem since the teeth are a focal point for the model. Since I printed this, Gambody reworked the model to allow seperate printing of the teeth... but that was later.
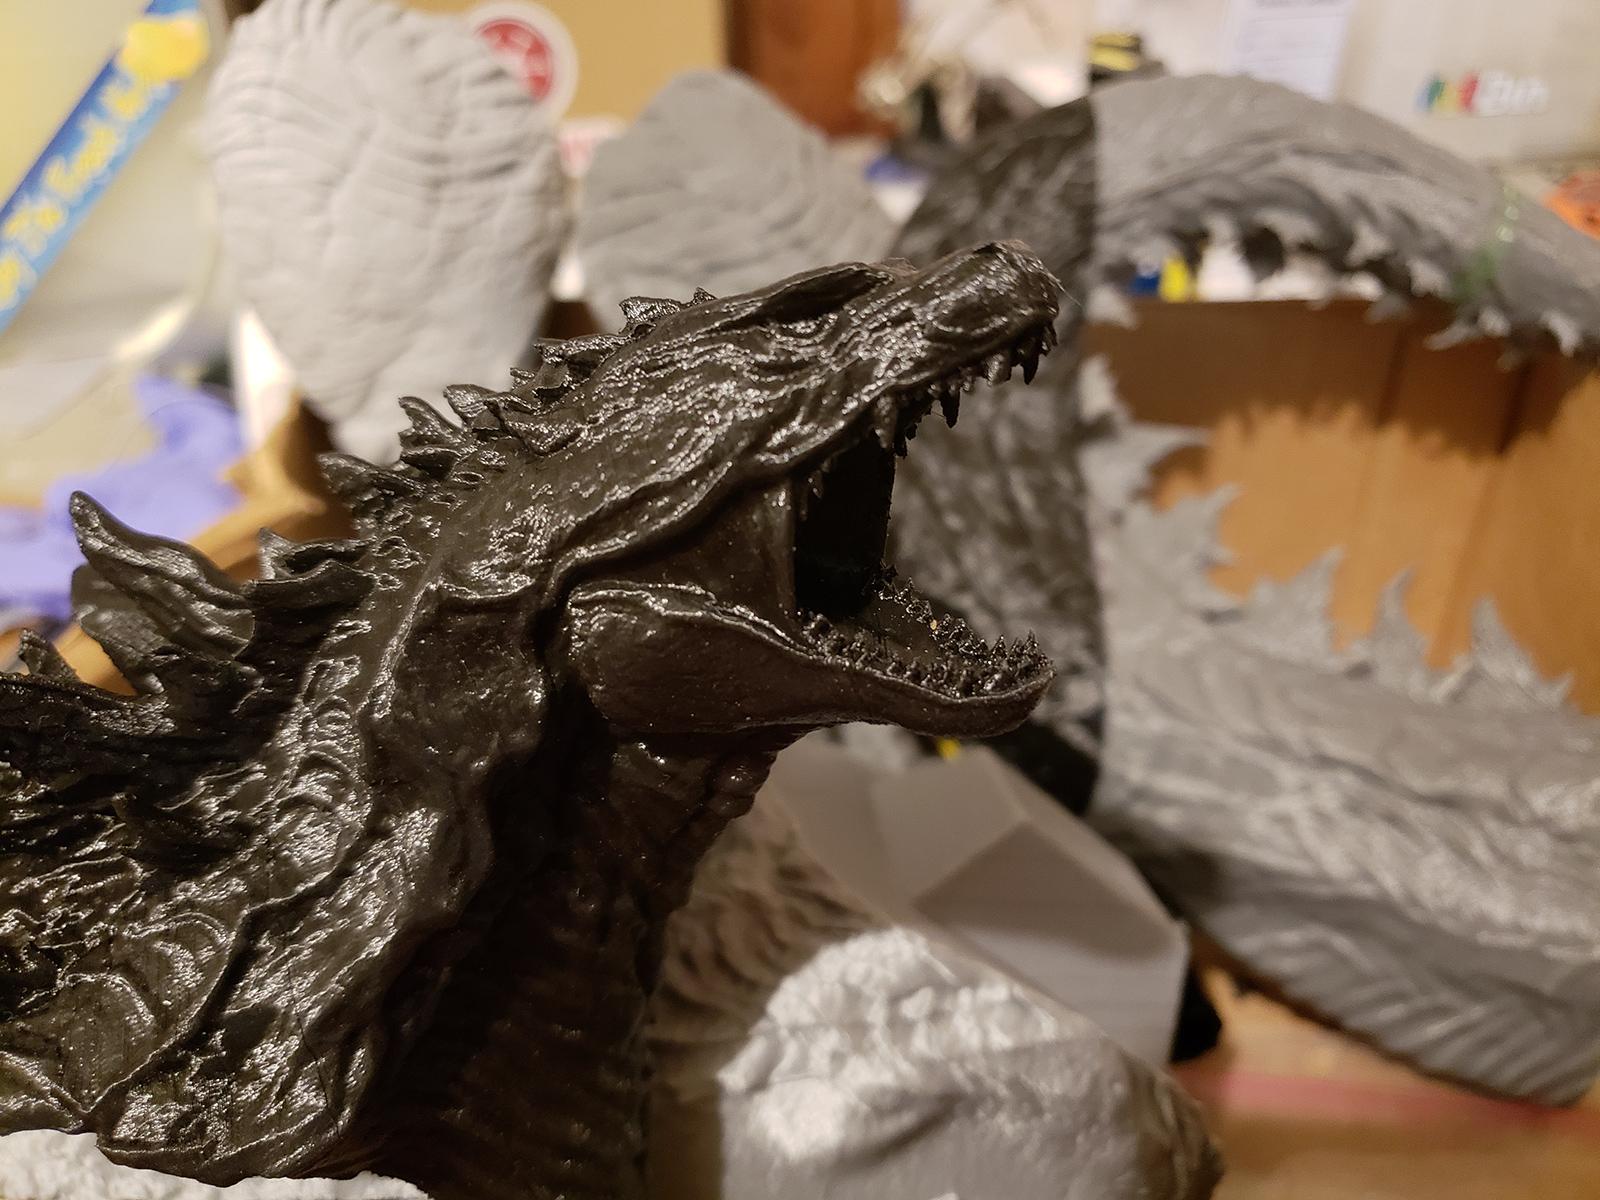
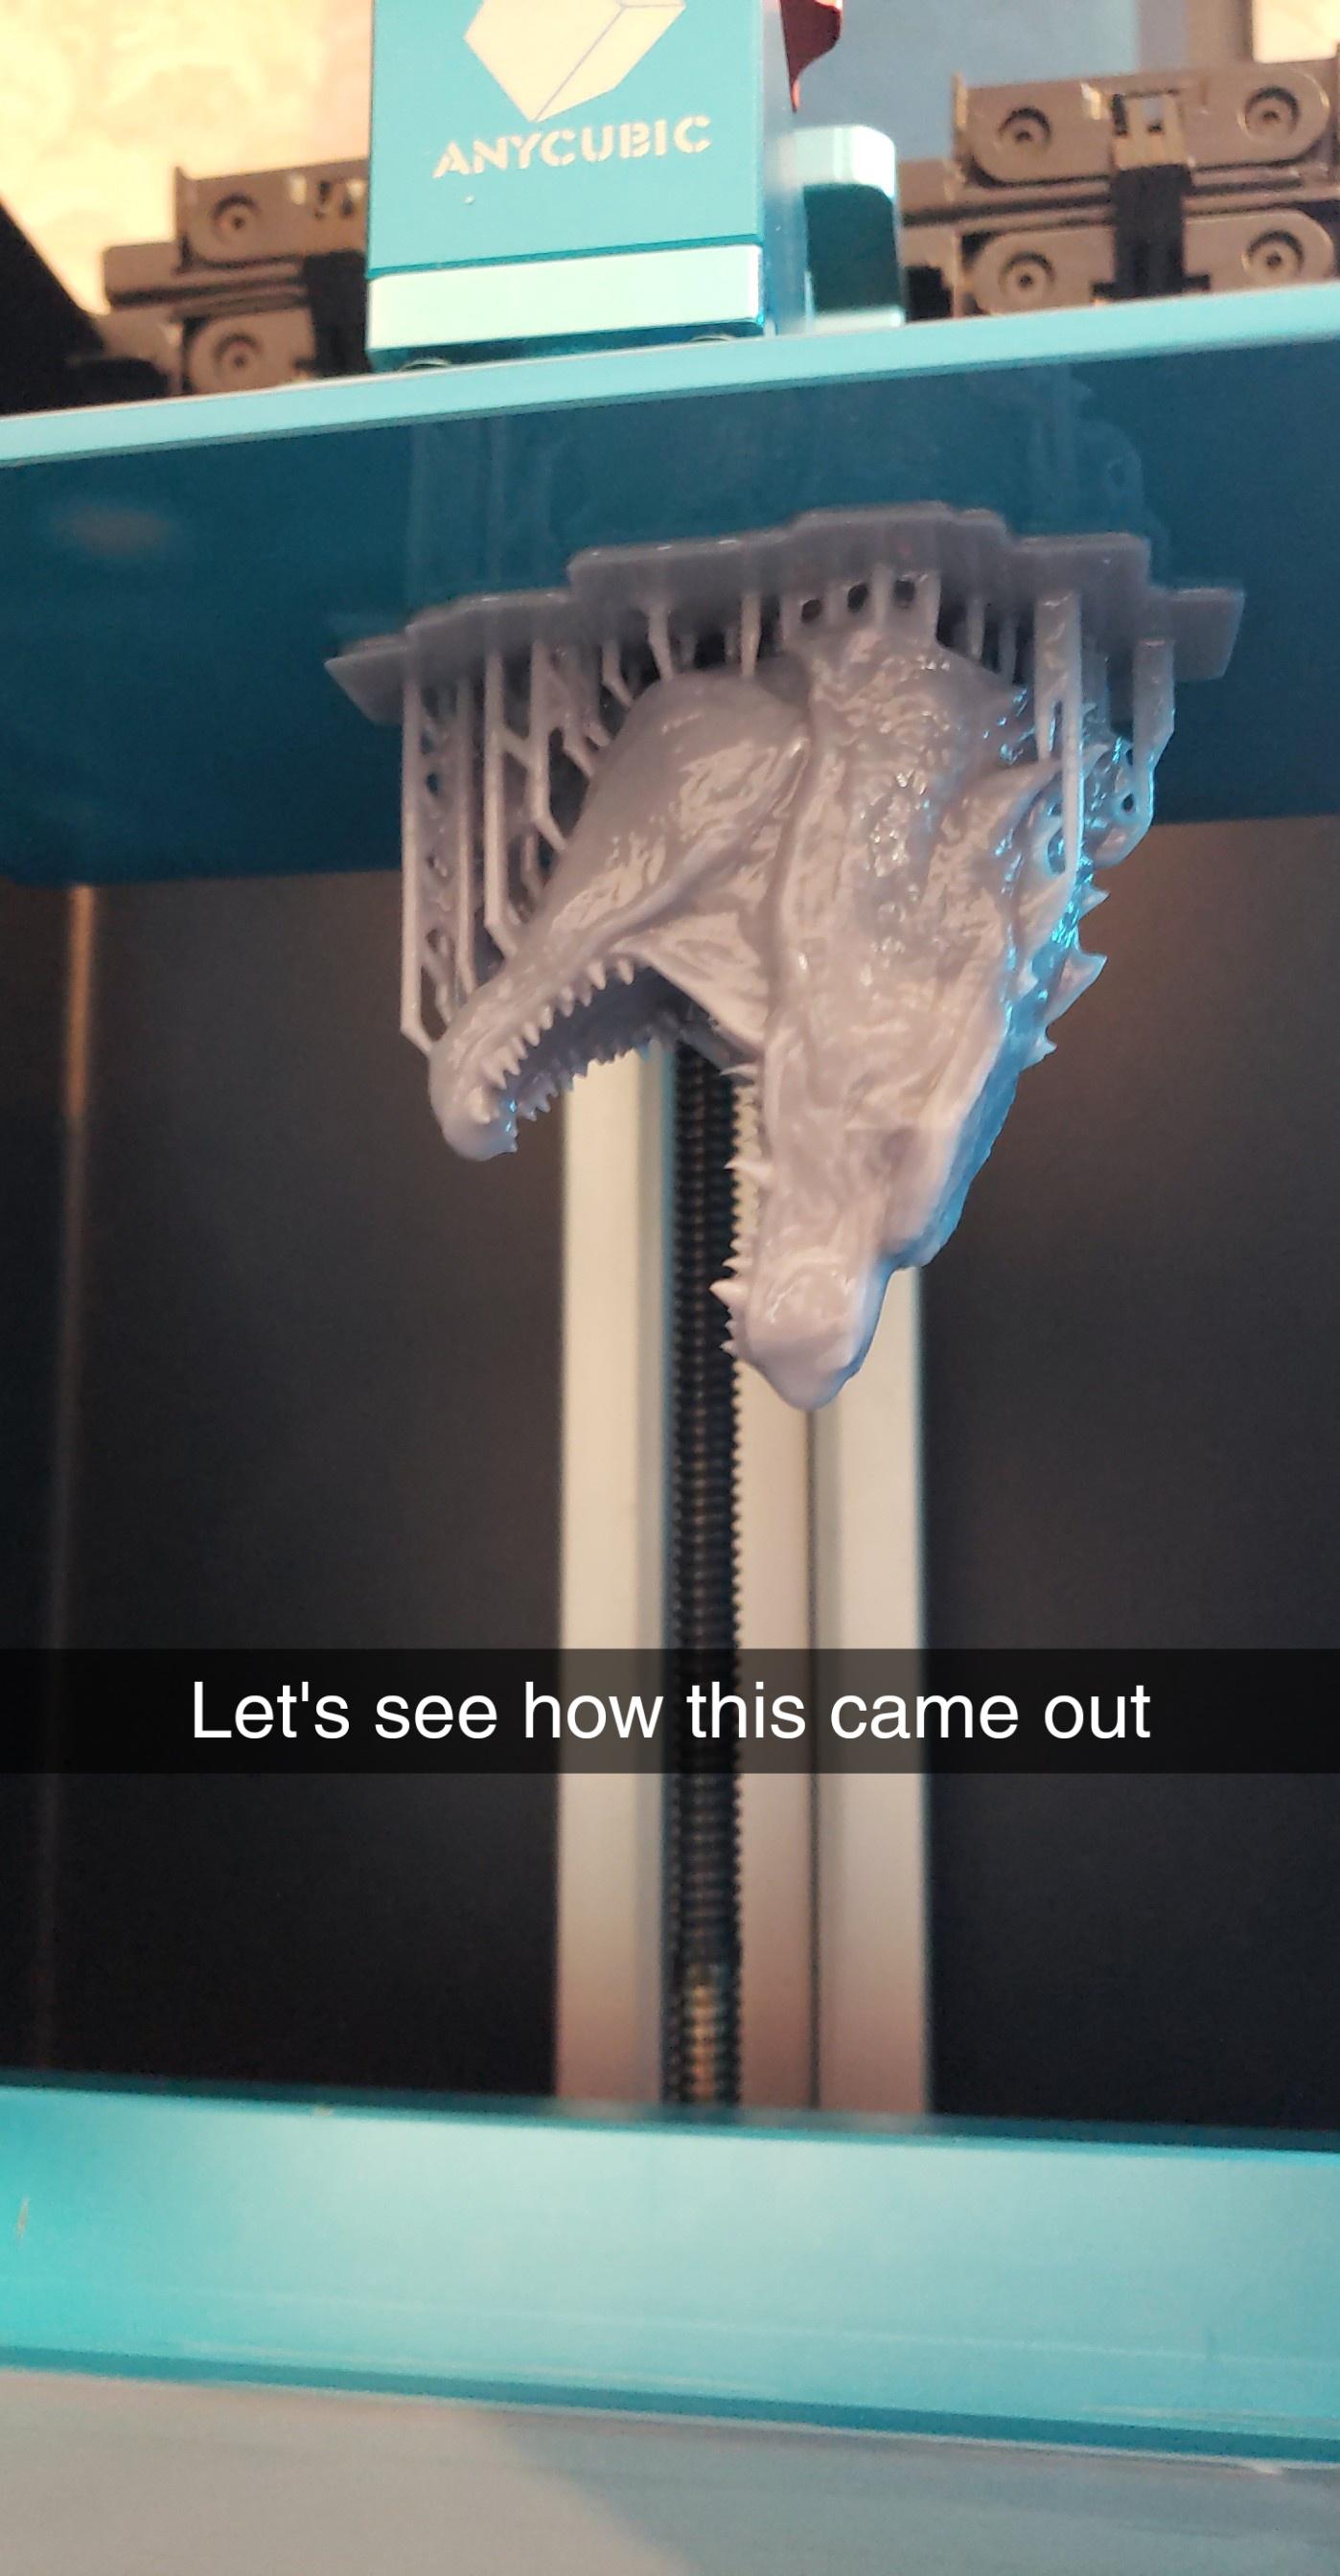
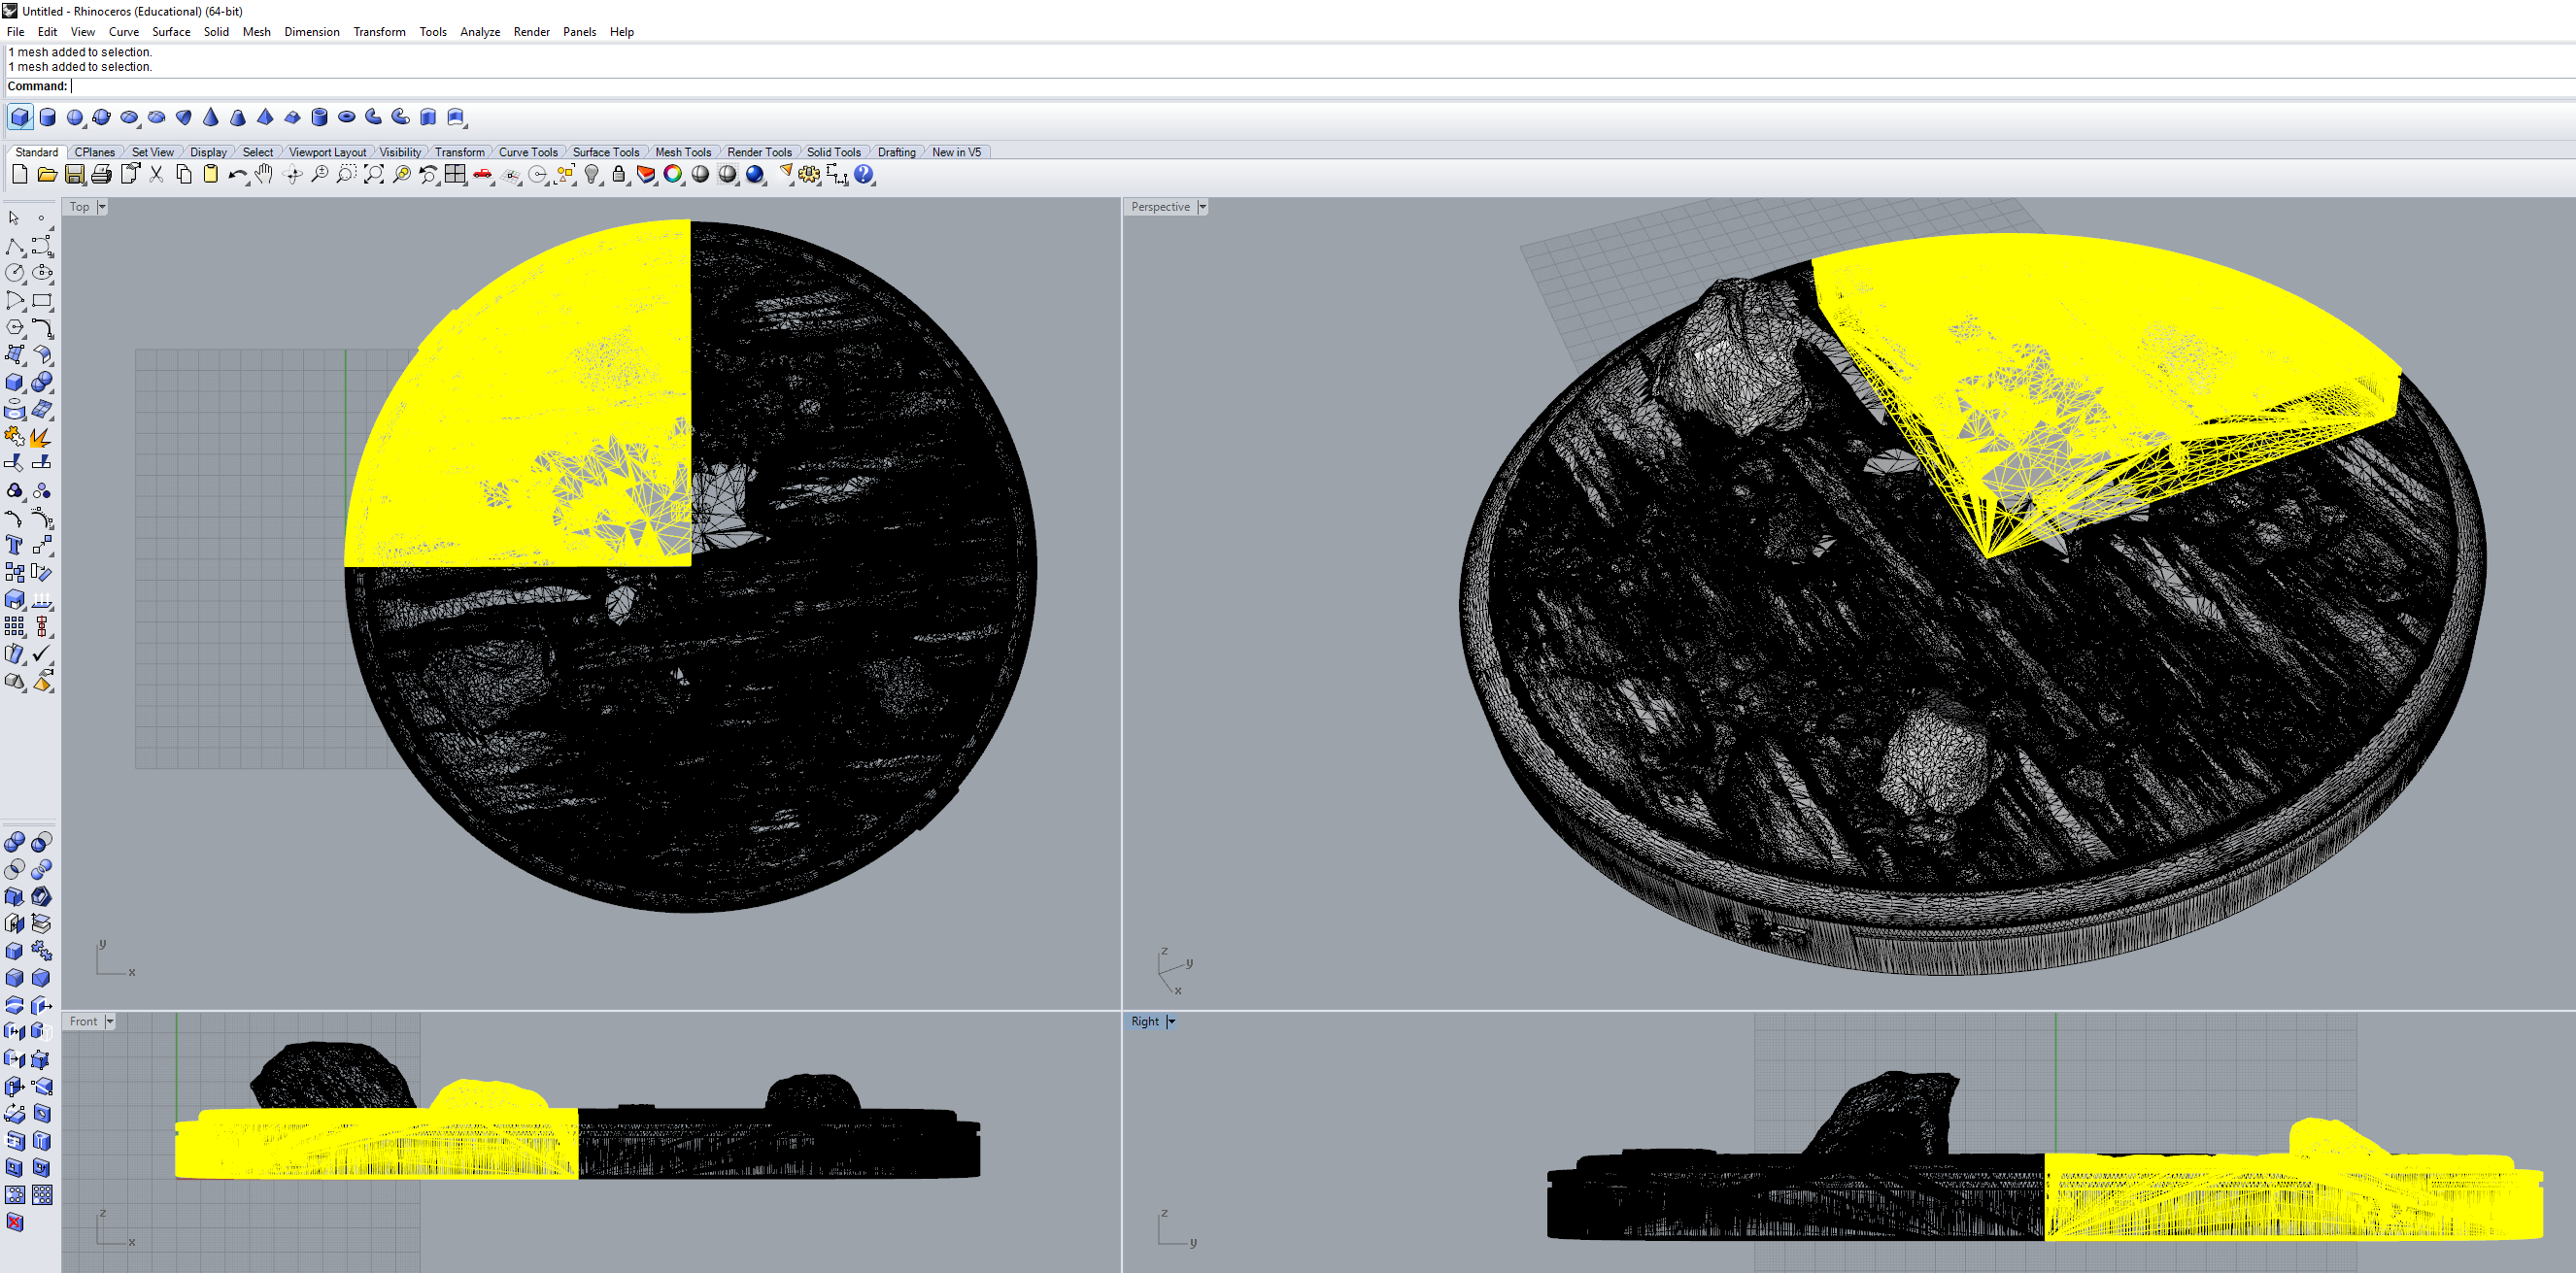
I have a program called Meshmixer, which lets you do various stuff to stl files. I had mostly used it to hollow prints for my DLP printer, but it turns out it could also split models and key them for easy, accurate joins. I split the head off at the neck and printed the head with my DLP printer, an Anycubic Photon:
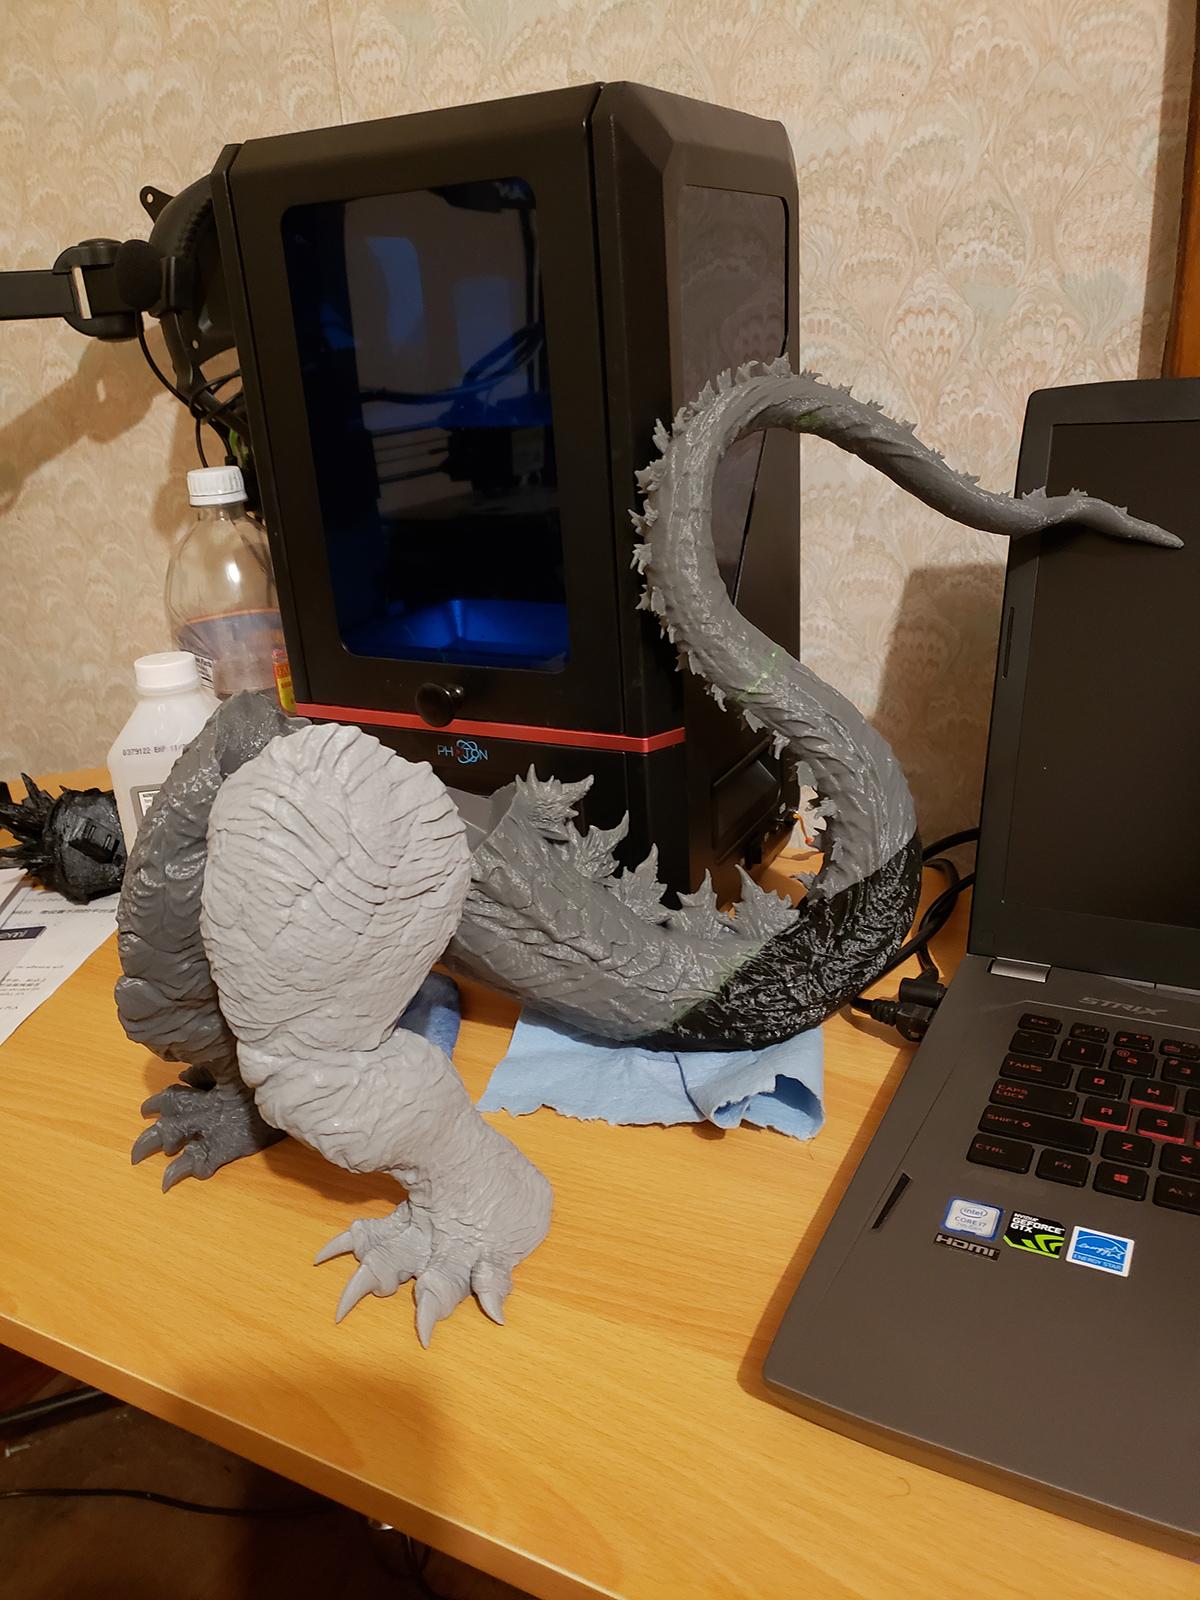
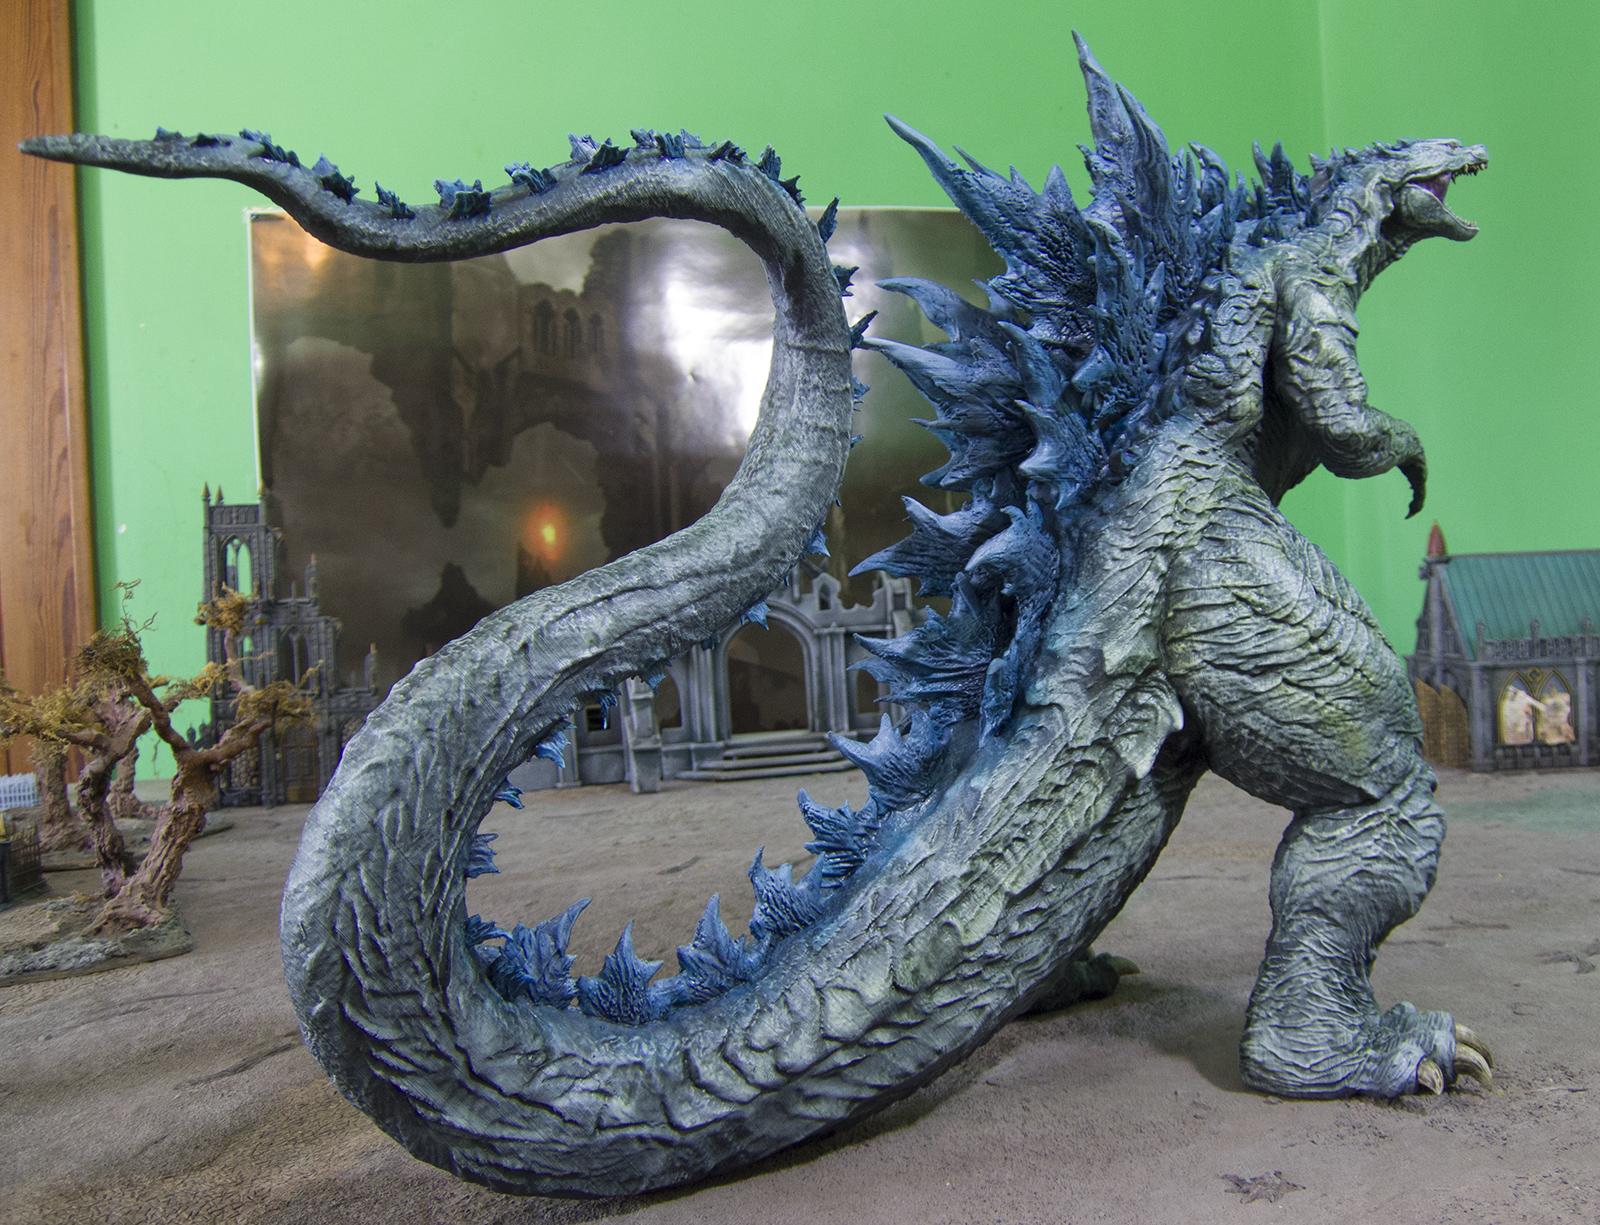
Pretty happy with how the head came out. Here is the entire body, joined:
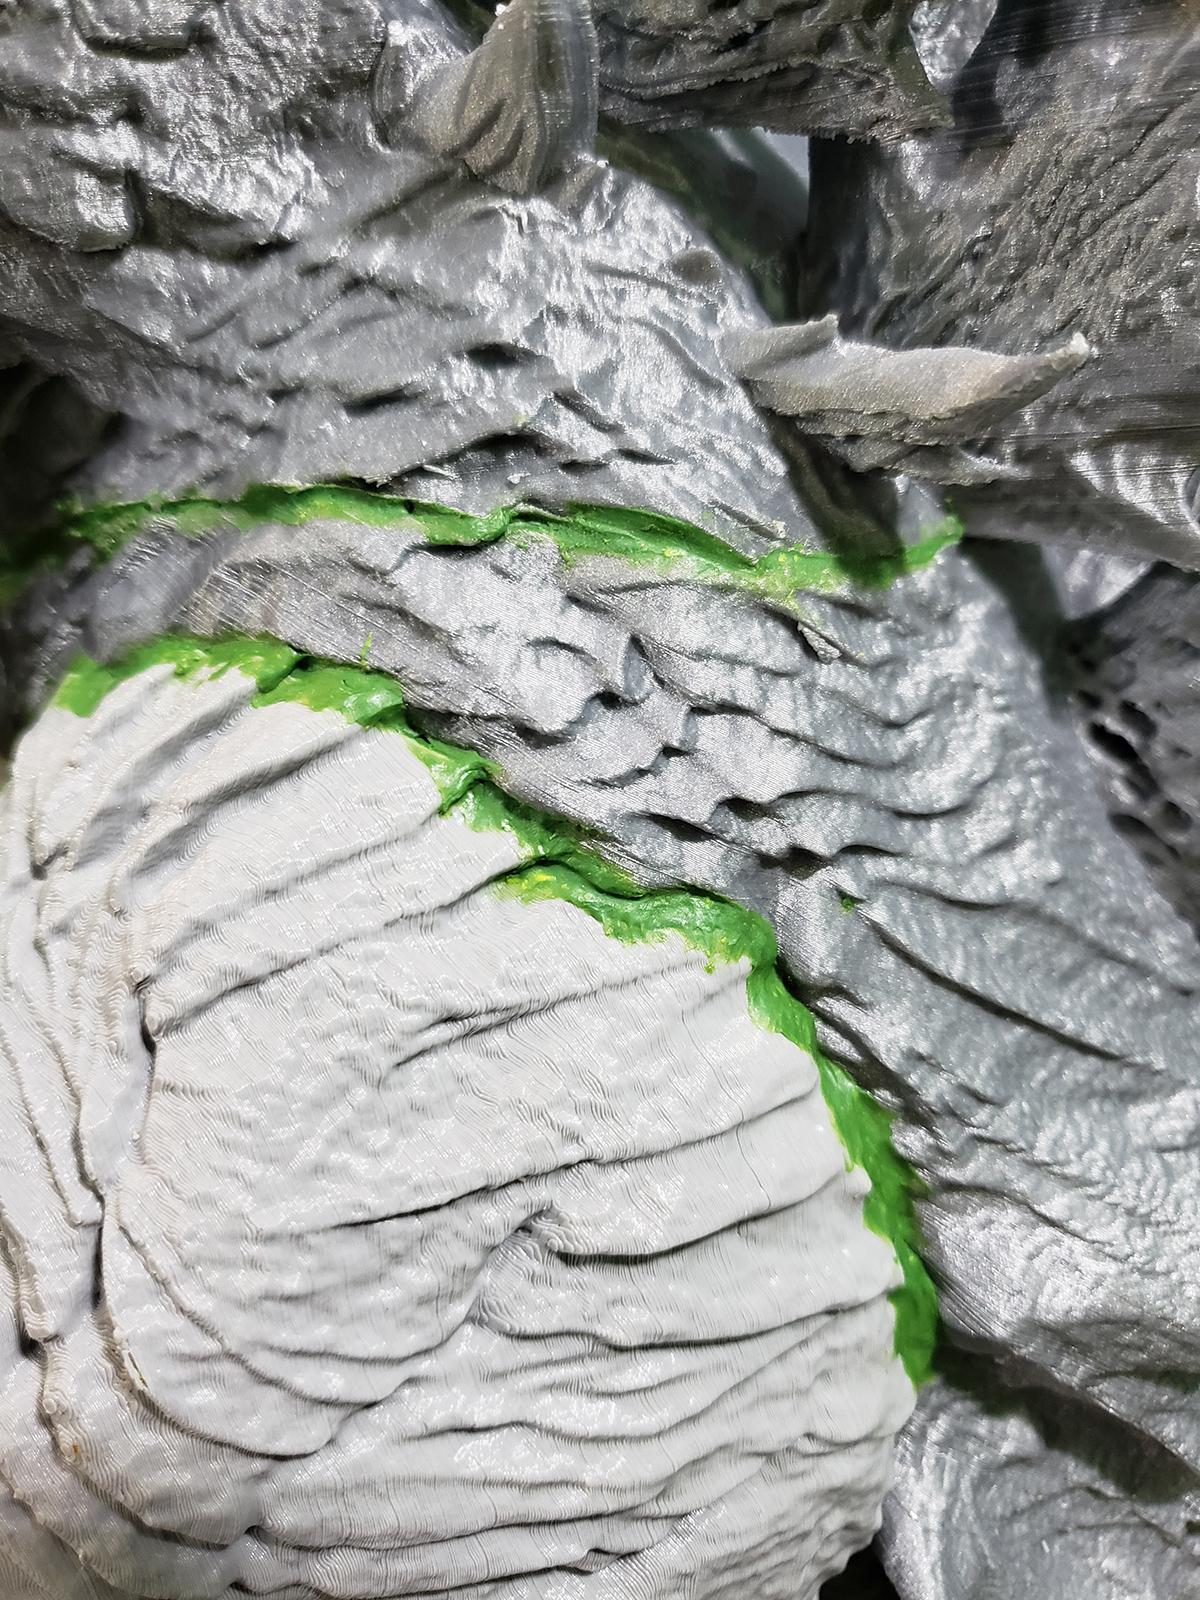
I blended all the joins with greenstuff. I have seen a few people paint theirs up without ever blending the joins, which blows my mind: why would you spend so long on a great model and leave these giant visible seams? Looks terrible.
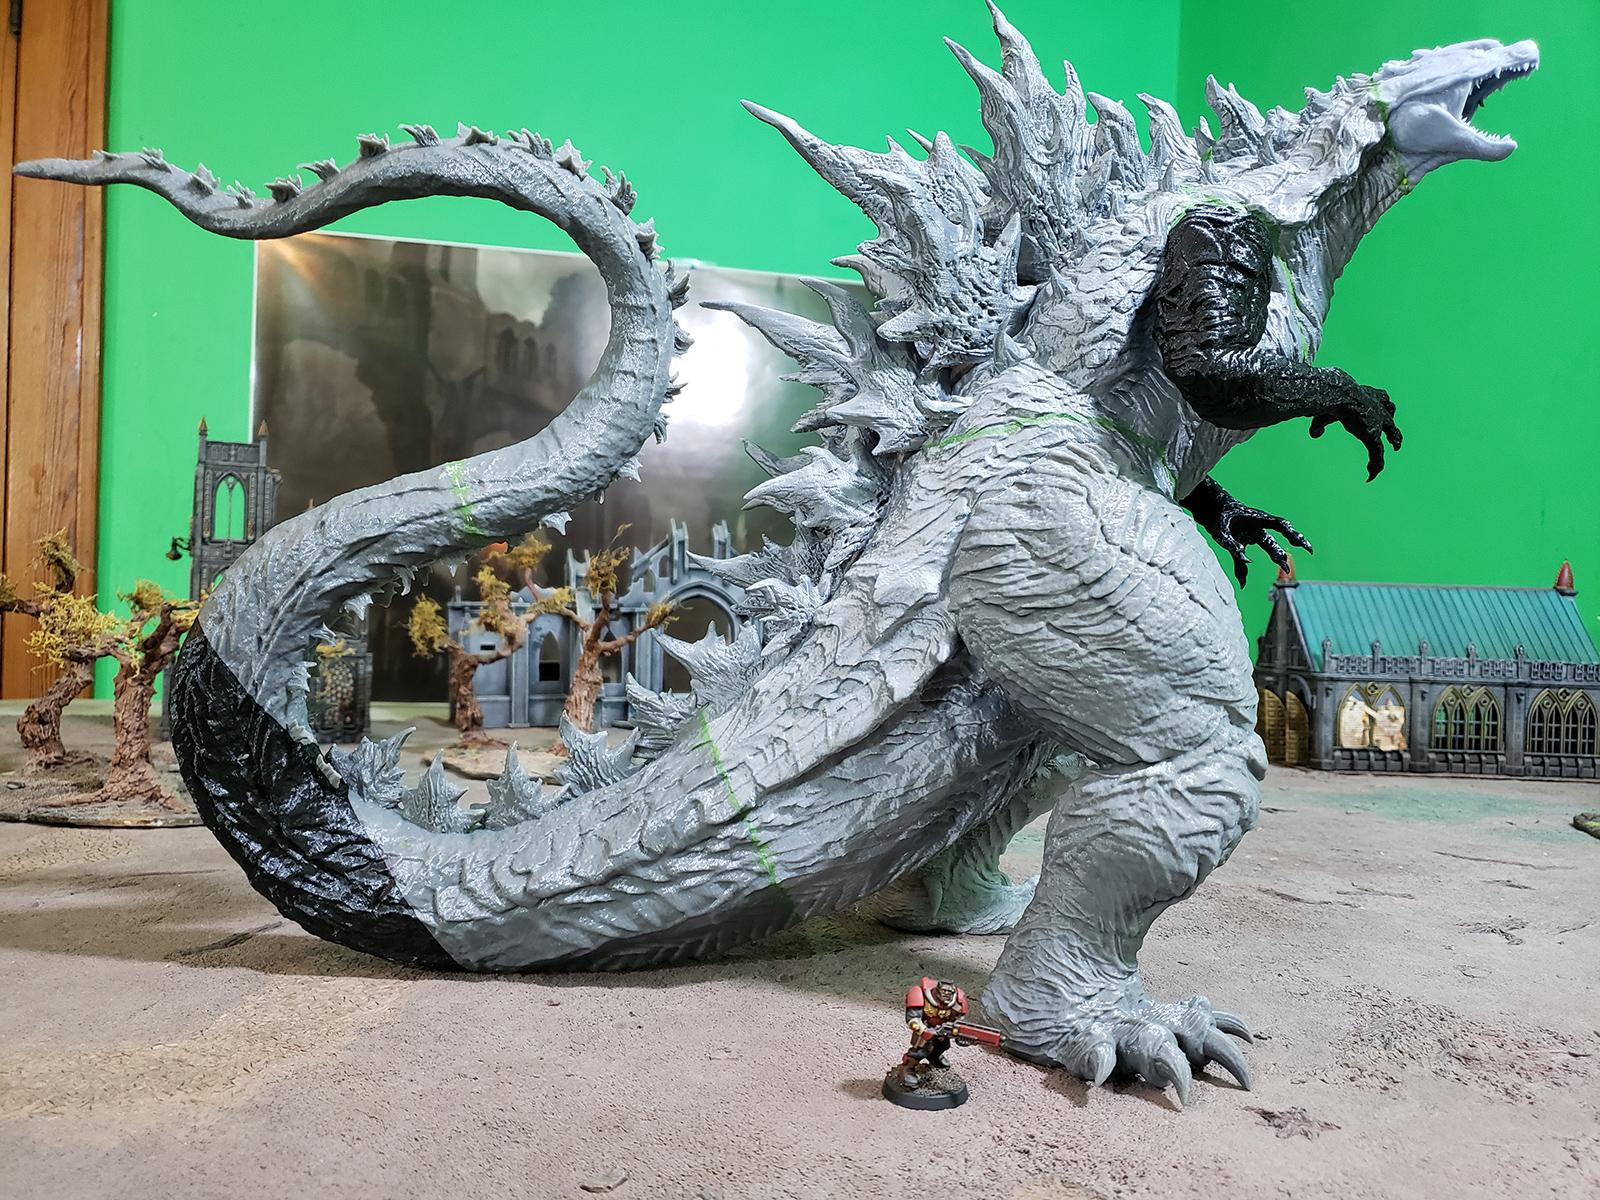
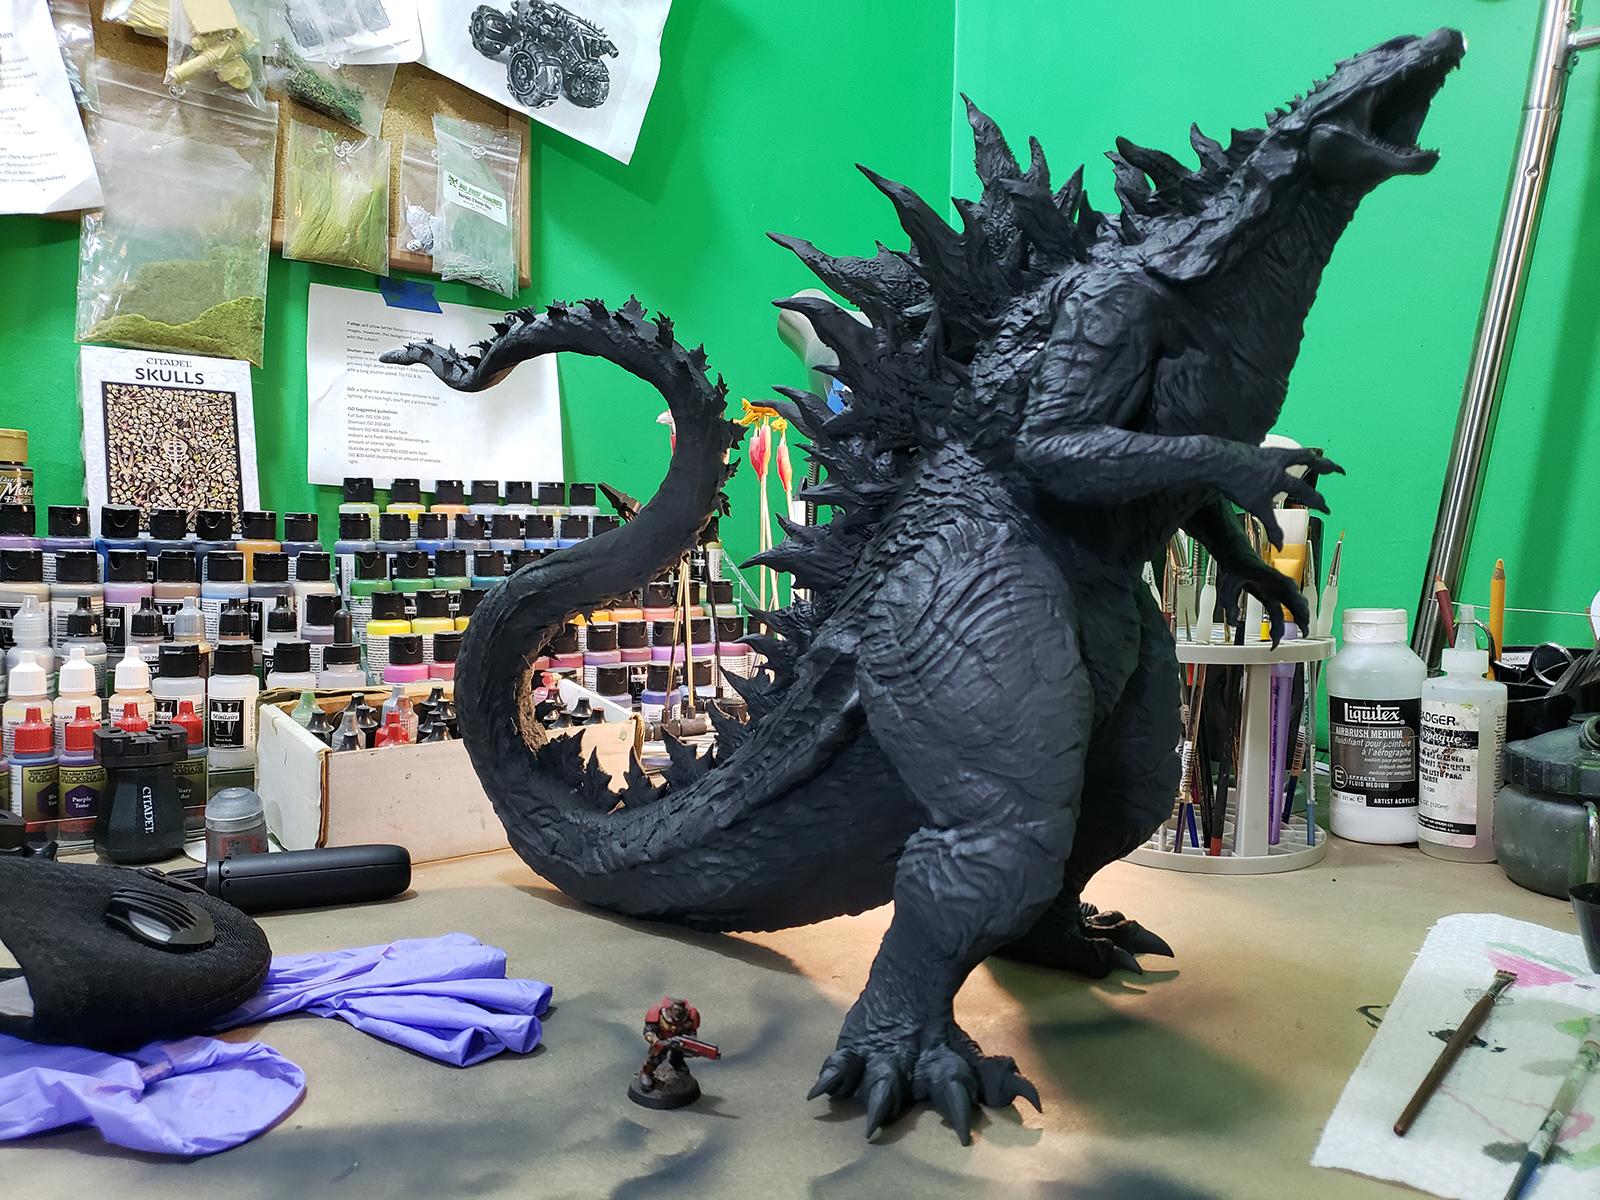
All primed up:
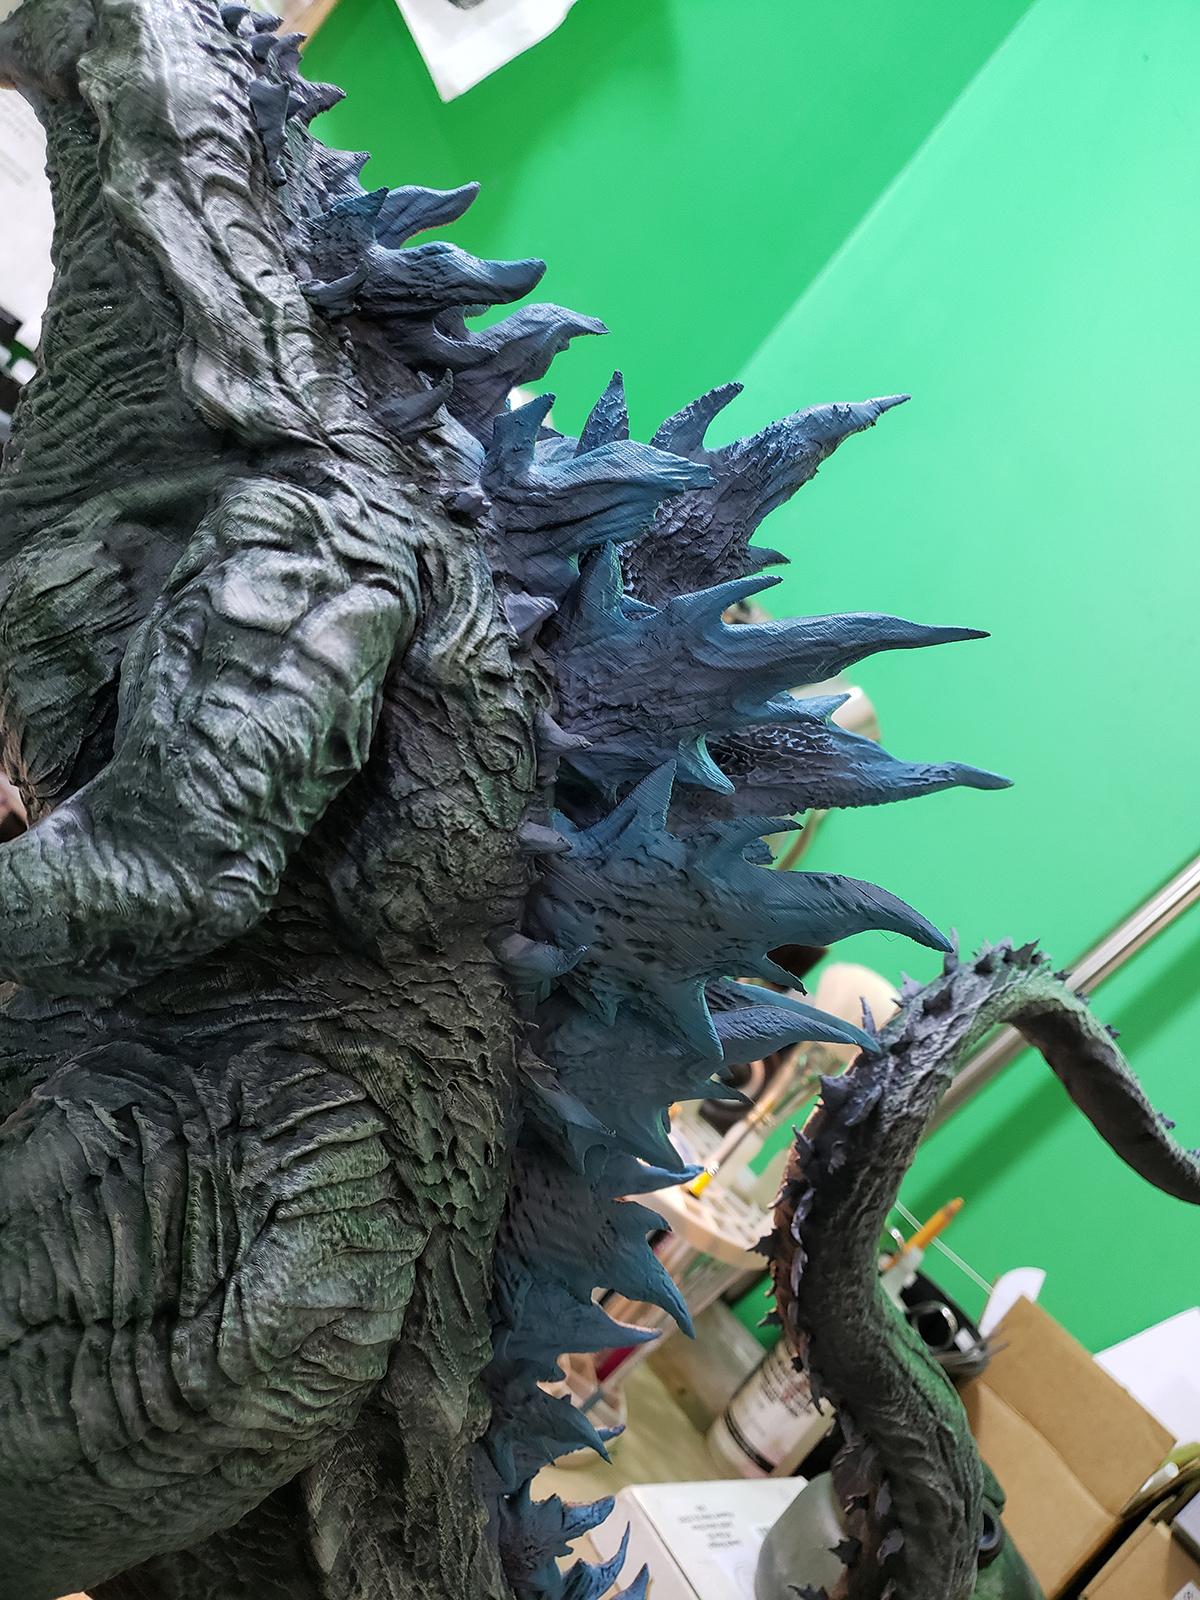
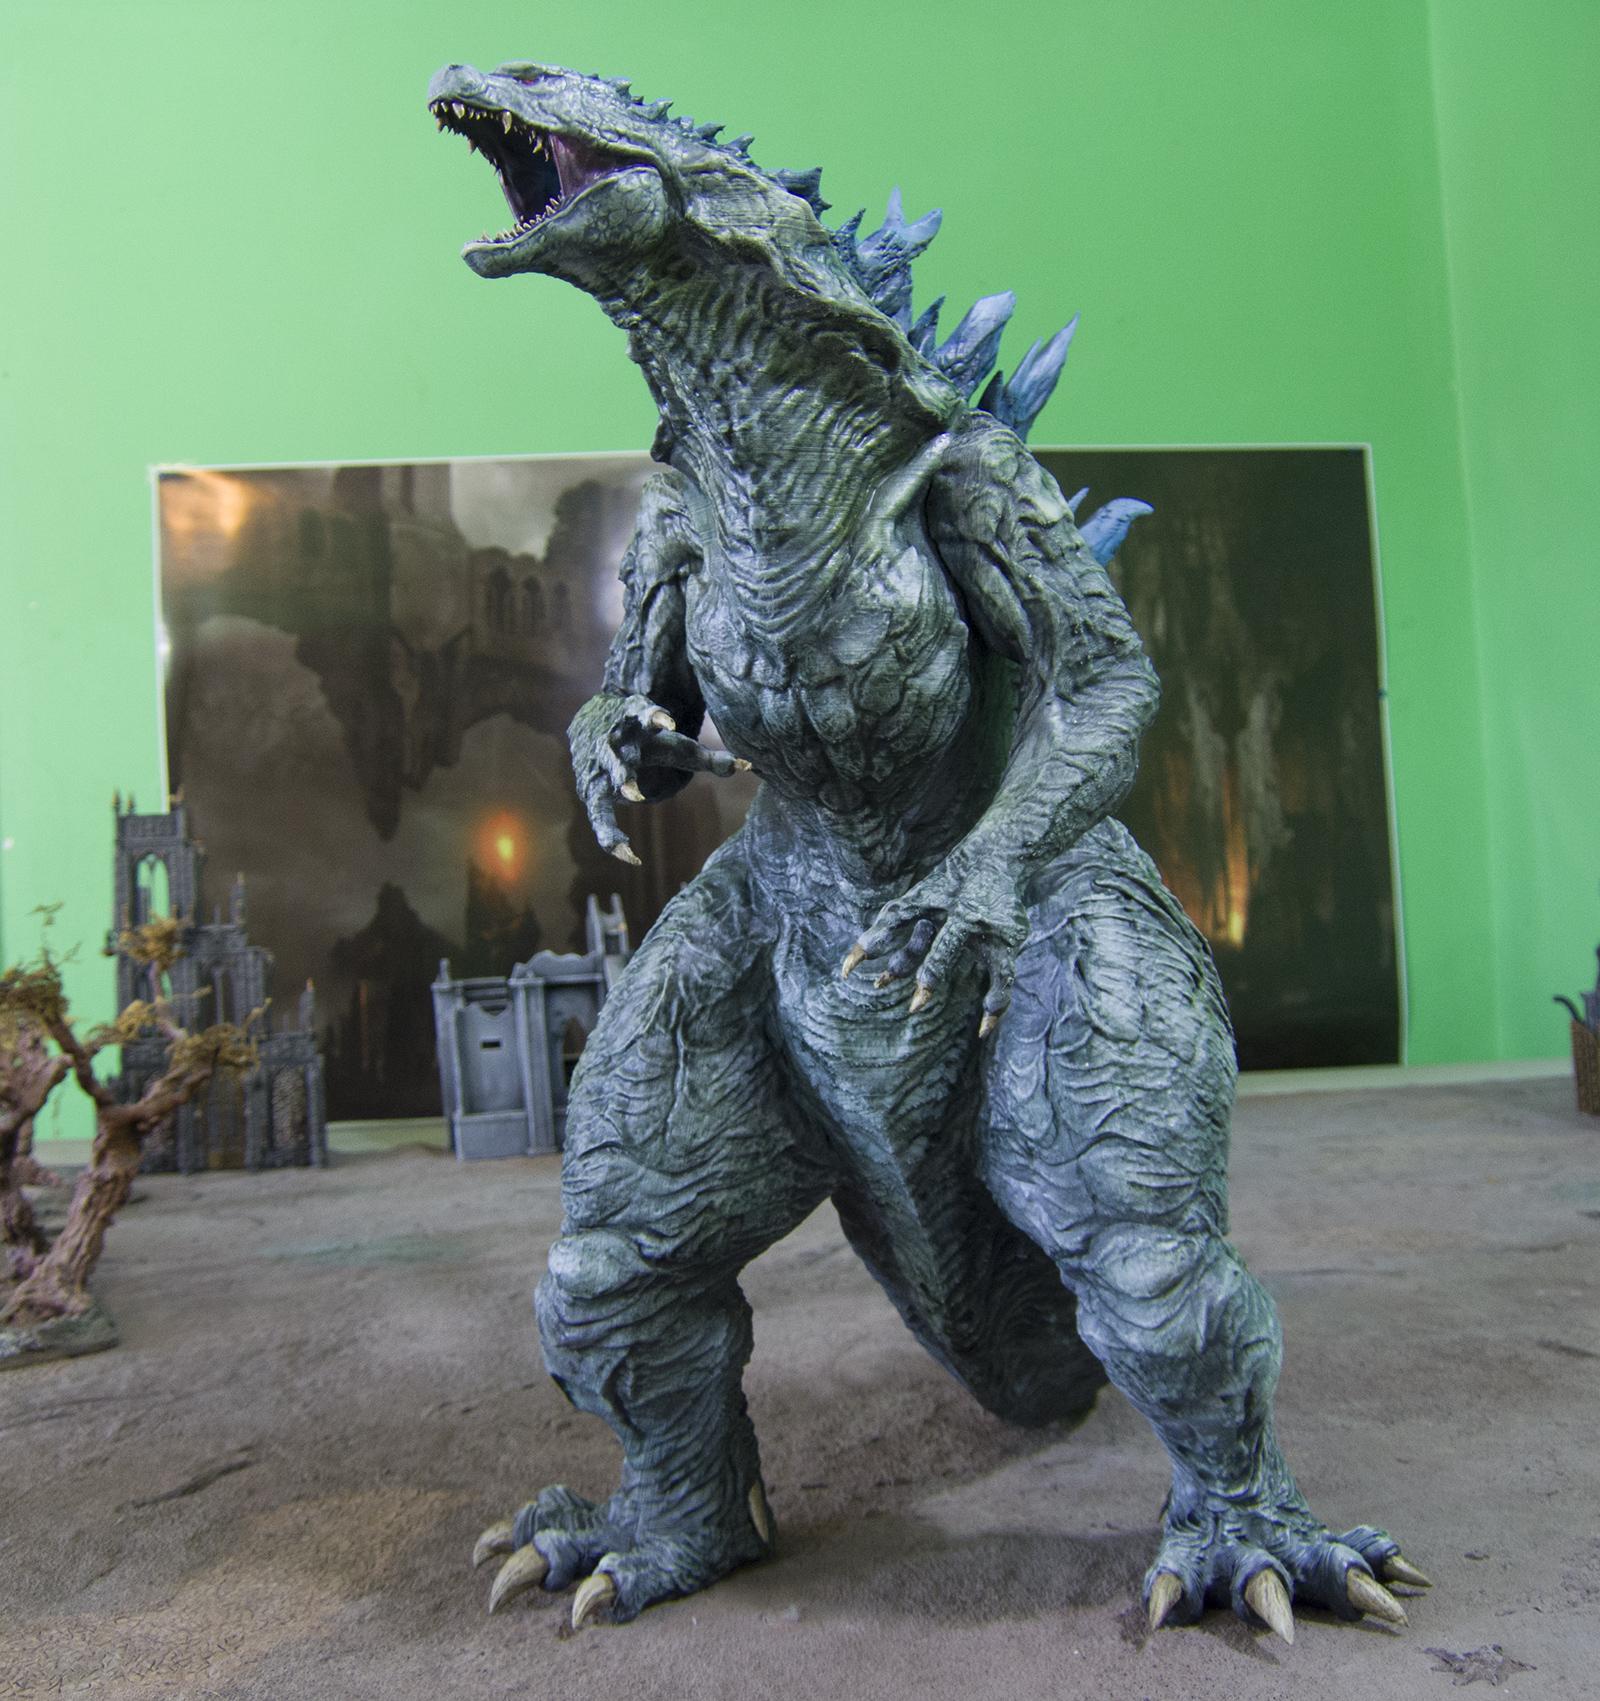
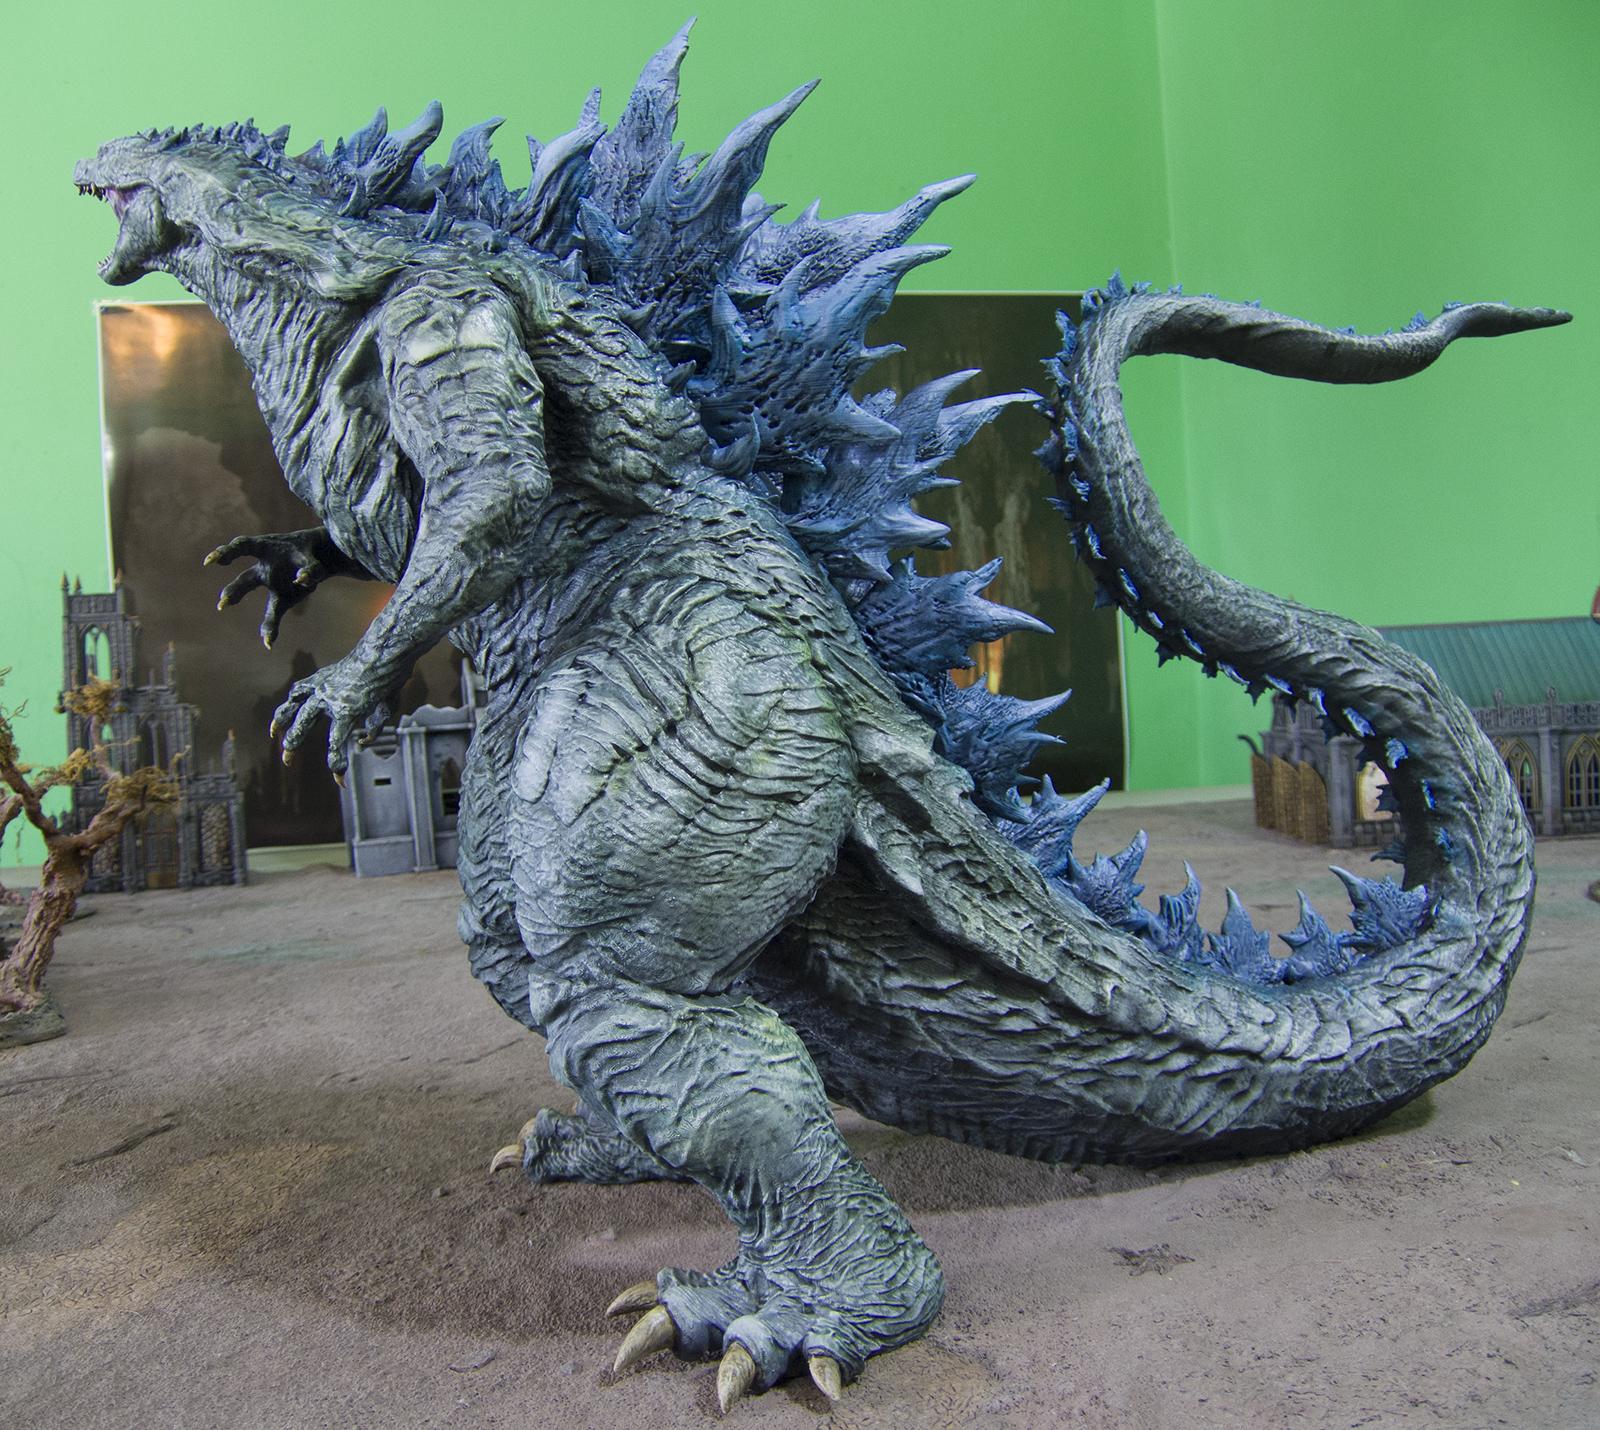
I blocked in colors with the airbrush, then drybrushed, gave it a wash and so on. The normal stuff for any mini. There are two places where I kind of did unplanned stuff. The first is the green shading on the finished models in a few places - i don't know why I felt compelled to add that, it wasn't in the plans. Ultimately it didn't either help or hurt the finished mini I don't think, it's pretty subtle.
The spines came out a much brighter blue than I was aiming for. I'm not sure how happy I am with that.
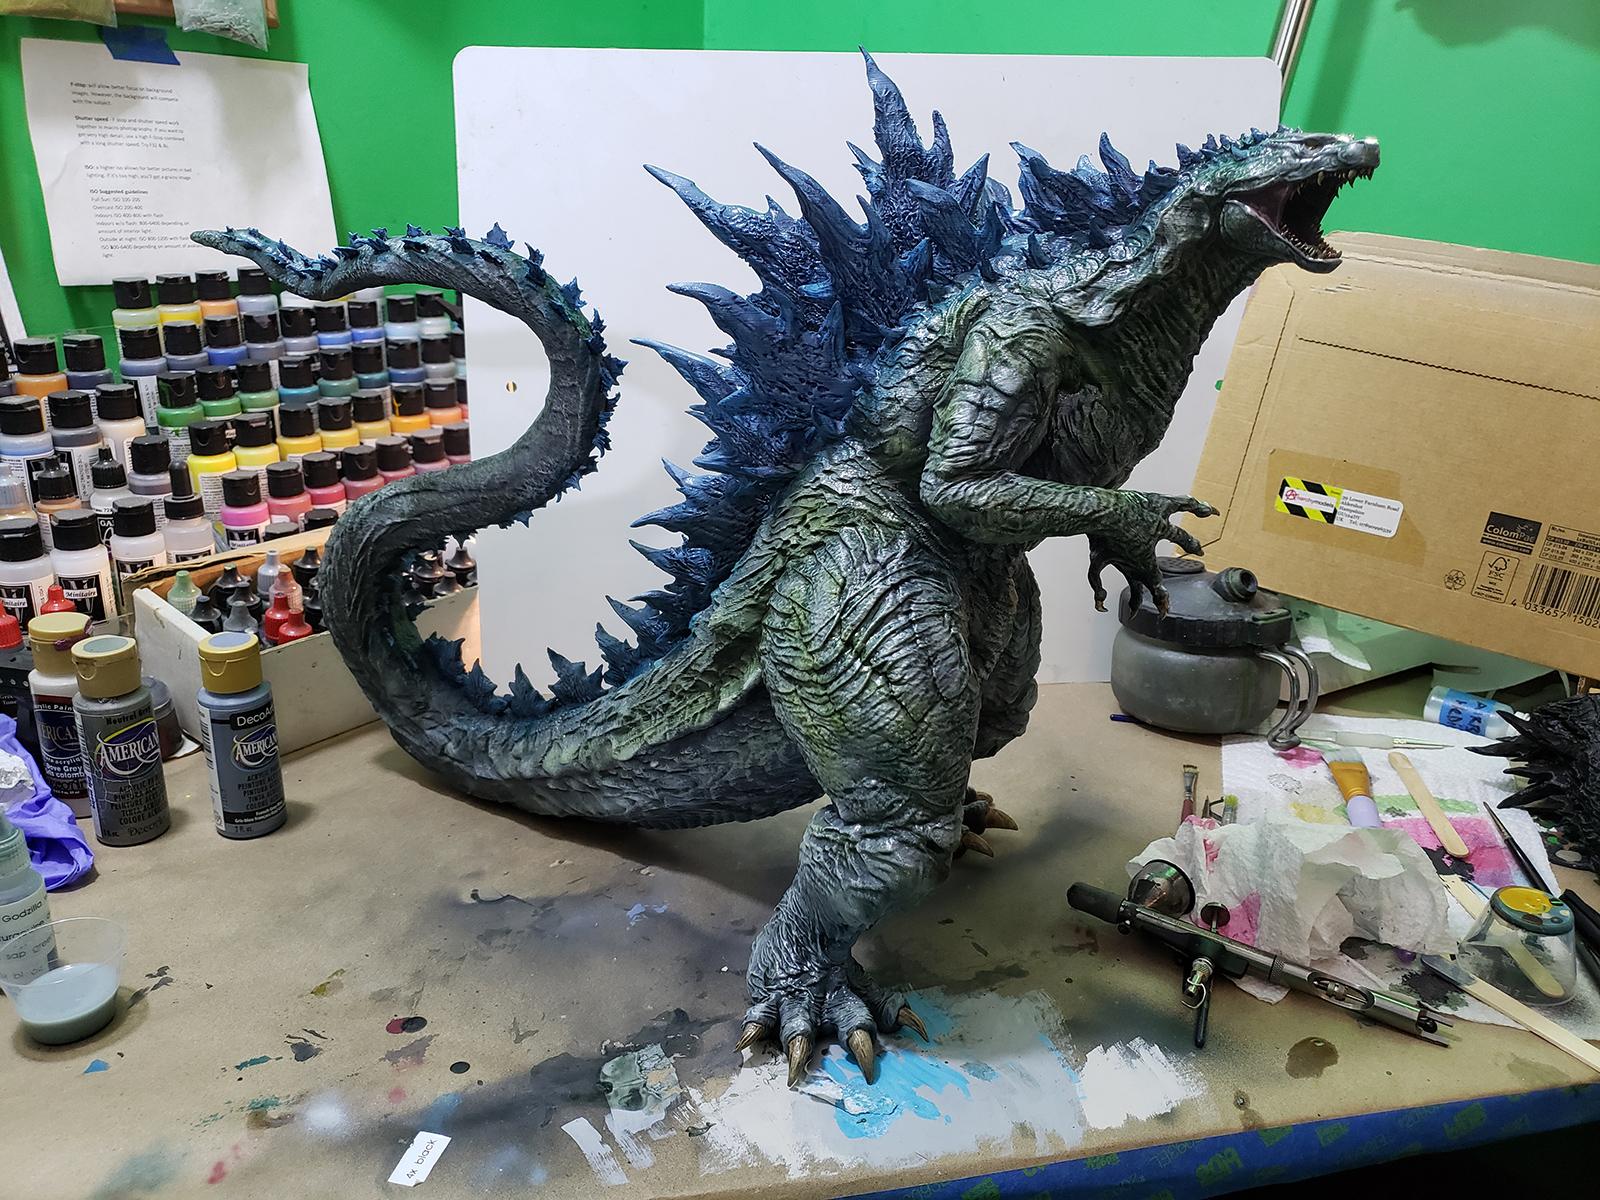
The second to last step was spraying the entire model with a generous coating of Future floor polish to give it a bit of protection:
and then dullcote.
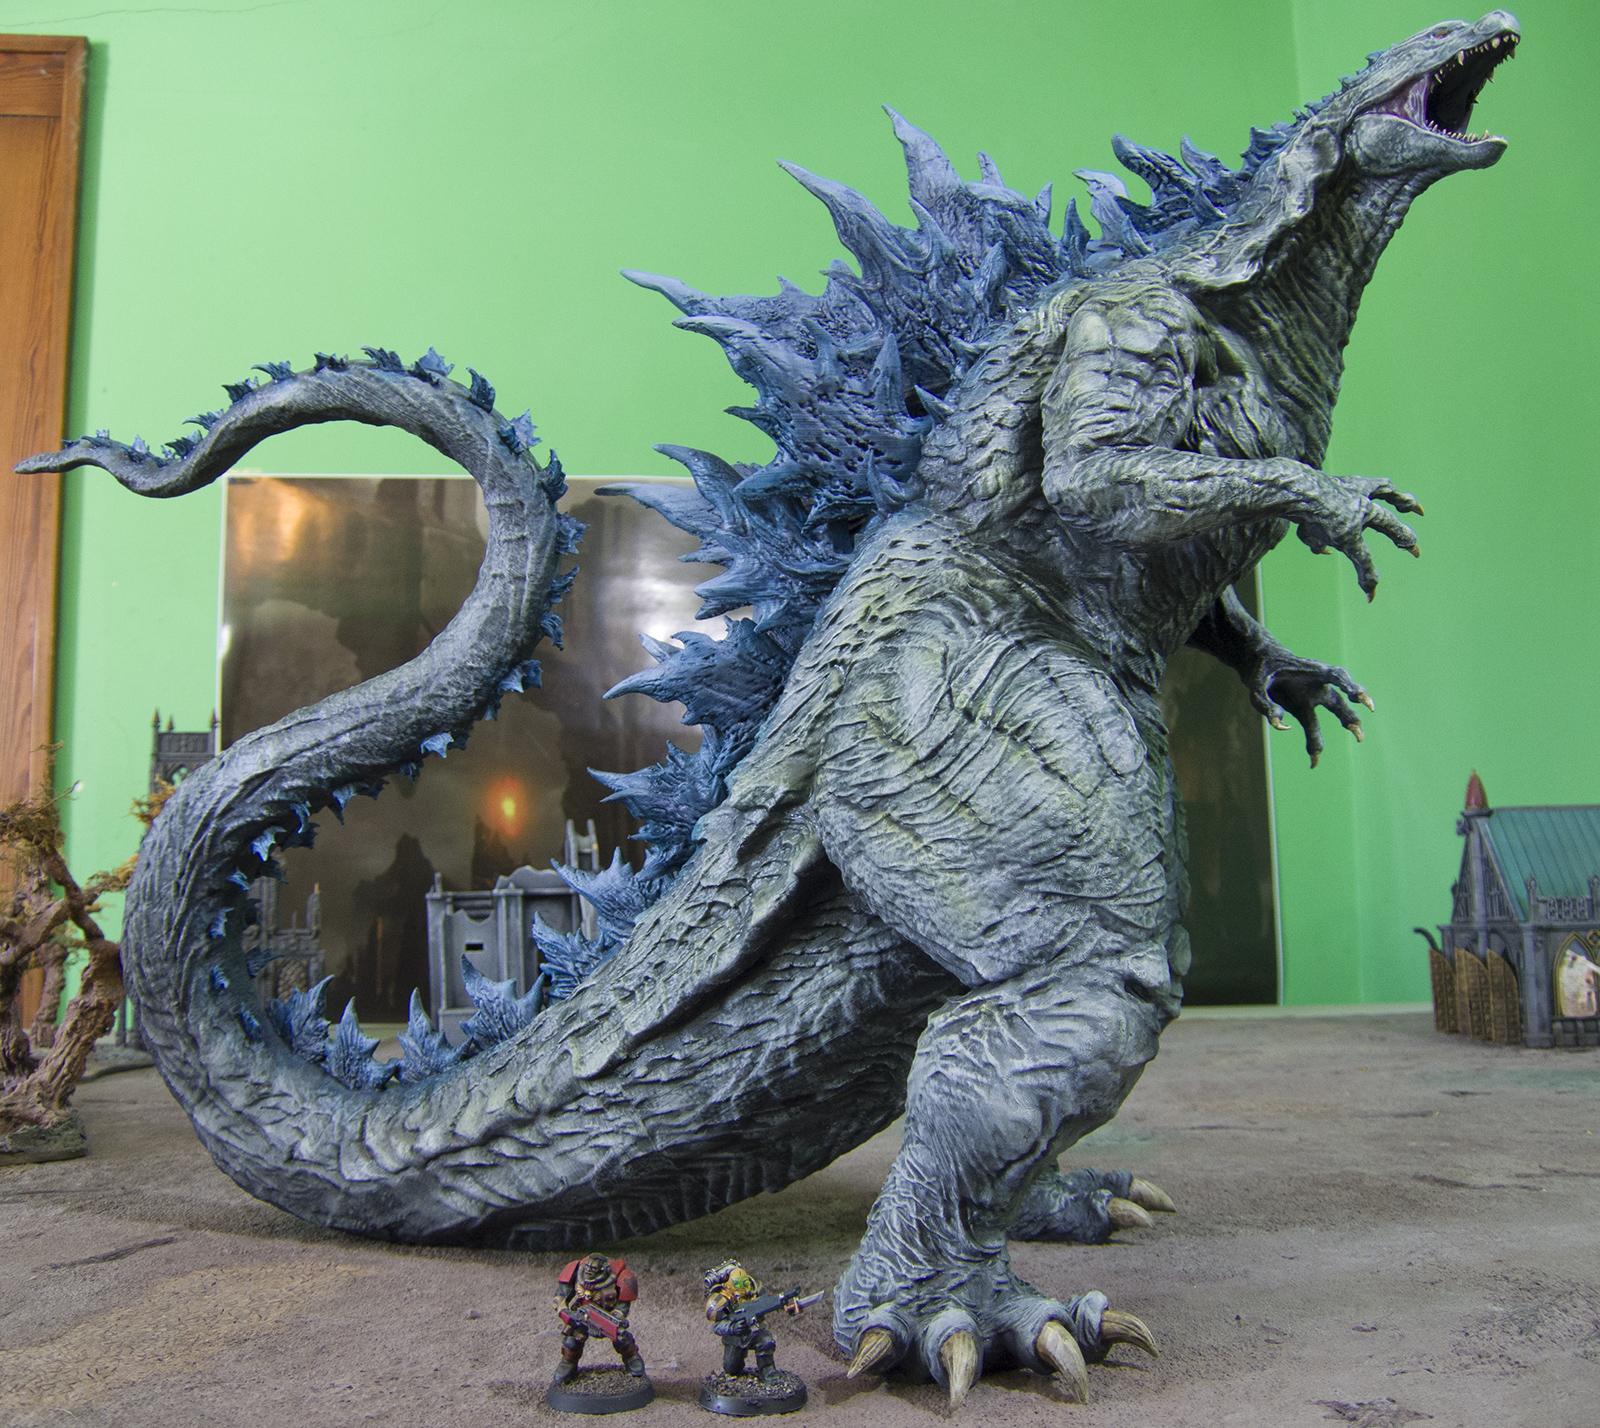
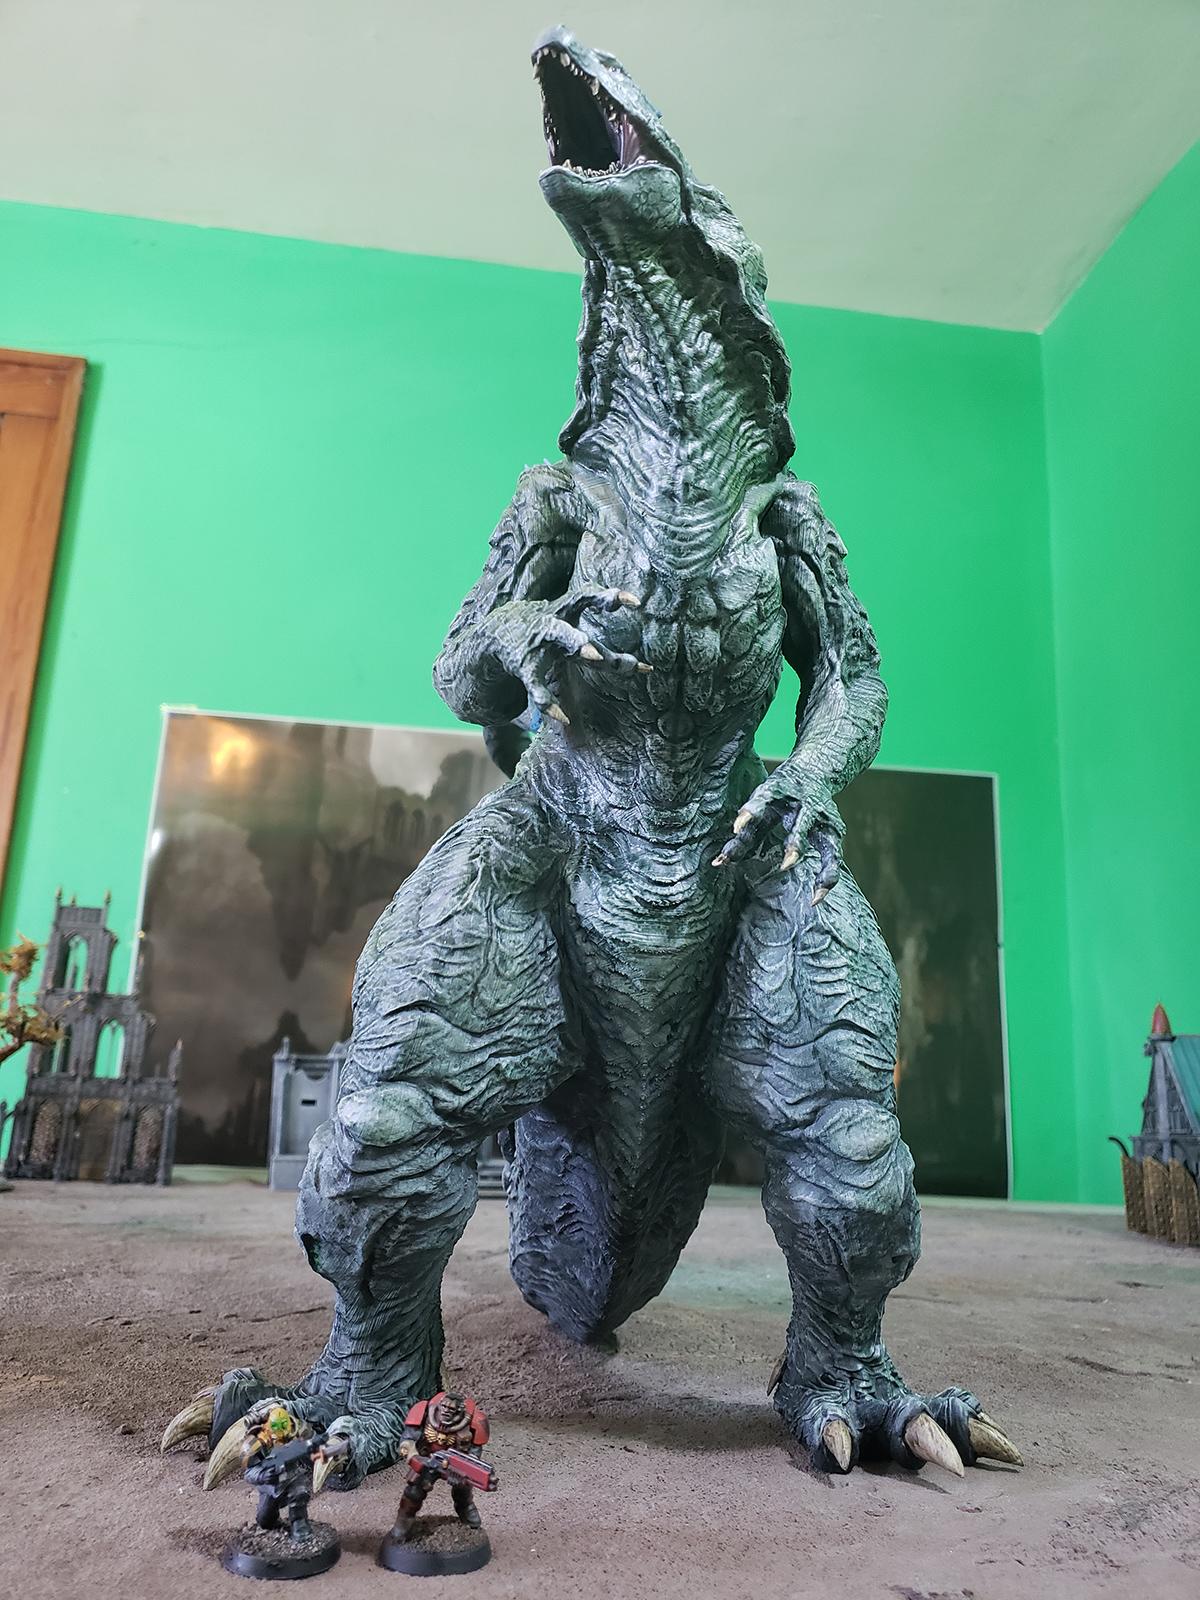
And then the finished pictures:
Spoiler:
I wound up painting him over the course of about a single day, which is amazing since I have space marines that don't have a lick of paint on them a decade old. On the other hand, this was like 99% airbrush, which is fast, and the entire model is like 8 colors tops including shades and washes.
Some minis for scale:
I learned a lot from this model. For one, I primed it with my go-to primer; Vallejo German Panzer Grey. That was sort of a mistake - you can really see the stepping lines and the wash I gave the model only made that worse. If I could do it over again I would use a rattlecan of rustoleum filler primer to smooth that out a little. Ah well, next time.
For now, i am pretty happy with how it came out. I managed to cut myself about 8 times over the course of ths model, which is an action and a number both pleasing to the Blood God.
This message was edited 2 times. Last update was at 2020/09/21 15:23:01
lord_blackfang wrote: Respect to the guy who subscribed just to post a massive ASCII dong in the chat and immediately get banned.
Flinty wrote: The benefit of slate is that its.actually a.rock with rock like properties. The downside is that it's a rock
My brother has asked me multi types to go in with him on a 3D printer and now I really want too...
d-usa wrote: "When the Internet sends its people, they're not sending their best. They're not sending you. They're not sending you. They're sending posters that have lots of problems, and they're bringing those problems with us. They're bringing strawmen. They're bringing spam. They're trolls. And some, I assume, are good people."
KingCracker wrote: That's pretty cool looking. How long did that take to print out?
It's hard to say exactly since each piece took a different amount of time. The longest parts were about 112 hours, and the fastest were about 70 hours (the arms, the head). If I had to guess, and this would be very rough, it would be about 650 hours or so, which works out to nearly a month of printing (with a few one-offs here and there). Seems to line up with the pictures I took on my phone - I started around December 15th and finished printing around Jan 15th.
This probably is not a typical experience, this was only the second model I've ever printed on an FDM printer and I used the universal, conservative settings the model creator suggested. I think you could do a lot to reduce that by reducing the density of the supports and infill - but the first part I printed was so good, I didn't want to change any settings to match that part perfectly.
The next question would be cost, and I think I ran through about 3 spools of filament - at $14 each, it cost around $42 to print. Again, reducing infill and support density could probably reduce that quite a bit.
Automatically Appended Next Post: As a side note, I started a thread in Nuts and Bolts asking about non-wargaming stuff in the showcase (like this), and I was sort of hoping the question of basing came up... because this model actually does have a base. It's split into 4 quarters and connects with clips you print, and would be about 12" wide / 312mm. Since it stands up just fine on it's own, I don't intend to print the base.
Spoiler:
This message was edited 2 times. Last update was at 2019/02/09 02:07:53
lord_blackfang wrote: Respect to the guy who subscribed just to post a massive ASCII dong in the chat and immediately get banned.
Flinty wrote: The benefit of slate is that its.actually a.rock with rock like properties. The downside is that it's a rock
Life is like a box of chocolates. A cheap, thoughtless and perfunctory gift nobody ever asked for. Unreturnable because all you get back is another box of chocolates. So you're stuck with this undefinable whipped mint crap that you mindlessly wolf down because there's nothing left to drink. Sure once in a while there's a peanut butter cup or a English toffee, but they're gone too fast and the taste is fleeting. So you end up with nothing but broken bits of hardened jelly and teeth shattering nuts. If you're desperate enough to eat those all you've got left is a. An empty box, filled with useless brown paper wrappers.
Cool read, and really solid - and huge! - king of monsters all told The stepping is a bit unfortunate, though it was smart to print at least the head with a different machine, obviously for the teeth but also as a focal point.
Not gonna lie, your posts make me want to get my buddy to print me some stuff on his new machine and airbrush it up
Ouze wrote: I really could use some appropriately sized city terrain. All of the 40K terrain I have is 28mm. I don't know what scale would work correctly.
What scale is the new titan game? Those buildings work?
Godzilla has had a lot of flex in his size over the years, gives you a range to play with.


 224th Astra Legion (main army)
 628th Praetorian Guard Cohort (wife's army)
 827th Auxilia Cohort (ad mech fun)
 825th Foderati Cohort (in the beginning army)
 1212th Foederati Cohort - Jokaero (cause I like apes with guns)
  The stepping is a bit unfortunate, though it was smart to print at least the head with a different machine, obviously for the teeth but also as a focal point.

 An ork with an idea tends to end with a bang.
  14000pts Big 'n Bad Orkz
 7500pts Necron Goldboys

 Ultramarines, 3rd Co. and friends, 16k+
  4k
4k  2k Points
 Competition Index