
- by Iain Wilson
I somehow managed to get through Salute this year without bankrupting myself on shiny, new models, but I did come home with a few fun-looking odds and ends. There were quite a few vendors selling laser-cut
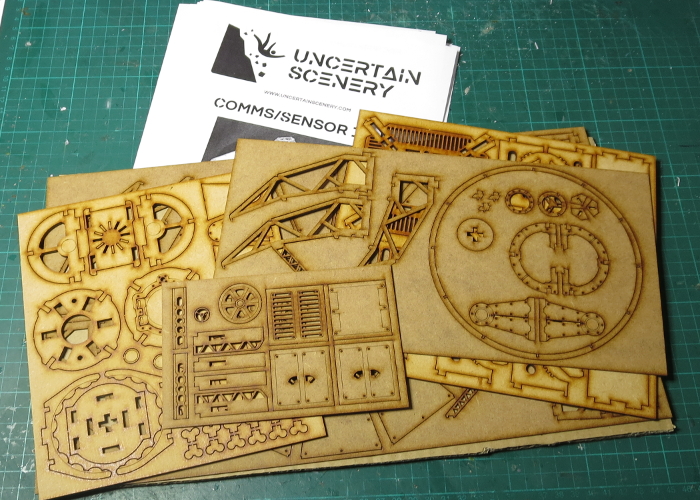
MDF kits, some of which I had seen before and some that were new, at least to me. One of the latter was
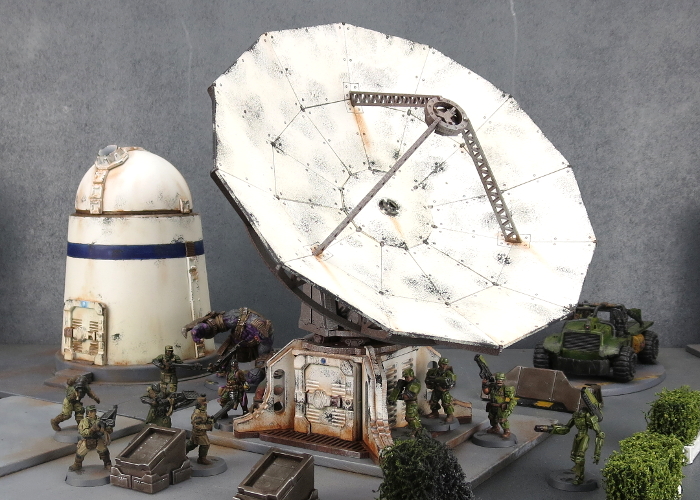
Uncertain Scenery, who had an amazing industrial catwalk setup topped with a very cool sensor dish that I couldn't resist picking up.
This week, I decided the time had come to crack it open and see what I could do with it!
I have to start by saying that this was a fantastic kit to put together! It uses a mix of 3mm and 1.5mm
MDF, and the design is really clever at making use of those two sheet thicknesses to create detail. Parts are cut with only a single attachment point to the surrounding sheet, so removal is easy and there's only that one point to trim up.
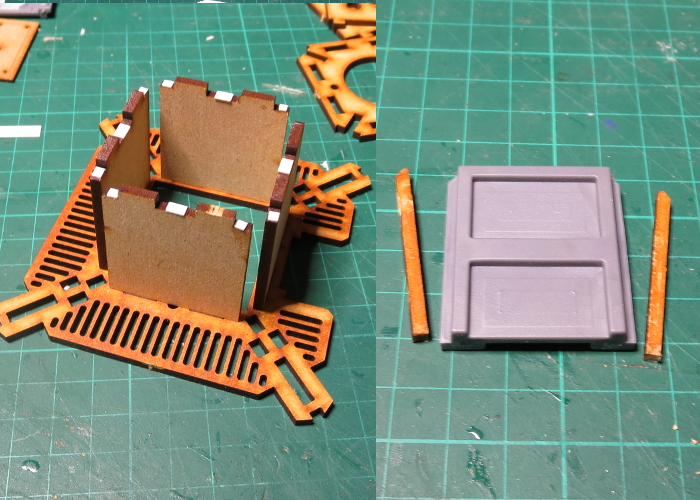
Because I can't resist the urge to tinker, I did make a few minor changes. As with a lot of
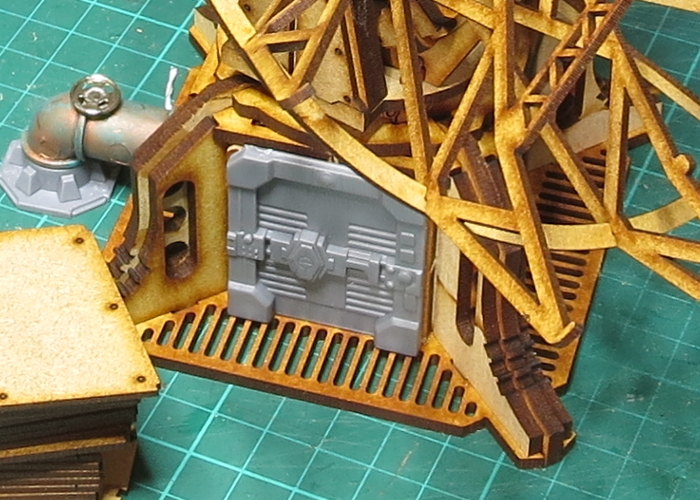
MDF kits, the doors on the base of the structure were just a single panel with the door shapes etched into them. To give a little more detail, and to better fit in with the rest of my terrain collection, I decided to replace the existing doors with a door from the Maelstrom's Edge terrain sprue. It turned out the base structure was just a fraction shorter than the plastic door, so I added some spacers cut from 0.5mm plastic strip to the tops of the interior walls. This lifts the roof piece up just enough for the plastic door to slot in place. Rather than cutting into the walls to slot the door in, I cut a strip of leftover
MDF from one of the parts sheets to run up either side of the rear of the door frame, and then just glued the door onto the outside face of the interior wall.
I also decided to replace the blocky,
MDF ladder with a plastic ladder from the terrain sprue, cut to an appropriate length. The original ladder used a 3mm thick ladder piece, and guardrails up either side assembled from three pieces of 1.5mm sheet. As luck would have it, the ladder and the innermost guardrail sections together turned out to be exactly the same width as the plastic ladder, so leaving out these inner sections allowed my adjusted ladder to just slot into place as if it was meant to be there.

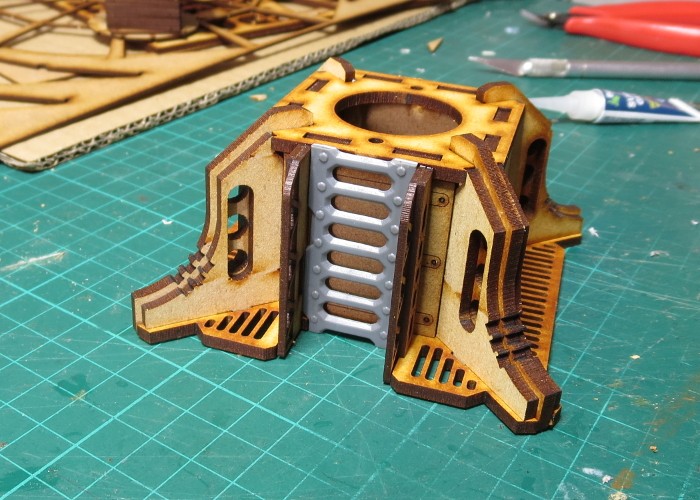
The base section originally had doors on two opposing walls, but I decided to just go with the one, and have a pipe running in where the other should have gone. I glued the door piece on backwards, with a new panel line etched in with a panel scriber so it wasn't just a featureless expanse, and added a pipe made from a couple of large pipe fittings from the terrain sprue, a piece of a 13mm drip irrigation elbow, and half of a press-stud for a valve.
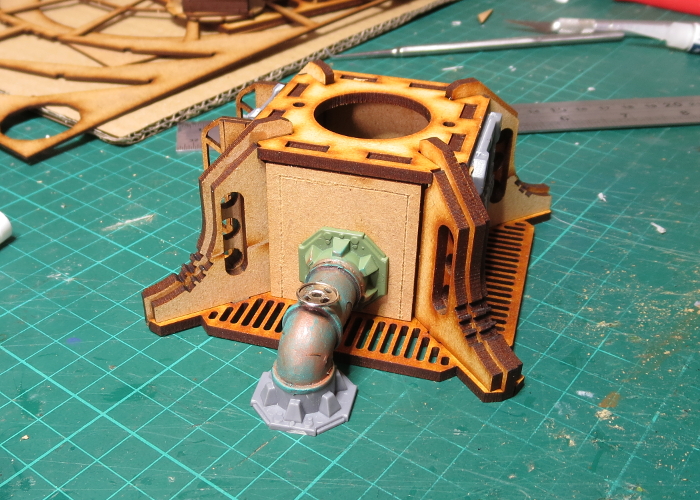
Everything else was assembled as per the nicely comprehensive instructions, although I left the dish panels off for spraying to make life a little easier, gluing them on once everything was mostly painted.
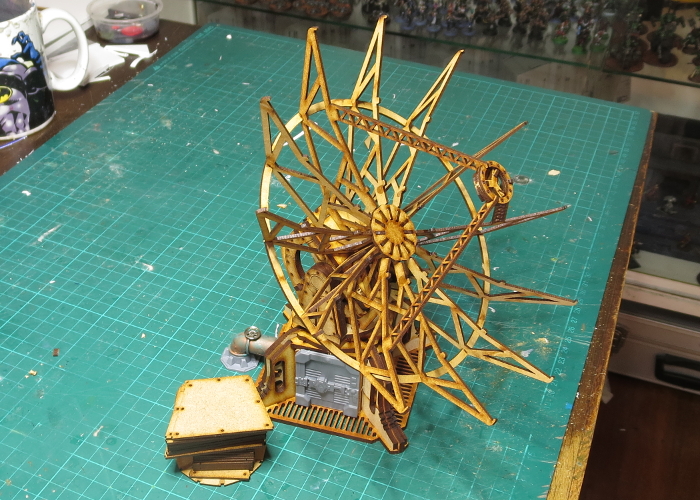
To paint, I started by giving the whole kit a coat of matte sealer, to help prevent the basecoat from soaking into the
MDF as much. The base structure and dish panels were sprayed with a beige primer, and then given a rough coat of flat white.

For the rest of the assembly, I sprayed a generous basecoat of AK Interactive Rust spray, and then a light spray of Army Painter Platemetal. The bare metal parts on the base structure were given a coat of some old Citadel Scorched Brown, and then a drybrush with P3 Pig Iron.

I added weathering to the white by sponging on Vallejo heavy charcoal, and then dirtied everything up wherever seemed appropriate with a drybrush of Vallejo Beasty Brown.
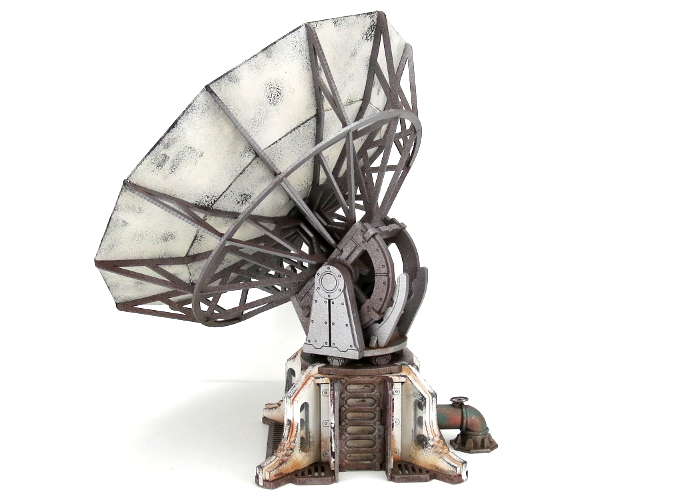
And that's it, ready (for now) for the table. I've left it unbased for now, as I have some plans in that direction which will likely wind up in a future article...

To spruce up your own
MDF kits, you can pick up the Maelstrom's Edge terrain sprue, along with the rest of the Maelstrom's Edge model range in the webstore
here.
As always, feel free to pop along and share your creations, or ask any Maelstrom's Edge- or hobby-related questions on the
Comm Guild Facebook page!
For other Maelstrom's Edge modeling articles, including tutorials and walkthroughs of a wide range of different building and miniature projects, check out the Hobby section of the Maelstrom's Edge website
here.


