I am really enjoying this set of rules. I especiallly like the way you get rewarded for using good tactics.
The paratroopers usually have higher inintiative (the rules call it "reputation" ) so tend to go first.
The tactic we used over and over again - went like this:
1: Airborne units approach target area under cover of darkness and hedgerows.
2: The leader of the group is able to peak through the hedgerow (or sometimes an opening), identify the target and duck back before being seen.
3. On the next turn, the group crawls through the hedgerow,causing a reaction test that is hard for the Germans to win. Sometimes when they win, they loose.
In a reaction test, the highest roll goes first. But it is also tied to your "Rep" (4 for Germans, usually a 5, but sometimes a 6 for paratroopers).
If you roll higher than your rep, you cannot move, even if you "won" the reaction die roll.
4. The fire from the airborne usually caused the Germans to duck back under cover (if it didn't kill or wound them).
5. This is immediately followed up by a grenade or two and a soldier charging into the building unopposed.
And now for the battle:
Nuts! – by Two Hour Wargames (WWII solo skirmish rules)
Scenario #2 – Sound of the Guns
Before dawn, June 6th, 1944 - Neuville-au-Plain, France
On this occasion my son (22) played the part of SSG Rockstar, while I served as
GM. His first game, my second – kind of like putting a man who has never seen a horse on a horse that has never been ridden, hoping they can learn together.
Objective
SSG Rockstar: “All right men, we have some buildings to clear. The map shows six of them, but we have to be quick as we want to get this done before dawn when our chances of being discovered increase dramatically.”
One of the men: “So do we play hide and seek now, sarge?” (Words spoken to my father shortly after landing in Normandy)
Turn 1:
Time being of the essence, Rockstar splits his squad in two. He sends Sgt Lyons, T3 Seid and two lost privates from the 101st (neither of whom has a long arm) to search for an equipment bundle.
Rockstar leads the rest of the squad in an advance towards the first building (#5). The men double time and take cover behind the hedgerow, staying outside of their line of sight. Rockstar takes a quick peek, long enough to spot enemy troops in the building, but ducks back under cover before the sleepy sentry spots him.
Turn 2:
“We hit the mother lode men,” Rockstar whispers. “Looks like a command group of some sort. Lots of movement, a couple of officers at least, and a not too observant sentry.
Rockstar waits for the right moment, “Let’s go he whispers.” Rockstar assigns targets and his men enter the hedgerow. The lookout at the window finally spots them, but Rockstar and his men open fire first. The volley knocks down a couple of the enemy and drives the rest back deeper inside the building.
Meanwhile, Sgt Lyons’ search turns up nothing.
Turn 3:
In a surprise move. SSG Rockstar splits his squad again. He sends BAR-man Blanchard as well as Privates Miller and Guidas to investigate another different building (#3) just to the right– but they are to wait until Rockstar starts his assault before they move.
Rockstar decides to press the attack before the enemy can recover. Sgt Kelley rushes to the door, opens it and throws a hand grenade inside. Before the enemy can recover, Rockstar charges in, accompanied by Cpl Bechtold and T4 Shivers. When the dust clears, there are no enemy soldiers left in the fight.
Rockstar has captured a German Major. The dead include two lieutenants, one sergeant and two privates. They have also captured an MP40, two rifles and a radio. “Pick up those weapons, those 101 boys could use them. Those three pistols may come in handy as well. Make a good trade if nothing else. Smash the radio.” But what to do with that major, thought Rockstar…
Oh the shame of it all: my son decides to off the POW (well according to my dad, who was with 1/507/82, their orders were no prisoners). Good-bye Major Mügge.
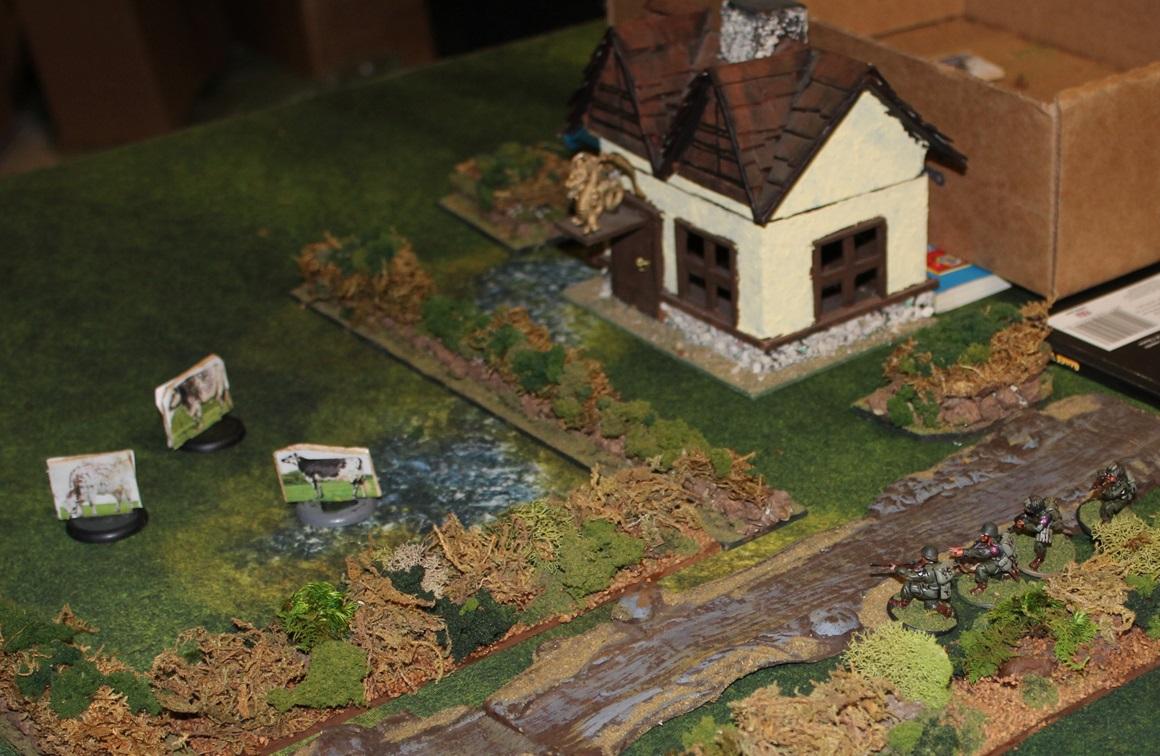
Meanwhile, Sgt Lyons and his crew have approached their building (#1), but due to darkness, it is just out of sight.
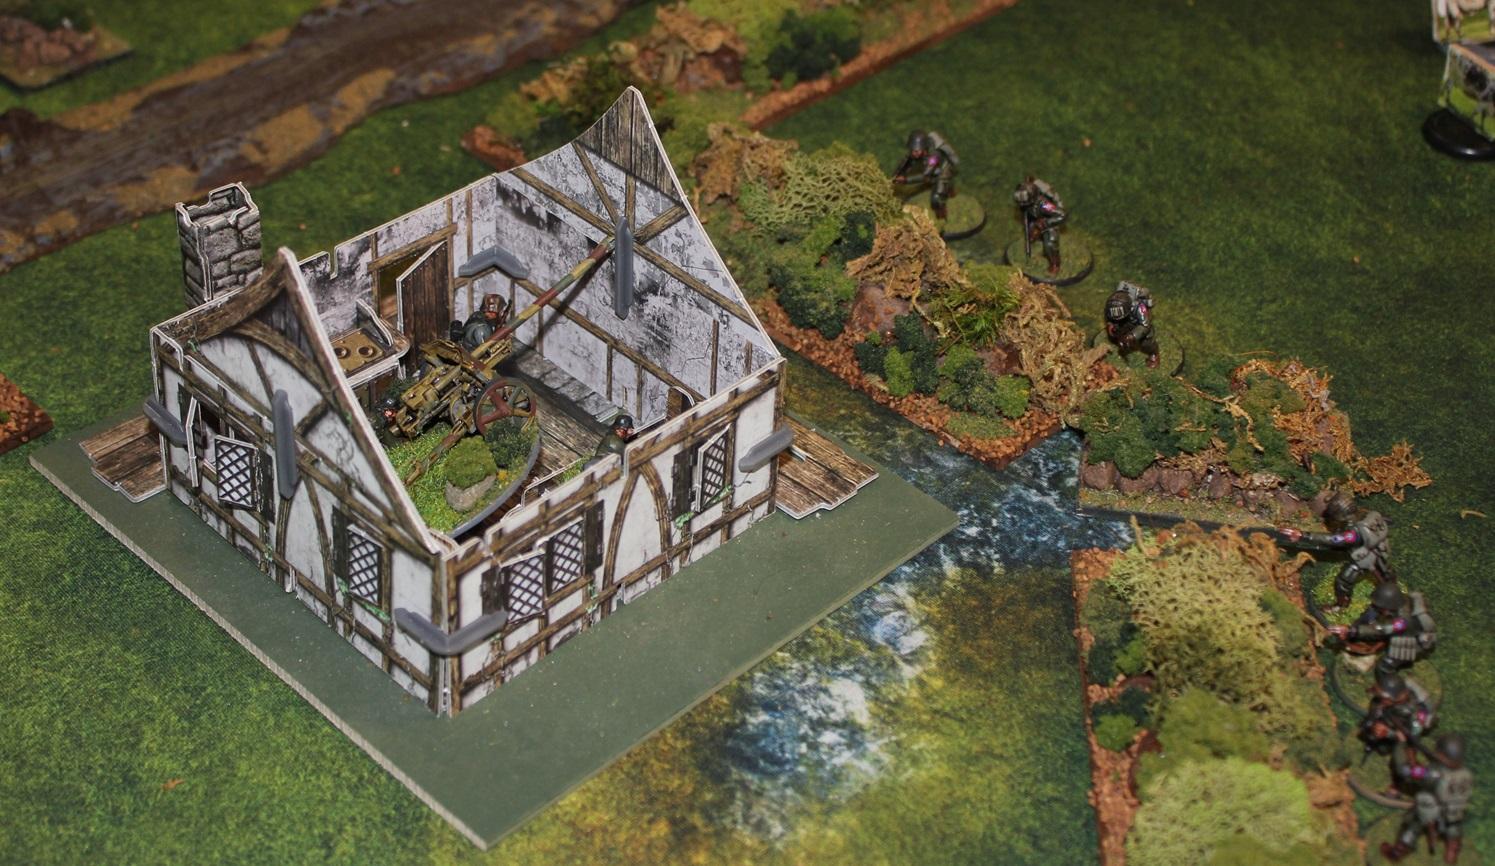
PFC Blanchard takes a quick look at the occupants of his building (#3) – an anti-tank gun pointed right at him (I used a directional dice to determine facing). He ducks back into the hedgerow before he is spotted.
Turn 4:
Good news and bad news. Good news: reinforcements have arrived – Captain Rae has returned with two more lost troopers from the 101. But Cpt Rae is unarmed and the two troopers only have pistols.
SSG Rockstar leaves the building and reunites with Sgt Kelly.
Sgt Lyons investigates the building #1 and discovers a not particularly alert two-man anti-tank team (
ST 44 and panzerfausts). One of the 101 privates dashes to a window and throws a grenade inside, killing both enemy. The two 101st men are now armed with captured
ST 44 and panzerfausts.
Meanwhile, PFC Blanchard organizes his assault on building #3. First step, PFC Blanchard blasts the open window with his BAR, knocking one soldier out of the fight and causing two others to back up under cover. Under cover of Blanchard’s BAR fire, Pvt Guidas charged the building and tossed in a grenade, disabling the rest of the crew. As the dust settled, Private Miller dashed inside and finished off the rest of the crew.
Turn 5:
Airborne units spend the turn maneuvering for better positions. Germans fail activation again. Blanchard and his group move in and take control of the
AT gun. All that training with enemy weapons is about to pay off.
Turn 6:
SSG Rockstar and his group double time down the dirt road to the south east, staying under cover of the hedgerow,
Cpt Rae cautiously moves towards the sound of a PEF.
Sgt Lyons has one of the 101 men search the field for any equipment bundles, but comes up empty. The rest of his group advance towards building #2.
PFC Blanchard and his group decide to make use of the
AT Gun and turn it on building #4. The Germans in that building are alerted but unable to coordinate any action – presumably they are repositioning their MG42s. The gun having already been loaded by its German crew, Blanchard and his group fire off a round into building #4. The blast knocks out two crewman and forces the other two to take cover.
Turn 7:
Rockstar and his group continue to move rapidly down he dirt road. They are approaching building #8, but cannot identify anything yet.
Cpt Rae decides his ears are playing tricks on him, as there is nothing there. But his gut tells him there may still be something out there.
Sgt Lyons advances towards building #2 and takes cover behind the intervening hedgerow.
Before the German
MG crews can recover, PFC Blanchard again blasts the open window with his BAR, wounding one of the last two German still standing. Under Blanchard’s covering fire, Privates Guidas and Miller charge in. The last German standing (unfortunately a loader) can’t get to an
MG fast enough, so fires with his Kar98, but misses. He is killed by Private Guidas. Blanchard’s group captures a couple of Rifles and one MG42 (we figured the closest one was destroyed by the
AT gun).
As the dust settles, Pvt Miller takes a quick look out the window towards building #2, discovering a panzerschrek team. Miller ducks back under cover before the enemy can react.
Turn 8:
Sgt Lyons leaves one man behind to search for bundles and finds SMG ammo.
Cpt Rae searches northwest corner but finds nothing
SSG Rockstar searches for bundles and finds some BAR ammo.
Pvt Nelson, a lost trooper from the 101 appears near building #6. Much to his relief building #6 is empty.
Meanwhile, in the center, PFC Blanchard fires his BAR at building #2, wounding one soldier. The second returns fire with his SMG, causing Blanchard to duck for cover. However, by this time Guidas and Miller have set up the captured
MG 42 and spray the building, killing the last two enemy soldiers. All buildings have now been cleared of enemy.
End Result:
Another easy victory for the paratroopers (and the dice gods who frowned upon the Germans all game). Rockstar hasn’t had much luck with equipment bundles, so if it weren’t for captured weapons, his squad would be in some serious trouble.
Captain Rae and the 101 troopers wander off, and a couple more troops marching to the guns have joined SSG Rockstar.
And a few photos
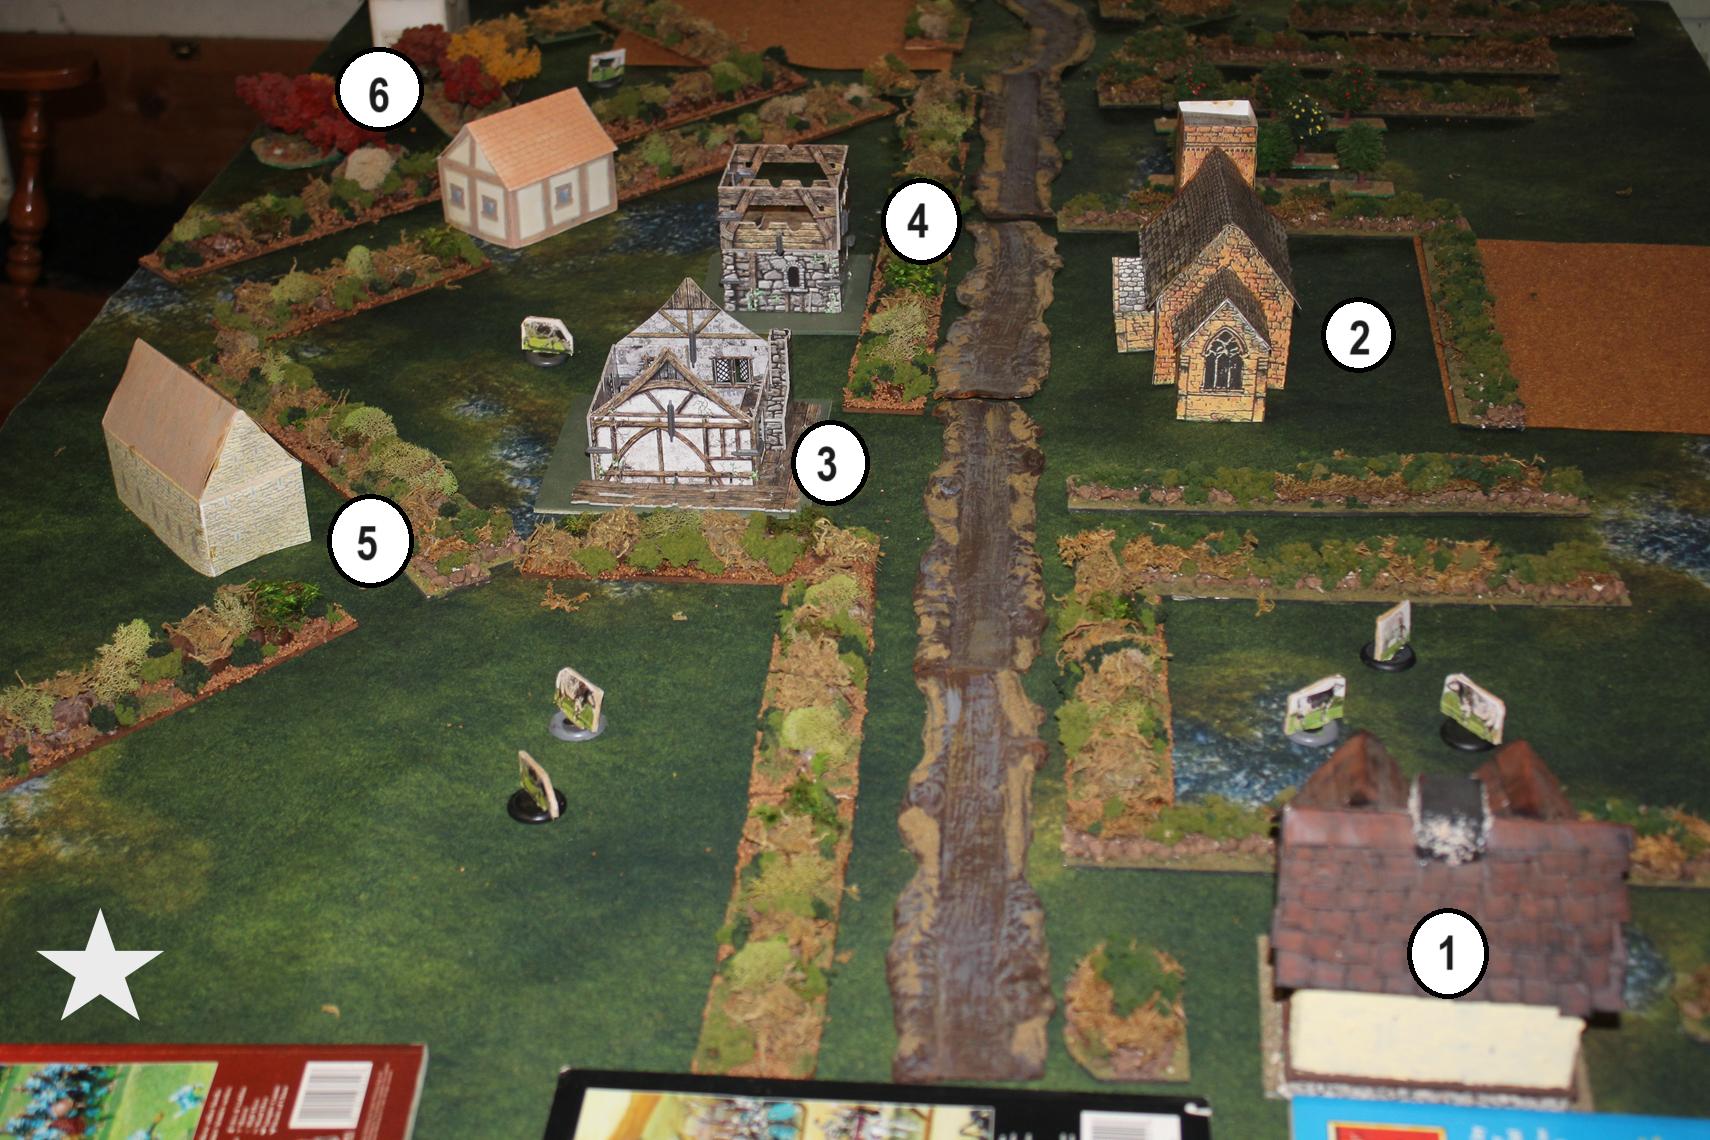
Start-up. The numbers are the building numbers as used in the narrative
SSG Rockstar orders his group to move out

Sgt Lyons and his team (lower right) investigate why there is a Dwarven Alehouse in Normandy
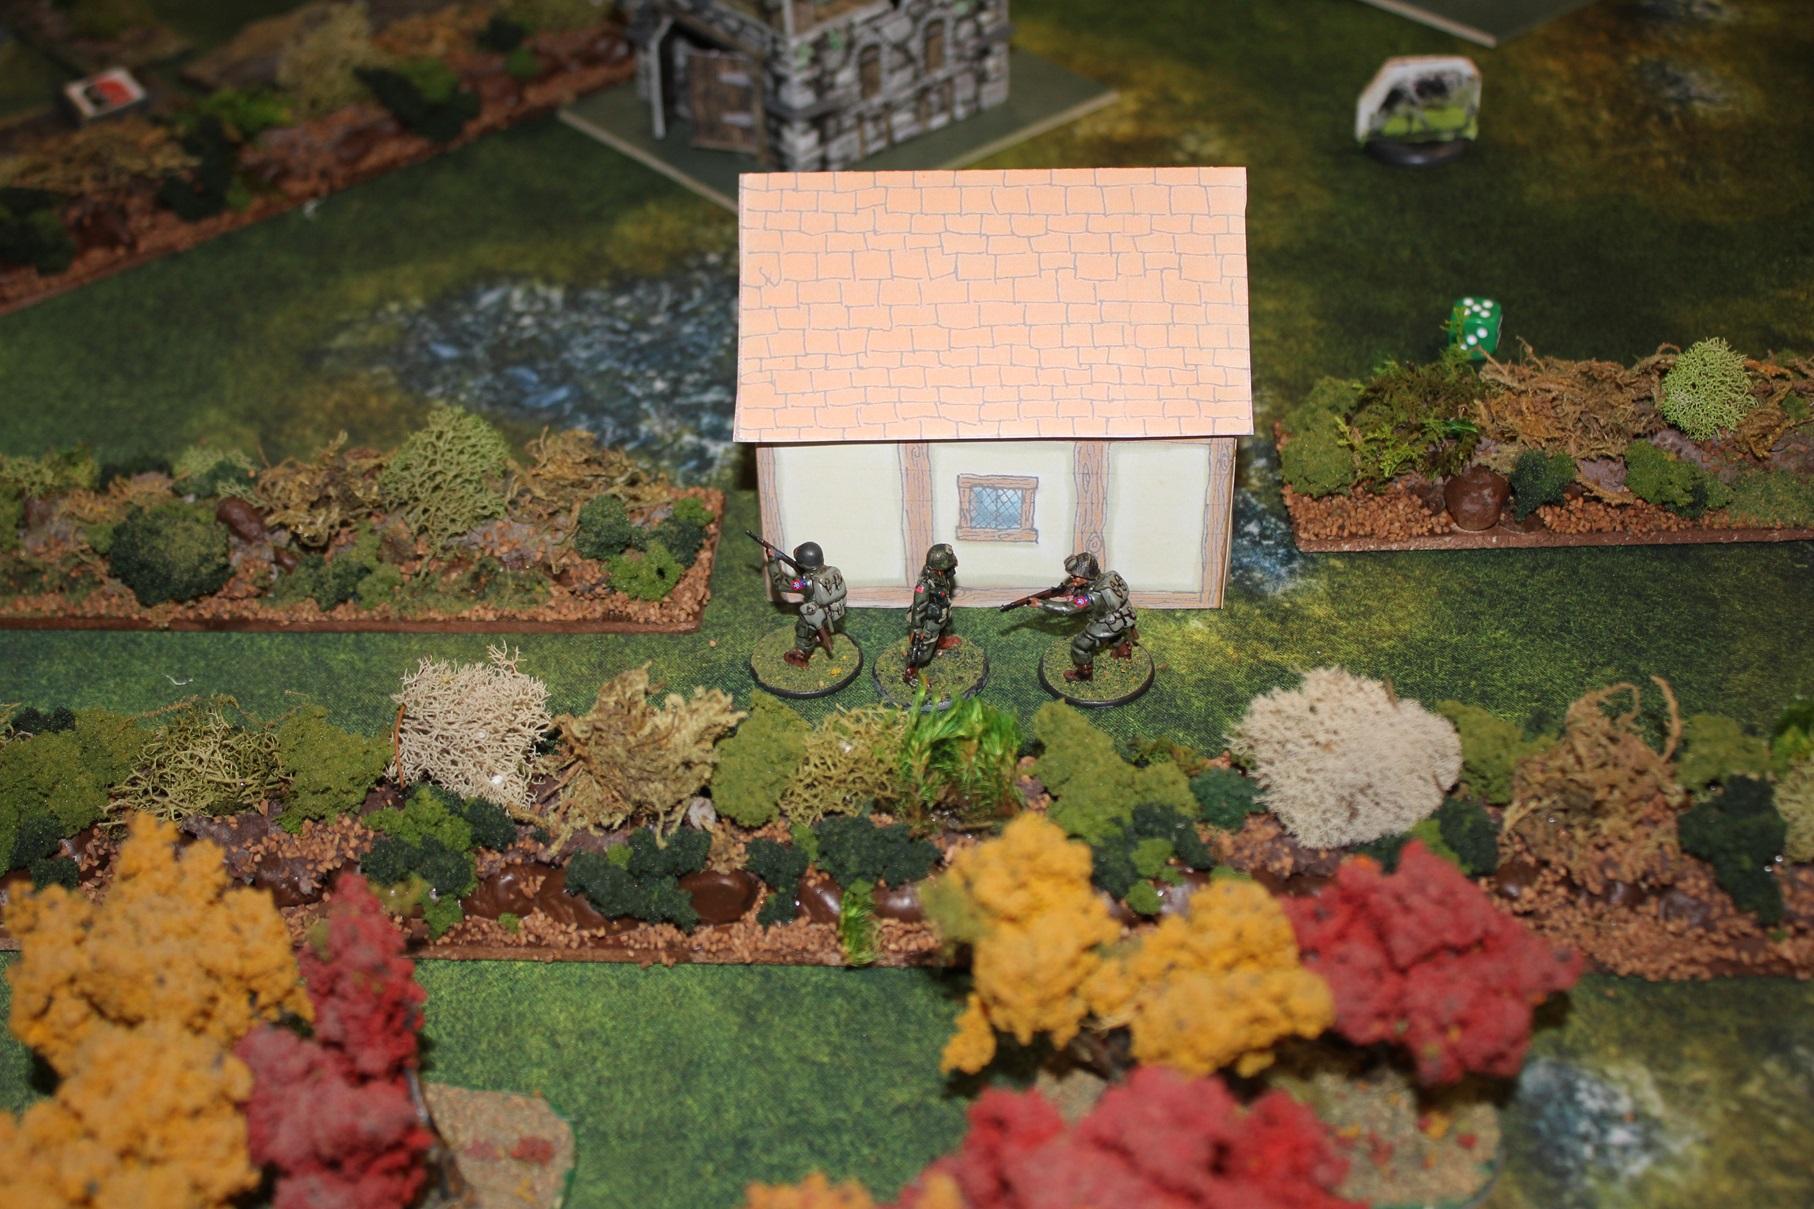
Cpt Rae and two troopers take cover behind a building
Who puts an
AT gun in a building so close to a hedgerow?
This map shows the movement of the various groups
Yellow = Cpt Rae
Red = SSG Rockstar
Blue = PFC Blanchard
White = Sgt Lyons


