Are you sick of turning your walkers over on their sides when they inevitably get blown away during the game? Sure the wreckage provides cover and blocks LOS, but it makes it pretty hard to tell exactly how when the thing has a huge round disc glued to it's feet that's almost the size of the front of a Rhino.

Plus there's the fun of breaking off aerials, smoke stacks, and other cool greeblies that have been lovingly added to the model only to be broken off when tipped over. So I decided to make some cheap and easy dead walker markers and here's how I did it.
Materials needed:
Walker Base (or something to make into a base)
Styrofoam
Aluminum Foil
Elmer's Glue (or any glue that won't melt Styrofoam)
Basic tools (Knife, Teeth, Heavy rock, etc.)
The first step is choosing the subject. The model can be finished but it makes it easier if the pieces haven't been put together yet. I'm sure you've all got un-built duplicates of all of your walkers sitting around just in case a situation like this comes up so we'll just move on.

Making the base is easy if you've got extra walker bases handy. The IG weapon teams use these bases so if you base them separately you'll have a few extras of these lying around. If not, a 2.5 or 2.75 inch hole saw bit in a drill and some thin pressboard will do the trick. Cardboard and a compass will even work like a champ, but be careful when you apply the glue later on because an excess amount may warp the cardboard.
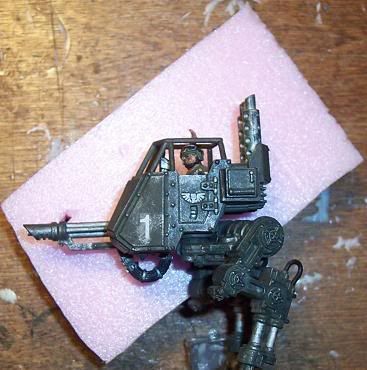
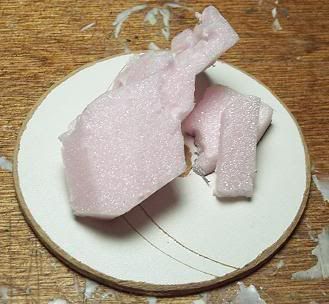
The next step is to begin cutting the basic shape of the model out of the Styrofoam. I chose the pink insulation foam because it's the easiest for me to work with, but any foam would probably work. I also used an X-acto knife to cut the shape but a foam cutter or any other sharp tool would probably work. Remember the thing doesn't really have to be exact since the end result will be a burned out hulk anyways.
After the basic shape is formed the foam needs to be refined. For this example I gouged out the area for the cockpit and shaped the rear engine area to roughly mimic the IG Sentinel body.
This is a good time to arrange the piece on the base without gluing it to figure out what the end result will look like and get the dimensions of how big the wreckage will be when completed. More foam can be cut out to represent the pieces that come off of the main body as well. I usually keep it pretty simple, but more pieces can be added depending on how much wreckage is to be represented.
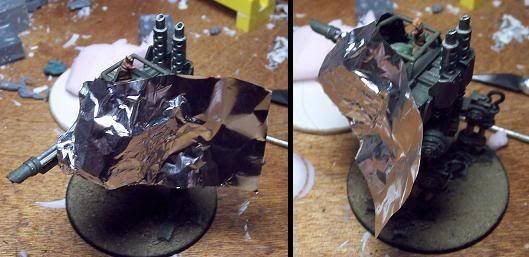
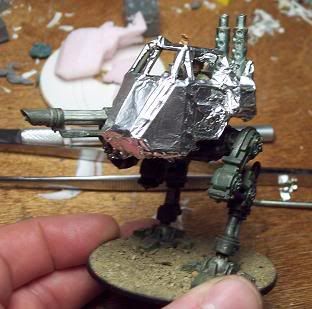
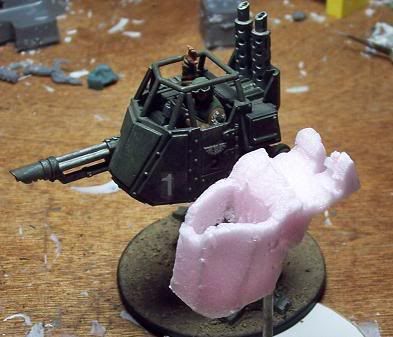
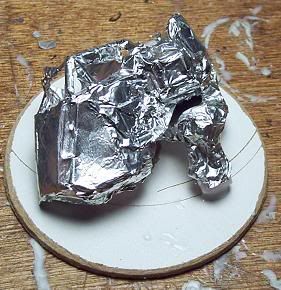
This is the fun part. Remember when I said it was easier if you had the parts in an un-built state? This is why that would be easier. Still, it’s not too bad. Just wrap the tinfoil around the model using your fingers or blunt objects to form it around the details. It helps if you have stubby little girl fingers like mine (pictured above) for this. Rubbing the foil will bring out more detail, but super detail isn’t really what we’re looking for since the thing is really just a piece of burned out junk anyways. Some of the foil may have to trimmed away if it starts bunching up too much around the shape.
When the foil looks good carefully peel it away from the model with a toothpick, fingernail, or knife. Don’t worry about it losing its shape slightly since we will be using the foam to form it to. Using a glue that won’t eat foam (I use Elmer’s white glue) attach the foil to the foam. Don’t worry too much if the foam doesn’t exactly match the original. It may seem like the foil is like a suit that’s too big or too small, but these irregularities will just look like dents and melted metal in the end.
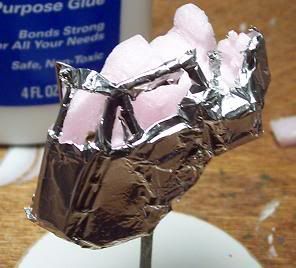
Repeat this process for any smaller parts that will be part of the end result as well. The main body may even need more foil to cover it too. For my Sentinel I needed another piece of foil for the inside of the cockpit. Depending on how easy it is to operate spray cans in your work place it may not be feasible. I use a black spray that I know will melt the foam I’m using to accentuate the effect of the burned and melted wreckage, but brushing on any paint will work too. Just remember that the exposed foam may not look as cool if it isn’t melted, so more foil might be in order.
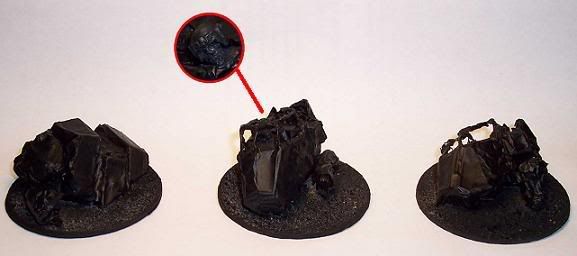
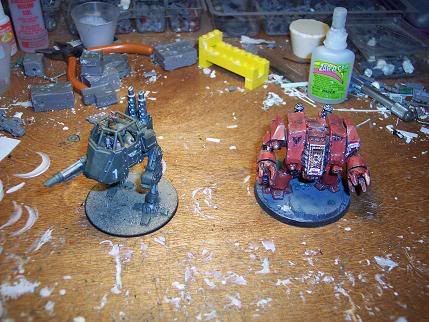
The finished result after basing and painting. I threw in a marine dreadnought as well since they like to get cut in half by Avatars and wraithlords just about as much as sentinels like to get blown up by any ranged weapon that fires at them. I even added a dead pilot to one of them. Most experienced sentinel pilots know to just bail out sometime before turn 2 or 3, but some of them didn’t get the memo.
Hopefully, someone will find this useful. The point is that this can be done pretty quickly and very cheaply by someone who doesn’t need to be completely sober. The same can be done with landpeeders or other small skimmers too. Even regular vehicle wrecks can be represented in this way. I don’t usually have that kind of room in my transport for my regular tanks and wreckage tanks but I’m sure there are crazies out there who are up to the challenge.