Switch Theme:

Scratch bulding a bfg fleet, part 1- escorts  [RSS] Share on facebook Share on Twitter Submit to Reddit
»
Author Message
Advert


Forum adverts like this one are shown to any user who is not logged in. Join us by filling out a tiny 3 field form and you will get your own, free, dakka user account which gives a good range of benefits to you:
  • No adverts like this in the forums anymore.
  • Times and dates in your local timezone.
  • Full tracking of what you have read so you can skip to your first unread post, easily see what has changed since you last logged in, and easily see what is new at a glance.
  • Email notifications for threads you want to watch closely.
  • Being a part of the oldest wargaming community on the net.
If you are already a member then feel free to login now.


Made in au
Regular Dakkanaut


Australia

This whole idea hit my head when I was reading Mr. Bombadidaloo thread on his scratch built inquisition fleet. Being one who always liked to take a good idea to the next step, I thought of how this excellent idea could be made better, that answer came around in 2 steps, the first being the relative difficulty of aquiring bfg models at a resonable price and the lack of variation in the models. The only real option was to goto BWB and check out their range for inspiration, relising that there were a lot of bits that were cheap (under $1.76) and most of them were quite usefull in the construction of a said bfg ship.

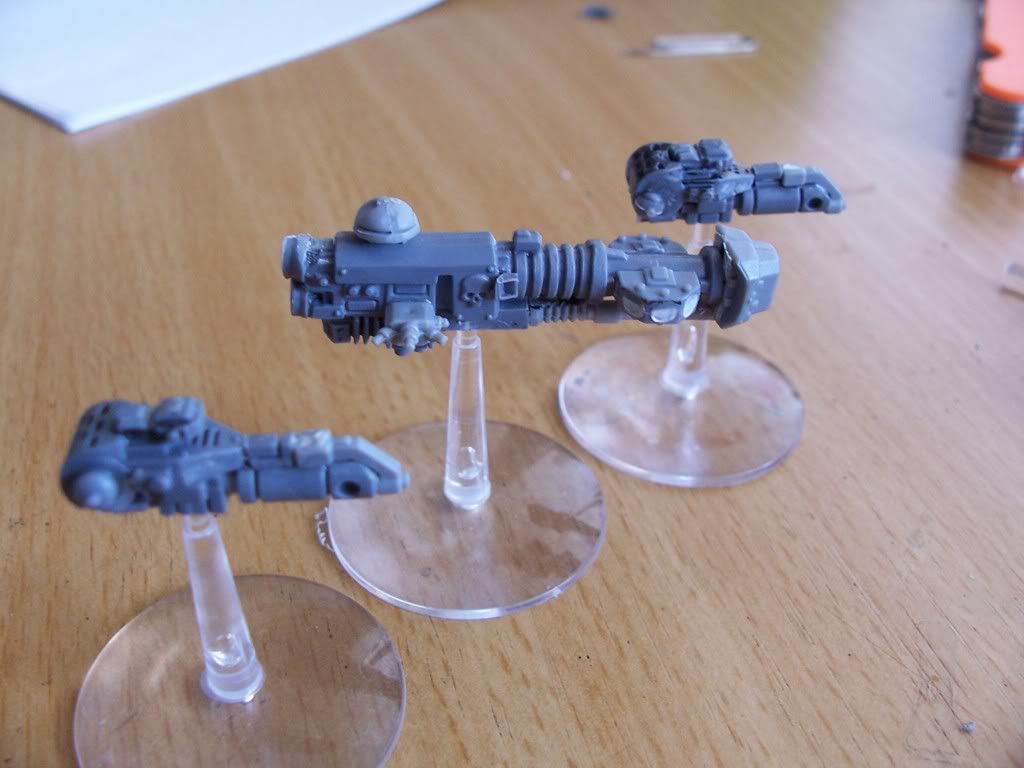
So far the majority of bits that have arrived were more of a test sample so no big ships for now. This tutorial is aimed at giving people ideas as to how the can go about creating thier own unique fleets, and this tutorial will show what I used to make a firestorm and a cobra:

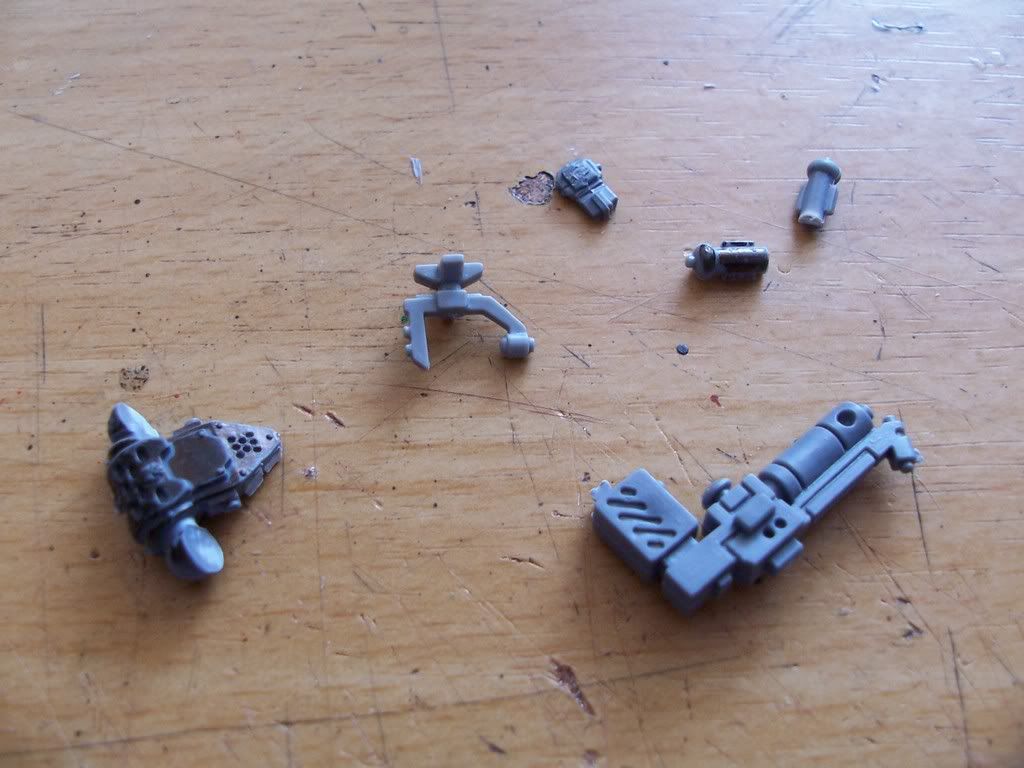
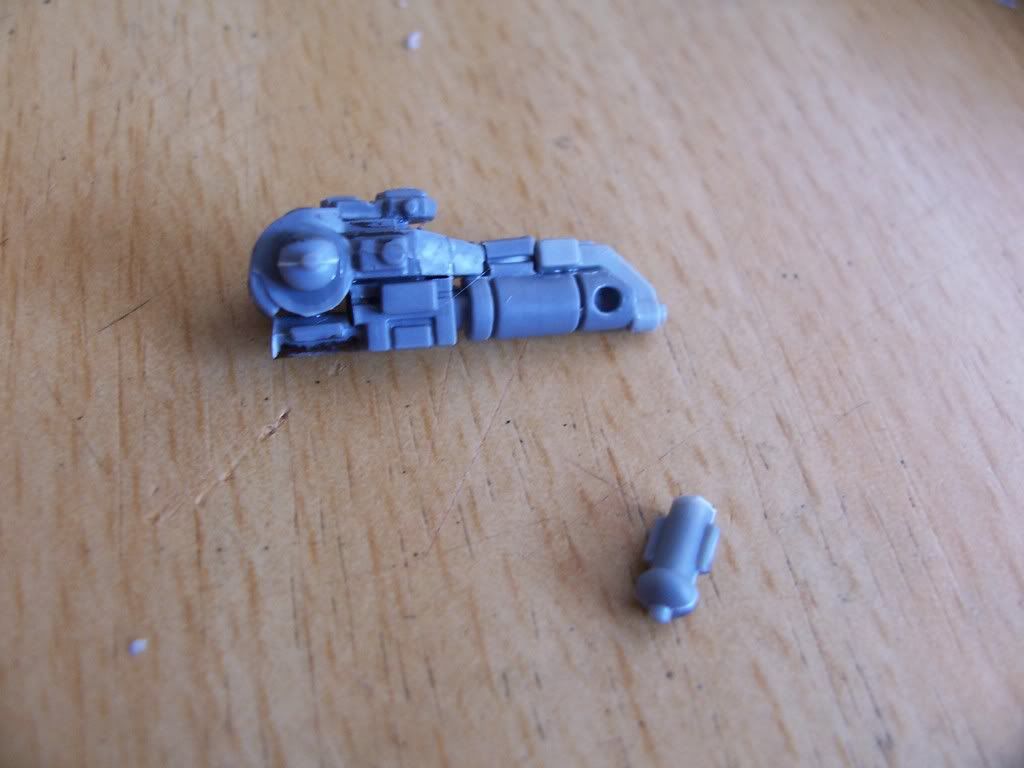
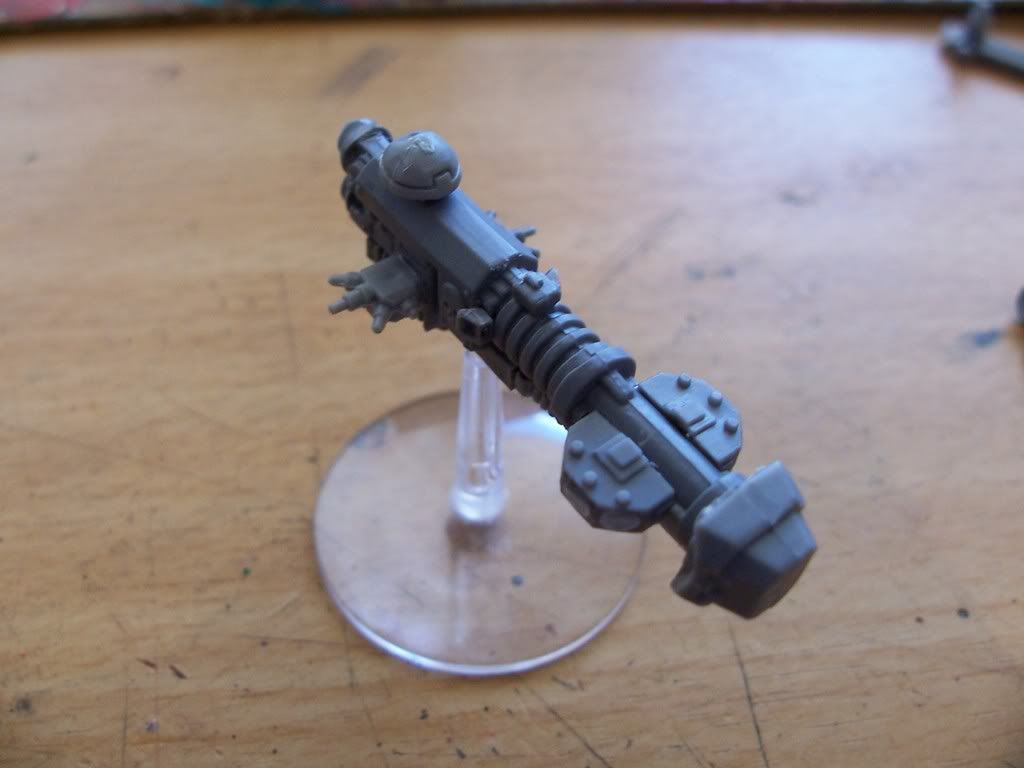
All these bits are quite straight forward, and for anyone who cant recognise it that round thing, its a stealth suit drone controller, all the parts scribbled in permanent marker will eventually get cut off.

Step one: front bulkhead, quite simple, cut the 2 dreadnaught toes off and glue together, like so:

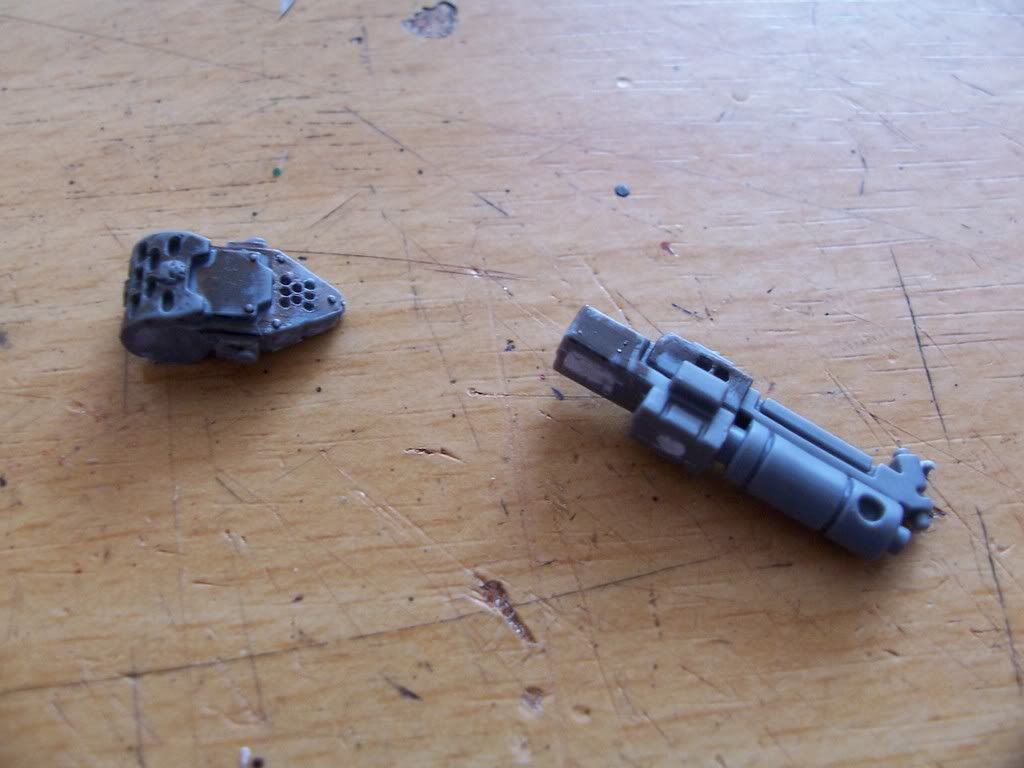
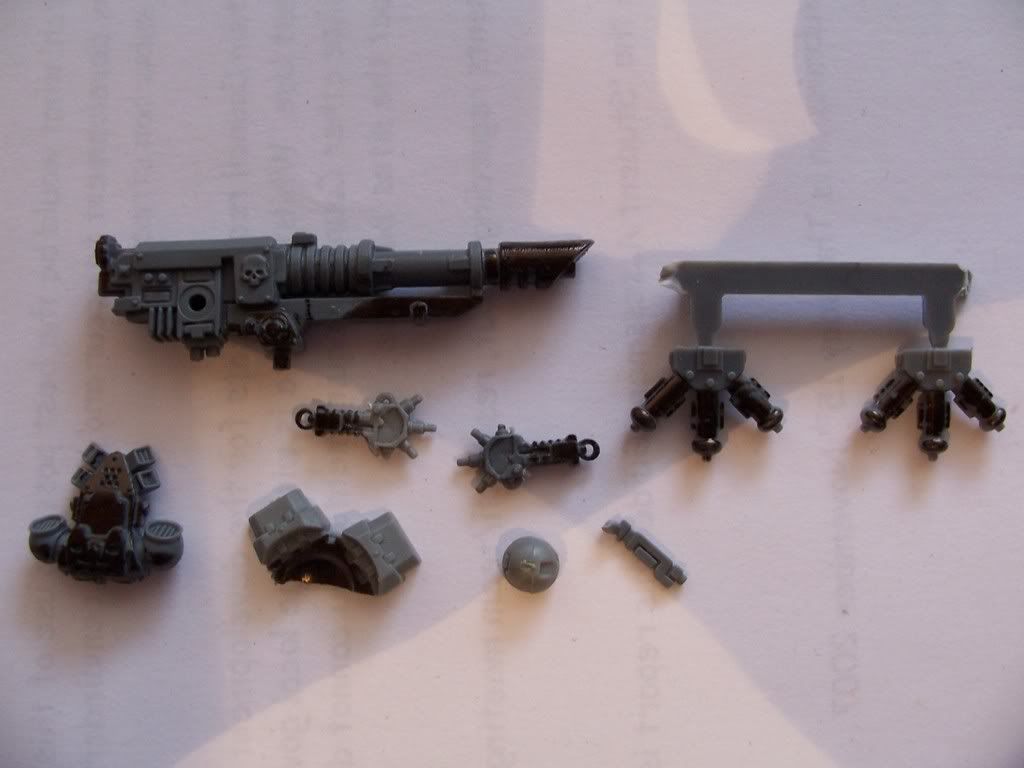
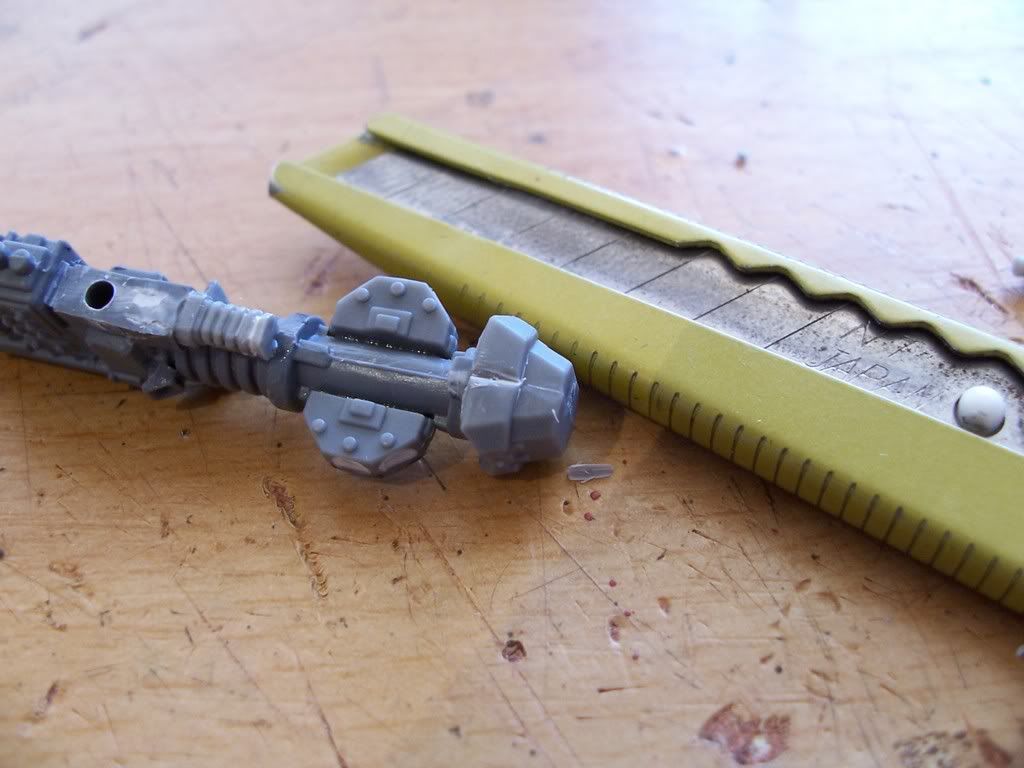
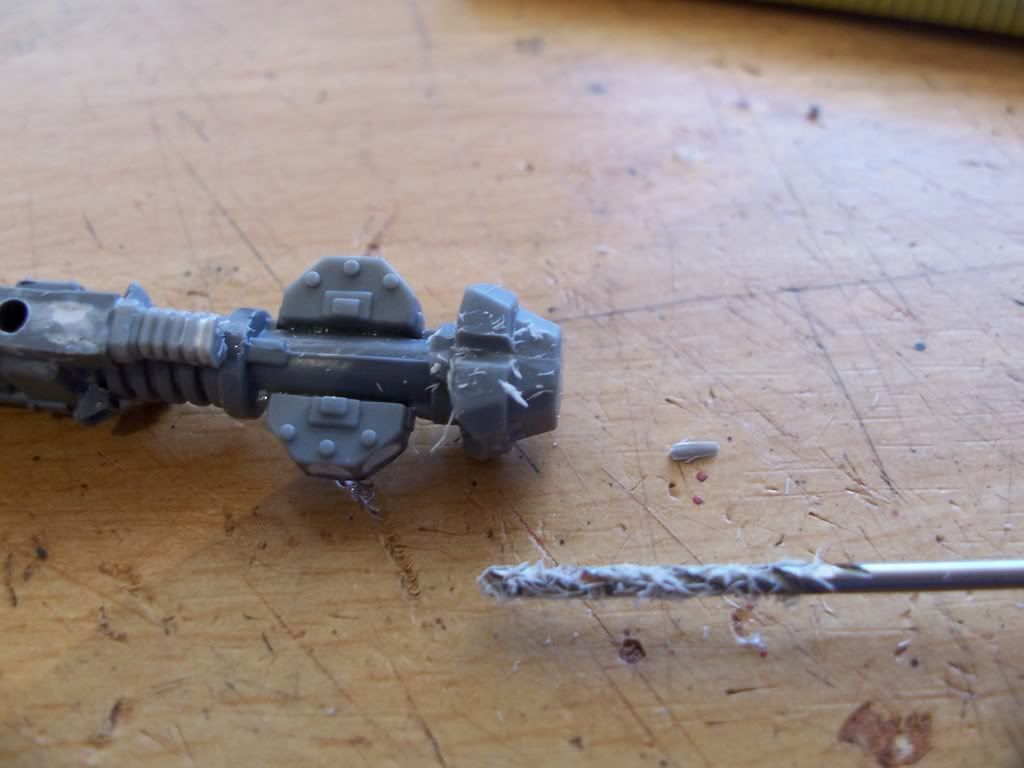
Step two: preparing the lascannon, lots of cutting, try to keep the cut off bits in as best shape as possible, as they might come in handy for future shipbuilding (see cobra), it should look like this when your done:

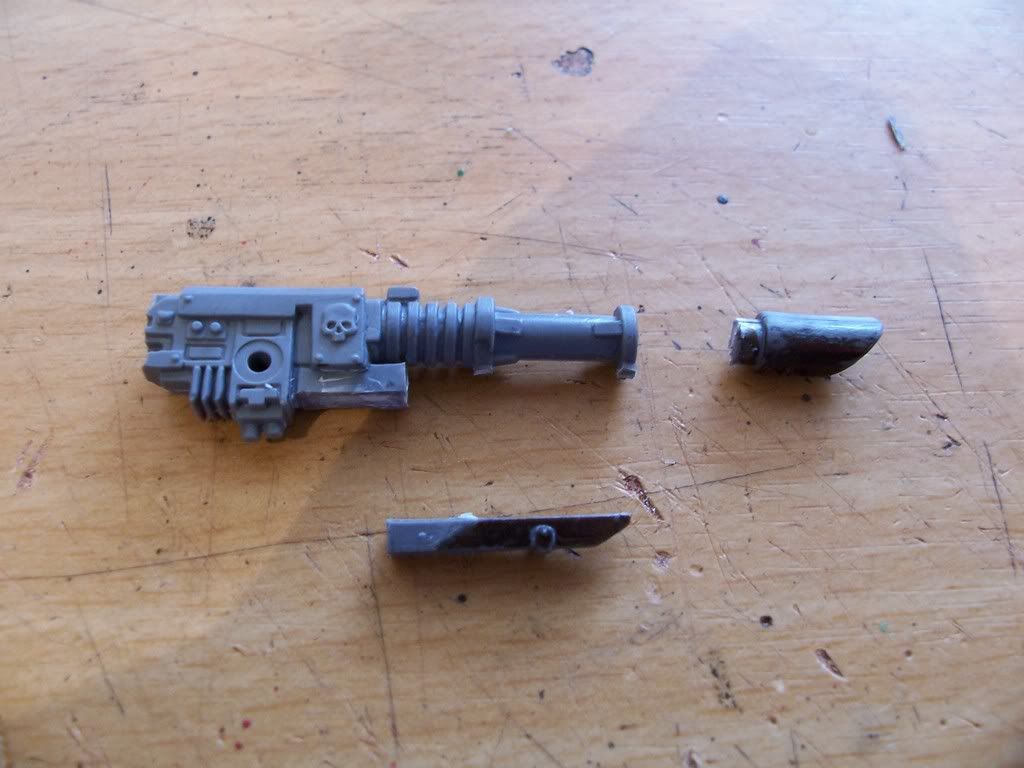
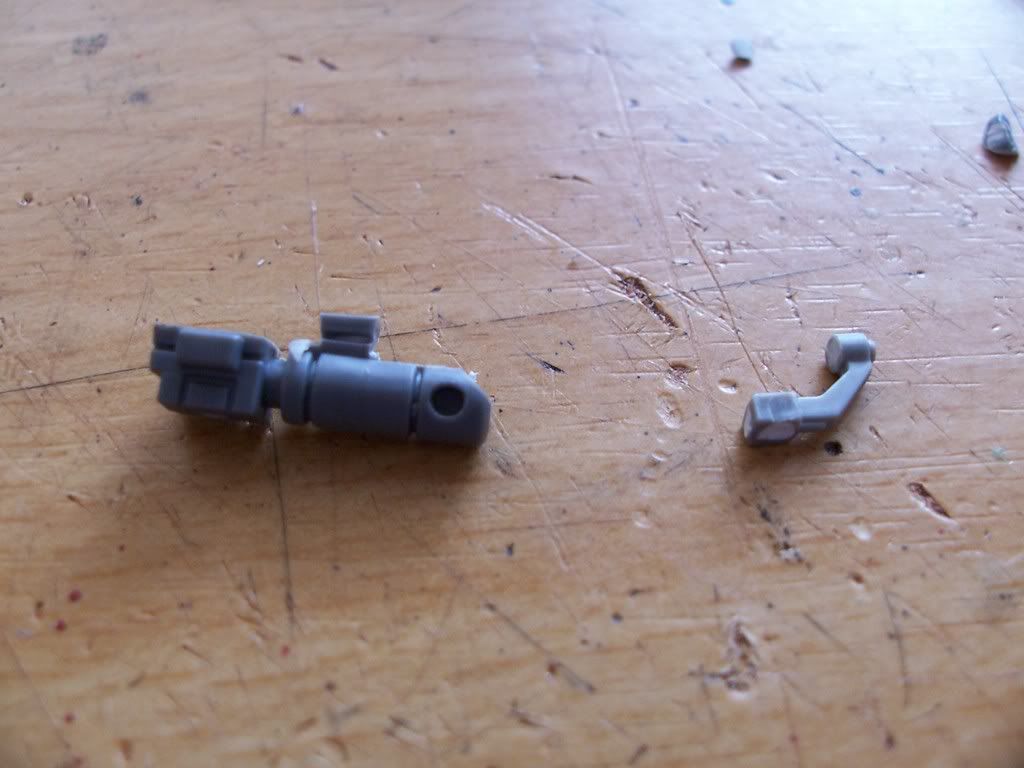
Note: Theres a little part of the rear of the lascannon that was cut off too, that will become the bridge of the cobra, so dont throw it away!

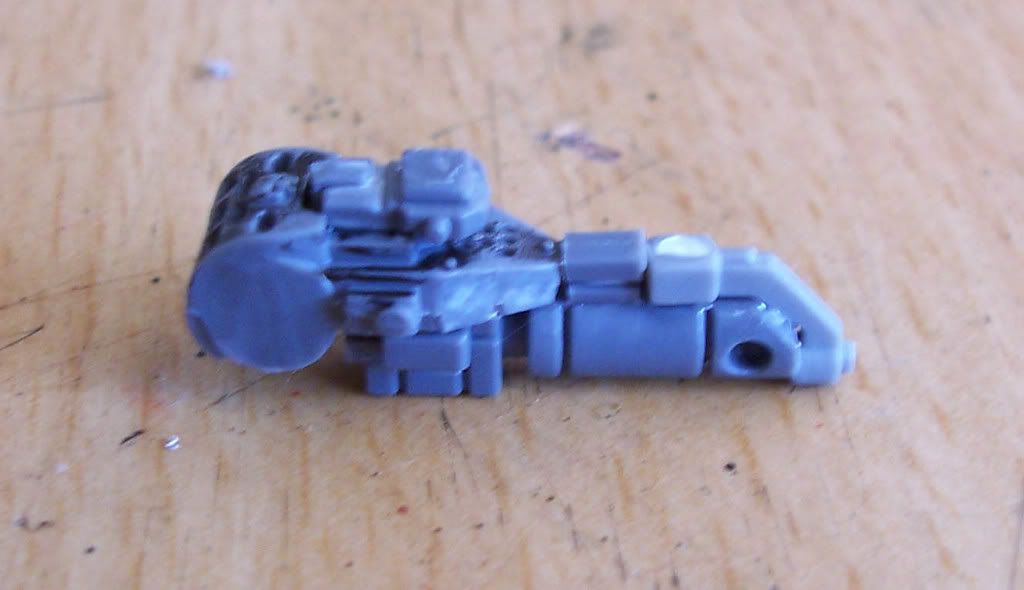
Iv cut a bit more of the stock (that is what its called, yea?) off than what I originally wanted, and thats because i wished to get a bit more detail onto the model. I used the handle of a SM auspex to represent venting where the lance would normally attach:

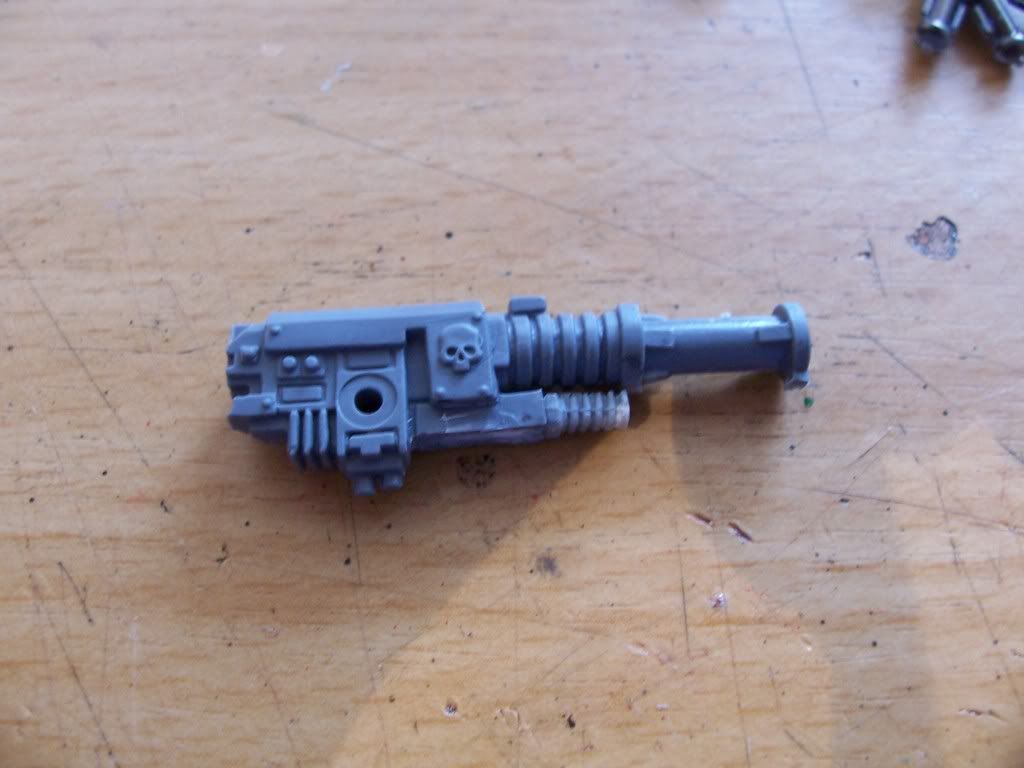
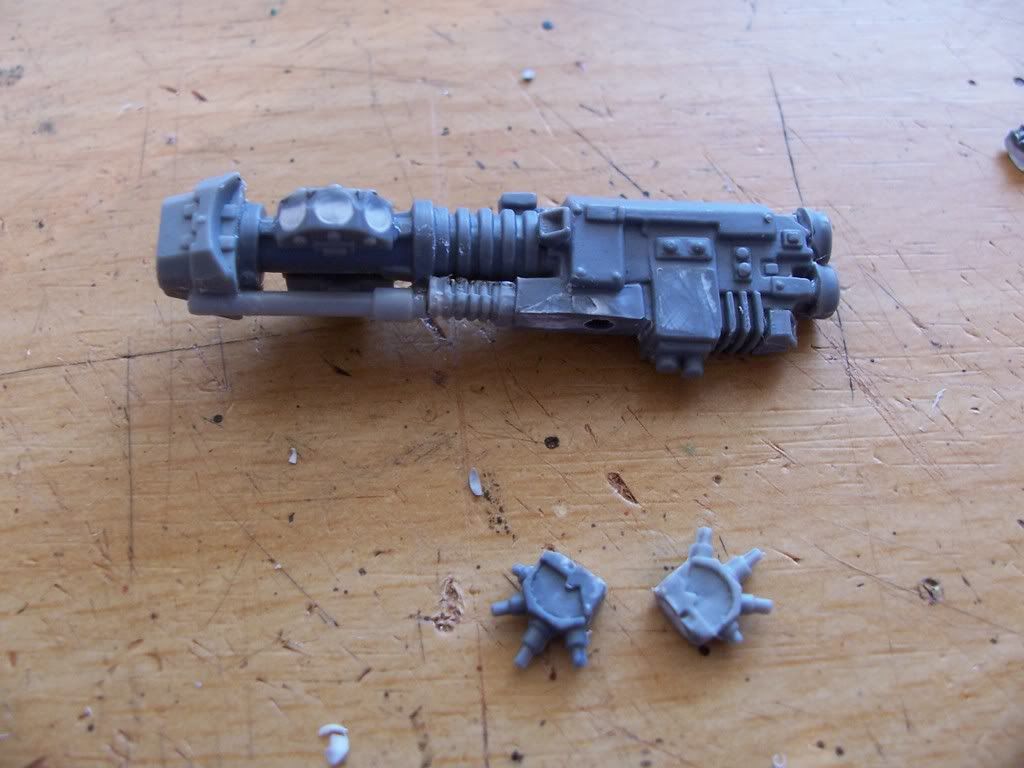
Next: Weapon batteries, made out of 2 IG smoke lauchers, with the pointy bits chopped off:

Youll also need to cut a bit off thoes barrel support things so the wepon batteries can actually fit onto the barrel. Might as well glue the bulkhead on now, this is what it should look like:

Step... Whatever: Vents, all of which came off a single SM backpack, the larger ones glued to the back to represent the main engine exhausts and the 4 smaller ones glued wherever you feel there needs to be details: (Dont actually have a good enough pic to demonstrate what the hell Im talking about, Ill edit one in when i get more bits)

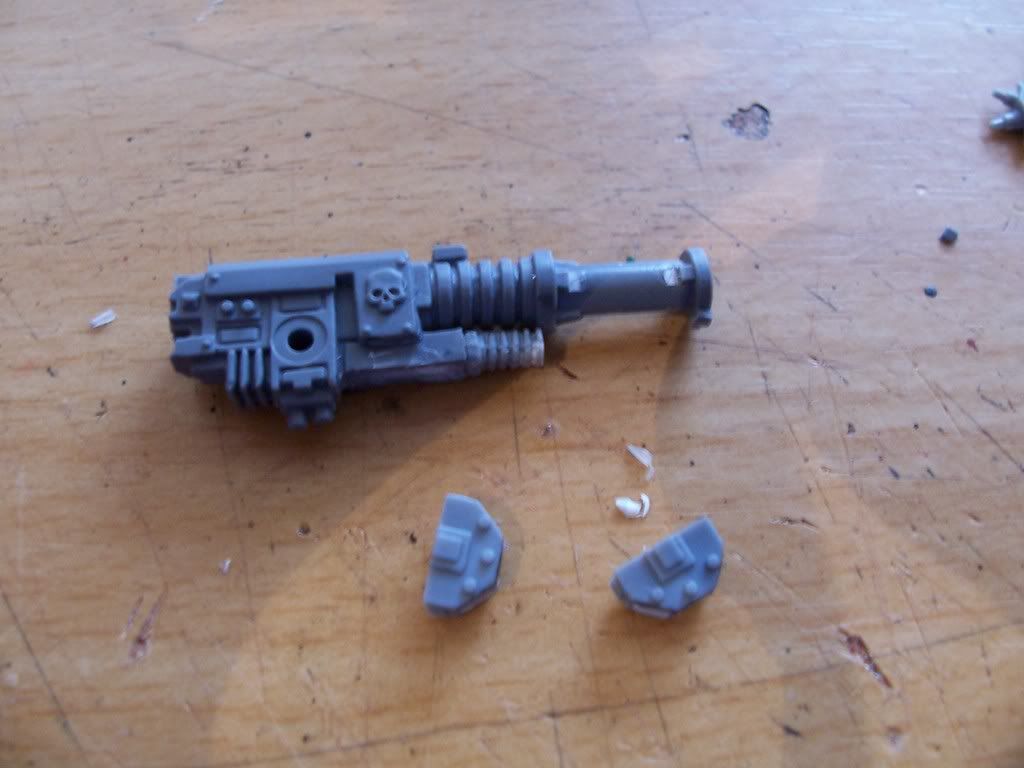
Step lance: The lance on this ship is made from a Tau crisis suit burstcannon barrel, which was carfully cut off:

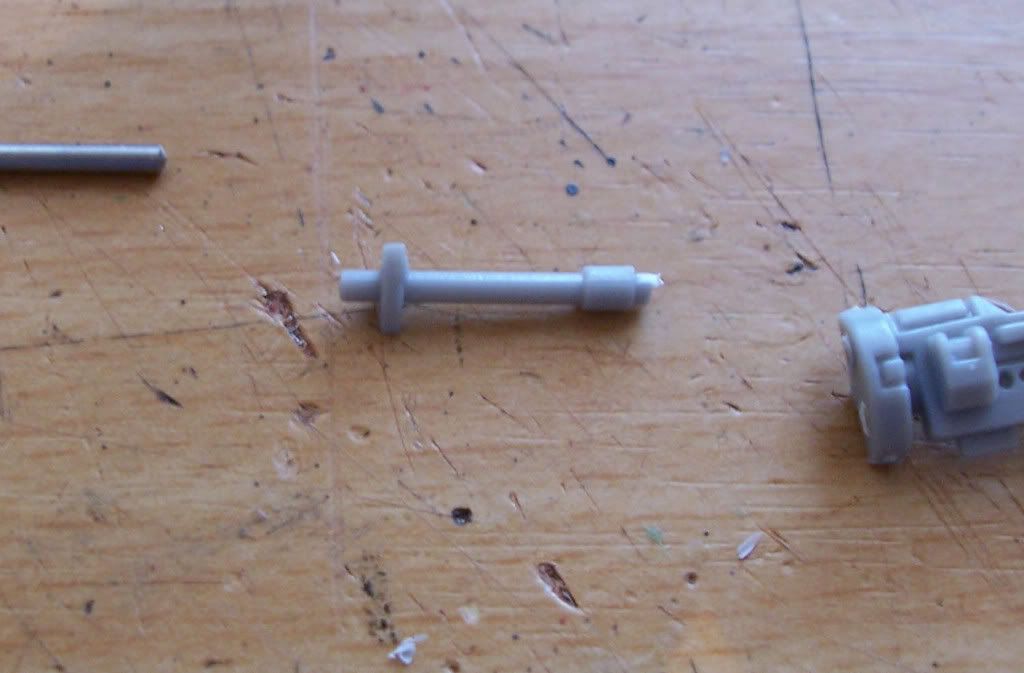
 And had that front thing shaved off.

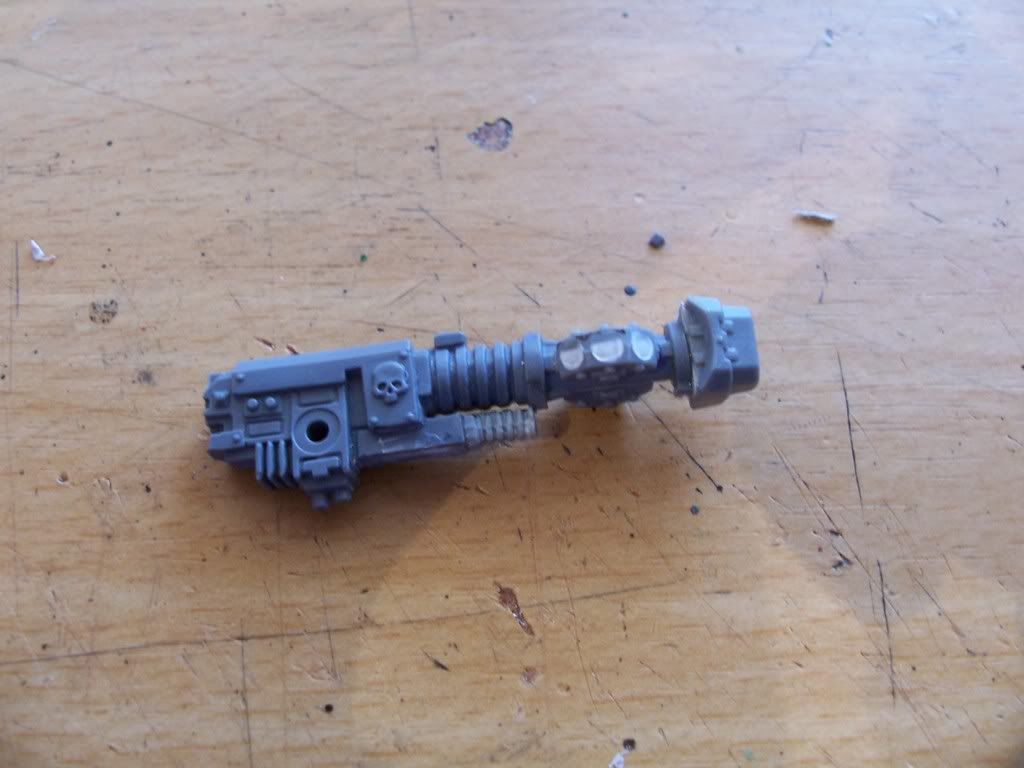
Next: Preparing the ship for the lance. Since the only real place for it to go is on the underside (I think you would have guessed that by now) it cant really be glued in and forgotten about, as the front bulkhead would make it point downwards, quite a lot too. So this is what need to be done to cure that syptom:

First: Cut a small 'V' shaped groove on the bulkhead, then:

Using your pin vice and a sutably large drill bit, place it in the 'V' groove and moving in a up-down (or in-out, whichever you are more proficient at ) while twisting the pin vice, your results should be similar to the above pic. Then glue the lance in place.

Next: The sonsor things, to cover up the hole in the side. Before glueing them on, youll need to shave off the details on the other side of the ship, as follows, and then glue the sensory part of the auspex on:

Now you just have to glue the bridge in place (stealth suit dron controller), and there you have it, a finished Flirestorm:

Stay tuned for the next post, the construction of a cobra.......


Nothing ventured, nothing gained

76% 
   
Made in au
Regular Dakkanaut


Australia

The cobra. If your quick about this conversion you can pull it off in less than 10mins, so if you have the parts, its a very good way of bulking out a fleet. To the topic, the parts:

The backpack, lascannon offcut and the smake laucher tubes are from the last conversion, sure can do a lot with a little.

Step one: first cuts. Maily cutting of the extremities from the flamer and backpack:

Next: More cutting. Reducing the bulk of the flamer and preping the front support member:

Step 2: gluing it together. Attach the above with the backpack and the lascannon offcut like so:

Finishing touches: Already! Cut the bulgy bit off the SL tubes and glue them to where the vents attached to the SM backpack, and attach one of the tubes to the underside to act as an engine exhaust, like so:

Now all that is needed is to gapfill and trim a few places but in the whole it done!

Completed work so far:


Nothing ventured, nothing gained

76% 
   
Made in gb
Longtime Dakkanaut


UK

wow, that really is incredible, though i think adding some more aerial type things (very very thin ones) to represent the sensors might help break up the profile of the model and help hide some more of the bits
Not quite sure how you'd make 'em though
   
Made in my
Dangerous Skeleton Captain


Very creative and excellent use of the bits! You might want to have a look at clearing the mold-lines off the various bits and pieces though, as well as sanding down the cut areas (ie the auspex bits) as it looks fairly rough at the moment.

Z4Miniatures - The Terran Diplomatic Corps

http://z4miniatures.blogspot.com 
   
Made in us
Regular Dakkanaut


Alright man, awesome work here! Love the ideas and where you've gone with the Firestorm escort!

The Cobra is certainly looking interesting, though I think it needs some more stuff, something up front perhaps.

I absolutely love what you've done with the auspexes, they look very awesome like that, I wish I had thought of that before I went and spray-painted my fleet

Anywho, keep up the great work! I hope to contribute a tutorial of my own eventually (probably sometime this month) if I'm able to motivate my ass enough

And God said unto Abraham, "Take this mighty bolter, my son, and smite thy enemies from afar. Fear not, Emperor protects..er, I mean, well, youknowwhatImean." 
   
Made in lk
Dakka Veteran


Sri Lanka

It's quite telling that hobbyists can do better with some high quality plastic bits, that most ship manufacturers can. I can't get enough of these BFG scratch builds.

Now all I need are dreadnought feet...


Made in au
Regular Dakkanaut


Australia

@ Bignutter: Hmmmm, I might as well go around trying to add some aerials to the model, it wont be hard - just like pinning but without the secod part.

@ZandrisIV: yea, I was in a bit of a rush 'cos I only had about 45mins on morning to do the work. Hopefully you wont see any of that in the next builds.

@Mr. Bombadidaloo: Im kinda out of ideas on what I can actually put onto the model, as my original idea for it was to make use of ventless backpacks. I think we'll just have to see what offcuts come off the other ships I have in mind


Nothing ventured, nothing gained

76% 
   
Made in au
Regular Dakkanaut


Australia

Now all I need are dreadnought feet...

you can always varient it:

Nothing ventured, nothing gained

76% 
   
Made in us
Regular Dakkanaut


That looks like a space marine foot!

...now all you gotta do is use a space marine arse for the rear exhaust j/k

I think the thing that keeps getting to me about the Cobra is the rear end just doesn't look enough like what you'd expect for thrusters, though it's probably just me.

And God said unto Abraham, "Take this mighty bolter, my son, and smite thy enemies from afar. Fear not, Emperor protects..er, I mean, well, youknowwhatImean." 
   
Made in au
Regular Dakkanaut


Australia

That looks like a space marine foot!
You know, I was thinking of using the left missle launcher hand on the font at one point, I might still do that if I have one spare! And thats auctually part of the ig vox caster, a left over from the light cruiser Im building, hopefully ill post it soon.

Nothing ventured, nothing gained

76% 
   
 
Forum Index » Painting & Modeling
Go to: