So I got tired of not having a display base at tourneys... packing up the models after each game, only to pull them out so I can pack them up again.
So I made me a display base.
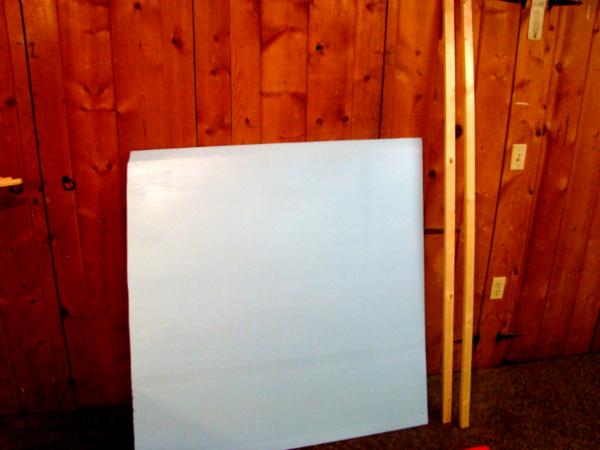
The Mats I used were.
1. 2x 6foot 1 by 2 inch boards
2. 1x sheet of Styrofoam (I got 1/2 inch... but 1 inch would work fine)
3. 1x set of L-Brackets
4. 2x drawer handles
5. 1x sheet of plywood
I got all of these at Lowes, for around $25
SAFTY FIRST… I don’t want any of you Dakka bone-heads suing me for you being idiots and cutting your own arms and legs off….
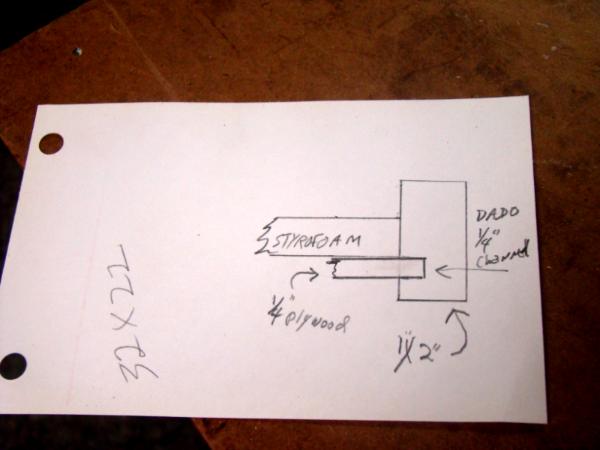
Hear is the Plan
And some of the
raw mats we used

If you can’t run the boards through, then just nail and glue the plywood to the bottom of the boards, this saves a lot of time but the over all look is diminished a bit.
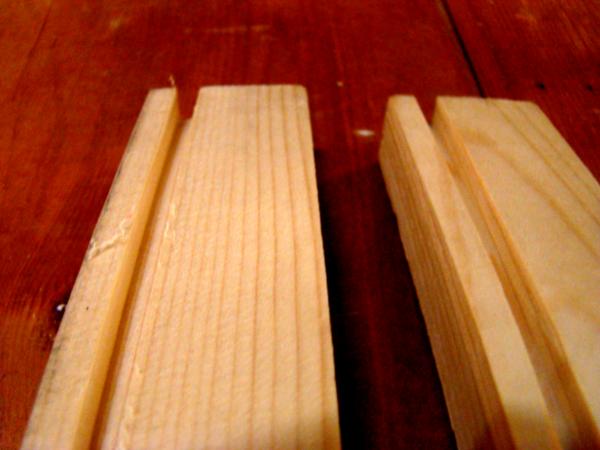
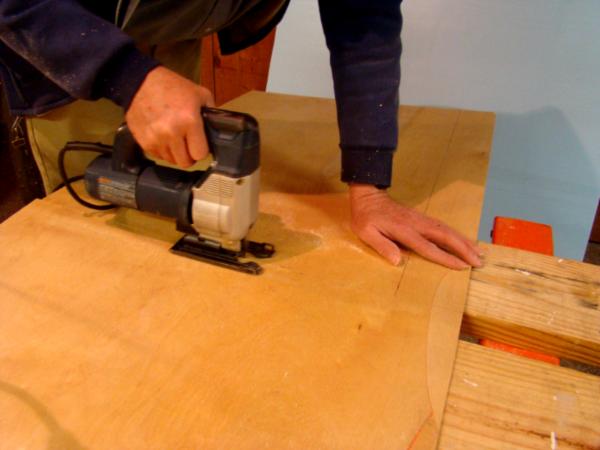
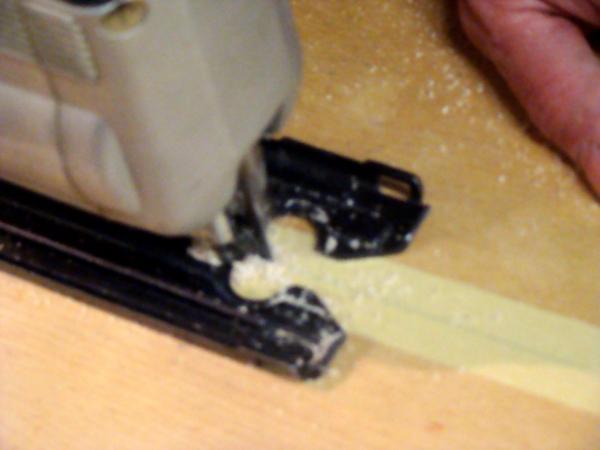
Start of by running a piece of scrap wood though a table saw to test the 1/4 inch grove.
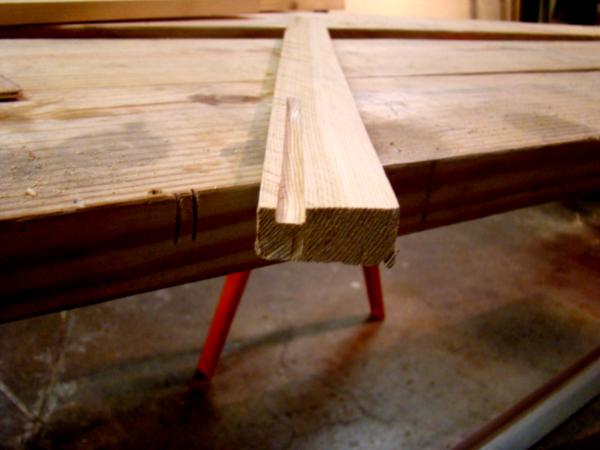
Whoops... you might end up with something like this if you don’t test... good thing this was just a test piece.
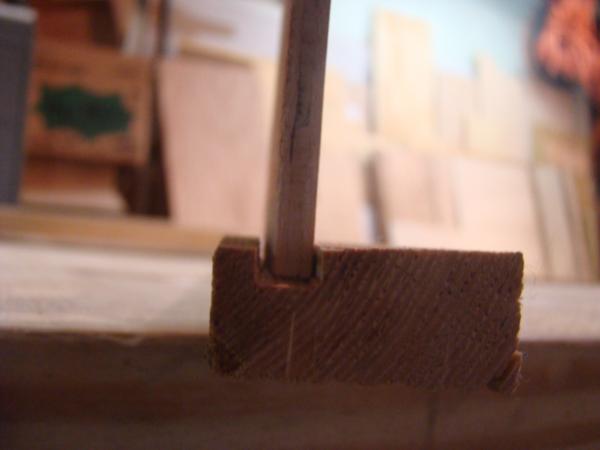
We made a slight adjustment to the blade, and the next test came out fine. Then we ran the frame boards through.
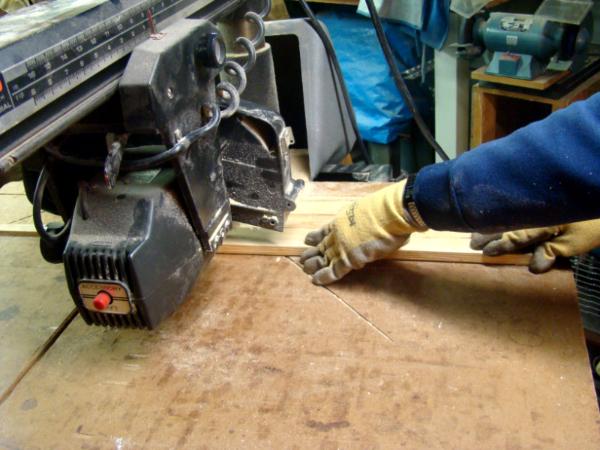
That saw is over 50 years old.
After the grove has been cut, decide what size you want your surface area to be... be careful though, hear are a few things to keep in mind
1. Figure out what you want the INSIDE of the frame to measure at, and remember that when your cutting.
2. If you have a 1/4 inch deep grove all the way around, you will need to add 1/2 inch to the measurement on your baseboard... 1/4 inch on both sides of the board.
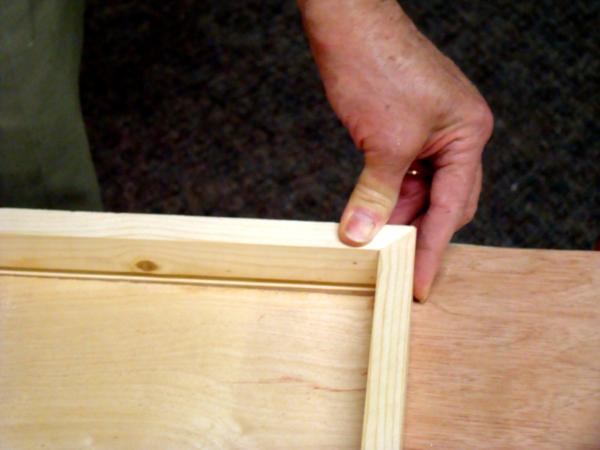
We built this to be 32 inches wide, and 22 inches deep on the INSIDE... so we marked on the wood where the inside joint will be, and cut the angle to match up like a picture frame (90 degrees)
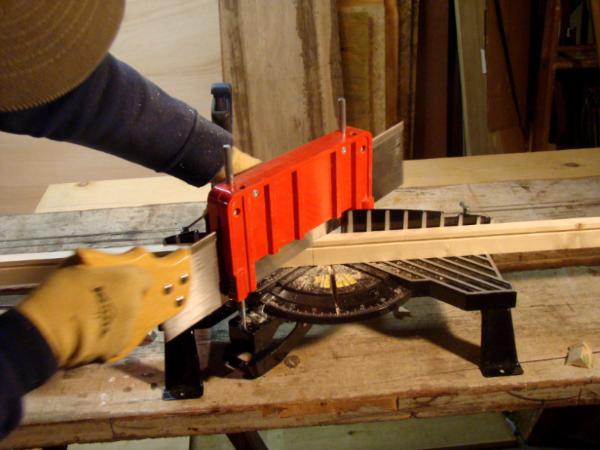
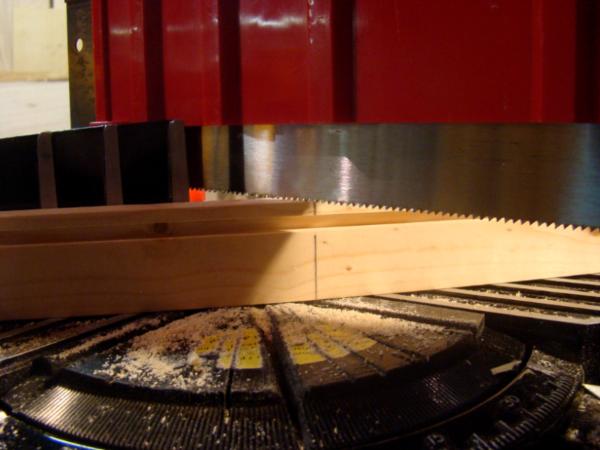
and when your cutting the angles, remember that the saw blade take off as much wood as the blade is wide... so position the edge of the blade on the edge of the outside of the cut...
Hear we are cutting one of the short pieces (the piece we are using is to the right of the saw blade)
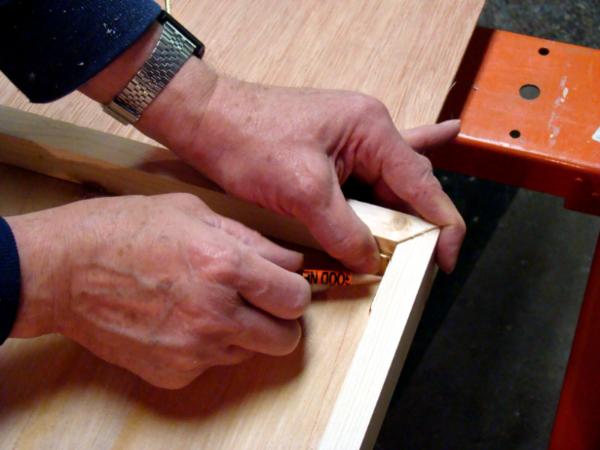
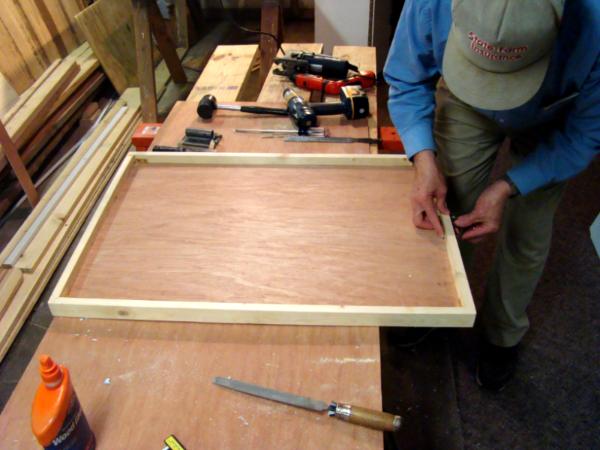
Once all your pieces are cut, test fit the frame together to see if it is squared up.
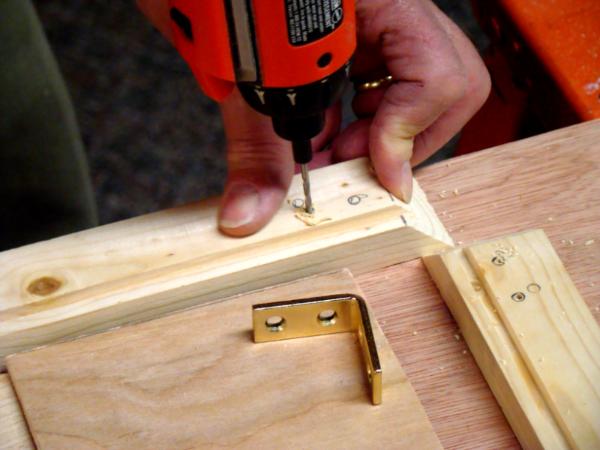
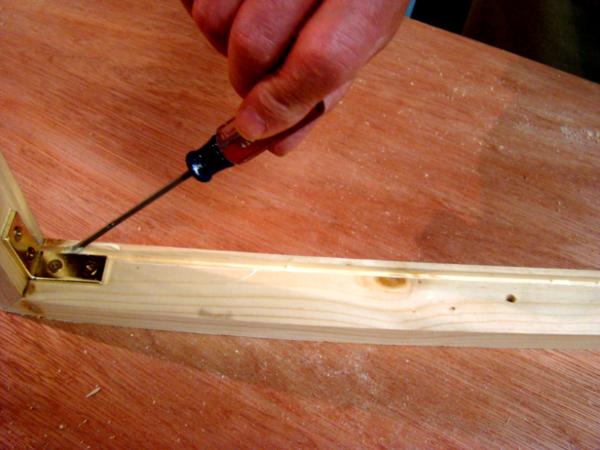
If it fits together, then mark where the holes for the L-Brackets need to be.
Pre drill the holes for the brackets... it makes life easier. Try not to drill all the way through the wood, but if you do then no big worries... that’s what gap filler is for

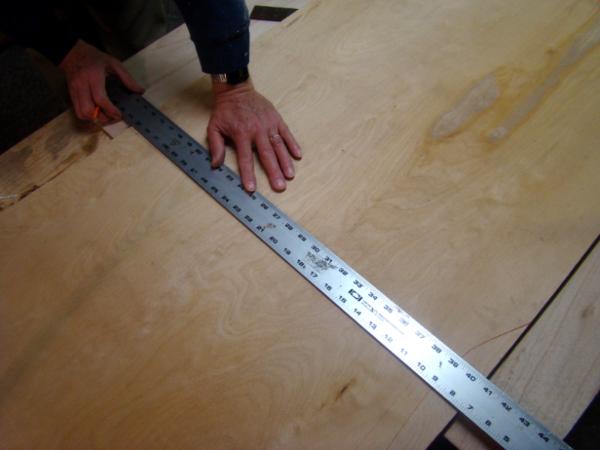
Next we measured, and cut out the base board... remember to add that 1/2 inch for the grove.
If you put plain old masking tape on the cut line, it will help to keep the wood from splintering (so you don’t get them in fingers)
Once everything is all cut out, test fit it once again... nothing is worse then finding out your baseboard is too small or too big when you got glue in the framework.
TEST... FIT...
IT.... AGAIN

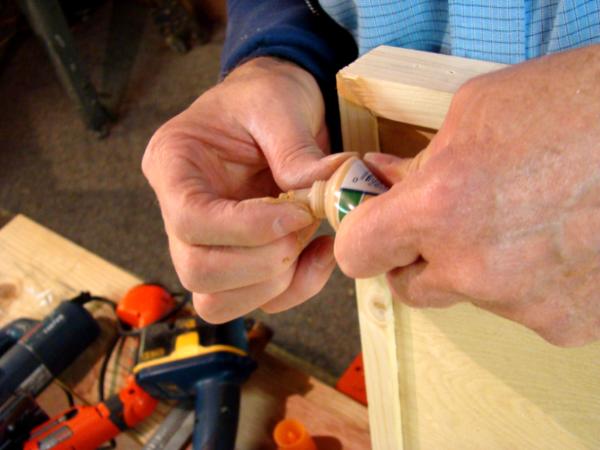
If everything matches up, then use the Brackets to screw together 3 sides to the frame. Once they are tight, run some
Wood Glue through the grove.
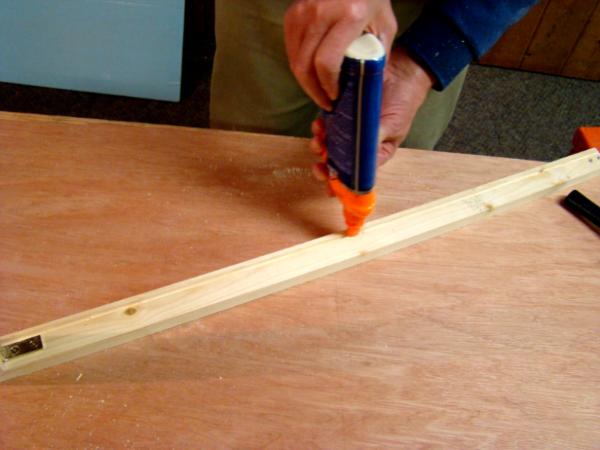
Sometimes the glue will not spread around right... so help it out a bit with a flat blade screwdriver.
After the glue is spread around slide your baseboard into the frame... then glue up the one missing side and put it on and screw the L-Brackets in.
If you have any gaps, now is the time to fill them.
This is what we got for drilling all the way through.
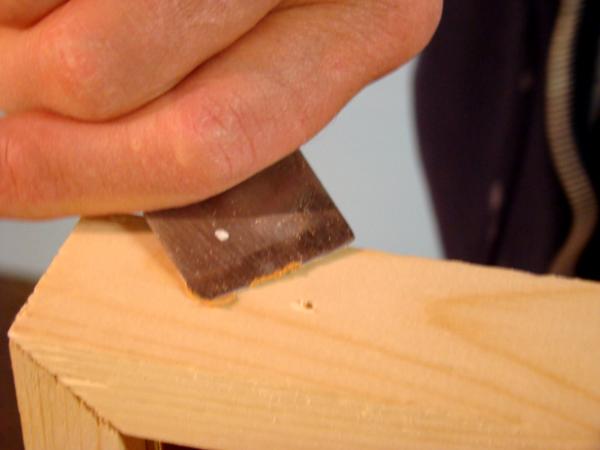
Once the gap filler dries (30 mins or so... we used this time as an excuse to go out for lunch) you can sand the thing down, to prep it for staining.

You CANT skip the sanding step... the stain will not take very well if the wood hasn’t been sanded down.... so after the display base has been sanded down, you can start to stain. Grandfather puts on a plastic glove, and then an old sock on top of that... dips the sock into the stain, and stains away.
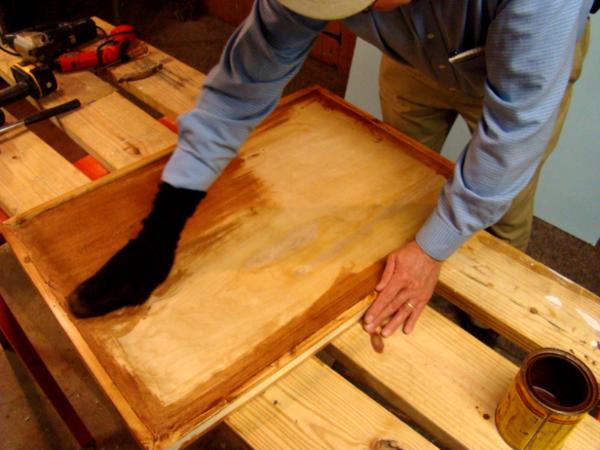
Give the stain at least a few hours to dry. Overnight is best... but once the stain is dry, you can put a coat of varnish on the display and get a good finish on it.
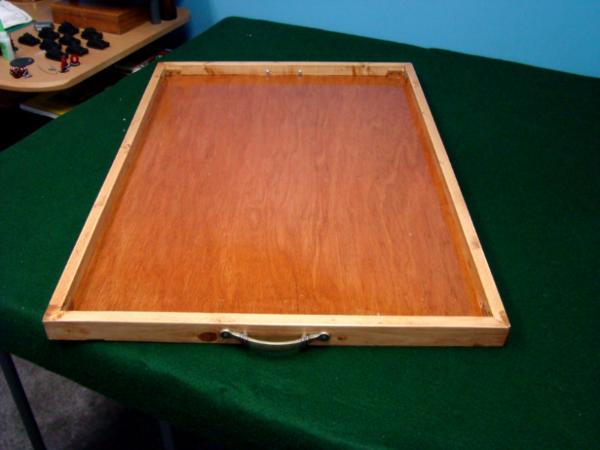
Hear is one of the display boards I have cut out... nothing on it yet, but you get the idear.

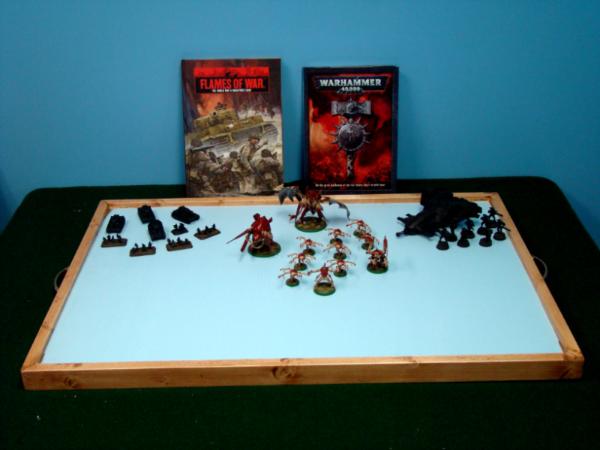
Using 1/2 inch fome I have a little lip around the base to keep stray dice from falling off, and to help that unlucky model that tips over stay on instead of getting in a fight with the floor.
For scale I have put some of my models on the base just to give an idea of what a 32 X 22 inside base would look like.
To the right I have a devilfish with 8 fire warriors
In the middle I have a hive tyrant, a fex, brood lord, lictor, and 8 stealers.
And to the left I have a 4 strong flames of war Panzer IV platoon, and a small rifle /
MG platoon with them.
any ways, thanks for taking a look.


 Necrons--17-2-5
 iGuard--36-1-10