Switch Theme:

Battle Reports: Tyranids vs tau and Guard (with pictures)  [RSS] Share on facebook Share on Twitter Submit to Reddit
»
Author Message
Advert


Forum adverts like this one are shown to any user who is not logged in. Join us by filling out a tiny 3 field form and you will get your own, free, dakka user account which gives a good range of benefits to you:
  • No adverts like this in the forums anymore.
  • Times and dates in your local timezone.
  • Full tracking of what you have read so you can skip to your first unread post, easily see what has changed since you last logged in, and easily see what is new at a glance.
  • Email notifications for threads you want to watch closely.
  • Being a part of the oldest wargaming community on the net.
If you are already a member then feel free to login now.


Made in us
Dakka Veteran


Portland

Hi. I've just started playing again after a decade away from the game. Here's the reports for my first four battles. i'm finding the Tyranids a lot of fun to play, and I'm looking forward to trying the rest of the units available to me

Game 1: Nick and I met up for a small 500 point game. Neither of us had played for the better part of 10 years, so this was very much a test game. The mission we rolled for was Spearhead. Here's our lists :

Nick's Tau (as best as I can remember):

-Commander in Crisis Suit with Fusion Blaster, Flamer, Missile Pod and 2 Drones.
- 12 Fire Warriors, with a Devilfish.
- 12 Kroot
- 3 Stealth Suits

My Bugs:

- Tyranid Prime with Devourer and Talons
- 15 Hormagants
- 13 Termagaunts
- Carnifex with Bio Plasma
- Zoanthrope

Deployment:
Nick took the table quarter occupied by a large open building that we had marked as area terrain with a +4 cover save and made it a home for his Fire Warriors, with his Devilfish close by. The Commander and the Kroot deployed off to the left, and the Stealth Suits infiltrated their way to the rear of my deployment zone to hide behind a building.

I stuck all of my guys in a big clump as close to the middle of the board as possible.

Turn 1:
I rolled to go first and decided to surge my army forward. My Hormagants ran directly up the middle of the board at the Fire Warriors while the rest of my army veered slightly to the right to take advantage of cover. Meanwhile, my Zoanthrope ducked back 6 inches to take a shot at the Stealth Suits. I caught all three with a Warp Blast. No more Stealth Suits! Of course, now the Zoanthrope was stuck 12 inches behind the rest of my army. and a whole board away from his primary targets.

In the Tau turn the Fire Warriors, Devilfish and Kroot opened fire, killing 7 Hormagants and 3 Termagaunts. The Commander moved into the area terrain in the middle of the board to get line of site on my Carnifex, causing a wound with the Fusion Blaster.

Turn 2: The Termagaunts fire on the Kroot, killing several, and the Prime charges in and kills a few more, taking out the entire squad with a sweeping advance. The hormagants continue running toward the Fire Warriors while the Carnifex charges the Tau Commander, taking out two of his drones and wiping him out in a Sweeping Advance (despite the Fex's natural 1 initiative).

The Fire Warriors pile into the Devilfish, which fires it's burst cannon shots at the prime, wounding it.

I took some pictures during turn 2, but my camera died before turn 3. Here's what I got. More next time!

Here's what the table looked like after movement in my part of turn 2.


The Kroot moved forward to shoot at the Termagaunts, but left themselves open to the Tyranid Prime.


The Hormagants hoofed toward the Fire Warriors, but were blocked by the Devilfish.


The Carnifex engaged the Crisis Suit. We accidentally knocked the suit off the table right after this picture was taken.


Turn 3: The Prime charges the Devilfish but fails to penetrate it's armor. The Hormagants arrive at the first objective, while the Termagaunts camp on the second.

The Devilfish makes a dash for the objective in the middle of the board, unloading the full Fire Warrior Squad to put 24 rapidfire shots on the nearby Zoanthrope and 3 Burst Cannon shots on the Hormagants. Results: 1 dead Hormagant, 1 wound on the Zoanthrope (it made 8 armor saves)!

Turn 4: The Fire Warriors failed to make a dent in my guys and are now completely surrounded. The Zoanthrope inflicts a Crew Stunned result on the Devilfish, while the Carnifex manages to get a Crew Shaken. The Prime charges the Fire Warriors, killing 4 and taking a wound in return. The Fire Warriors pass their morale and are stuck in combat.

It looked like a lost cause at that point so we decided to end it.

Why I won:
We both made some poor tactical choices and Nick had some exceptionally bad rolling contrasted by some pretty good rolling on my part (that Zoan made 8 saves in a single round of shooting). The big difference was that Nick was playing an army right out of the Tau battle force box, while I had the luxury of selecting a force form my large collection of models. Being able to choose what I wanted to bring gave me a pretty big advantage, I think.

Next: 600 points vs Tau!

This message was edited 1 time. Last update was at 2010/05/25 09:07:47


Made in gb
Lone Wolf Sentinel Pilot


where am I? *looks around* Well i'm...errr...I...I...don't know!

Nice BR, thanks for sharing...however your title said "vs Guard" so that was slightly confusing. I really like the terrain, how did you make it?


MAY YER BOLTER NAE FALTER!!!! 
   
Made in us
Dakka Veteran


Portland

Nick and I met again for 2 more games, this time at 600 points. Our first mission was Capture and Control using the Pitched Battle set up. Here's the lists:

Nick's Tau:

- Commander with Fusion Blaster, Flamer and Missile Pod, 2 Gun Drones
- 12 Fire Warriors with a Devilfish
- 12 Kroot
- 6 Stealth Suits

My Bugs:

- Tyranid Prime (naked)
- 3 Warriors with Barbed Strangler
- 15 Hormagaunts
-15 Termagaunts
- Hive Guard
- Carnifex with Regeneration

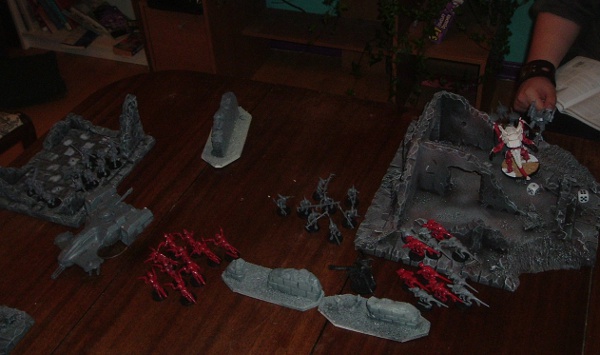
Deployment: I set my bugs up in a line behind some cover in the center of the board. My plan was to advance behind a wave of gaunts, letting the Warriors and Hive Guard shoot while the Fex soaked up wounds. Nick put his Devilfish full of Fire Warriors in the middle of his deployment zone, with his Commander nearby to the left and his Kroot far off to the right. The Stealth Team set up in front of his forces with a good field of fire.


Turn 1: During the Tau half of turn 1 the Kroot moved forward and the commander and Devilfish took a few shots at the Hormagaunts and Hive Guard. The Stealth Team moved into the ruins to fire on the Hormagaunts but lost 4 models to dangerous terrain rolls! The Commander also lost a drone to a separate dangerous terrain roll!

4 ones on the Dangerous Terrain rolls cut the Stealth Team down to two models!


In the Tyranid half of the turn the Termagaunts, Carnifex and Prime ran while the Hive Guard took a shot at the commander, failing to wound. The Warriors shot into the Kroot Squad, causing a few wounds. The Hormagaunts charge into the dangerous terrain after the stealth suits, taking 4 wounds from dangerous terrain tests! This tiny little bit of ruins must be the most dangerous place in the entire galaxy! The Hormagaunts, now down 8 models, wipe the Stealth Suits in combat.

Total Kills at the end of turn 1: Tyranids: 5, Tau: 4, Super dangerous Assassin Ruins: 9!

Turn 2: The Devilfish moves, speeding forward and shooting into the Warriors, causing a wound. The Kroot also fire at the Warriors, but fail to wound. The Commander jumps forward to flamer the Termagaunts, killing 5! He also puts a wound on the Hive Guard with his missiles before jumping back into the ruins and losing his second Gun Drone to another dangerous terrain test! The Hormagaunts die to the Kroot.

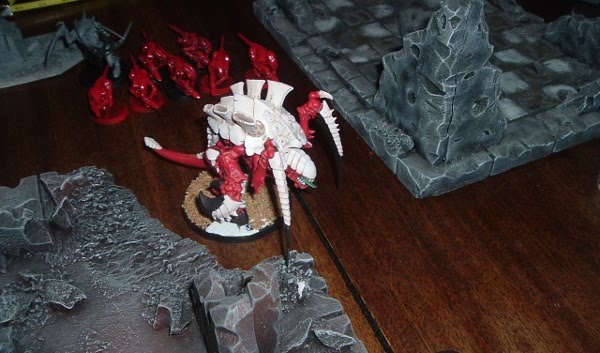
The Carnifex finally catches up to the Commander and rips him apart. The Prime and Termagaunts run toward the objective in the Tau zone, while the Hive Guard falls back to defend our objective, shooting the Devilfish and inflicting a Shaken result. The warriors shoot a few Kroot and take cover in some ruins.

The Carnifex leads the Termagaunts to the objective after murdering the Tau commander


The warriors find cover. It won't help.


Turn 3: 
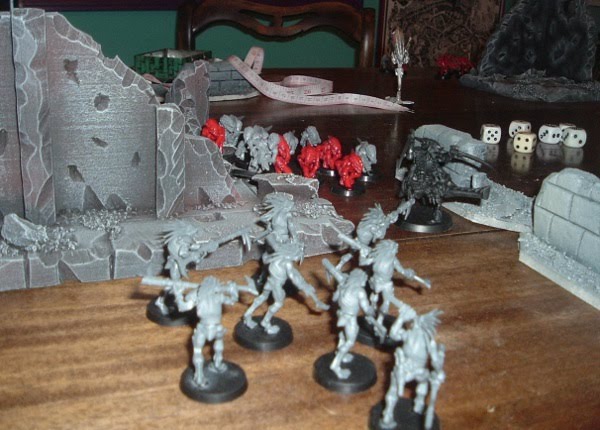
The Devilfish makes a play for the objective in the Tyranid zone, unloading Fire Warriors who put 7 wounds on the Warriors squad! The Kroot move into a support position.

The Fire Warriors decimate the Warrior brood!


The Hive Guard unloads on the Devilfish, destroying it. The surviving warrior charges the Fire Warriors, killing a few before dieing. The Carnifex and Prime turn around and head back toward the fight as the Termagaunts sit on the objective.

Turn 4: The Fire Warriors fire at the Prime but only cause 1 wound. The Kroot charge the Carnifex, loose all but 1 model and run away.

The Prime charges the fire warriors, breaking the unit and forcing it to flee.

Turn 5: The lone Kroot makes his leadership test (we didn't realize that you couldn't rally if you had less than half your squad) and contests the objective in the Tau zone. The Hive Guard shoots him dead.

Winner: Tyranids!

This was a great game. The Dangerous Terrain rolls were crippling for both of us, but I came out on the better end of it, only losing 4 Termagaunts. Nick lost 4 Stealth Suits and 2 Gun Drones!

Next: Another 600 point match vs Tau!


Automatically Appended Next Post:
Our next game was an Annihilation mission using the Dawn of War deployment. We set up a huge block of ruins in the middle of the table, creating a complicated series of corridors bunkers and fire lanes. This time we decided to forget about dangerous terrain, and just made the whole section difficult instead. We used the same forces as before.

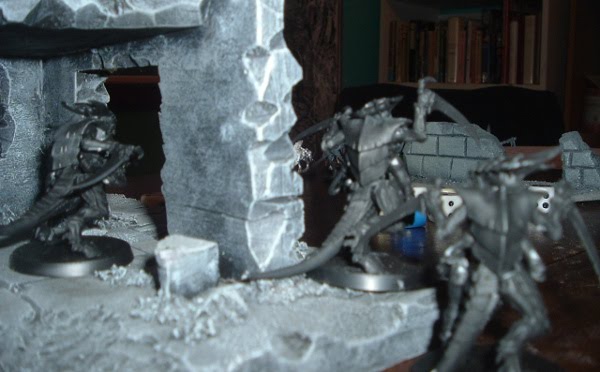
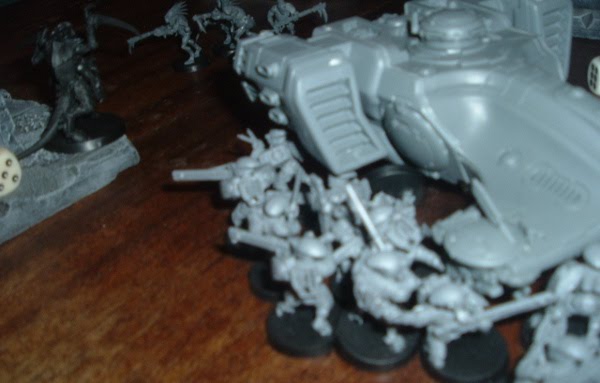
Deployment: I set up my Termagaunts in a building overlooking the center of the board. the Warriors and Prime set up in the ruins behind them. Nick deployed the Kroot, Devilfish, Commander and Fire warriors on the far left flank, well out of my range.
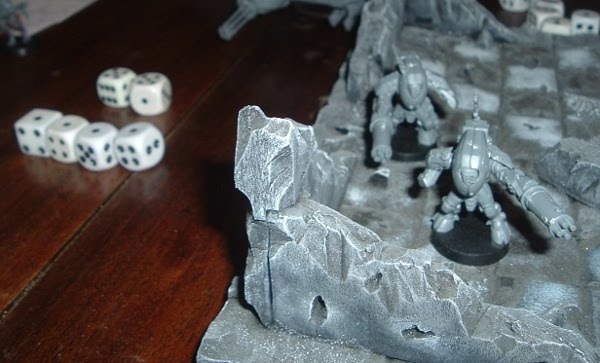
The Tyranid bunker


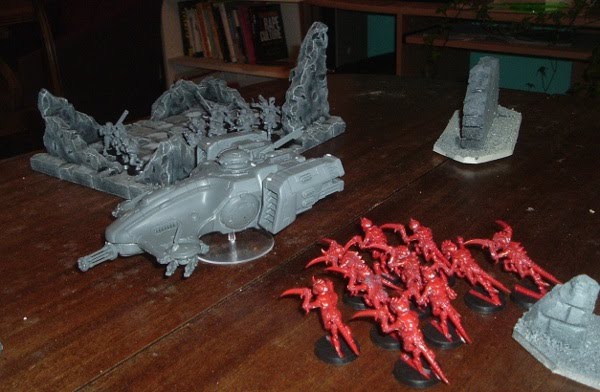
The Tau gun line flank


Turn 1: I brought the Carnifex, Hive Guard and Hormagaunts onto the table on the left flank. the Hormagaunts charged straight toward the Kroot, with the Carnifex trailing behind. The Hive Guard, Prime and Warriors took up firing positions in the ruins.

On the Tau half of the turn the Kroot stepped forward to rapid fire into the Hormagaunts, cutting the unit in half! The Fire Warriors and the Devilfish cut them down to a single model. The Stealth Suits walked onto the middle of the table and opened fire on the Termagaunts, killing 5!

The Stealth Suits prove that cover hates Tyranids


Turn 2: The Termagants fire back at the Stealth Suits, killing 2. The Hive Guard fires at the Kroot, also killing 2, while the Warriors fire their Barbed Strangler at the Fire Warriors, missing. The last Hormagaunt charges and dies to the Kroot, taking one with him. The Carnifex struggles to catch up.

The last Hormagaunt charges the Kroot!


The Fire Warriors and Stealth team open up on the Termagaunts, killing 5 more. The Devilfish and Commander put 4 wounds on the Warriors, while the Kroot charge through difficult terrain to wound the Hive Guard.

Turn 3: Things are starting to look bad for me. I'm down a full Hormagaunt Brood and 2/3 of a Termagaunt Brood, plus a Warrior. But... I'm in charge range! I split the Prime off from the Warriors so he can shoot at the Commander (killing a Gun Drone), and then charge (doing 2 wounds). The Warriors charge the Kroot (breaking the squad, which flees, and taking no wounds in return), the Carnifex charges and destroys the Devilfish and the Gaunts charge the stealth suits, trading 1 kill and tieing combat. Things are looking better!

The Fire Warriors put a wound on the Carnifex. The Prime murders the Commander in combat and consolidates into cover. The Stealth Suits kill 2 more Termagaunts, but the last survivor keeps them locked in combat.

Turn 4:i The Carnifex lumbers toward the Fire Warriors, but can't make it into charge range. The Warriors fire the barbed strangler at the Fire Warriors, but miss. The Prime charges and wipes out the Kroot. The Stealth Suits kill the last Termagaunt and consolidate toward cover.

The Fire warriors rapidfire on the Carnifex, causing 3 wounds (actually 7) and killing it! The Stealth Suits fail to shoot the Prime and lose a model to difficult terrain after a jet pack move.

The Carnifex falls to rapid fire!


Turn 5: The dice tell us this will be the last turn. The Warriors finally place a Barbed Strangler template on the Fire Warriors, killing half the squad. The Hive Guard Kills another Stealth Suit.

The Fire Warriors and remaining Stealth Suit fail to wound anything.

Winner: Tie? If the Devilfish counts for a Kill Point we tied, if not, the Tau won.

This was a tough game. The Tau chewed me up starting with the amazing rapid fire shooting from the Kroot in turn one. The Fire Warriors killed everything that got in their way. I'll never underestimate either again! It was only in the third turn when I was able to get all my units into combat that things began to change, and even then the Fire Warriors were still to far away for me to effectively deal with.

The Fex did regenerate 3 wounds, so that was fun! Actually, this is the kind of game I really love. Thanks Nick, and thanks Matt for standing around and checking rules for us.

This message was edited 1 time. Last update was at 2010/05/25 09:04:46


Made in us
Dakka Veteran


Portland

Matt and I finally played our first game this afternoon. I was expecting to play against Orks, but Matt showed up with 500 points of Guard, including a Chimera and a Russ. No pictures this time (sorry). Here's the lists:

Matt's Guard (as far as I can remember):

Command Squad in a Chimera
2 vet squads with Flamers and Powerfists, 1 with Autocannon
A Leman Russ with Heavy Bolter Sponsons
Scout Sentinel

My Bugs:

Prime
10 Termagaunts
11 Hormagaunts (I was over by one. I guess I counted wrong)
Hive Guard
3 Warriors with Barbed Strangler
Carnifex

Deployment: We rolled a Capture and Control mission and a Spearhead setup. I placed my Termagaunts and Hive Guard close to the objective on my side of the board (which was near a big piece of area terrain dividing up the middle of the board). The Carnifex was set up to run around the right side of the terrain, while the Hormagaunts were set up to run around the left with the Warriors and the Prime behind them.

Matt set up his Chimera (with the Command Squad inside), Sentinel and Autocannon squad in a gunline in the middle of his zone, with a good firing line on my Hormagaints. The Russ was set up behind them, and the 2nd Guard squad hunkered down near his objective back by the Russ, right in the path of the Carnifex.

1st turn: The Hormagaunts surged forward and to the right, claiming some cover from ruins but losing a model to Dangerous Terrain. The Warriors headed the same way, staying behind the
Hormagaunts for cover. On the other side of the board the Termagaunts moved forward to climb into the ruins and claim their objective, but lost 4 models due to Dangerous Terrain! They'll spend the rest of the game sitting on the objective and ignoring everything else. The Carnifex ran forward toward the Russ and Guard squad while staying out of line of site of the tank, and the hive Guard took his shots at the Chimera. Both miss.

The Chimera, Guard Squad and Sentinel open fire, killing a handful of Hormagaunts and putting a wound on the Warriors. The Russ's Battle Cannon scatters off the Warriors, but the Heavy Bolters do a wound. the second Guard squad shoots at the Carnifex but does no damage.

2nd Turn: Ineffective shooting from the bugs as they surge forward. The Warriors lose a wound and the Hormagaunts lose some models to Guard shooting. Nothing exciting happens.

3rd Turn: The Hormagaunts run toward the Guard line as the Warriors find cover in the ruins and miss with their Barbed Strangler. The Carnifex runs toward the Russ and Guard squad, but doesn't even make it half way there due to a 2 inch run roll. The Hive Guard fires two more shots at the Chimera, missing both (again).

Combined fire from the Guard line cuts the Hormagaunts down to 5 and puts a few more wounds on the Warriors, killing 1. The Carnifex suffers a wound from lasgun fire (or possibly autocannon fire).

4th Turn: The Hormagaunts charge forward, and thanks to a pinning test from the Warriors Barbed Stranngler (which killed 3 models) are able to get into combat against the Guard squad, where the 5 of them managed to only wound a single Guardsman with 15 attacks. Luckily he died, so even loosing a model to the Guard attacks meant the combat was only tied. The Carnifex lumbered forward but wasn't quite able to reach the Russ, coming short just out of combat range. The Hive Guard fired at the Chimera again, this time hitting once, penetrating and rolling a 6 on the damage chart. The Chimera explodes, taking 2 of it's embarked passengers with it.

The Sentinel puts another wound on the Warriors, reducing the squad to just 1 (and the Prime). The Hormagaunts roll 8 attacks but only kill 1 more Guardsman and get wiped out in return. The Russ, Command squad and 2nd Guardsman squad open fire on the Carnifex, killing it.

5th Turn: Final turn. The surviving Warrior fires at the Command squad, killing 2. Unfortunately the squad leader makes his morale check and stays on the board. The Hive Guard shoots at the Sentinel, missing both times.

The remnants of the Guard army open fire on the Termagaunts, trying to wipe them off the objective. Two die, but the combination of good cover and poor line of site keeps them alive to secure their objective.

Winner: Draw!

This was super tough. I was not expecting to fight Guard and had put together list with poor anti tank capabilities (although in hindsight I'm not sure what I would have taken instead). I was pretty sure my Termagaunts would sit happily on my objective and survive a fair amount of fire, but with the Russ planted near the back of the board on top of the objective I didn't feel like I had much of a chance of winning unless the Carnifex could get to it and take it out. It didn't quite happen. The Hive Guard could have glanced the tank (but only glanced, since he was never in a position to hit the side or rear armor) but I spent all game shooting at the Chimera, so I never had a chance. (It was very, very frustrating to fire 8 shots at the Chimrea and only have a single one hit). Matt pointed out a few times that the Warrior's could have hurt either tank in hand to hand. This is totally true, but I would have had to wade through his entire army to get to the Russ, and even if the Chimera was a more likely target, I don't like the odds of trying to glance a tank to death with a severely wounded Warrior squad.

Lessons learned: Be more aggressive with the Warriors. Don't face Guard without something that can kill a Russ without having to spend 4 turns running through fire.

Big disappointment: Missing 9 out of 10 times with the Hive Guard sucks! Especially since it should hit half the time!


Automatically Appended Next Post:
Imperial Monkey wrote:Nice BR, thanks for sharing...however your title said "vs Guard" so that was slightly confusing. I really like the terrain, how did you make it?


It was supposed to say "vs tau and Guard". Fixed. I've posted the Guard battle after the three tau battles.

The terrain is very nice. I totally didn't make it. I acquired it through a trade a few years ago. I wish I could remember who I got it from, because I'd love to have some more. It appears to be made out of styrofoam cut with a hot knife. It's very well done.

This message was edited 1 time. Last update was at 2010/05/25 09:11:22


Forum Index » 40K Battle Reports
Go to: