Had a game with Shaun last night. He's trying a new list I wrote for him based on stuff he's been using, so to make it work I'll be giving him tactics as well along the way.
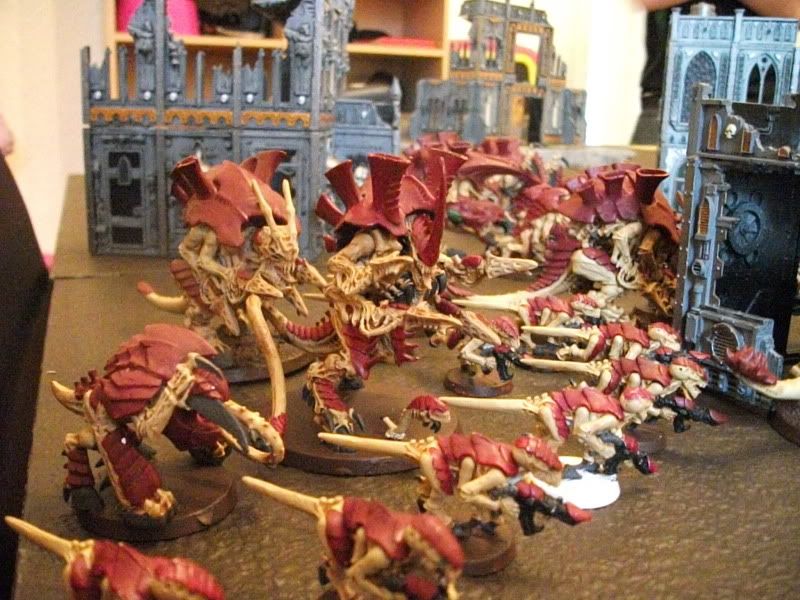
Tyranids "Hive Fleet Kraken" - 2,000 points
HQ
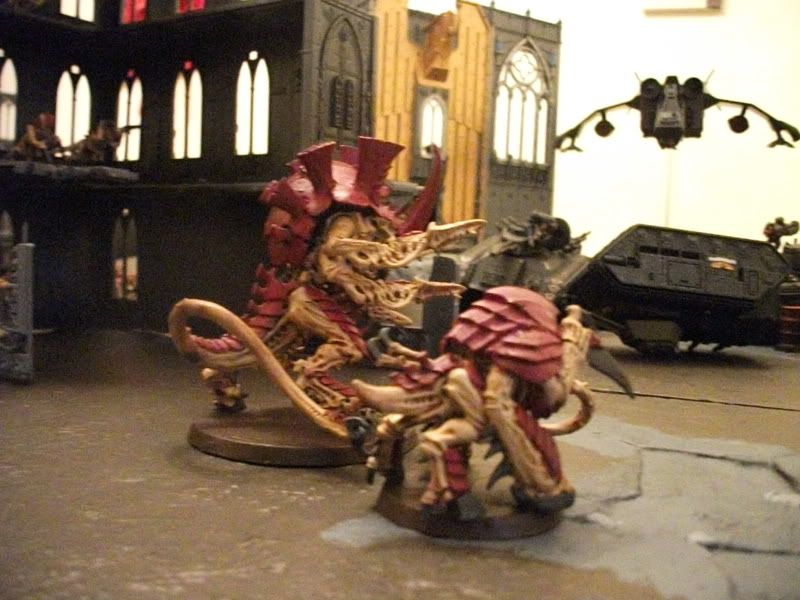
Hive Tyrant - 2 x twin-linked devourers, old adversary & armoured shell
Tyrant Guard - lash whip
Tervigon - crushing claws, adrenal glands, toxin sacs & catalyst
Elite
2 x Hive Guard
2 x Hive Guard
2 x Hive Guard
Troops
Tervigon - crushing claws, adrenal glands, toxin sacs & catalyst
Tervigon - crushing claws, adrenal glands, toxin sacs & catalyst
10 x Termagants
10 x Termagants
8 x Genestealers
8 x Genestealers
Heavy Support
Carnifex - 2 x twin-linked devourers
Carnifex - 2 x twin-linked devourers
Total: 1,994
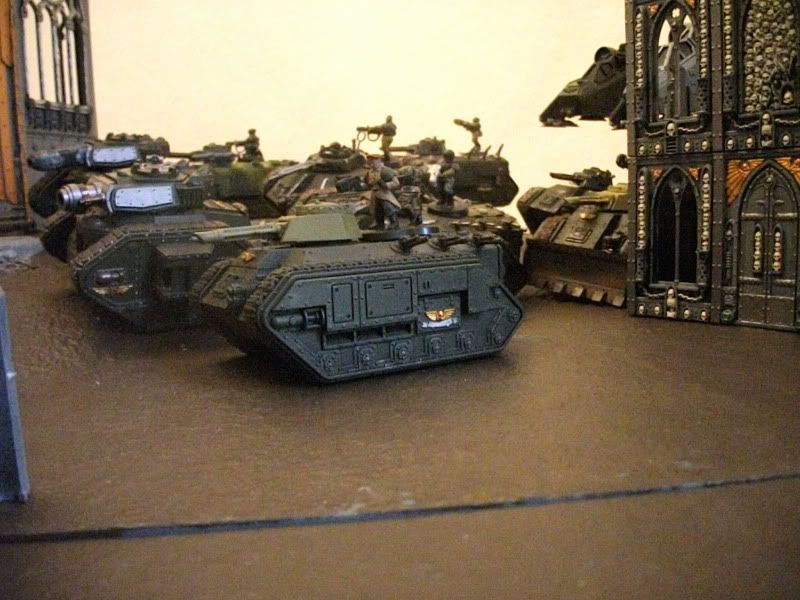
Imperial Guard "Shaun's Boys" - 2.000 points
HQ
Company Command Squad w/ Chimera - 4 x meltaguns - Chimera w/ heavy flamer
Company Command Squad w/ Chimera - 4 x meltaguns - Chimera w/ heavy flamer
Troops
Veterans w/ Chimera - 3 x plasma guns - Chimera w/ heavy flamer
Veterans w/ Chimera - 3 x plasma guns - Chimera w/ heavy flamer
Veterans w/ Chimera - 3 x meltaguns - Chimera w/ heavy flamer
Veterans w/ Chimera - 3 x meltaguns - Chimera w/ heavy flamer
Veterans w/ Chimera - 3 x meltaguns - Chimera w/ heavy flamer
Fast Attack
Vendetta
Vendetta
Heavy Support
Manticore Missile Launcher - heavy flamer
Manticore Missile Launcher - heavy flamer
2 x Leman Russ Demolishers - heavy flamers
Total: 2,005
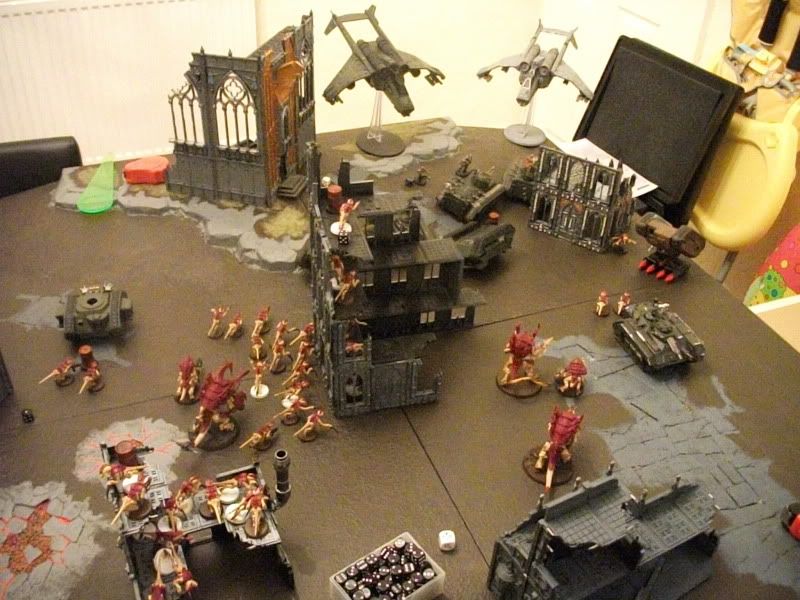
Game: Spearhead & Seize Ground
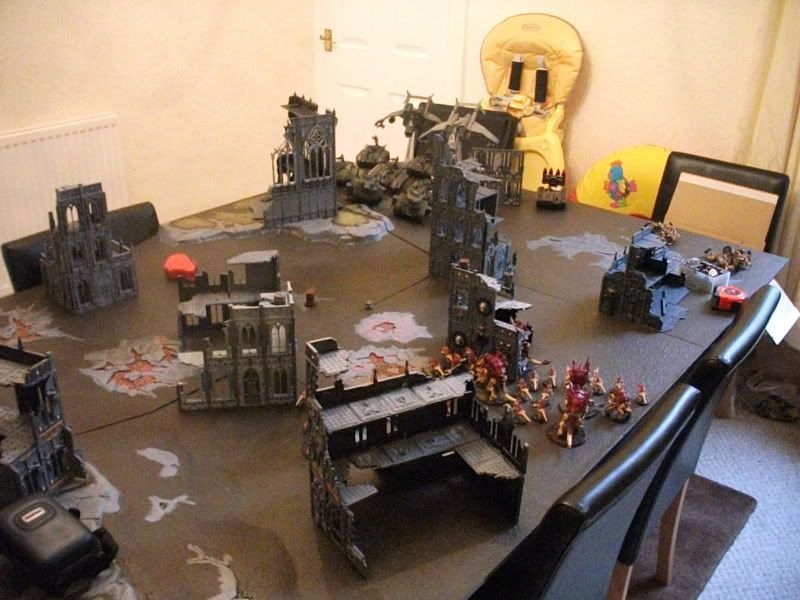
Deployment
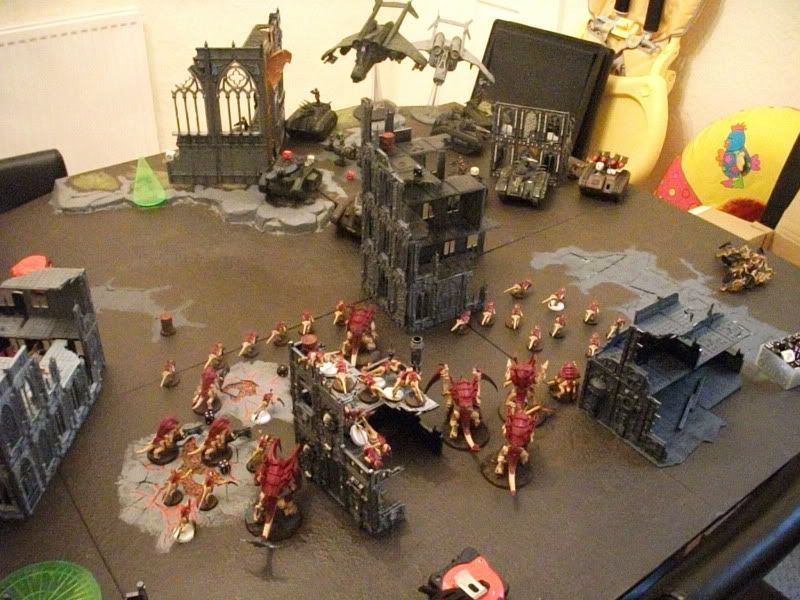
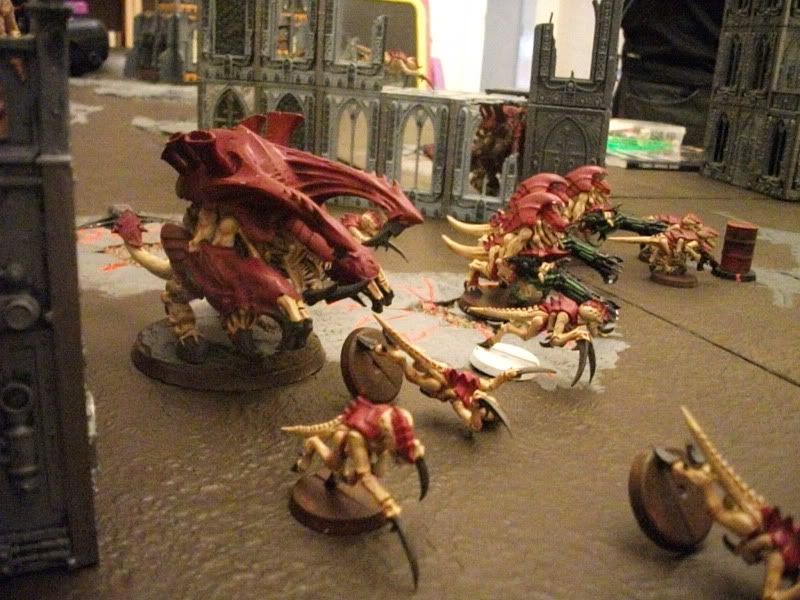
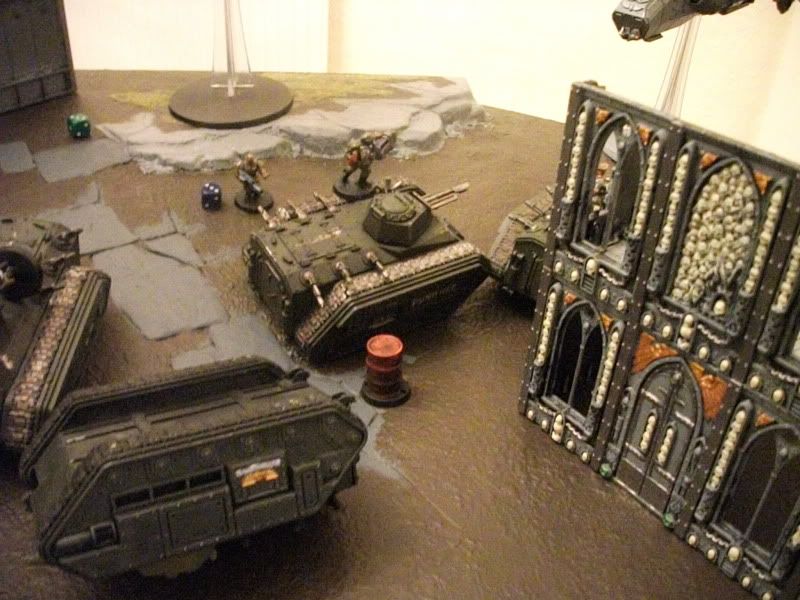
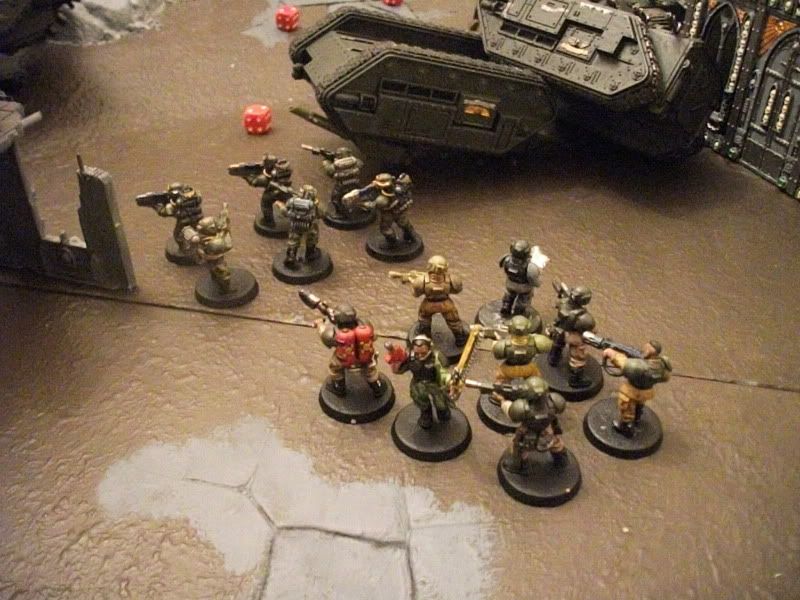
I won the roll off and decided to go first so I can get into assault quicker and don't have to weather the Guard fire power for first turn. I deployed a Tervigon in a ruin, behind it a unit of Termagants to give cover to the Tyrant and Guard, which a Carnifex hid behind. Between that ruin and another a line of Termagants spread out giving cover to all Hive Guard units behind which attempted to hide two Tervigons while the other Carnifex used the ruin which the Tervigon was deployed in to block
LOS. The two Genestealers units would outflank.
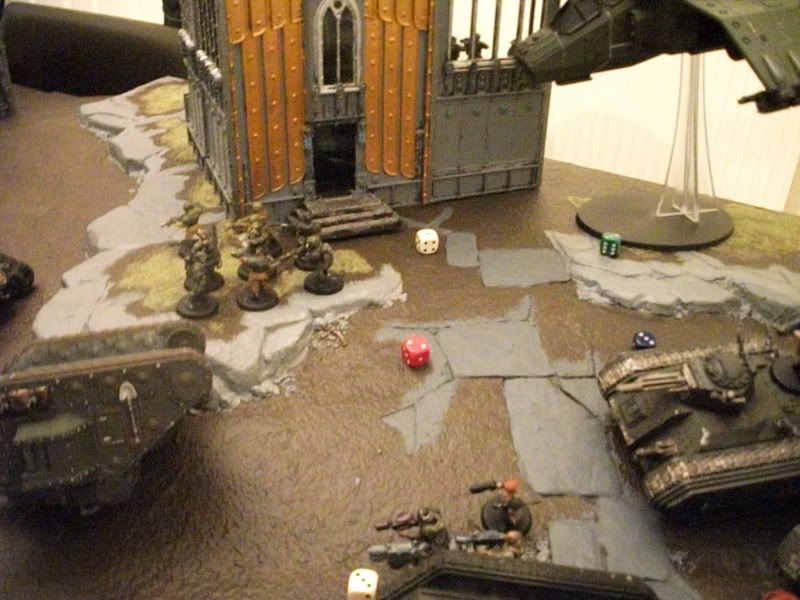
Shaun deployed top right corner of the board. I advised him to put the Vendettas near the board edge as they have range as he went to put them at the front, which would be in range of my Hive Guard and I don't like triple lascannons with Tyranids! I suggested to place the Leman Russes at front using the armour 14 as a shield for the Chimeras behind making sure a plasma unit remains on the objective. Both Manticores were deployed near the half way across the board with one in terrain.
Objectives had been placed in the ruin the Tervigon had deployed in, two in and near a open ruin on the left flank, one in a large centre ruin and one among where the mass of Chimeras had deployed.
 * Tactical Notes
I'm going to have to hit the Guard head on like a steam train and smash through stuff. I am hoping the Hive Guard can pop enough Chimeras to expose the fleshy Guardsmen so my Termagants and devourers can make sure work of them. I'll use the Carnifexes to assault those Demolishers if I can, as lets face it they are really the only things which have a decent chance of taking them out.
Objective wise (red oil barrels) I've placed mine up high which if Shaun wants to claim them he needs to get out his tank and expose his weak small squads of Guardsmen. I'll go for the three I placed in higher levels of the ruins as those are easier chances and the one new the left flank ruin out in the open I will leave until later turns and move a Tervigon out to claim it.
Turn 1
Tervigon more on the left flank spawns 7 Termagants and burns out, the Termagants move and run into the left flank ruin claiming the objective and the Tervigon follows. The wall of Termagants move and run forward with everything else following behind, everything runs except the Hive Guard. I cast feel no pain on all Hive Guard.
Shooting I'm only in range of a single Chimera and I don't want to fire at the Leman Russes. I blast a
CCS Chimera but only one Hive Guard unit is in range, they manage to immobilise it.
Shauns turn I suggest to him to move the Vendettas and Manticores a bit because if my Genestealers outflank next turn on that table edge I will auto hit, he moves the Vendettas only. One Chimera moves through the shrine ruin while the rest move forward a little bit but remain behind the Russes.
Shooting the Manticore rolls terrible and get a single shot each and only frag some Termagants. Vendettas blast some Hive Guard but only manage to score a single wound. Multi lasers fire at the Hive Guard but thanks to cover and feel no pain the Guard are all safe. Tyrant gets shot at by some multi lasers which can draw
LOS but the armoured shell makes all the saves.
 * Tactical Notes
That wasn't a particular awesome turn for either of us, I immobilised a tank and Shaun got some Termagants and wounded a Hive Guard. I need to get my Hive Guard into range more to get those Chimeras.
Next turn I'll move the burnt out Tervigon more through the left flank ruin and it can bunker down in there and later go for the objective out in the open. I'll move the other Tervigon off the objective and spawn Termagants to hold it, this way when I move forward I have monstrous creature saturation and can spawn more Termagants on the way.
Turn 2
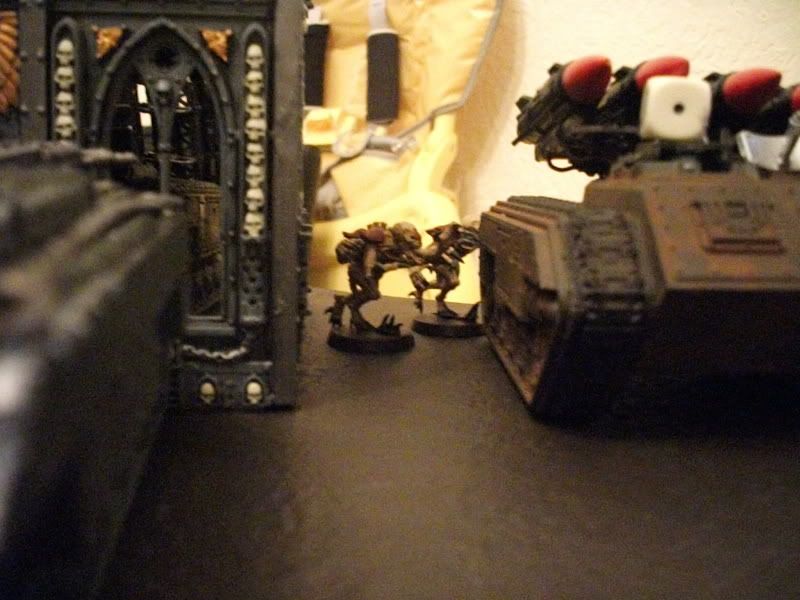
I roll for reserves and a single Genestealer unit arrives on the right flank by the Manticores which haven't moved.
Movement I move the burnt out Tervigon through the ruin where it pitches up. I move the Termagant walls with Hive Guard following behind and monstrous creatures, both remaining Tervigons spawn with the
HQ one getting 15 and the other 12, the unit of 12 moves onto the objective the Tervigon just held. I cast feel no pain on the Hive Guard again without any problems.
Shooting unit of Hive Guard blasts the same
CCS Chimera and wrecks it, they pass pinning. Another Hive Guard unit blasts a Veteran melta tank and it explodes killing a few Guardsmen who pass morale and pinning. The other Hive Guard I have no choice but to fire at the Russes due to range, I'd rather get lucky than not fire at all, I manage to glance and score crew shaken on one after Shaun fails cover save as he popped smoke last turn.
Genestealers assault and auto hit the two Manticores scoring immobilised and crew shaken on both of them.
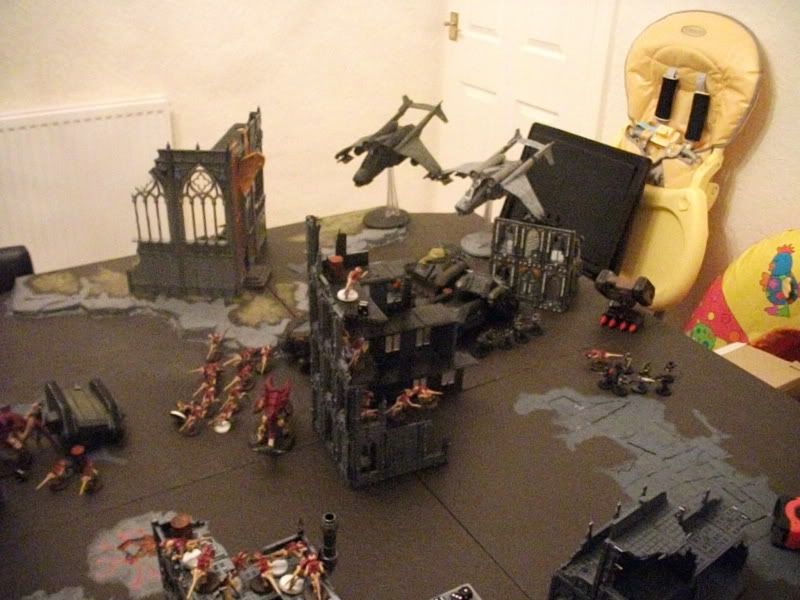
Shauns turn he moves the Chimera in the shrine ruin forward more while the other Chimeras adjust to deal with the Genestealer threat.
Shooting Demolisher fires and frags some Termagants but the Hive Guard passes cover save which was under the blast. Vendettas do better wiping out a Hive Guard unit and killing another Hive Guard leaving one on it's own. Genestealers get blasted by flamers and melta leaving just two left who pass morale.
In assault the two 'Stealers attacks the immobilised Manticore but does nothing.
 * Tactical Notes
Not a bad second turn for me as I've taken out a melta unit which is sitting in a crater so they'll have to foot slog to get close which means I should be able to counter charge. I've taken out a CCS tank which means they are walking as well, next turn I'm hoping to introduce them to mass devourers, maybe. The Genestealers have proved great this turn knocking out the Manticores for a single turn and asborbing a lot of fire power which means those tanks aren't shooting at me or coming closer.
Next turn one Carnifex will be in range to assault the Demolisher squadron which should be fun. I'll just keep moving up and I'm hoping the devourers will be in range to slaughter infantry or do some damage to some tanks. Be nice if those other 'Stealers come in from reserve as well.
Turn 3
I roll for reserves but the other 'Stealers do not come on.
I don't spawn any Termagants this turn as I want to wait until I'm closer and more tanks are opened up, so I plod the monstrous creatures forward with the Termagant wall and Hive Guard. Like a dumbass I forget to cast feel no pain, fool!
Shooting Tyrant fires devourers at a Chimera near the two Genestealers hoping to stun lock it but fails. Hive Guard blast the Chimera in the shrine as I suspect Shaun is keeping it for later to charge down at the objective, it explodes killing a few Guardsmen who pass pinning test. Hive Guard all blast the side armour of the single Russ but fail to do anything.
In assault Carnifex charges the Russes and wrecks one and weapon destroys the other. The two Genestealers wreck one Manticore.
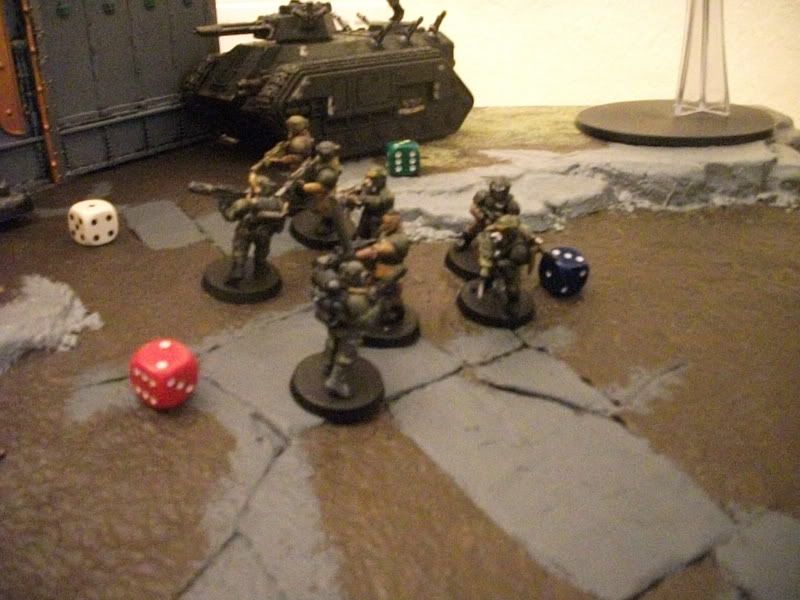
Shauns turn I suggest to him to move the melta unit out the crater from last turn to blast the Carnifex with the
CCS, he does this. He moves a Chimera to get better
LOS on the Genestealers and moves the Vendettas so they don't get auto hit along with three Chimeras, he moves one by the objective to reinforce it. Single Demolisher rolls down towards the objective.
Shooting Shaun issues bring it down to the melta unit but the order fails, but it works for the
CCS. He shoots the Carnifex and no meltas hit! Carnifex gets blasted by lascannons though and it's dead. Single Manticore fires frags some more Termagants and puts a wound on the full unit of Hive Guard. Meltas blast and kill the Genestealers along with lasguns. Demolisher BBQs a few Termagants.
 * Tactical Notes
Pretty decent turn for me here. Demolishers are out of action now just a av14 heavy flamer. One Manticore is down and Veterans have come closer to blast the Carnifex which has been a wasted sacrifice as fleshborers will get them next turn or soemthing equally nasty.
My plan is to roll up the monstrous creatures as I'm close enough now. I'll assault that Chimera which killed the Genestealers with Termagants and hopefully block it in or something. The large unit of 15 Termagants I'll run onto the large ruin to get the objective while I go for the exposed melta Veteran and CCS units.
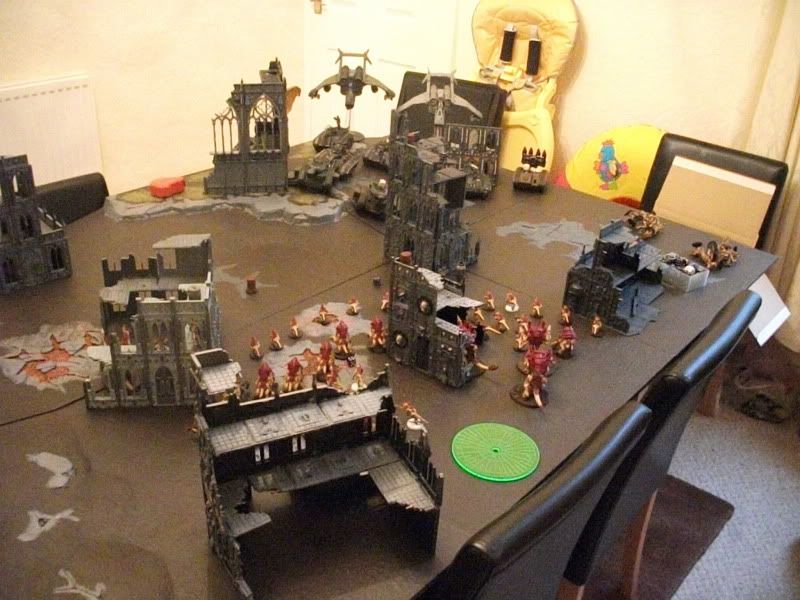
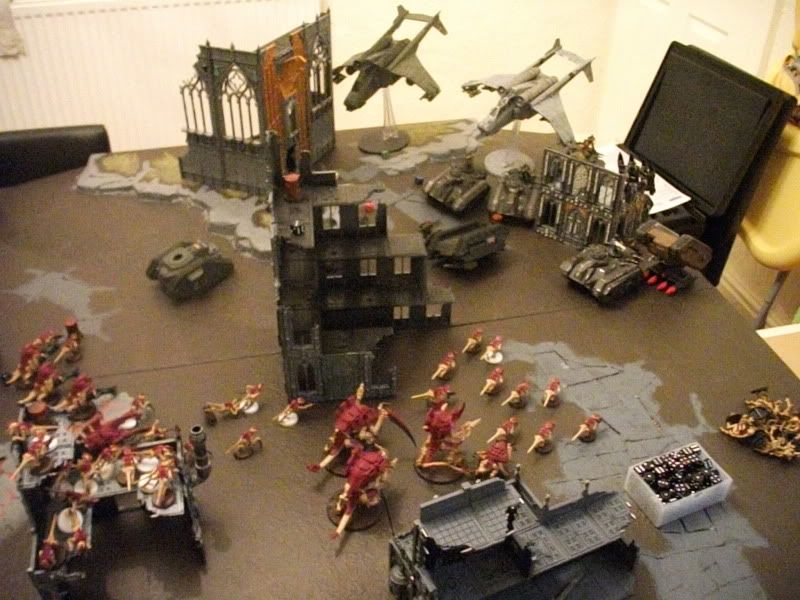
Turn 4
I roll for reserve and the last Genestealer unit comes on outflanking on the right side again, they come on by the Vendettas.
I spawn a unit of 10 Termagants with the
HQ Tervigon which move towards the exposed Veterans as the original unit for the Termagant wall peels off with Hive Guard and moves to get the objective on the left flank in open ground. The unit of 15 moves and runs into the large ruin claiming the objective. Termagants move ready to assault the Chimera which slaughtered the Genestealers.
Shooting Veterans get blasted by fleshborers and stinger salvo then and finished off with the single Hive Guard's impaler cannon wiping them out.
CCS gets blasted with devourers from the Hive Tyrant and all die. Carnifex blasts the Chimera the Termagants are going to assault but is out of range by half a inch :(. Tervigon near the Hive Tyrant runs forward to make sure within 6" of the Termagants to buff them. Other Hive Guard blast a melta Chimera exploding it and killing the Guardsmen inside, the unit fails morale and falls back.
In assault Genestealers multi assault a Vendetta and melta
CCS Chimera but fail to do damage to either of them. Termagants charge and shake the Chimera thanks to the Tervigon's adrenal gland buff.
I suggest to Shaun to use the Vendettas to blast the Tervigon to pieces which will also kill some Termagants so he moves this to get better
LOS. The two Chimeras by the objective move to burn the Genestealers along with the Manticore which pivots to burn. The Chimera which is shaken tank shocks the Termagants which just move out the way.
Shooting the Genestealers get incinerated, eat plasma, melta and multi laser and all die. Tervigon gets blasted by lascannons from the Vendetta and meltas from the tank which just tank shocked, it dies and leaves only two Termagants left who luckily are in synapse. Other Vendetta fires leaving a single Hive Guard left from the solo pair and heavy flamer from the Demolisher kills the single wound Hive Guard and several Termagants.
 * Tactical Notes
This turn hasn't gone to bad, I've managed to pop another Chimera which has made the squad fall back, killed a Veteran squad and CCS taking away melta fire power which can threaten my monstrous creatures. My Genestealers failed to do anything though against the Vendetta and Chimera would have been nice to take one of those out, probably the Vendetta.
Next turn I'll move the Tyrant up while the Carnifex goes for that Chimera. Everything else will move up to enclose and I'll spawn more Termagants from the HQ Tervigon while the other Tervigon hiding away can now reveal itself and charge the Demolisher which is burning everything in sight.
Turn 5
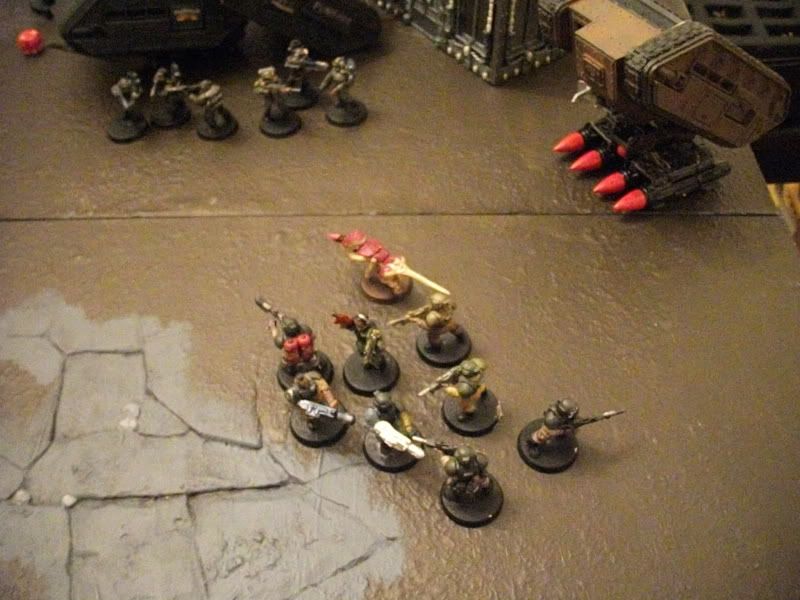
Tervigon comes out of terrain to smash the Demolisher while Hive Tyrant walks towards the last melta Chimera to smash it. The two Termagants run into a ruin near the objective Guard side.
Shooting Carnifex blasts side of the Chimera but only stuns it. Hive Guard broadside a Chimera hoping to pop it so the Tyrant can do some damage but fails, Tyrant fires at the same tank and does nothing.
In assault Carnifex charges and explodes the Chimera killing some Guardsmen who pass pinning and morale. Tyrant charges and explodes the Chimera, Guardsmen pass pinning test. Tervigon immobilised and weapon destroys the Demolisher.
Shauns turn I suggest to him to get the
CCS out the Chimera and walk them towards the Tyrant and move the melta unit back towards his objective while the two Chimeras move to BBQ the Termagants and the last plasma unit bails out to blast the Carnifex.
Shooting
CCS issues bring it down to itself and the other melta unit, they blast the Hive Tyrant with the Guard taking all the melta wounds and the Tyrant taking the lasgun wounds, but the Tyrant rolls 3 1's and dies! Plasmas and meltas hammer the Carnifex and it's dead. Termagants get blasted by heavy flamer, one dies and the other fails morale and runs off. Hive Guard get blasted by multi laser and Vendetta and are dead. Tervigon gets blasted by the other Vendetta leaving it with 3 wounds after failing cover saves.
In assault Tervigon wrecks the Demolisher.
 * Tactical Notes
Hmmm well I've lost my Tyrant which I was hoping to maul a unit with, I cannot believe the beast has a 2+ armour save and just lost all wounds thanks to lasguns! lol. Rest isn't going to bad but I've lost a Carnifex and the other Tervigon is taking wounds.
My plan next turn is to hold my ground as Shaun isn't going to get those three objectives, well four actually, unless a Vendetta can reach one. I'll use my Termagants and HQ Tervigon to kill those exposed Guardsmen in revenge for killing my monstrous creature.
Turn 6
My turn I move the
HQ Tervgion up along with Termagants to blast and assault some Guardsmen. I move the two Termagants by the Demolisher wreck behind it to block
LOS.
Shooting Termagants blast the
CCS killing one.
In assault Termagants charge the
CCS and kill them, they consolidate onto the objective. While the melta unit gets smacked about by the Tervigon but only lose a single Guardsmen and fall back
Shauns turn I suggest to him to bomb the Tervigon and Termagants by the Demolisher and follow it up with lascannon shots so at least no one has that objective. Then use the plasma unit which killed the Carnifex to blast the Tervigon along with a melta unit still in the shrine ruin as the heavy flamers burn the Termagants.
Shooting plasmas and meltas blast the Tervigon killing it as the heavy flamers incinerate the Termagants. Lascannons blast the Tervigon as the Manticore rains down, the Termagants die but the Tervigon hangs in with a couple of wounds left.
At this point we call it a day. Tyranids win claiming 4 out of 5 objectives.
 Summary
Everything went pretty well except a few mistakes. I forgot to cast feel no pain for practically half the game, if I would have done this certain things would have been alive for longer i.e Hive Guard, Termagants and Tervigon. I also sometimes forgot to spawn but that wasn't so much of a issue.
Shaun did ok, but must be said he did more damage through out the game with my guidance than on his own. The trick is knowing when to get those Guardsmen out the tanks and if it's worth doing. Whatever they are shooting at you want it dead as it's possible the Guardsmen will die and if what they are shooting at doesn't die then it's a partial waste.
A few mistakes as well, Demolishers should have stayed static and kept the distance. Also some of the tanks were moved when immobilised (Manticore) and fired when shaken (meltas from Chimera) need to remember to put dice on top of them Shauny-boy number equal to damage table.
Shaun said he liked the list but wasn't keen on the Demolishers, I have mentioned to him in the past about tanks in squadrons. He has been thinking about getting two Hydras and another plasma Veteran squad which I think will do nicely.


 Blood Angels - 2000
  Iron Warriors - 2000
  Orks -2000
  Imperial Guard - 2000
 Eldar - 2000
  Hive Fleet Krakken - 2000
  Dark Eldar - 2000
  Necrons - 2000
  Grey Knights - 2000
  Daemons - 2000
  Ravenwing - 2000


 Tyranids 500
 1k
1k