Popped down the Vine Inn Gamers club on Sunday. Not only did I get some Magic in, but also got a 2k game of
40k in as well

Thought I would use my G.K as not used them for ages. Been loving the Daemons too much!
.
Grey Knights 'Purifier Order' - 2,000 points
HQ
Castellan Crowe
Inquisitor Coteaz
Inquisitor - psyker
Troops
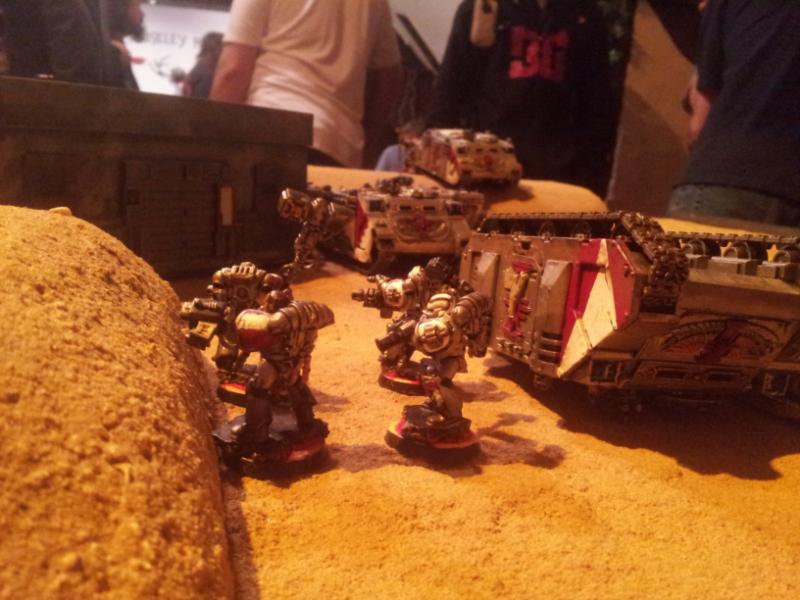
5 x Purifiers w/ Rhino - 2 x psycannons, nemesis halberd & 2 x nemesis daemon hammers
5 x Purifiers w/ Rhino - 2 x psycannons, nemesis halberd & 2 x nemesis daemon hammers
5 x Purifiers w/ Rhino - 2 x psycannons, nemesis halberd & 2 x nemesis daemon hammers
5 x Purifiers w/ Rhino - 2 x psycannons, nemesis halberd & 2 x nemesis daemon hammers
5 x Purifiers w/ Rhino - 2 x psycannons, nemesis halberd & 2 x nemesis daemon hammers
5 x Purifiers w/ Rhino - 2 x psycannons, nemesis halberd & 2 x nemesis daemon hammers
3 x Servitors - 3 x plasma cannons
3 x Servitors - 3 x plasma cannons
Heavy Support
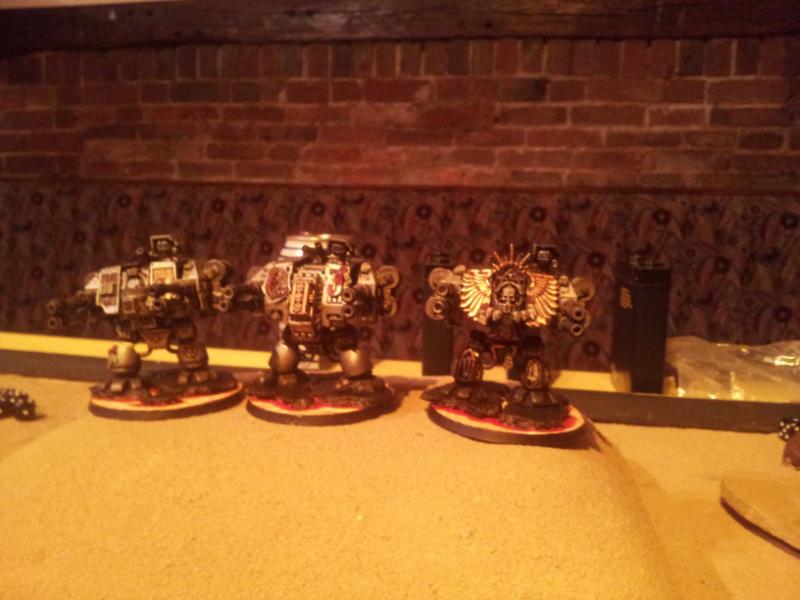
Dreadnought - 2 x twin-linked autocannons + psybolt ammo
Dreadnought - 2 x twin-linked autocannons + psybolt ammo
Dreadnought - 2 x twin-linked autocannons + psybolt ammo
Space Marines - 2,000 points
HQ
Librarian - terminator armour
Elite
Dreadnought - 2 x twin-linked autocannons
Dreadnought - 2 x twin-linked autocannons
8 x Terminators - assault cannon & chain fist
Troops
10 x Tactical Marines w/ Razorback - meltagun & multi melta - Razorback w/ twin-linked plasma gun & lascannon
10 x Tactical Marines w/ Razorback - plasma gun & plasma cannon - Razorback w/ twin-linked lascannon
10 x Tactical Marines w/ Razorback - plasma gun & plasma cannon - Razorback w/ twin-linked lascannon
5 x Scouts - sniper rifles & camo cloaks
Fast Attack
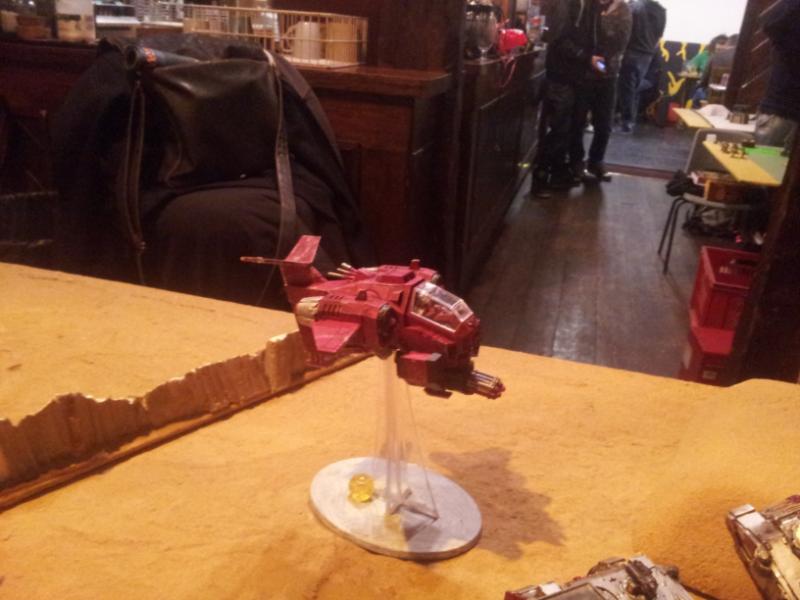
Stormtalon - cyclone missile launcher
Heavy Support
5 x Devastators - 2 x missile launchers & 2 x lascannons
Game: Big Guns Never Tire + Hammer & Anvil - night fighting is not active
Deployment
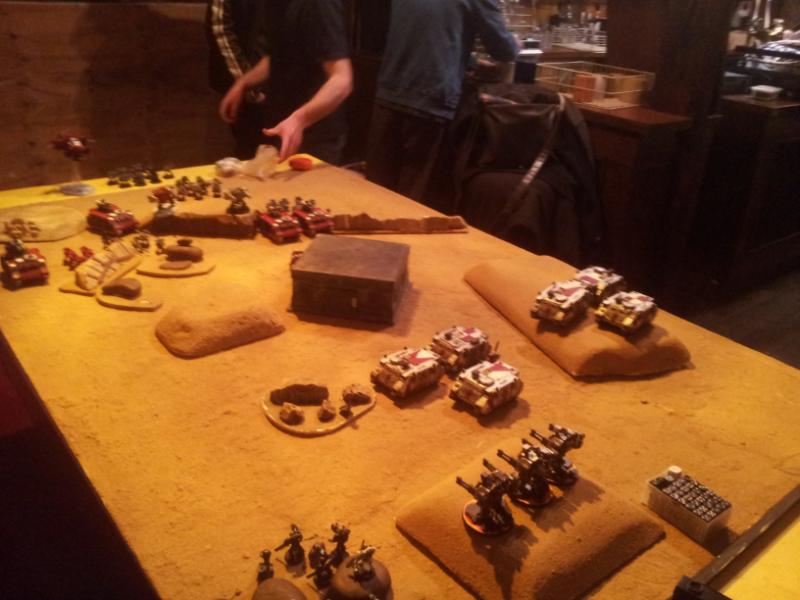
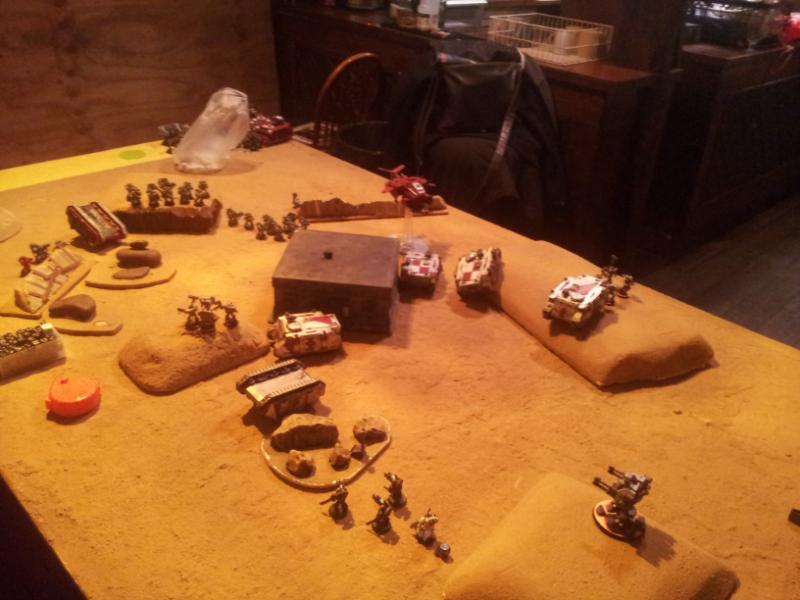
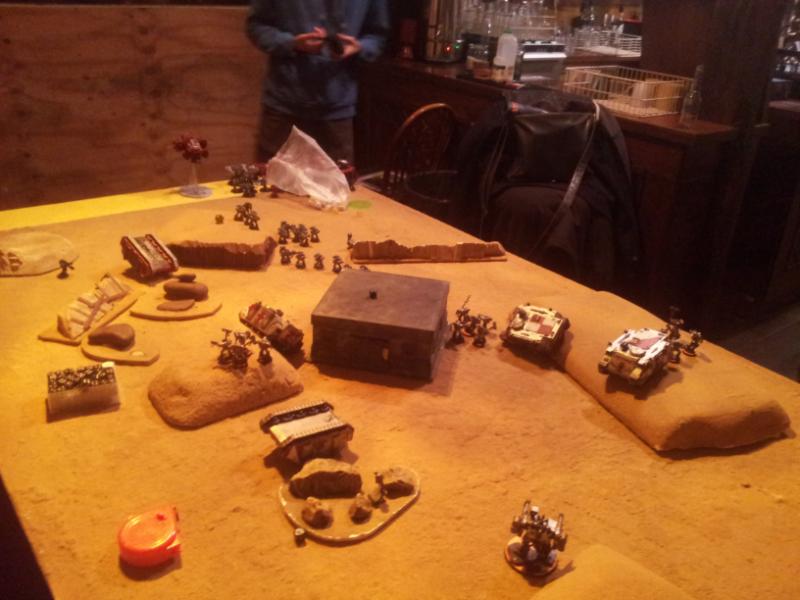
Five objectives had been placed; Jon put two about 12" from the centre and another in the centre his side of the bunker. I put two deep in my deployment zone, one near the back of the table in terrain and another a little further away also in terrain; both of these objectives are in cover for my troops and a fair distance away from Jon's forces.
I win the roll off for deployment side while Jon wins the roll off for deployment, he decides to go first.
Jon deploys and only has one Razorback with a unit inside; the melta unit; the other half hides behind a barricade on the objective. Dreadnoughts deploy on a hill support with Razorbacks each side and Devastators while the two Tactical Squads deploy far back behind the Razors for cover.
Jon has spread his army evenly and I think the flanks are pretty balanced, however the right flank with only two Razorbacks seems to be weaker. I deploy three Rhinos on the right flank in a triangle formation side on and the other three in the centre; this is taking advantage oif the centre bunker (nice 3+ cover save) and gives me split fire bases in the form of two threats. Dreadnoughts deploy on a hill to get
LOS, they huddle together and both Servitor units deploy on the objective bottom left corner; it's the only terrain piece witin my deployment zone you see which is far back.
Jon infiltrates his Scouts and strangely puts them on the objective his side by the bunker; this is a bit of a pickle as they are in open ground so will only get cover from camo cloaks (6+ not very good) and the bunker blocks their
LOS.

 * Tactical Notes
Ok, there's quite a few high priority targets in Jon's army; the Razorbacks are pretty nasty and so are the Dreadnoughts. The Devs can be a problem, but these guys will give me a point if I can sack them. The priority Razorback will be the one carrying meltas, if I can strand that squad, then I do not have to worry about them.
Terminators I'll deal with when they arrive, hopefully I can bomb them with plasma cannons.
Stormtalon I'll unleash mass dakka and hope weight of shots can bring it down.
Turn 1
Jon moves his Tacticals closer and runs them too if I remember right. Tanks move up as well. I think that's about it.
Shooting; lascannons and autocannons blast the Rhino at the front on the left flank and it loses two hull points. I think that's really about it.
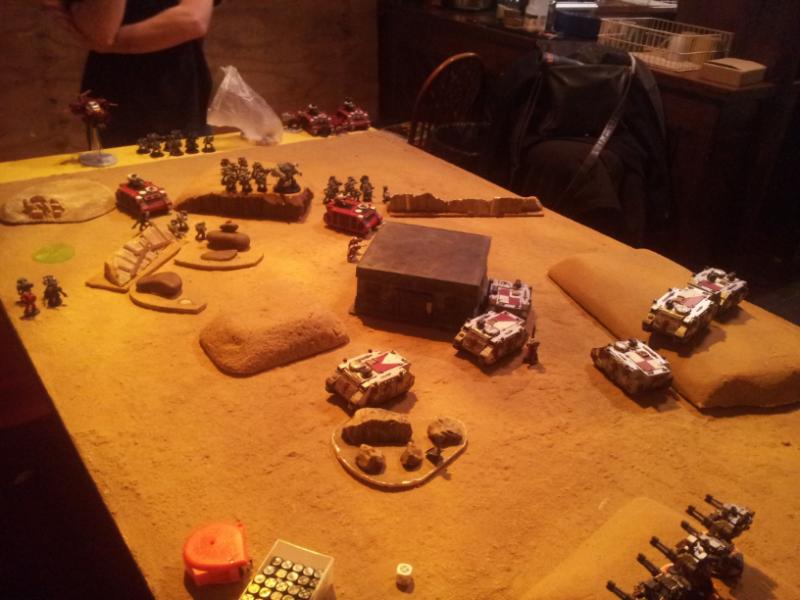
My first turn; I do a bit of sneaky premeasuring and move the one hull point Rhino up while the two supporting it move and hide behind the bunker. One from the other block of three scoots down. Rest remains static.
Shooting; psycannons from the one hull point Rhino take down the oncoming las/
plas Razorback; that's the melta dudes out in the open and now on foot. Dreadnoughts fire at Jon's Dreadnoughts, one goes boom while the other gets cover from the bunker and is only immobilised. Psycannons on the right flank rip into a Razorback and it goes boom. Rest of my psycannons are out of range. Plasma cannons bomb the combat squad near the objective by the barricade and they are all wiped out.
 * Tactical Notes
Ok, cracking start, Jon has lost half of his anti tank what's on the table and on a good note his melta unit is stranded; if this unit comes towards me then they will die. On another good note a combat squad is down, this will force Jon to make decisions on how to get that objective; he only has a melta unit to get it and a Tactical Squad.
Next turn I'll keep going for the Razorbacks and Dreadnoughts. I'll start picking on the Devs when I get close enough.
Turn 2
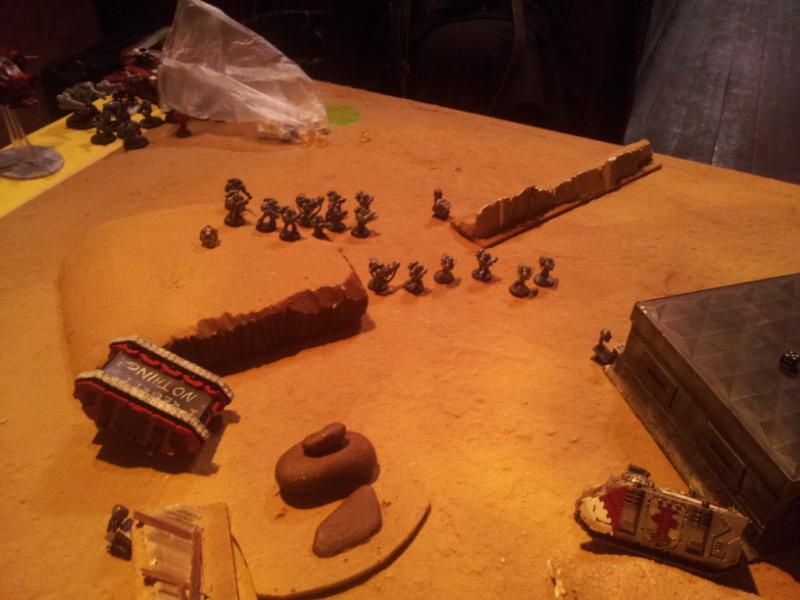
Jon rolls for reserves and his Terminators arrive. He deep strikes them bottom right corner behind the trio of Rhinos.
Movement wise the
Devs move up as does the Razorback behind them. Melta unit falls back to grab the objective by the barricade. I think that's about it.
Shooting; Terminators fire assault cannon, storm bolters and this pyromancer power blast thingy into Crowe, I roll two 1's and he dies; what a tosser. Autocannons dakka the one hull point Rhino and it goes down, the squad comes under fire from bolters and plasma; plasma cannon scatters and misses and I pass cover/armour saves well, only one dies. Lascannons tackle two of my Dreadnoughts, robbing a lot of my long ranged fire power. Plasma cannon from the Tactical Squad near the bunker hits a Rhino and it goes boom; all Purifiers are safe as houses.
I decide to keep all units static this turn as I want to use full fire power to take out those Terminators; I do not fancy them wading around in my deployment zone.
Only one unit of Servitors can spot the Terminators, but thanks to prescience, they hit twice and hit a total of 9 Terminators; 6 fail invulnerable saves and the Libby also takes a wound. Terminators receive minimum psycannon fire power before they go down; lots of rends do the trick! Due to my position of units I can only get limited dakka now, so the lone Dreadnought blasts the Razorback by the
Devs and it loses a hull point while the one on the right flanks gets blown up by psycannon fire. I move a few Rhinos flat out just to get in better position for next turn.

 * Tactical Notes
Ok, not a too bad turn. The Terminators and Libby have gone, which is one less thing I have got to worry about. I've also sent a Razorback packing and one has taken some damage. It has been a low damage output this turn, but the plasma cannons did very well for me.
Next turn I'll start moving units up and focus on the Devs and Scouts; Devs will take away Jon's fire power and earn me a point and Scouts means that objective is free. The last Razorback I'll also tackle too.
Turn 3
Jon rolls for reserves and the Stormtalon arrives, it moves 36" down the board on my right flank and stops in front of the Rhinos by the bunker. I think this is the only movement for Jon.
Shooting; Dreadnought fires at my last Dreadnought and scores stunned while Stormtalon fires at the closest Rhino and scores crew shaken. Plasma and bolters blast the Purifiers behind the hill, plasma scatters and misses while my Purifiers pass cover/armour saves. Plasma cannon from the other unit blasts a Rhino, but does bugger all.
I move the Inquisitor's unit of Servitors forward through terrain; they will grab the objective up ahead while Coteaz's unit shuffles a mighty 1" through terrain. Purifiers behind the hill move up onto it to draw better
LOS while a Rhino peaks out from behind the bunker to lay down supporting fire; the Rhino has 25% covered, that bunker is very handy. Rest hold position to lay down full dakka into the Stormtalon and Tacticals.
Shooting; Purifiers on foot and unit in the Rhino dakka the
Devs and they are dead meat. Dreadnought finishes off the Razorback while psycannons dakka the Stormraven and I take a hull point off it. Psycannons also dakka the Scouts and they are now wiped out. Last Dreadnought goes down to psycannon fire.
 * Tactical Notes
Things are going well atm. Devs, Dreadnought and Razorback are gone, so only anti tank fire power is the Stormtalon and plasma cannons, if you want to call the plasma cannons anti tank. Now the Scouts have gone, this will force Jon to react and move up to claim it or let it go to me.
Next turn I'll move up the Rhino supporting the Purifiers on the hill, they can lay down fire power on the melta unit on the objective behind the barricade, then turn 5 they can rock up and bail out and claim it. The other Rhinos will use the bunker for cover and then move up and bail out to take the objective.
Turn 4
Tactical Squad on the hill move down to grab the objective on the right flank while the other Tactical Squad moves forward to claim the objective behind the bunker which the Scouts once held. Stormtalon comes down to deal with the Servitors in open ground.
Shooting; Stormraven unleashes assault cannon and frags on the Servitors, only who survives who fails morale and legs it. Rhino with two hull points left by the bunker gets shot by plasma gun and plasma cannon, it goes boom. That's it for Jon!
I attempt to regroup the lone ranger Servitor, but he fails and runs off. I move the Dreadnought down the hill towards the objective the Servitors were going for while the Rhino supporting the Purifiers on the hill moves up 6"; that's it for me!
Shooting; squad on the hill with supporting Rhino dakka the melta unit, only the Sgt survives who fails morale and falls back. Stormtalon gets blasted by the Dreadnought and psycannons, it passes a evade save but utlimately goes down. Psycannons rip into the Tactical Squad by the bunker; they take over 25% damage and pass morale.
 * Tactical Notes
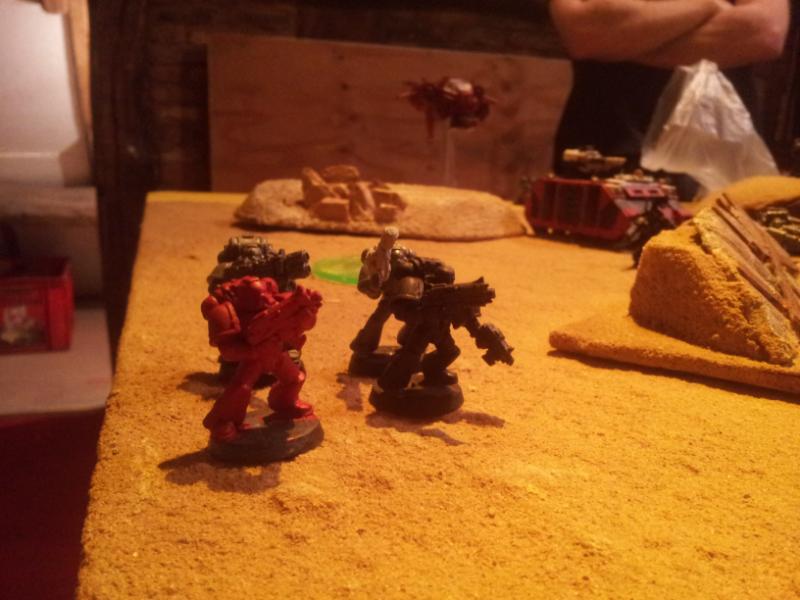
Right, not to sound cocky, but looks like this game is in the bag. My objectives cannot be contested by anything, so I've got two no problem. The solo Sgt isn't going to survive the fire power I am going to drop on him, plus I'll contest it with Purifiers too. The Tacticals by the bunker I'll unload with psycannons and then charge them, will cast hammerhand so I can clobber them good.
Turn 5
Lone ranger Sgt regroups and gets the objective while both Tacticals move and run to claim the objectives; that's it for Jon!
I move the Dreadnought up and secure the objective the Servitors was going for. Purifiers in the Rhino supporting the unit on hill, move up and bail out and aim at the Sgt. Purifiers who got blown out their ride last turn by the bunker, move up and prime those psycannons and nemesis weapons while mobile Rhinos move up to support.
Shooting; psycannons and storm bolters dakka the Sgt and he is dead meat. Psycannons and storm bolters dakka the Tacticals and they are wiped out.
At this point Jon concedes as he has no way to win this game, as he only holds one objective and has got 3 points for killing Crowe and two Dreadnoughts. I have got four points for slay the warlord, linebreaker, first blood and killing the
Devs plus the three objectives I control.
Summary
Not a bad game with Jon
tbh. The thing with my Purifiers is they can rock up mid field and just unleash dakka; weight of shots will bring anything down. Once the coast is clear, they can move up and do more or less what they want.
The way Jon played worked to my Purifiers style of play. See, he played defensively and put all objectives close to him. He would have done better placing them further back, which would have made me come closer to him using valuable turns of movement - he could have laid down fire power and took out my rides. Also, infiltrating the Scouts where they did was a bad idea; not only couldn't they draw
LOS much, but also had no cover - objectives for a unit like this need to be at the back of the board. I also think not using combat squads caused Jon more problems, as he had loads of Marines just pissing in the wind and not up close firing those bolters.
I forgot to use Coteaz's second power which I rolled for, it gave units within 12" a 4+
inv and would have been useful for when that Stormtalon blasted by Servitors. Ah well, never mind.


 Blood Angels - 2000
  Iron Warriors - 2000
  Orks -2000
  Imperial Guard - 2000
 Eldar - 2000
  Hive Fleet Krakken - 2000
  Dark Eldar - 2000
  Necrons - 2000
  Grey Knights - 2000
  Daemons - 2000
  Ravenwing - 2000
 Brothers of Sanguinor
 Purifiers
 Bad Wolves
  no worries

 5K Points of Grey Knights and Red Hunters