Down to Powerfist Gaming last night and took my Ravenwing for a rumble. Played against Gaz, never played against him before and found out he had brought Tyranids - looks like Ravenwing are just destined to get practice games in against horde of bugs!
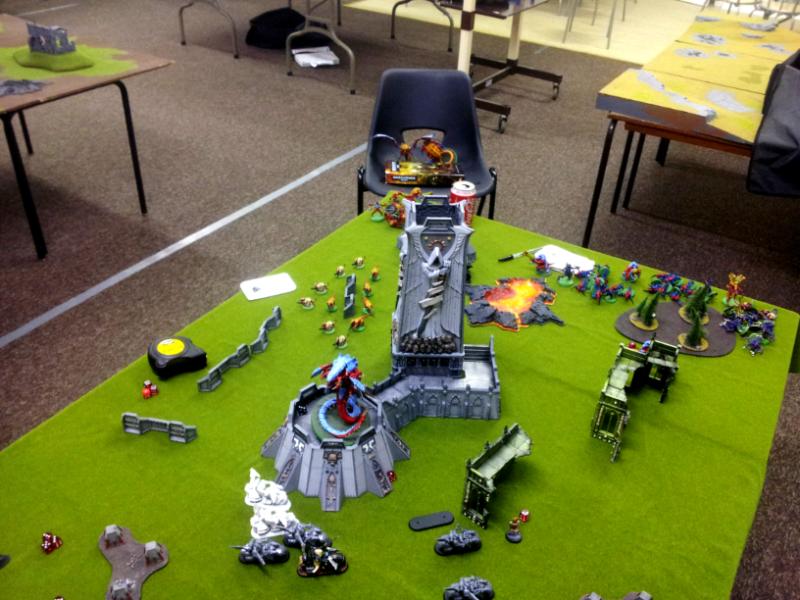
* Sorry for the crap pics, I wasn't on planning on uploading any pictures.
Dark Angels 'Ravenwing' - 2,000 points
HQ
Sammael
Ravenwing Command Squad - grenade launcher, banner of devastation & apothecary
Techmarine - bike & power field generator
Troops
5 x Ravenwing Bikers w/ Attack Bike - 2 x meltaguns - Attack Bike w/ multi melta
5 x Ravenwing Bikers w/ Attack Bike - 2 x meltaguns - Attack Bike w/ multi melta
5 x Ravenwing Bikers w/ Attack Bike - 2 x flamers - Attack Bike w/ multi melta
5 x Ravenwing Bikers w/ Attack Bike - 2 x flamers - Attack Bike w/ multi melta
5 x Ravenwing Bikers - 2 x plasma guns
5 x Ravenwing Bikers - 2 x plasma guns
Fast Attack
8 x Ravenwing Black Knights - 2 x grenade launchers
Tyranids - 2,000 points
HQ
Hive Tyrant - wings
Elite
Venomthrope
3 x Hive Guard
3 x Hive Guard
Troops
Tervigon - unknown wargear
20 x Termagants
20 x Hormagaunts - toxin sacs
8 x Genestealers w/ Broodlord
8 x Genestealers w/ Broodlord
Heavy Support
Trygon Prime
Trygon
Game: The Relic + Hammer & Anvil - night fighting is on
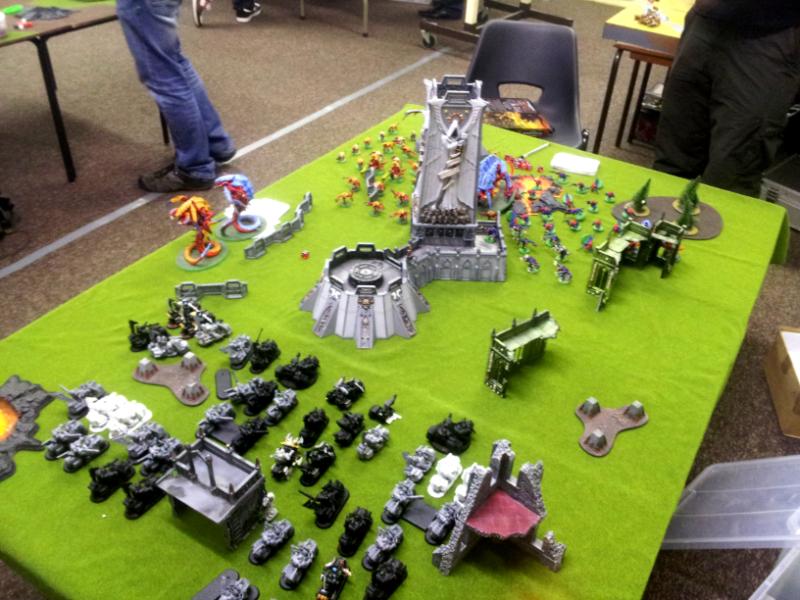
Deployment
I won the roll off for table side and deployment; I decided to go first. I put all my bikes on the right flank, except the Black Knights, they are on the left flank - this is due to space. Attack Bikes go at the front, then flamer units, then Command Squad flanked by melta units and at the back the plasma units.
Gaz deploys and puts a Hive Guard unit on each flank each supported by a Genestealer unit. Termagants go left flank while Hormagaunts go right flank. Tervigon sits in the middle with the Venomthrope close by while the Flyrant chills in a ruined bunker - we decided this was a ruin but gives 3+ as still as fortification. Both Trygons are sitting in reserve.
 * Tactical Notes
I've only tested Ravenwing against Tyranids so far and I am going to learn from my mistakes. Usually I would go for the Hive Tyrant, but seems it is close combat based I expect it to land and I do not think it will be doing many vector strikes.
My target is the Tervigon, I do not want it spawning and overloading my Ravenwing with bodies - I've only got 47 bikers and swarm armies seem to give them serious head aches.
Genestealers and Hormies will a pain due to rending and poison - bolter or flamer these will do.
Hive Guard can deplete my bikers pretty easily as they wound on a 2+, if I can knock them down and then tie them up in combat and then do hit and run I'll be happy.
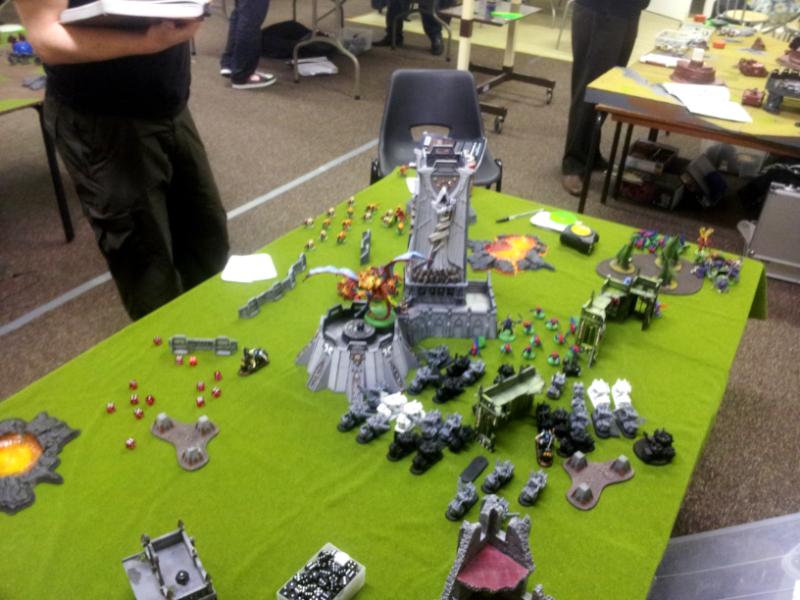
Turn 1
Gaz does his infiltrate moves bringing the 'Stealers closer (already shown position). I then scout forward my units. Gaz attempts to seize initiative though fails.
Ravenwing; I move up to get my guns into range, Black Knights are like 1" away from the Genestealers, though I need to plasma the Tervigon in order to kill it. I hope the Black Knights can hold on and then hit and run on the 'Stealers.
Shooting; Black Knights dakka the Tervigon and it drops two wounds. I blast the Tervigon with bolters and multi meltas, drops some more wounds, in the end long range plasma shots take it out - it kills a couple of 'Gants. Remaining Attack Bike dakkas and kills the Venomthrope - should have done this first though wanted to make sure the Tervigon was dead. Bolters blast into the 'Stealers on the right and all are killed except Broodlord - I only don't kill him as cannot see him. I dakka some Hormies and kill five them due to firing through my own units and take a wound off a Hive Guard on the right flank.
Tyranids; Flyrant flies up and lands on top of the relic position. Broodlord comes forward supported with Hormies while other Genestealers move to assault the Black Knights with some fire power support from remaining Termagants.
Shooting; shockingly the Termagants kill three Black Knights, disappointed is an understatement. Hive Guard take pot shots at Attack Bikes, take wound of two of them,
Assault; Broodlord charges a wounded Attack Bike gets the gaze off and batters the bike - suits me as the Broodlord is in a choke point of open ground and will eat plasma/bolters next turn. Hormies charge another Attack Bike, batter it leaving me with two Attack Bikes left, they consolidate in the choke point of open ground and are perfectly bunched up for flamer attack. Genestealers assault the Black Knights, I get three gets hot on overwatch, luckily all save - after combat only a single Black Knight remains - does hit and run and legs it back to Ravenwing terriority.
 * Tactical Notes
I kind of sold my Black Knights out in order to get the Tervigon. I guess my number of bolters could have done the job and instead I should have fire them into the Tervigon with the Attack Bikes and left the Venomthrope, then tackled the Genestealers with Black Knights. Ah well.
Overall things have gone ok, I have taken out a Tervigon, Venomthrope and practically an entire Genestealer unit first turn. I've lost pretty much all my Black Knights, which really I only have myself to blame and also lost two Attack Bikes. I don't think I can complain all in all.
Next turn I'll shoot two Attack Bikes and a melta unit straight up to mass tackle the Hive Guard on the right flank. Flamers will come forward and bbq the Broodlord and Hormies, this will clear the choke point and I can advance more easily. Lone Black Knight will fall back to the Ravenwing while others will re-position to blast the Hive Tyrant, now the Tyrant has biomancy and is T9 at the moment if I remember right.
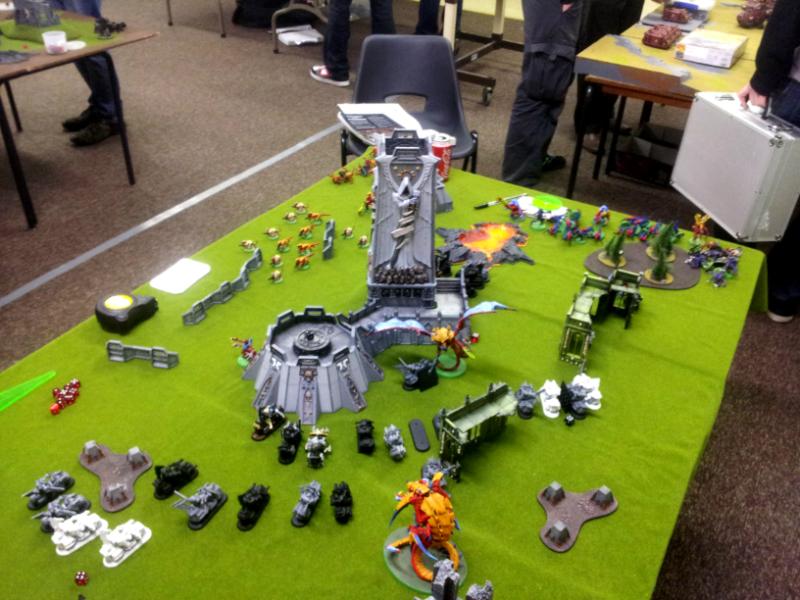
Turn 2
Remaining two Attack Bikes rock up towards the Hive Guard on the right flank with a melta unit in tow. Flamer units re-position to blast the Hormies and Broodlord while remaining units position to blast the Tyrant - the other melta unit does move to get long range bolter shots on the Genestealers if they want.
Shooting; meltas and bolters blast into the Hive Guard, one dies and one loses a wound. Flamers and bolters dakka the Hormies and they are wiped out, other unit dakkas the Broodlord and he is dead. Plasma talons fire into the Hive Tyrant, I fail to ground it. I decide to fire the melta units bolters into the Genestealers as they will be causing me some pain, I cannot see all of them, so two remain including Broodlord.
Assault; Attack Bikes and meltas slam into the Hive Guard, one Hive Guard dies and so does an Attack Bike.
Tyranids; Gaz rolls for reserves and the Prime arrives near my Command Squad. Flyrant comes down and gets ready to assault a flamer unit - this is because my bikes are too close to the fortress and no place for the Tyrant to land, plus the Command Squad is screened by flamer units. The Flyrant has picked up the relic
btw as got that warlord trait which lets it score. Genestealers come forward and eye up the melta unit which just dakka'd them. I think Hive Guard fail synapse test though 'Gants are fine.
Shooting; Prime fires at the Command Squad and gets two precision shots on the banner, banner saves and Techmarine bounces off the other saves. A single Hive Guard takes a long range shot into a flamer unit, though bounces off the power armour.
Assault; Genestealers charge melta unit, melta unit does overwatch and wastes the Genestealers - two left - Broodlord challenges Sgt, Sgt accepts though denies the witch against the gaze power. All Genestealers then die in combat leaving the Broodlord on his own, Ravenwing hit and run

. Flyrant attacks the flamer unit, only the Sgt remains and fails hit and run - this dude is too hardcore! Hive Guard vs Bikes combat is a draw I think, melta unit does hit and run while remaining Attack Bike fails.
 * Tactical Notes
I have managed to thin out the right flank pretty well, all that remains now is a single Hive Guard and Flyrant. The Trygon Prime has added numbers, but I am not worried about that. On a further good note the remaining Genestealers are gone and just the Broodlord is left who is standing in open ground.
Next turn I was hoping to rad grenade the Tyrant, though hit and run failed, so denied. Instead I'll be dropping the rad grenade on the Trygon and will dakka it's face in before it assaults. Broodlord will be blown away too. The melta unit which just did hit and run from the single Hive Guard will move up and shoot and assault the other unit, this will stop them from firing at me as I'll do hit and run.
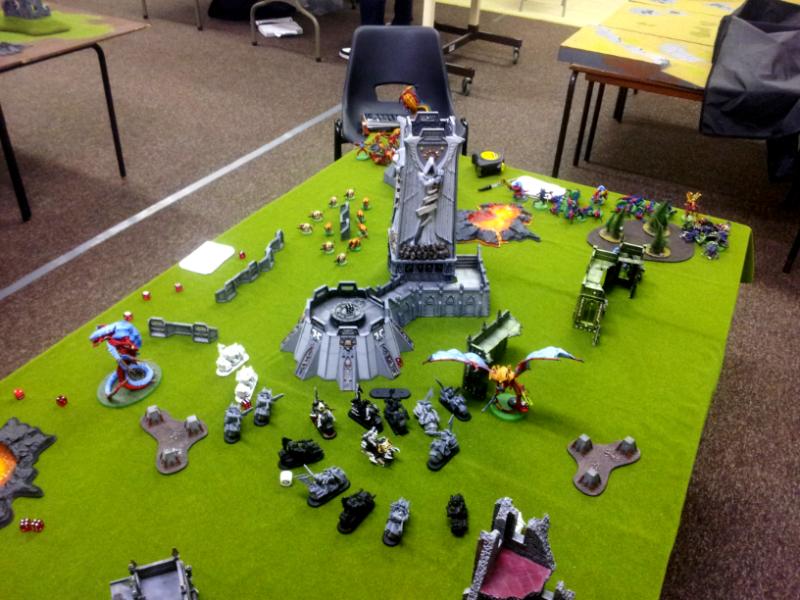
Turn 3
Ravenwing move down to the tip of the fortress and make sure in banner range. Melta unit moves to assault the Hive Guard in terrain on the left flank.
Shooting; Command Squad drop a rad shell on the Trygon and it hits, bolters and plasma go to work and the beast is slayed. As a depleted plasma unit hasn't fired yet and got no target, I turbo boost them and use them to screen my Command Squad from Flyrant assault. I also turbo boost another unit I haven't fired and screen the other side of the Command Squad, the Flyrant isn't going to assault that Command Squad! Melta units blasts Hive Guard and kills one - unit fails morale and falls back 3". Shots go into the Broodlord and it is wasted.
Assault; melta unit assaults the Hive Guard, causes a single wound if I remember right. Attack Bike and Hive Guard slug it out while the brave Sgt gets mashed by the Flyrant.
Tyranids; the other Trygon arrives in the fortress ruin. Flyrant moves to assault the remaining flamer unit. Termagants fail synapse and just piss about.
Shooting; Trygon blasts the plasma unit who wasted the Broodlord, though all saves made.
Assault; Flyrant murders the flamer squad and consolidates into a small ruin - Tyrant is T8 thanks to biomancy - one remains from the squad and falls back. Hive Guard kill a single Ravenwing, I do hit and run and I am ready to charge again. Attack Bike and Hive Guard juke it out, Attack Bike fails hit and run again; such a noob!
 * Tactical Notes
Even though I have lost a fair amount of bikes, I think I have this game in the bag. All I need to worry about is a Flyrant who is on the ground - I will make this my priority to kill. Then just the Trygon. After that nothing worries me.
Turn 4
I re-position all units so the Tyrant won't get so much cover, but due to space it's not entirely possible.
Shooting; rad shell fires and hits the Tyrant, now T7 and it is time for bolter death! Flyrant takes some punishment, Sammy's plasma cannon shot scatters and kills two of my own bikers - idiot! Eventually the Tyrant goes down and drops the relic right by a depleted plasma unit. Melta unit fires into Hive Guard and takes a wound off I think.
Assault; melta unit slams into the Hive Guard, I lose a biker thanks to dangerous terrain, though unit stays locked.
Tyranids; Trygon moves to assault my Command Squad Termagants fail synapse again and just piss about. Trygon slithers up to bring the pain.
Shooting; Trygon fires into Command Squad, all ok.
Assault; Trygon assaults my Command Squad, Techmarine asborbs some damage, though eventually dies, Sammy does well on saves and has two wounds left - unit fails morale and falls back.
 * Tactical Notes
The game is firmly in my hands now, only thing what threatens me is a nasty Trygon and with the amount of shots I have I can easily take it out. I just need to grab the relic and job done.
Turn 5
Ravenwing re-position to dakka the Trygon while depleted plasma unit pick up the relic.
Shooting; everything fires into the Trygon, the fortress protects it and it survives. I do move one unit which hasn't fire to screen the relic unit.
Assault; more Hive Guard punch face, nothing major.
Tyranids; Trygon assaults my Command Squad, the banner bearer dies but Sammy survives with a single wound!
Ravenwing pick up a crushing victory with 6 (first blood, slay the warlord, linebreak & the relic) points to 1 (linebreaker)
Summary
Cracking game with Gaz, I really enjoyed it. Things started off well for me and got better as things went on. Unfortunately due to Tyranids assault nature all they can do is come forward and beat my face in. Due to my low unit numbers, 'Nids win combat and then stand there ready to be shot in the face, though this is the nature of the beast with assault armies.
I think I didn't play the Black Knights so well. I knew the 'Stealers would assault them and most my plasma talons were out of rapid fire range after all that including the grenade launcher. I guess if I hadn't lost so many to fleshborers, then things would have been different as I would have three left.
Rest of the army I am happy with. At first glance flamers do not seem a good idea because of all the bolter shots, though I need a backup plan in case that banner goes down and flamers is that backup plan for hordes.
Techmarine did well this time. I'll be honest I only took a Libby for extra wounds and rare I used the powers. The Techmarine doesn't seem as a good deal, but costs cheaper and also comes with a power fist, which is great.
Gaz played well though I feel his Flyrant would do better staying in the air; dropping it down to assault is just costing serious points and not getting the use out of wings. Better to take a foot Tyrant with armoured shell than wings or consider a cheapo Tyranid Prime and throw in another Trygon.
Trygons also would have been better slithering up the board, something else for me to deal with straight away instead of giving me breathing room when they are in reserve. When the beasts deep strike they have to come close to assault which puts them in my range anyway.


 Blood Angels - 2000
  Iron Warriors - 2000
  Orks -2000
  Imperial Guard - 2000
 Eldar - 2000
  Hive Fleet Krakken - 2000
  Dark Eldar - 2000
  Necrons - 2000
  Grey Knights - 2000
  Daemons - 2000
  Ravenwing - 2000
