Here is my how-to on doing an urban-esque paint scheme for Tau Stealth Suits using an airbrush.
You *can* get the same effect using a regular paint brush, but it requires more time and thin paint. Why thin paint? Well, when painting my first stealth suit (which you can see finished lurking here), I used a regular brush. I found that in a few places I built the paint up a bit too thick near the edges of the tape, and so left a ridge in between colors. So just a word of caution about that....thin paint, and build slowly! Also, helps to paint *away* from the tape edges if possible (so the paint doesn't accumulate at the edge).
My color pallet is:
-- Primer: Flat Black (Krylon Camo)
-- 1st layer: VMC German Grey
-- 2nd layer: Regal Blue
-- 3rd layer: Mechanicus Grey
Disclaimers:
These were mini's that I acquired from ebay. They were already put together. I think with plastic glue, because I tried the freezer trick, and they didn't budge. These babies are rock friggin solid. I also decided part way through to document this, as some had been asking how I did my first one...so there aren't pics until a little later in the process.
STEP ONE
First step was to prime the mini in Flat Black. No picture of this...as all you would see is a black stealth suit
 STEP TWO
Second step was to use blue painters tape to mask off areas that we wanted to remain black. Using your x-acto knife, you can cut out whatever shape camo pattern you want: angles, blocks, stripes, dots...whatever floats your skimmer. You can see in the picture below in step four how masking looks.
STEP THREE
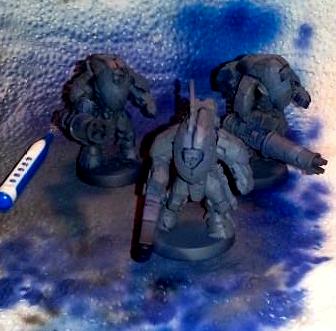
Third step is to lay down a coat of German Grey. From the picture below in Step Four, you can see that the middle model is completely grey. I wanted to experiment the German Grey as a basecoat, instead of black. The other two models have already had their black blocked off and a coat of G. Grey sprayed over them. I am in the process of blocking off the G. Grey with those models.
STEP FOUR
After spraying the G. Grey and letting it dry, you block off the parts of your model that you want to keep German Grey. DO NOT remove the pieces of tape that you had laid down to block the black. Leave them alone!! You can see the blocking for G. Grey and Black in this example:
 STEP FIVE
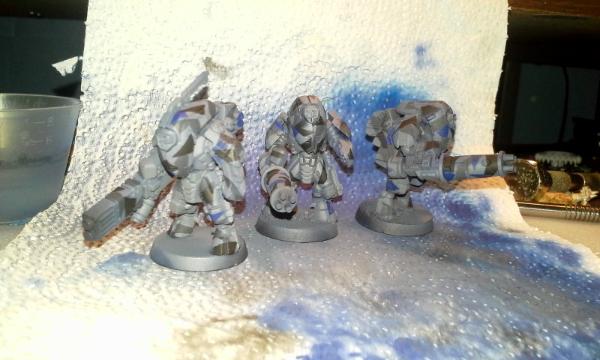
Having blocked off your German Grey, you are now able to paint the Regal Blue. The camera flash makes the blue show much brighter than it is in reality,
fyi. DO NOT remove the pieces of tape that you had laid down to block the black or g. grey. Leave them alone!!
 STEP SIX
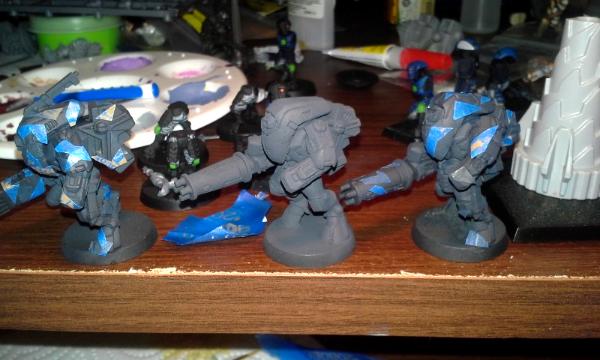
You block off the spots that you want to keep Regal Blue. After that, give a coat of Mechanicus Standard Grey. DO NOT remove the pieces of tape that you had laid down to block the black, g. grey, or regal blue. Leave them alone!!:
I used 4 colors this time around. I had used 4 colors previously as well, but a different mix (Black, Midnight Blue, Mechanicus Grey, Shadow Grey). I wanted to try something a little different--less "bright" grey, for example.
Once your paints are all dry (give them an hour to be safe...though using an airbrush, you can speed the drying time by blowing air on it) you can begin the task of peeling off all the little tape blocks, eventually revealing something like this:
If you want, you can touch up the blocks with your paint brush--though you may not need to.
What's great, is that this kind of painting can be used with any kind of camo color pallet: desert camo, forest camo, jungle camo, arctic camo....really, the possibilities are endless.
You can also vary how you layer your paint choices. If you want to start with a grey base and end with black...you can. If you want to start with a blue base, and end with German Grey...you could do that too! You aren't limited to following my pattern or color choices...come up with your own and have fun!
You also aren't limited to just Tau Stealth Suits.
Tanks
Flyers
Cloaks
Clothing
Dreads
You name it!


