Converting a more streamlined Stormtalon
So, when the Stormtalon first came out, I was not a fan of
GW's model. The whole assault cannon assembly struck me as out of proportion to the rest of the model and I didn't care for the stubby wings. There had to be a better way. With this tutorial, I'll show you how to make your Stormtalon look better.
Stock
GW Model:
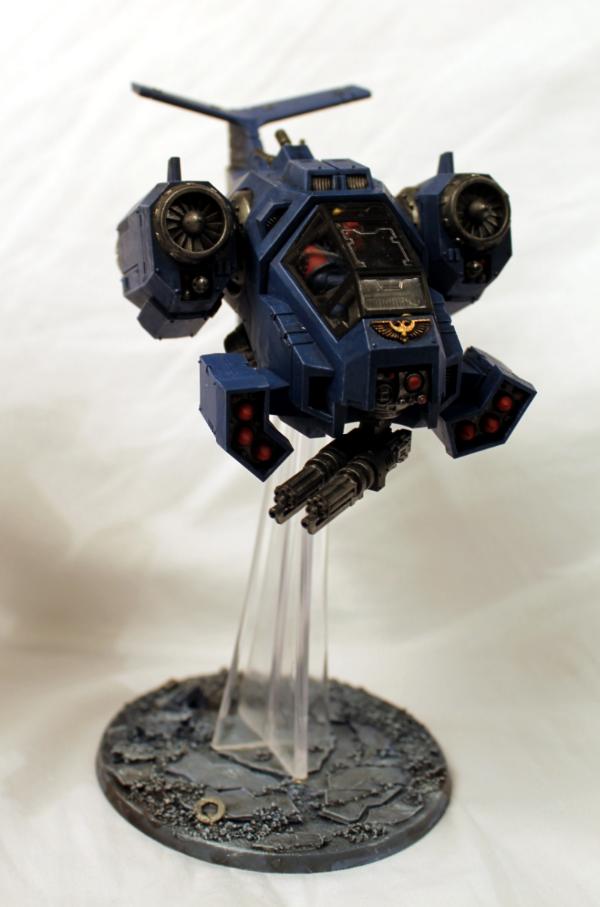
Kolath's Improved version!
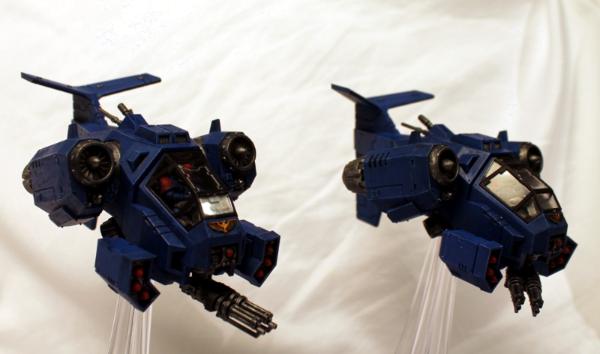
 Size Comparisons
For reference, my converted gun assembly is on the left, the stock
GW assault cannon turret is on the right:
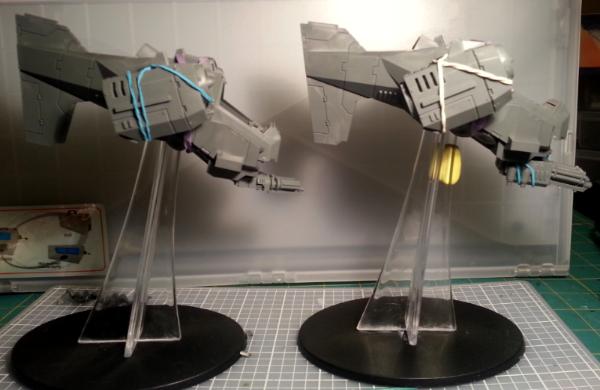
Front View
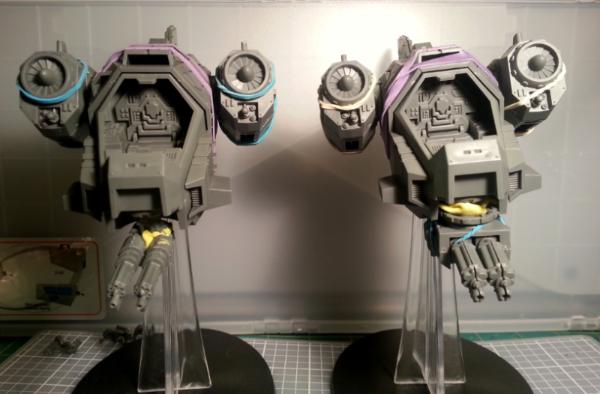
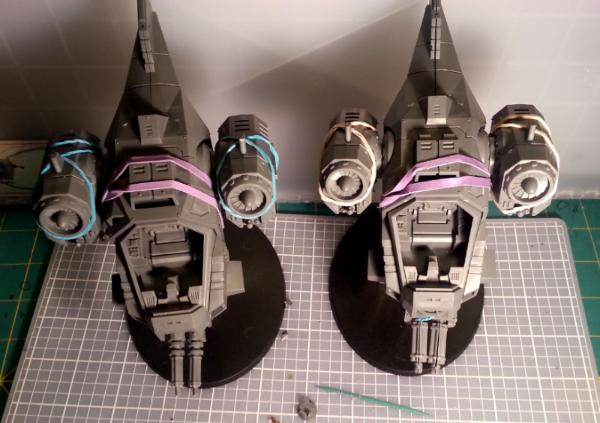
Top View
 Parts Required
2 assault cannons from the Dark Angel Ravenwing upgrade sprue
1 hunter-killer missile from a space marine vehicle accessory sprue
1 landspeeder underslung weapon mount
Some thin plasticard or green stuff
5x 1/8" rare earth magnets
1x large rare earth magnet
Procedures
Parts Required
2 assault cannons from the Dark Angel Ravenwing upgrade sprue
1 hunter-killer missile from a space marine vehicle accessory sprue
1 landspeeder underslung weapon mount
Some thin plasticard or green stuff
5x 1/8" rare earth magnets
1x large rare earth magnet
Procedures
1. First, on the bottom hull piece of the Stormtalon, cut off the turret peg so that the turret mount point is flat.
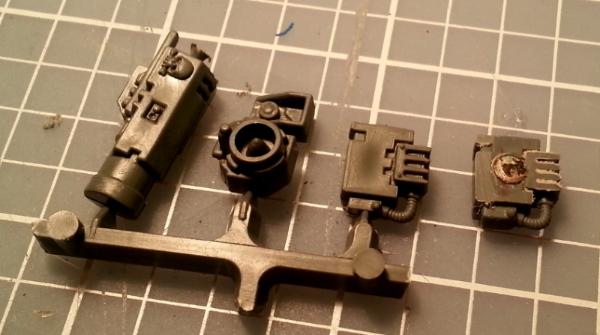
2. Next, take the landspeeder weapon mount and cut off, the parts that stick out (see the one on the left below). This will form the piece that attaches to the stormtalon.

3. Now, put one of the rare earth magnets into the hole on the top of the weapon mount. This will attach the mount to the bottom of the storm talon. Go ahead and also glue in the large rare earth magnet to the inside of the storm talon hull plate.
Warning! be sure to check polarity of the magnets before gluing!
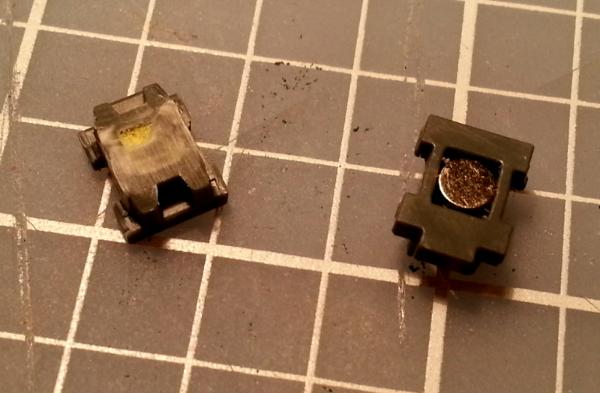
4. Now you're going to need the hunter killer mount point. The only part you need is the boxy piece (left most on the sprue). Drill a hole through the middle of it and put in two rare earch magnets. This is the piece that attaches to the assault cannons themselves.
5. Take the landspeeder mount piece from step 3 and glue it to the hunter killer mount piece. Here's the trick for the orientation, the L-shaped hose on the hunter-killer piece is going to be at the bottom-back of the final assembly. I put the sticking out peg of the landspeeder mount in the back too, but that is arbitrary. This is what it looks like when glued:
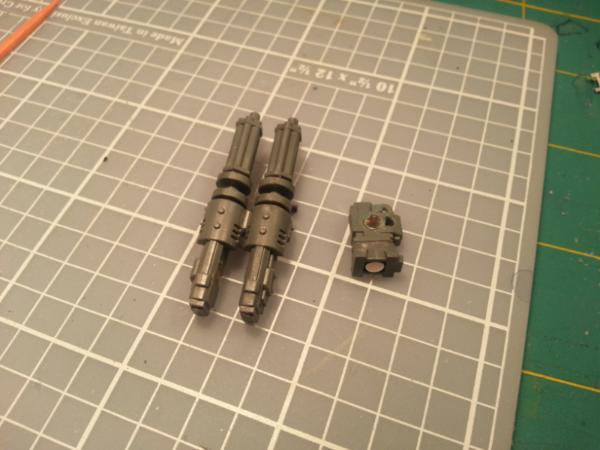
6. Now, on the assault cannons, grab two, you'll notice that the Ravenwing kit has two variants. One build for an ammo cannister on the right and one for it on the left. Take one of each and they are going to fit with the ammo side in (see above picture). But before you attach them, you need to drill a hole and put in the rare earth magnets on either side.
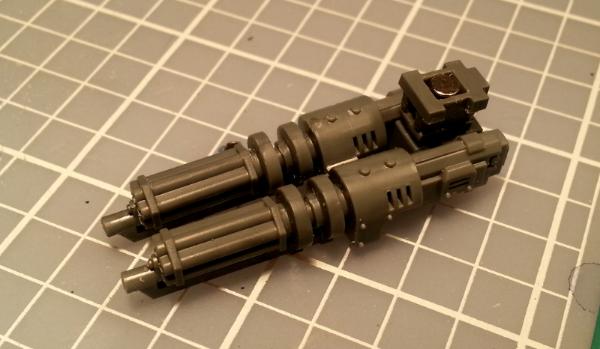
7. One the magnets are in and you've checked that they fit with the gun mount assembly, you need to glue the guns together. I put a thin strip of plasticard between them to space them properly. This is essential because otherwise the guns won't be wide enough to fit the mount point. Here's the finished gun assembly!
8. (Optional) I chose to ommit the little wings on the engine nacelles, so I cut off the mounting strip and filed them down flat, this is an optional step, but I liked the look better.
Voila! All done!
Stay tuned for another tutorial on how to make flyer bases that pack flat!


 6,000
6,000 
